FOCACCIA WITH A THRILL

When Phil and I sat down to plan the menu for our recent reception, the first thing he suggested was focaccia. Why? Because it is a crowd pleaser and I can make it in my sleep. But Sally’s mind works in mysterious ways. Instead of sticking with my tried and true recipe – the focaccia I blogged about when the Bewitching Kitchen was only 5 days old – I decided to try a completely new recipe. What enticed me was  its overnight rise in the fridge and with it, the promise of a sharper, more complex flavor.  Big risk? Maybe.  But, I am here to share with you great news:  I like this version even better than “the old one”.  The texture turned out perfect, and the taste was just the way I like it, with a very subtle hint of sourness, but mild enough that the focaccia paired well with all sorts of cheeses and dips.  The recipe published in Fine Cooking, comes with a big name behind it, Peter Reinhart. He knows his way around bread, and this formula proves the point.

IMG_0096OVERNIGHT HERBED FOCACCIA
(adapted from Peter Reinhart’s recipe, through Fine Cooking)

1 lb. 9 oz. (5-1/2 cups) unbleached bread flour
2-1/2 cups cold water (about 55°F)
2 Tbs. plus 1 tsp. granulated sugar (1 oz.)
2 tsp. table salt or 3-1/2 tsp. kosher salt (1/2 oz.)
1 packet (1/4 oz.) instant yeast
10 Tbs. extra-virgin olive oil
Dried Italian herbs (I used Pasta Sprinkle mix from Penzey’s)
Sea salt or kosher salt for sprinkling

The day before baking, mix the dough and let it spend the night in the refrigerator. Combine the flour, water, sugar, salt, and yeast in the large bowl of a stand mixer (use the paddle attachment, not the dough hook). Slowly mix until the ingredients form a ball around the paddle, about 30 seconds. Switch to the dough hook and mix on medium low for another 3 minutes. Stop the machine to scrape the dough off the hook; let the dough rest for 5 minutes and then mix on medium low for another 3 minutes, until it’s relatively smooth.

Coat a bowl large enough to hold the dough when it doubles in size with 1 Tbs. of the olive oil. Transfer the dough to the bowl and rotate the dough to coat it with the oil. Hold the bowl steady with one hand. Wet the other hand in water, grasp the dough and stretch it to nearly twice its size. Lay the stretched section back over the dough. Rotate the bowl a quarter turn and repeat this stretch-and-fold technique. Do this two more times so that you have rotated the bowl a full 360 degrees and stretched and folded the dough four times. Drizzle 1 Tbs. of the olive oil over the dough and flip it over. Wrap the bowl well with plastic and refrigerate it overnight, or for at least 8 to 10 hours.

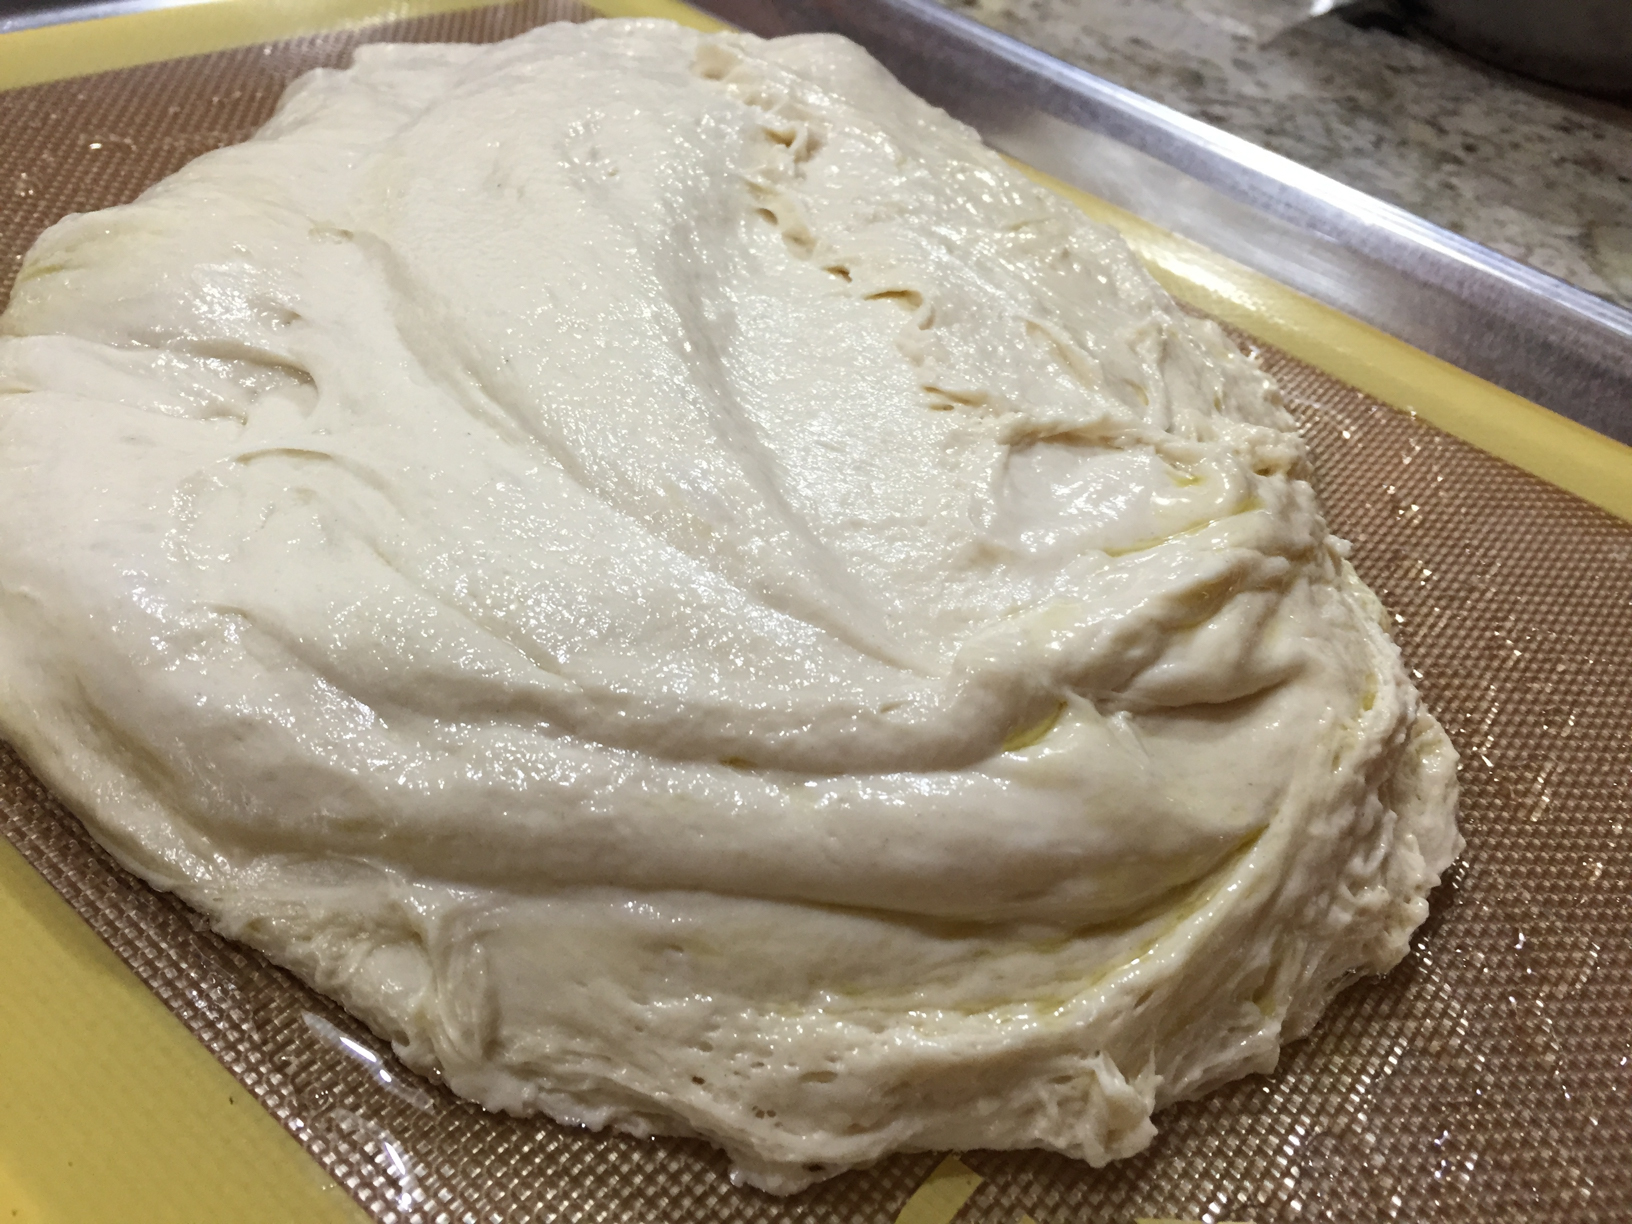
Shape the focaccia: Remove the bowl of dough from the refrigerator and start shaping the focaccia 2 to 3 hours before you intend to bake it. The dough will have nearly doubled in size. Cover a 13×18-inch rimmed baking sheet with parchment or a silicone baking mat and coat the surface with 2 Tbs. of the olive oil. Gently slide a rubber spatula or a dough scraper under the dough and guide it out of the bowl onto the center of the pan.

Drizzle 2 Tbs. of the olive oil on top of the dough. Dimple the entire dough surface, working from the center to the edges, pressing your fingertips straight down to create hollows in the dough while gently pushing the dough down and out toward the edges of the pan. At first you might only be able to spread the dough to cover about one-half to three-quarters of the pan. Don’t force the dough when it begins to resist you. Set it aside to rest for 20 minutes. The oil will prevent a crust from forming.

After letting the dough rest, drizzle another 2 Tbs. olive oil over the dough’s surface and dimple again. This time, you will be able to push the dough to fill or almost fill the entire pan. It should be about 1/4 to 1/2 inch thick. If it doesn’t stay in the corners, don’t worry; the dough will fill the corners as it rises. Cover the dough loosely with oiled plastic wrap, put the pan on a rack to let air circulate around it, and let the dough rise at room temperature until it’s about 1-1/2 times its original size and swells to the rim of the pan. This will take 2 to 3 hours, depending on the temperature of the room. Thirty minutes before baking, heat your oven to 475°F.

Bake the focaccia: Just before baking, gently remove the plastic wrap and sprinkle a few pinches of salt and dried herbs of your choice over the dough. Put the pan in the middle of the hot oven and reduce the heat to 450°F. After 15 minutes, rotate the pan to ensure even baking. Set a cooling rack over a sheet of aluminum foil or parchment (to catch drippings). Use a metal spatula to release the dough from the sides of the pan. Slide the spatula under one end of the focaccia and jiggle it out of the pan onto the rack. If any oil remains in the pan, pour it evenly over the focaccia’s surface. Carefully remove the parchment or silicone liner from beneath the focaccia. Let cool for 20 minutes before cutting and serving.

ENJOY!

to print the recipe, click here

IMG_0044


This dough was a pleasure to work with! I highly recommend this recipe if you have yeast-phobia, because it is simple, straightforward, and it will work perfectly no matter your skill level as a bread baker, I promise. If I had extra time, I would have made a rosemary-infused oil, but the dried herbs worked very well. You can use dried oregano, dried thyme, or get a mixture ready to use as I did.  Fines Herbes, Herbes de Provence, they can all work well topping the focaccia.

compositenewSO, WHERE IS THE THRILL?

BuckBoy

Did you call me, Mom? 

The Saturday before our reception was one of my busiest cooking days ever. Still, when I took the focaccia out of the oven, I decided to do a quick run to the recycling center, to dump our glass waste. Buck is my buddy for these outings, the only one who likes to ride in the car with me (Oscar has the shakes whenever faced with a drive).  Got there early, no one around,  so I mentally patted myself on the back: “Great job, Sally, you can park right by the glass container spot, in and out in 30 seconds. You rock!”  So I got off the car and left the engine running, my handbag inside with Buck. Rush out, rush back, done! Done? Not so fast. It was more like “rush out, rush back, shock and horror!  The doors were locked! Buck must have jumped on the switch when I left and locked them. If you lock one side from the inside, both doors get locked. I know, perverse technology. Big, huge shiver up and down my spine. The drama unfolded as I entered the recycling office in complete panic, barely able to form complete sentences, begging to use their phone to call for help… This HUGE guy sweet as a teddy bear said “maybe I’ll be able to help you….” – and he comes out with a bunch of gadgets worthy of a professional burglar… a little inflatable black plastic bag that he pushed through the door and pumped just enough to get a little opening, then a big wire – he manipulated it like a pro to hit the control to bring the window down. Of course, Buck is going NUTS inside, in complete disapproval of that humongous human being next to his Mom and messing with the pickup truck….

My life doesn’t have that many dull moments, I tell ya! It was a wild, wild ride…. So, my advice for you: never ever EVER leave your car running with a dog inside. Lesson painfully learned, but with a happy ending. All things considered, it could have been much worse…  

FocacciaPiecesWe are ready to party! What about you?


ONE YEAR AGO:  Raspberry Brown Sugar Chocolate Chip Ice Cream

TWO YEARS AGO: Chocolate Mousse “Légère comme une plumme”

THREE YEARS AGO: Black Olive Sourdough

FOUR YEARS AGO: Buttermilk Cluster 

FIVE YEARS AGO: Farfalle, Farfalle

BBA#43: ROASTED ONION and ASIAGO CHEESE MICHE

Photo courtesy of  PJG, thanks!

With this bread, I completed the BBA CHALLENGE!


For a PDF version, click here (breads are ranked from one to five stars)

A big thank you to Nicole for setting up this event, and of course to Peter Reinhart for his wonderful book.  I’ve had it many years, but never imagined that one day I’d say that “…I baked them all!”

ROASTED ONION AND ASIAGO CHEESE MICHE

This last bread took 3 days to prepare.  The sourdough sponge, made on the first day, was mixed and shaped on the second day, and  after a night in the fridge it was topped with roasted onions and grated asiago cheese, then finally baked.   I made a half  recipe, which was still  enough for one  big round loaf.

The onions can be prepared the day before…

and added to the bread 30 minutes before baking ….

The dough contains a lot of grated asiago cheese,  so each bite acquires its sharp flavor, mellowed  by the sweet roasted onions.   What a beautiful combination!

You can check the Roasted Onion Asiago bread made by Oggi (the first baker to complete BBA Challenge) by clicking here….

Our five favorite breads from the challenge were:
Potato, Cheddar, and Chive Torpedo
Roasted Onion and Asiago Miche
Vienna Bread
New York Deli Rye
Potato Rosemary Bread

To all my virtual fellow challengers baking along this tasty path, have fun with it.   I’ll be watching and cheering for you!  😉

BBA#42: POTATO, CHEDDAR AND CHIVE TORPEDO

With my heart beating fast in anticipation, I am thrilled to say:   forty-two breads down,  ONE to go!

This bread is definitely one of my favorites, for several reasons. First,  it uses a sourdough starter, which already makes me pretty excited about it.  Second, it contains potatoes, a great addition to this kind of bread,  as they give it moisture and a texture hard to reproduce in any other way.    Third, it takes cheese rolled in the middle of the loaf.  No need to explain the positive aspects of this.  Too obvious for words.   Did the recipe rise to my expectations?

Oh, YESSSS!  😉

This was not a difficult bread to make.  Because the dough takes a mixture of sourdough starter and commercial yeast, it rises quite fast: the whole process – from mixing the dough to baking – took just a little over 3 hours!   I used the full amount of potato water called for, hoping for a more open crumb.   Instead of kneading, I folded the dough twice, at 20 and 40 minutes, then allowed it to rise undisturbed for another hour.

Here are a couple of shots from the loaf right after shaping, and before going into the oven.

I am sure I’ll be making this bread again and again.  At first, my husband said he would prefer it without chives, but after a few bites,  he agreed that they add a special flavor, quite unique.  This is an impressive loaf, that would be perfect with an Italian-inspired meal.

Please visit these links to see my fellow friends who already baked #42:

For Oggi’s blog, click here.

For Paul’s blog, click here.

I am submitting this post to Susan’s Yeastspotting event, Special Holiday Edition.

MEETING PETER REINHART


When I learned that Peter Reinhart was teaching some classes on Artisan Bread Baking in Texas, I had to enroll. I chose the Jan 31st event at the Central Market in Plano, TX, which is normally just a couple of hours from our home. Unfortunately, fate delivered an ice storm across my path just three days beforehand, making the driving pretty scary and quite a bit longer.

Still, I left early and managed to arrive an hour early at the Central Market, where I immediately saw Mr. Reinhart talking to his associates outside the beautiful classroom. I’d brought the book with me, hoping for his signature, but at first I couldn’t muster the courage to talk to him. It often happens when I’m confronted by people whom I admire: 90% of my composure disappears, leaving me to stumble on embarrassingly short sentences that may or may not make sense.

A past event comes to mind: the day that I met Francois Jacob, the 1965 Nobel Prize winner for his incredible work on the regulation of bacterial genes. In 1994 I was in Paris working at Institut Pasteur in the lab of Dr. Maurice Hofnung, one of Jacob’s students. Maurice had himself received an award from Legion d’Honneur, and Jacob was in attendance to celebrate the occasion. I was lucky enough to be a witness!

The large dining room was filled with small, elegantly set tables, at one of which I sat and waited. Suddenly, Dr. Jacob entered the room. We all felt expectation and tension in the air, until in slow, surreal motion he approached my table and sat down right across from me! We shook hands, exchanged the mandatory “Enchante / Enchantee,” and I spent the rest of the meal as a nervous wreck. But, it was worth it!

Those memories flashed through my mind in the Plano classroom, debating if I should talk to Mr. Reinhart. I finally convinced myself: “if you survived a meal with Francois Jacob, you can make it through a conversation with Peter Reinhart…” 😉 So, I got up and tracked down my bread guru. After accidentally breaking a glass full of water and ice with my handbag, and pulling a huge handle off the glass door as I left the room (I’m a walking disaster, in finest form), I met Peter in the hallway outside.

Mr. Reinhart is a wonderful, personable man, who immediately put me at ease. He’s impressed by the BBA Challenge, and was eager to discover any breads that were particularly tricky, or failed to meet expectations. I mentioned my trauma with the infamous 100% rye, and he wasn’t much surprised by my troubles. He then talked about the method of folding the dough a few times instead of extensive kneading. In fact, that point was the focus of his lecture.

The venue was perfect: TV cameras positioned over the workspace, two flat screen TVs projecting the event on both sides of the room. Organizing and teaching the class wasn’t trivial. Mr. Reinhart worked non-stop shaping several breads, as well as baking breads that were shaped beforehand in three large ovens, each with idiosyncrasies: too hot, not hot enough, uneven heat. It was the kind of stuff that really happens, and nice to see how a professional deals with it: zero hyperventilation.

We tasted samples of each bread – starting with thumbprint jams, then French bread, crumb cake, sticky buns, challah and chocolate babka (everyone’s favorite!).

If you’re a novice bread baker, I recommend that you attend one of Peter’s classes. But, if that’s not feasible, then his new book (Artisan Breads Every Day) is a great alternative. It’s quite instructive: – clear, detailed descriptions of how to make a starter, to maintain it, and the most important thing: to get the most of your bread dough by folding it.

I was thrilled to see Mr. Reinhart explaining the method in his new book, because I’m also a huge fan of this approach, having used it in many of the BBA recipes.

The icing on the cake was meeting a bunch of wonderful people attending the event, friends I’ve met through cooking forums online (Sharon, Cindy, Amy, and Dona), and two bloggers who are also fellow BBA Challengers: TxFarmer, the outstanding baker who keeps a blog in Chinese, and Stacey, with her beautiful blog Magnifico, who traveled all the way from Arizona to be in Peter Reinhart’s class!

A fun day, worth the dreadful drive…. and yes, I got my book signed, with Peter’s legendary motto:

May your bread always rise!

BBA#28: POTATO ROSEMARY BREAD

One more bread following along with the “Bread Baker’s Apprentice Challenge, the group project in which bakers make every single recipe from Peter Reinhart’s book, in the order they are published.

Potato Rosemary bread: I was looking forward to this one. Homemade bread has plenty of wonderful qualities, but often tastes best on the day it is baked, because contrary to its commercial counterparts, it has no preservatives.   However, something quite interesting happens once you add potato, or even potato cooking water to bread dough: the potato starch molecules “trap” water, and as a result, the bread stays fresh longer.   It will not lose moisture as fast as a regular bread.

Peter Reinhart’s recipe calls for a biga – a stiff mixture of flour, water, and yeast that ferments overnight – as part of the dough, that also contains a small amount of commercial yeast, flour, mashed potatoes, chopped rosemary, black pepper, and salt. Instead of kneading I folded the dough at 20, 60, and 90 minutes.  After two hours I formed a “boule”, and allowed it to rise 2 more hours.  My other modification was to bake it with steam, that is, I baked it for 30 minutes covered with a roasting pan, then removed the cover,  and allowed it to bake for ten more minutes. The internal temperature of the bread was a little higher than 200F at that point.

Here are some photos of the process…

Slashing for this kind of bread is optional, but I like to practice my skills with the baker’s blade…   😉

Large, uneven holes, a vision that makes me very happy…

Time for lunch!   Everyone is invited…

Some of my fellow bakers already made this bread, please visit their sites following the links:

Paul loved this bread, particularly how wonderful it made his home smell during baking (the same happened in our home)

TxFarmer, as usual, does a great job shaping her bread in unique ways, I love to visit her blog, even if my Chinese skills are not up to par to read the text. Maybe one day… 😉