I don’t know how to put this more clearly to you: MAKE THESE COOKIES. Do not hesitate, do not postpone to next week, next month. My friend Dorothy from shockinglydelicious raved about them, and I am so glad I took action. They are incredibly easy to make and OMG-delicious! Addictive. Seriously so. The recipe is not yet in her blog, but I got it through her Facebook (check it out here if you are on FB).
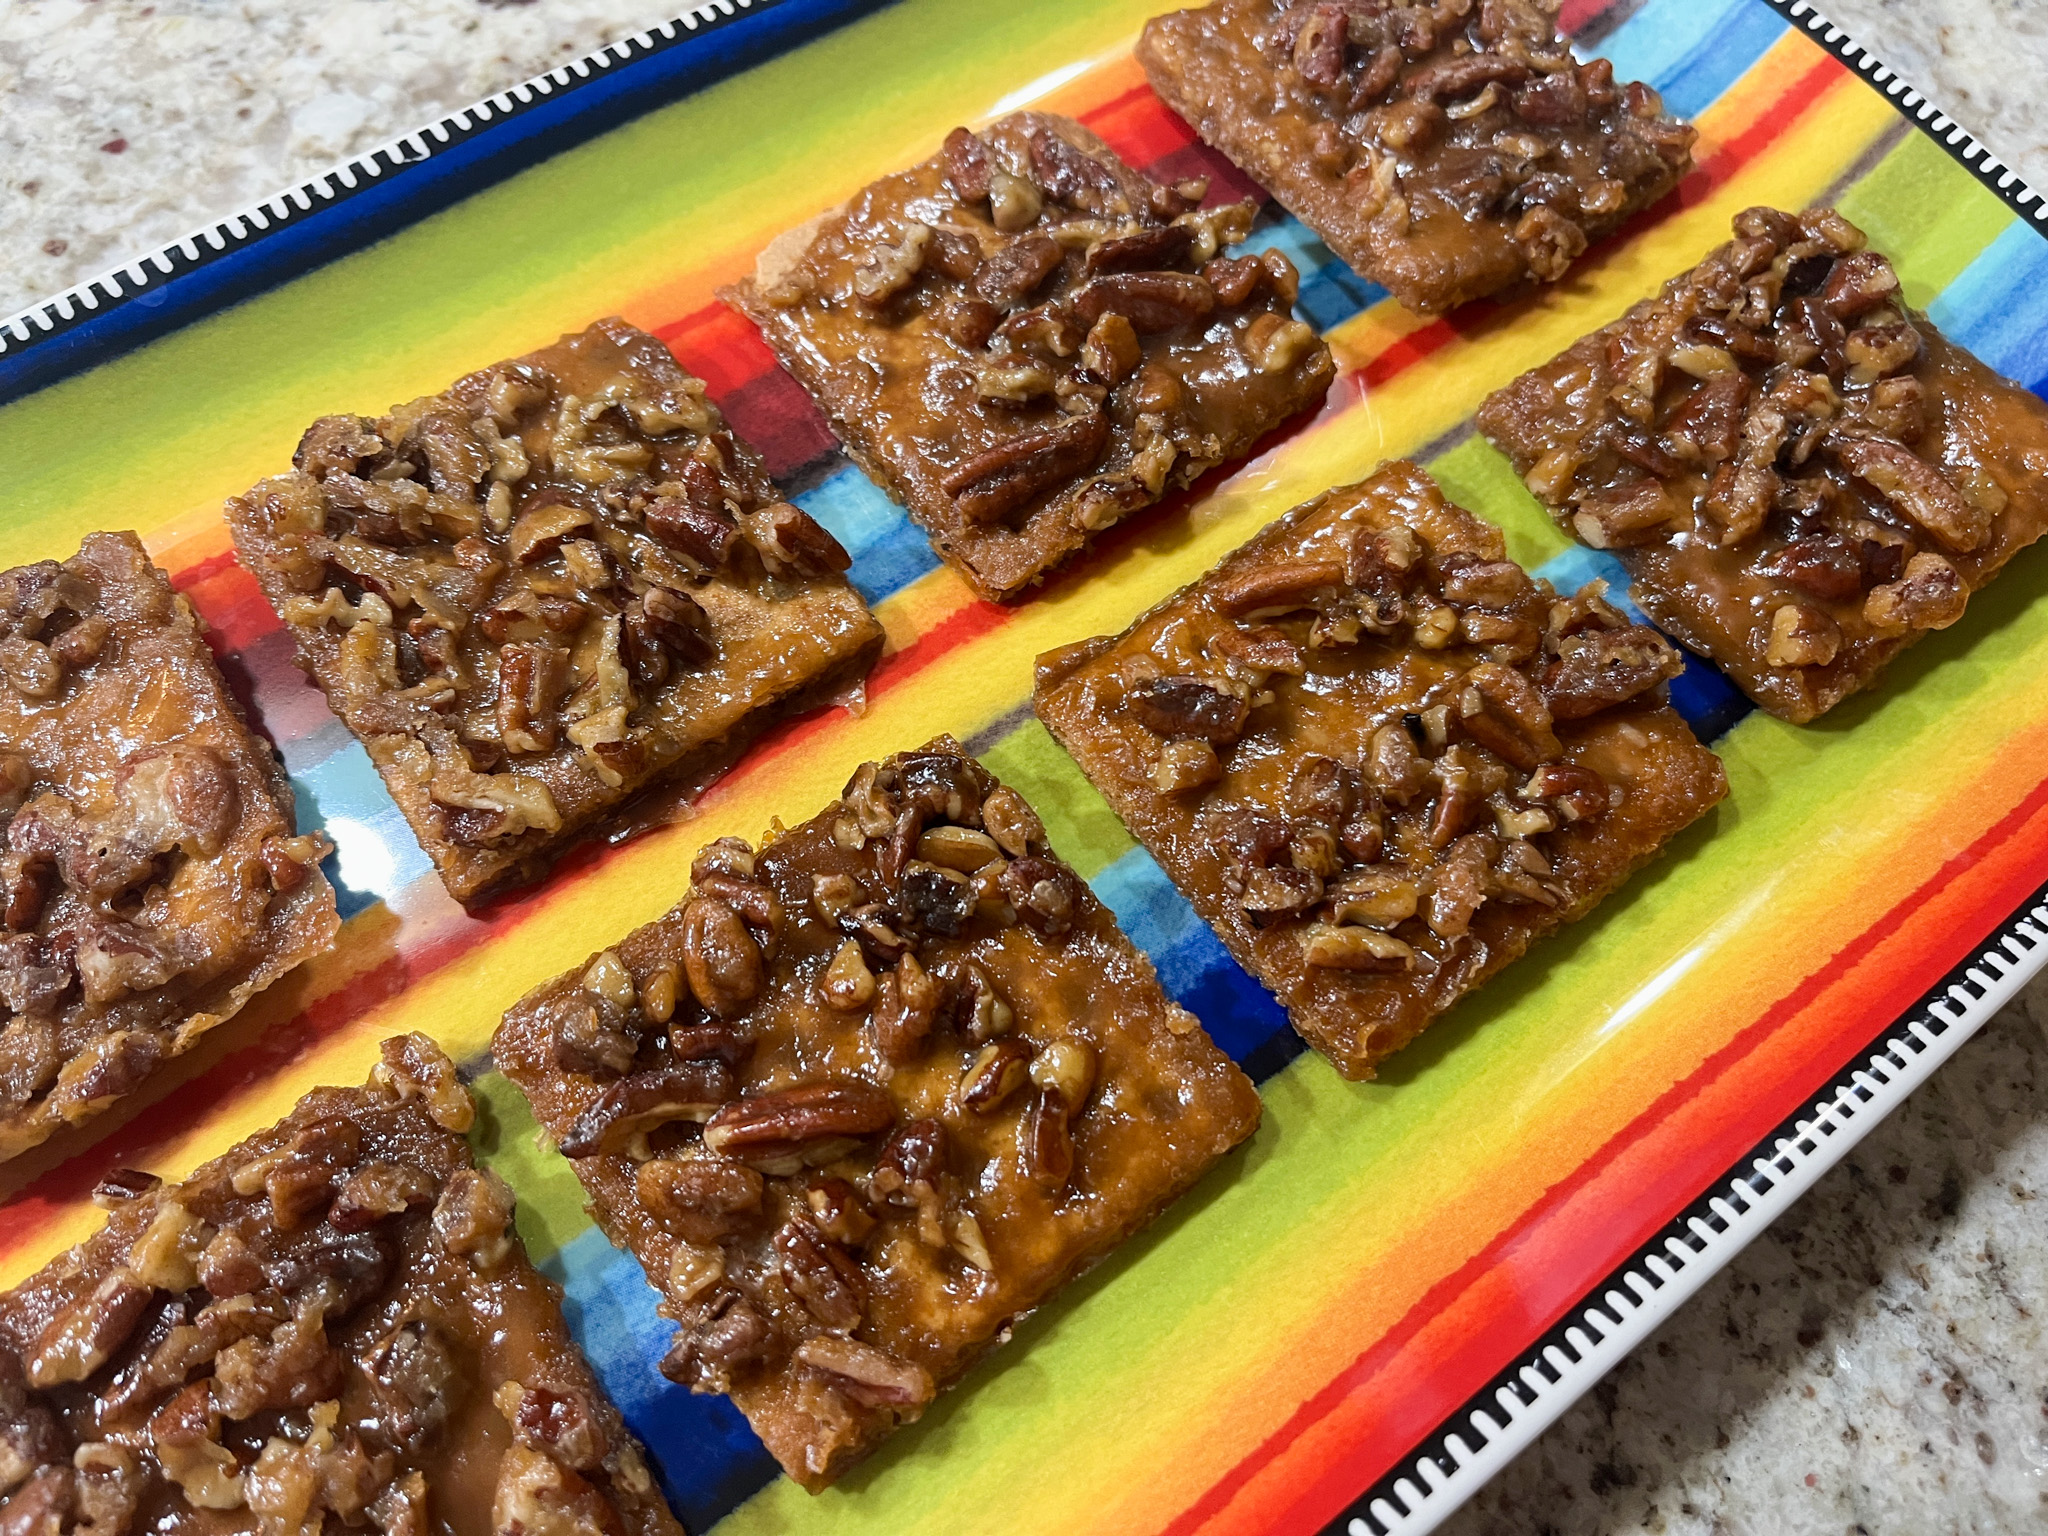
PECAN PIE “CRACK”
(from Dorothy Reinhold)
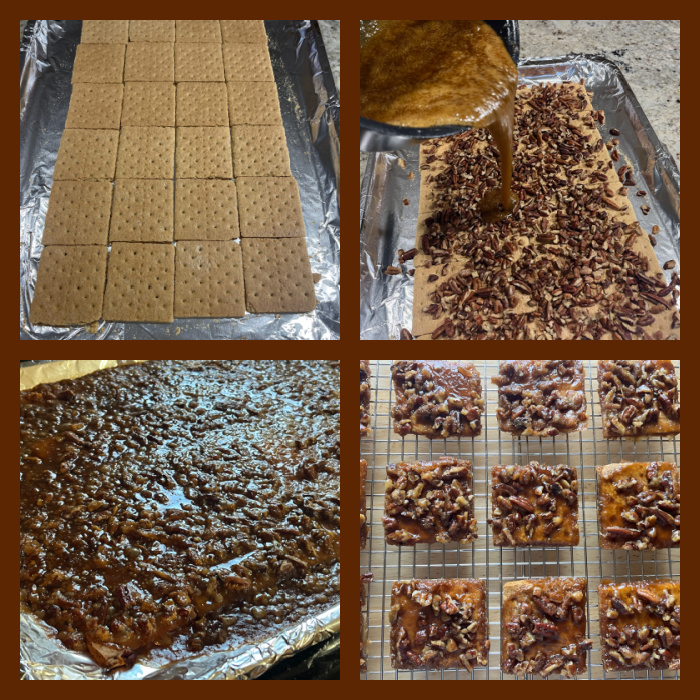
13 graham cracker rectangles
2 cups pecan halves and pieces
1 cup brown sugar
1 cup (2 sticks) unsalted butter
1/4 teaspoon salt
1 teaspoon vanilla extract
Heat oven to 350F. Line a rimmed baking sheet with parchment paper (or foil). Lay graham crackers to fit, breaking them if you need to. Fill the whole pan. Sprinkle all the pecans over top.
In a medium pot over medium heat, combine brown sugar, butter and salt. Bring to a boil and once boiling, let cook 2 minutes, stirring constantly. Remove from heat, stir in vanilla and quickly pour hot mixture over graham cracker and nuts in the pan, making sure all crackers are covered.
Bake 10 minutes; it will be bubbly. Remove from oven, allow to cool completely and break into pieces. This will be screaming hot, so don’t even try tasting it until it is entirely cool.
ENJOY!
to print the recipe, click here
Comments: As you know, I donate 99% of the sweets I bake, or close to it… But every once in a while I get to taste one, particularly when it is a recipe I’ve never made before. So I did. The nickname “crack” seemed appropriate, not that I ever suffered from drug addiction. The image fit nicely. I had to exercise ALL my will power to put them away, so the poor homeless would have a chance. They are impossibly good. Trust me. As you are making them you will be sure there will be a disaster in the end. Things get furiously bubbly, it looks like chaos. But there will be a super bright and tasty light at the end of that tunnel!
THANK YOU, DOROTHY! THESE ARE AMAZING!
ONE YEAR AGO: Chicken Stir-fry with Cashews and Broccoli
TWO YEARS AGO: It’s not the recipe
THREE YEARS AGO: Pfeffernusse
FOUR YEARS AGO: Clay Pot Pork and Tomatillo Braise
FIVE YEARS AGO: Vegan Chocolate-Dipped Cinnamon Cookies
SIX YEARS AGO: Lemony Barley with Shrimp and Spinach
SEVEN YEARS AGO:Black Rice with Roasted Cauliflower
EIGHT YEARS AGO:La Couronne Bordelaise
NINE YEARS AGO: A Special Birthday Dinner
TEN YEARS AGO: Duck Confit for a Special Occasion
ELEVEN YEARS AGO: Tuscan Grilled Chicken and Sausage Skewers
TWELVE YEARS AGO: Celebrate Wednesday with Pork Tenderloin & Apples
THIRTEEN YEARS AGO: Salmon Wellington
FOURTEEN YEARS AGO: The Green Chip Alternative
FIFTEEN YEARS AGO: Weekend Pita Project
SIXTEEN YEARS AGO: Let it snow, let it snow, eggs in snow