SPRINGTIME CUPCAKES

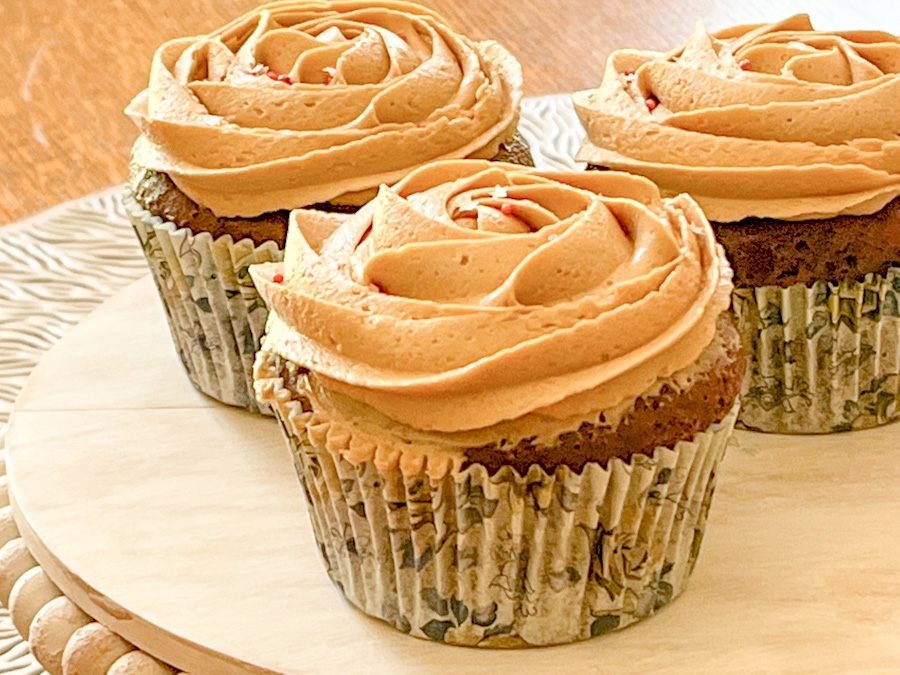
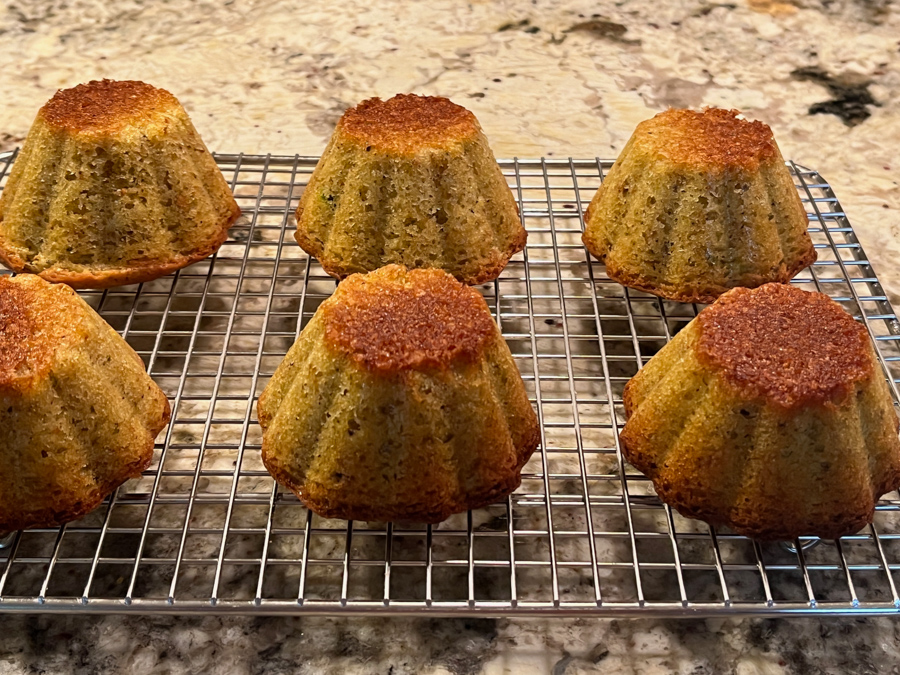
Spring is taking its time to show up, we even had a light snow the other day, but apparently now things are headed in the correct direction (knock on wood). These cupcakes celebrate the season. You can use any recipe you like for the cake component. I went with a very basic vanilla concoction. The frosting is your humble American buttercream. Honestly, I don’t see the need to go through the extra work of a Swiss buttercream to cover cupcakes. It crusts well, so transporting the cakes (which matters a lot to me) is not a problem. They also stand well to sitting at room temperature for an hour or more.

The basic formula is simply 1X amount of butter + 2X amount of powdered sugar. Change the starting weight of butter according to how many cupcakes and how many colors you’ll need, as you will see in the individual cupcakes after the recipe.

BASIC BUTTERCREAM FOR CUPCAKES
(from The Bewitching Kitchen)

226g butter, unsalted, softened
452g powdered sugar
pinch of salt
Vanilla extract, about 1 tsp or more to taste
a couple or more tablespoons of milk (to adjust consistency)

Place the softened butter in the bowl of a KitchenAid type mixer with the paddle attachment, add the pinch of salt, and whip at high speed for about 7 minutes. It needs to be really soft and lighter. Stop the mixer. Eyeball the amount of powdered sugar, add 1/3 and mix at low speed at first, once the sugar is starting to get incorporated, increase the speed to medium-high.

Add the second portion of the sugar, and incorporate the same way. Add the final portion, start at low speed, clean the sides of the bowl well with a spatula, add the vanilla and increase the speed slowly all the way to high. Whip it until very smooth. Add milk to desired consistency. If desired, add any flavoring ingredients, about 1/4 cup (Nutella, jam, teaspoon of emulsions). If working with different colors, divide the buttercream into small bowls and dye each one with food gel color.

Fill piping bags fitted with the icing tips of your choice. Ice fully cooled cupcakes.

ENJOY!

to print the recipe, click here

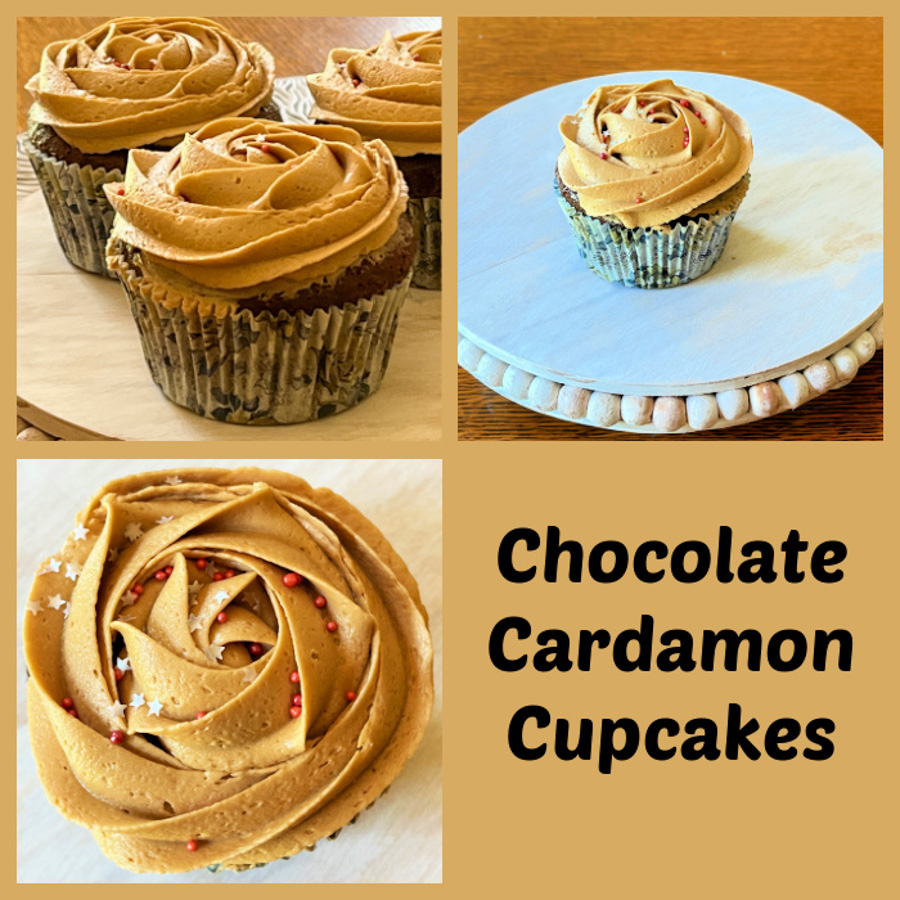
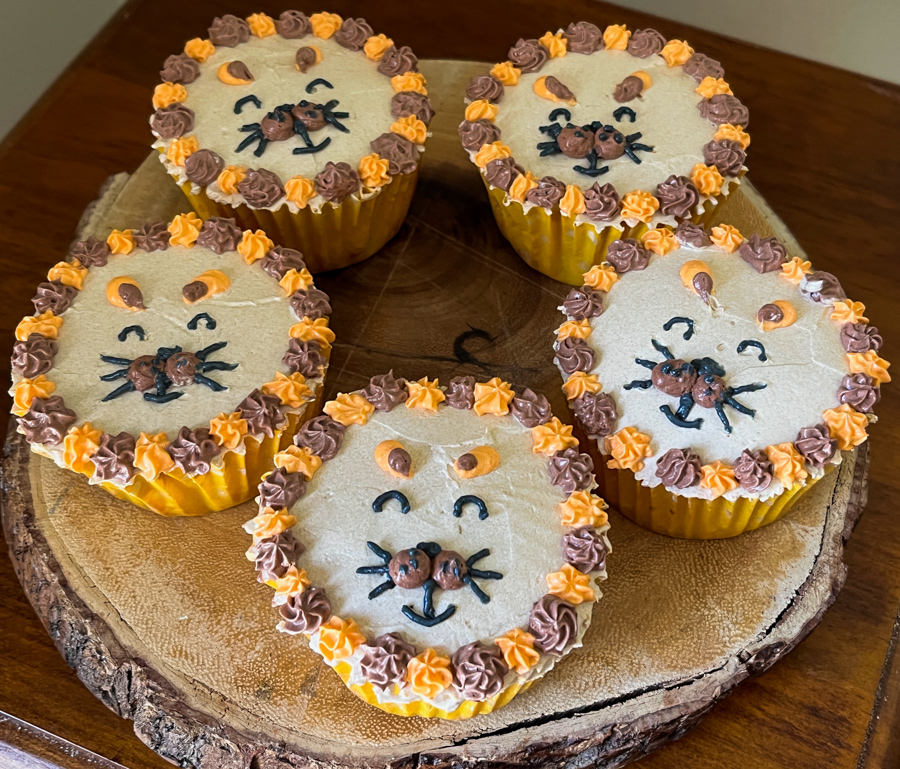
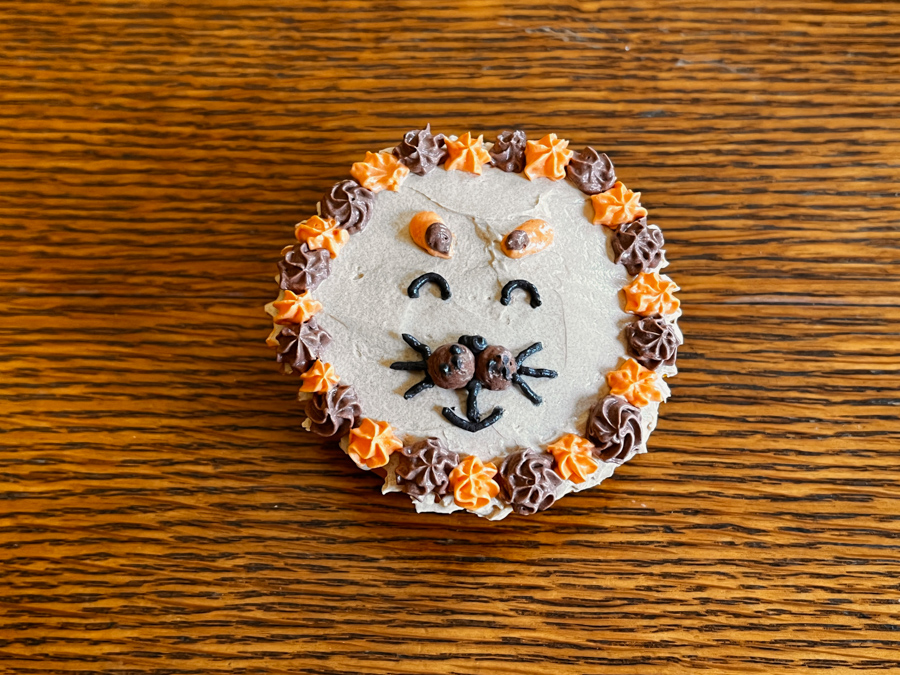
LUCK OF THE IRISH CUPCAKES

For 12 cupcakes my starting point was 150g butter + 300g powdered sugar, plus 1/4 cup Nutella as flavoring.
I used 1M tip to make rosettes, and gilded the lily with sprinkles and a fondant clover.

HYDRANGEA CUPCAKES

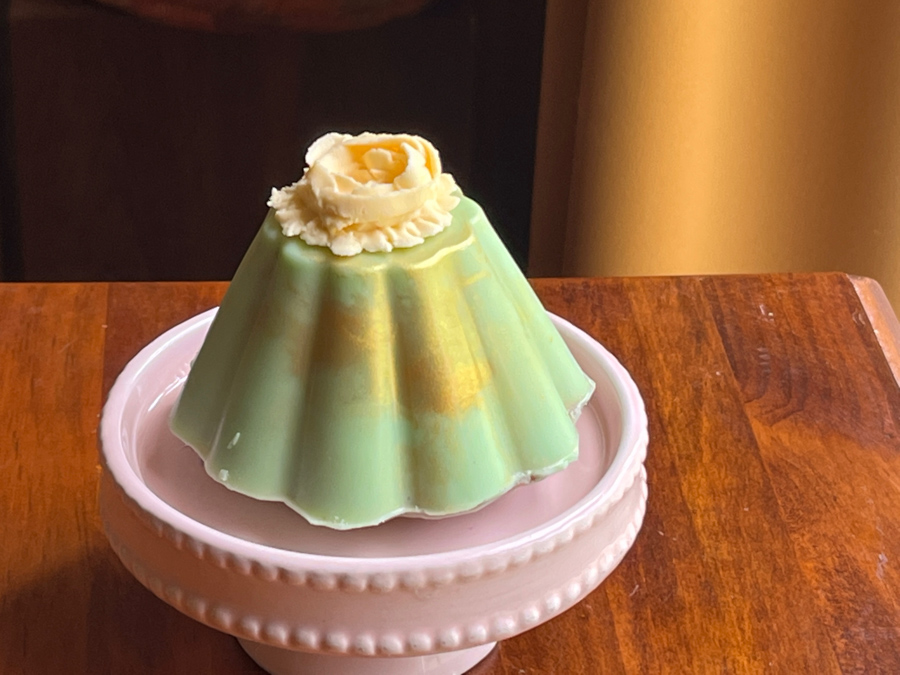
For these cupcakes, I made buttercream with 200g butter + 400g powdered sugar. Divided in three portions and dyed them very very lightly with pink, lavender, and blue. The colors were spread as bands over plastic, and a little sausage was formed, then dropped in an icing bag with the1M tip. To make the flowers, I piped small blobs all over anda second layer going up towards the center.

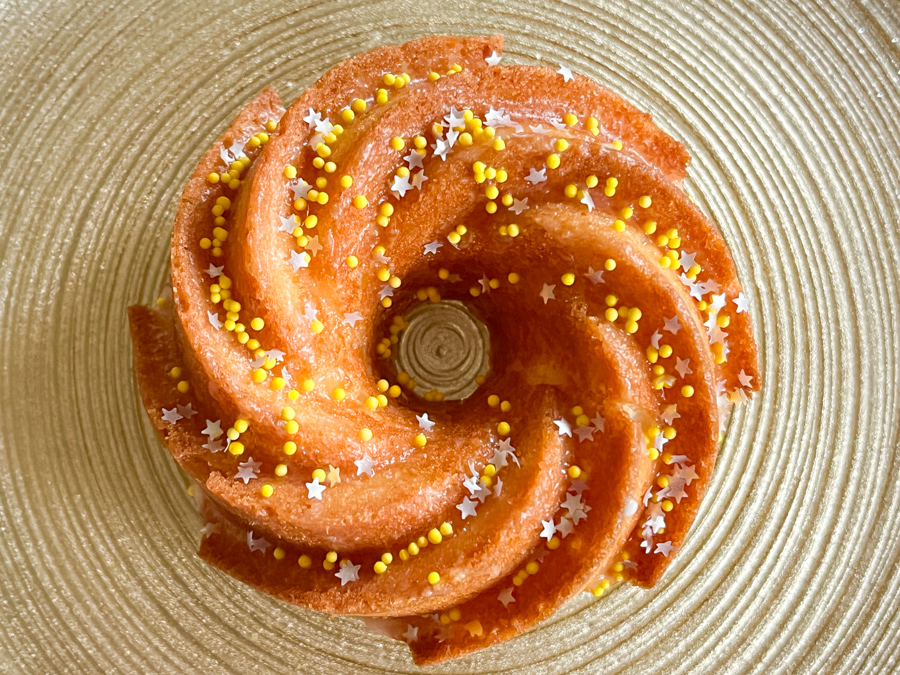
RUFFLED FLOWER CUPCAKE

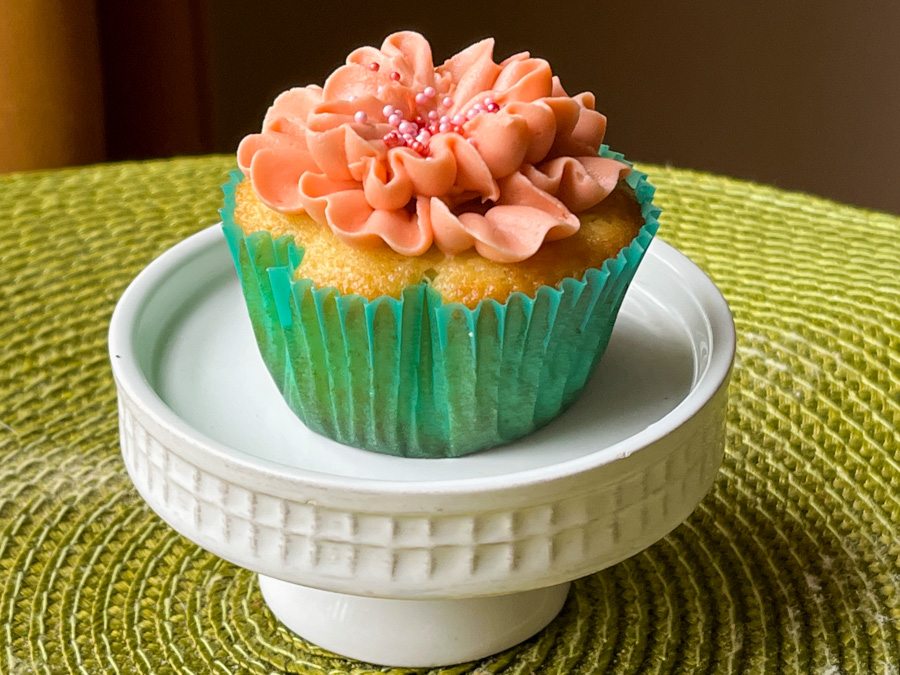
These cupcakes were made together with the last one (multiple colors) so for the full batch (12 cupcakes) I used the recipe as published (226g butter). I was playing with several colors and did not want to run out of any of them. A more experienced baker might get by with a smaller amount of icing to start with.

This flower was made with the petal tip 104, laying very flat on the surface of the cake, in two rows to give more lift and volume. Sprinkles added just because. You could make a center with buttercream dots in a contrasting color, if you prefer.

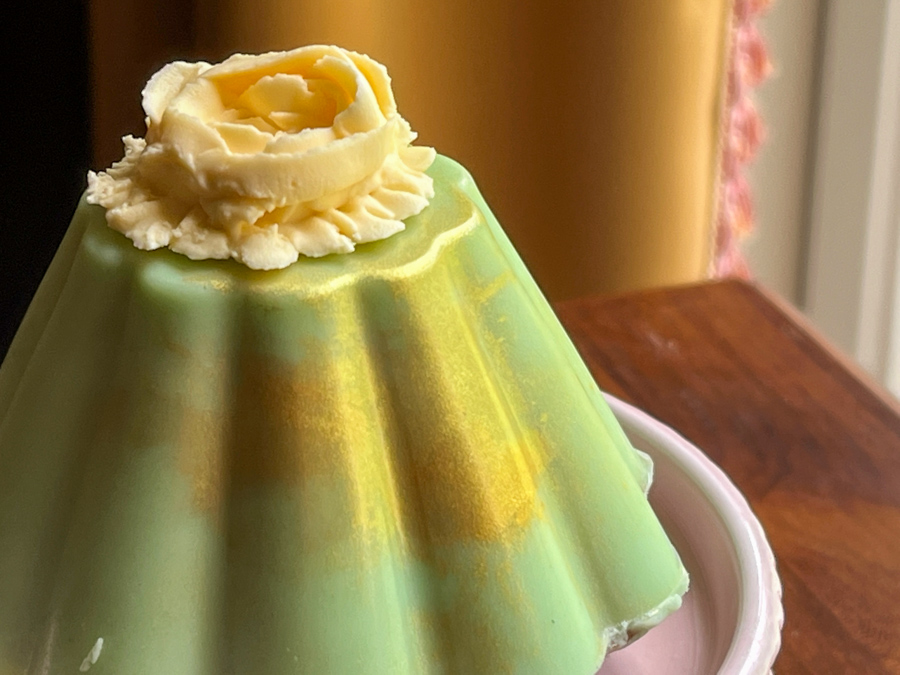
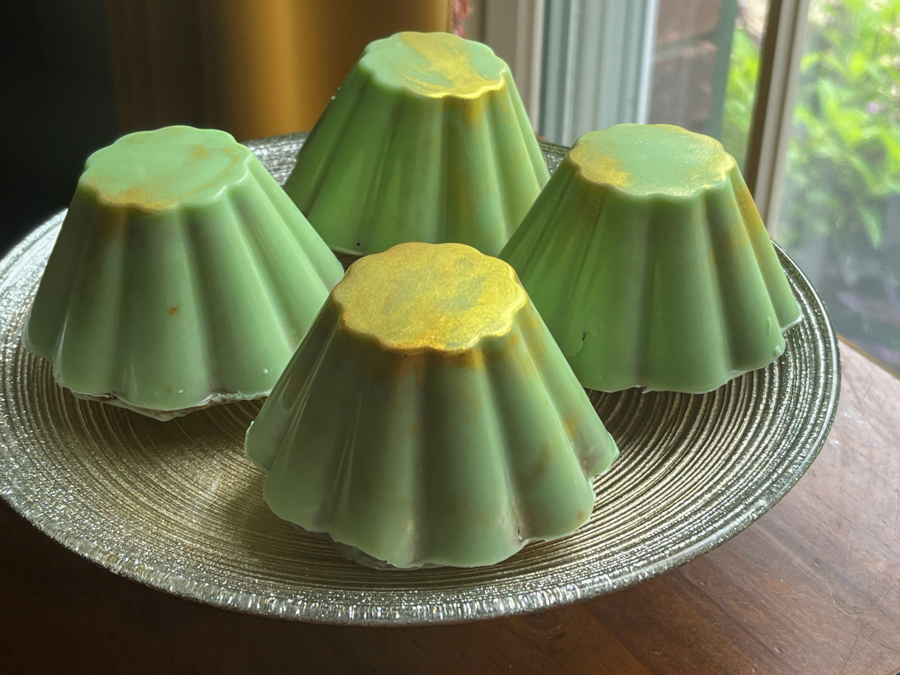
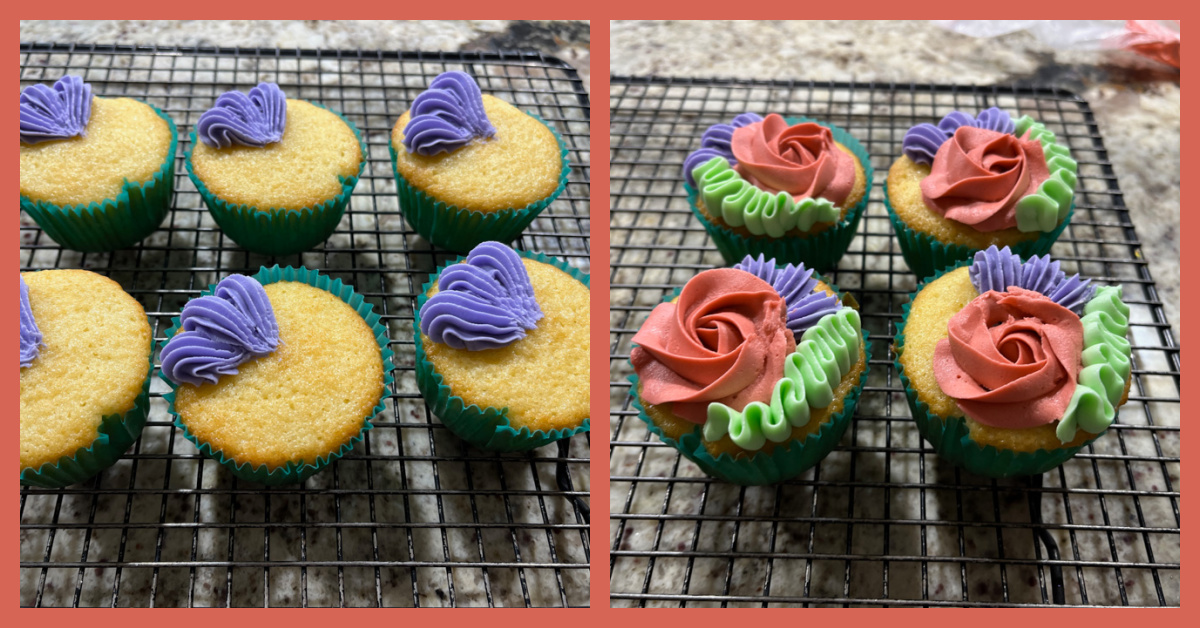
MULTICOLOR FLORAL CUPCAKES

I divided the buttercream in four batches and dyed them pink (toned down with a touch of brown), purple, green and yellow. Four tips were used. Wilton 1M for purple, closed star for flower (Wilton 2D), petal tip for green (Wilton 104), and a small open star for the yellow (Wilton 18).

Inspiration to decorate these cupcakes came from this video available on youtube.

Cupcakes are so much fun to decorate….
ALMOST as much as cookies!

ONE YEAR AGO: Eggplant-Hummus Phyllo Rolls

TWO YEARS AGO: Happy Easter!

THREE YEARS AGO: Brioche Pepin

FOUR YEARS AGO: Sakura Buche du Printempts

FIVE YEARS AGO: Clay Pot Roast Chicken

SIX YEARS AGO: In My Kitchen, April 2017

SEVEN YEARS AGO: Secret Recipe Club: Chicken Korma and a Bonus Recipe

EIGHT YEARS AGO: Josey Baker’s Olive Bread

NINE YEARS AGO: Almonds, A Cookbook Review

TEN YEARS AGO: Pomegranate-Molasses Glazed Carrots

ELEVEN YEARS AGO: Codruta’s Rolled Oat Sourdough Bread

TWELVE YEARS AGO: Roasted Corn and Tomato Risotto

THIRTEEN YEARS AGO: Light Rye Bread

NINE BAKES, WITH LOVE

Time to spread some food blog love around… Today I share nine bakes that are perfect for the season and come from sites I closely follow. All recipes can be retrieved with a visit to the original post, which you will find below the pictures.


BAKE #1
HELEN FLETCHER’S PUMPKIN CAKE DONUTS

(for recipe, click here)

I know I repeat myself, but you simply cannot go wrong with Helen’s recipes. This one goes to my Personal Hall of Fame. Taste and texture could not be better. Her detailed instructions make it a breeze to make. I assume it is still ok to post pumpkin recipes, after all – according to the calendar – it is still Fall (cough, cough). Donuts get a streusel topping and need nothing but a dusting with powdered sugar to shine!


BAKE #2
CELIA’S FUDGE BROWNIES

(for recipe, click here)

Celia used to be a very active food blogger, but although she is not posting often, her recipes are still on the site and each one is a gem. If you like to learn about chocolate tempering, make sure to visit her blog and read one of her posts on the subject. These brownies received two thumbs up from the Resident Brownie Critic. Need I say more? Make them!

BAKE #3
KAREN’S DEVIL’S FOOD THUMBPRINT COOKIES

(for recipe, click here)

Amazing recipe, it is almost like having a little bite-size brownie with jam on top. Simple to make, they will make your holiday table shine, and your guests very happy!

BAKE #4
CARO’S CHOCOLATE CARDAMON CUPCAKES

(for the recipe, click here)

Aren’t those super elegant? I fell in love when Caro first shared the recipe, and could not wait to bake a batch. Cardamon and chocolate go surprisingly well together, so consider making them too… Sprinkles added just because…. sprinkles make life better!

BAKE #5
CARO’S RASPBERRY JAM AND COCONUT SPONGE SQUARES

(for the recipe, click here)

These are delicious, you cannot beat the texture of the cake… and the jam plus coconut topping is perfection. I know that some people don’t care for shredded coconut, but if your group of guests is ok with it, make sure to feature it in your holiday get-together.

BAKE #6
AMISHA’S DATE AND NUT CHOCOLATE BARS

(for recipe, click here)

Super festive, the list of ingredients is long, but it is a reasonably simple recipe to put together. It has all the flavors I adore, including a light hint of rose, that goes well with all the other flavors. You can use ruby chocolate or add pink fat soluble dye to regular white chocolate for the marbling. Check out her blog post, the instructions are very detailed. Gold leaf is optional, but if you happen to have some, it is the perfect concoction to make them shine. Literally.

BAKE #7
LINDSAY’S STUFFED CHERRY AMARETTI COOKIES

(for the recipe, click here)

These are simply amazing! I made them three times, they were originally all going for my weekly donation box, but one batch made it to my beloved husband’s golfing buddies, and they got a lot of praise… Once you bite into the cookie, the soft almond crumb gives room to the sharp cherry inside, and you are forced to close your eyes and dream. Seriously good.

BAKE #8
LINDSAY’S VEGAN AMARETTI COOKIES

(for the recipe, click here)

Another recipe from Lindsay’s blog, Love and Olive Oil. When it comes to “veganizing” a baking recipe, nothing beats macarons and amaretti type cookies, as all you need is remove the egg whites and use aquafaba instead. That is the magical ingredient, that works exactly the same, no loss of flavor, no unpleasant changes in texture. Of course, you could stick a cherry inside those too if you feel like it!

BAKE #9

HEATHER’S PEANUT BUTTER CUP COOKIES

(for the recipe, click here)

Aren’t those the most adorable little bites of heaven? If you are a lover of peanut butter, these are for you! I love Heather’s cookbooks, and her blog is always a source of inspiration, so make sure to bookmark and visit. I had to change the recipe a bit because our grocery store did not have peanut butter chips, so I used candy melts for the drizzle instead. Other than that, I followed her recipe to a T.

So there you have it, nine recipes from sites I love, as this is the season to spread love and gratitude around… I hope you can find something that inspire you to grab that bag of flour, those eggs, pull the mixer out to play, and get busy baking!

ONE YEAR AGO: Asian-Style Chicken Meatballs

TWO YEARS AGO: Cookies for the Holidays, SPRINGERLE

THREE YEARS AGO: Bread – Episode 2 of Great American Baking Show

FOUR YEARS AGO: Apple and Sobacha Caramel Dome Cake

FIVE YEARS AGO: Cocktail Spiced Nuts

SIX YEARS AGO: How the Mighty Have Fallen

SEVEN YEARS AGO: Festive Night at Central

EIGHT YEARS AGO: The Perfect Boiled Egg

NINE YEARS AGO: Light Rye Sourdough with Cumin and Orange

TEN YEARS AGO: Homemade Calziones

ELEVEN YEARS AGO: Plum-Glazed Duck Breasts

TWELVE YEARS AGO: Holiday Double-Decker

THIRTEEN YEARS AGO: New York Deli Rye

VANILLA MINI-CAKES WITH HONEY PEARS

The cake batter for these cupcakes is very simple to make, the only other step needed is preparing the pear topping, but if you want to make your life real easy, you can do that the day before and keep it in the fridge. They don’t need anything but a light shower with powdered sugar.


VANILLA MINI-CAKES WITH HONEY PEARS
(adapted from several sources)

for the pear topping:
2 tablespoons (1/4 stick) butter
4 Anjou pears, peeled, cored, cut in small cubes
1/3 cup (65g) golden brown sugar
2 tablespoons honey


for the cakes:
3/4 cup (185g) unsalted butter, room temperature
1 cup (200g) sugar
4 large (200g) eggs
1 teaspoon vanilla extract
1 + 1/3 cups (160g) all purpose flour
1 teaspoon baking powder
1/2 teaspoon salt

powdered sugar


Melt butter in a large non-stick skillet, add the pears and sauté for 5 minutes, until tender. Add brown sugar and honey, cook until pears are evenly coated, about a minute or so. Transfer to a small bowl, cover and put in the fridge until needed.

Heat oven to 350°F. Coat 8 mini-cake pans with non-stick spray. Beat butter and sugar until smooth. Add eggs, one at a time, beating constantly. Add the vanilla. Which the flour, baking powder and salt in a bowl, and sift that mixture into the butter/egg, mixing gently until combined.


Divide the batter among cups, filling a little more than half-full. Spoon 1 to 2 tablespoons of the pear mixture on top of the batter. Bake until a toothpick inserted in the center comes out mostly clean, about 25 minutes. Let rest 15 minutes before un-molding. Right before serving, add a little powdered sugar on top with a sieve.

ENJOY!

to print the recipe, click here

Comments: For the cakes, I used one of my favorite pans, which I bought a long time ago on eBay. I have not been able to find a source to get it in the US, but you can see it here. It is the same pan I’ve used for mini Victoria cakes (flash back post here). It bakes like a dream, and since the bottom is loose, you can push the cakes out easily. I love the look of the mini-cakes, they get perfectly straight edges. If you don’t have a similar pan, use a regular cupcake pan. Maybe the number and size of your cakes will be different but it will work.

The same approach will work with other fruits, and I also think pineapple could be wonderful, so that’s an idea for future adventures…

ONE YEAR AGO: Buttermilk Roast Chicken

TWO YEARS AGO: Cauliflower and Sweet Potatoes in Yogurt-Curry Sauce

THREE YEARS AGO: Panettone, Wild-Yeast Version

FOUR YEARS AGO: Turkey Chili Under Pressure

FIVE YEARS AGO: Tiramisu Macarons

SIX YEARS AGO: Cider Mini-Cheesecakes with Caramel Sauce

SEVEN YEARS AGO: Rustic Ciabatta and Mini-Meatloaves

EIGHT YEARS AGO: Green Rice

NINE YEARS AGO: Potato-Crusted Italian Mini-Quiches

TEN YEARS AGO: Beetroot Sourdough for the Holidays

ELEVEN YEARS AGO: Cod Filet with Mustard Tarragon Crust

TWELVE YEARS AGO: Soba Noodles: Light and Healthy

THIRTEEN YEARS AGO: Potato-Rosemary Bread

A TRIO OF LITTLE CAKES

Mini-cakes are cute from the get-go, in fact most desserts made in single serving are pretty adorable by default. But some details can raise their level of cuteness even higher. Today I share three ideas to make mini-cakes a little more special.

The first method to make cute cupcakes is using a different shape of pan. Like this pan from Nordic Ware. I think the quality of their pans is hard to beat, and totally worth the price tag. They are heavy, well-made and bake like a dream. I usually still spray the inside with PAM baking spray, a light coating ensures nothing will stick in the little crevices.

LEMON MINI-BUNDT CAKES

LEMON MINI-BUNDT CAKES
(adapted from several sources)

125g butter (I used Kerrygold)
150g sugar
zest of 1 lemon
2 large eggs (100g)
180 g all-purpose flour
1 + 1/4 teaspoon baking powder
Pinch of salt
½ cup milk
1 tablespoon freshly squeezed lemon juice
1 tsp lemon extract
for the glaze:
200g powdered sugar (1 cup)
Juice of 1 fresh lemon (amount adjusted for consistency)
sprinkles to decorate (optional)

Heat oven to 350 F. Rub the sugar with the lemon zest for a couple a minutes until very fragrant. Cream butter and lemon-infused sugar together. Add eggs one at a time, beating in slow speed until incorporated. Add the dry ingredients and milk. Mix well to combine, then add the lemon juice and extract, whisking gently.

Pour batter into the pan a little over 1/2 full in each cavity, but not quite reaching 3/4 of the capacity. Bake until a toothpick inserted in the cake comes out clean, about 22 minutes. Leave the cakes in the pan for 5 minutes than invert and cool them completely over a rack.

Make the glaze by mixing the ingredients. You want a pourable consistency, but not too thick so that the ridges of the cake still show. Pour over the cooled cakes. Decorate with sprinkles.

ENJOY!

to print the recipe, click here

These lemon cakes are very moist, with intense citric flavor. I used a very thin glaze because I wanted the ridges to be evident. If making a regular cupcake, consider a much thicker icing that will stay on the surface a little better.

PISTACHIO-ROSE MINI-CAKES

In this method, used by Sonali from sugaretal, you will need a silicone mold to bake the cakes. Then, after washing it well, the pan is used to apply the compound chocolate coating. The result is quite stunning, but the process pretty simple. I used this pan.

PISTACHIO ROSE MINI-CAKES
(recipe from Sonali)

To get the recipe, follow the link to her Instagram page.

After baking the cakes….

The silicone pan is washed and dried very well. I used a little gold luster powder to brush the bottom of the pan, then poured Candy melts dyed light green. Carefully brushed that all the way to the sides of each cavity and placed the cake back, snuggly, so that it would get a smooth coating on the surface. Make sure to do one little cake at a time, so that the melted compound chocolate does not harden.

The pan is placed in the freezer for about 30 minutes, so that the shell is properly formed and the cakes will release fully coated.

I am totally in love with this combination of pistachio and rose. In fact, I urge you to visit Sonali’s blog, full of elegant ideas for all sorts of desserts.

Finaly, the third way to dress up a cupcake, is making a few colors of Swiss meringue buttercream and creating a cute pattern on the surface. I followed the design of Liz Shim, available at Domestika.com

CUPCAKES DECORATED WITH SWISS MERINGUE BUTTERCREAM

LION HEAD CUPCAKES
(design from Liz Shim)

I made a simple vanilla cupcake (recipe from America’s Test Kitchen), and a batch of Swiss meringue buttercream following the recipe provided by Liz Shim in her class. I coated the top of the cupcakes with buttercream, and separated small amounts to dye orange, brown, and black. Those were used to make all the details using star-shaped or round piping tips.

I hope you enjoyed this trio of cakes. There are many options for mini-cake pans at Nordic Ware, one more beautiful than the other: hearts, little houses, tiered little cakes, stars… just choose your favorite and play with cake flavors. I think the pan I used would be very nice with a red velvet cake too.

Coating a cake with compound chocolate is another great option to include in your repertoire, and Sonali is a pro at that. You might remember I’ve used her method in the past (click here).

As to piping designs with buttercream, it involves a bit of a learning curve. I am much more comfortable piping Royal icing, which stays put better and is less prone to melting with the heat of your hands in the piping bag. But I intend to keep practicing, so stay tuned!

ONE YEAR AGO: From our Garden to You

TWO YEARS AGO: Lady Bug Macarons

THREE YEARS AGO: Five-Stranded Braided Bread

FOUR YEARS AGO: Green Olive Salad

FIVE YEARS AGO: Coffee Macarons Dressed up to Party

SIX YEARS AGO: Blogging Hiatus

SEVEN YEARS AGO: Tomato Tatin

EIGHT YEARS AGO: Headed to Colorado!  

NINE YEARS AGO: Farofa Brasileira

TEN  YEARS AGO: Thai-Inspired Pork Tenderloin

ELEVEN YEARS AGO: A yummy Brazilian cake: Bolo de Fuba’

TWELVE YEARS AGO:  Summer’s Tomatoes

THIRTEEN YEARS AGO: Leaving on a jet plane… 

ONE BOWL, ONE WHISK CONFETTI CUPCAKES

Cannot get much simpler. These are egg-free cakes, easy and fast to prepare. The buttercream icing is a lot more involved than the cake, but if you prefer you can serve them with a dusting of powdered sugar, or a simple glaze. Many cookbooks and blogs have versions of these cupcakes, I based mine on smittenkitchen.com

CONFETTI CUPCAKES WITH VANILLA BUTTERCREAM FROSTING
(adapted from several sources)

200g all-purpose flour
160 grams granulated sugar
1 + 1/2 teaspoons baking powder
1/2 teaspoon salt
1 cup full-fat milk
1/3 cup grapeseed oil
1 tablespoon lemon juice
1 teaspoon vanilla extract
1/8 teaspoon almond extract
1/3 cup rainbow sprinkles

for the buttercream:
1/2 cup butter, at room temperature (1 stick, 113 g)
4 cups powdered sugar (32 oz)
1/4 cup milk
1 tsp vanilla extract
pinch of salt

Make the cupcakes: Heat oven to 350°F. Place cupcake liners in a 12-cup standard muffin tin.

In a large bowl, whisk flour, sugar, baking powder, and salt together. To the center, add the milk, oil, lemon juice, and flavoring extracts. Whisk very well until smooth. It will be very liquid. Add sprinkles, fold them gently. Using an ice cream scoop, fill each cupcake lines 2/3 full.

Bake for 15 to 20 minutes, until a toothpick inserted in the center comes out clean. Let the cupcakes cool before frosting.

To make the frosting, beat the butter with 2 cups of the powdered sugar, the milk, vanilla, and salt. Once that is smooth, keep adding the rest of the powdered sugar. You might not need it all, add it until you have the desired spreading consistency.

Frost the cupcakes using a Wilton 1M tip, then add confetti sprinkles, if desired.

ENJOY!

to print the recipe, click here

Comments: As I mentioned, these are probably the easiest cupcakes ever to make, even a cake-o-phobe will have no issues. They are tender, light, and delicate. Also festive, because rainbow sprinkles make anything festive… I like the addition of vanilla buttercream, even if it increases the complexity of the bake a bit. You can omit it, the cupcakes are delicious without it also.

ONE YEAR AGO: Incredibly Simple Times Four

TWO YEARS AGO: Phyllo Parcels with Moroccan Turkey

THREE YEARS AGO: Roasted Corn and Zucchini Salad

FOUR YEAR AGO: Fraisier Cake, A Celebration of Spring

FIVE YEARS AGO: Zucchini Frittata with Roasted Tomatoes and Goat Cheese

SIX YEARS AGO: Playing with Pectinase

SEVEN YEARS AGO: Poached White Asparagus with Lemon and Pistachios

EIGHT YEARS AGO: Dan Lepard’s Saffron Bloomer

NINE YEARS AGO: Fesenjan & The New Persian Kitchen

TEN YEARS AGO: Quinoa Salad with Roasted Beets

ELEVEN YEARS AGO: Pasta Puttanesca

TWELVE YEARS AGO: Miche Point-a-Calliere