1 cup flour 1/2 tsp baking soda 1/8 cup vegetable oil 1/4 cup natural peanut butter (Do NOT use a peanut butter with Xylitol, as it is very toxic for dogs) 3/4 cup applesauce go with plain, unsweetened 1/2 cup pumpkin puree 1 egg FROSTING 1/2 cup plain Greek yogurt 1/4 cup peanut butter
Heat oven to 350 degrees F. In a large bowl, combine flour and baking soda. In a separate bowl mix together vegetable oil, peanut butter, applesauce and pumpkin puree. Once combined, mix in egg and mix well. Mix wet and dry ingredients and stir until no dried bits of flour are visible.
Pour mixture into an 7 inch square pan that has been greased with oil. Bake for 20 to 25 minutes or until a toothpick inserted into the center comes out clean and the cake springs back when pressed lightly. Allow to cool on a wire rack prior to removing from pan. After cooling, add frosting if desired.
For the frosting: Mix Greek yogurt and peanut butter until well combined. Spread over cake. If not serving immediately, store in refrigerator.
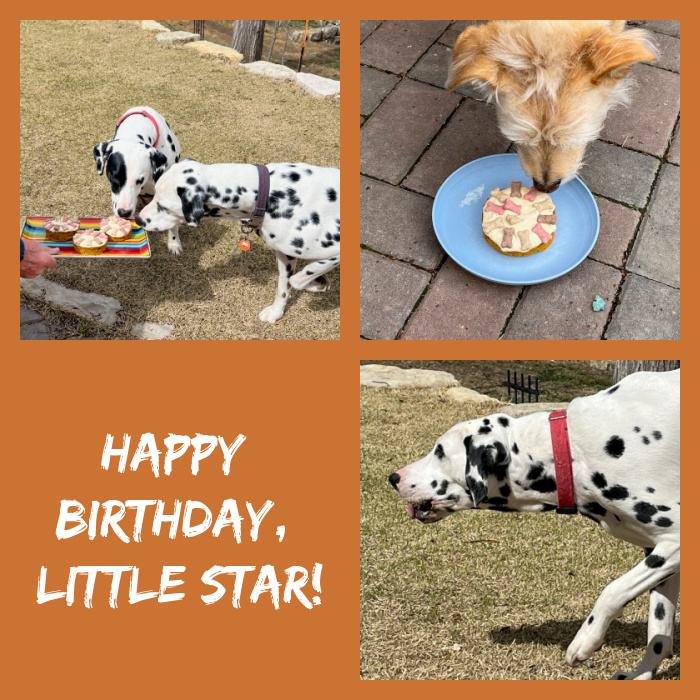
Comments: This is a super easy treat to bake, and we actually tried the cake (without the frosting) and it is not bad at all! We cut three circles to offer the pups, and the leftover was cut in cubes and saved for later. Tiny Milk Bones to decorate are optional, but dog-appreciated… Our Birthday girl gave it two paws high up!
Valentine’s Day is almost here! Some don’t care for it, some enjoy each minute. Whatever team you are on, here are some bakes that you can try this week, or anytime love is on your horizon… Without further ado, one recipe and eight ideas for you. Read on…
. BLUEBERRY CURD SWISS ROLL CAKE (filling adapted from Caroline’s blog)
for the decoration: 50g butter, softened 50g powdered sugar 50g egg whites 50g all-purpose flour black and red gel colors
for the cake: 130g cake flour 1 teaspoon baking powder 5 large eggs, at room temperature 200 g granulated sugar Zest of 1 lemon 1/2 teaspoon lemon extract 1/2 teaspoon vanilla extract ¼ teaspoon kosher salt 2 tablespoons butter, melted and cooled
Make the piping decoration by beating the butter with powdered sugar in a small bowl until fully combined. I used a hand-held electric mixer. Add the egg whites and beat for a couple of minutes. Add the flour and mix by hand with a spoon, divide in one small portion to dye black, one larger portion to dye red.
Make a diamond pattern with a Sharpie pen on parchment paper, and add heart shapes. Flip the paper so that the writing is at the bottom, and pipe the outline black. Freeze for 10 minutes. Quickly fill the hearts with red paste. Freeze again while you make the cake.
Heat oven to 350°F. Sift the flour and baking powder into a small bowl. Reserve. Place the eggs and sugar in the bowl of a standing mixer fitted with the paddle attachment. Beat until the mixture form ribbons, about 12 minutes. Add the lemon zest, lemon extract and vanilla. Beat until combined. Sift the flour mixture over the beaten eggs, fold gently. When the flour is mostly incorporated, add a little bit of the mixture to the melted butter, whisk well. Pour that into the cake batter, whisk gently to disperse. Pour over the frozen parchment paper placed in a half baking sheet, and smooth the surface.
Bake the cake until it begins to pull away from the sides, 12 to 17 minutes.
Transfer the pan to a cooling rack, cover the cake with a towel and let it cool for 10 minutes. Remove the towel, sift a little powdered sugar over the surface and flip it over parchment paper. Gently peel off the paper with the design, flip the cake again over a clean towel. Starting with a short side of the cake, roll the cake gently, using the towel to support the cake as you go. Let the cake cool all rolled up in the towel, seam side down.
Carefully unroll the completely cool cake, spread the blueberry curd filling, then roll it again. Wrap the cake in plastic and refrigerate for at least 3 hours, overnight is best. When ready to serve, slice a small piece of each of the ends, so that it looks more polished.
Comments: I haven’t made a patterned roll cake in a while, so I really enjoyed this little adventure. I messed up while making the curd (sorry, Caro!), did not cook it enough, so after 10 hours in the fridge it was still too loose. Lesson learned. I made a gelatin mass with 1 tsp gelatin + 5 tsp water, warmed it to dissolve in the microwave. I heated up the curd to about 60 C and added the melted gelatin. Mixed well and allowed it to cool slowly, then placed in the fridge overnight. It was perfect to use next morning. Huge thank you to my friend Gary for the advice to deal with the curd. I added a very small amount of pink gel dye to the cake batter, but that is optional. I did not include in the recipe, as the cake will look perfectly ok without it.
The cake was moist and tender, the blueberry curd absolutely delicious! The combination of orange and blueberry is a real winner, thank you Caro!
And now, time to share a few ideas, you can use any recipe you like, or some that are already in my blog
.
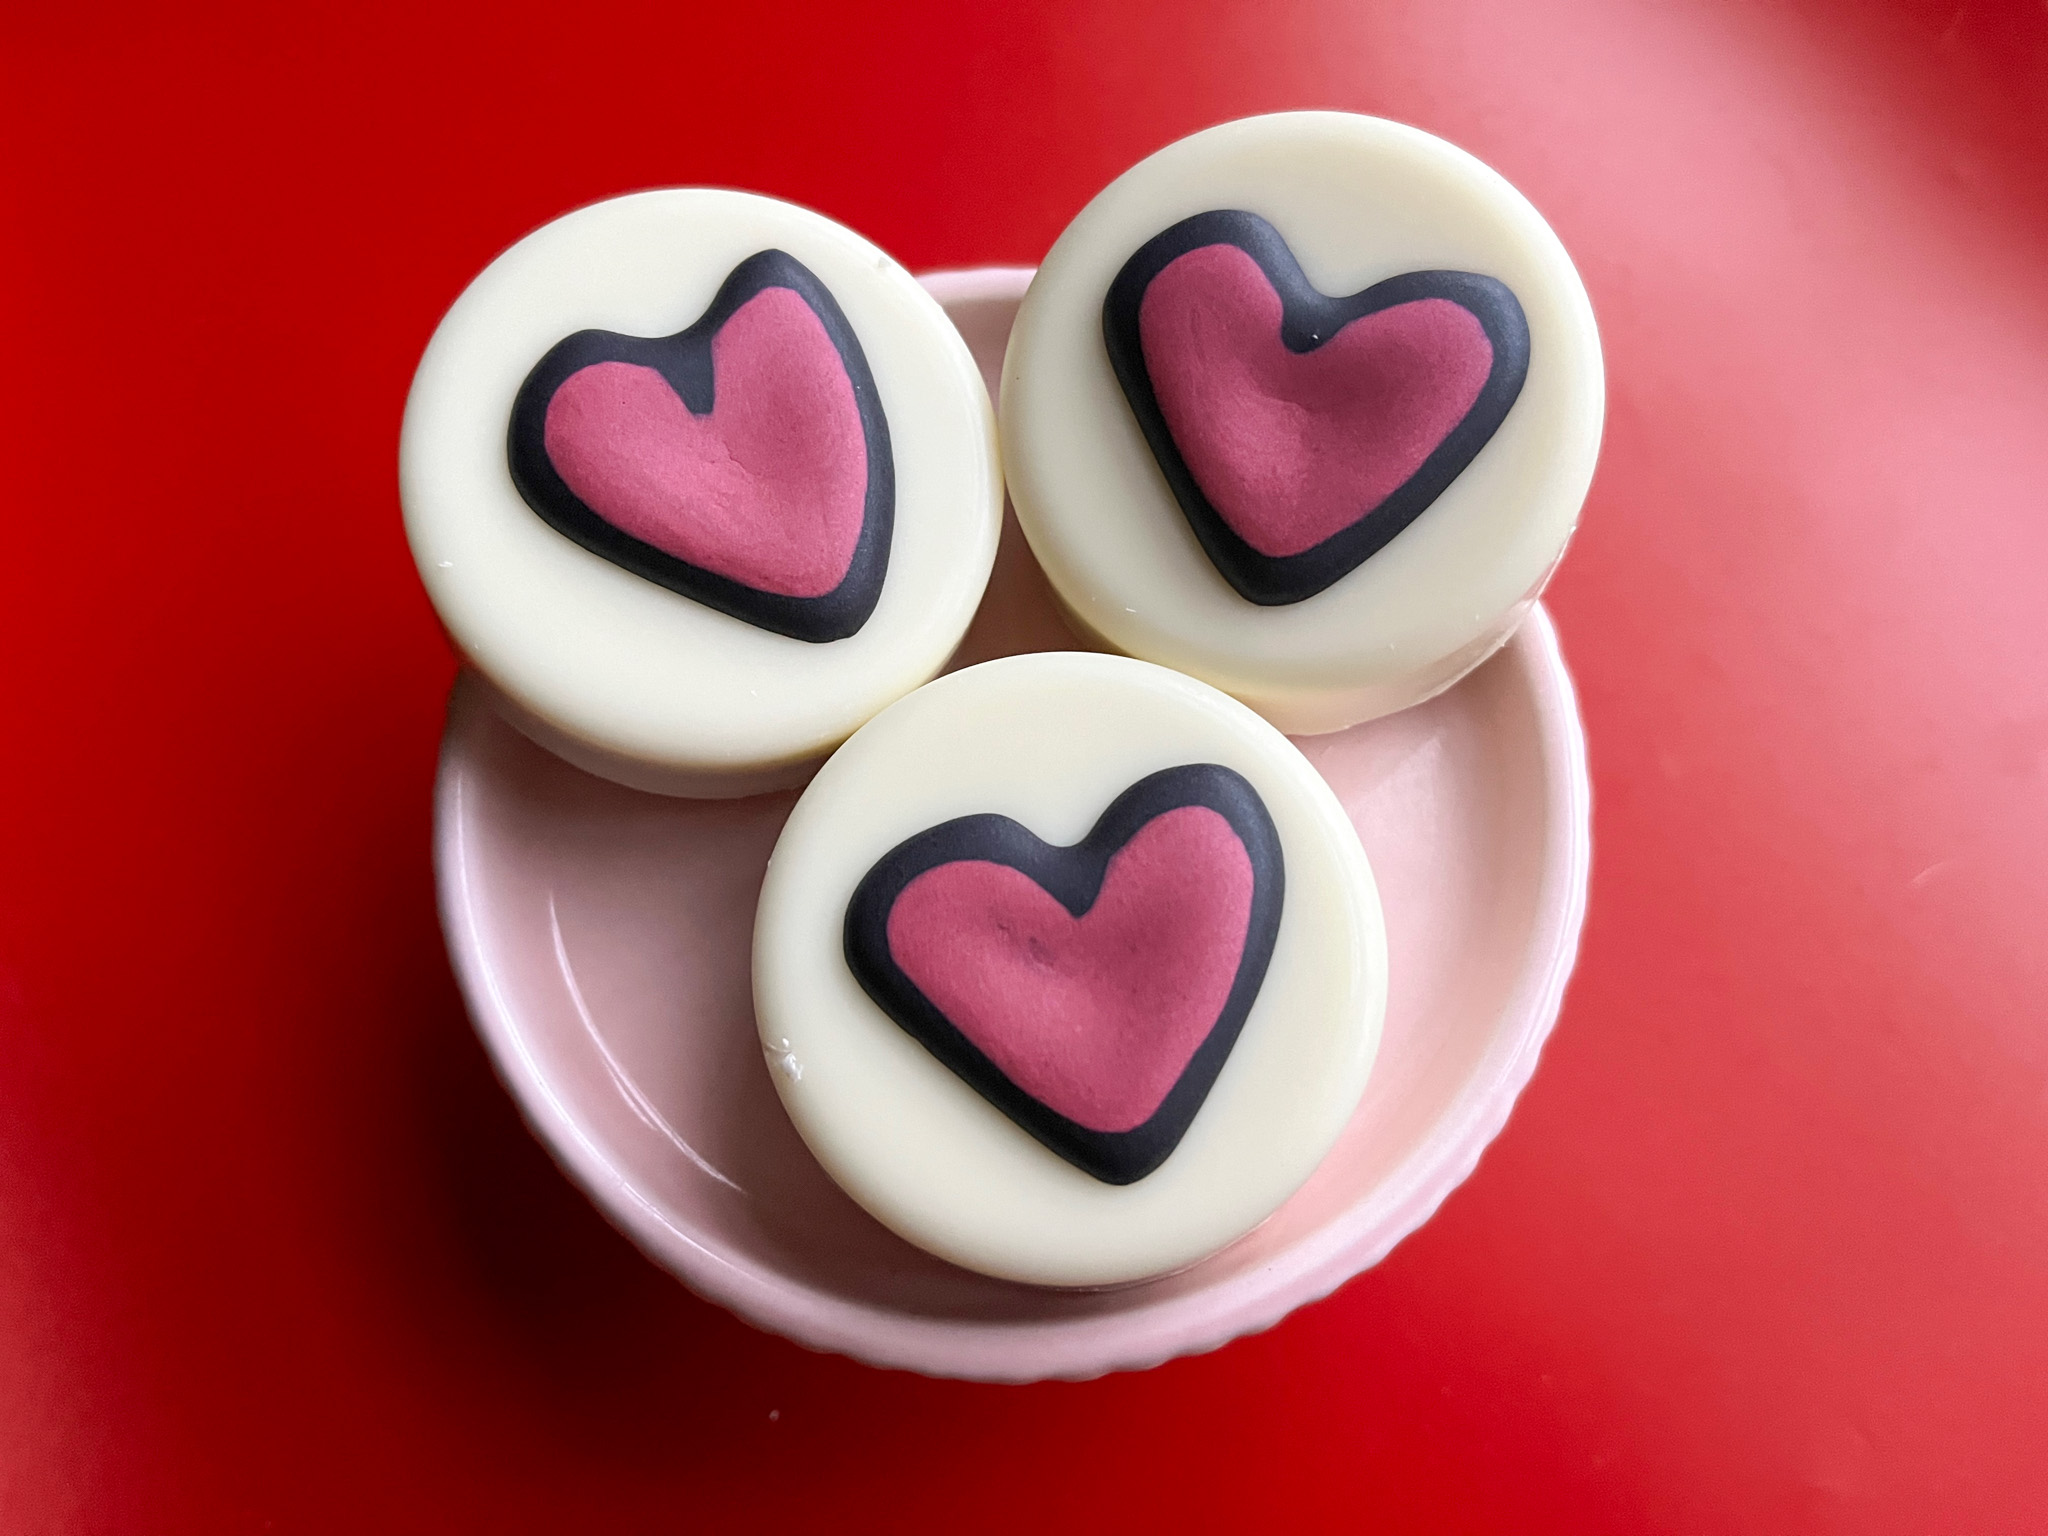
CHOCOLATE-COVERED OREOS
I used white Wilton candy melts to cover Lemon-flavored golden Oreos, and once that was set I made the heart decoration with Royal icing. First piped the black outline, let that set a bit and flooded the center with pink.
.
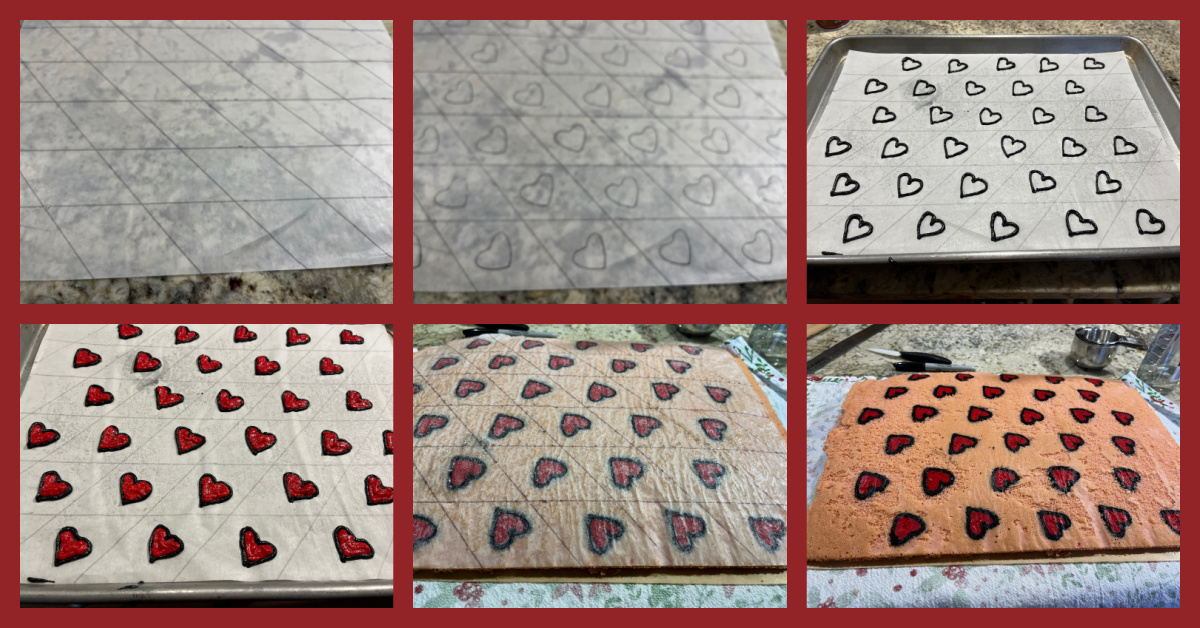
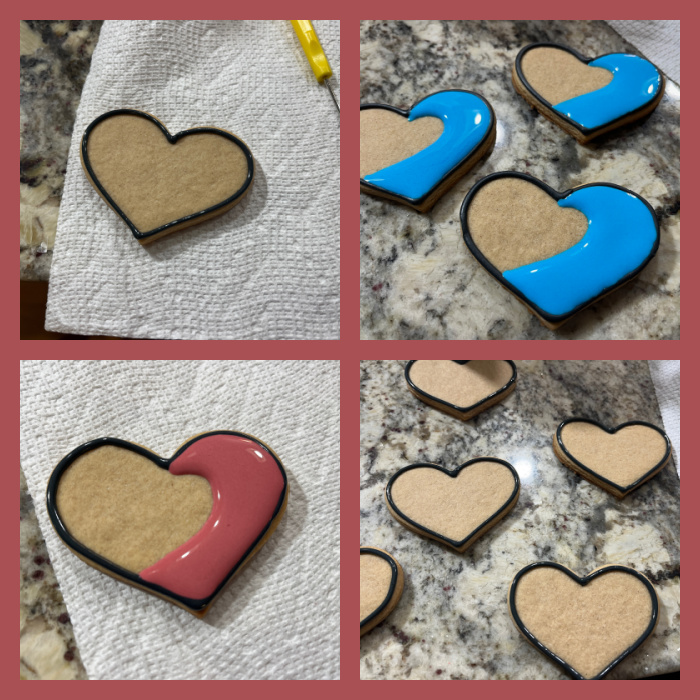
COMIC-STYLE HEART COOKIES
Comic-style, so popular these days! I followed a recent tutorial from Amber (join her club here) to make these babies. Some steps shown below.
.
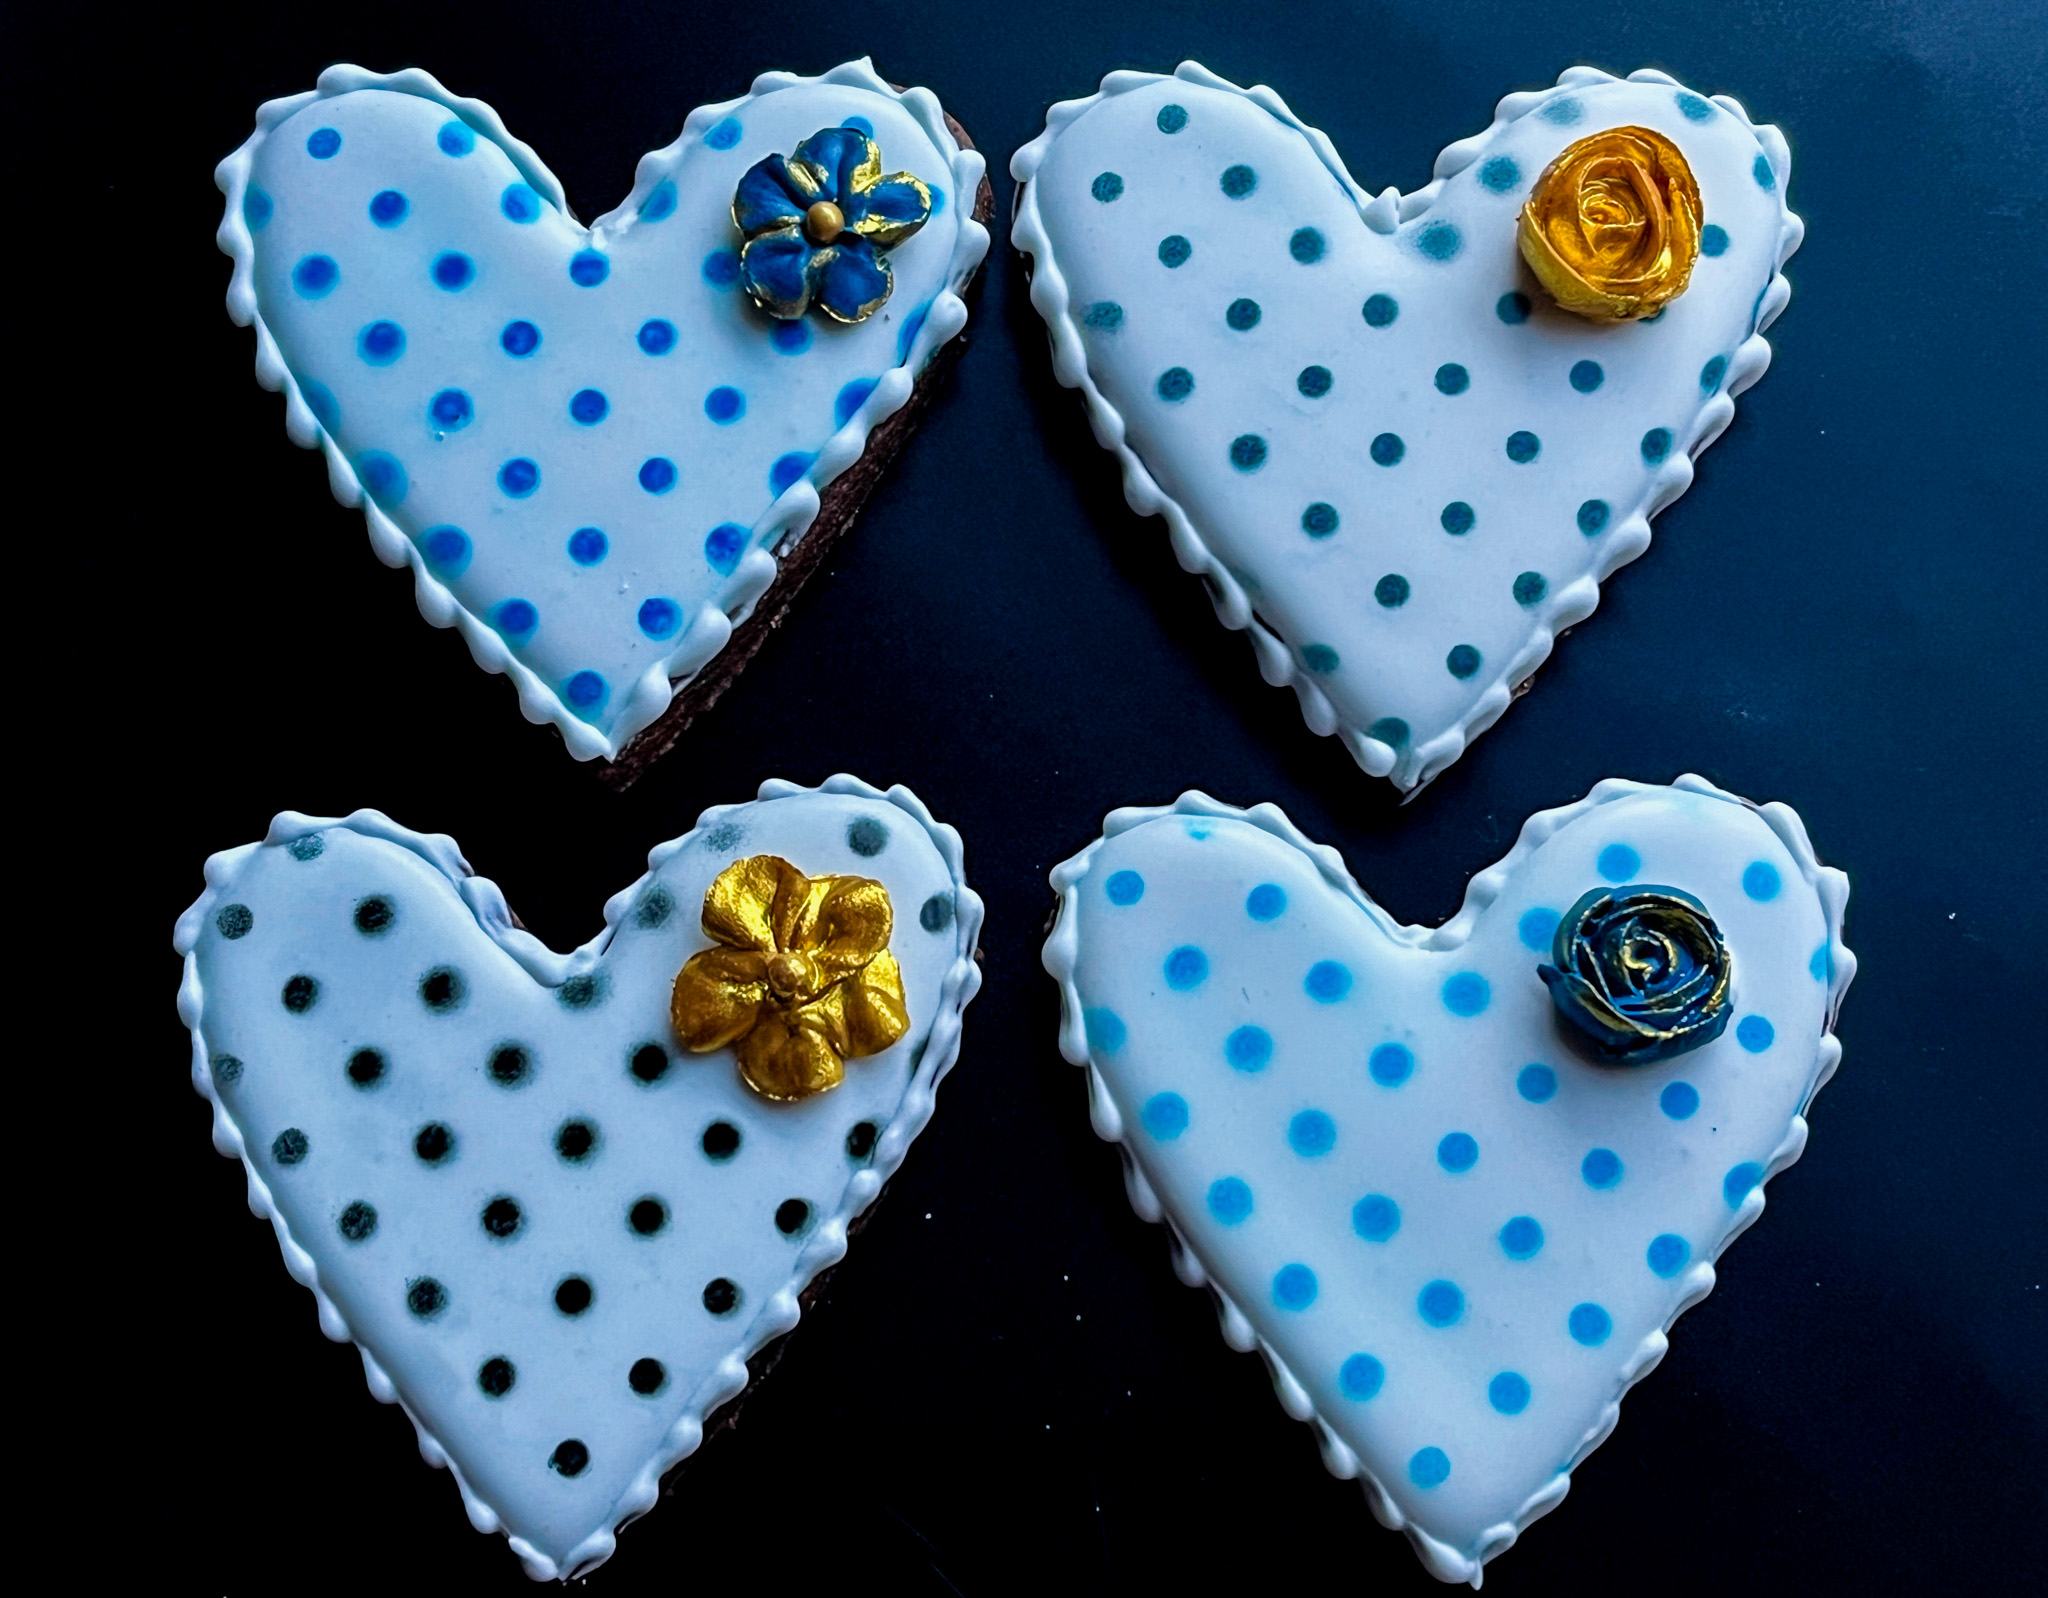
POLKA-DOT HEART COOKIES
Super simple design, just flood, air-brush with a stencil and add some Royal icing transfers. A little bead border is of course more than welcome…
.
ZENTANGLE HEARTS, TWO WAYS
For a modern look, just flood with any color of your choice, and then use a food safe pen to draw the design…
For a modern but romantic look, just play with flowers…
.
BICOLOR HEART COOKIES
For those who do not care for icing, these will be a huge hit. Just mix two recipes, chocolate and plain, cut shapes and mix-and-match the centers. Bake and you are done!
.
MINI-BONBONS WITH MARSHMALLOW FILLING
I used candy melts to coat tiny silicone molds with heart shapes (available here). Placed a mini-marshmallow in the center and covered the molds with melted chocolate. Once that set, I un-molded the bonbons and drizzled white chocolate for the decoration, adding a little sprinkle heart on some of them.
.
POLKA-DOT HEART SOURDOUGH
For the recipe, check my blog post with a click here.
I hope you’ve found some inspiration in this post for your future bakes, and please enjoy the weekend ahead, particularly if you are a football fan!
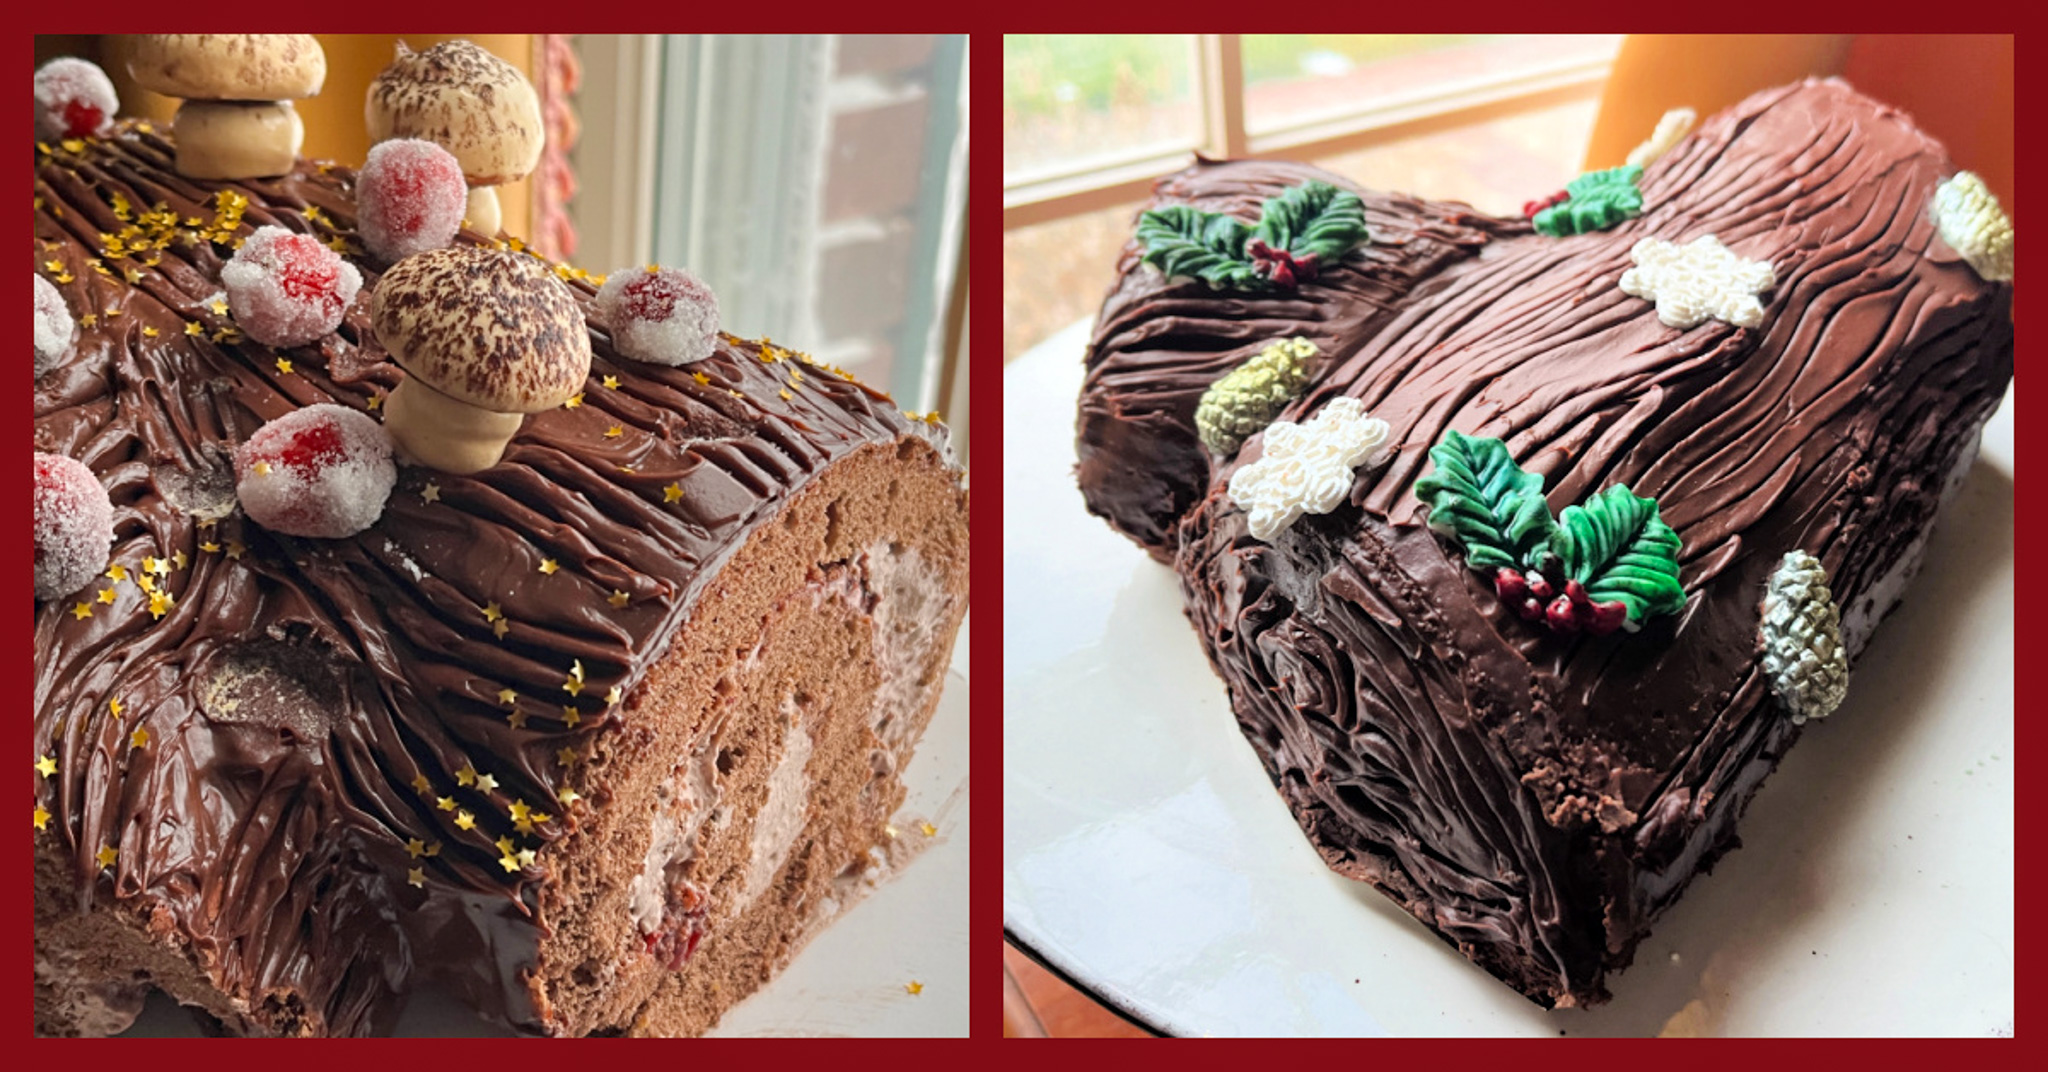
Not my first time making it, but in the past I was not fully happy with the results. I show you two ways to decorate it, but will share only the most recent recipe, cake portion courtesy of Helen Fletcher, my beloved virtual mentor!
for the chocolate spongecake: ¾ cup sifted cake flour (75 grams) ¼ cup sifted cocoa (25 grams) ¼ teaspoon baking powder 6 eggs separated ⅔ cup sugar, divided (140 grams) 1 teaspoon vanilla
for the filling: 1 cup unsalted butter softened (226g) 3 cups confectioners’ sugar (380g) or more if needed 1 teaspoon pure vanilla extract 1/4 cup 60-80ml heavy cream (60mL) or more if needed 1/3 cup black cherry jam or other jam of your choice
for the ganache coating: 170g semi-sweet chocolate, finely chopped 3/4 cup (180ml) heavy cream
Heat the oven to 350. Spray the bottom of ½ sheet pan (11×17 inches) with cooking spray. Line with parchment paper and spray the paper. Do not spray sides of pan. Set aside.
Whisk together the flour, cocoa and baking powder, mixing well. Set aside. Combine the egg yolks, ⅓ cup sugar and vanilla in a mixing bowl fitted with the whisk attachment. Beat until very thick and very pale yellow.
In a clean mixing bowl with a clean whisk, beat the egg whites until soft peaks form. Slowly add the remaining ⅓ cup sugar and beat until fairly stiff. Place the egg yolks over the egg whites and sift half the flour/cocoa mixture over the beaten eggs. Fold together. Fold in the remaining flour/cocoa. Gently pour into the prepared pan and spread out evenly. Bake 10 to 12 minutes. The top will spring back when lightly touched. Immediately cover directly with foil and place on a rack to cool completely. When ready to assemble, it will roll out easily.
Make the filling: In a stand mixer fitted with the paddle attachment, mix together the butter and confectioners’ sugar. Begin on low speed until crumbly, and then increase to high and beat for 3 minutes. Add vanilla extract and beat again for another minute. Add heavy cream 2 tablespoons at a time while mixing on high until the mixture is light and fluffy. Transfer the frosting to a piping bag.
Make the ganache: Place chopped chocolate in a medium bowl. Heat the cream in a small saucepan until it begins to simmer. Pour over chocolate, then let it sit for 2-3 minutes to gently soften the chocolate. Slowly stir until completely combined and chocolate has melted. Refrigerate, uncovered, for about 1 hour to thicken.
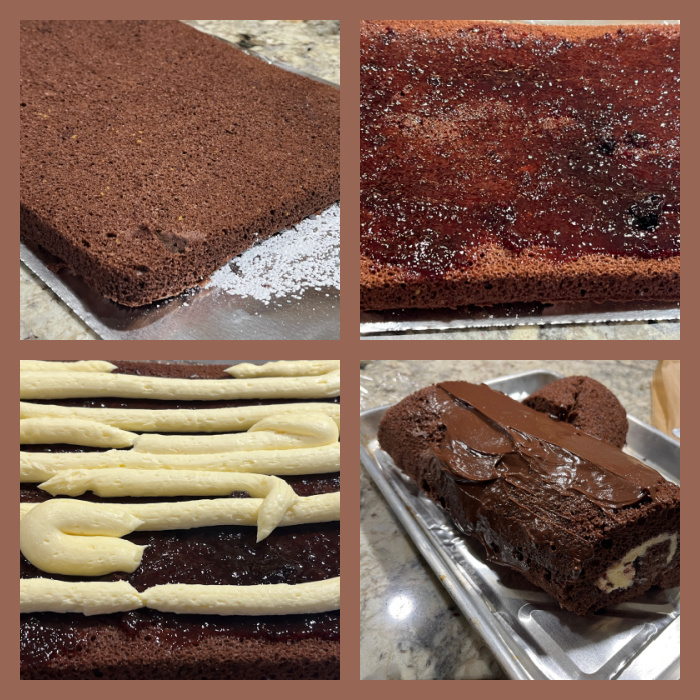
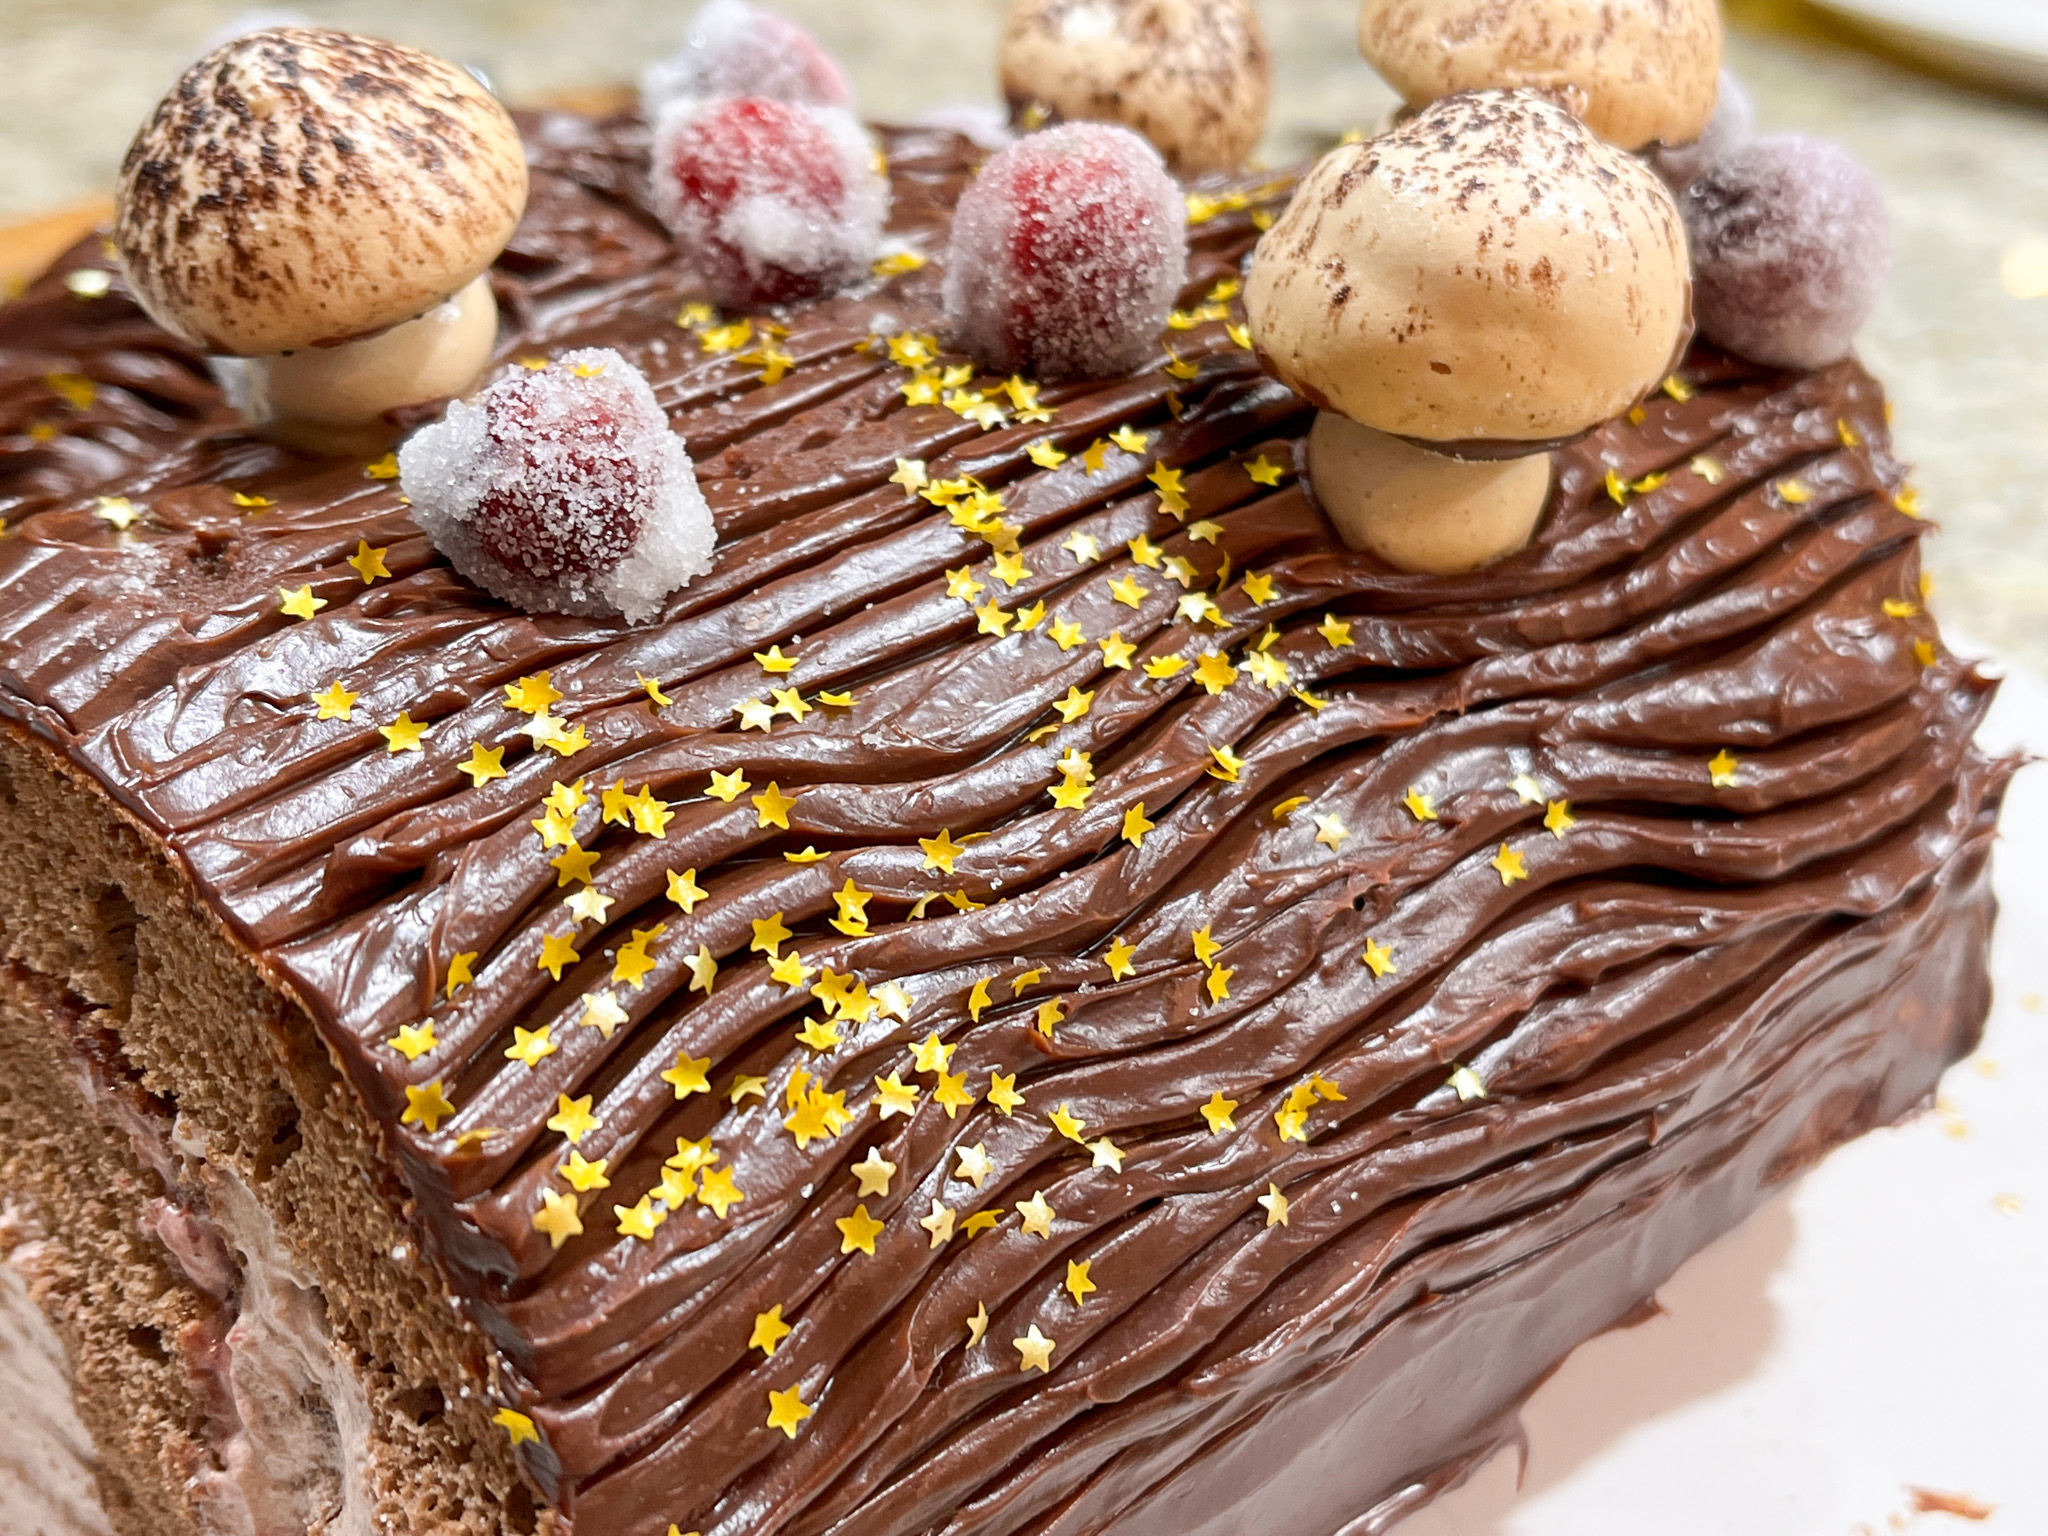
ASSEMBLE THE CAKE: Lay a large piece of aluminum foil and dust it with powdered sugar. Remove the foil on top of the cake and go around the edges of the pan with a spatula. Pick the spongecake up by the parchment and turn it out onto the powdered sugar lined foil. Remove the parchment paper. Spread the jam over the surface of the cake, then the buttercream, starting by piping large stripes of the cream over the surface (see my composite photo after the recipe). Using the foil as an assist, roll up the spongecake jelly roll style. The last roll should put the spongecake on the board. Cut the ends of the cake at a diagonal and use one or both cut pieces to make branches sitting next to the main log.
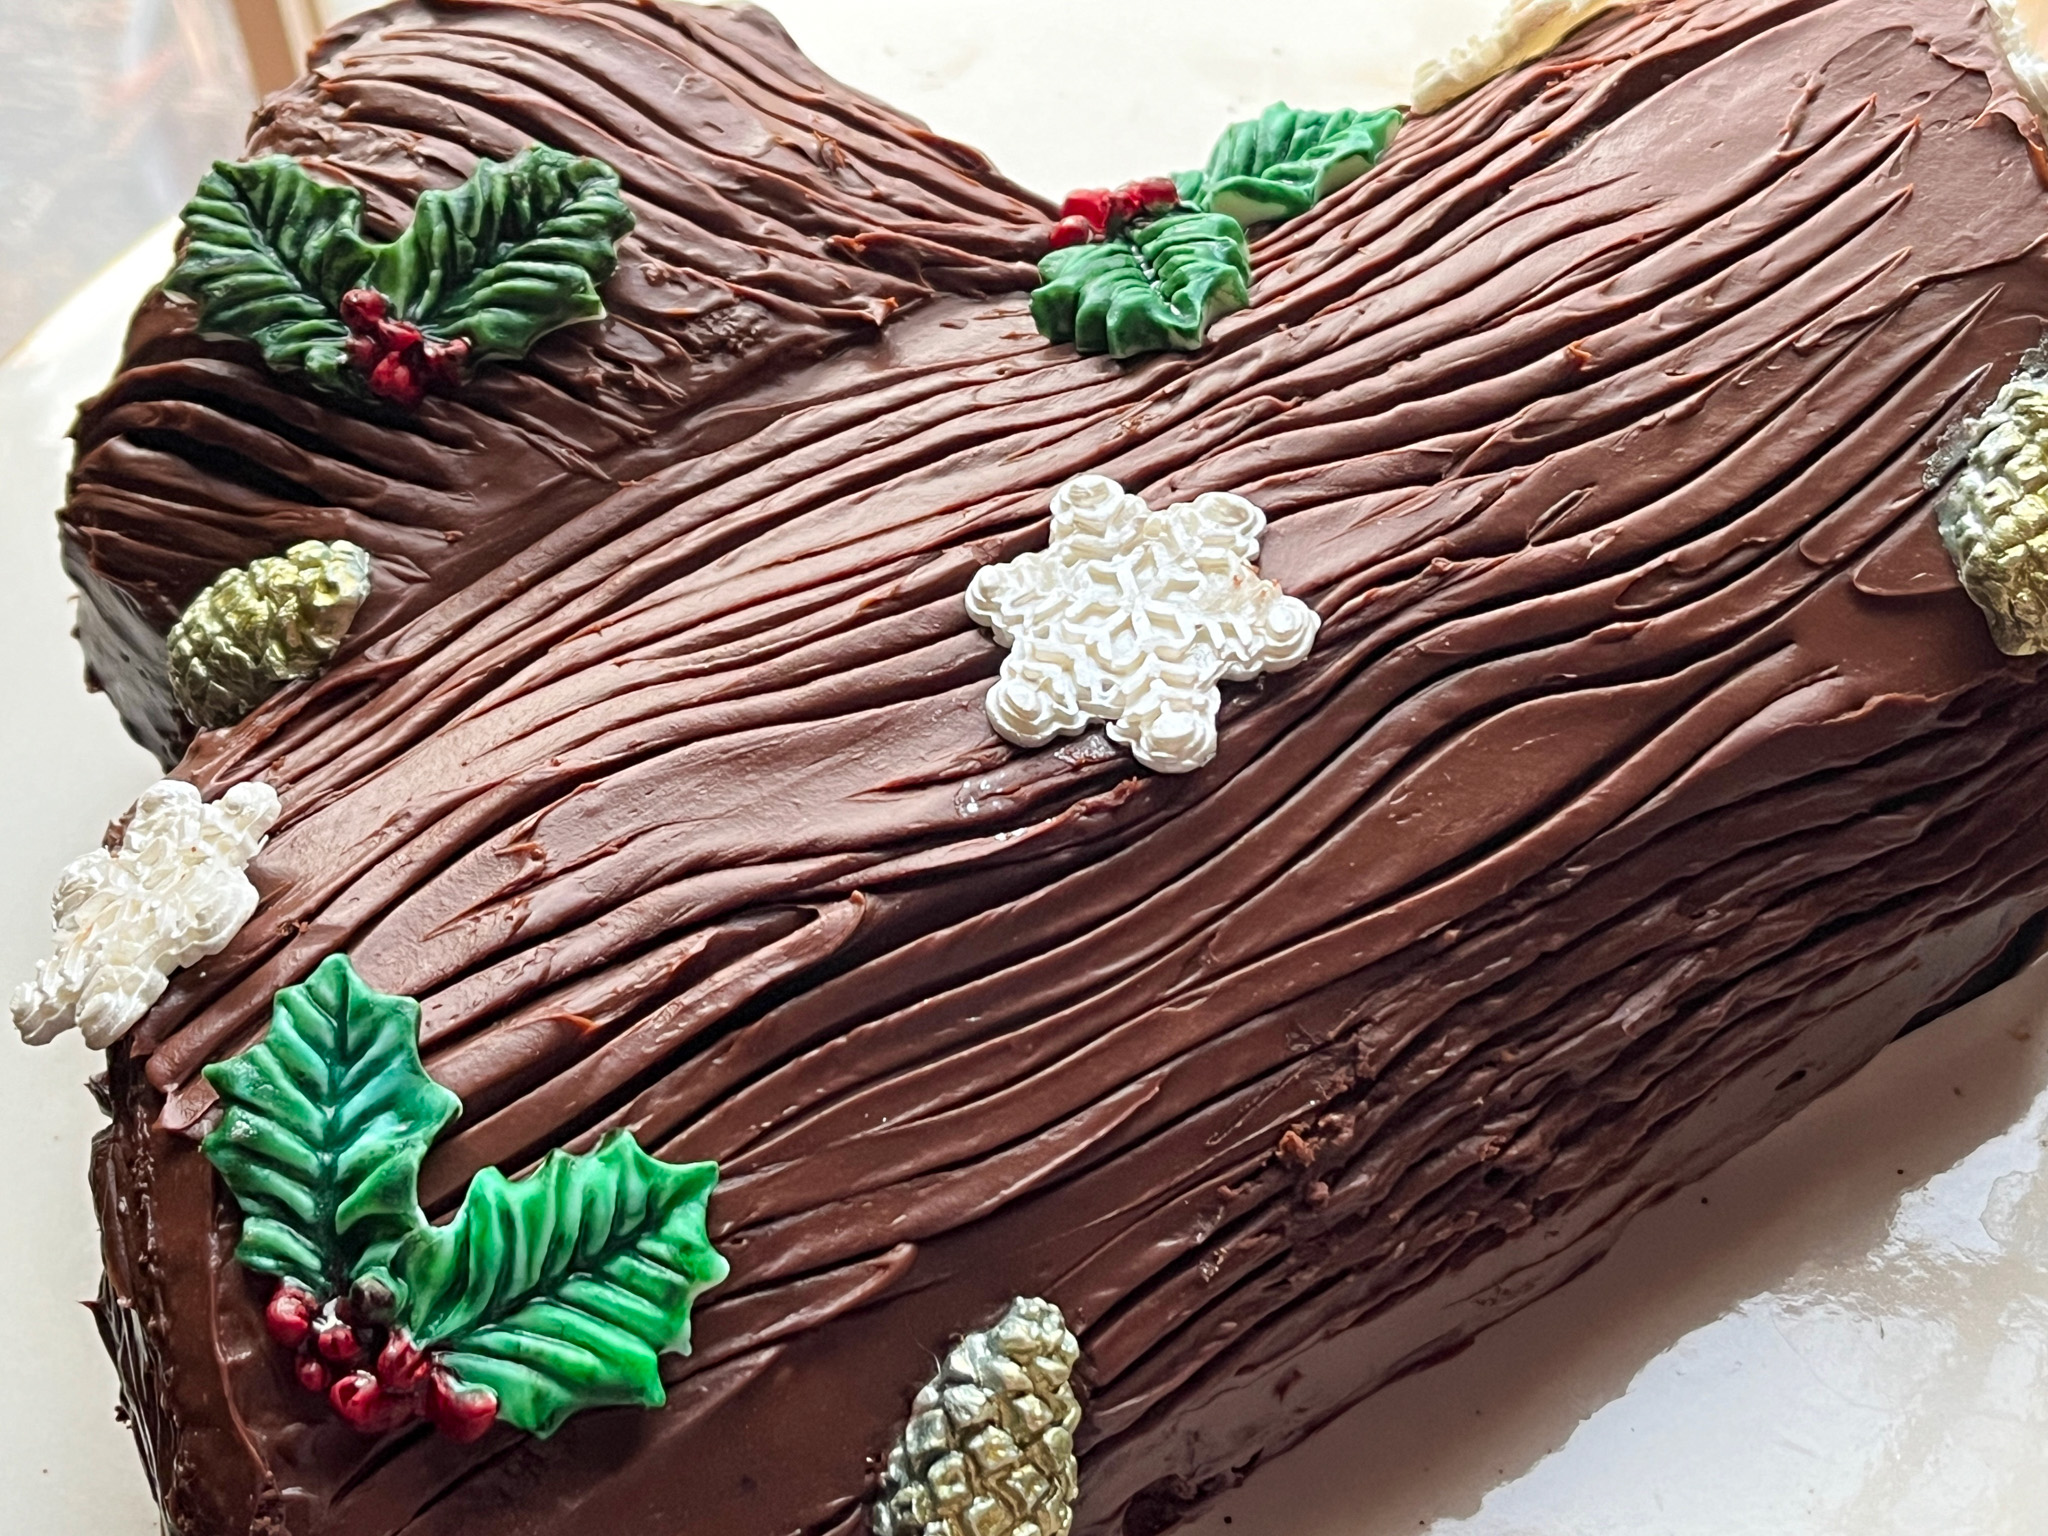
Cover the log with ganache, making a design on top with the tines of fork. Decorate with fondant pieces or meringue mushrooms, sugared cranberries, chocolate leaves, whatever you desire. Refrigerate for a few hours before serving, and allow to come to room temperature before cutting your first slice.
Comments: I advise you to go to Helen’s site to get all the details of making her cake. She uses a different method to deal with the sponge cake, and it does work like a dream. The cake is covered with aluminum foil as soon as it gets baked, and is allowed to cool like that. As a result, it steams during cooling and becomes very flexible. No harm to the texture of the cake in the finished product.
I have made a Buche de Noel in the past using a different recipe for the cake, but I am much happier with Helen’s version, that calls for a classic sponge cake. You can also find in her blog post a detailed recipe for the meringue mushrooms, which I did not use this time. They are fun to make, for sure.
I love making fondant pieces, so that is what I went with… I cannot show you a picture of the cut cake because I donated it whole, but I got very nice feedback about it, and that of course made me super happy!
for the cake: 1 cup unsalted butter (226g) 1/3 cup cocoa powder (35g) 1 teaspoon kosher salt 1 cup water 2 cups all-purpose flour (240g) 1 + 3/4 cups granulated sugar (350g) 1 + 1/2 teaspoons baking soda 2 large eggs 1/2 cup sour cream 1 teaspoon pure vanilla extract
for the chocolate glaze: 4 ounces bittersweet chocolate finely chopped 1 tablespoon corn syrup 1/2 cup heavy cream 1 + 1/2 tablespoons granulated sugar sprinkles to decorate
Heat oven to 350F. Prepare your Bundt pan by spraying it with cooking spray or coating with butter and flour.
In a small saucepan, combine the butter, cocoa powder, salt, and water and place over medium heat. Cook, stirring, just until melted and combined. Remove from the heat and set aside.
In a large bowl, whisk together the flour, sugar, and baking soda. Add half of the melted butter mixture and whisk until completely blended. Add the remaining butter mixture and whisk until combined. Add the eggs, one at a time, whisking until completely blended. Whisk in the sour cream and the vanilla extract. Whisk until smooth.
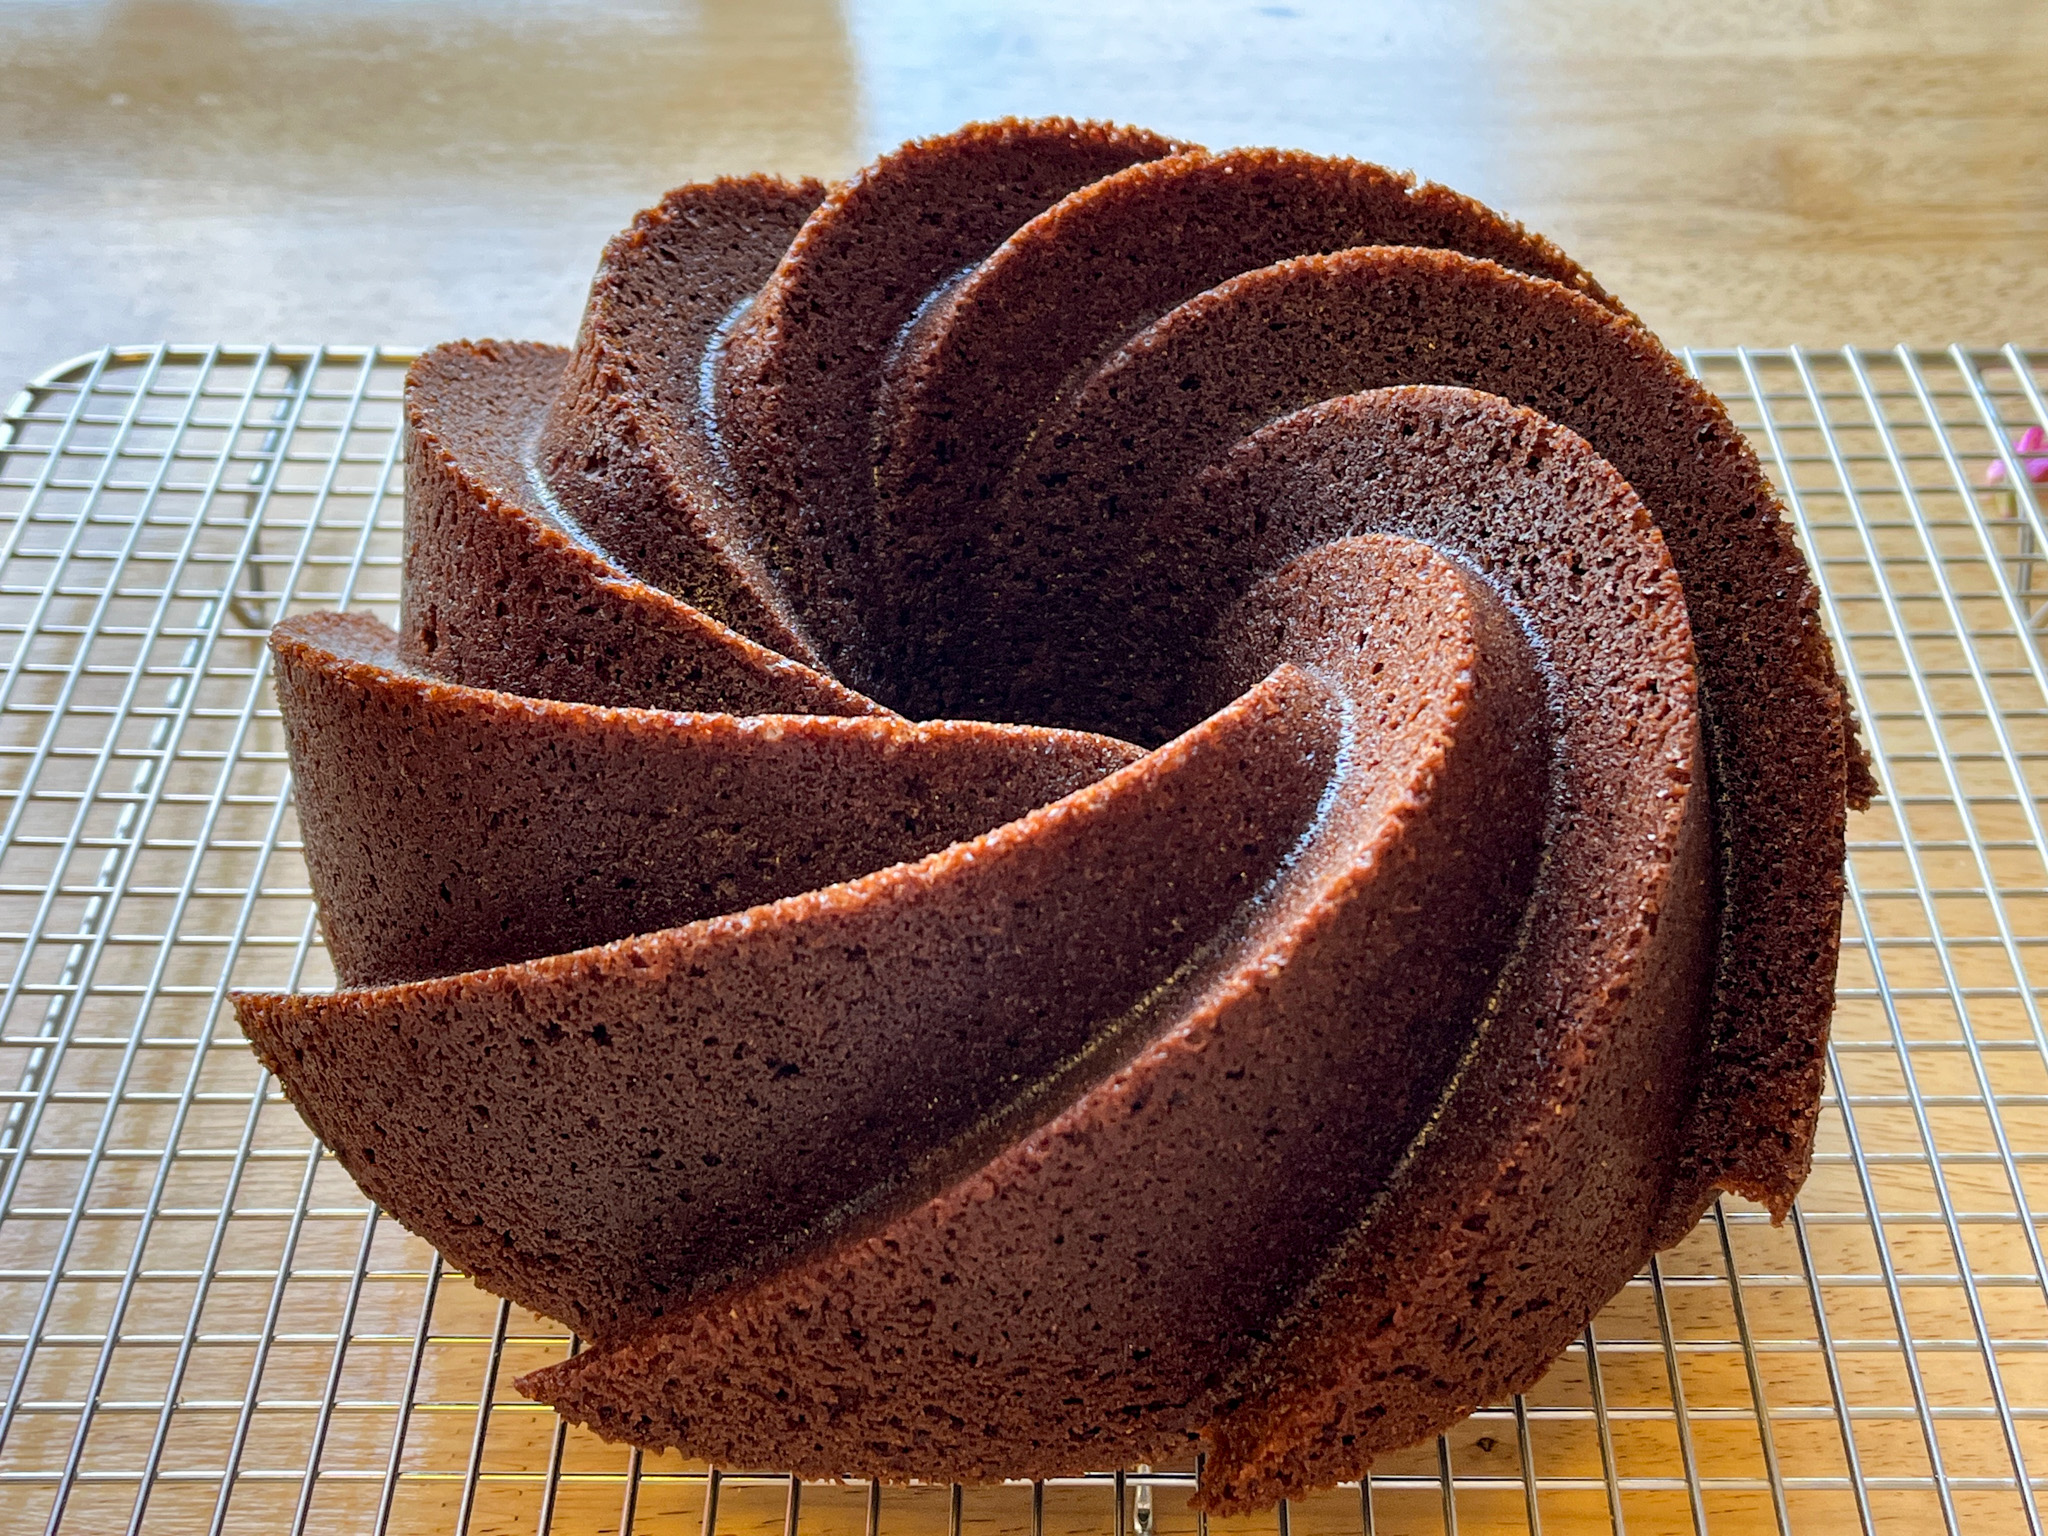
Scrape the batter into the prepared pan and bake until a toothpick inserted into the center of the cake comes out clean, 45 to 50 minutes. Let the cake cool in the pan for 15 minutes and then invert onto a rack. Let cool completely before glazing.
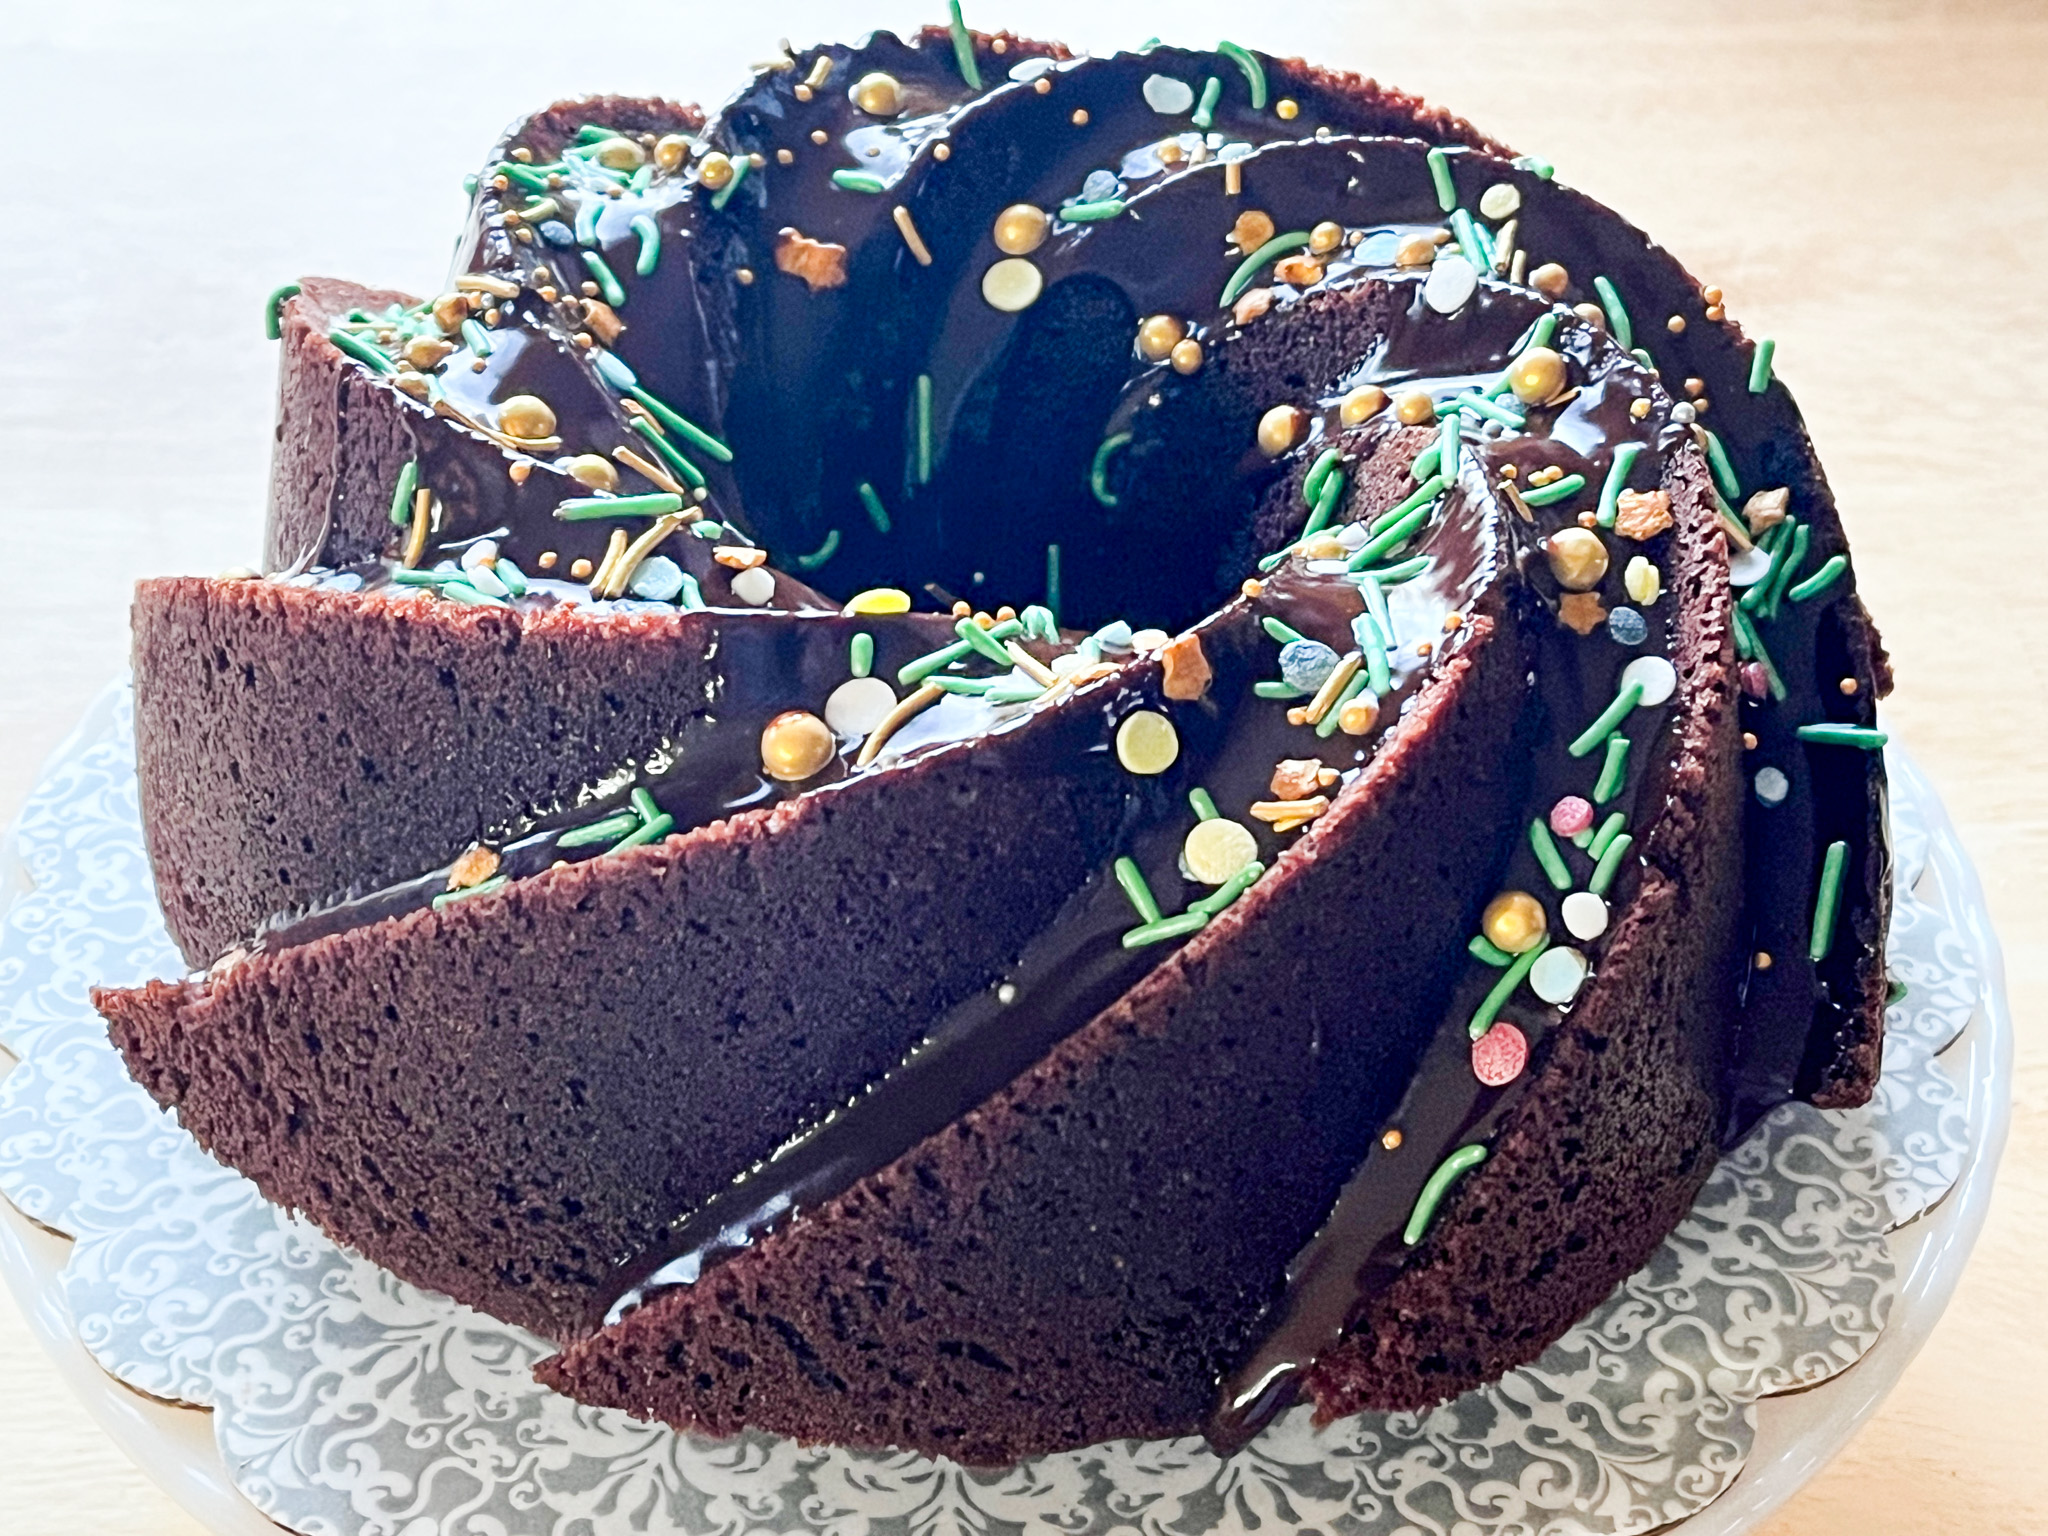
While the cake is cooling, make the chocolate glaze. Place the chopped chocolate and corn syrup in a medium bowl and set aside. Combine the heavy cream and sugar in a small saucepan and put over medium heat. Stir until the cream is hot and the sugar is dissolved. Pour the hot cream over the chocolate and whisk until smooth. Generously drizzle the glaze over the cooled cake, allowing it to drip down the sides. Decorate with sprinkles while still soft.
Comments: This classic Nordicware pan will always have a warm spot in my heart, as that was the very first pan I used in the tent in the Great American Baking adventure of years back. I remember the thrill when the cake un-molded beautifully in front of the cameras, and I always have the same smile when it un-molds at home (the thrill is not as intense, but still there!).
Once again it was a cake I did not get to taste, as it was donated whole. But I got real nice feedback about it, it cut very nicely in thin slices so that lots of people could get to taste it. Everybody loved it, the flavor of chocolate is intense and the ganache coating a perfect complement for it. I hope you give it a try!
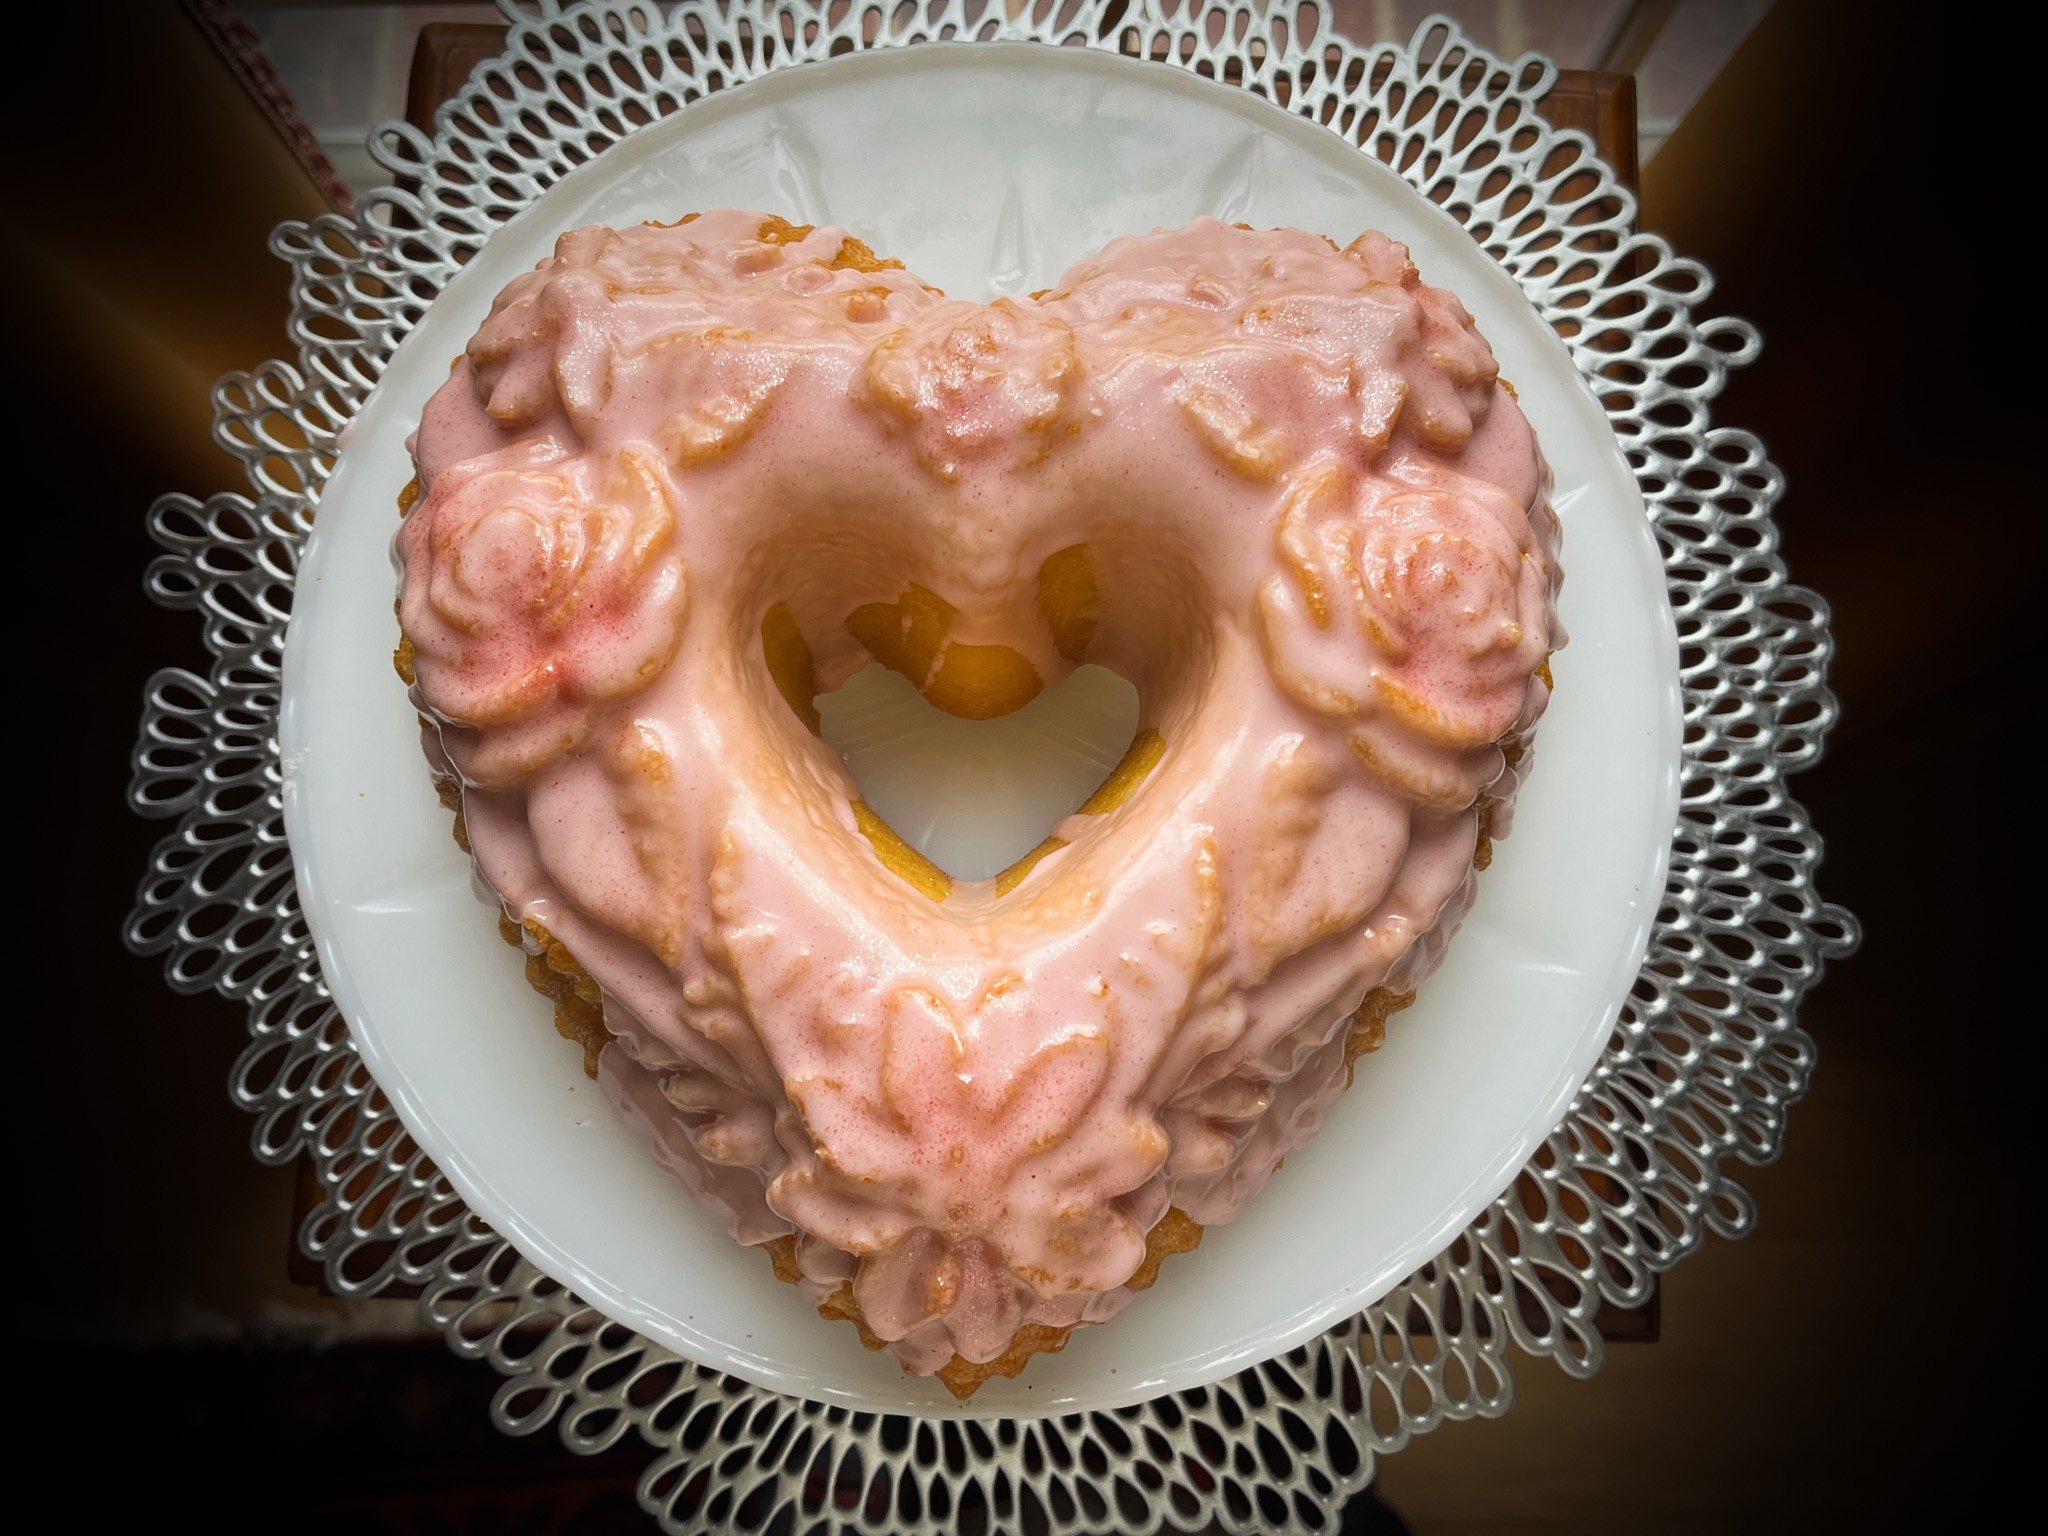
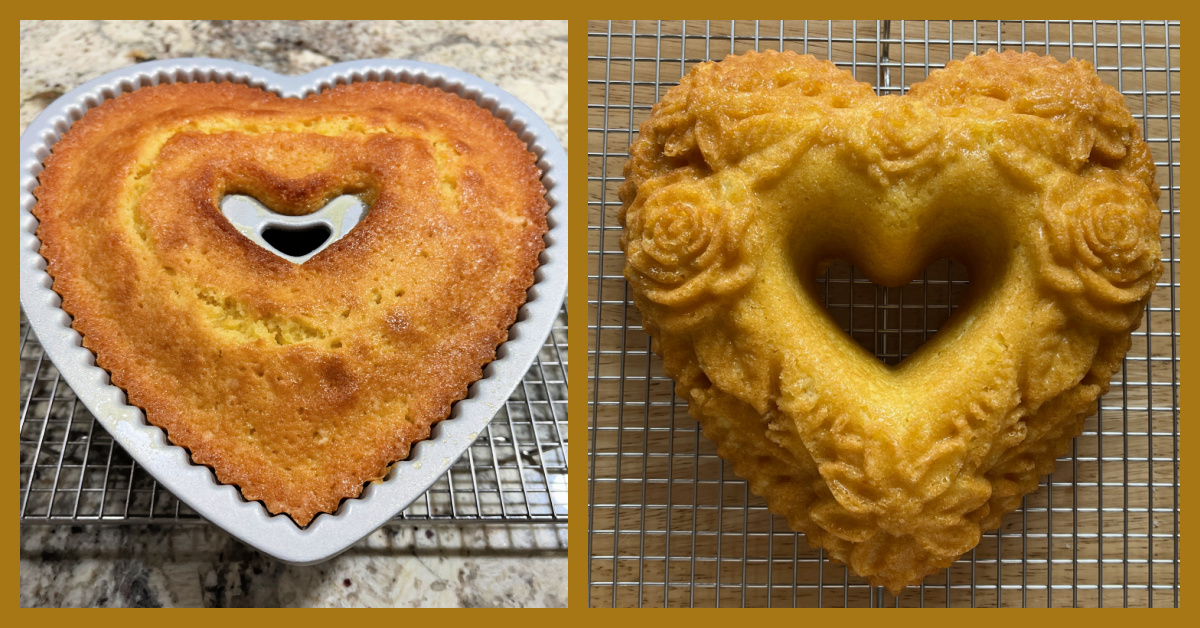
Perfect for the holiday season! First, a simple vanilla cake made special by a soft pink hibiscus glaze…
I debated for a while whether to order this gorgeous pan from Nordicware. It took me 24 hours of back and forth until I caved, and I am so glad I did! As all the products from that company, the pan is super high quality and the cake baked perfectly and un-molded like it was born to do so….
VANILLA BUNDT CAKE WITH HIBISCUS GLAZE (from Nordicware)
for the cake: 1 + 1/2 cups flour (180g) 1/2 tsp salt 1/4 tsp baking soda 1/2 cup butter, softened (113g) 1 + 1/2 cups sugar (300g) 4 eggs 1 tsp vanilla extract 2/3 cup plain yogurt
for the glaze: 2 bags Hibiscus tea 1 cup water 1 + 3/4 cups Confectioners’ sugar (220g) 2 tsp fresh lemon juice 1-3 Tbsp brewed Hibiscus tea, cooled to room temperature
Make the tea: In 1 cup of boiling water, brew tea bags, covered, for 8-10 minutes. Set aside and cool completely.
Heat oven to 350° F. Prepare pan with baking spray. In a small bowl, mix together flour, baking soda and salt. Set aside. Using a mixer with a paddle attachment, cream butter and sugar. Mix in eggs until thoroughly incorporated. Add vanilla, flour mixture and yogurt. Blend until smooth. Pour into prepared pan, filling no more than 3/4 of the capacity. Tap on counter to release air bubbles. Bake for 40 to 45 minutes or until toothpick inserted into center of cake comes out clean. Remove from oven and let cake cool for 10 minutes before inverting onto a cooling rack.
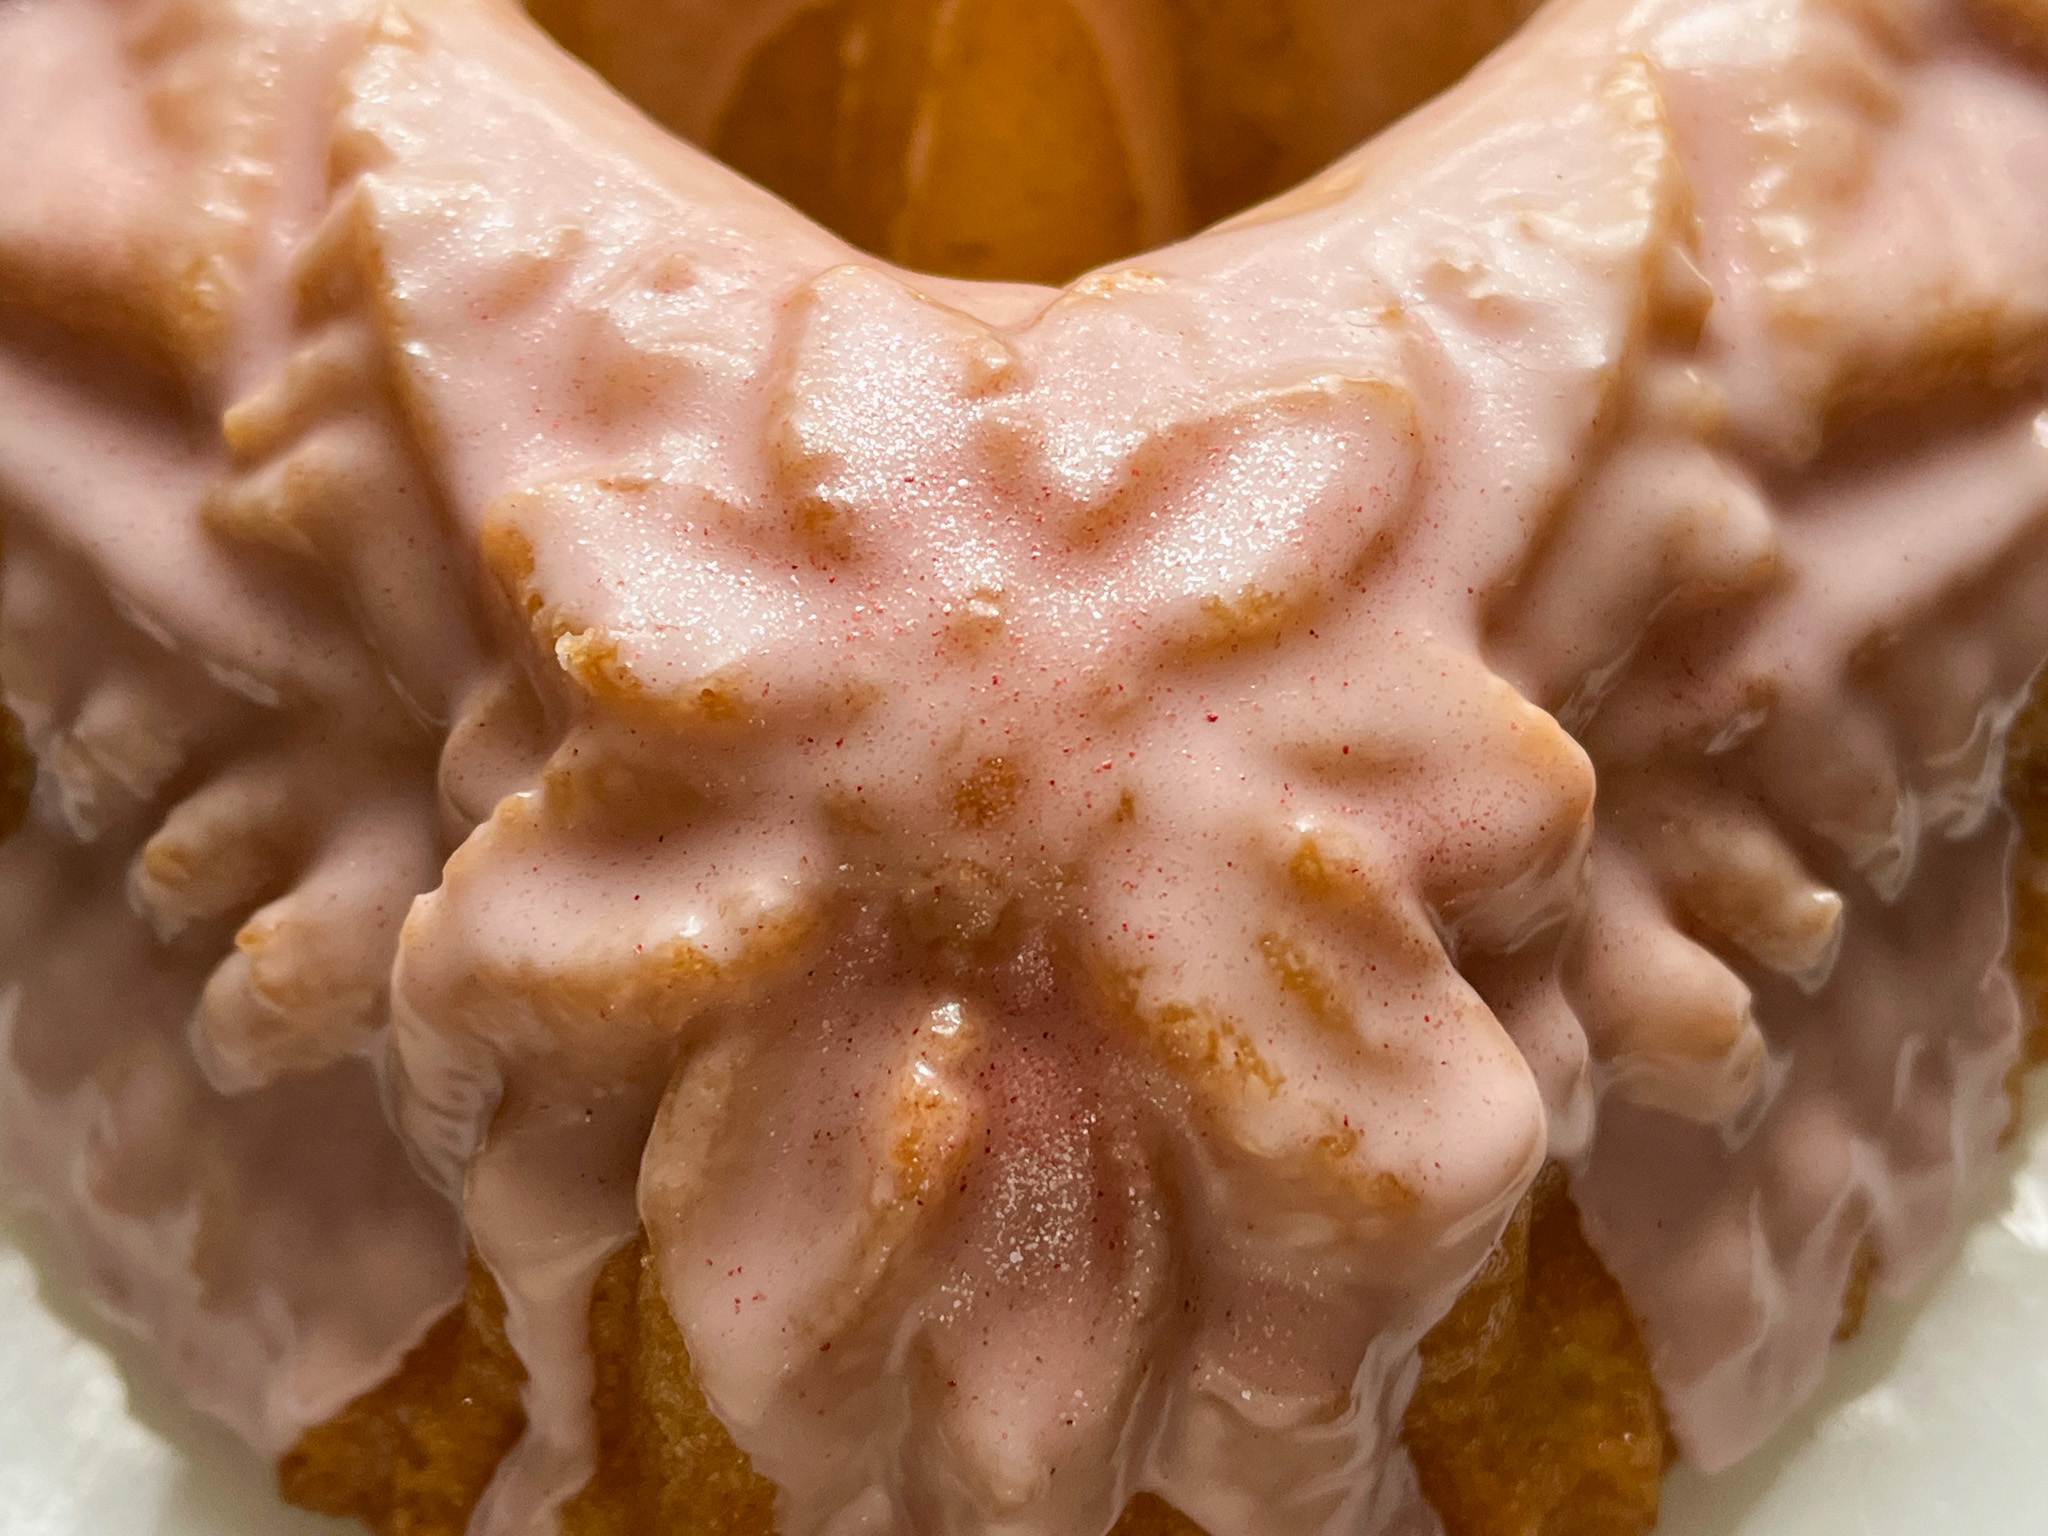
While cake is cooling, mix the rest of glaze ingredients. To the confectioners’ sugar, add lemon juice and cooled brewed tea, adding 1 tablespoon at a time and up to 3 tablespoons for desired consistency and color. Drizzle glaze over cooled cake.
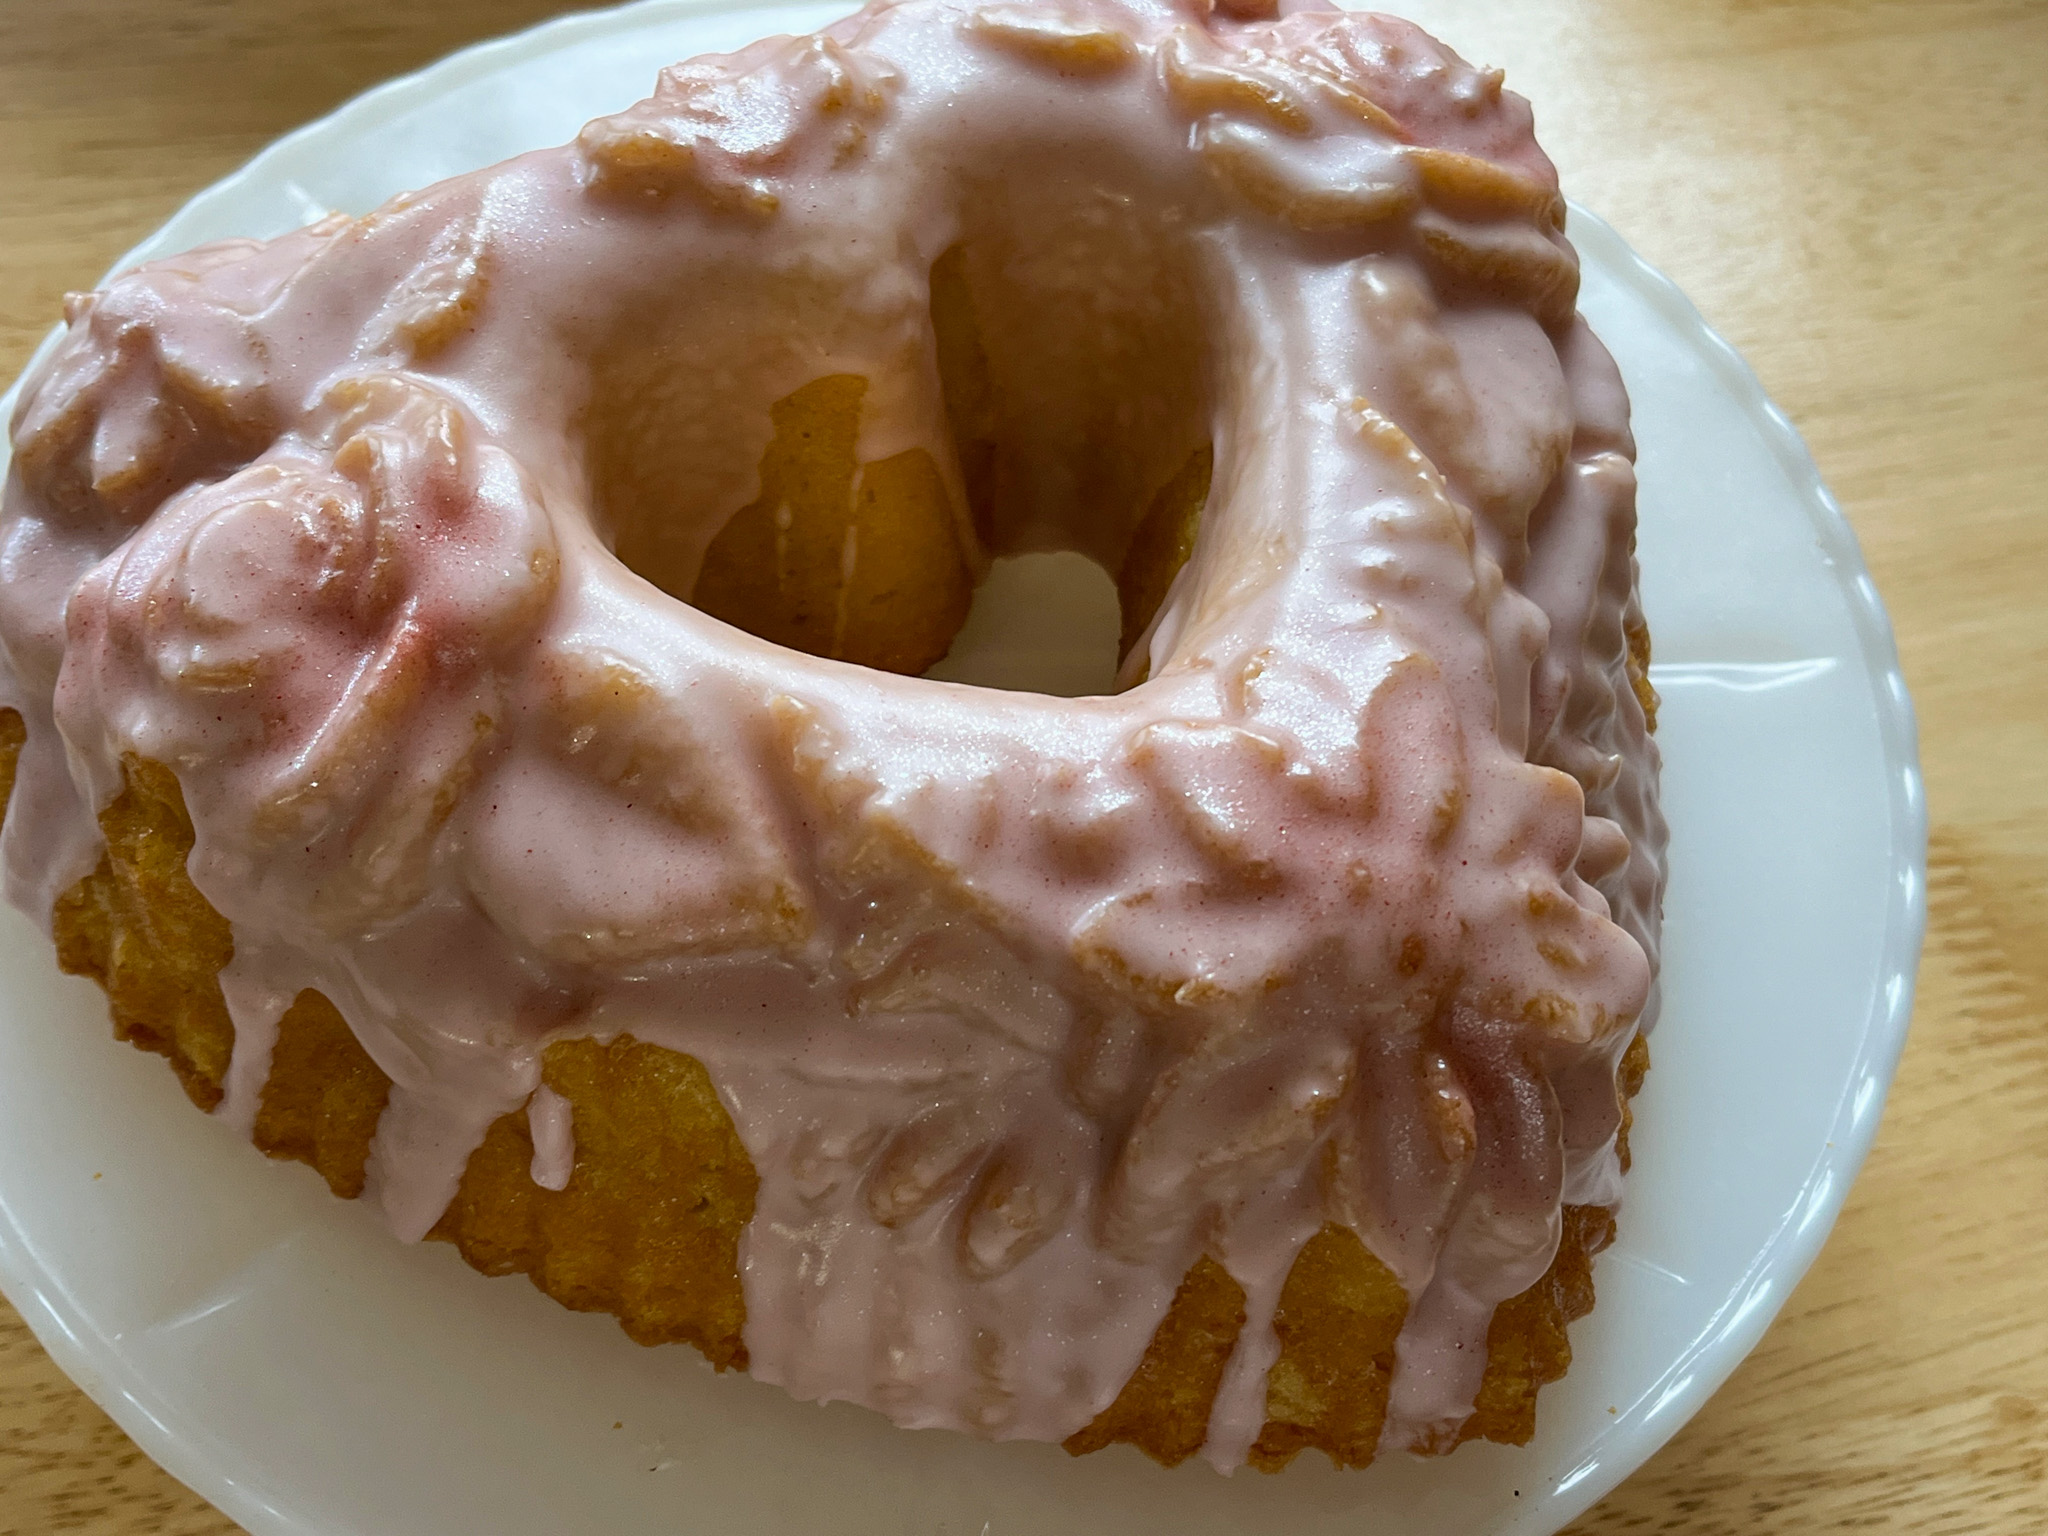
Comments: I don’t think it is possible not to smile when a cake un-molds like that… I was actually smiling the whole day. I was not sure if the glaze would cover the details too much but in fact, I think it turned out pretty perfect.
I sprayed a little gold dust on some spots of the cake because I cannot help it. The cake was donated so I could not taste it but I heard it was absolutely delicious, very moist and tender, and everybody was mesmerized by the look…. So I say mission accomplished!
Stay tuned for PART TWO of Festive Cakes, coming up very soon, I promise…