First things first, huge thank you to Chef Faye Palmqvist, who inspired me to get this special baking pan, and most importantly, stop hyperventiating about it and BAKE! You can marvel at her creations and learn a lot by visiting her site, her IG page, and also her Facebook page.

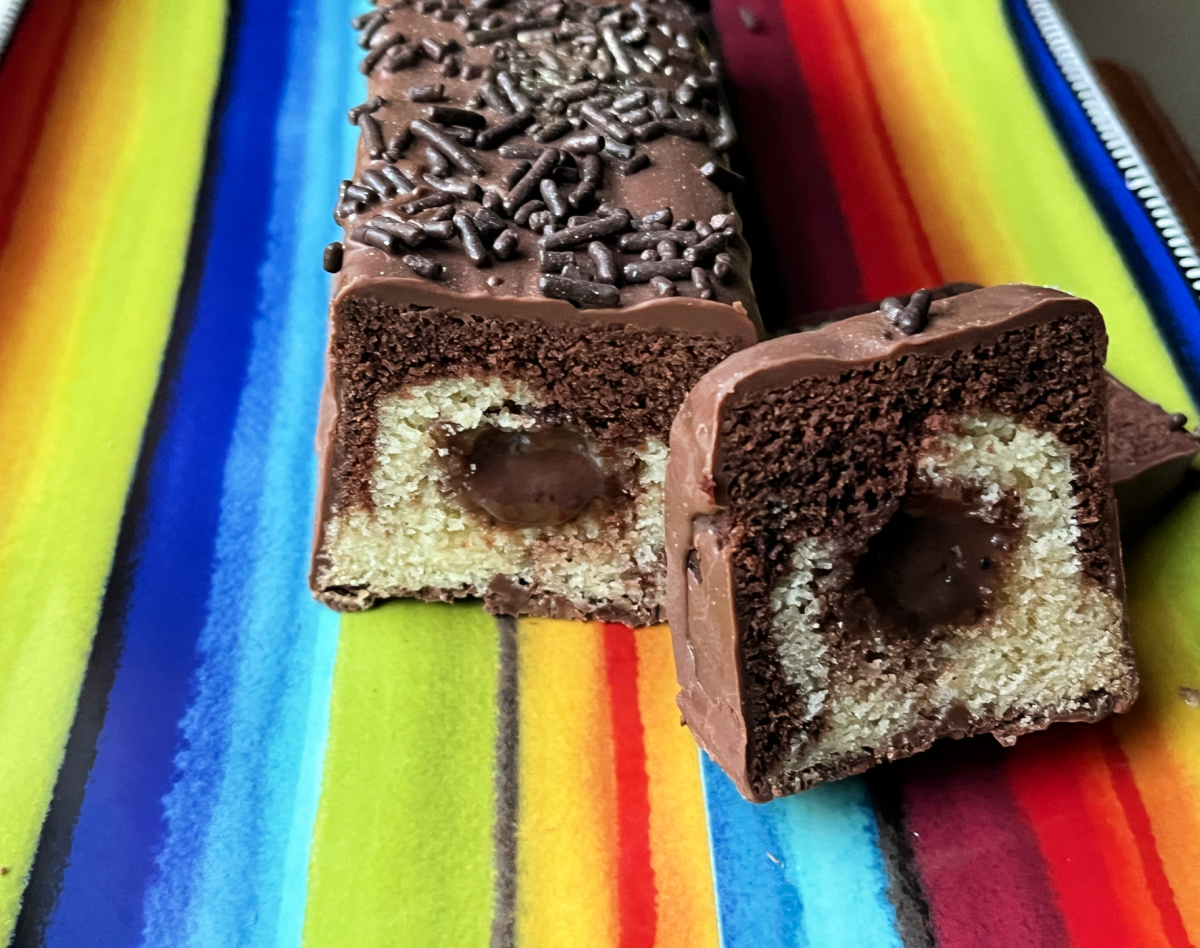
To make this cake, you need a special pan that leaves an opening in the center, thanks to the empty cylinder that slides into it through holes at the sides.
(ordering info here)

It is a very clever system. If you don’t want to have the hole in the center, simply slide into the pan the insert that closes the holes, and bake a regular cake in it. If you place the cylinder, make sure to spray it with baking spray or coat it well with butter and flour it lightly.

For the cake component, I won’t share the recipe Chef Faye sent me, as it is from her copyrighted files, but you can use any marbled cake you like, just don’t make a huge batch. A recipe that calls for ONE EGG will be enough. I suggest this one although you will probably still have leftover cake batter if using the same pan I did. If you over-fill a bit, cake batter will spill out of the pan through the side holes or even from the top. Do not worry about it, just bake for about 40 minutes at 325F with the pan closed and after allowing it to cool for 10 minutes, you can slide the top open. I put the open pan in the fridge for 20 minutes after that to solidify things a bit before pulling the cylinder out. It worked like a dream, although my job doing the marbling was pretty pathetic… It was hard to judge what I was doing, especially with the cylinder in the middle of the the way. Next time will be easier.

The filling component… I used a soft-batch of brigadeiro to fill the empty space, my default recipe was published in the early years of my blog. Check it out here. Just don’t cook it all the way into rolling stage, stop when the mixture just starts pulling away from the sides of the pan but not furiously bubbling. I transferred to a shallow baking dish to cool faster, and filled the hole of the cake while it was still warm, but the cake cold from the fridge. It might be better to freeze the cake for a while, but I have not tried that this time.
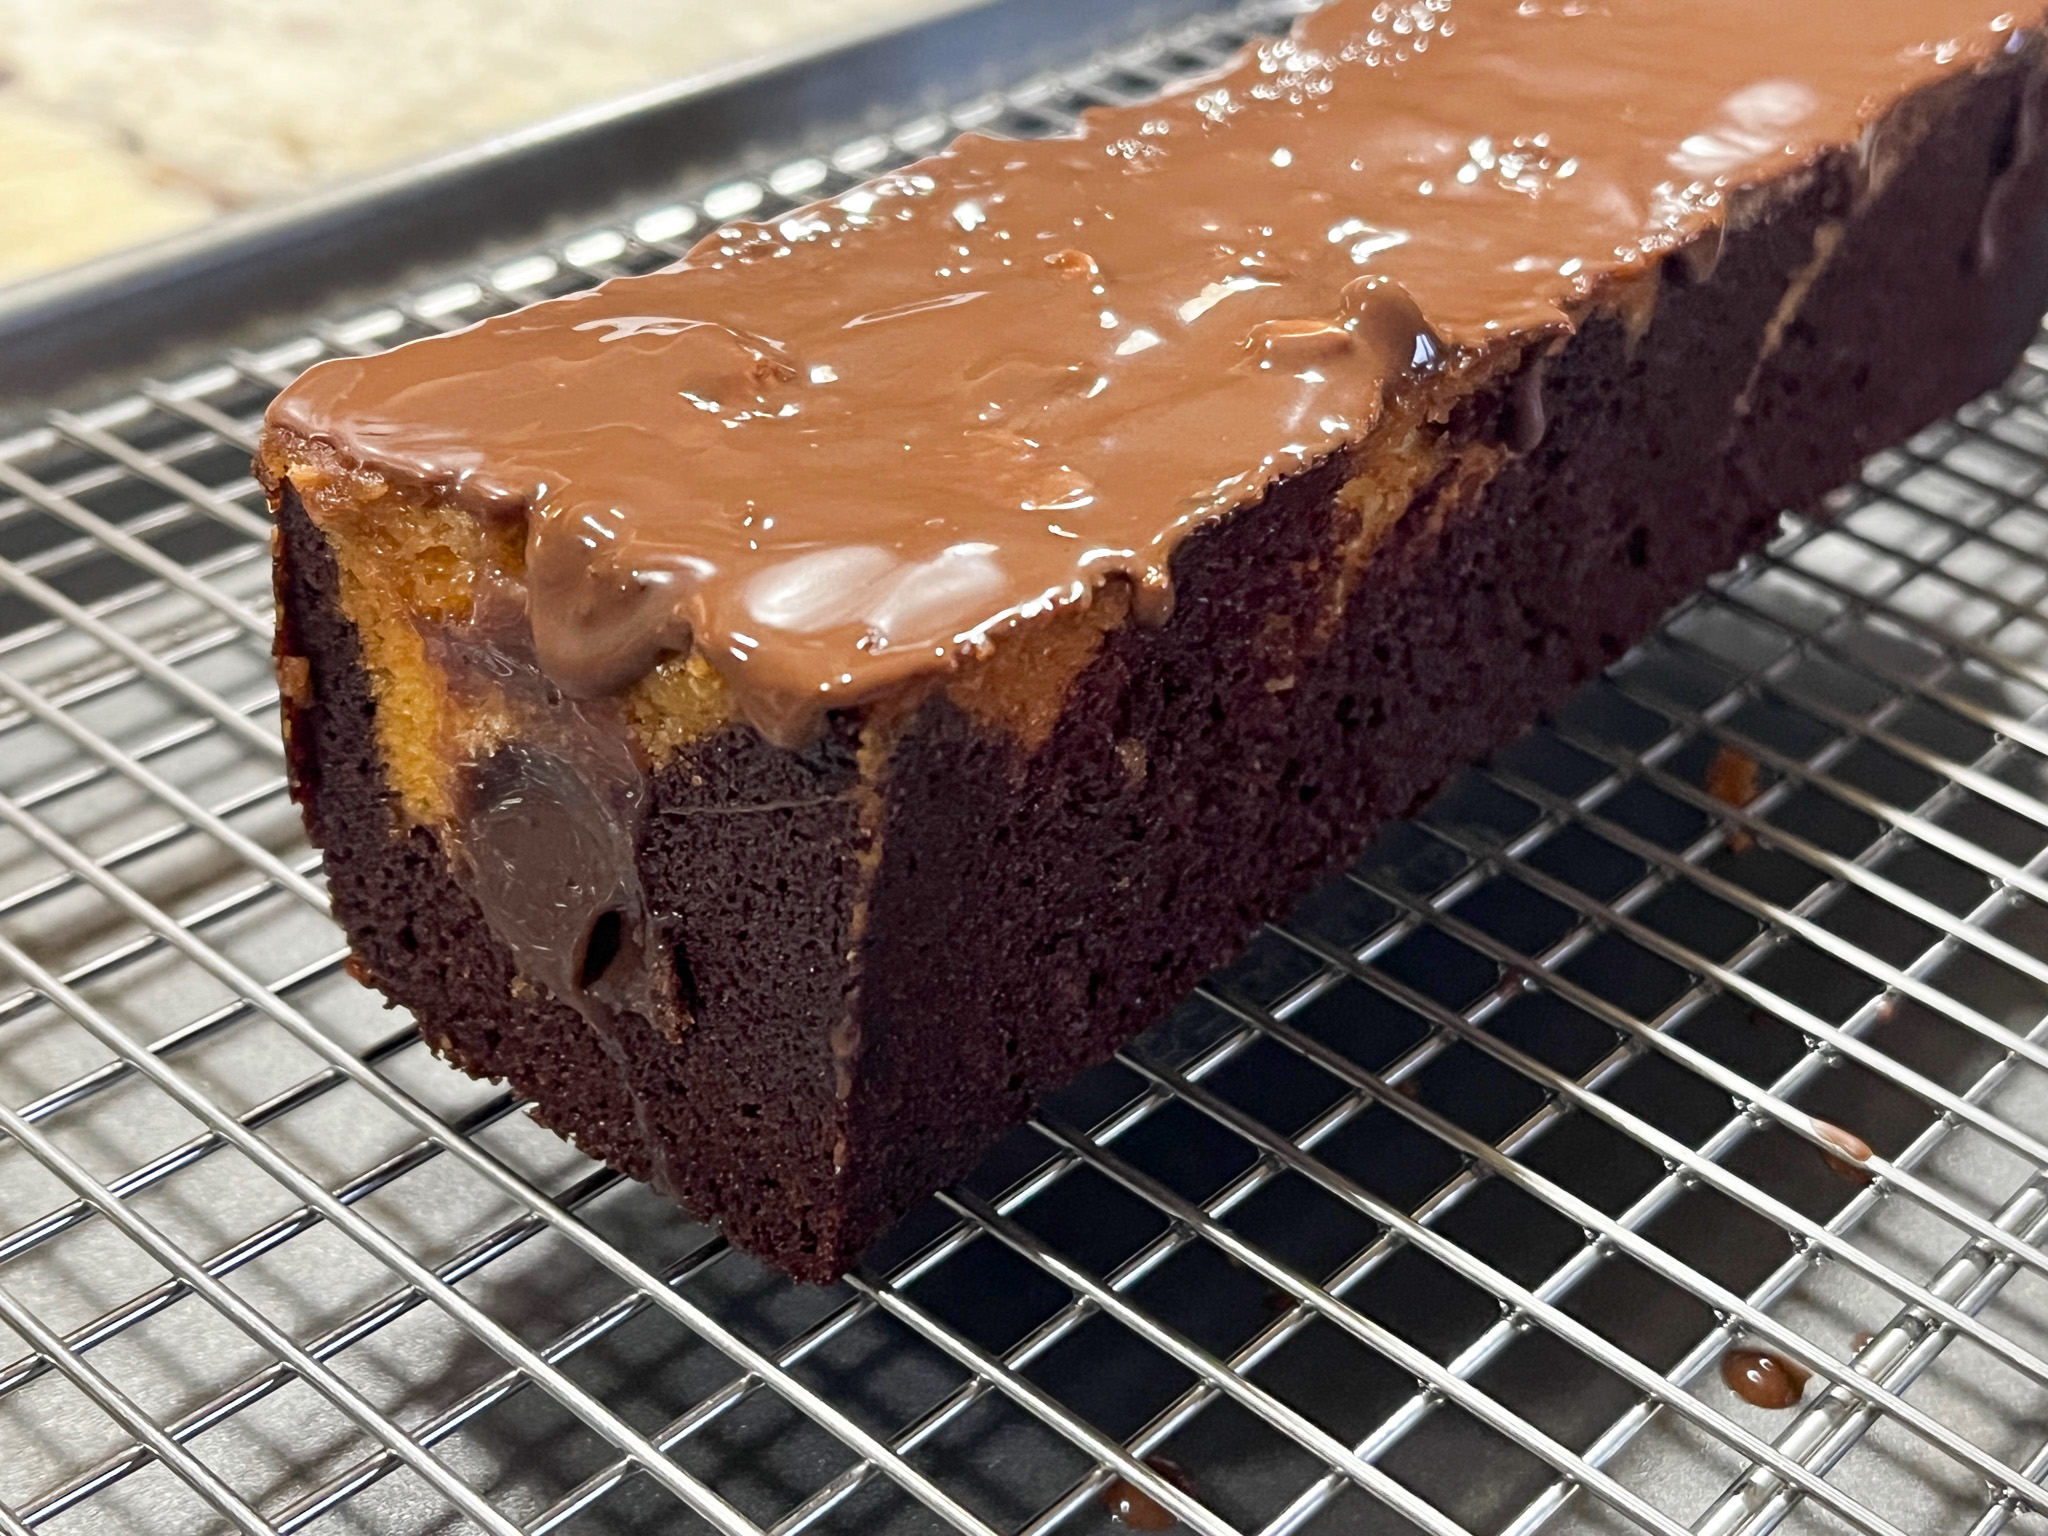
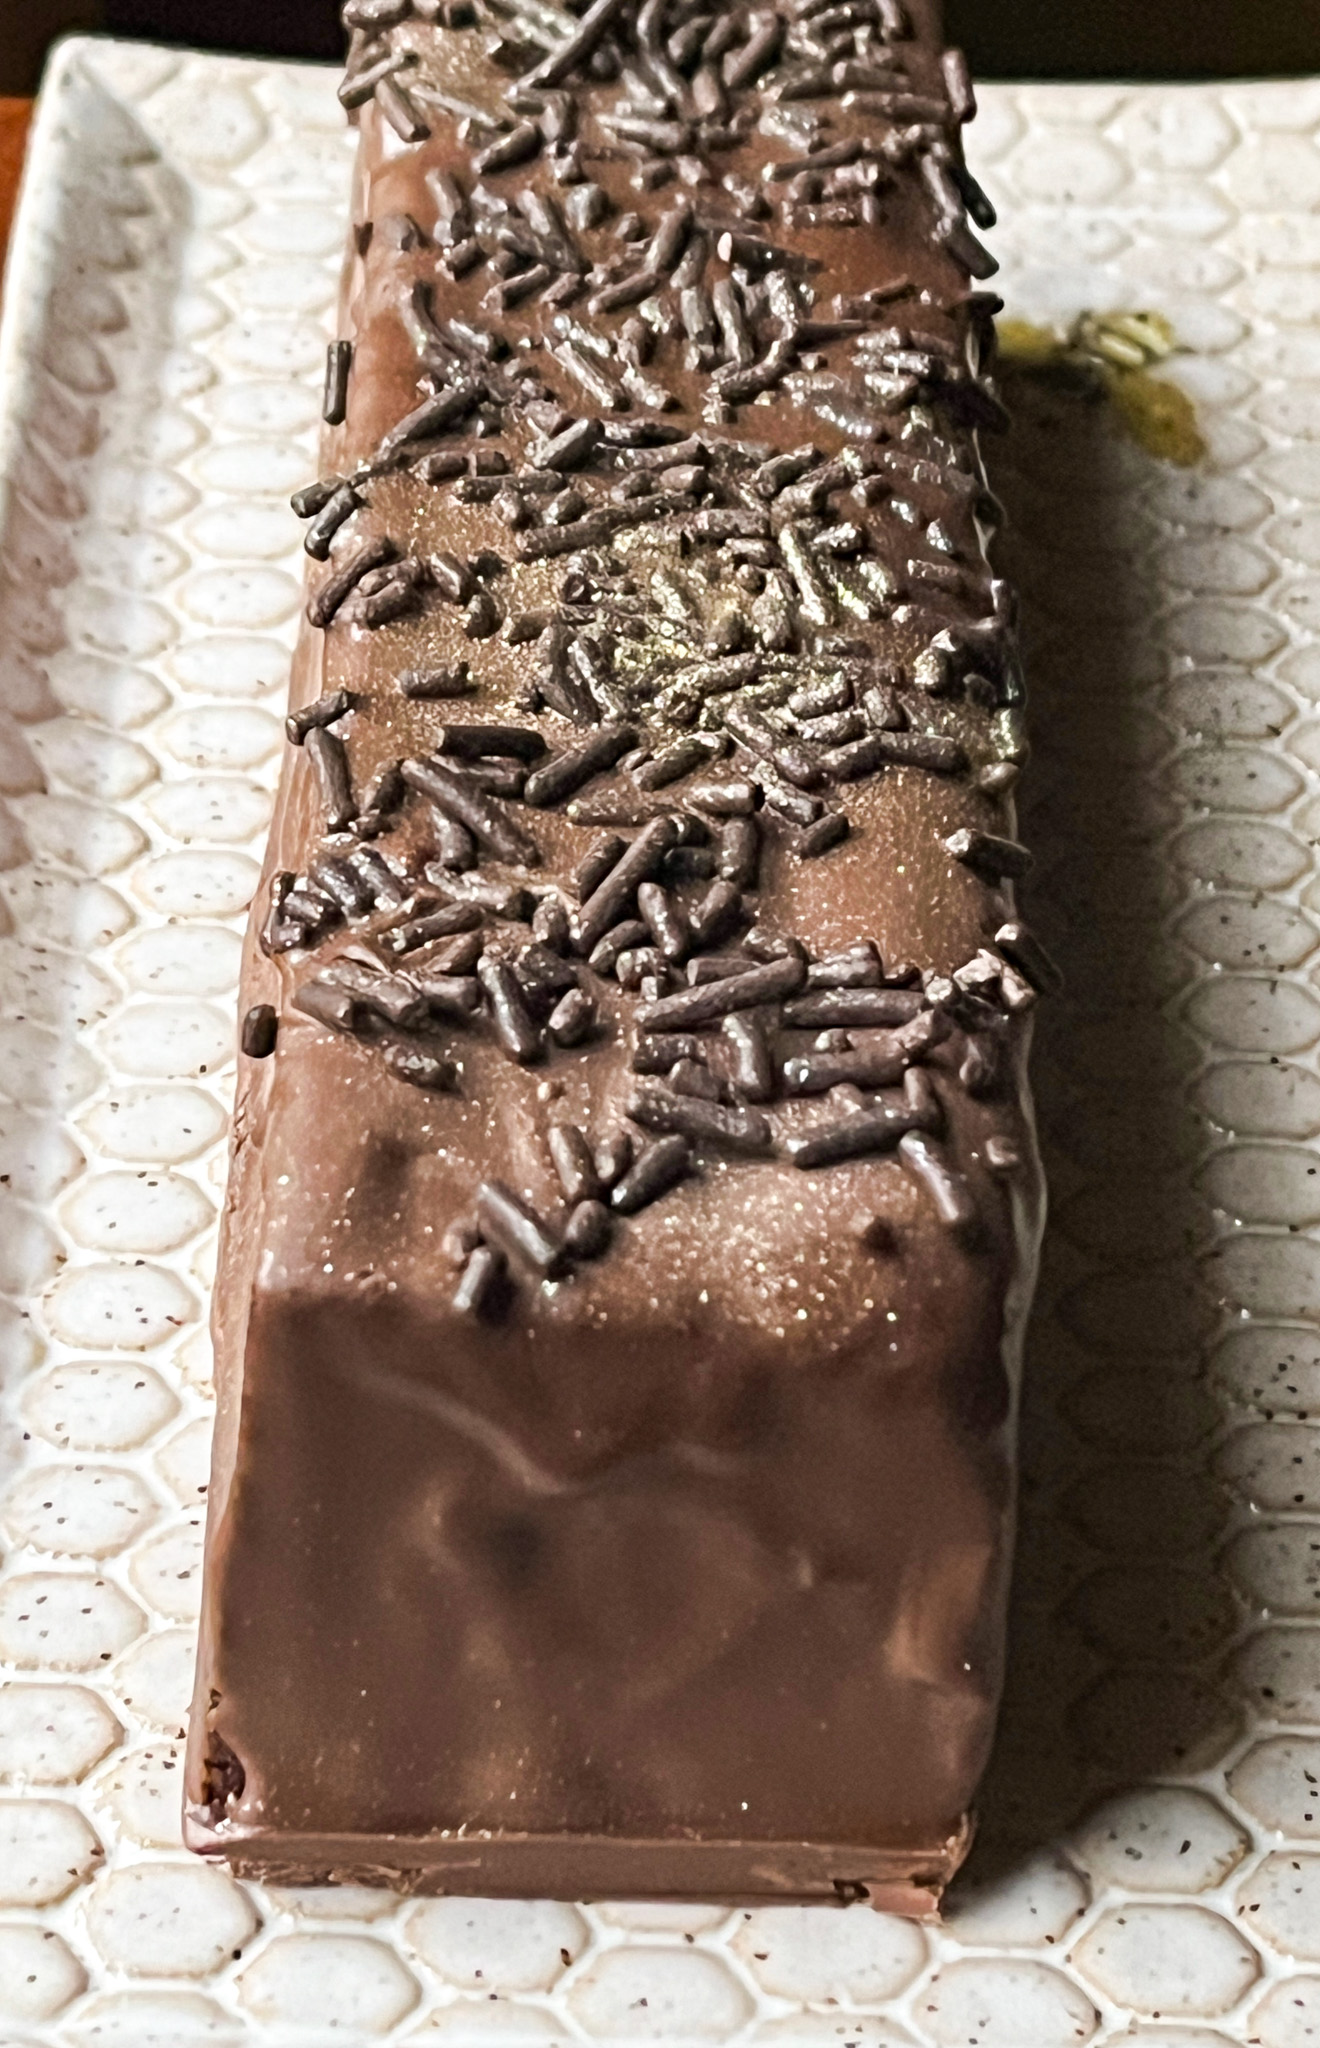
To coat the cake, I used a mixture of compound chocolate, milk chocolate and grapeseed oil (150g compound chocolate, 75g milk chocolate, 1 tablespoon grapeseed oil). Melt gently, whisk until super smooth. Place the cake in the freezer for 30 minutes, then remove and coat the bottom. Let it set, if needed warm gently the coating so that it flows nicely, and coat the sides and top. Immediately add chocolate sprinkles for the traditional “brigadeiro” look. I sprayed a little gold luster because that’s how I roll. And apparently also how I cake.
Travel cakes last for several days at room temperature, that’s why they are called this way. In French, even more beautiful… Gateaux de voyage! What a dream!
I still consider it a work in progress. Better marbling, and a slightly thicker filling are my goals for the next adventure…
ONE YEAR AGO: Thai Carrot and Sweet Potato Soup
TWO YEARS AGO: Vanilla Mini-Cakes with Honey Pears
THREE YEARS AGO: Buttermilk Roast Chicken
FOUR YEARS AGO: Cauliflower and Sweet Potatoes in Yogurt-Curry Sauce
FIVE YEARS AGO: Panettone, Wild-Yeast Version
SIX YEARS AGO: Turkey Chili Under Pressure
SEVEN YEARS AGO: Tiramisu Macarons
EIGHT YEARS AGO: Cider Mini-Cheesecakes with Caramel Sauce
NINE YEARS AGO: Rustic Ciabatta and Mini-Meatloaves
TEN YEARS AGO: Green Rice
ELEVEN YEARS AGO: Potato-Crusted Italian Mini-Quiches
TWELVE YEARS AGO: Beetroot Sourdough for the Holidays
THIRTEEN YEARS AGO: Cod Filet with Mustard Tarragon Crust
FOURTEEN YEARS AGO: Soba Noodles: Light and Healthy
FIFTEEN YEARS AGO: Potato-Rosemary Bread