I am often inspired by Molly Yeh and her fun show Girl Meets Farm on FoodTV Network. This is dinner in a single pan, filling and nutritious. I made the salmon in two different ways, as the husband prefers a simpler seasoning for his fish. See the comments for what I would change next time.
SALMON AND BABY BOK CHOY OVER SUSHI RICE (adapted from Molly Yeh’s recipe)
1 + 1/2 cups sushi rice 4 small heads of baby bok choy, halved 1 tablespoon grapeseed oil 1 tablespoon toasted sesame oil 2 tablespoons grated fresh ginger 1 limes, zested and halved 2 teaspoons kosher salt plus more for seasoning the salmon 2 + 3/4 cups water 2 tablespoons light miso paste 2 tablespoons Japanese mayonnaise 4 skinless center cut salmon fillets Sriracha, for drizzling
Heat the oven to 425 degrees F.
Put the rice in a fine strainer and rinse until the water runs clear. Drain well and spread in a braiser. Lay the bok choy in an even layer over top. Drizzle with the neutral oil, sesame oil, ginger, lime zest, and salt. Drizzle the water into the braiser. Bring to a boil.
Cover tightly with a lid and bake for 15 minutes.
While the rice and bok choy bakes, stir together the miso and Japanese mayonnaise. Season the salmon lightly with salt and brush with the miso sauce. After 15 minutes, carefully uncover the braiser and lay the salmon pieces over the rice and bok choy. Cover again and continue to bake until the rice is tender and the salmon is just cooked through, about 15 minutes more.
Uncover the braiser and broil on the top rack just until the top of the salmon is nicely glazed, about 1 minute. Squeeze the halved lime over top. Serve with a drizzle of Sriracha.
Comments: First things first, I really loved the Japanese mayo-based topping for the filets. It is salty, a tad sweet, super flavorful. But the husband was happier with the more austere version I made for him, just olive oil, lemon juice, salt and Herbes de Provence. Do what suits you best. The rice was perfectly cooked using the timing suggested by Molly. Now, comes the full disclosure: the bok-choy disappointed us. It turned mushy and not at all the type of veggie we enjoy as a side dish. It is a nice idea to have everything in a single pan, but next time I will keep just the rice and salmon, and cook whatever veggie separately. Sautéed, air-fried, roasted. Anything to give it better texture.
We enjoyed it with air-fried carrots, so in the end it was a super nice meal for a Saturday night…
This recipe has been waiting for a long time in that list of “To Make Soon”. Better late than never, I actually made it twice, because I wasn’t totally happy with my first attempt. This is a classic Mexican sweet bread, with a colorful coating that is sweet and addictive…
In the bowl of a KitchenAid type mixer, add the flour, sugar, cinnamon, salt, yeast, and butter cut into pieces. Using the hook, mix for a few minutes until the butter is fully incorporated. Add one egg at a time, mixing for a minute after addition. Slowly add the milk, and once the mixture is smooth, knead it for a full 15 minutes, until the dough is super smooth and elastic.
Transfer to a buttered bowl, and let it rise until doubled. About 2 hours.
Make the topping by kneading (by hand is fine) flour, powdered sugar and butter until a dough is formed. Divide it in four pieces, add cocoa powder to one of them fourths, strawberry powder to the second half, vanilla to the remaining pieces. Add food color of your choice, if so desired. You can leave one of the vanilla pieces plain. Place in the fridge to set while the dough rises.
Punch the risen dough down, divide in 8 pieces and form little balls. Place them over parchment paper, four per baking sheet. Divide the colored dough into two, so you have a total of 8 pieces, 2 of each color. Use a tortilla press to roll them out, placing parchment paper squares on top and bottom to make it easy to move the dough around. Place the dough over the little rolls, and cut around to make it neat. Use the concha press to make the design on top. Cover, let them rise for 30 minutes and bake at 350F for about 25 minutes. Add a baking sheet with ice at the bottom of the oven to generate steam. You can also spray some water lightly over the dough after 2 minutes during baking.
Comments: Talk about a fun baking project, this is definitely it! When I made it the first time, I did not cover the breads fully with the colored dough, and later learned that the traditional way covers them fully. They get a more polished look that way. Below you see my first attempt, I used a heavier hand with the colors also…
When I make them again, I will either make half the recipe and form 6 little breads, or make the full recipe and shape 12 because I think these turned out slightly too big. Also, I think it would be fun to gather the different colors of topping and knead them slightly together to make a fun marbled topping. I just love the look of the bread as it goes through the final proofing.
I donated the whole batch, but of course had to ‘test taste” one. Love the cinnamon flavor, the bread is soft, tender, moist. And the topping, yes, addictive!
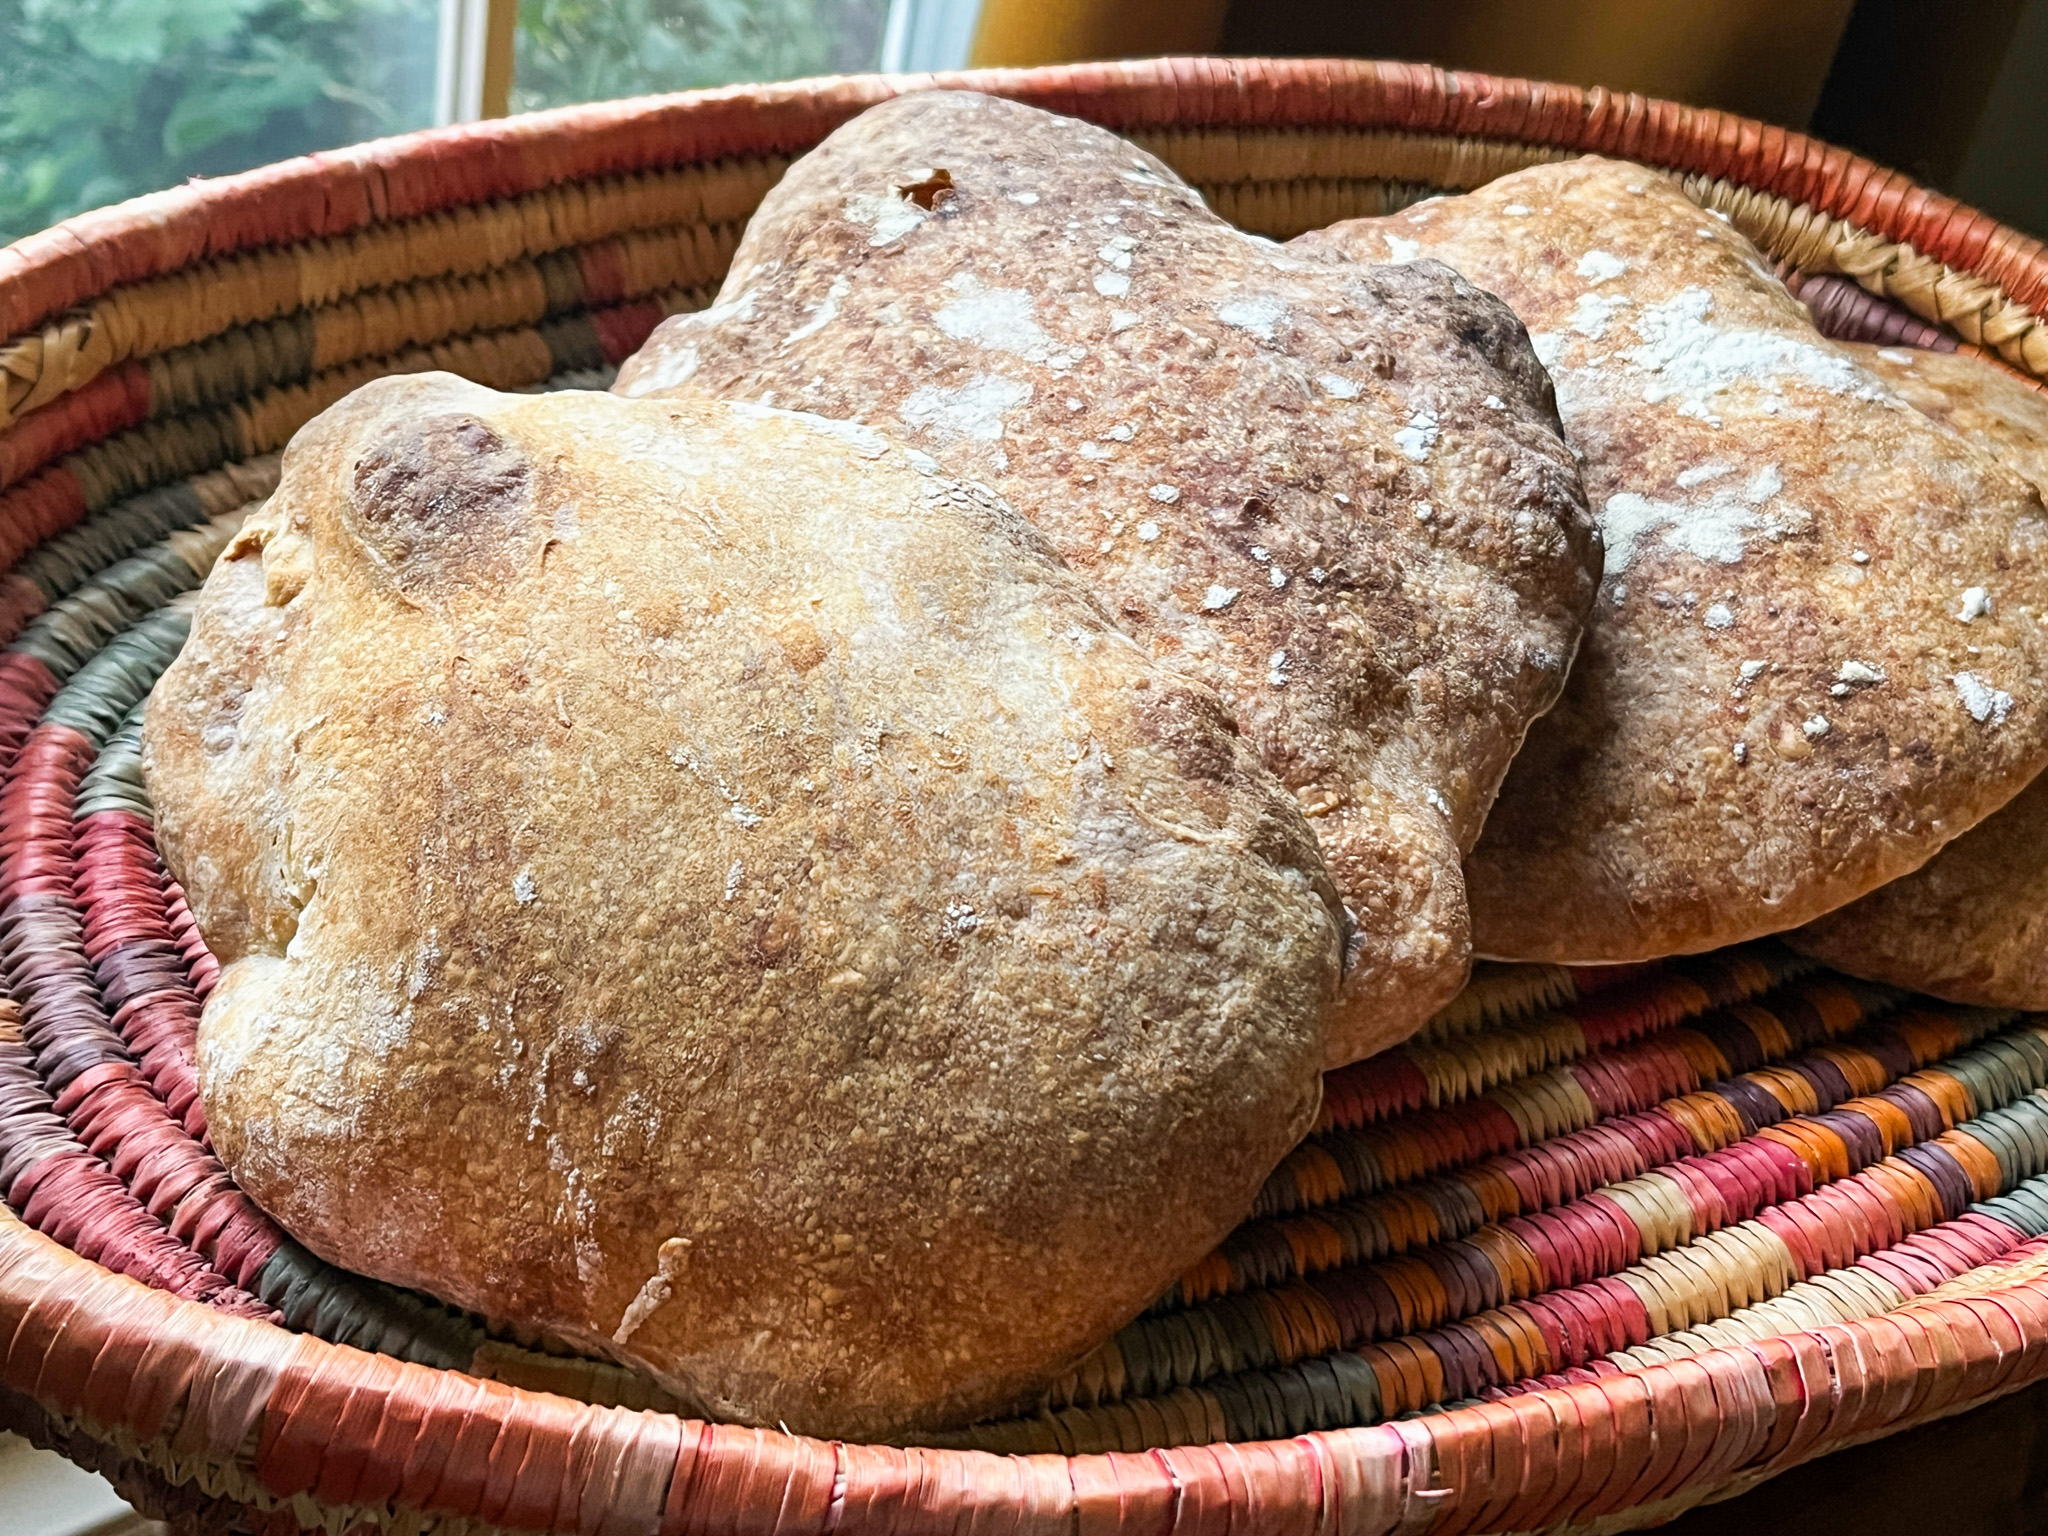
For a long time I’ve fllirted with the idea of working with a sourdough at 100% hydration. What’s the big deal, you might ask? First of all, in bread lingo, the hydration level reflects the amount of water in relation to total flour. Total flour then becomes the amount considered as 100%, and all ingredients are listed in proportion to that amount. If a bread calls for 500g of flour and 250g of water, it is at 50% hydration. Usually, if you look at recipes for sourdough bread, that level sits at 65% to 70%. If you want to see what increasing the level of water from 65% to 100% does to a dough, simply mix 100g of flour with 65g water and play with it. Now do the same with 100g flour + 100g water. It is a totally different reality… Anyway, without further ado, this is my first adventure with a sourdough bread containing 100% water. The famous “Pan de Cristal”.
PAN DE CRISTAL (from The Bewitching Kitchen)
makes four loaves
400g strong flour 400g water (divided in 350g + 50g) 10g olive oil 10g salt 100g starter (at 100% hydration)
Mix the flour with 350g of water in a bowl. Use a dough whisk or your hand to mix it until no dry bits of flour remain. Let that sit for 45 minutes at room temperature. Mix the salt with the 50g water and reserve.
Add the sourdough starter, incorporate by kneading into the flour/water mixture. Add the remaining water/salt in 3 additions spaced by 10 minutes, mixing with your hand. After the last amount of water is added, wait 10 minutes and add the olive oil .
The dough is ready for bulk proofing. Place it in a square pyrex dish sprayed with olive oil. Perform coil folds every 45 minutes. You should do five to six cycles of folding, as shown in the video. Transfer the dough to the fridge overnight
Next morning, place parchment paper over your countertop, and flour the surface of the dough, as well as the parchment paper. Flip the dough onto the floured paper, then divide it with a bench scraper in four pieces. Each piece should go into a separate piece of floured parchment paper for easy moving into the oven. Cover the pieces and let them proof at room temperature for 45 minutes.
Heat your oven to 450C with a baking stone over the rack. Bake the bread with steam for 10 minutes, the reduce the temperature to 425F and bake for 20 minutes more.
Let it cool completely over a rack before slicing.
Comments: Below you can watch a video of the last cycle of “folding” before placing the dough in the fridge for its overnight beauty sleep.
It was quite a challenging dough to work with, but I am pretty happy with the outcome. Make sure to flour the surface quite a bit before diving the dough into four pieces.
The crumb was very open and airy, the bread is delicious and was perfect for pulled pork sandwiches on the 4th of July… If you like to have a little bread baking challenge, I highly recommend this recipe!
In My Kitchen posts are hosted by Sherry, from Sherry’s Pickings. Please visit her site to see what everybody else is sharing this month. I join four times each year, on the first day of January, April, July and October. If you are a food blogger, consider taking part of this fun event. It is a chance to share those little things you bought or received as gifts and that make your life in the kitchen easier. I open this post with one amazing shot taken by my beloved, when he was at the golf course. The world is a beautiful place and I wish humans would work harder to keep it that way.
In our kitchen…
It is not very easy to find raw pistachios unsalted at the grocery store. This product was recommended by a cookbook author and I decided to give it a try. They are indeed excellent and I think you will be very happy by ordering from this company.
In our kitchen…
This is a very interesting cooking oil that I heard about recently and decided to try (available here). It is very low in saturated fat and has a super high smoking point so it is perfect to sear meat on top of the stove or use it in any kind of recipe that calls for sauteing in high heat. It has absolutely no after taste. Interestingly enough a couple of weeks after I bought them I saw Jeffrey Zakarian recommending it on the Food TV show The Kitchen.
In our kitchen…
This little cupcake stands were a surprise find at our Marshall Store. Of course, I put them to use very quickly once I brought them home.
.
In our kitchen…
I am totally in love with this one! A product just launched by Evil Cake Genius, it cuts 2” circles that are perfect to use in molds to make Chocolate Covered Oreos. No more cutting the chocolate transfer sheets by hand, a tedious process that is also not easy to turn into a perfect circle. Ordering info here.
In our kitchen…
Another lucky find at Marshalls which I HAD to bring home… It now hosts some of my food safe pens and I always smile when I grab the box to play.
In our kitchen…
We saw this basket for berries and fruits at my brother-in-law’s home. I had to get one for us, as it is perfect for storage in the fridge after washing them. Available at amazon.com. A note about washing berries: the husband is the official fruit handler in the house. He makes a 3% salt solution (about 1/8 cup salt in a quart of water, if you don’t have a scale), and soaks the fruits for 5 minutes. Then he rinses in cold water to remove the salt. This gets rids of impurities and also deals with any pesticide residue present. Below you see the color of the water after soaking.
In our kitchen…
This is such a cool ingredient! It is great drizzled over cheese, used in salad dressings, not too hot, just deliciously spicy. Available here.
In our kitchen…
What are the odds on that? Should we play the lotto? TWO double-yolk eggs on a single pan! Those were for our lunch on a Saturday, so definitely made the weekend start on a great note…
In our kitchen…
I love scented candles (although I am very picky about their scent) and light them almost every evening. On the other hand, I absolutely despise grocery store matches like the infamous Diamond brand. They come in a box of 300, but after match #20 you can’t make a single one light on your first attempt. These are a pleasure to use, and the boxes are little works of art… (different styles available here).
In our kitchen…
Sometimes, serendipity happens… and the outfit of the baker matches the bake! .
And now, for something completely different….
Apparently some four-legged friends are anxious to bark their piece, so without further ado, let’s welcome them to this edition of In My Kitchen…
Prince Freckles of Tatarrax is the resident countertop surfer. Osky is too short and too feeble, Star does not seem to be interested in standing on her back legs to inspect the surroundings. Prince misses absolutely nothing. On the back you see braided chews that are too big and too hard, so we soak them for a few hours in warm water, untwist them, and cut in small pieces. The three pups get one small piece every evening while we watch TV, but Prince seems to think that he can make them levitate into his mouth if he stares at them long enough. He will stare, turn around and look at us, stare some more. Can you say adorable?
Please, spare me. Nothing adorable about that. He is being silly, immature, and endlessly annoying.
Star, on the other hand, could not care less about Osky’s opinion on the brother. She tends to keep herself busy, by taking power naps around the Kingdom.
and yes, sometimes the power nap will take place in the middle of a ball game…
Oscar is quick to point out that Star’s approach to handling a ball – to put it mildly – SUCKS. That is how it is done! And while you are at it, FIX your ear, it is not a dignified look.
The Black Spotted Heroes in fact know very well how to play…
. And things can get quite intense…. much more intense than Osky could handle!
Obviously, after so much activity, they do need to take it easy, preferably enjoying the scent of one of their favorite humans….
So all was going well with the year 2025, but dark clouds accumulated on the horizon. Very fast.
DID WE HEAR THE K-WORD??????
Yes, unfortunately they were forced to spend some time in the kennel, It is not fun for anyone, we hate to leave them behind, but sometimes there is no other way…. At least they get to ride in the pickup truck in style!
Before you accuse us of playing favorites, Osky has never enjoyed car rides, he gets the shakes, hates every minute of it. Prince and Star go with us to the grocery store, run a few errands, and we imagine it is pretty cool for anyone driving behind us to see the license plate and two Dalmatian heads sticking out of the window.
True, I could not care less about their fancy rides. “I” am the only one to get professionally groomed, which is the true mark of being special…
BUT BACK TO WHAT MATTERS! The pups have a hard time believing we struggled with being away. Yeah, that’s what they say… But does it look like they are struggling? Zenless even got to cheat on us with other pups! THE NERVE!
Well, what can we say? We enjoyed our time away, but once we were back, we absolutely spoiled them rotten…
Bed privileges were not uncommon….
Osky got as many belly rubs as he could handle….
And life in the Kingdom of Tatarrax, went back to normal…..
.
That is all for now, folks! We wish you a wonderful Summer, and we’ll be back to bark and play in October… .
I am a bit shocked that in 16 years of blogging life, this recipe has not been featured yet. I used to make it often in the early years of our marriage, but truth is, that marriage is now over 25 years young. So there you go. Better late than never, here I am to share my favorite method to make spaetzle. With a very light hand on saturated fat, but still super tasty.
SPAETZLE (from the Bewitching Kitchen)
1 + 1/2 cups all-purpose flour 1 tsp kosher salt, plus more for the water 1/4 teaspoon ground nutmeg 3 large eggs 6 tablespoons low-fat milk olive oil and olive spray Panko bread crumbs to taste
Place the flour, salt and nutmeg in a large bowl. Whisk to combine. Make a well in the center. Mix the eggs with the milk in a small bowl and whisk well until fully blended. Pour into the flour well and stir until no bits of dry flour are present. Cover the bowl with plastic wrap and refrigerate for 30 minutes or longer.
Bring a large pot of salted water to a boil. Spray a large rimmed baking sheet with oil. Reserve.
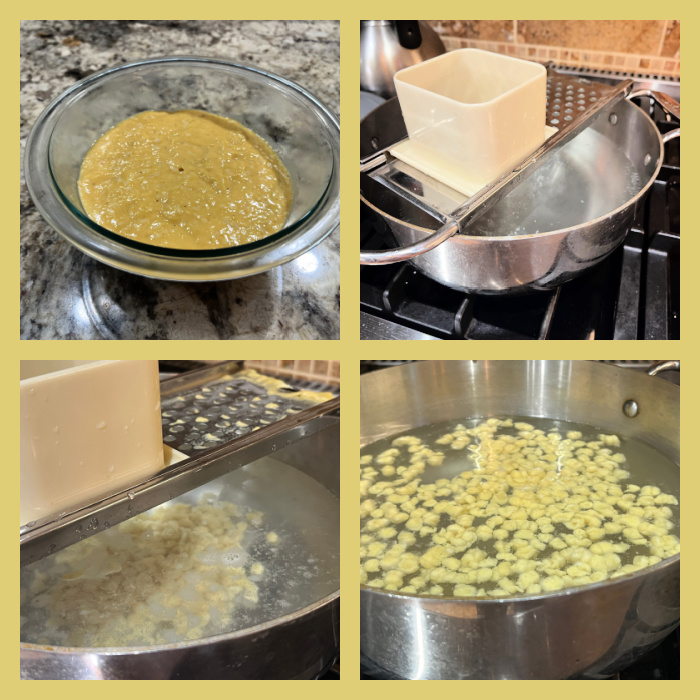
When the batter is ready, place a spaetzle maker over the boiling water. Pour the batter into the metal basket, over the holes. Run the plastic component back and forth over the holes. I cooked mine in three batches.
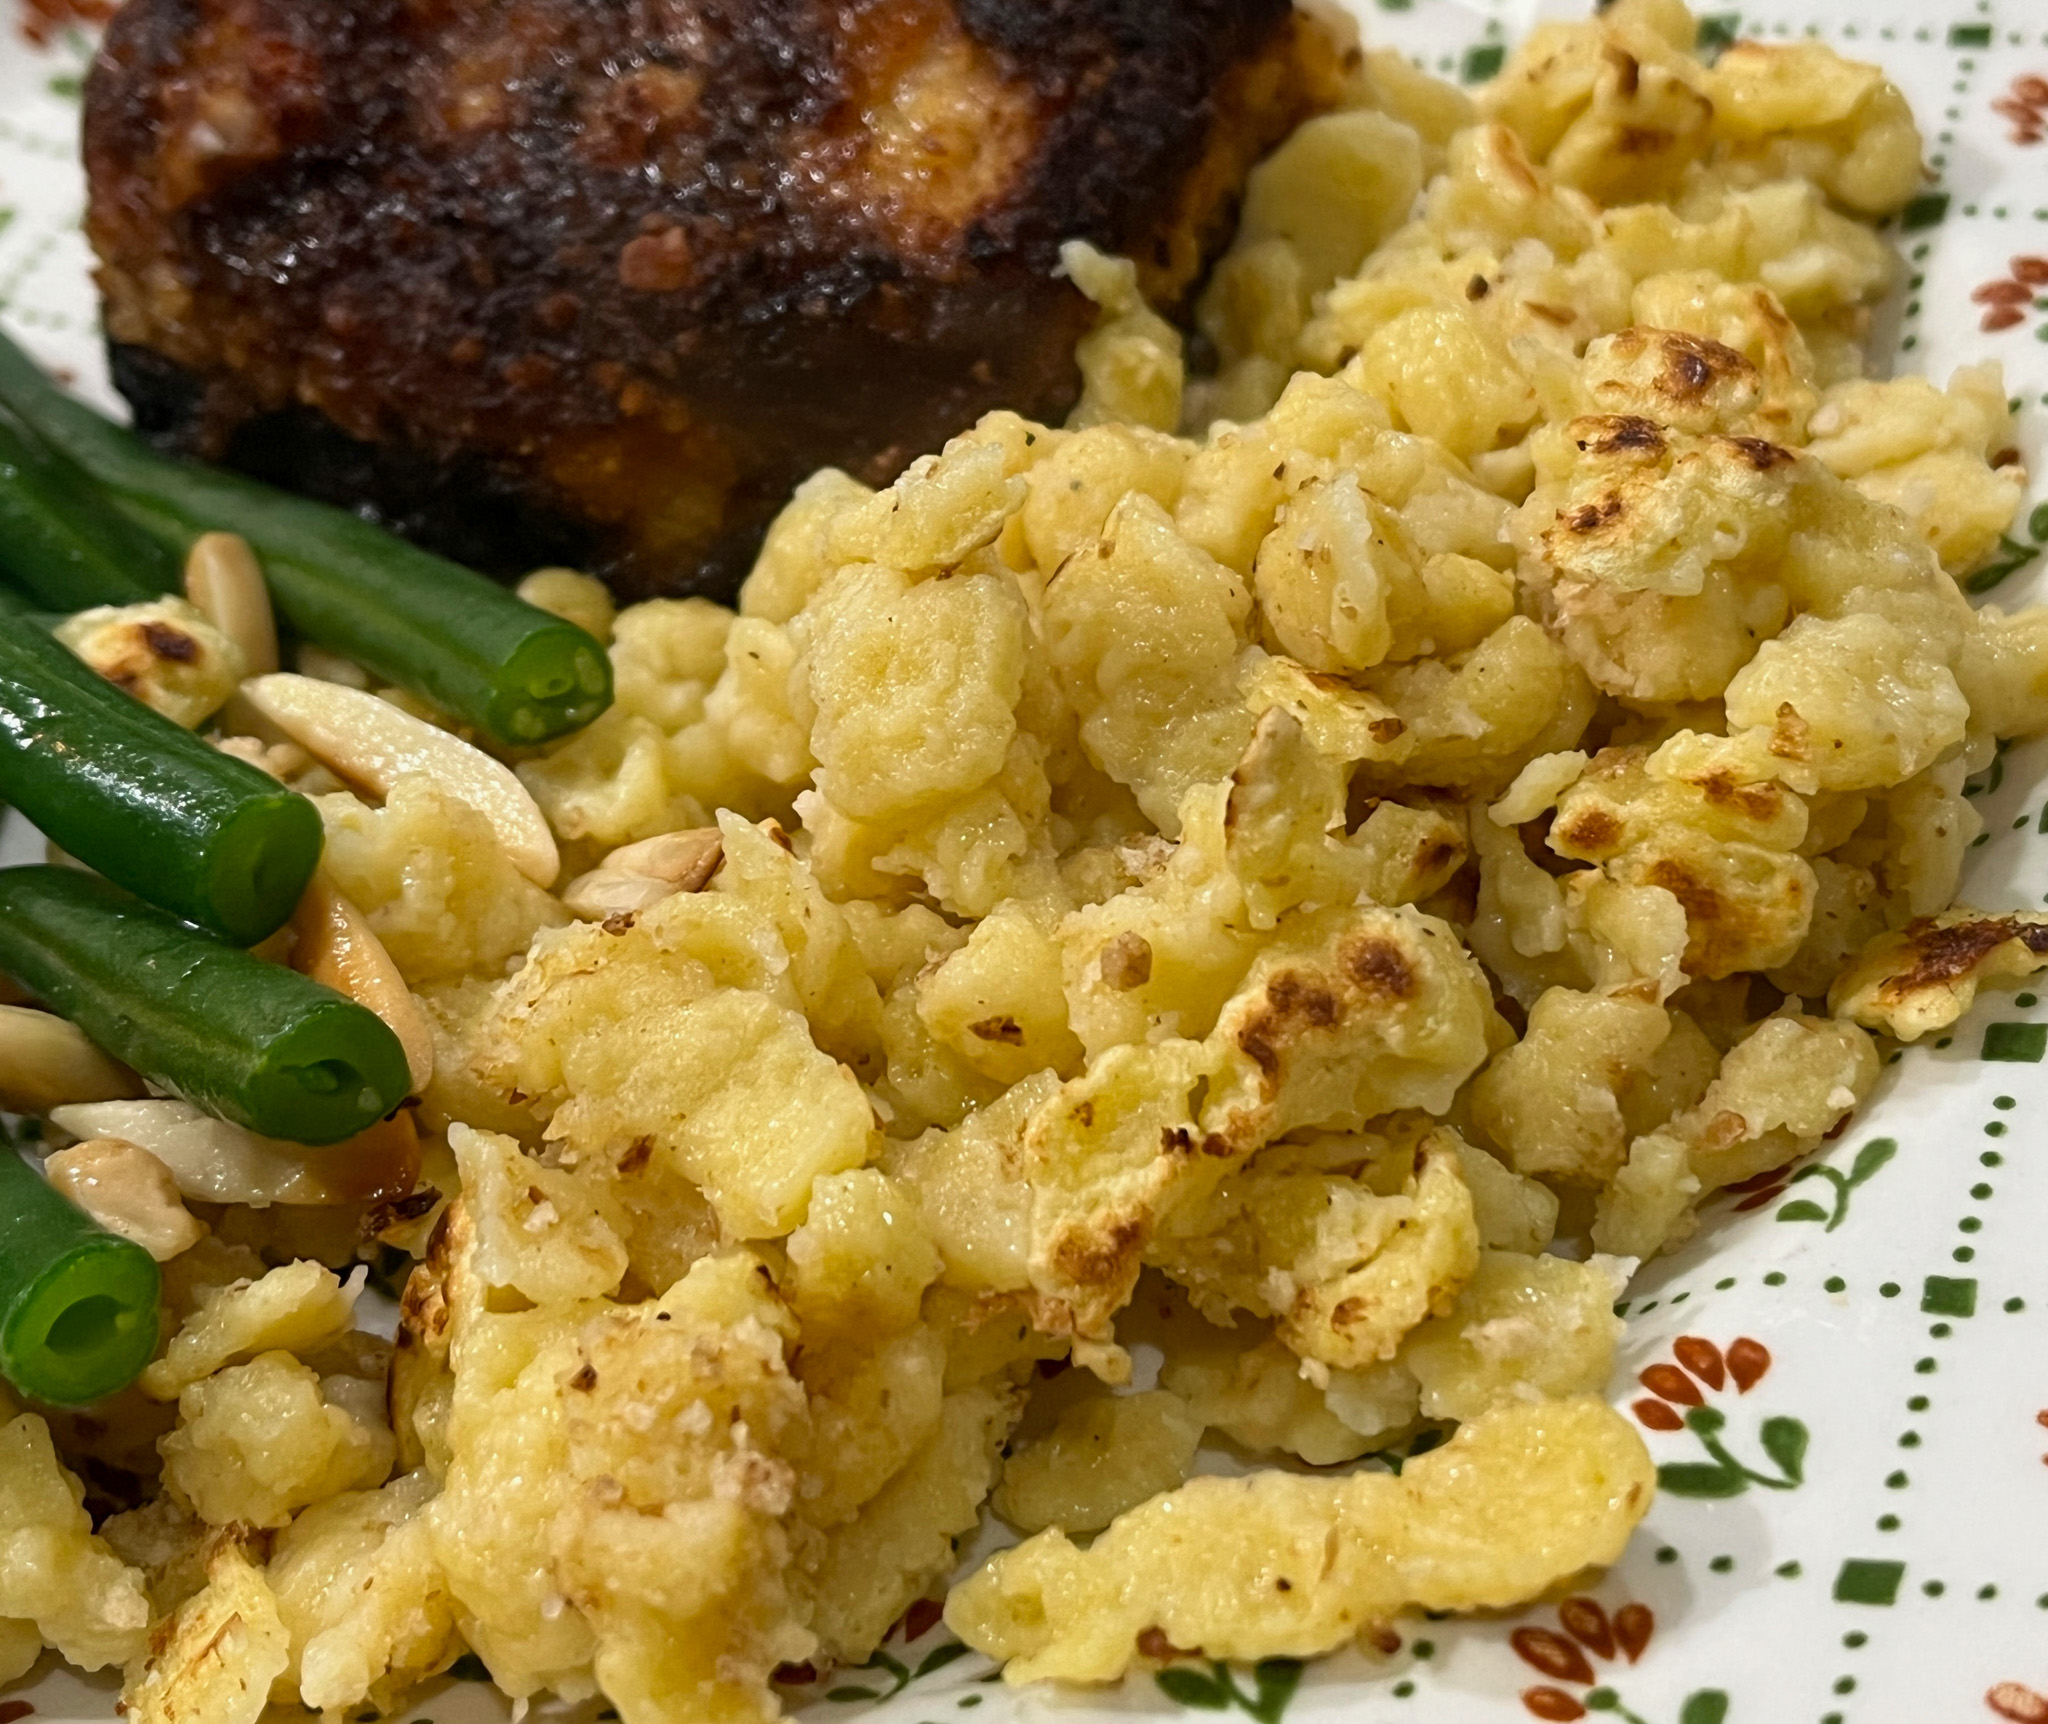
Once the all spaetzle floats to the top, simmer for 1 minute more. Transfer with a slotted spoon to the oiled baking sheet. You can enjoy them now with butter if desired, or pan-fry it like I did, with olive oil. To fry, heat a large non-stick skillet over medium-high heat. Add 2 tablespoons of oil and the spaetzle. Add some bread crumbs as you sautee the spaetzle, season with more salt if needed. Serve while still warm.
Comments: It was so nice to make this recipe again, after such a long hiatus. Not even sure why it took me so long to re-visit it. It is a wonderful side dish that goes well with meat, poultry, seafood. We enjoyed it with roasted chicken thighs and some green beans. If you don’t have a spaetzle-maker, you can use a colander. Works perfectly well, just rub the batter into the holes with a rubber spatula over the boiling water.