I got a new gadget, in fact a set of four cute gadgets to help decorate sourdough bread. It comes from Sourdough Fever, and you can get your own set here. Three different sets with four stencils included. I must say the set with heart shaped pattern ones is calling my name, and I might get it at some point. Before Valentine’s Day says hello.

SMALL BOULE SOURDOUGH BREAD
(from The Bewitching Kitchen)
240g water
70g starter at 100% hydration
7g salt
270g white bread flour
80g whole wheat flour
Make the levain mixture about 6 hours before you plan to mix the dough. It should be very bubbly and active.
When you are ready to make the final dough, place the water in the bowl of a KitchenAid type mixer and dissolve the starter in it, mixing with a spatula briefly, then add the two types of flour, and the salt. Turn the mixer on with the hook attachment and knead the dough for 4 minutes at low-speed all the time. If the dough is too sticky, add a maximum of 1/4 cup flour, you want the dough to start clearing the sides of the bowl, but still be sticky at the bottom.
Remove from the machine, and transfer to a container lightly coated with oil, cover lightly with plastic wrap and allow it to ferment for 2 hours, folding every 30 minutes or so. After the fourth folding cycle, let the dough sit at room temperature for another 2 hours. Shape the dough as a ball, and place, seam side up, in a lightly floured banetton. Place in the fridge overnight, from 8 to 12 hours or even longer, if you prefer.
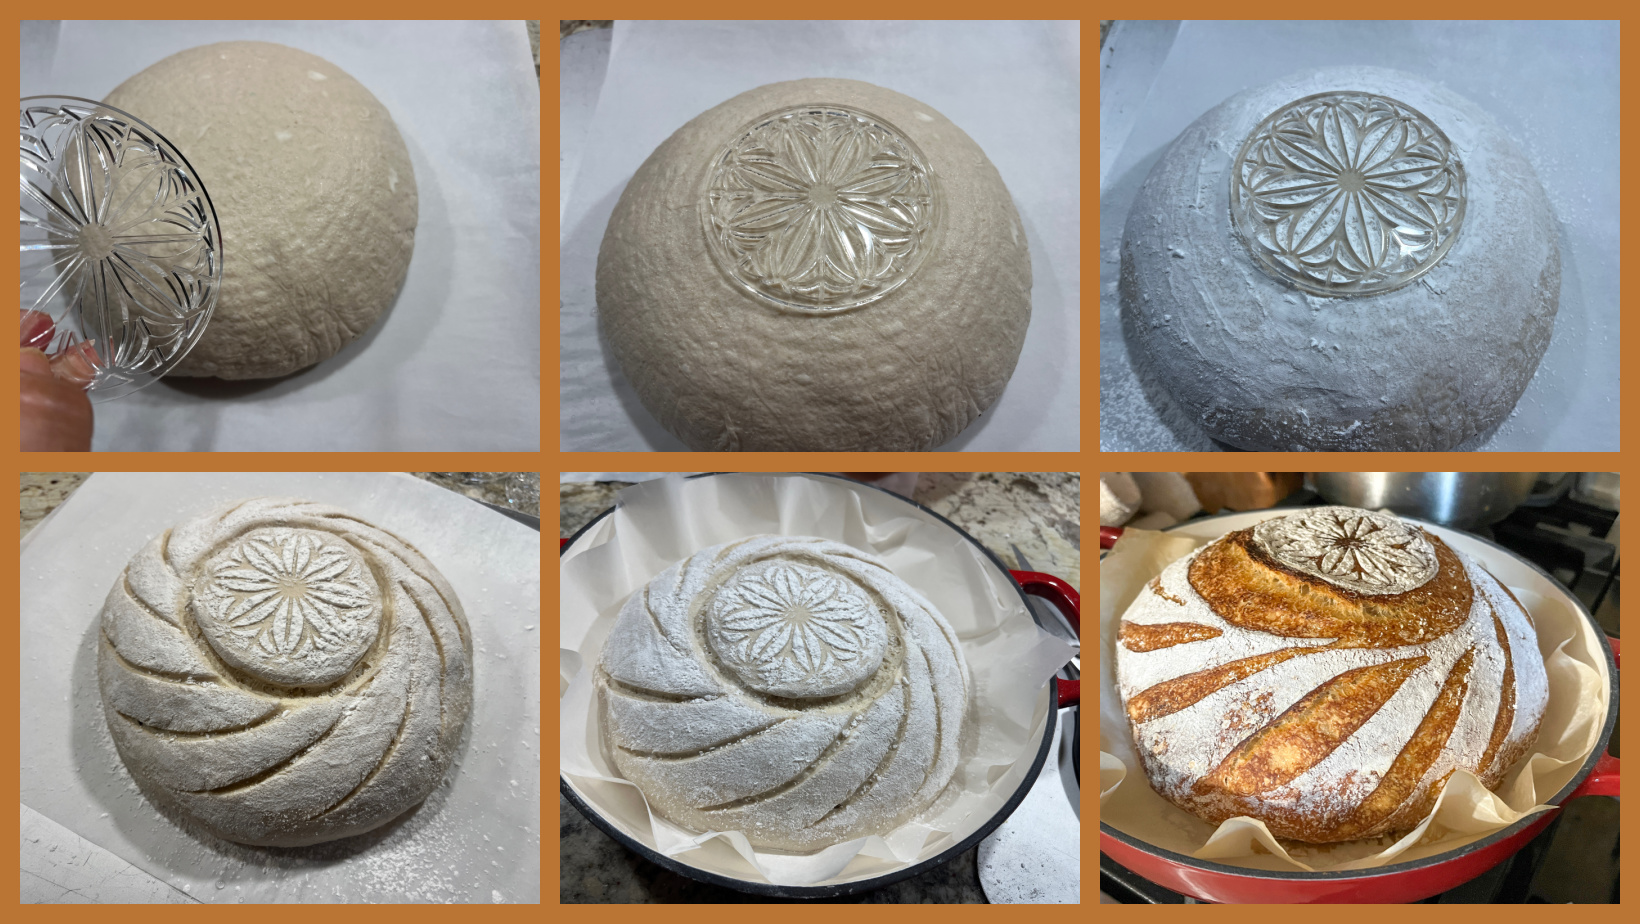
Next morning, heat the oven to 450F. Invert the dough over parchment paper, carefully place the stencil on top, and dust with flour. Make sure to rub the flour well into the design, a small brush is helpful. Lift the stencil and place the dough in a Dutch oven.
Bake at 450F for 45 minutes, preferably covered for the first 30 minutes to retain steam. Cool completely over a rack before slicing.
ENJOY!
to print the recipe, click here
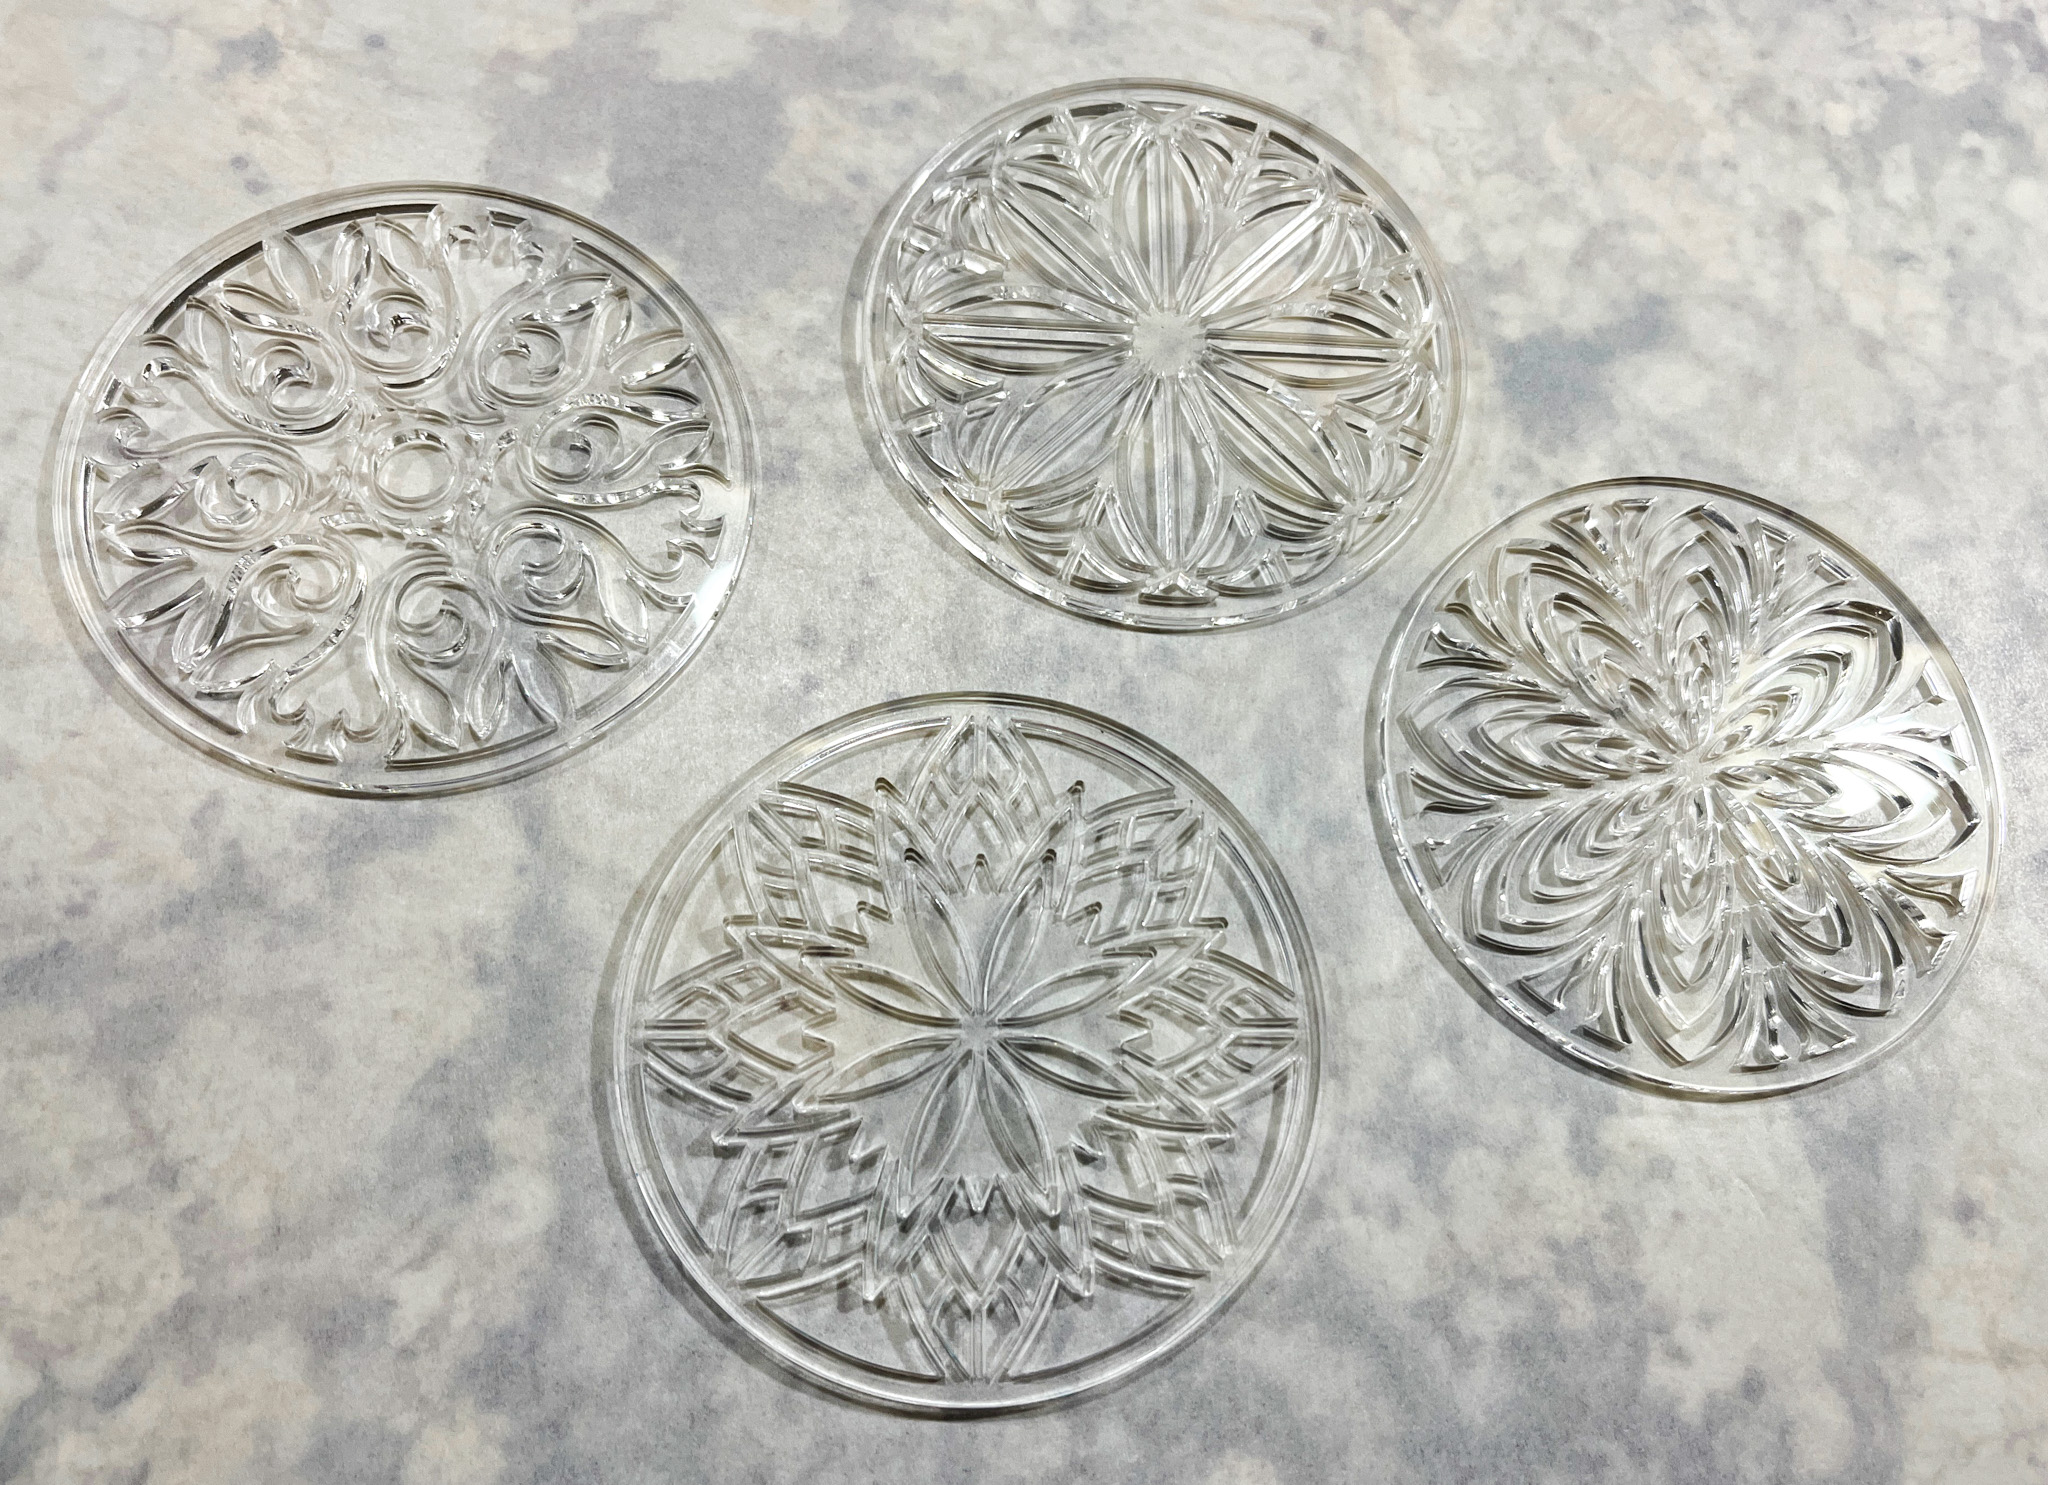
Comments: I love the way these stencils work. They lay nicely on the surface of the bread, but do not stick too badly, so you can easily lift it and preserve a nice image. In the set I got, you can have the four styles shown below.
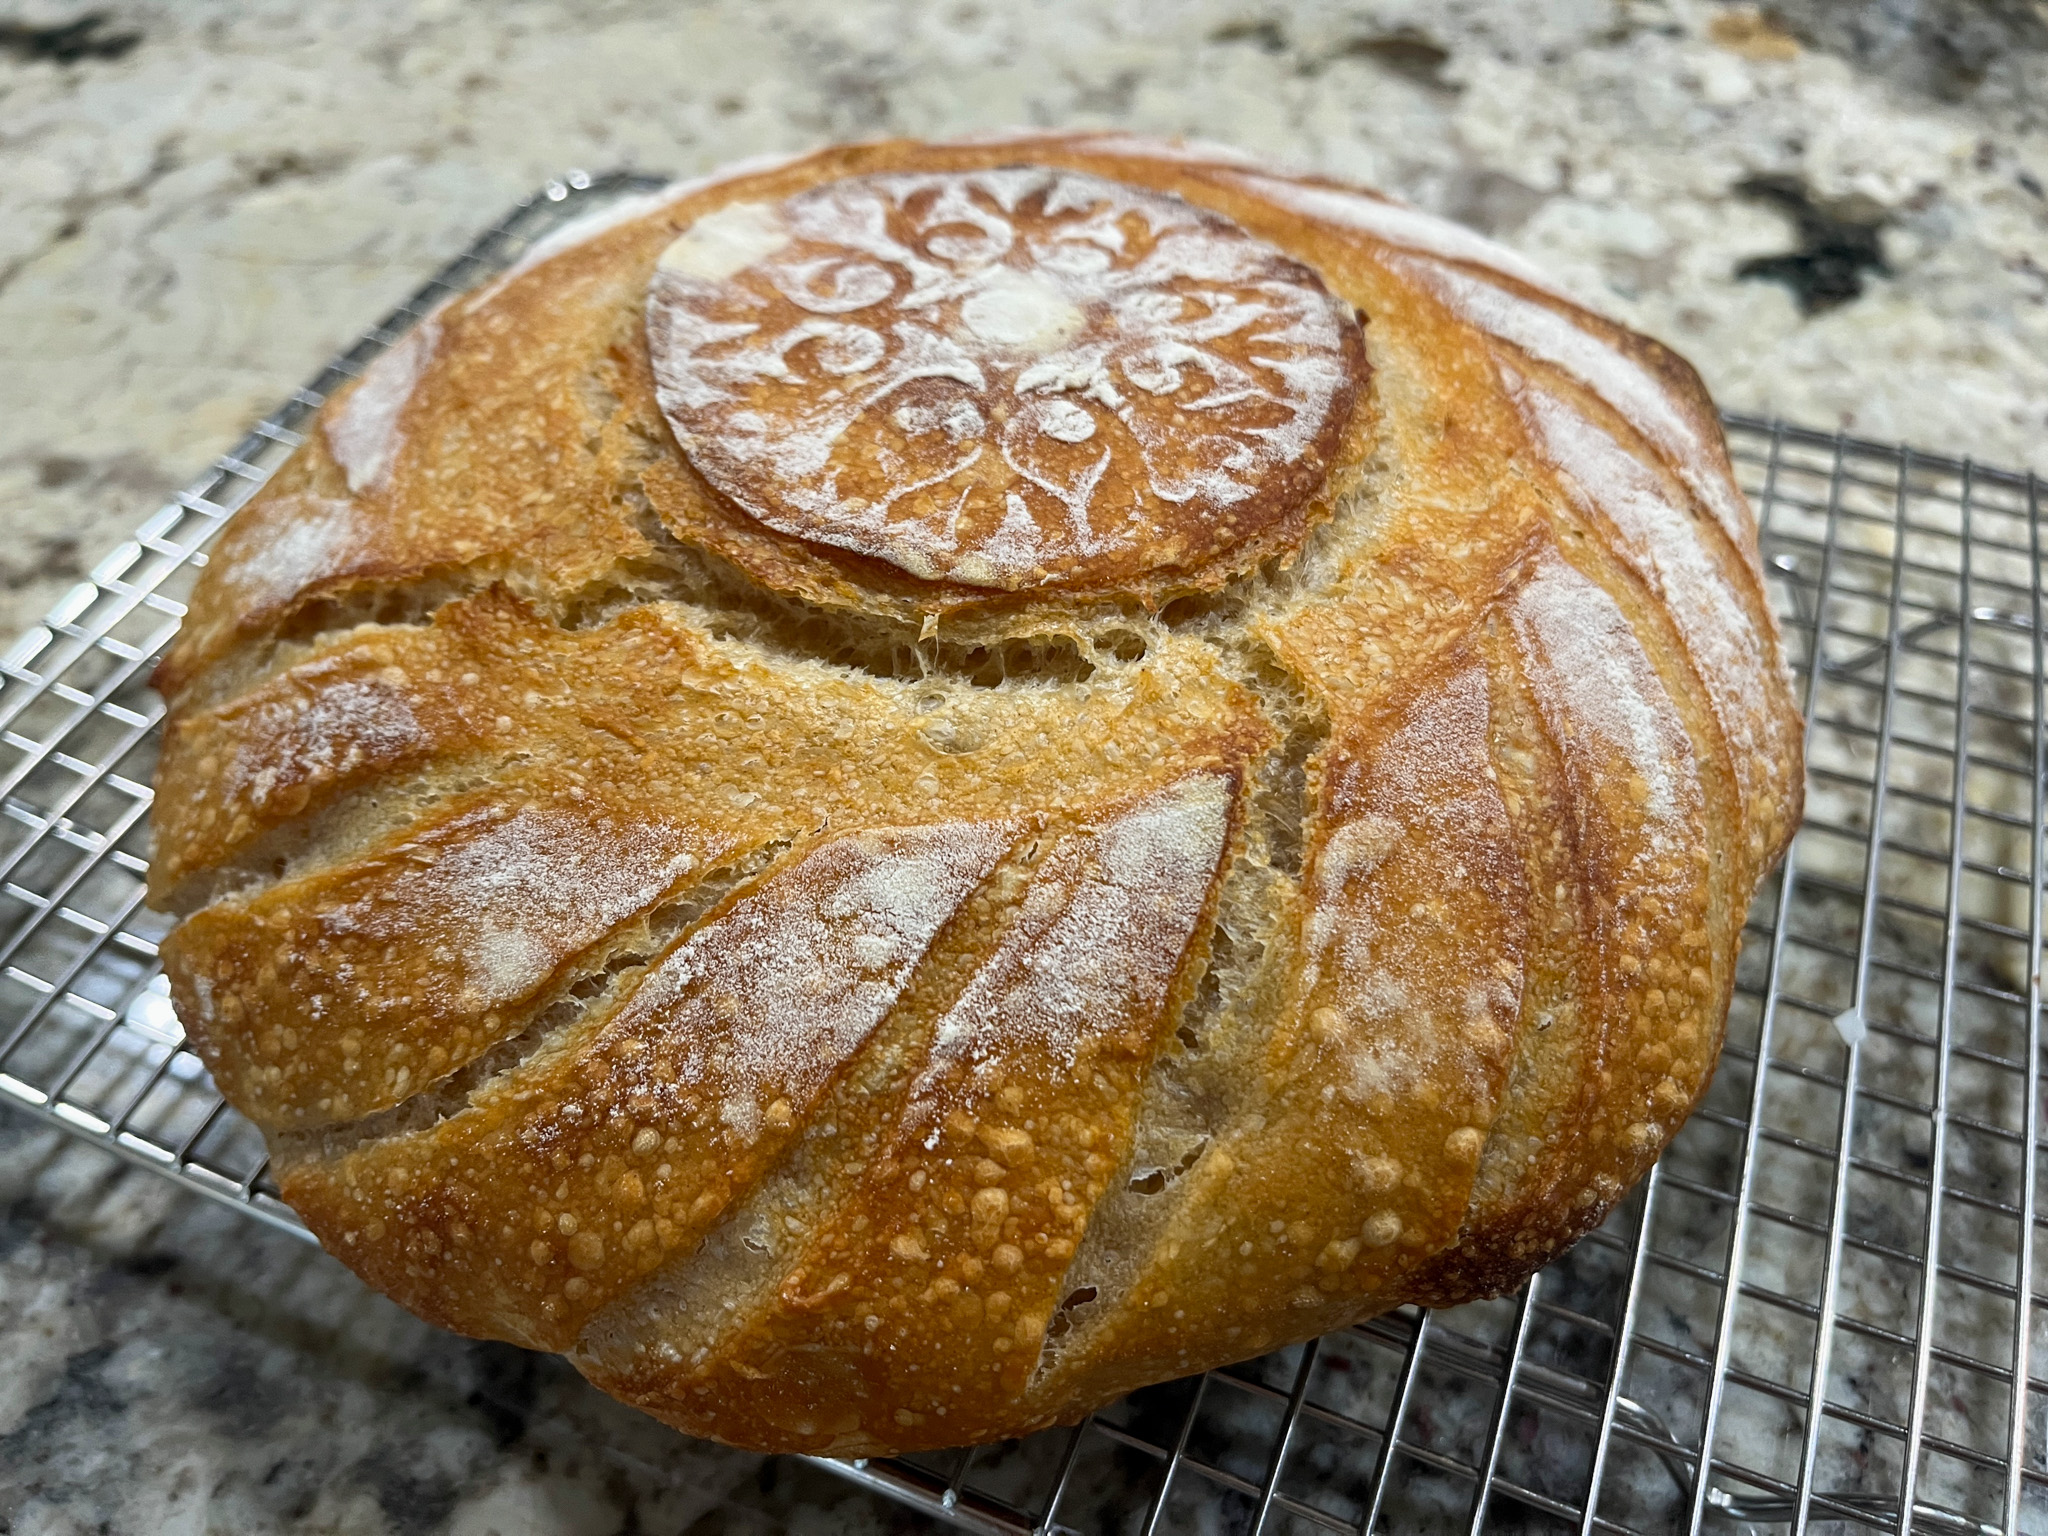
For my second loaf, I used the same recipe, but sprinkled regular white flour instead of tapioca on the surface. The contrast is a little less dramatic, but still visible.
If you like to decorate your sourdough loaves, consider these plastic stencils as a nice option. The company is locate in the UK. I bought them long before the tariffs were in place, so I am not sure how things are working at the present time.

ONE YEAR AGO: Il Pane de Vincenza
TWO YEARS AGO: Gruyere Cheese Biscuits
THREE YEARS AGO: Incredibly Simple Korean Chicken Thighs
FOUR YEARS AGO: Zucchini with Quick-Pickled Vegetables and Peanut Sauce
FIVE YEARS AGO: Nha Benta (Brazilian candy)
SIX YEARS AGO: The Best, The Very Best Hummus
SEVEN YEARS AGO: Chicken Katsu
EIGHT YEARS AGO: Whole-Lemon Marinade: Long Overdue
NINE YEARS AGO: Tomato and Cucumber Salad with Almond Vinaigrette
TEN YEARS AGO: Eggplant Tomato Stacks
ELEVEN YEARS AGO: The Couscous that Wasn’t
TWELVE YEARS AGO: Apple-Cinnamon Bread
THIRTEEN YEARS AGO: Blueberry Galette
FOURTEEN YEARS AGO: In My Kitchen, August 2011
FIFTEEN YEARS AGO: Journey to a New Home
SIXTEEN YEARS AGO: Friday Night Dinner