SECRET RECIPE CLUB: PAALAK PANEER, A FAREWELL POST

the-end11Not sure even how to break this to my readers. This will be my last post with The Secret Recipe Club. Not because I am leaving, but because the club as a whole will be shutting down. It is sad, very sad, I’ve been a member for a long time. My first post was in October 2011. Five long yeas, and I enjoyed every single month of it. But, many members were quitting, not enough new members joining, so that is that, folks. We knew about this for over a month, and I’ve been dreading this post with the bitter taste of farewell. Farewell to a good thing. Anyway, my last assigned blog was My Hobbie Lobbie, hosted by Trisha and I can say it allowed me to close this blogging chapter with a golden key. I learned so much by stalking her site, Trisha cooks a lot of authentic Indian food, a cuisine I adore but find a bit intimidating.  I had a mile-long list of stuff bookmarked, will share a few of my choices to give you a taste (pun intended) of what her site is all about.  For starters, her take on Tiramisu…   But then, she tempted me with Homemade Samosas (sigh). Or Methi Namakpare, something you probably don’t know what to make of, but jump over there to start dreaming about it.  Her take on Chicken Tikka is another show-stopper. But the one that I really wanted to make and if life was a little less frantic I would have: Chicken Biryani, the very best according to Trisha. I even bought all the ingredients to make it, just never got to it. Not yet, that is…  Another heavy contender – a very unusual daal using black chickpeas. Guess what? I found those in our Oriental market, so stay tuned, it will be on the blog sometime soon. Anyway, you can see how much I adored getting her blog for my final assignment.  Final assignment. This is really sad.

Note added after publication. For this final adventure in SRC, my blog was assigned to Sawsan, from Chef in Disguise. I woke up today to read her post that shall stay with me forever.  I am touched beyond words. If you’d like to see what she cooked from my blog (it’s a great bread!), visit her wonderful site.

paneer


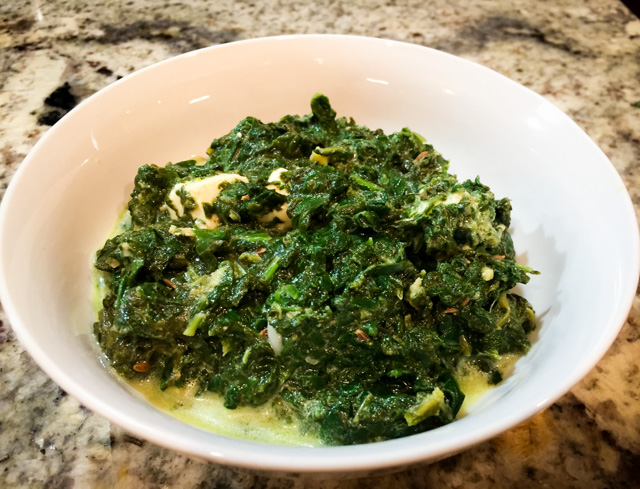
PALAAK PANEER
(slightly modified from My Hobbie Lobbie)

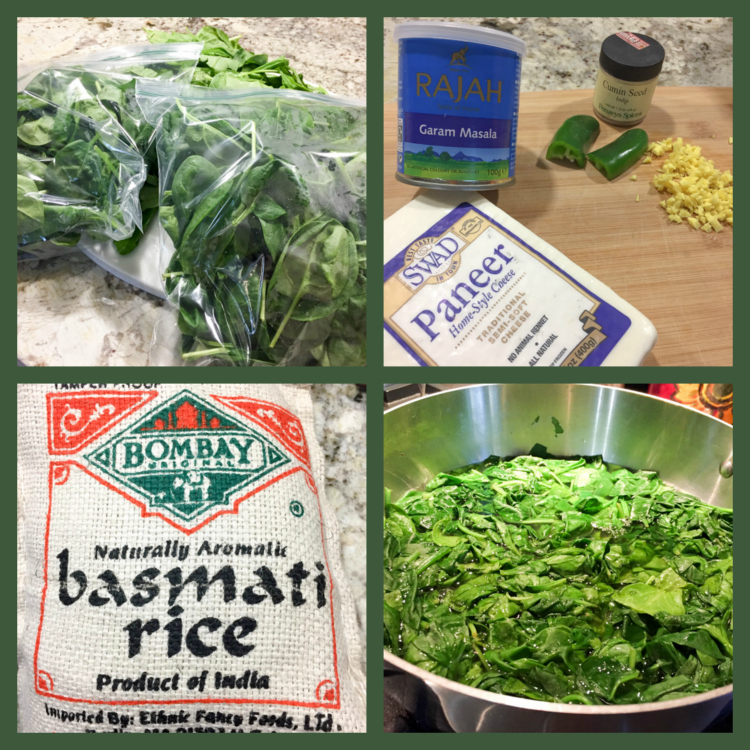
750 g spinach, washed and drained
3 tbsp vegetable oil
1 tsp cumin seeds
1 shallot, chopped
1 1/2 tbsp finely chopped ginger
1 green chile, whole
2 tsp coriander powder
250g Paneer cheese, cut into cubes
1/2 – 1 tsp garam masala powder
6 tbsp whole milk
1-2 tsp lemon juice, or to taste
Salt, to taste

Blanch the spinach in hot water till wilted. This should take about 3 minutes.

Drain using a colander and run under some cold water till it cools down. This will help maintain its lovely color and will prevent it from cooking any further. Blend it to a smooth paste and set aside.

Heat oil in a large pan. Add the cumin and fry till it is fragrant. Don’t let it burn. Add the shallot and let it fry on low heat till it turns soft. This should take about 5-6 minutes. Add the ginger  and chile and cook for another minute.
Add the coriander powder and salt and cook for 30 seconds.

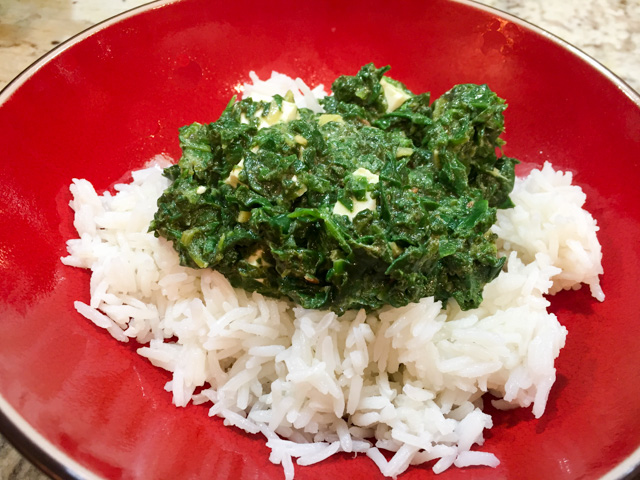
Add the spinach puree and a tiny splash of water if necessary. The puree should be loose, but not watery.  Bring this to a boil and simmer for 3 minutes. Add the garam masala powder, paneer cubes and milk. Stir and cook for a few minutes till the spinach is nice and creamy. Add lemon juice to taste. Serve over rice.

ENJOY!

to print the recipe, click here
composite
Comments: I’ve had Paalak paneer in Indian restaurants quite often. Love the stuff. The creaminess, the spices, but I never attempted to make it at home. Like sushi, palaak paneer is something I reserved for dining out. Once I got this assignment and spotted the recipe on Trisha’s site, I could not quite get it out of my mind. Plus, our Oriental market carries paneer cheese, so the trickiest ingredient involved did not pose a problem. My only advice is, get a lot of spinach. A LOT. I did not bother weighing, but I just got a lot more than I thought I needed, and that was a wise decision. I intended to  make some of her Jeera rice, but ended up serving it with normal, plain Basmati. My favorite rice in the whole wide world.

served

After we enjoyed it at dinner, there was a little bit of Paalak left. Not enough to stand on its own as a side dish. I considered adding to a frittata or omelette for my lunch next day, but then it hit me: why not use it as the flavoring base for a soufflé? At first I tried to fight that idea. The spices seemed wrong and out-of-place. But shouldn’t we try to open our horizons instead of accepting preconceptions?  I went ahead with it. Used my basic Julia Child’s method, and… one word for you: WOW!

indiansoufflee
We devoured this soufflé with abandon… it was spectacular. So, yes, I recommend that you not only make the Paalak paneer, but then save a little bit of it to use in this quite successful fusion cuisine experiment.  It was creamy, tasty, the spices made it absolutely special.

creamyDinner is served: Paalak Soufflé with grilled flank steak and mushrooms… 
Life is good!

goodnight

Well, folks this is it for the Secret Recipe Club. It was great while it lasted, that’s for sure.
Like the beautiful full moon that was shinning the night we enjoyed the Paalak Paneer…

A big thank you to the organizers, moderators, members,
that kept such great atmosphere in the background.
I had a blast with all of you.

palaak-paneer-souffle-from-bewitching-kitchen

Add to FacebookAdd to DiggAdd to Del.icio.usAdd to StumbleuponAdd to RedditAdd to BlinklistAdd to TwitterAdd to TechnoratiAdd to Yahoo BuzzAdd to Newsvine

ONE YEAR AGO: In My Kitchen, November 2015

TWO YEARS AGO: Helen Fletcher’s Oatmeal Cookies

THREE YEARS AGO: Thai-Style Pesto with Brown Rice Pasta

FOUR YEARS AGO: Shrimp with Spicy Orange Sauce

FIVE YEARS AGO:  A Simple Appetizer (Baked Ricotta)

SIX YEARS AGO: Sour Cream Sandwich Bread

SEVEN YEARS AGO: Pasta with Zucchini Strands and Shrimp

GOING NAKED… AND MY HUSBAND LOVED IT!

Obviously, I am talking naked tomatoes. Obviously. Another almost non-recipe that went from spotting on a site to preparing and blogging in record time… The source for this little gem is the video blog Food Wishes, hosted by Chef John. I’ve been following his site for a long time, he always posts interesting stuff, but I admit to rarely watching the videos. I am a very impatient person. Give me the recipe, if possible with just a photo or two, and I’m a happy camper. But, I must say whenever I watch his videos, I feel happy I did. He is a natural teacher, concise, and very witty. Anyway, these naked tomatoes intrigued me. I read his post while we were away in Portland. We landed back in town, and stopped at the grocery store on our way home. I made a beeline for the fresh produce stand. Not a single cherry tomato to be found. However, gorgeous grape tomatoes said hello to me, so I asked “do you mind if I take your clothes off?”

naked-grape-tomatoes2

NAKED GRAPE TOMATOES
(adapted from Food Wishes)

a bunch of grape tomatoes
salted boiling water
ice water bath
a little patience and loving care
extra-virgin olive oil
white balsamic vinegar (or regular balsamic, or sherry vinegar)
dried thyme to taste
salt and pepper to taste

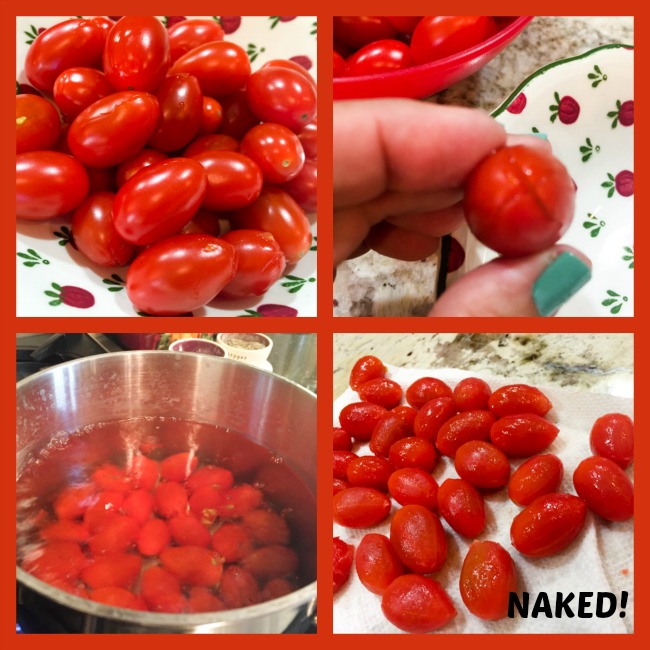
Make two very small and not too deep incisions in each grape tomato on the side opposite of the stem.

Drop them in salted boiling water for just a few seconds. The moment the skin starts to curl up, remove them quickly and dump them in ice water until cold.

Carefully peel off the skin, one by one. Be Zen. It is good for you.

Add them to a small bowl. Whisk the olive oil, vinegar, thyme (or another herb of your choice), salt and pepper. Pour over the tomatoes, cover with plastic and leave at room temperature until serving time.

ENJOY!

to print the recipe, click here

compositenaked

Comments: I will not lie to you, peeling small tomatoes is a labor of love. But worth it. If you have a dinner party, these would be amazing as appetizers. Grab a toothpick, pop one of these naked cuties in your mouth, repeat. I also envision them served over crostini, a nice smear of ricotta underneath, maybe even baked ricotta. Have you ever had baked ricotta? Here is a recipe for you, just to make things easier. Both Phil and I loved these tomatoes, the resulting texture is wonderful! The dressing, instead of slipping off the tomato skin, permeates delicately through its flesh. Is that sexy or what?

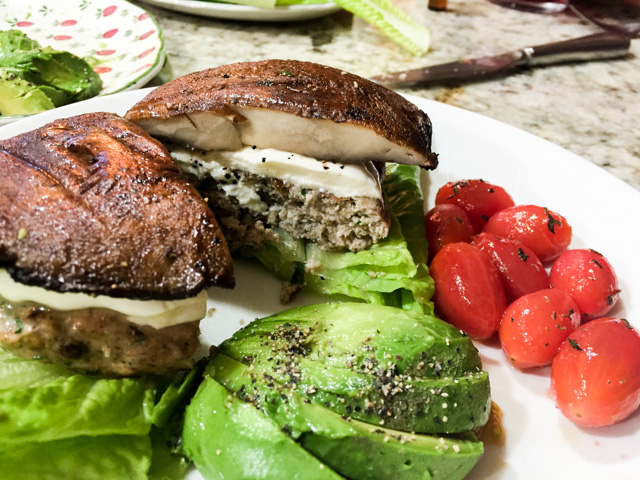
dinner-servedDinner is served: Turkey Portobello Burgers, avocados,
and Naughty Grape Tomatoes… 

naked-grape-tomatoes-from-bewitching-kitchen

ONE YEAR AGO: Cream Cheese Mini-Pancakes with Smoked Salmon

TWO YEARS AGO:  Star-Shaped Chocolate Brioche Bread

THREE YEARS AGO: Blueberry-Banana Bread 

FOUR YEARS AGO: Into the Light Again

FIVE YEARS AGO: Five Grain Sourdough Bread

SIX YEARS AGO: The Nano-Kitchen

SEVEN YEARS AGO: Kaiser Rolls

Save

RUTABAGAS ANNA

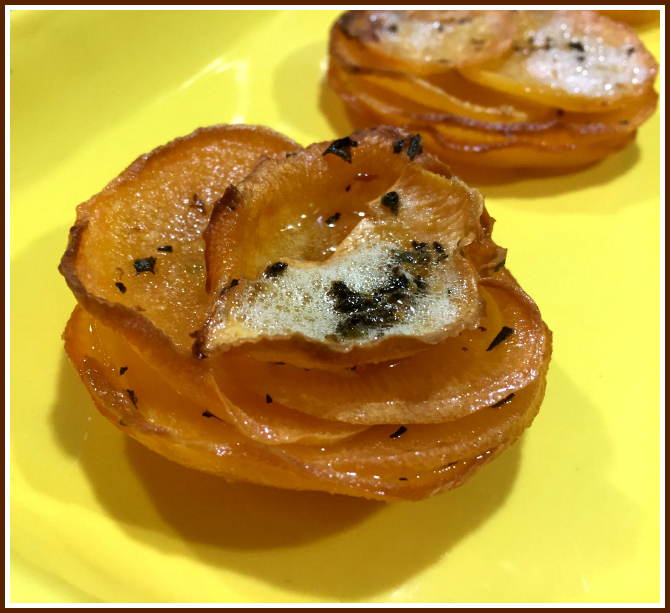
Talk about life not being fair. This poor veggie falls quite short on looks, no way to sugar coat that pill. But to add insult to injury, someone decided to name it rutabaga. I mean, c’mon!  “Go to sleep now, or the rutabaga will come and get you!” No wonder most people don’t even look at them at the grocery store. My friend Denise tells me that in England they are called swedes, a much more poetic name. I was intrigued, so a quick stroll through Wikipedia-Land brought the light at the end of the tunnel: the name has its roots in old Swedish. Rotabagge from rot (root) + bagge (short, stumpy object). so swede would be a natural choice to name these ugly ducklings.  Call it swede, rutabaga, white turnip, or snadger (yeah, that too), this recipe is absolute perfection.  I still cannot believe that two ingredients (sliced swedes and butter) plus a little seasoning could result in such a perfect side-dish. Pretty easy on the eyes too. So, get over their funky looks and unfortunate name. Bring them home, get slicing and cooking… Did I mention it is reasonably low-carb?

Rutabagas Anna1a
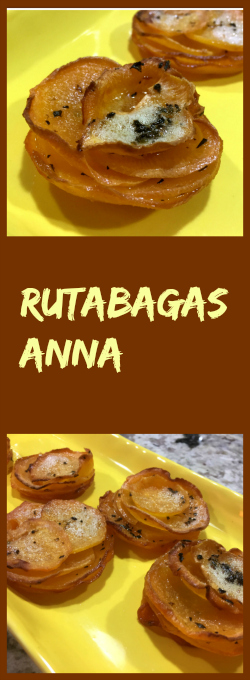
RUTABAGAS ANNA
(slightly modified from Ketogasm)

2 small rutabagas, thinly sliced
½ stick of butter
1 teaspoon dried thyme
2 teaspoons salt

Heat oven to 350 degrees. Slice rutabaga thinly using a mandolin or knife. Reserve the sliced rutabaga in a bowl. Melt the butter in a small saucepan over medium heat. Add thyme to melted butter and let it gently simmer for a couple of minutes.
.
Pour the melted butter herb mixture over the sliced rutabaga. Ensure the slices are evenly coated by rubbing them all with the butter using your hands. Gloves work wonders here…

Arrange and layer the rutabaga slices, dividing among the muffin tins, larger slices at the bottom, overlapping smaller slices on top.   Drizzle any remaining butter over your rutabaga little towers. Cover the muffin tin with foil.

Bake for 35 minutes. Remove foil. Continue baking uncovered for an additional 25-30 minutes, or until the edges are golden and crispy.

ENJOY!

to print the recipe, click here

rutabagacomposite
Comments: I found this recipe over at Ketogasm, a blog that is new to me. Being a huge fan of Potatoes Anna, but rarely indulging in it, I thought that this version with a lower-carb root veggie could be worth trying. We both loved it. The rutabaga gets very creamy, with the crusty edges offering a nice contrast, very similar to the authentic Anna. I don’t usually like to mess with classics, but there’s really nothing  bad to say about this version.  My only recommendation is to add more slices to the muffin tin than you think you’ll need. The little towers collapse a lot during baking.  Next time I’ll start with three rutabagas and make 6 individual portions. We love our leftovers, and I am not finicky about warming up in the microwave for my lunch next day.  If you’d like to serve these for company, do the first step of baking, covered, and reserve. Twenty minutes before serving, finish them uncovered.  They keep warm for quite some time.  You can add different spices, perhaps. Smoked paprika sounds great, maybe a little cumin for a Southwest flair. Great side dish, satisfying without being too heavy.

Note to self:  Try alternating slices of rutabaga and sweet potatoes,
I bet it could look and taste wonderful too!


Rutabagas Anna, from Bewitching Kitchen

.
ONE YEAR AGO: The Ultimate Raspberry Sorbet

TWO YEARS AGO: Crispy Cornmeal Sweet Potato Fries

THREE YEARS AGO: Pan-grilled Tilapia with Smoked Paprika & Avocado Cream

FOUR YEARS AGO: Golden Saffron and Fennel Loaf

FIVE YEARS AGO: In My Kitchen, July 2011

SIX YEARS AGO: Heavenly Homemade Fromage Blanc

SEVEN YEARS AGOA Perfect Sunday Dinner


ZUCCHINI NOODLES WITH SUNDRIED TOMATO PESTO

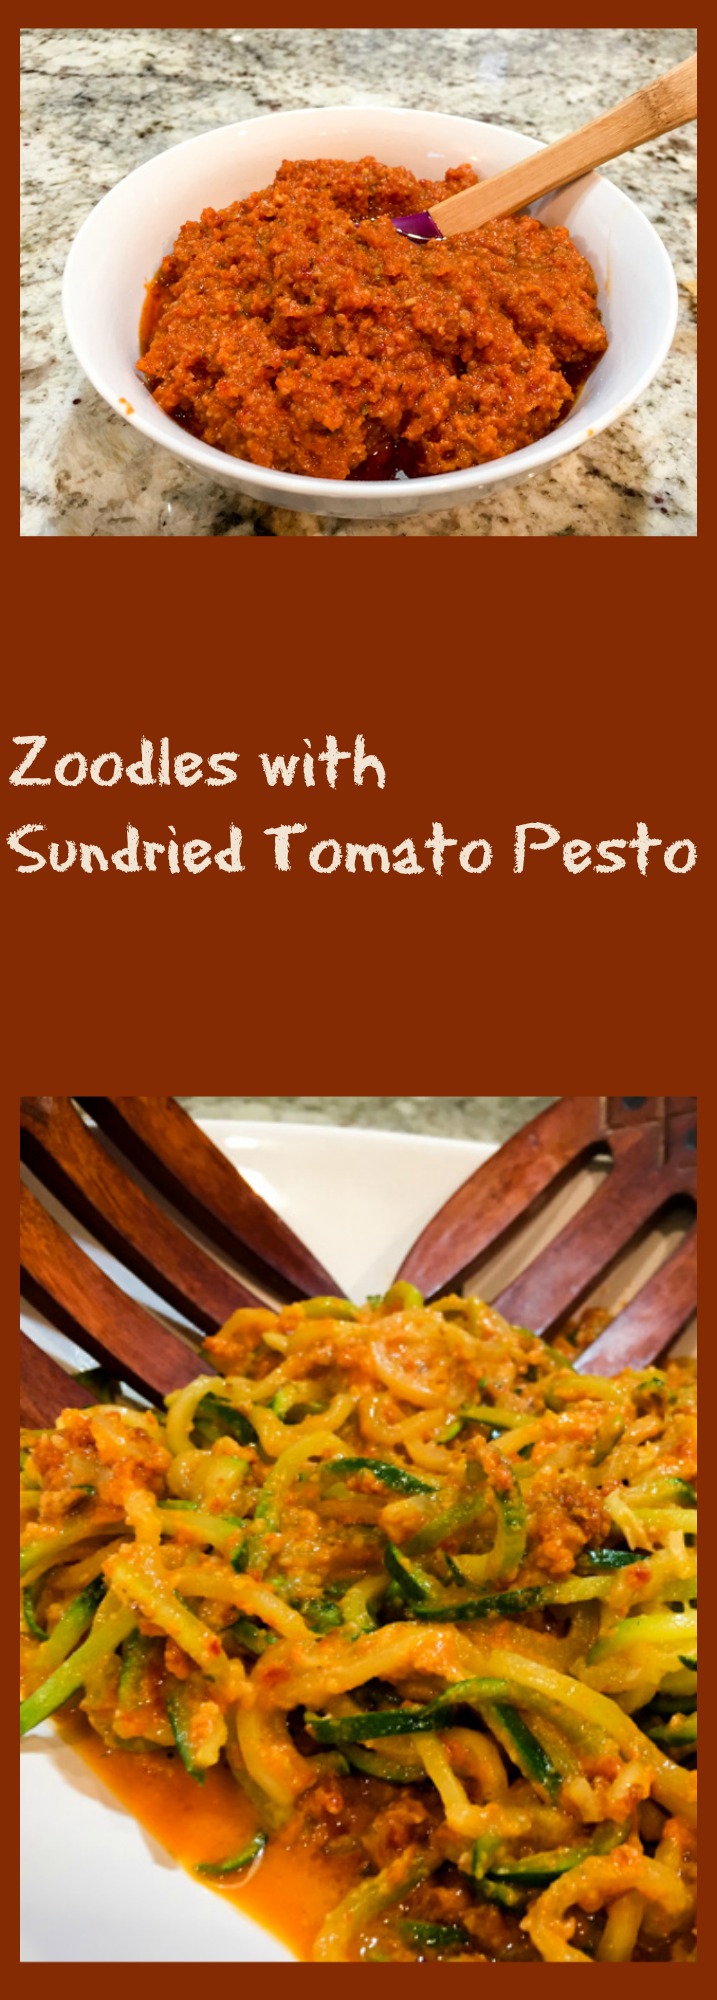
One of the best acquisitions for our kitchen was the spiralizer. It is the type of gadget that requires a little bit of getting used to. When I first got it, the idea of dragging it out of the cabinet, setting it on the countertop, and getting my technique right so that the strands would be uniformly gorgeous… seemed a bit much. But trust me, the more you use it, the better you’ll be and the more you’ll fall in love with it. Now I don’t even blink, grab it, and try it on all sorts of veggies, broccoli stalks being the most recent. Stay tuned for that one… Should I call them “broodles?” Yeah, broodles. Mind. Blown. But anyway, zucchini is probably the number one veggie that everyone uses. They have the perfect shape and give super long and beautiful strands. Plus, they marry well with so many sauces: Oriental style like soy with peanuts plus a little fish sauce to hip-it-up, tomato based sauces, cashew cream, real cream, pesto, browned butter… Today I am sharing a recipe from a favorite food blog of mine. I’ve cooked many dishes from  The Iron You. Mike raved about the combination of sun-dried tomato pesto and zoodles. He is one smart cookie. It is superb! You must try it.

ZoodlesSundried11

ZUCCHINI NOODLES WITH SUN-DRIED TOMATO PESTO
(adapted from The Iron You)

for the sun-dried tomato pesto:
½ cup  oil-packed sun-dried tomatoes, drained
⅓ cup roasted almonds
4 tablespoons grated Parmesan cheese
4 tablespoons grated Pecorino Romano cheese
small bunch of fresh basil leaves
salt to taste
4 tablespoons olive oil

for the noodles:
6 medium-large zucchini

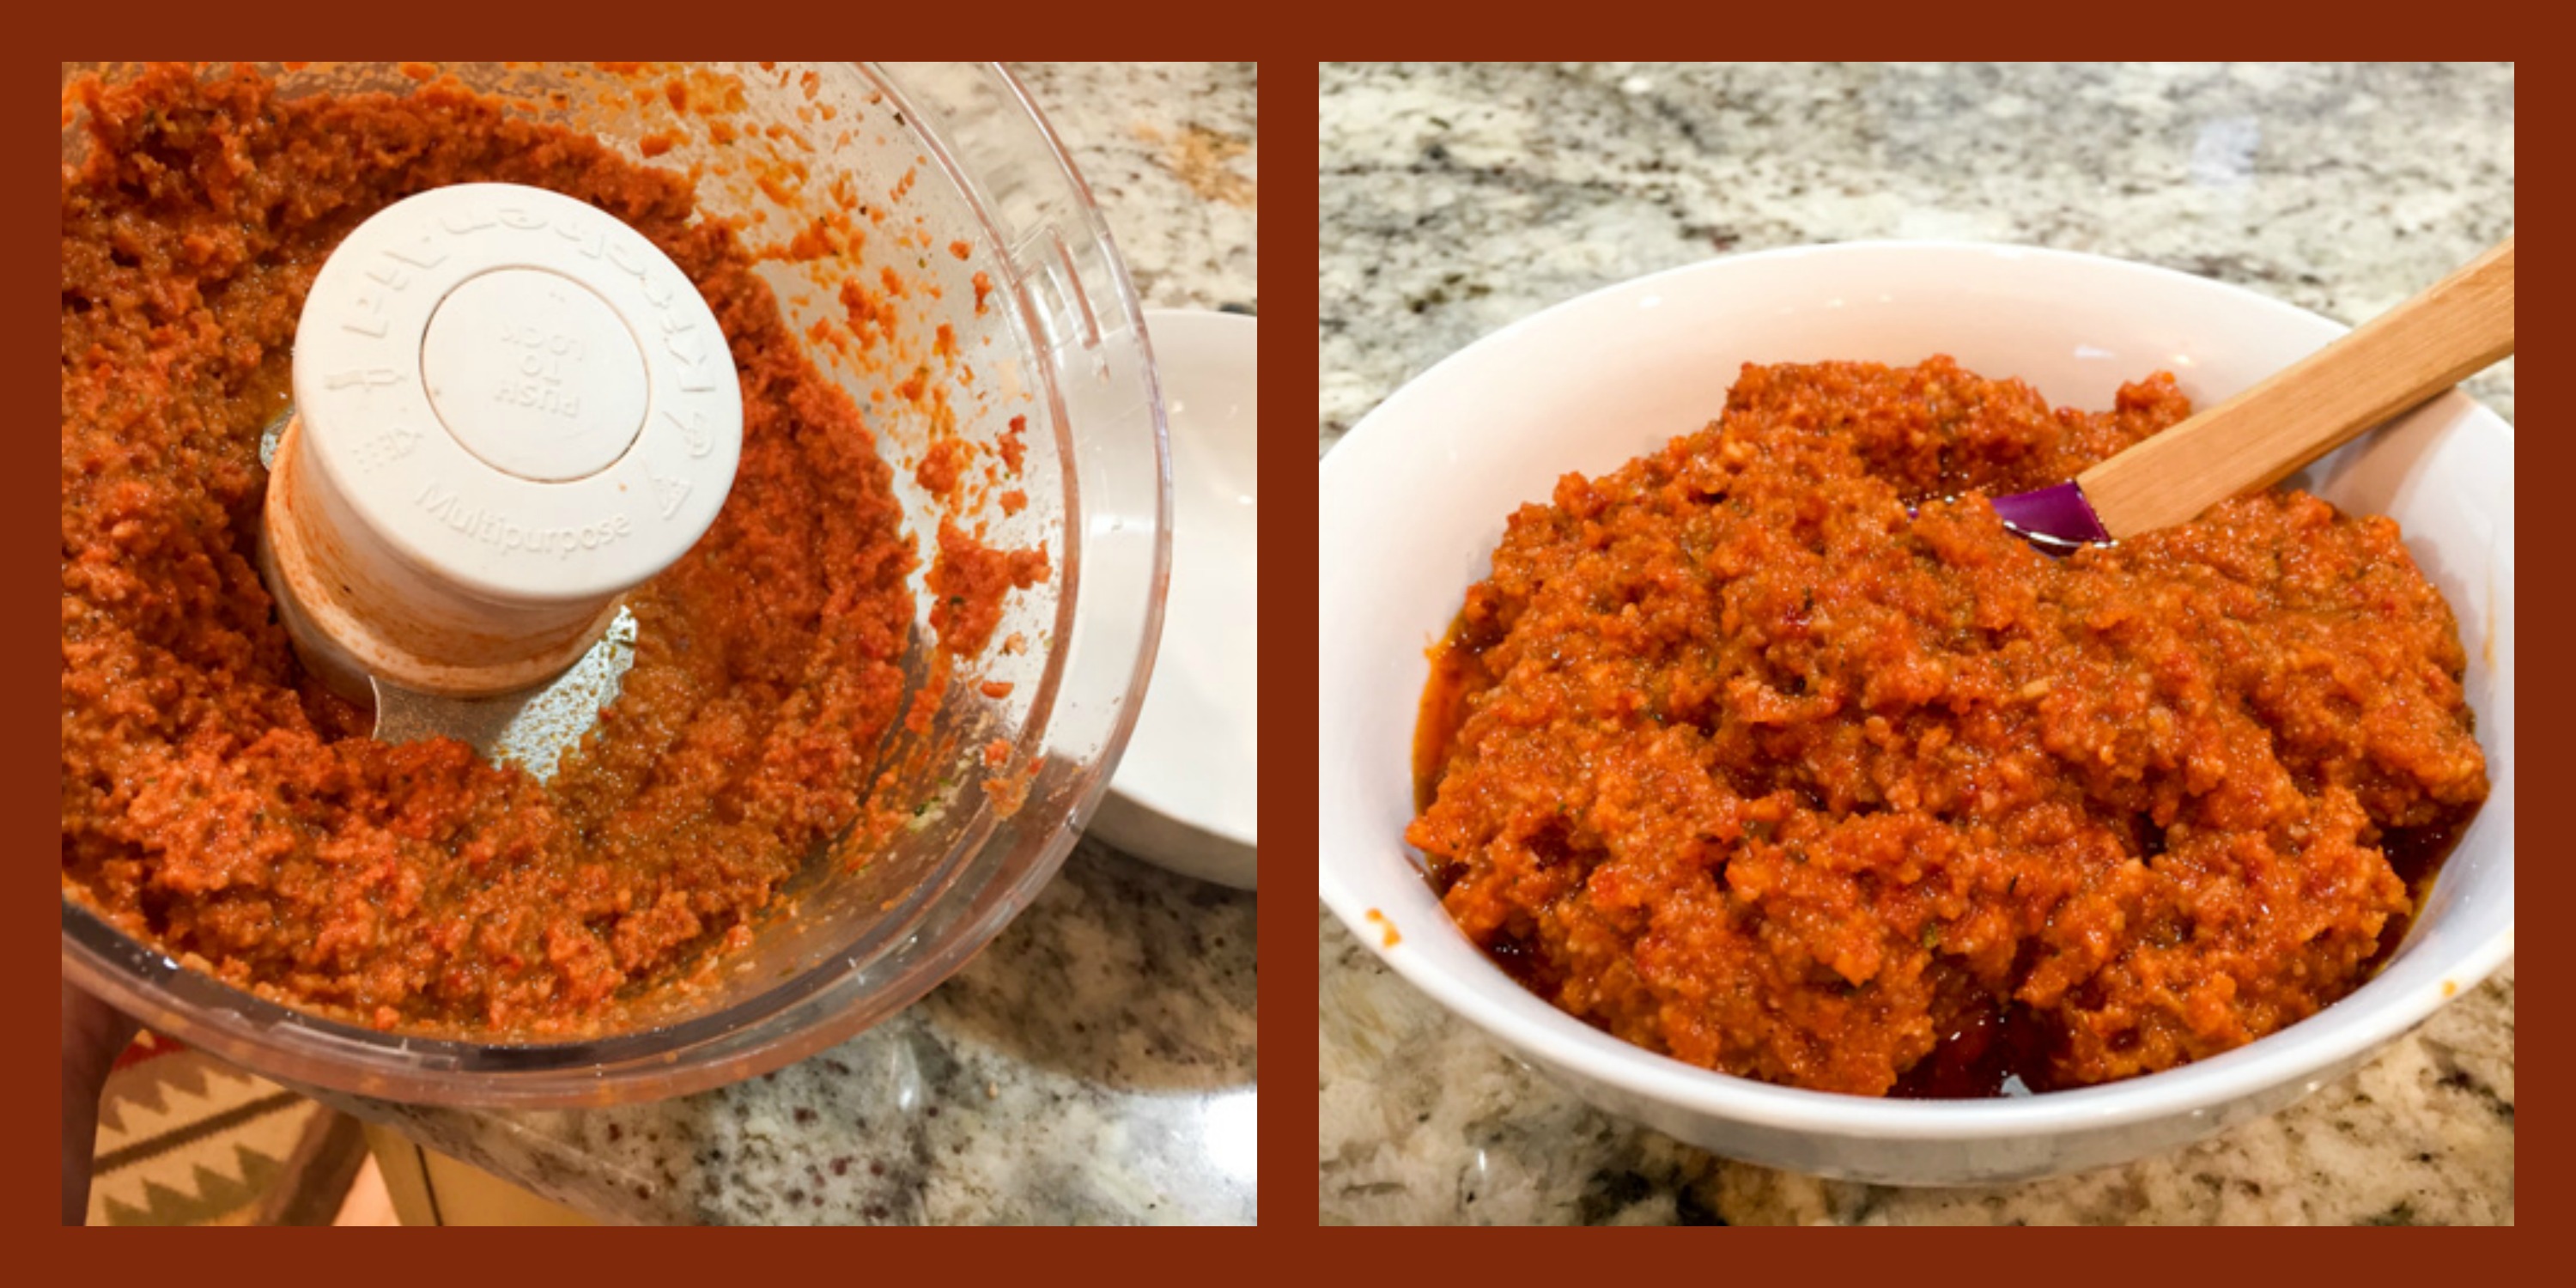
In a food processor (or blender) add roasted almonds and basil and pulse until roughly chopped. Add sun-dried tomatoes, Parmesan cheese, and Pecorino Romano cheese and process until a uniform paste has formed. Season with a little salt. With the food processor (or blender) running, stream in the olive oil and continue blending until the olive oil is emulsified into the pesto and the sauce looks uniform. Pesto can be stored in the refrigerator with a thin film of olive oil on top.

Using a spiralizer create zucchini noodles using your favorite blade, thin or thick, whatever you prefer.

Boil the zoodles in salted boiling water for 2 minutes, drain and mix with the pesto sauce while still very hot.  Sprinkle with additional Parmigiano cheese before serving.

ENJOY!

to print the recipe, click here

comp1


Comments:
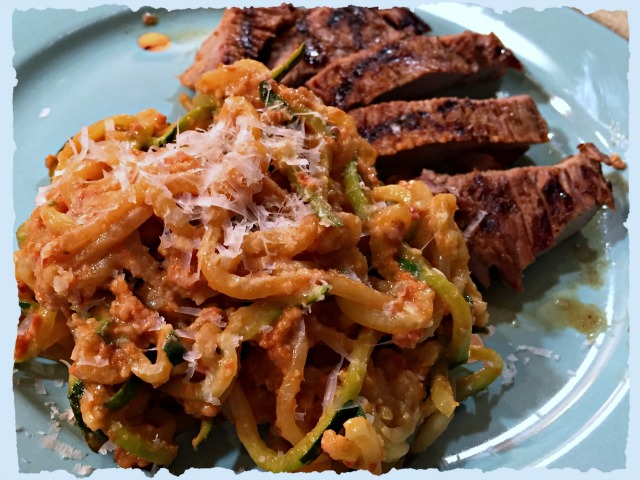
Talk about a tasty pesto!  The texture of mine was not as smooth as the one Mike made, at least from the photos, but I don’t think that matters that much. If you prefer a smoother texture, process further and maybe add a little more olive oil.  I used roasted unsalted almonds, so I adjusted the seasoning with salt. Mike used salted almonds and he also used garlic, which I am sure most of my readers will enjoy too.  I fully agree that it was a match made in heaven with the zoodles.  We enjoyed it as a side dish with grilled pork tenderloin, but of course you could make it into a fully vegetarian meal if you add a few more goodies on the plate, like roasted asparagus, a big salad, or a crostini with a smear of goat cheese run under the broiler. Yeah, that sounds about right!

served11

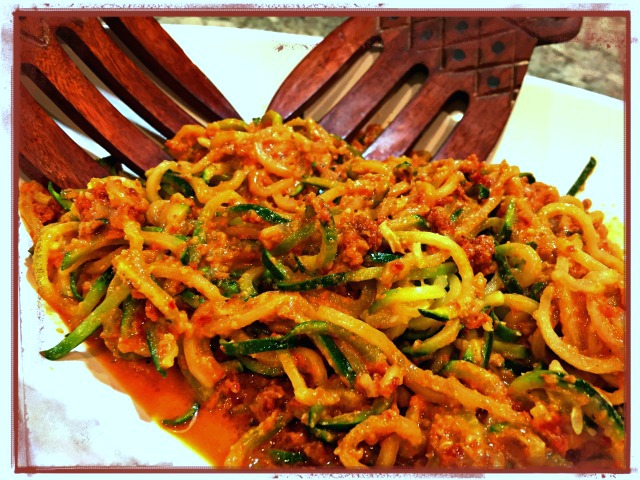
Dinner is served!


Zoodles with Sundried Tomato Pesto


ONE YEAR AGO: Caprese Salad with Toasted Walnuts

TWO YEARS AGO: Oh, my God! I think I saw something!

THREE YEARS AGO: Celebrate Wednesday with Hoisin-Grilled Chicken and Soba Noodles

FOUR YEARS AGO: The Manhattan Project

FIVE YEARS AGO: Carrot “Nib” Orzo

SIX YEARS AGO:  A Sticky Situation

SEVEN YEARS AGO:  The Garden

SECRET RECIPE CLUB: CHOC-ORANGE MINI CAKES & A BONUS RECIPE

13082596_1327954120553739_3054889855668038106_n(Reprinted with permission from Adrienne Hedger)

And here we are landing firmly in the month of May. This year is flying by, if you ask me… First Monday of the month means fun. It is Reveal Day for The Secret Recipe Club, that event in which bloggers are paired in secret and cook a recipe from their assigned site.  This month I got a food blog that was new to me: Chit Chat Chomp, hosted by Leigh, who blogs from Melbourne, a place I would love to visit one day. Leigh’s site is a thing of beauty, very stylish, elegant, amazing photos, and great prose. Basically, a must-read food blog!  She summarizes her approach to cooking in a delightful way:

Recipes inspired by my travels through France, adapted for everyday simplicity and filled to the brim with nutrition.  Mostly gluten and refined sugar-free, my recipes lean towards food that inspires, heals and nourishes, but above all else, it’s fresh, organic and simple.

Recipes inspired by my travels through France… She’s got my full attention!  In fact, she describes herself as a lover of all things French. You can imagine the smile I opened when I read that line, right?  I spent quite a bit of time stalking her blog, but jumped on a recipe right away for a reason I will classify as “The Swedish Effect.” Small parenthesis is needed.  We have an undergraduate student from Sweden in our lab called Olivia. She happened to mention that April 15th was her “name day” back home.  I was puzzled, but then learned that in Sweden each day of the year is associated with a particular name, as you can see in this site. April 15th is the name day for Olivia (girls) and Oliver (boys). Olivia said that her Grandma always gave her a nice card on that day to celebrate the occasion. So, I thought it would be cool to bake something starting with the letter O and bring to the lab on that day. Orange-Chocolate mini-cakes seemed perfect! Obviously, I jumped on the recipe with no hesitation whatsoever. But, my decision had a small problem associated with it, which led me to make a second recipe for today’s reveal. Read on…

Choc Orange Mini Cakes
ORANGE-CHOC MINI CAKES
(from Chit Chat Chomp)

Makes 6 mini-cakes

1 orange
1 cup almond meal
1 tsp baking powder
2 large eggs
1 Tbsp raw cacao powder
1 Tbsp rice malt syrup or raw honey
handful of raw cacao nibs
handful of sunflower seeds (I omitted for lack of sunflower seeds)

Heat oven to 320 F and line a mini cupcake pan with 8 cupcake papers

Place the orange in a pot and cover with water. Bring to the boil then reduce the heat to low and simmer for 1 hour. Allow to cool.

Chop the cooked orange into chunks and place in a blender and blitz until smooth. Add all other ingredients (except cacao nibs and sunflower seeds) to the blender and pulse until combined.

Divide the batter between your cupcake papers, filling close to the top as they will not rise by much, and top with the cacao nibs and sunflower seeds. Pop into the oven for approximately 30 to 40 minutes, or until a skewer comes out clean when inserted in the middle.

ENJOY!

to print the mini-cake recipe, click here

orangecakecomp
Comments: As Leigh mentioned, the only tricky part of this recipe is to boil the orange. Tricky in the sense that you need to dedicate one hour for that step. Essentially hands-free, though. The smell in the kitchen as the orange simmers…. wonderful!  Once the orange is ready and cooled down, the batter will be ready in minutes. Now, let’s talk about the “small problem.”  The recipe made six cupcakes, enough for each of our lab members to enjoy, but Phil and I could not have any. In short, I made a recipe for The Secret Recipe Club, but never got to taste it. I had only one way to restore my dignity as a blogger: choose a second recipe from Chit Chat Chomp, and make it too… and that’s what I did, so today you get two recipes instead of one. How’s that for problem solving?

Without further ado… my bonus recipe from Leigh’s great blog:

Veggie Bread

VEGGIE BREAD
(from Chit Chat Chomp)

1 + 1/2 cup almond meal
3/4 cups arrowroot flour
1/2 teaspoon sea salt
1/2 teaspoon baking soda
5 eggs
1 + 1/2 teaspoon apple cider vinegar
1 large zucchini, grated
1 large carrot, grated
1/2 cup finely grated Parmesan cheese
2 tablespoons pepitas.

Heat the oven to 325 F and line a standard loaf pan with parchment paper.

In a large bowl, mix together the almond meal, arrowroot, salt and baking soda. In a separate bowl whisk the eggs lightly with the apple cider vinegar. Add zucchini, carrot and cheese and mix well.

Add the egg mix to the dry ingredients. Mix to combine. Pour the dough into the prepared loaf tin and sprinkle with pepitas.

Bake for 35-40 minutes or until the top starts turning golden and a skewer comes out clean. Remove from the oven and transfer to a wire rack. Allow to cool for five minutes before cutting into slices.

ENJOY!

to print the Veggie Bread recipe, click here

veggiecomposite

Comments: We loved this bread! It is obviously gluten-free, no regular flour, but the texture reminded me of quick breads, except that this had considerable more moisture. Not too dense like some gluten-free breads turn out.  Leigh said it freezes well, but we did not get to test that, in three days it was gone. I enjoyed a slice at lunchtime, and was surprised that Phil did that too, he prefers his bread to be loaded with gluten. This one had so much flavor that the lack of wheat flour was not a big deal.  Once it sits in the fridge for a while, the best way to bring it back to life is toasting it…  paired with juicy tomatoes, it was out of this world delicious!

toasted

I wanted to try to make croutons out of it.  Not sautéed because I am afraid they would crumble, it is a very delicate bread. But maybe spraying the croutons with coconut or olive oil then toasting them in the oven. I bet they would turn out amazing on a kicked-up version of Caesar salad, or over a massaged kale concoction. Definitely a bread to play with.

I must say it was not easy to decide on which recipe to make as the bonus.  I really wanted to make her Savoury Muffins, not only because the recipe enticed me, but for the write-up about it. You gotta go and read it… it has to do with France…   And, if the weather was a little more appropriate, I would love a bowl of her luscious Carrot Soup… Another heavy contender was the Zucchini Noodle with Kale Pesto, which is pretty much my favorite type of meal these days.

Leigh, I loved getting your blog as my assignment this month, and feel sorry I could not taste those cute mini-cupcakes… Thinking back, I should have made a double batch, but I only thought about it after they were all baked and I had no time to boil another orange and start over. It was getting close to bedtime then… oh, well. Such is life!

Please make sure to click on the blue frog sitting patiently at the end of this post, so you can marvel at the posts that my virtual friends from Group A made for their assignments.

Adrienne, thank you again for allowing me to share your cartoon on the blog!
I love your work!

ONE YEAR AGO: In My Kitchen, May 2015

TWO YEARS AGO: P90X3, a Review of Tony Horton’s Latest Fitness Program 

THREE YEARS AGO: Pasta and Mussels in Saffron Broth

FOUR YEARS AGO: Triple Chocolate Brownies

FIVE YEARS AGO: Shanghai Soup Dumplings

SIX YEARS AGO: Bite-sized Chocolate Pleasure