THE BEWITCHING KITCHEN TURNS EIGHT: TWO MILESTONES AND A TRIPLE GIVEAWAY!

*comments are now shutdown, winner to be announced July 3rd, 11pm*

Here I am, wrapping up my eighth year of food blogging. But, are you ready for something even more amazing than that? Today, on this exact day, with this very post, I reach ONE THOUSAND ARTICLES PUBLISHED. I can hardly believe it myself… Can you imagine the odds on that? Gives me a thrill, that’s for sure. I actually noticed that those events could coincide, so I increased up slightly the pace of posting this month, lending a little helping hand to fate. Still, it deserved a very enthusiastic version of Sally’s Personal Happy Dance.  You should be grateful that there are no videos. But, to what matters most. What is a Birthday without cake? It is an idiosyncrasy. I could not allow that to happen. So, I rolled my sleeves up, took a few yogic breaths in and out, sat down on a rug staring at a candle for a full 19 seconds, and look what I baked for this party:
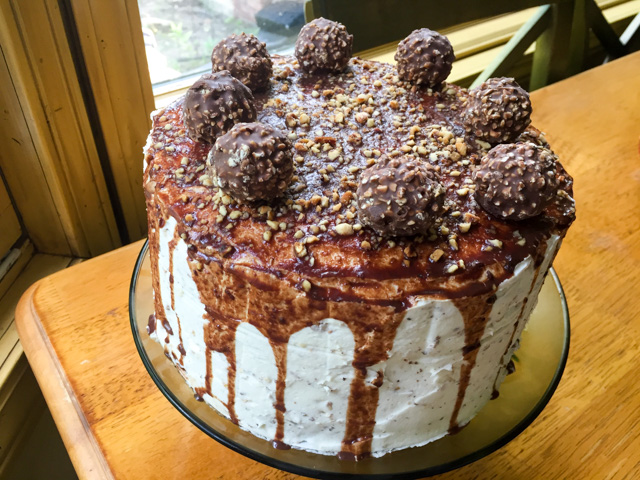
A Ferrero Rocher Cake, with – obviously – eight bonbons decorating the top. One for each year, my friends!
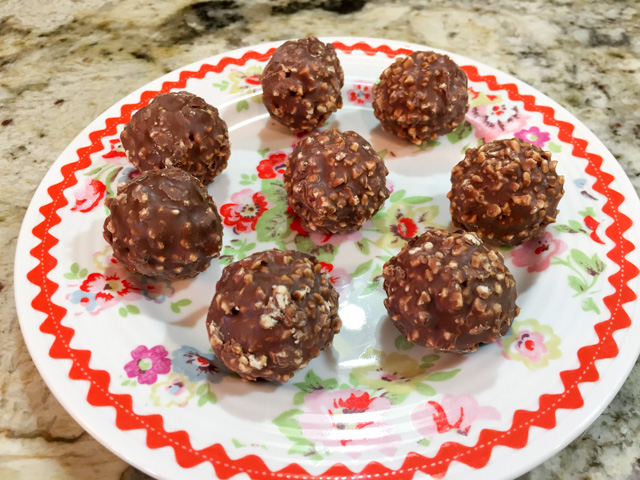
The interesting thing is that I own a pathetically large number of cookbooks. Of those, many, I repeat, many are cake cookbooks. Is this recipe from one of them? Obviously not. Why would I take the sensible path? No, not a chance. I got this recipe from the youtube channel hosted by Chetna Makan, the wonderful contestant of  The Great British Bake Off. A couple of months ago she demonstrated this Ferrero Rocher cake, making it seem easy and doable. I could not take it out of my mind. Plus, the idea of topping it with eight bonbons… how could I not go for it on this occasion? You can see Chetna in action with a click here.  And without further ado, I share with you my transcript of her recipe.

FERRERO ROCHER CAKE
(slightly modified from Chetna Makan)

for the cake component:
250g softened butter
250g caster sugar
50g melted dark chocolate
5 eggs, roughly whisked
200g self-rising flour
50g cocoa powder
1 tsp baking powder
2 Tbs milk

for the ganache:
375g dark chocolate
450mL double cream (I used heavy cream)
30g unsalted butter

for the icing:
300g salted butter, softened
600g icing sugar, divided in two equal portions
2 Tbs milk
4 Tbs finely ground hazelnuts

for the pouring ganache and decoration:
50g dark chocolate
150mL double cream (I used heavy cream)
8 Ferrero Rocher bonbons

Make the sponge cake component: prepare three 9-inch round pans by greasing them with butter and placing parchment paper on the bottom. In the bowl of a KitchenAid type mixer, combine the softened butter with superfine (caster) sugar. Beat until creamy, a couple of minutes. Add the melted chocolate, mix a few seconds.  Slowly add the eggs, a little at a time with the beater running in low-speed.  Still in low-speed, add sifted self-rising flour, cocoa powder and the additional teaspoon of baking powder.  Mix until combined, add the milk, and mix well. Pour into prepared pans and bake at 350F for about 20 minutes, until a cake tester comes out clean.

Make the ganache: place the chocolate cut into pieces in a large bowl, add very hot –  almost to the boiling point – cream, allow it to sit for a minute, then slowly mix with a spatula. When the chocolate is dissolved, add the butter. Reserve, covered with plastic wrap.

Make the buttercream icing: Add the softened salted butter to the mixer, beat with the paddle attachment until creamy. Add the sifted powdered sugar in two additions, 300g each. Mix well, then add the finely ground hazelnuts. Taste a little bit and dream. Reserve.

Assemble the cake: place the first layer to a cake stand, add the cooled ganache. Spread almost to the edges. Sprinkle diced hazelnuts all over the ganache. Place the second cake layer on top, repeat the ganache/hazelnut spreading. Place the third cake on top. Refrigerate for 30 minutes. Ice the cake with the buttercream hazelnut component. Try to make it smooth on top and sides. Refrigerate the cake for 30 minutes.

Make the pouring ganache: mix the chocolate in pieces with almost boiling heavy cream. Wait a minute or so, then stir until the chocolate is fully melted and smooth. Pour on top of the cake, allowing it to flow down its sides. Sprinkle the top with more chopped hazelnuts, decorate with Ferrero Rocher bonbons….  Place in the fridge until serving time, removing it to room temperature about 30 minutes before slicing.

ENJOY!

to print the recipe, click here

Comments: I decided to take my time to make this cake. Baking the cakes on a Saturday, making the ganache and frosting the following morning, assembling the cake in the afternoon. A well-laid plan indeed. To my delight, the cakes baked beautifully, flat and smooth. I removed them from the pans as if I was born doing it. Something we all know not to be the case. Next day the ganache and buttercream preparation went flawlessly. I was radiating self-confidence and pride. Then, I confronted the hazelnuts. A portion to be coarsely chopped, a smaller portion processed more finely. Hazelnuts are kind of expensive, so I bought them whole. That was a move to regret for as long as I live. Have you ever had to peel those pesky creatures? The skin seems to be covalently bonded to the nut. If you are not into chemistry, let me explain. Covalent bonds are strong. The atoms involved are sharing electrons, and the electrons don’t intend to stop dancing together in that complex, undetermined space. I sense an essay coming:  Implications of Sub-atomic Interactions for Cake Baking.  Anyway,  it took me 90 minutes to peel the hazelnuts. On my first innocent attempt I trusted instructions to simply roast them “and the peel will come off easily by rubbing them with a paper towel.” That is not only wrong, it is cruel. In desperation, and with two fingers burned, I googled for alternatives. Found out that if you boil them for “a couple of minutes” the peel should come off with “very little effort.” When I did that, I could hear the dancing electrons laughing at me. No intention of leaving their Covalent Gala. More google action. Found yet another set of instructions, more realistic as it included a clear warning – this method won’t be easy, but it’s by far the best way.  You do boil them, but with baking soda. A lot of it, actually (3 tablespoons for 2 cups of water). The pan will look like a witches brew, as you can see on the composite photo below. 

Get a bowl of cold water ready. After 4 minutes, grab a couple of hazelnuts with a slotted spoon and throw them in the water. Rub gently with your fingers, if the peel starts to come off, you are done. If not, keep boiling them, stirring constantly in low heat, otherwise you will have a very epic mess  on your stove (no need to ask me how I know). Once you reach the point of peels starting to come out,  drain the whole batch and shock them all in cold water. Peeling them will still be a labor like no other. Messy and long-lasting. An ordeal that I do not wish on anyone. In fact, I tell you what a great concept for hell could be. A place where you spend your full day peeling hazelnuts. In the background, the song “Don’t worry, be happy” plays non-stop. Once you are done, you can go to sleep, but not before watching Titanic, beginning to end. That is hell. Hazelnuts, Bobby McFerrin & Titanic, day in, day out.
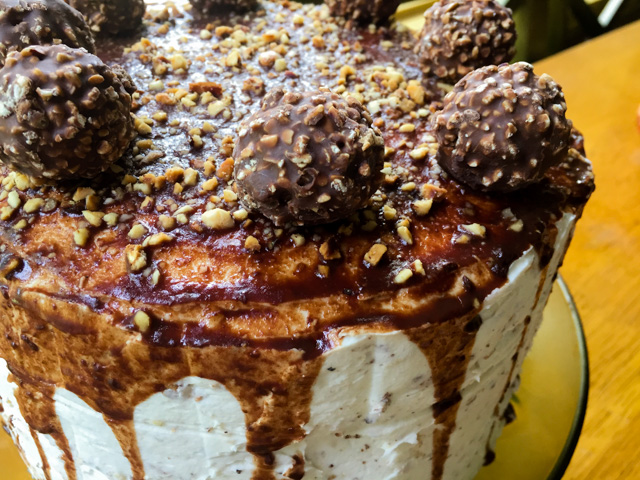
But was it worth all the trouble? Oh, yeah! I tell you one thing, the icing with the finely ground hazelnuts is to die for, some serious deliciousness in taste and texture. If you like Ferrero Rocher, this cake is the ultimate celebration of it. The creaminess of the ganache, its intense chocolate taste echoed by the sponge cake. A real winner. Now, if you watch Chetna’s video, you’ll notice that her pouring ganache ended up thicker than mine. I think it’s a matter of the ingredients used. She used double cream, easily available in the UK, I had to go with our regular whipping cream. If I knew my way around baking, I would probably adapt it, perhaps using a higher proportion of chocolate. At any rate, I am happy with the way it turned out. Also, a warning: the ganache makes more than you’ll need. Chetna baked four cakes, I went with three, slightly larger. But trust me, you can use the leftover ganache in many tasty ways. Macaron filling? Yesssss!  Stirred into the morning cappuccino? Oh, yessssss…

So here I am, at the eight year mark! According to Foodista, 8% of the blogs make it to six years, no statistics available for food blogs older than that. What matters is that I am still having fun, and intend to keep going, so if you’d like, step with me into the 9th year of adventures in our kitchen.

source Foodista

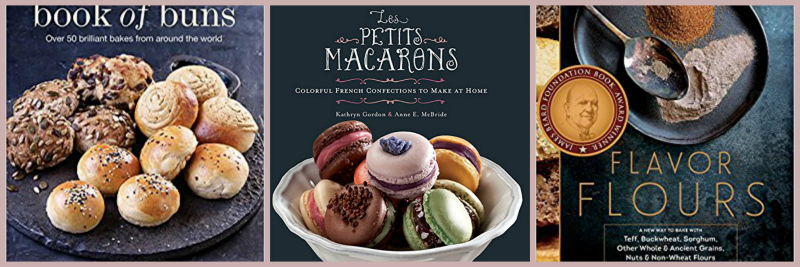
To celebrate my special double milestone, I am offering a triple giveaway!  Three cookbooks that deal with some of my passions. The Book of Buns, a delightful publication that covers all sorts of breads, from simple to more complex. Second, Les Petits Macarons, because… how could I not include this colorful obsession of mine? And finally Flavor Flours, in my opinion the best cookbook for gluten-free baking. If you follow my blog, you know I don’t have any dietary restrictions. But recipes that try to adapt classics to gluten-free alternative versions fascinate me.  I’ve made quite a few of her recipes, and they were all top-notch. Alice Medrich does her homework before coming up with a recipe.
If you’d like to enter this giveaway, just leave a comment, and I’ll draw the winner on June 30th, announcing it the day after. I intend to give the books either as real hard copies (for those living in the USA), or as Kindle copies to those anywhere else in the world. Of course, if you live in the US but rather have the virtual versions, let me know.


Grab a pin to celebrate!

Add to FacebookAdd to DiggAdd to Del.icio.usAdd to StumbleuponAdd to RedditAdd to BlinklistAdd to TwitterAdd to TechnoratiAdd to Yahoo BuzzAdd to Newsvine

ONE YEAR AGO: The Bewitching Kitchen Turns Seven!

TWO YEARS AGO: Bewitching Kitchen Turns Six!

THREE YEARS AGO: The Bewitching Kitchen turns Five!

FOUR YEARS AGO: The Bewitching Kitchen turns Four!

FIVE YEARS AGO: The Bewitching Kitchen Turns Three! 

SIX YEARS AGO:  The Bewitching Kitchen turns Two!

SEVEN YEARS AGO:  Bewitching Birthday!

EIGHT YEARS AGO: Welcome to my blog!

SaveSave

SaveSave

SaveSave

SaveSave

SaveSave

SaveSave

SaveSave

SaveSave

SaveSave

SaveSave

SaveSave

SaveSave

SaveSave

SaveSave

SaveSave

SaveSave

SaveSave

SaveSave

SaveSave

SaveSave

SaveSave

SaveSave

SaveSave

SaveSave

SaveSave

SaveSave

SaveSave

SaveSave

SaveSave

SaveSave

SaveSave

SaveSaveSaveSave

SaveSave

Save

SaveSave

SaveSave

SaveSave

SaveSaveSaveSave

SaveSave

SaveSave

LEMON BUTTERCREAM MACARONS

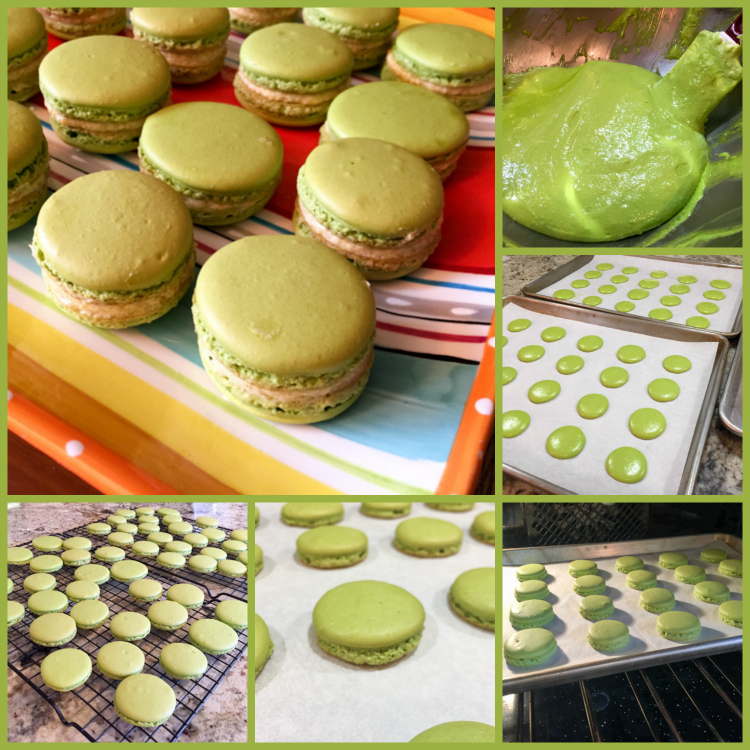
I baked this batch back in February, evidently I took my sweet time (pun intended) to blog about them. The recipe is the same basic one I’ve been using from the Craftsy tutorial. I want to feel totally comfortable with it before moving to the Italian version. To get this color, I used a mixture of green and yellow gel coloring, but it’s hard to be precise about the amounts. I added a little bit of the green, mixed, added a little more, then some yellow, and gave a thorough mix. Crossed my fingers and hoped that the color would stay true during baking. You just never know. Not a single shell cracked, and all formed cute feet. What more can a baker ask to the Macaron Gods? Not much. Maybe uniformity in size? Yeah, that would be nice…


LEMON BUTTERCREAM MACARONS
(from the Bewitching Kitchen, adapted from Crafsy)

for the shells:
198 g powdered sugar
115 g almond meal
113 g egg whites (aged for three days)
a pinch of cream of tartar
100 g granulated sugar
Green and Yellow Gel colors from AmeriColor
2 drops vanilla extract

for the filling:
3 eggs
1 cup (200 grams) sugar
grated zest from 2 large lemons
juice of 2 large lemons
1 cup plus 2 tablespoons (230 g) chilled butter, cut in pieces

Line 3 heavy baking sheets with parchment paper or Silpat mats. Layer the powdered sugar, almond meal and lavender in a food processor or mini processor. Pulse until the mixture looks like fine meal, about 15 seconds. Pass through a sieve and transfer to a small bowl. Set aside.

Place the egg whites and pinch of cream of tartar in the bowl of a stand mixer fitted with the whisk attachment. Make sure that the bowl and the whisk are impeccably clean. Starting on medium speed, whip the whites with the cream of tartar until they look like light foam. The whites should not appear liquid. The foam will be light and should not have any structure.

Slowly rain in the granulated sugar, trying to aim the stream between the whisk and the side of the bowl. Turn the speed up to medium-high. Continue to whip the meringue until it is soft and shiny. It should look like marshmallow creme. Add the gel colors and the vanilla. Staying at medium-high speed, whip the egg whites until the mixture begins to dull and the lines of the whisk are visible on the surface of the meringue. Check the peak. It should be firm. Transfer the whites to a medium bowl.

Fold in the almond meal mixture in three increments. Paint the mixture halfway up the side of the bowl, using the flat side of a spatula. Scrape the mixture down to the center of the bowl. Repeat two or three times, then check to see if the mixture slides slowly down the side of the bowl. Put the mixture in a piping bag fitted with a Wilton #8 tip or another kind of your preference. Pipe rounds of the batter.

Slam each sheet hard four to six times on the counter. Then fist bump each end of the sheet’s underside twice. Let the unbaked macarons dry until they look dull but not overly dry. Drying time depends on humidity. Ina dry climate, the macarons can dry in 15 to 20 minutes; in a humid climate, it can take 35 to 40 minutes.

While the macarons are drying, heat the oven to 330 F (170 C/gas mark 3). Bake one sheet at a time on the middle rack. Check in 11 minutes. If the tops slide, then bake for 2 to 3 more minutes. The macarons should release without sticking. Check one or two. If they stick, put them back in the oven for 1 to 2 more minutes. Let the macaroons cool for 10 minutes before removing from the pan.

Make the filling: Beat together the eggs and the sugar with a Kitchen Aid type mixer on high-speed. Try to get the butter to double in volume by beating. Transfer to a saucepan and add the lemon zest and juice. Stir until it thickens slightly and all liquid is incorporated.  Pour the mixture into a bowl, cover with plastic wrap and cool in the fridge.

Once the lemon mixture is cold, put back into the bowl of the mixer, and beat with the wire whisk for a couple of minutes. Start adding the pieces of chilled butter, whipping until incorporated.  The mixture is now ready to be used to fill the shells.

Assemble the macarons: find two macarons similar in size and add a good amount of filling to the bottom of one of them. Place the other on top and squeeze gently to take the filling all the way to the edge.  Ideally, store in the fridge for 24 hours before savoring them.

ENJOY!
to print the recipe, click here

Comments: I made this batch before my dear niece Raquel sent me the macaron Silpat that I showcased in the Black Sesame Macarons post. The mat does make it a lot easier to get baking, as there’s no need to draw circles in parchment. Place the silpat over the baking sheet and off you are to a good start.  The lemon buttercream turned out very good to balance the sweetness of the shells. If you’d like to make it even easier, get some lemon curd from the store, but I imagine the texture is not as pleasing as homemade buttercream.

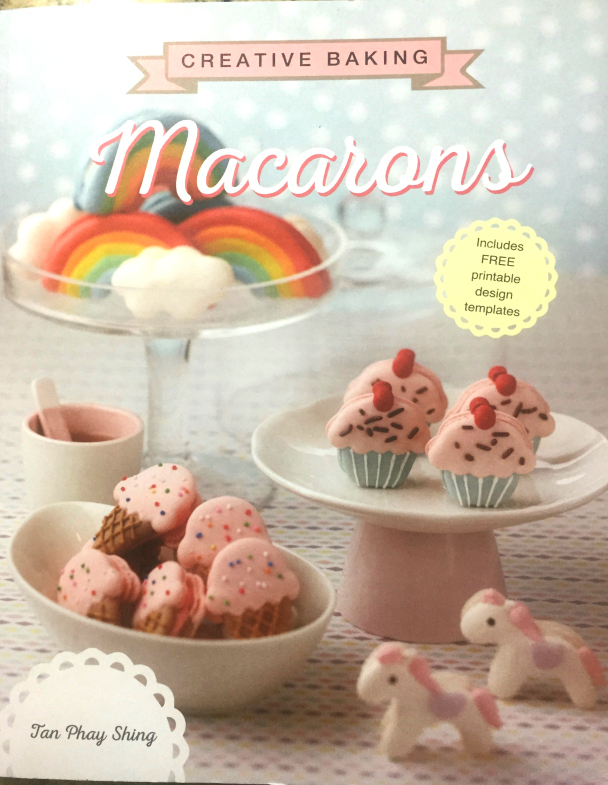
I must say that now I am not sure what I enjoy more, baking bread or macarons. They can easily turn into a bit of an obsession. And when you are obsessed, you tend to order special cookbooks. Such as….

order from amazon with a click here
(side note: I am not affiliated to amazon.com)

This is a more advanced macaron book. Can you imagine little macaron horses? I am not ready to face fancy shapes yet, but it’s fun to dream… It all starts with a dream, you know…

😉

Add to FacebookAdd to DiggAdd to Del.icio.usAdd to StumbleuponAdd to RedditAdd to BlinklistAdd to TwitterAdd to TechnoratiAdd to Yahoo BuzzAdd to Newsvine

ONE YEAR AGO: Raspberry Buckle

TWO YEARS AGO: Seafood Gratin

THREE YEARS AGO: Black Bean and Pepper Jack Burger

FOUR YEARS AGO: Carrot and Sesame Sandwich Loaf

FIVE YEARS AGO: Border Grill Margaritas

SIX YEARS AGO: Goodbye L.A.

SEVEN YEARS AGO: Vermont Sourdough


SaveSave

SaveSave

SaveSave

SaveSave

SaveSave

SaveSave

SaveSave

SaveSave

SaveSave

SaveSave

SaveSave

SaveSave

SaveSave

SaveSave

SaveSave

SaveSave

BANANA BREAD WITH ESPRESSO GLAZE

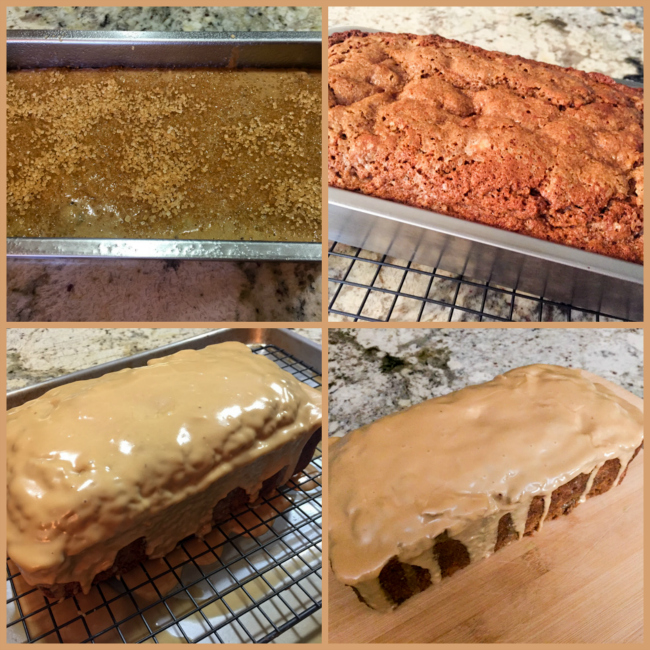
There is no shortage of banana bread recipes in the universe. So, why would I share one more? Because it’s a great version, the icing takes it to unprecedented levels of deliciousness. The idea of pairing banana bread with coffee is superb, if you’ve never considered it, trust me, it has potential to become a classic. Like chocolate and coffee. I spotted this recipe back in January on the blog How Sweet It Is, hosted by Jessica. I made it not too long after her post was published, but as usual it is taking me a while to share with you. Two details make it special, a delicate layer of sugar sprinkled on top before baking, and of course, the glaze in all its caffeinated glory.

BANANA BREAD WITH ESPRESSO GLAZE
(from How Sweet It Is)

for the bread:
1 + 2/3 cups whole wheat pastry flour
1 teaspoon baking soda
1 teaspoon espresso powder
1/2 teaspoon salt
1/4 teaspoon cinnamon
2 large eggs
1 cup loosely packed brown sugar
1/3 cup milk
1/2 cup coconut oil, melted and slightly cooled
4 very ripe bananas, mashed
1 teaspoon vanilla extract
coarse sugar, for sprinkling (I used turbinad0)

for the espresso glaze:
1 + 1/2 cups powdered sugar
2 ounces freshly brewed espresso
1 teaspoon milk
1/2 teaspoon vanilla extract

Heat oven to 325 degrees F. Spray a 9×5 inch loaf pan with nonstick spray.

In a small bowl, whisk well the flour, baking soda, cinnamon and salt. In a large bowl, whisk together the eggs and brown sugar until smooth. Add the milk and coconut oil, mixing until combined. Stir in the mashed bananas and vanilla extract. Slowly stir in the dry ingredients and mix until just combined. Pour batter in the greased loaf pan. Top with coarse sugar.

Bake for 75 to 85 minutes, or until the center is set. If the streusel begins to brown, tent the bread with aluminum foil. Remove the bread and let it cool in the pan for 20 minutes. Turn the bread out on a plate or cutting board and let it cool completely before glazing.

Whisk together the ingredients until a smooth, drippy glaze forms. If the mixture is too thin, you can thicken it by adding a little more powdered sugar. If it seems too thick, add 1 teaspoon of milk at a time, whisking to combine. Pour it over the banana bread and let it set for at least 30 minutes before slicing it.

ENJOY!

to print the recipe, click here

Comments: The glaze… the glaze…  as Jessica wrote in her post, it’s all about the glaze. Or almost, because the banana bread itself is pretty delicious too, with the added sugary topping, which oddly enough does not make it overly sweet. But the glaze… am I repeating myself? The glaze, you must collect what puddles underneath the rack as you ice this beauty. Collect it, save it in a little bowl. No need to offer to guests, it won’t be fancy enough for that. Just keep it in the fridge, and when no one is looking, you go there with a tiny little spoon and scrape a little bit off. Then savor it, eyes closed. Seriously good stuff.

As usual, I took this batch to the department, and even a person who is not at all fond of coffee stopped to make enthusiastic compliments about the bread. Or cake. I am always confused, banana bread looks a lot more like cake in loaf form than bread. But, I won’t disturb the apple cart. Or banana cart. Or any cart, for that matter.

Make this bread, make this glaze, and go thank Jessica for it! 

ONE YEAR AGO: Slow-Cooker Carnitas & Paleo Planet Cookbook Review

TWO YEARS AGO: The Making of a Nobel Reception

THREE YEARS AGO: Fennel Soup with Almonds and Mint 

FOUR YEARS AGO: Green Curry Pork Tenderloin

FIVE YEARS AGO: Farfalle with Zucchini and Ricotta

SIX YEARS AGO: Slow-baked Salmon with Lemon and Thyme

SEVEN YEARS AGO: Hoisin Explosion Chicken


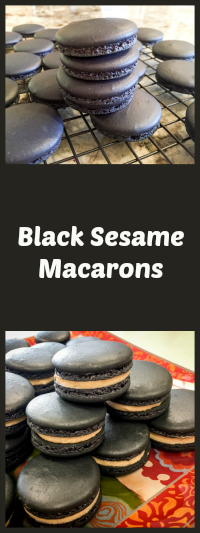
BLACK SESAME MACARONS

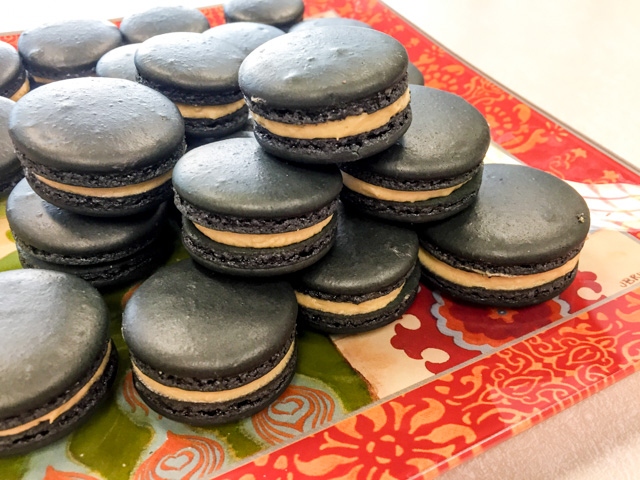
My macaron obsession goes on and on. I would love to bake a batch each weekend, but must keep in mind that even the most understanding departmental colleagues might say enough is enough. Plus, if I only make macarons…  brownies, cakes, and cookies will get jealous. So here I am to share with you a batch I am quite proud of: Black Sesame Macarons. Because, although I’m addicted to colors, we all know that black is beautiful…


BLACK SESAME MACARONS
(from the Bewitching Kitchen)

for the shells:
198 g powdered sugar
100 g almond meal
15 g black sesame powder (or you can grind black sesame seeds to a powder)
113 g egg whites (aged for three days)
1 g or a pinch of cream of tartar
100 g granulated sugar
Black Gel color  (about 1/2 teaspoon, add 1/4 to start and adjust as you mix)
for the filling:
8oz (227g) cream cheese
⅔ cup (134g) brown sugar
1 tsp (5g) vanilla extract
½ cup (122g) heavy whipping cream

Line 2 or 3 heavy baking sheets with parchment paper or Silpat mats. Layer the powdered sugar, almond meal and black sesame powder in a food processor or mini processor. Pulse until the mixture looks like fine meal, about 15 seconds. Pass through a sieve and transfer to a small bowl. Set aside.

Place the egg whites and pinch of cream of tartar in the bowl of a stand mixer fitted with the whisk attachment. Make sure that the bowl and the whisk are impeccably clean. Starting on medium speed, whip the whites with the cream of tartar until they look like light foam. The whites should not appear liquid. The foam will be light and should not have any structure.

Slowly rain in the granulated sugar, trying to aim the stream between the whisk and the side of the bowl. Turn the speed up to medium-high. Continue to whip the meringue until it is soft and shiny. It should look like marshmallow creme. Add the gel color and the vanilla. Staying at medium-high speed, whip the egg whites until the mixture begins to dull and the lines of the whisk are visible on the surface of the meringue. Transfer the whites to a medium bowl.

Fold in the almond meal mixture in three increments. Paint the mixture halfway up the side of the bowl, using the flat side of a spatula. Scrape the mixture down to the center of the bowl. Repeat two or three times, then check to see if the mixture slides slowly down the side of the bowl. Put the mixture in a piping bag fitted with one of the tips listed above. Pipe on the prepared baking sheets.

Slam each sheet hard four to six times on the counter. Then fist bump each end of the sheet’s underside twice. Let the unbaked macarons dry until they look dull but not overly dry. Drying time depends on humidity. In a dry climate, the macarons can dry in 15 to 20 minutes; in a humid climate, it can take 35 to 40 minutes.

While the macarons are drying, heat the oven to 330 F (170 C). Bake one sheet at a time on the middle rack. Check in 11 minutes. If the tops slide, then bake for 2 to 3 more minutes. The macarons should release without sticking. Check one or two. If they stick, put them back in the oven for 1 to 2 more minutes. Let the macaroons cool for 10 minutes before removing from the pan.

Make the filling:Whip the cream in a clean bowl till stiff peaks. In another bowl, whip the cream cheese, sugar, and vanilla extract.   Gently fold in the whipped cream into the bowl until well combined. Reserve.

Assemble the macarons: find two macarons similar in size and add a good amount of filling to the bottom of one of them. Place the other on top and squeeze gently to take the filling all the way to the edge.  Ideally, store in the fridge for 24 hours before digging in…

ENJOY!

to print the recipe, click here


Comments:  I am definitely not the first person to bake black macarons. A quick google expedition will show you a few other examples. Some recipes go to extent of using exclusively powdered sesame seeds as you would use almond meal for the shells. I did not want to do that, fearing that the change would be too much of a departure from the classic. So I used a small amount of black sesame powder (15 g in 115 g total seed/nut component). We could definitely taste it in the final product and I thought it was just right. More could have been overpowering.  My intention was to use a white chocolate filling, but I ran into problems and my filling never set enough to use. White chocolate is a temperamental creature. So I quickly whipped up (literally) a vanilla cream cheese filling and used it instead. It complemented well the sesame flavor of the shells, and the slight hint of caramel color given by the brown sugar looked good with the black surrounding it.

I was very happy with the way these turned out. Not a single shell cracked during baking, and the surface was for the most part pretty smooth. Beautiful, well-formed feet, and the black food coloring rose to the challenge. I am almost to the point of trying the Italian  meringue method, but want to tackle this simpler version a few more times. You know, build confidence first before facing the combination of hot syrup with egg whites.


I have yet another macaron post for you, shockingly green…  Stay tuned!

Add to FacebookAdd to DiggAdd to Del.icio.usAdd to StumbleuponAdd to RedditAdd to BlinklistAdd to TwitterAdd to TechnoratiAdd to Yahoo BuzzAdd to Newsvine

ONE YEAR AGO: Fine Tuning Thomas Keller

TWO YEARS AGO: Cauliflower Tortillas

THREE YEARS AGO: Majestic Sedona, Take Two

FOUR YEARS AGO: Secret Ingredient Turkey Meatballs

FIVE YEARS AGO: Swedish Meatballs and Egg Noodles

SIX YEARS AGO: Italian Easter Pie

SEVEN YEARS AGO: Black Olive Bialy

DAN LEPARD TIMES THREE

Dan Lepard is the person who many years ago started my bread baking adventures through his fascinating book The Handmade Loaf. I even named my sourdough starter “Dan” and he is now a healthy and bubbly 8-year-old boy. Dan is better known as a bread baker, but his talent goes way beyond that, as you can see in his book Short and Sweet, which I reviewed five years ago. He often writes articles in The Guardian and in Goodfood (an Australian online publication) and I try not to miss anything new coming from him.  Today I share three wonderful recipes, one published in Short and Sweet (but shared by Dan in The Guardian) and two from Goodfood. Dan prefers not to have his recipes published in food blogs, so respecting his wishes, I will only share the links. You can fetch them easily and make them in the comfort of your kitchen…

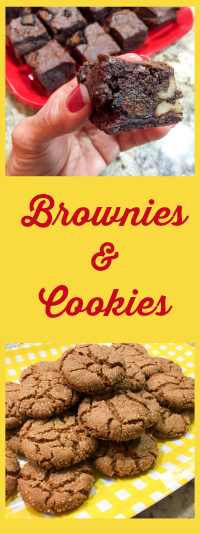
First, a batch of brownies that could very well be my favorite brownie recipe ever.  Very sophisticated and complex, even those with issues against brownies will be awed by Dan’s take on it.  Figs and chocolate are a great match, but add a little red wine and you’ll hit a jackpot.  Make them. You must.

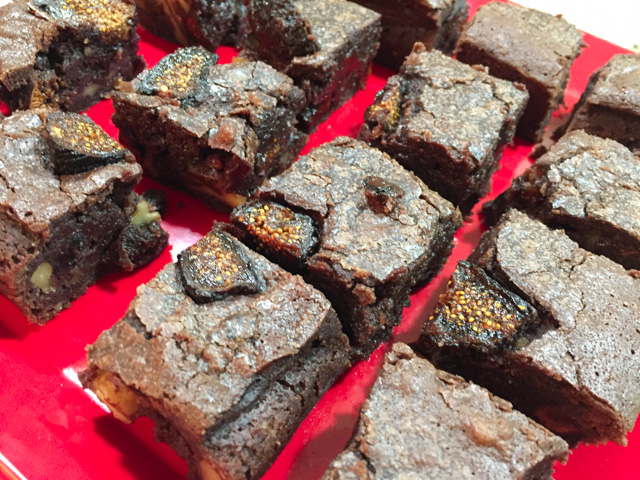
SHIRAZ FIG BROWNIES

First you reduce Shiraz on the stove top until it is a concentrated purple-reddish beauty that smells wonderful… then you add to it chocolate, butter, walnut halves and dried figs. By the way,  get the best quality figs you can find for these brownies. Also, make sure to keep the walnuts in large pieces, don’t go dicing them.  The texture of the figs, the gooey chocolate and a slight touch of fennel seeds make this recipe shine! A real masterpiece in brownie format.

for the full recipe, click here


Tell me, don’t you wish you could have a piece like RIGHT NOW?


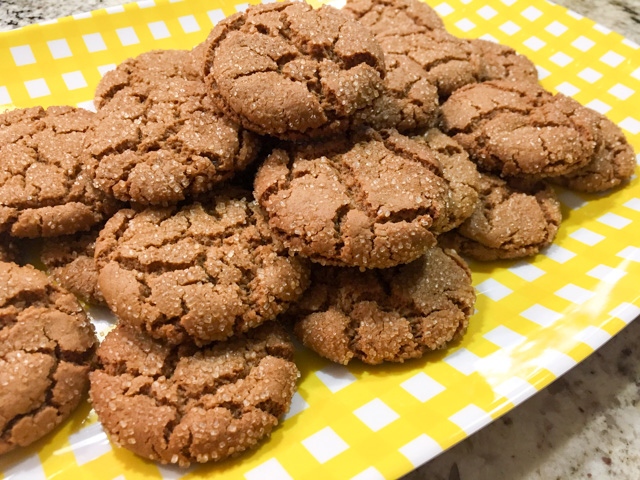
Next, let’s talk Chestnut Ginger Biscuits. I adore ginger and anything sweet with spices, but normally have a bit of a problem with crispy cookies. I am definitely a soft-baked kind of girl. Sorry, odd phrase. Anyway, these cookies are basically dressed-up gingersnaps. They are crispy, they are hard, but once you bite into them, they melt in your mouth, and your senses are invaded with the warmth of ginger and cloves. Spectacular. Make them. You must. 

CHESTNUT GINGER BISCUITS

The recipe uses chestnut flour, an ingredient that might be a little tricky to find, but you can order it online. Smells amazing, actually. As usual for nut flours, keep it in the freezer. The preparation is actually quite simple, a one-bowl type of thing. Melt the butter, add the spices, get all happy with the intense smell as you mix the dough, that must sit in the fridge for a little while before scooping little balls and rolling in coarse sugar.  They are fun to make, fun to watch as they bake and get all cracked, and fun to share with co-workers. On a side note, I baked mine for only 18 minutes instead of 25 as called for in the recipe, and they turned out perfect.  As soon as they started to collapse a little, I removed them from the oven.

for the full recipe, click here

Finally, let me share a special bread. It is not a Johnny Depp-like loaf. No, definitely not eye-candy. It is black, with a tight crumb, quite humble looking. But when you taste it, you realize you are in front of bread royalty. Believe it or not, I made it in December 2014 and never blogged about it, hoping to make it again and perhaps get better pictures. I have good intentions, but they don’t always materialize. Oh, well. Make this bread. You must.


RUSSIAN BLACK BREAD

Very interesting preparation, rye flour is added to boiling water, then allowed to cool to lukewarm.  Yeast and sugar are added.  At that point, I realized I was out of an important ingredient to continue with the recipe (caraway seeds!) so I dashed to the grocery store, and returned to find quite a bit of a mess over my counter.  On the positive side,  at least I could be sure the yeast was alive and kicking.  Or, should I say, bubbling?  Another interesting twist in the recipe is the addition of grated carrots to the dough. All in all, a very straightforward bake, the bread will be ready in less than 3 hours start to finish.


for the full recipe, click here

As I mentioned, I baked this bread back in December 2014, when two very special friends (Marijo and Vlad) visited us. I knew that Vlad grew up in Russia enjoying dark rye breads, and decided to try and bake one for him.  Of course, I trust any recipe designed by Dan, and this one hit the spot. Vlad said that my bread took him straight to his childhood and teenage days. I cannot think of a better compliment…

Bumper sticker from Penzey’s, a company I’ve been a customer for 15 years. They are taking a firm stance on a message of inclusion, of embracing diversity and refusing hate and division.  On top of it, their spices rock!  Visit and support their online store with a click here.


Add to FacebookAdd to DiggAdd to Del.icio.usAdd to StumbleuponAdd to RedditAdd to BlinklistAdd to TwitterAdd to TechnoratiAdd to Yahoo BuzzAdd to Newsvine

ONE YEAR AGO: Turkey Portobello Burger

TWO YEARS AGO: Raspberry Ricotta Cake

THREE YEARS AGO: In My Kitchen, April 2014

FOUR YEARS AGO: Whole-Wheat Pasta with Lemony Tomatoes and Spinach

FIVE YEARS AGO: Blood Orange Duck: A work in progress

SIX YEARS AGO: Grilled Mahi-mahi with citrus marinade

SEVEN YEARS AGO: Memories of Pastéis (and my Dad)