BANANA BREAD WITH ESPRESSO GLAZE

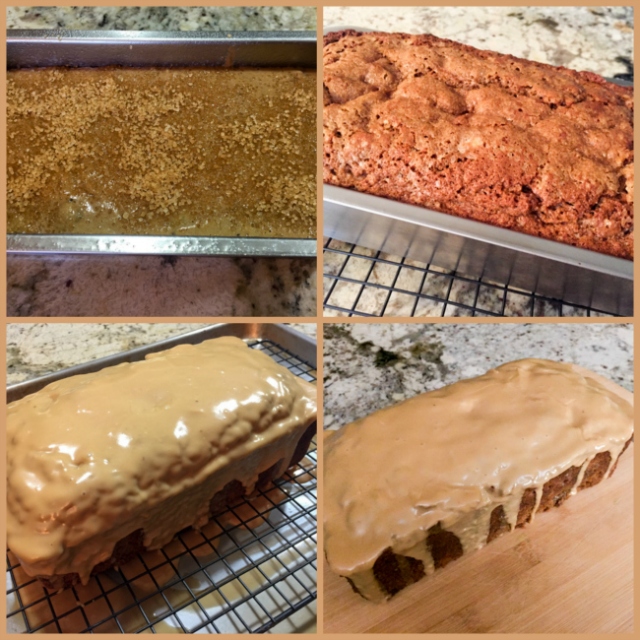
There is no shortage of banana bread recipes in the universe. So, why would I share one more? Because it’s a great version, the icing takes it to unprecedented levels of deliciousness. The idea of pairing banana bread with coffee is superb, if you’ve never considered it, trust me, it has potential to become a classic. Like chocolate and coffee. I spotted this recipe back in January on the blog How Sweet It Is, hosted by Jessica. I made it not too long after her post was published, but as usual it is taking me a while to share with you. Two details make it special, a delicate layer of sugar sprinkled on top before baking, and of course, the glaze in all its caffeinated glory.

BANANA BREAD WITH ESPRESSO GLAZE
(from How Sweet It Is)

for the bread:
1 + 2/3 cups whole wheat pastry flour
1 teaspoon baking soda
1 teaspoon espresso powder
1/2 teaspoon salt
1/4 teaspoon cinnamon
2 large eggs
1 cup loosely packed brown sugar
1/3 cup milk
1/2 cup coconut oil, melted and slightly cooled
4 very ripe bananas, mashed
1 teaspoon vanilla extract
coarse sugar, for sprinkling (I used turbinad0)

for the espresso glaze:
1 + 1/2 cups powdered sugar
2 ounces freshly brewed espresso
1 teaspoon milk
1/2 teaspoon vanilla extract

Heat oven to 325 degrees F. Spray a 9×5 inch loaf pan with nonstick spray.

In a small bowl, whisk well the flour, baking soda, cinnamon and salt. In a large bowl, whisk together the eggs and brown sugar until smooth. Add the milk and coconut oil, mixing until combined. Stir in the mashed bananas and vanilla extract. Slowly stir in the dry ingredients and mix until just combined. Pour batter in the greased loaf pan. Top with coarse sugar.

Bake for 75 to 85 minutes, or until the center is set. If the streusel begins to brown, tent the bread with aluminum foil. Remove the bread and let it cool in the pan for 20 minutes. Turn the bread out on a plate or cutting board and let it cool completely before glazing.

Whisk together the ingredients until a smooth, drippy glaze forms. If the mixture is too thin, you can thicken it by adding a little more powdered sugar. If it seems too thick, add 1 teaspoon of milk at a time, whisking to combine. Pour it over the banana bread and let it set for at least 30 minutes before slicing it.

ENJOY!

to print the recipe, click here

Comments: The glaze… the glaze…  as Jessica wrote in her post, it’s all about the glaze. Or almost, because the banana bread itself is pretty delicious too, with the added sugary topping, which oddly enough does not make it overly sweet. But the glaze… am I repeating myself? The glaze, you must collect what puddles underneath the rack as you ice this beauty. Collect it, save it in a little bowl. No need to offer to guests, it won’t be fancy enough for that. Just keep it in the fridge, and when no one is looking, you go there with a tiny little spoon and scrape a little bit off. Then savor it, eyes closed. Seriously good stuff.

As usual, I took this batch to the department, and even a person who is not at all fond of coffee stopped to make enthusiastic compliments about the bread. Or cake. I am always confused, banana bread looks a lot more like cake in loaf form than bread. But, I won’t disturb the apple cart. Or banana cart. Or any cart, for that matter.

Make this bread, make this glaze, and go thank Jessica for it! 

ONE YEAR AGO: Slow-Cooker Carnitas & Paleo Planet Cookbook Review

TWO YEARS AGO: The Making of a Nobel Reception

THREE YEARS AGO: Fennel Soup with Almonds and Mint 

FOUR YEARS AGO: Green Curry Pork Tenderloin

FIVE YEARS AGO: Farfalle with Zucchini and Ricotta

SIX YEARS AGO: Slow-baked Salmon with Lemon and Thyme

SEVEN YEARS AGO: Hoisin Explosion Chicken


TIRAMISU

Some things do not make much sense. Take Tiramisú, for instance. It is definitely one of our favorite desserts, up there with Crème Brûllée and Oeufs a la Neige. However, after almost 8 years of food blogging, I do not have a single recipe for it in the Bewitching Kitchen. How could that be? I’ve made it in the past, but during this stretch of 8 years we’ve only enjoyed it in restaurants. To be completely honest, one example totally ruined us for other versions. A small Italian restaurant in Paris, called La Trappola, very near our apartment in the 7eme had simply the best, the very best, the most awesome, delicious, luscious, fantastic, superbly addictive Tiramisú in the known universe. Before we left Paris, I tried to convince the owner to share his secrets, but no matter how much batting of eyelashes and smiling I did, he was unmoved. Acted like a real gentleman, but kept saying he wanted us to come back to his restaurant whenever we were in town. Yeah, as if Paris was a cab ride from Manhattan, Kansas. The humanity! Oh, well. I don’t have his recipe, but David Lebovitz shared his online, and I can tell you it made Phil and a couple of friends we had over for dinner very very happy. Oh, and me too!

TIRAMISU
(slightly modified from David Lebovitz)

makes 4 servings
1/2 cup (125 ml) espresso, at room temperature
2 tablespoons dark rum
2  large eggs, separated, at room temperature
pinch of salt
7 tablespoons (90g) sugar, divided
1 cup (250g) mascarpone
twelve 3½-inch ladyfingers (70g)
optional: 1 ounce (30g) bittersweet chocolate
unsweetened cocoa powder, for serving
 .
Mix together the espresso and rum. The mixture should taste strongly of alcohol. If not, add more until it does.
In the bowl of an electric mixer beat the egg whites with a pinch of salt until they begin to get stiff. Beat in half of the sugar until stiff. Scrape the egg whites into a small bowl and reserve.
.
Beat the egg yolks with the remaining sugar until stiff and light-colored, about three minutes. Beat in the mascarpone (still cold from the fridge) until lump-free. 
Fold in half of the reserved beaten egg whites, then the remaining half, just until fully incorporated.
.
Submerge each ladyfinger in the espresso mixture for 3 seconds on each side, until soaked but not overly so. Layer them on the bottom of individual serving bowls. Top with mascarpone cream, grate semisweet chocolate on top. Add another layer of lady fingers, top with more cream. Cover and refrigerate for a few hours, preferably overnight.
.
Right before serving, shower with cocoa powder and shave some bittersweet chocolate on top.
.
ENJOY!

to print the recipe, click here

Comments: At first I intended to make a recipe from America’s Test Kitchen, but when I realized the huge amount it made, I quickly moved away from it, but kept some of their special tips in mind. One of them: contrary to what most recipes advise, do not bring the mascarpone cheese to room temperature before beating it. It has a tendency to separate. It will result in a perfectly creamy texture if you whip it while fridge-cold. Yeah, mind blown. So that’s what I did.  Worked like a charm. Also, I prefer not to over-soak the lady fingers, because I rather have a little bit of texture remaining in the cookie component. If you go by Lebovitz, he states “cut them in half to make sure they are saturated enough, they should be dropping wet.”  Decide how you like it best, and do it that way.

I wanted a recipe that would give us just enough for a dinner party with a couple of friends, and David’s version delivered exactly what I was looking for. I got the little glass dishes at Pier 1 Imports. They had only 6 left in stock, and by the time I left, their inventory dropped to two. It gave me a thrill to find exactly what I needed, one day before showtime. It’s not always the case, trust me on that.

Was it as good as La Trappola’s?  I am afraid nothing will match that version. Maybe being in Paris was part of it. Still, this was one spectacular dessert. At first I thought the portion was a bit too big. But next thing I knew, I was licking the spoon and staring at a clean little bowl. Such is life.  Woke up next morning and went for a nice jog. Order of the universe restored!

As I was composing this post, Phil found two photos from our past…
One at the entrance of La Trappola, and another of the Tiramisu of our dreams!  

(unfortunately La Trappola is not in business anymore)


Add to FacebookAdd to DiggAdd to Del.icio.usAdd to StumbleuponAdd to RedditAdd to BlinklistAdd to TwitterAdd to TechnoratiAdd to Yahoo BuzzAdd to Newsvine

ONE YEAR AGO: Pulled Pork, Slow-Cooker version

TWO YEARS AGO: The Pie of the Century

THREE YEARS AGO: Bon Bon Chicken

FOUR YEARS AGO: Leaving on a Jet Plane

FIVE YEARS AGO: A Pearfect Drink

SIX YEARS AGO: Ming Tsai Under Pressure

SEVEN YEARS AGO: Paris, je t’aime!

Save

OWN YOUR KITCHEN with CAPPUCCINO PANNA COTTA

HAPPY THANKSGIVING TO ALL MY AMERICAN READERS! 

You will definitely find plenty of T-day recipes (plus leftover ideas) in the food blogosphere, so I will dance to a slightly different tune, and offer you a cookbook review instead…  

_________________________________________________________

Anne Burrell strikes again with a new cookbook, “Own Your Kitchen: Recipes to Inspire and Empower.”   Knowing that on January 1st my annual New Year’s Resolution of  “No more cookbooks!”  will be in place, I ordered it on the first week of November.  I am obviously quite astute.  😉 However, after browsing “Own Your Kitchen,” I concluded that it would be worth breaking any New Year’s Resolution, no matter what the resulting karma may be.   I couldn’t wait to cook something from it, and with a dinner party approaching this dessert selection was winking at me:  a batch of  her Cappuccino Panna Cotta, that Anne describes in her delightful way:

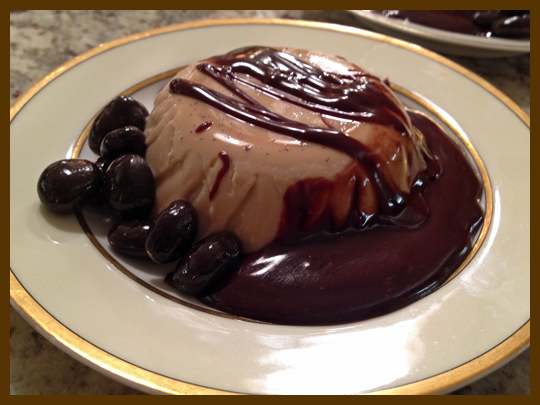
“My version tastes like a coffee milkshake…YUM!  It’s super cinchy to make but very impressive and a perfect do-ahead… Dress it up with a little chocolate sauce and voilà, it’s fancy!”
Cappuccino Panna Cotta

CAPPUCCINO PANNA COTTA WITH CHOCOLATE SAUCE
(from Own Your Kitchen, re-printed with permission from Anne Burrell & Random House LLC)

for the panna cotta:
4 sheets of gelatin (*)
3 cups heavy cream
¾ cup sugar
2 tablespoons instant espresso powder
½ vanilla bean
½ cup chocolate-covered coffee beans, for garnish (I opted for chocolate-covered cranberries)
.
for the chocolate sauce:
4 ounces semisweet chocolate chips
¼ cup heavy cream
2 tablespoons unsalted butter
2 tablespoons light corn syrup

.
Make the panna cotta: In a small bowl of cool water, submerge the gelatin sheets to soften. They will go from stiff to soft.
.
In a small saucepan, combine the cream, sugar, and espresso powder. Split the vanilla bean lengthwise down one side, open it up, and scrape out the seeds with a paring knife. Add the seeds and the hull to the pan. Whisk to combine everything.  Bring the cream mixture to a boil and then immediately turn off the heat.
.
Remove the softened gelatin sheets from the water and squeeze out the excess water. Add the gelatin sheets to the pan and whisk to combine. Immediately ladle the cream mixture into four 6-ounce ramekins and refrigerate for 2 to 3 hours or overnight.
.
Make the chocolate sauce: Fill a small saucepan with 1 inch of water and bring it to a boil.  In a medium heatproof bowl, combine the chocolate chips, heavy cream, butter and corn syrup. place the bowl on top of the pan of water. Reduce the heat to a simmer. Stir until the chocolate has melted and all the ingredients are combined. Remove and use immediately or store in a warm place until ready to use.
.
Unmold the panna cotta:  Fill a small saucepan with 1 inch of water and bring to a boil, then turn off the heat. Run a paring knife around the outside edge of the panna cotta to loosen it. Set each ramekin in the saucepan for 10 seconds. Place a small serving plate on top of each ramekin and flip it over to unmold the panna cotta. If it doesn’t release, put the ramekin in the water for a few seconds more and try again.
.
To serve, ladle a couple of tablespoons of the chocolate sauce around the panna cotta and sprinkle with a few chocolate-covered espresso beans.
.
(*) If you can’t find gelatin sheets, you can substitute powdered gelatin. To use powdered gelatin in this recipe, first bloom one ¼ ounce envelope in 2 tablespoons water, then add it to the mix. ENJOY!

to print the recipe, click here

composite1

My comments on the panna cotta…   Our desserts tend toward simple rather than extravagant, and  Panna Cotta is the essence of simplicity.  It’s a recipe that you can take in countless directions by changing the flavors in the steeping cream.   The espresso powder in this version performs pure magic with the vanilla, and when the chocolate sauce joins it, the party reaches perfection.   And, because chocolate-covered cranberries never hurt anyone, I invited them too.  😉   The fact that you can prepare the panna cotta the day beforehand makes it great for entertaining.  I measured and placed all the chocolate sauce ingredients in a double-boiler, except the butter and cream that I kept in a small bowl in the fridge.  When the dinner wound down I cooked up the chocolate sauce, unmolded the cold panna cotta, and assembled each individual serving.  The softness of the cool panna cotta against the warm sauce, and the little crunch of the cranberries was out of this world!  A perfect end for any special meal, and as Anne pointed out, simple to prepare.

panacotta1

OWN YOUR KITCHEN, my review…

ABCover

If you were hooked on Anne’s FoodTV show  (and can’t quite understand why they don’t bring her back for new episodes….) you’ll love her new book.    If you’ve never watched her show, the outcome will be exactly the same!. 😉 “Own Your Kitchen” is an extension of her personality,  highlighting the fun aspects of cooking, but also loaded with culinary knowledge from her many years as a successful chef.   My favorite cookbooks not only feature nice recipes, but also share a little background about each one.   Is it a family recipe?  Is it something that the author recreated from a vacation, or maybe from a restaurant meal?  What makes it so special that I’d want to hurry to the kitchen and prepare it?   On the other hand, I don’t  need a philosophical treatise tagged to a Bolognese sauce.  Anne Burrell achieves just the right the balance between food and entertainment.

Like many cookbooks, the overall organization of  “Own Your Kitchen”  is divided into courses, but in a flexible, amusing way:  Firsts, Seconds, Brunch, Sandwiches, Sides, and Desserts.  She precedes each recipe with what I’d call a  “teaser paragraph,” that reveals interesting info about it.  In the recipe itself she highlights (with a “HINT!”) steps to prepare ahead of time, or even the day before, that will help those who are not seasoned cooks.   Lastly, after the recipe you’ll often find remarks called Anne-notations, in which she suggests possible changes, how to make that recipe your own. It’s the “inspire and empower” aspect of the book.

Now, for a brief virtual tour of “Own Your Kitchen,”  I’ll describe my two favorite recipes from each chapter.

FIRSTS
Tomato Salad with Shrimp and Black Volcanic Salt.  
Simple has never looked so decadent and luscious.  With just a few ingredients,  she re-created a recipe  enjoyed on a trip to Hawaii, a place so dear to my heart!  Of course, I had to place an order for Black salt, and this salad will be on our table whenever great tomatoes are back in season…

Ricotta Flan with Bacon, Corn, Cherry Tomatoes and Arugula Pesto.    In Anne’s words:  “…this lovely little flan says, “Hi, ricotta, you shy girl, come out and be the superstar!”  😉  You can make your own ricotta (she shows you how), or use store-bought, but this recipe would be amazing to start a dinner party, or to enjoy as a light meal.

SECONDS
Cornish Game Hens with Pancetta-Rosemary Crust. 
She developed this recipe years ago, while working in a restaurant in New York where “her paycheck kept bouncing and she was frustrated and broke.”   She left that place, but took this gem of a recipe with her.  Wise girl! I wonder if the place still exists (I bet it doesn’t) and how they feel about losing Anne as a chef.  Ha! Their loss! Come to think of it, that’s the type of recipe that has her trademark all over, using an ingredient (pancetta) in a completely unexpected way. I love it!

Balsamic-braised Brisket with Bacon and Mushrooms.   I almost picked this recipe as my first to cook from the book, because I remember it from her show on TV.   She actually wrote that the filming crew attacked the meat once the show was over.   I can imagine the scene…  Her personal endorsement:  “one of my favorites of all the recipes I’ve ever written.”  You can bet I’ll be making it during the cold months ahead of us.

BRUNCH
Farro Granola.  
To deal with the harsh texture so common in granola,  Anne uses a clever twist on the grains of farro before adding them to the other ingredients.  Fascinating, Mr. Spock, fascinating…

Homemade Ricotta.   Making ricotta from scratch has been on my list of things to do for years!  Shame on me!  Maybe this cookbook will finally push me in the right direction.

SANDWICHES
Killer Turkey Burger.  
I remember this burger from her TV show too.   She was so tired of bad turkey burgers that she took matters into her own hands, and made a great version.  In typical Anne Burrell fashion, you will find an ingredient you would not expect in the mix.  😉

Tallegio Grilled Cheese with Bacon and Honey Crisp Apples.   Her upscale version of a classic, adding crisp apples to a strong cheese and smoky bacon.  Comfort food, in sandwich form…

SIDES
Shaved Raw Cauliflower with Caper-Raisin Vinaigrette.  
  I just know this will be a winner!   She shaves the cauliflower, then takes it in the direction of ceviche.  Yeah, baby… Much to my beloved husband’s consternation, I can’t have enough recipes for cauliflower…

Yukon Gold Potato Pancakes.    These are NOT your regular potato pancakes.  Trust me, Anne adds her usual twist to the recipe, and these pancakes will top any other version.

DESSERTS
Cappuccino Panna Cotta.  
Today’s post, a winner all the way…

Sticky Toffee Pudding.     I’ve been meaning to make this dessert forever,  as I’ve never had it but it sounds incredibly tasty.   Anne’s description of her own experience in a London restaurant will convince you  to bake a batch right on the spot.

_______________________________________________________________________________________________________________________

My job is to empower you to become the best cook you can be and learn to own your kitchen. Why? Because cooking is fun and delicious.
(Anne Burrell, Own Your Kitchen)

_______________________________________________________________________________________________________________________

She definitely succeeds in doing that. First, there is no doubt she brings the fun aspect of cooking to the forefront. Diluting a sheet of gelatin in water and feeling its textural change? Fun! Making and cooking dough? Fun (and satisfying)…  Cracking the salt crust on a whole fish at the table?  Fun! Mixing bread and sausage with your hands to make a stuffing?  Fun, of course!  But, she is also a natural teacher who is able to stress what really matters in a technique. With her trademark phrase “Brown food tastes good!“, she makes sure that cooks take their time to do that first step so common in stews, braises and even roasts: BROWN your food, do it nicely, do it well. That step alone will make a huge difference in the quality of your dishes. But that’s just one example, there’s a lot more to learn from her.

The holidays are coming up, so if you want to give someone a great cookbook, order a copy of “Own Your Kitchen“. Now, if you are like me and insist on making New Year Resolutions that involve a self-inflicted moratorium on cookbooks, hurry up and get a copy for yourself: 2014 is just about to say hello…

Disclaimer: I do not accept requests or any type of compensation to review cookbooks or products. I am not affiliated with amazon.com or any other company. Not that there’s anything wrong with it, but I like to make this point clear.

ONE YEAR AGO: Chicken Parmigiana, the Thriller

TWO YEARS AGO: Wild Mushroom Risotto

THREE YEARS AGO: Tartine Bread:  Basic Country Loaf

FOUR YEARS AGO:  Pugliese Bread

PORK TRINITY: COFFEE, MUSHROOMS, AND CURRY

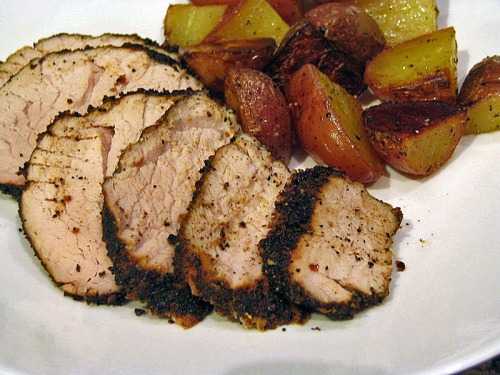
I’m always searching for interesting ways to bring pork tenderloin to our table.  This preparation, with a dry rub of powdered trumpet mushrooms, coffee, and curry, turns humble pork into a feisty little beast.  The meat gets tightly wrapped, then rests in the fridge for a couple of hours (or more).    The flavors of this threesome synergize to more than the simple sum of their parts.  Funky, deep, mysterious… you’ll hear your diners asking… “what is this spice?”

I found the recipe five years ago in a blog called Foodie NYC.  To my disappointment, the proprietor seems to have vanished from the blogosphere – no activity since 2008.   Still, I highly recommend that you browse his blog, because all the recipes are original, not from cookbooks or magazines.  It’s impressive!

BLACK TRUMPET  COFFEE CRUSTED PORK TENDERLOIN
(from Foodie NYC blog)

1 package of dried black trumpet mushrooms (or dried shiitake)
handful of coffee beans
1 tsp hot curry powder
2 pinches of freshly ground nutmeg
kosher salt and pepper to taste
1 pork tenderloin
1-2 Tbs olive oil

Using a spice grinder, grind enough black trumpet mushroom to obtain 1/4 cup of powder.  Reserve.   Grind the coffee beans and add 3 Tbs to the powdered mushroom.  Add the curry and nutmeg; mix well.

Dry the pork tenderloin (previously brined it if you prefer, but it’s not necessary), place it on a piece of plastic wrap and add the mushroom /spice powder to its surface, completely covering it.  Wrap it tightly and refrigerate for at least one hour.

Heat the oven to 300 F.

Add the oil to an oven-proof skillet and heat on top of the stove over high heat.  Sear the meat briefly on all sides – the idea is to seal the crust, not to make it golden brown.  Since the meat will cook in the oven, over-browning the crust now could make it burn later.

Transfer the pan to the oven and roast  for about 30-35 minutes (see comments).  Remove the meat from the oven and let it rest for 10 minutes.

ENJOY!


to print the recipe, click here


Comments: I’ve made the full menu as described in Foodie NYC, serving the pork with eggplant puree and  pistachios, and it was excellent. But I also made only the pork and then picked different side dishes to accompany it.  For our dinner this week I served it with new potatoes, that were roasted in a light coating of olive oil, salt and pepper.

Cooking conditions: Some people like their pork medium-rare, however my old-fashioned (in a good way…) beloved prefers it traditionally well-done, so I increase the time and sometimes also the temperature (350F).  Use a meat thermometer and adapt the cooking to your taste.

Note to self: play with other flavors… cocoa powder?   a little smoked paprika?  ground ginger?  Just don’t skip the mushrooms…   😉

SNICKERDOODLES WITH A TWIST

cookies1

For the record, I don’t have a sweet tooth. I can go for months without dessert, and my sweet cravings are satisfied by some yogurt with a little agave nectar and by bits of bittersweet chocolate every now and then. So, if I tell you that when I made these cookies I ate one and went back for three more…. trust me, you should fire up your oven!

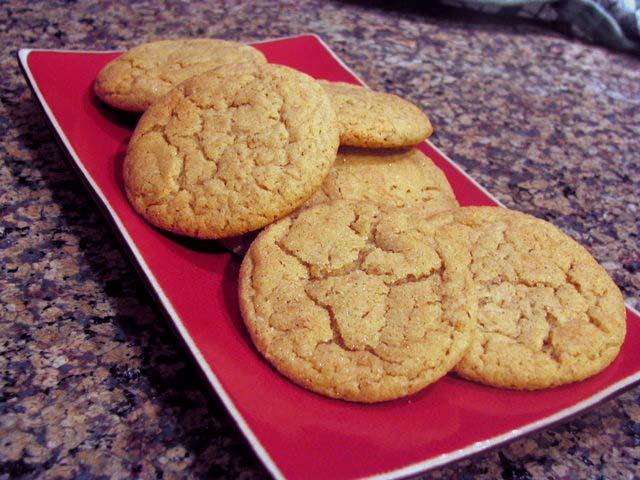
I chose these cookies because I was mesmerized by their picture in this wonderful blog.  I am so glad I did, even though my photos don”t come close in terms of quality, the flavor of these babies is great: snickerdoodles with a twist…

For Brazilians and other foreign readers who may not know about them, snickerdoodles are a classic, probably of German origin, that have been around since the beginning of last century. They are very simple cookies, that get rolled in cinnamon and sugar right before going into the oven. The crinkled look is their trademark.

In this rendition, a little coffee powder is added to the dough. Normally, I don’t like changes in a classic recipe, but in this case, the results were awesome. Even if you’re not fond of coffee, give these cookies a try. The coffee flavor is subtle, and it’s wonderful with the cinnamon, making these cookies simply irresistible.

closeup

CINNAMON CAPPUCCINO COOKIES
(recipe adapted  from “A Kiss and a Cupcake“)

1 cup butter (two sticks), softened
1 + 1/4 cup granulated white sugar
1/4 cup light brown sugar
2 large eggs
2 + 3/4 cups flour
2 teaspoons cream of tartar
1 teaspoon baking soda
1/4 teaspoon salt
1 + 1/2 tablespoons powdered coffee (see comments)
granulated sugar + cinnamon (3:1)

Preheat oven to 350°.

Cream together sugar and butter whipping them with an electric mixer for about 2 minutes. Add eggs, one at a time, beating until smooth.  Add powdered coffee and beat until incorporated.

Combine remaining dry ingredients in a separate bowl. Add to butter mixture in three batches. Chill resulting dough for 20-30 minutes. Scoop out 1-inch balls of dough and roll them in sugar/cinnamon mixture; place on chilled cookie sheets 2 inches apart. Bake for 8-10 minutes or until centers are set.

Yield: 2 1/2 dozen.

click here for comments and additional photos