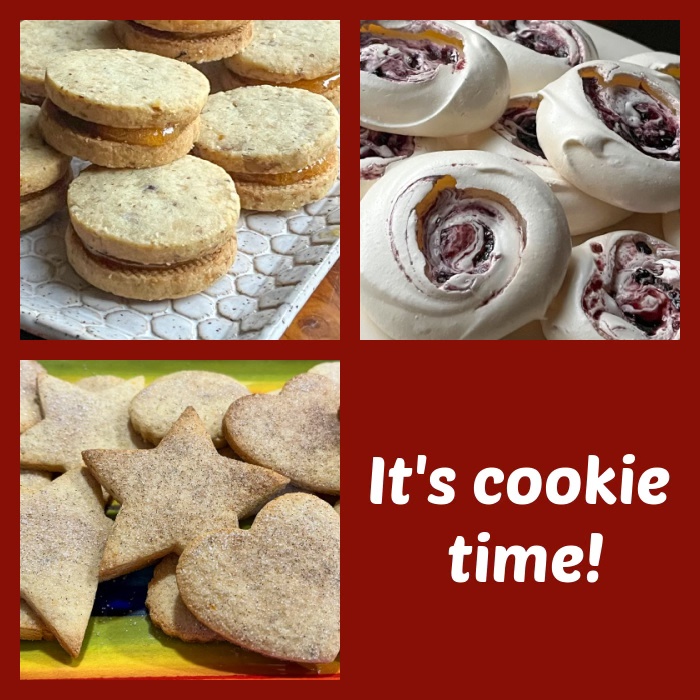
The holiday season is all about baking, so today I offer three ideas for cookies that may not be on your radar. I start with a recipe recently shared by the baking queen extraordinaire, Helen Fletcher.
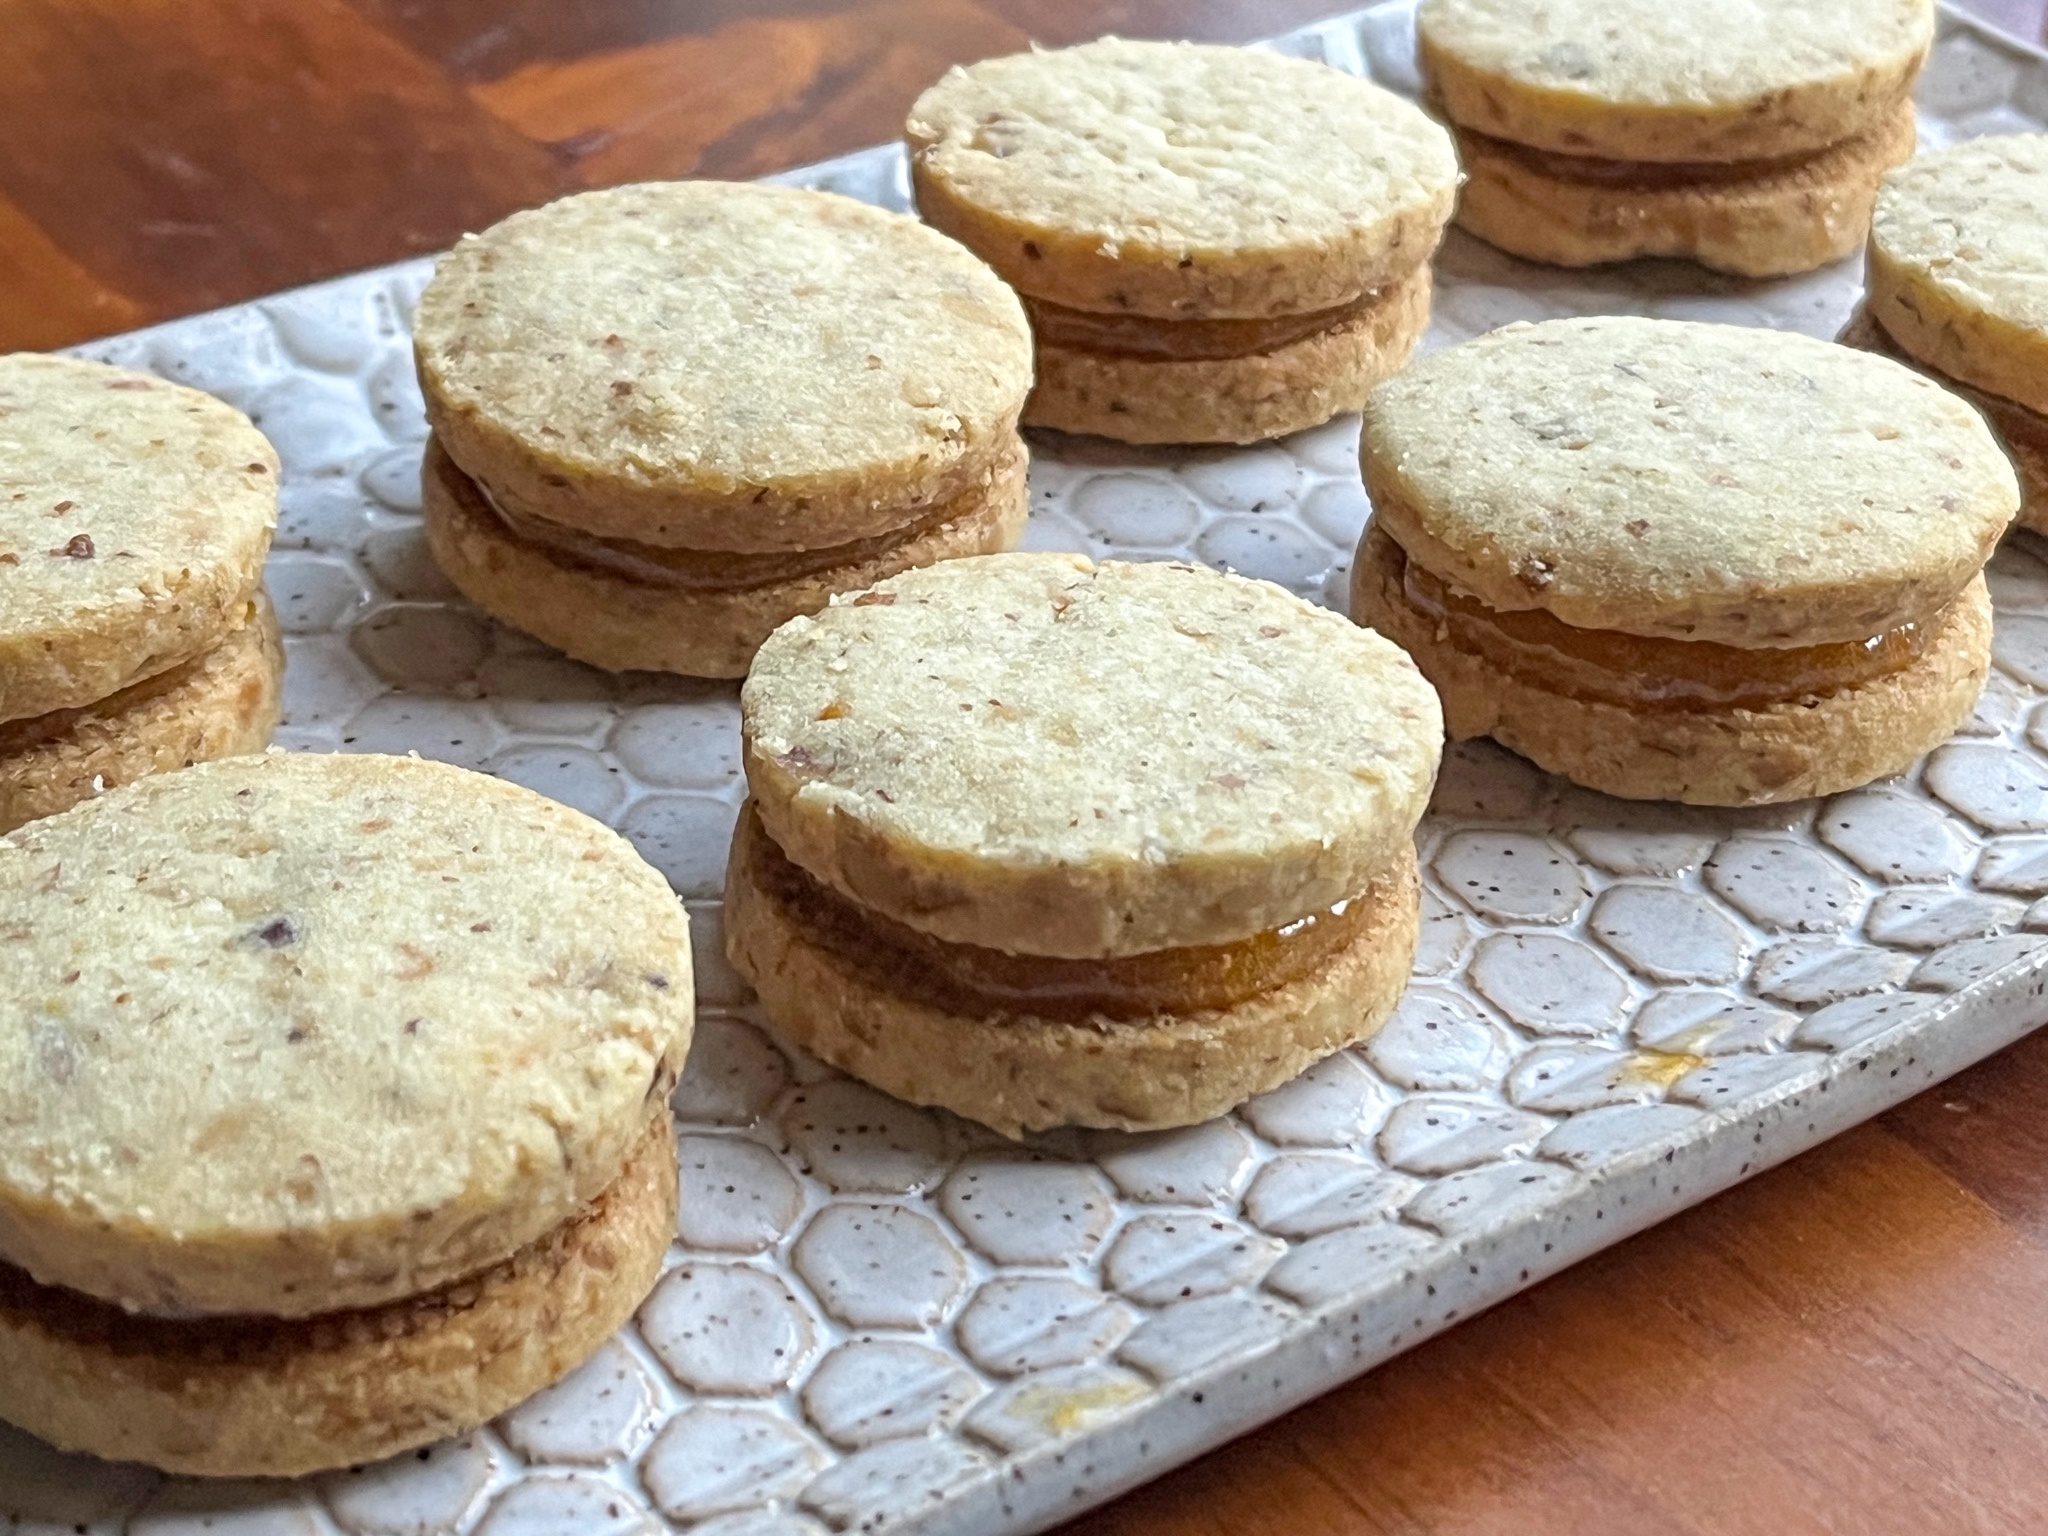
SERBIAN WALNUT COOKIES
SERBIAN WALNUT COOKIES
(from Helen Fletcher’s blog)
for the filling:
¾ cup apricot preserves
1 ½ teaspoon gelatin
1 tablespoon cider vinegar
for the cookies:
1 cup walnuts (114 grams)
½ cup unsalted butter, softened (114 grams)
1 cup + 1 T granulated sugar (75 grams)
1 large egg yolk
1 ½ teaspoons vanilla
1 ¼ cups all-purpose flour (175 grams)
2 cups powdered sugar (260 grams)
Make the filling, if you prefer, a few days in advance. Place the apricot preserves in the bowl of a processor. Process until smooth. Dissolve the gelatin in the vinegar in a very small bowl. Heat the preserves just to a simmer. Remove from the heat. Tear the gelatin into about 6 pieces and immediately add it to the hot preserves. Wait for a minute or two until you can see the gelatin has liquified. Stir it into the preserves. Transfer to a small container and refrigerate until needed.
Make the cookies: Heat the oven to 325°F. Line a couple of baking sheets with parchment paper and set aside. Place the walnuts on a rimmed baking sheet and toast for 7 to 10 minuts until fragrant and slightly browned. Cool completely. When cool, place the walnuts and flour in the bowl of a processor. Process until the nuts are finely ground and instinguishable. Set aside.
Place the butter and sugar in the bowl of a mixer. Beat until light. Add the egg yolk and vanilla and beat to combine. Add the flour mixture and beat on low just until completely incorporated. The dough should be good to roll out but if it is too soft, refrigerate briefly. Place the dough between two large pieces of waxed or parchment paper. Roll the dough to abut ¼” thick. With a 1 ½” round cutter, cut the cookies out, keeping them close together.
Remove the top piece of waxed paper and, keeping the cookies on the bottom pieces of paper, transfer the whole thing to a baking sheet. Freeze until rock hard. When frozen, punch them out and place them on a cookie sheet. Bake for 15 to 17 minutes from the frozen state until lightly browned and firm. Cool completely.
Assemble the cookies: Stir the filling vigorously to smooth it out. Turn half the cookies upside down and fill with about ¾ teaspoon apricot filling. Place the tops on the cookies. Allow the filled cookie to set up on a rack overnight to tighten the filling. Store in an airtight container for a week or 10 days.
ENJOY!
to print the recipe, click here
Comments: These cookies are so delicious that they can stand on their own without the filling: nutty, great texture, not too sweet. I advise you to stop by Helen’s site so you can see all the detailed pictures and step by step instructions. I love the way she adds gelatin to a store-bough concoction to make it perfectly set in the sandwich cookie. I don’t like fillings that ooze out when you hold or bite into the cookie. She definitely knows all the great tricks in the baking world… I omitted the showering with powdered sugar, as they are easier to box and share without the sugar coating. Excellent cookies, make sure to give this recipe a try. As I’ve said many times over the years, you cannot go wrong baking with Helen!
.
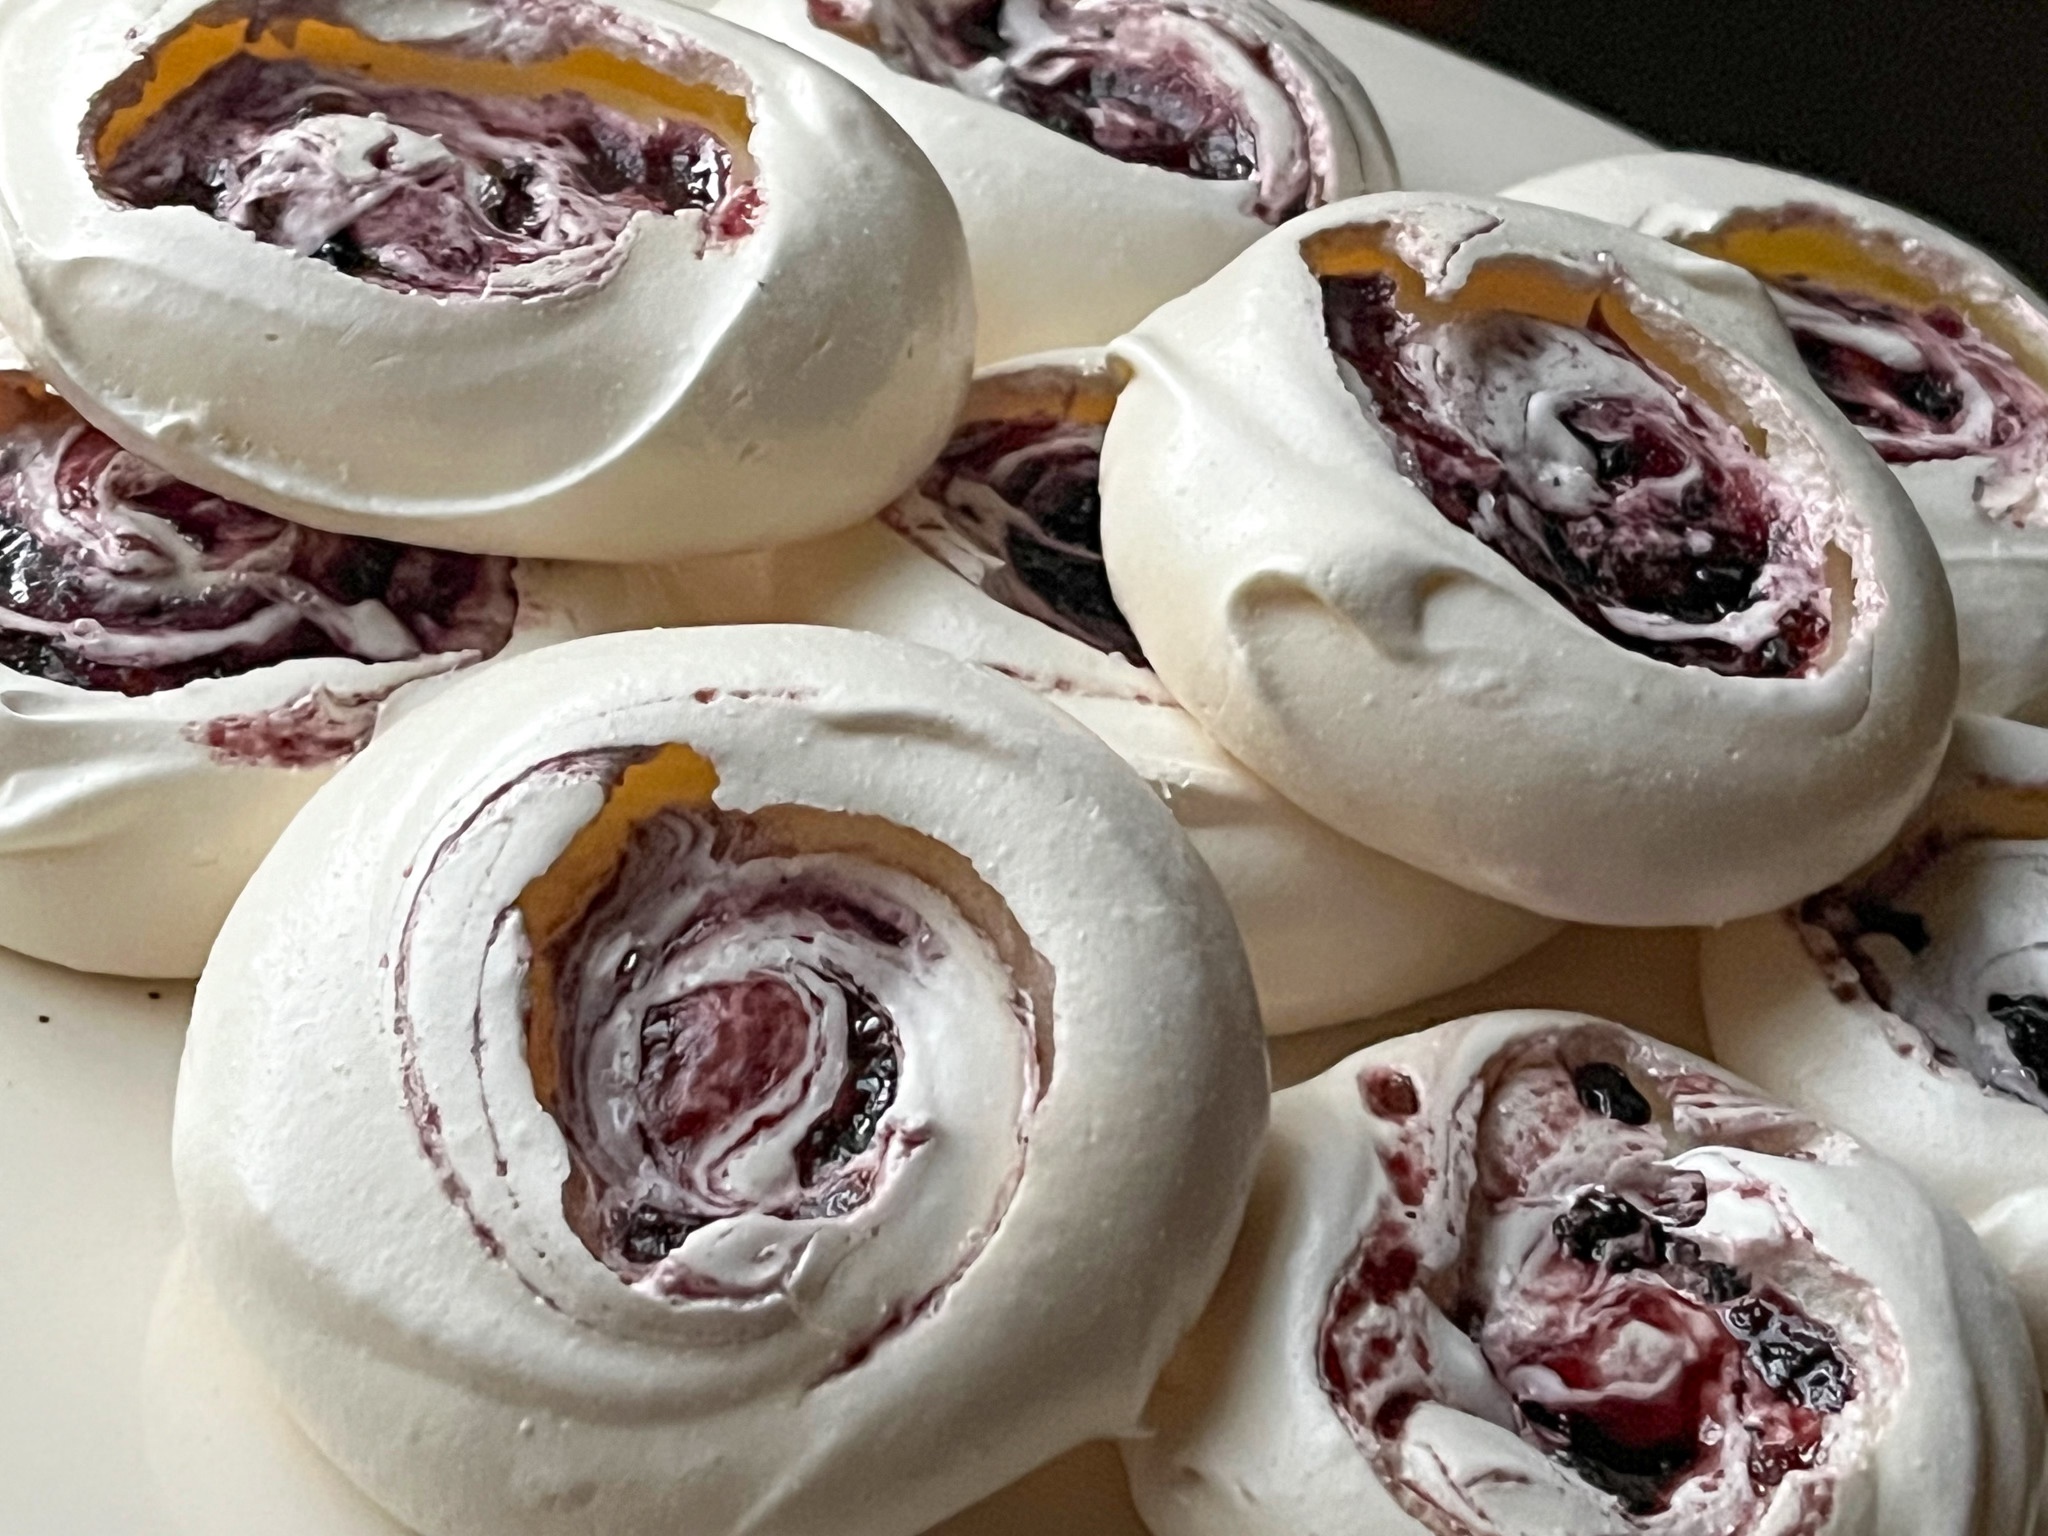
BLUEBERRY SWIRL MERINGUE COOKIES
BLUEBERRY SWIRL MERINGUE COOKIES
(from The Bewitching Kitchen)
120g egg whites
1/4 tsp cream of tartar
pinch of salt
200 g sugar (about 1 cup)
2 tsp cornstarch
1 tsp vanilla paste
blueberry jam, about 1 cup
Heat oven to 200°F and line two baking sheets with parchment paper. Combine the egg whites, cream of tartar, and salt in the bowl of a stand mixer fitted with the whisk attachment. Whisk on low to combine, then turn the speed up to medium and whip until frothy. With the mixer is still running, add the sugar in small increments. Once all the sugar has been added, turn the speed up to high and whip until the meringue is glossy, thick, and holds stiff peaks, about 3 minutes.
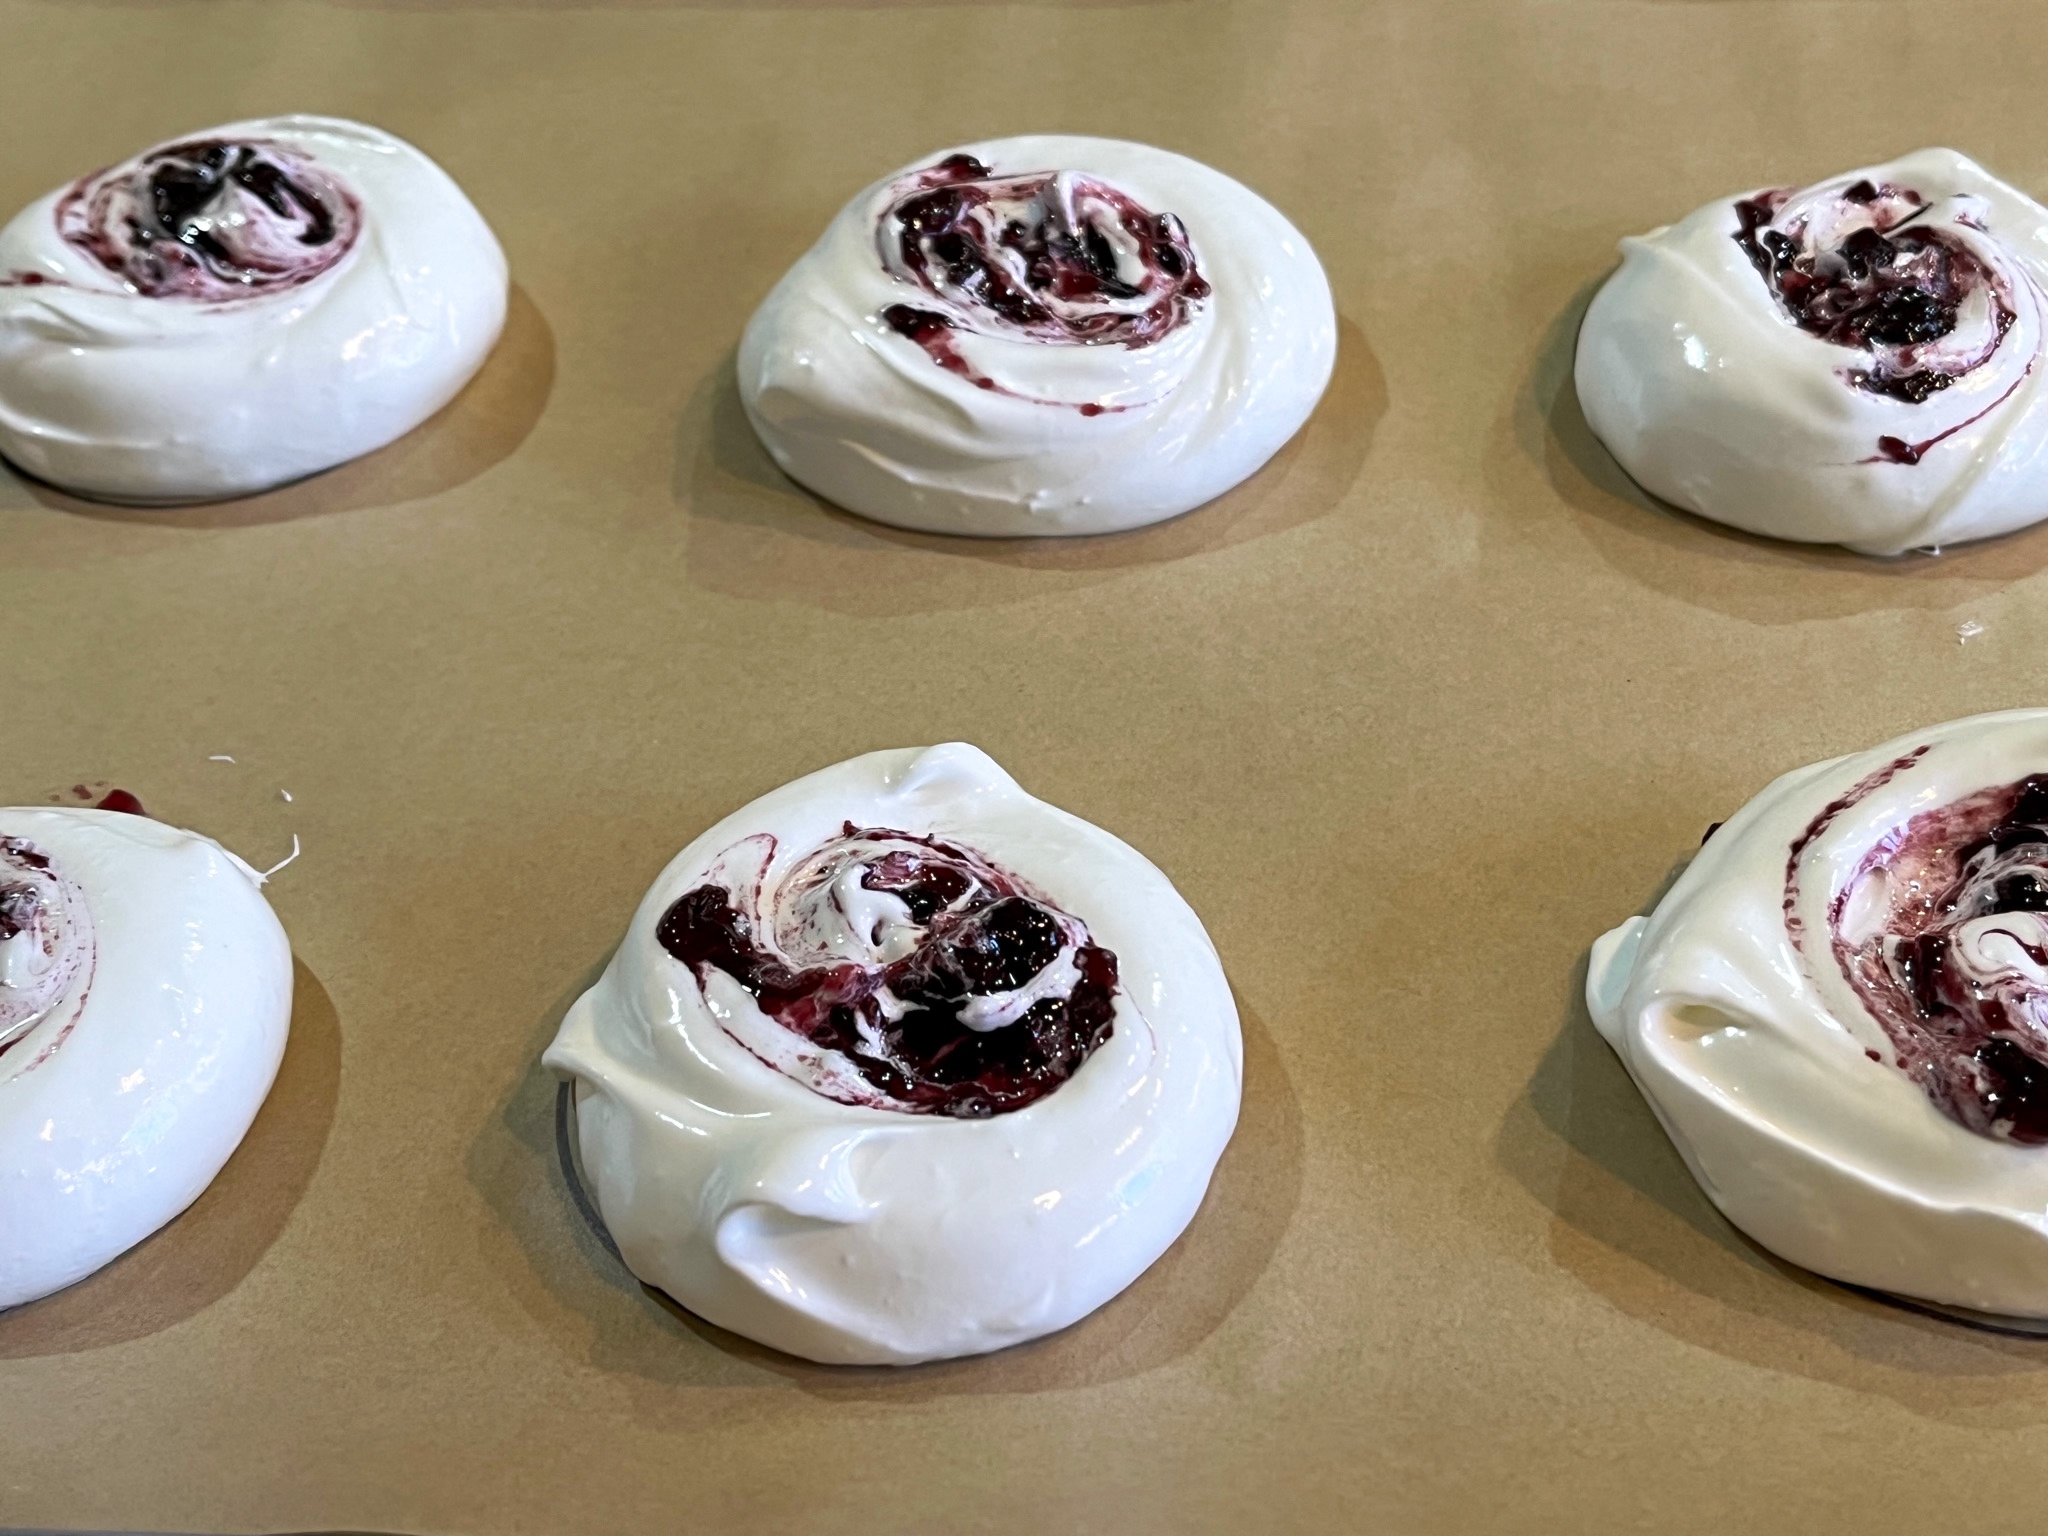
Sprinkle the cornstarch and vanilla on top and fold gently to combine. Divide the meringue into 12 equal rounds, using a cookie or ice cream scoop or two spoons. Spoon a small amount of blueberry jam on top of the meringue and use a chopstick to gently swirl it. Bake the meringues for 2 hours, then turn the oven off and allow the meringues to cool gradually inside the oven for another hour. Store leftover meringues in an airtight container at room temperature for up to 3 days.
ENJOY!
to print the recipe, click here
Comments: These are pretty amazing, and you can add different jams and I imagine it would work well with Nutella also! Make them big, I think they turn out better this way.
.
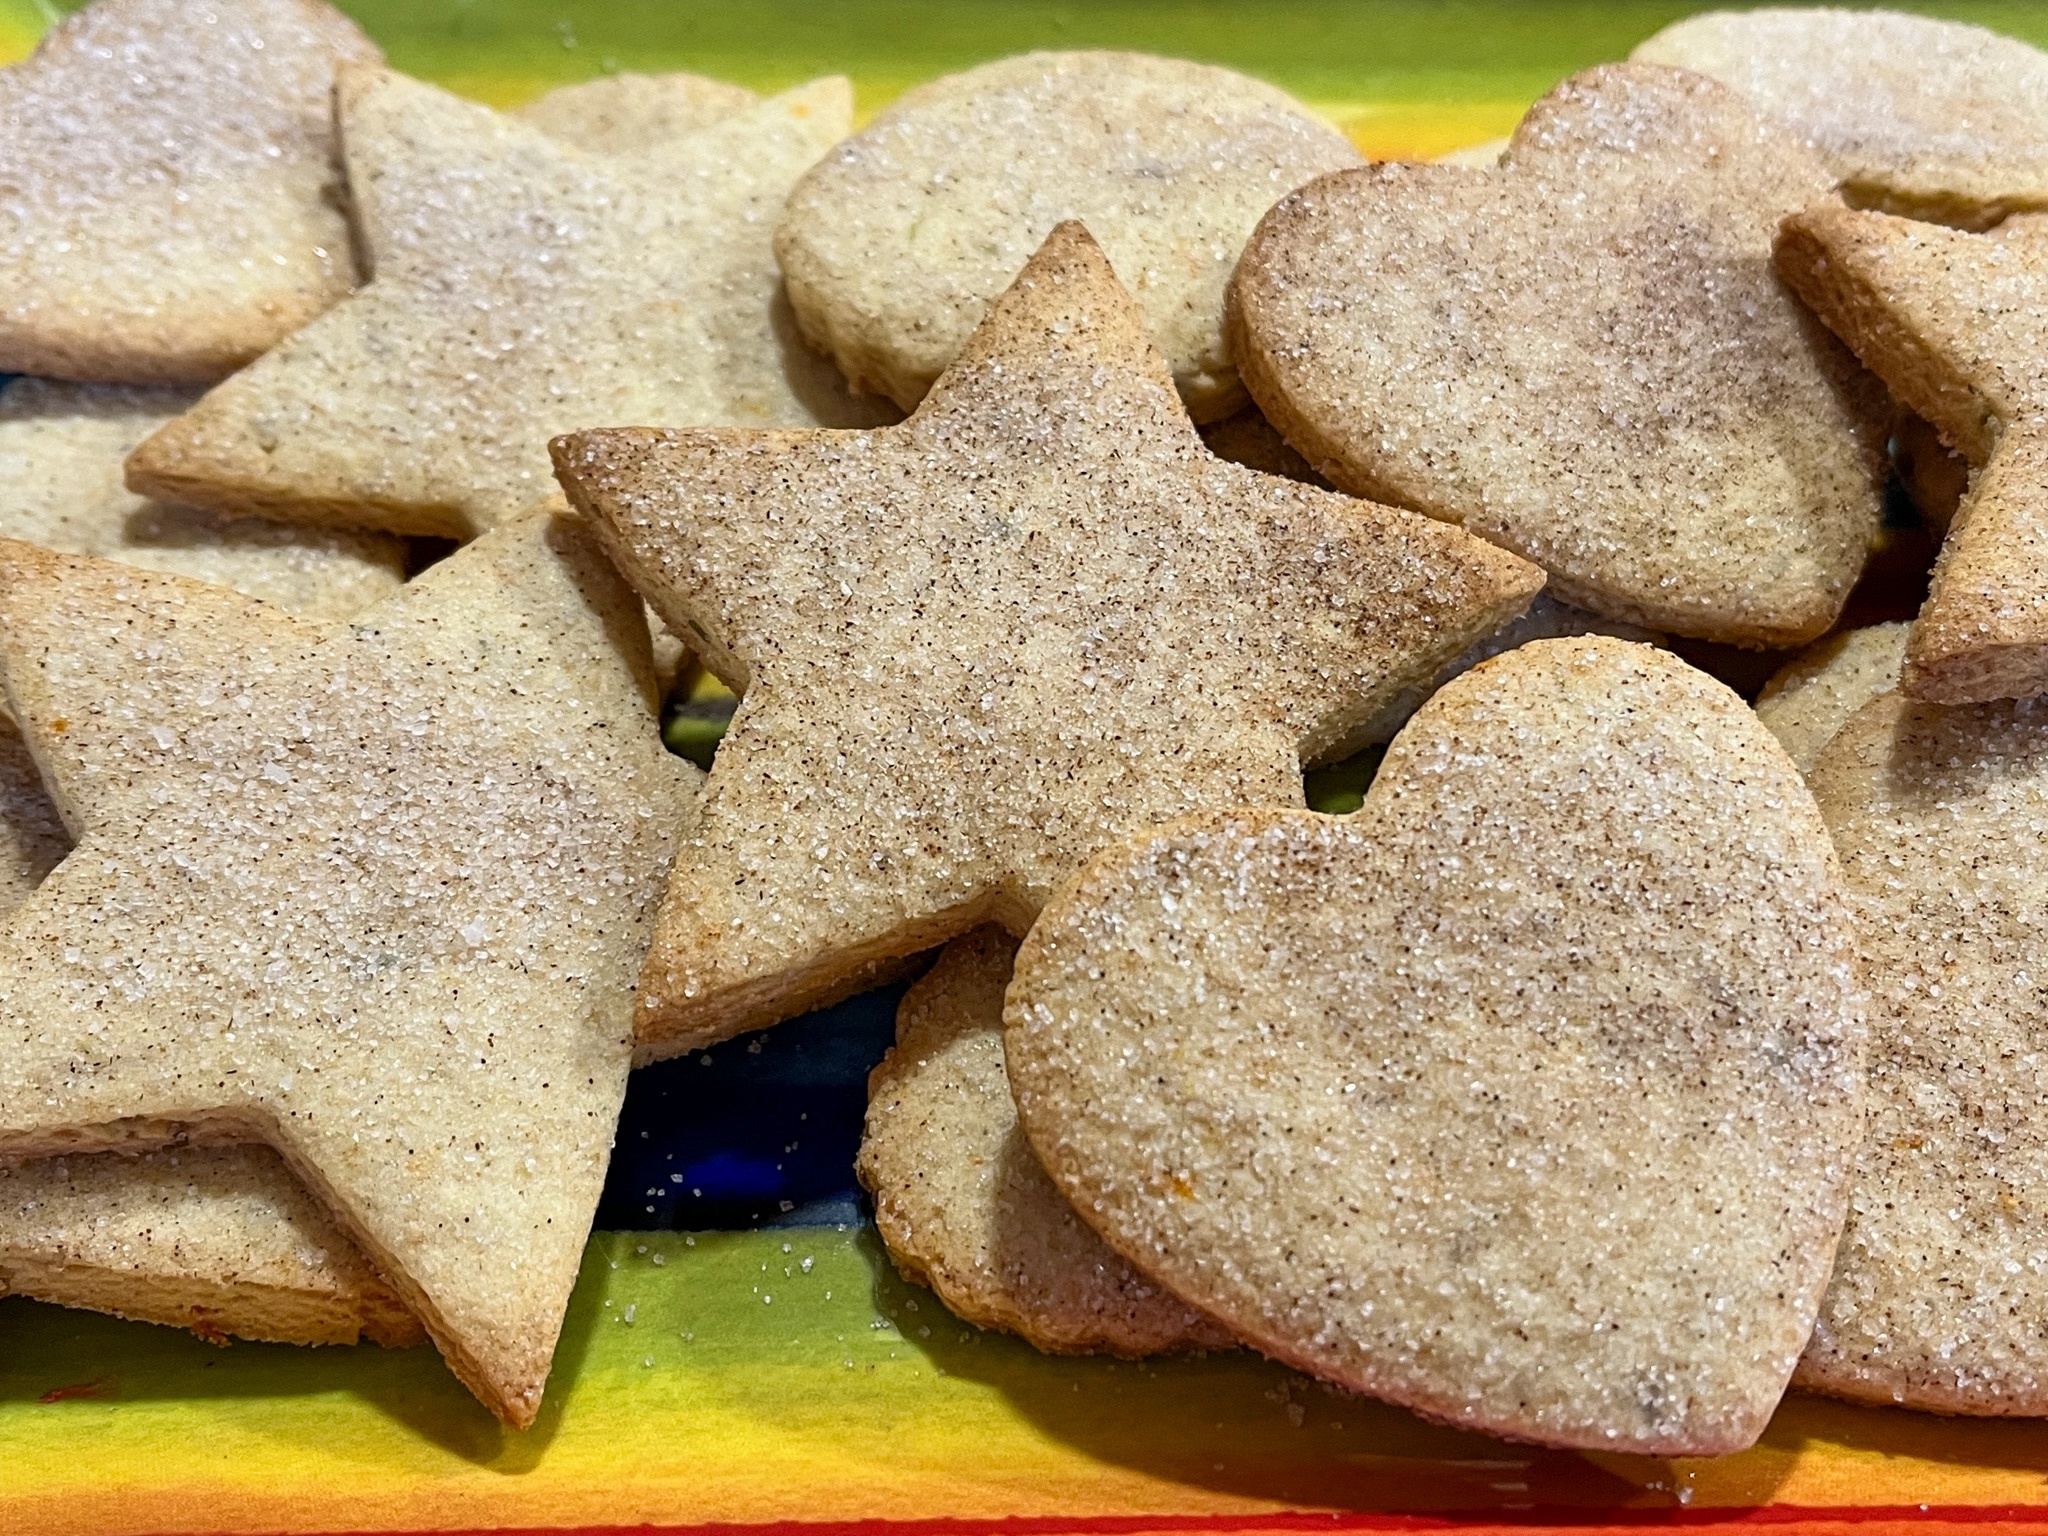
BISCOCHITOS
BISCOCHITOS
(from The New York Times)
½ cup (113 grams) unsalted butter, at room temperature
¾ cup (150 grams) sugar
1 tablespoon anise seeds
1 large egg
1 tablespoon grated orange zest
2 teaspoons vanilla paste or vanilla extract
2 cups (260 grams) all-purpose flour
1 cup (116 grams) yellow masa or finely ground yellow cornmeal
1½ teaspoons baking powder
½ teaspoon coarse kosher salt
2 tablespoons rum or brandy (optional)
FOR THE TOPPING:
½ cup (100 grams) sugar
1 teaspoon ground cinnamon
Small pinch of coarse kosher salt (such as Morton)
Prepare the dough: In the bowl of a stand mixer with the paddle attachment beat softened butter with sugar on medium-high until well combined, about 2 minutes.
While butter is creaming, toast the anise seeds in a small skillet on medium heat for 30 to 35 seconds until fragrant, just to open up the flavor. Transfer to a mortar and pestle, or crush under a heavy pan, and grind to medium fine.
Add the egg, toasted anise seed, orange zest and vanilla to the butter mixture and beat for 2 to 3 more minutes, scraping the sides, until well combined. In a separate bowl, combine the flour, masa, baking powder and salt.
In two additions, with the mixer on low speed, add the dry ingredients to the butter mixture, scraping down the sides of the bowl each time. Increase speed to medium-high and beat until well combined but crumbly. Add rum or brandy, if using, and beat for another 30 seconds to 1 minute, until the dough comes fully together.
Place the cookie dough between two pieces of parchment paper and roll out evenly to ¼- to ½-inch thickness. Freeze for at least 10 minutes, or refrigerate for 20 to 30 minutes. The cookies will keep a sharper shape depending on how cold they are when they go into the oven.
Heat the oven to 350 degrees. Make the cinnamon sugar topping: In a small bowl, whisk together the sugar, cinnamon and salt; set aside. Once the oven is at temperature, remove the dough from the freezer, remove the top parchment layer and cut the dough with a cookie cutter into your preferred shapes, such as stars. Gather any dough scraps and combine them into a disk. Roll and repeat the cookie-cutting process, chilling as necessary. Line 2 large baking sheets with nonstick baking mats or with parchment. Transfer cut cookies, spacing 1 inch apart, to the prepared baking sheets. Sprinkle the cookies with the cinnamon sugar topping.
Bake the cookies, rotating the sheets after 8 minutes, until the cookies are light brown around the edges but still pale in the center, 13 to 15 minutes total. Cool the cookies on the sheets for 3 to 5 minutes, then transfer to a wire rack to cool completely. Store the cooled cookies in an airtight container for up to 3 days.
ENJOY!
to print the recipe, click here
Comments: These are very unusual and quite addictive. I was surprised by how sharp the edges turned out even though there is quite a bit of baking powder in the recipe, made me wonder about adding a touch of masa harina to sugar cookies and see what happens. A friend of mine made this recipe and it turned out hard to roll out, very crumbly, so if that happens to you, add some milk to the dough to make it smoother. Probably less than a tablespoon is all you’ll need. I love their flavor and texture, I hope you also give this recipe a try during the holidays, they are perfect to include in a cookie box, as they are quite sturdy and last well. at room temperature.
ONE YEAR AGO: Two Festive Cakes, Part One
TWO YEARS AGO: Broccoli Slaw Salad with Poppy Seed Dressing
THREE YEARS AGO: Vegan Blueberry-Lemon Cheesecake
FOUR YEARS AGO: Green Tea Rice with Edamame and Butternut Squash
FIVE YEARS AGO: Santa Hat Mini-Mousse Cakes
SIX YEARS AGO: Fun with Sourdough
SEVEN YEARS AGO: Pasteis de Nata
EIGHT YEARS AGO: New Mexico Pork Chile, Crockpot Version
NINE YEARS AGO: Chocolate on Chocolate
TEN YEARS AGO: Double Chocolate and Mint Cookies
ELEVEN YEARS AGO: The Story of my first Creme Brulle’
TWELVE YEARS AGO: Sourdough Mini-rolls
THIRTEEN YEARS AGO: Focaccia with Sun-dried Tomatoes and Gorgonzola
FOURTEEN YEARS AGO: Mediterranean Skewers
FIFTEEN YEARS AGO Fettuccine with Shrimp, Swiss Chard, and Tomatoes