RED WINE SOURDOUGH BREAD WITH CRANBERRIES

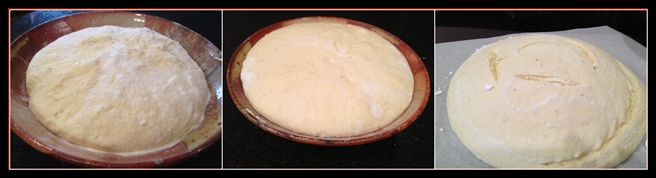
The Fresh Loaf Forum is a virtual paradise for bread bakers, as not only very experienced folks share their best recipes, but you can also get feedback in case problems arise with a recipe.  Last week I stopped by the site and the thread right at the top had the following title: Sourdough Wine Bread. That got my full attention.  I clicked on it, and was blown away by the gorgeous photos, and the unusual color of the bread’s crumb, given by the wine and the dried cranberries.  I revived my starter that same day, and started this bread on a Friday night.  Sometimes you  should not wait to chase a dream.loaf1RED WINE SOURDOUGH BREAD WITH DRIED CRANBERRIES
(adapted from The Fresh Loaf Forum, bread by Yuko)

102 g sourdough starter (at 100% hydration)
288 g  all-purpose flour
80 g water
123 g red wine
6.7 g Salt
80 g dried cranberries

In a bowl, mix flour, wine, and water roughly, cover it with plastic and keep for 12 hours in the fridge (autolyse).

Add sourdough starter and mix by folding dough in the bowl. Add  cranberries and mix by folding dough in the bowl. Add salt and slap & fold for 3 – 4 minutes or until the dough becomes a ball.  Bulk fermentation at room temperature, folding the dough every half and hour until it develops enough strength (I did 4 sets of folds).

Let it rise until the dough starts showing the yeast activity. It takes about 6 hours total depending on the temperature of your kitchen (I used my bread proofing box set at 78 F).  Shape the bread as a boule (or 2 baguettes), place in a banetton or other appropriate container, and let it proof in the fridge for 16 to 18 hours.

Pull it out of the fridge and leave it out for one to three hours (see comments).  Slash the bread and bake in a 450F oven with initial steam for a total of 40 minutes (for a boule), or 20 to 25 minutes for baguettes.

Cool on a rack before slicing.

ENJOY!

to print the recipe, click here

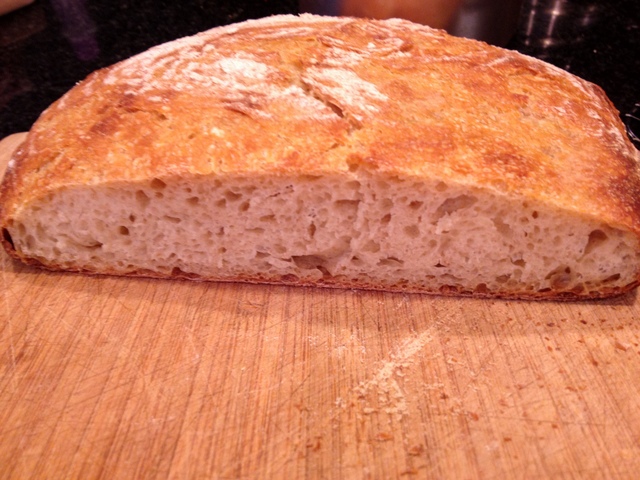
crumb

Comments:  Preparing this bread had me worried up until the point I finally sliced it. Something seemed terribly wrong, as I detected very little fermentation, even though I kept the dough for almost 7 hours at 78 F. The original recipe called for retarding the dough in the fridge and shaping it next day, but my dough seemed so…. slow!  I decided to shape it on the same day, and retard the dough in its final form, ready for the oven.  Ideally, you should remove the bread from the fridge and allow it to almost double in size.  That was not happening, so after a couple of hours I simply had to bake it.

Now, a little tangent.  I usually wake up several times during the night, and tend to think about our experiments while trying to go back to sleep.  Sometimes (unfortunately not that often),  when I wake up again an hour or so later, I have a new idea to solve a problem or at least approach it.  Almost as if during my sleep something goes to work “behind my back”…   😉  That Saturday night, I went to bed thinking about the red wine sourdough and why it seemed so weak.  Exactly at 2am I woke up with one word blinking in my mind: SULFITES!  All wine these days is preserved with sulfites! Maybe some batches have a higher concentration, maybe some of the bacteria or yeast in my starter was particularly sensitive to it.  At any rate, one thing is certain: when you add red wine to make the dough the pH will be lower (higher acidity) so that will affect the efficiency of fermentation.  Add to that the sulfites, and things can get trickier.   Discussing these points in The Fresh Loaf forum, one of the bakers mentioned that when he adds wine to the dough the crumb of his bread gets tighter (indicating lower production of gas). For that reason,  he normally tweaks his recipes to lower the alcohol and increase the water.  Since in this case we are hoping for a nice red tint in the crumb, compromise is in order.  I’d say keep the recipe as it is, and see how your starter behaves with it.  Just for fun, I’ll try to find an organic red wine for my next “experiment”. Organic wines cannot have extra sulfites added,  so the levels of the chemical will be low, ranging from 10 to 20 ppm (parts per million).  Non-organic red wines often reach 125 ppm of sulfites or higher.

Even if the fermentation was not at its peak, this bread was delicious!  I love the slightly sweetness given by the cranberries.  My favorite match for the bread was a Maytag blue cheese, sharp and salty.   Next day, slightly toasted, it seemed even better!

plattercheese

I am submitting this post to Susan’s Yeastspotting

ONE YEAR AGO: Award-Winning Sourdough Baguettes

TWO YEARS AGO: Country Rye (Tartine)

THREE YEARS AGO: Penne a la Vechia Bettola

SESAME AND FLAXSEED SOURDOUGH

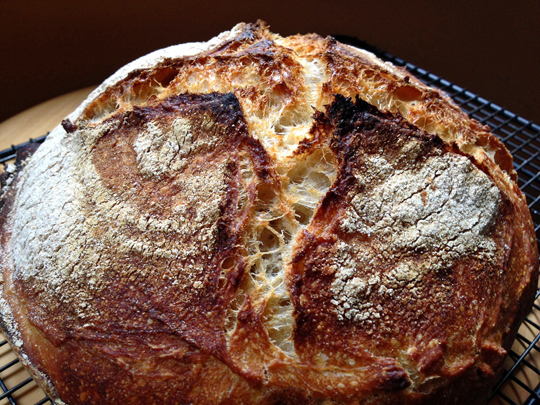
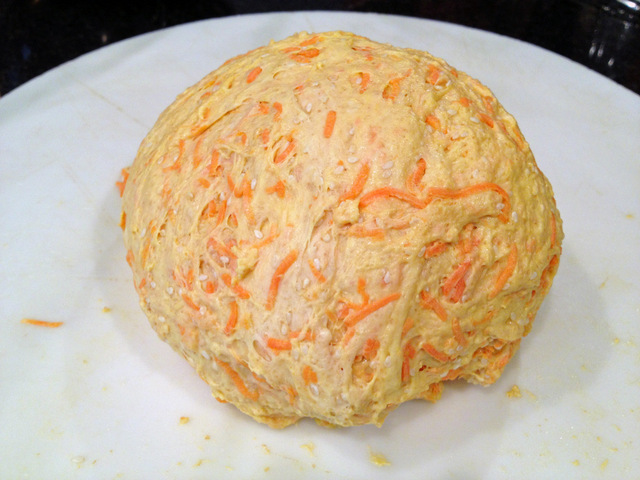
This  loaf of bread was made on a whim on a busy weekend mainly devoted to the lab. Tired of refreshing my starter and putting it back in the fridge, I decided that – no matter what – we would be having home-made bread on Super Bowl Sunday.  I had to cheat, though. The dough got spiked with some commercial yeast to speed up fermentation. Let’s hope the Wild Yeast Gods will have mercy on me…  😉
boule1

SESAME AND FLAXSEED SOURDOUGH
(inspired by Hamelman’s Bread)

Starter mix:
2.4 oz bread flour
3 oz water at room temperature
1 Tablespoon mature sourdough culture

Soaker:
1.5 oz flax seeds (about 1/4 cup)
1/2 cup water at room temperature

final dough:
12 oz bread flour
1.6 oz rye flour
2 oz sesame seeds, toasted
5.7 oz water
10 g salt
all the soaker
4.8 oz starter mix (you will have a small amount left)
1/2 teaspoon active dry yeast

Prepare the levain build 12-18 hours before making the final dough. Mix all ingredients and leave in a covered container at room temperature.  At the same time, make the soaker placing the flax seeds with water in a small bowl.  The seeds will expand quite a bit, so use a bowl that will allow that to happen without overflowing.

Next morning, make the final dough by mixing all the ingredients together in the bowl of a KitchenAid type mixer.  Mix on lowest speed for a couple of minutes.  Check the hydration level, adjust if necessary.  Increase speed to medium-low (level 3 of a KitchenAid), and mix for 3 to 4 minutes.

Let the dough ferment in a lightly oiled bowl for 2 and half hours, folding the dough twice at 50 minutes interval. After 2.5 hours, shape the dough as a ball and place in a suitable container for the final proofing.   My bread was ready to bake in 2 hours and 45 minutes.

Bake in a 450 F oven for 45 minutes. If baking covered to generate steam, remove the cover after 30 minutes.  Cool completely before slicing.

ENJOY!

to print the recipe, click here

composite

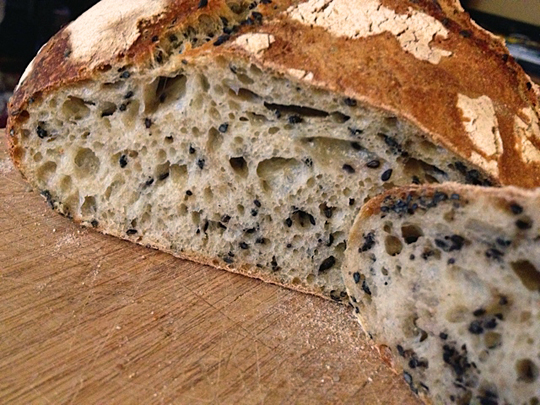
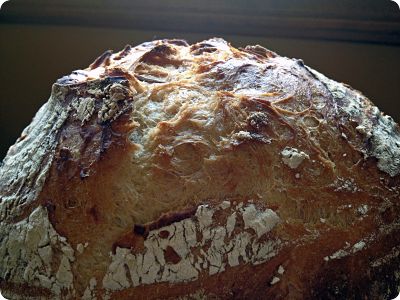
Whenever I bake a loaf of bread, I go into full scrutiny mode. I stare at the crust,  inspect the edge of the slashing,  and look for small blisters on the surface.  Then, after patiently waiting for the bread to cool,  I cut a slice and start the convoluted process of analyzing the crumb.  Phil knows better and allows me this important “bread-introspection” time before reaching to grab a piece. But, once he senses the green light, it never fails:  “This is good bread”.  Really, this bread is awesome!”   It gives me a thrill… I know he means it, and it puts all my bread scrutiny into perspective.   For instance, I had to stop beating myself up because the holes in the crumb did not organize into the pyramidal shape I love so much.  Oh, well… This is good bread.

IMG_1434
The flax seeds are visible, of course, but the sesame more or less disappears in the crumb. However, the flavor is there beyond any shadow of a doubt, and complements very well the small amount of rye and the hint of sourness.  Everyone watching the Super Bowl loved this loaf, some even preferred to turn the back to the TV and concentrate on it.  😉

Buck2

I am submitting this post to Susan’s Yeastspotting….

ONE YEAR AGO: Green Beans with Miso and Almonds

TWO YEARS AGO: Saturday Morning Scones

THREE YEARS AGO: White Bread

AUVERGNE COURONNE FROM LOCAL BREADS

First bread post of 2013!

closeup

A change from the usual boule or batard, this bread is fun to make, beautiful to look at, and a pleasure to eat!   The recipe comes from Local Breads, by Daniel Leader (with Lauren Chattman), a book that any serious bread baker should own.  I actually have his first book too, Bread Alone, and keep both volumes together on the shelf as lovely siblings.  Bread Alone is an excellent starting point for beginner bread bakers as well as those who want to try their hands at baking with wild yeast. Local Breads is perhaps slightly more “advanced”,  lots of sourdough, with formulas that  focus on regional recipes that Leader collected through his  travels around Europe. Reading his books is like having a master bread baker giving you a private lesson, going through the details that make a difference between a so-so loaf of bread and one that makes you dream.

I wanted my first bread post for 2013 to be special, and this loaf surpassed my expectations. It is surprisingly simple, no special flours, no grains, no seeds.  Just a well-fed sourdough starter, the best quality flour you can find, and a little tender loving care to shape the dough and bake it.
bread2AUVERGNE CROWN
(formula from  Local Breads, published with permission from Daniel Leader)

Levain Starter (you will not use the full amount prepared):
45g levain starter, firm (about ¼ cup)
95g unbleached all-purpose flour
5g stone-ground whole wheat flour
50 g tepid water

for the bread:
500g  unbleached all-purpose  flour
340g water
125g levain (less than the amount prepared above)
10g sea salt

Prepare the levain: Pinch ¼ cup of your stiff levain and place in a bowl with 50 mL water.  Mash the levain with a whisk  until it dissolves, then add both types of flour and stir.  Turn the mixture onto a work surface and knead to fully incorporate the flour.  Place the levain in a covered container and let it sit at room temperature (70 to 76°) for 8-12 hours or until it has doubled in volume and the surface is domed.

Make the bread: Pour the water into a large mixing bowl or the bowl stand mixer. Combine the flours until all the ingredients are incorporated. Cover and let it rest for 20 minutes, while the flour hydrates.Uncover the dough, add the salt and the levain and incorporate with your hands or a spatula using a fw firm strokes.  Knead the dough with the dough hook by mixing on low-speed (2 on a KitchenAid) for a minute.  Increase speed to medium (4 on a KitchenAid) and knead until smooth and muscular; an additional 8 to 9 minutes. Transfer the rounded dough to a lightly oiled container, preferably clear, so you can mark the level of the dough with a masking tape.  Let the dough ferment until doubled in size, 3 to 4 hours at a temperature of 70 to 75 F.

Shape the crown.  Cover a surface with a little flour.  Place the risen dough over the counter and roll it very gently into a long fat rope, about 8 inches long and 3 inches wide. Connect the ends of the rope overlapping by about 4 inches. Press the ends together to seal. Dust a ring baking pan with flour and carefully drop the shaped dough inside.  Allow it to proof at 70 to 75 F until it looks “pillowy”,  1 to 1 and a half hours. When you press your finger tip into the dough, it should spring back slowly.  As the bread proofs, heat your oven to 425 F and place a large roasting pan, without the lid, inside.

Bake the bread. Once the bread is proofed, slash the outer edge of the round with a razor blade, and place the ring pan inside the roasting pan, and close with the lid slightly moist with tap water.   Bake covered for 30 minutes, uncover, remove the ring pan from the oven, carefully invert it to remove the bread, and finish baking the bread sitting on the oven rack, for 15 to 20 more minutes.

Let it cool completely on a rack before slicing through.

ENJOY!

 to print the recipe, click here

bread1
Comments: In the past, I’ve made a few loaves of ring-shaped breads, and had problems moving the bread to the oven after the final rise. I ended up deflating the dough too much and also messing its shape.  This time, I tried something a little different: after shaping the loaf, I placed it in a well-floured ring baking pan, and let the dough go through the final proofing in the pan.  When it was time to bake, I quickly scored the outside edge of the dough, and placed the pan and all inside a pre-heated, large roasting pan.   The next couple of photos should help explain my strategy, which, I am thrilled to inform, worked quite well!
doughbakingpan
After 30 minutes baking with the lid closed, I removed the lid, took the ring pan carefully out, inverted it quickly over the counter to release the bread, and placed the bread on the oven rack, without any baking sheet underneath, so that the crust would get a final roasting free of constraints.   I like to bake my bread until it’s really dark, because that’s when the taste of the crust delivers the punch I like, the one that transports me to a Parisian bakery…

ABOUT LOCAL BREADS: Ten years passed between Leader’s publication of his first book, Bread Alone, and Local Breads. During that period, he worked with many master bakers in Germany, Italy, and Eastern Europe. In the first chapter of his book, he talks about his bread journey and how he’s gained a special respect for simple but crucial details such as the choice of flour. After a couple of chapters devoted to general lessons on equipment and technique (a must read, by the way), he shares his many recipes in sections divided  according to region. He will take you from France to Italy, stop in Germany, Poland, Austria, and the Czech Republic, sampling some of their unique yeast concoctions.

If you enjoy baguettes, you’ll be happy to know that Leader offers recipes for French, Italian, and German baguettes, so you can bake them all and compare their “personalities”. He also shares his recipe for the famous miche from Pain Poilane in France, as well as German Rye Sourdough, two examples of bread that, in my humble opinion,  can be quite intimidating.  With his detailed instructions, you’ll feel ready to tackle any project, Pain Poilane included!  So, if you don’t have Local Breads on your shelf, correct this severe cookbook handicap with a simple click here.  😉

I would like to thank Dan Leader for his permission to publish this great recipe. This post goes straight to Susan’s Yeastspotting!

ONE YEAR AGO: Orange-Pomegranate Chicken

TWO YEARS AGO: The Getty Museum

THREE YEARS AGO: Crowd-Pleasing Pulled Pork

MERRY CHRISTMAS!

For those who celebrate, we wish you a Merry Christmas!  In proper holiday spirit, I will share with you a recipe that has festive written all over it: Sourdough Popovers!  They were described quite appropriately in the King Arthur website as “High, Wide, and Handsome”    😉
baked222

SOURDOUGH POPOVERS
(from King Arthur website)

1 cup milk (full-fat, reduced-fat, or skim)
3 large eggs
1/2 cup sourdough starter, fed or unfed
3/4 teaspoon salt
1 cup unbleached all-purpose flour

In the microwave or in a small saucepan, warm the milk until it feels just slightly warm to the touch. Combine the warm milk with the eggs, sourdough starter and salt, then mix in the flour. Don’t over-mix; a few small lumps are OK. The batter should be thinner than a pancake batter, about the consistency of heavy cream.

Heat a muffin or popover pan in the oven while it’s preheating to 450°F. Carefully remove the hot pan from the oven, and spray it thoroughly with non-stick pan spray, or brush it generously with oil or melted butter. Quickly pour the batter into the cups, filling them almost to the top. If you’re using a muffin tin, fill cups all the way to the top. Space the popovers around so there are empty cups among the full ones; this leaves more room for expansion.  Bake the popovers for 15 minutes, then reduce the oven heat to 375°F and bake for an additional 15 to 20 minutes, until popovers are golden brown.

Remove the popovers from the oven and serve immediately.

ENJOY!

to print the recipe, click here

Comments:  Popovers might be the easiest thing in the world to make! In this case, the sourdough doesn’t act as the leavening agent, it is there exclusively for taste, so don’t worry if your starter is not at its peak of activity.  A big bowl, a wire whisk, and a few minutes of preparation is all you’ll need. The real magic happens in the very hot oven.  If you have kids around, let them peek as the popovers rise up and up and up, it’s fun to follow their baking.

Enjoy the popovers as soon as they are out of the oven, because they will deflate somewhat.  Break each one open, and dig in!
goodie111
They are perfect with roast meats.  We enjoyed these babies with roast turkey, gravy, and the most delicious cranberry sauce with dried Mission figs and Port wine.  Recipe to be featured soon, stay tuned… 😉
plateddd

I am submitting this post to Susan’s Yeastspotting….

ONE YEAR AGO: Merry Christmas!

TWO YEARS AGO:  Sourdough Focaccia, with a twist

THREE YEARS AGO: Merry Christmas!

LET’S BRAID IT ON!

Joanna from Zeb Bakes is a constant source of inspiration. She always comes up with the most amazing breads, just because she got up one day in the mood to play with an idea, or try to mimic something from a fancy bakery.  Not too long ago she shared with her readers a gorgeous bread with a crown, looking like a Roman Emperor, perhaps Julius Caesar on his golden days.  According to Joanna, the Emperor had indulged a tad too much on vino the evening before, so his crown was tilted to one side.  Granted, we’ve all had our days of overindulging, so let’s not be too critical.  Here is my attempt at crowning a sourdough:
boule1
HAIL CAESAR SOURDOUGH
(adapted from Joanna, at Zeb Bakes)

Mix together:
25 g of active sourdough starter
100 g  bread flour
125 g water

Leave for 12-16 hours in a cold kitchen;  6-10 hours in a warm one.

The following day, make the dough:
225 g of the above mixture
200 g water
175 g bread flour
150 g regular bread flour
75 g dark rye flour
1/2 tablespoon of dark malt dissolved in water
3 g dry yeast
10 g sea salt

Mix all ingredients together, except the salt.  Leave the mass of dough to rest for 20 minutes, sprinkle salt on top and knead it in for a couple of minutes until smooth. You can use a KitchenAid in low-speed if you like.

Ferment the dough for 3 hours, with two folds (at 60 and 120 minutes). Leave the dough rise undisturbed for the last hour.   Weigh the dough and separate a small amount roughly 10% of its weight for the braid.  Divide that portion in three, make long strands with it, and form a braid.   Place the braid at the bottom of a well floured banetton, form the remaining of the dough as a ball, and place it, seam side down over the braid.

Ferment the shaped dough for 2 hours, invert it on a piece of parchment paper, and bake in a 450 F oven with initial steam for 20 minutes, reduce the oven to 420 F and bake for 20 to 25 minutes more.  Cool completely on a rack.

ENJOY!

to print the recipe, click  here

composite

I loved making this bread!  When Joanna posted her article, she got a comment from the baker who originally designed this recipe, and he advised her to use less dough (5 to 8% from the total weight) to make the braids.  I used 10% because it already seemed like a very small amount, but I ran into some difficulties. I should have rolled my strands a little longer, and glued them better to the rest of the dough.  Still, it is a nice touch to embellish a sourdough boule. I will not lie to you, though.  My  Emperor was also vino-happy the previous night, as these (more revealing) shots will demonstrate. 😉

oops2oops

This was a nice loaf of bread, with the delicious flavor of rye, and a golden brown crust, boosted by the inclusion of malt. I baked it inside a large roasting pan with a lid, after a nice comment left by Donna on my sourdough mini-rolls post. It worked extremely well, thanks for the great tip, Donna!  I did not add any extra water inside the pan. I just poured some inside the lid, emptied it leaving a little water clinging to the surface, and inverted it quickly to close the roaster.  At the end of 20 minutes I opened the roasting pan and continued baking uncovered.

closeup

Joanna, thanks for another great recipe!  This one goes straight to Susan’s Yeastspotting

ONE YEAR AGO: In My Kitchen, December 2011

TWO YEARS AGO: Festivus Dinner Rolls

THREE YEARS AGO: 100% Sourdough Rye