UTTAPAM, WHITE LENTIL AND RICE FLATBREAD


I am back with another recipe using ivory lentils (in case you’ve missed the first one, click here). I had never heard of uttapam, but learned about it in the website of the very company I got the lentils from. They are described as flatbreads, but I suppose little pancakes (or fritters) could work equally well if not better. After all, it is more a batter than a dough, that is poured instead of rolled, and cooked over a griddle, not an oven. In my mind, that gravitates to pancake territory. But flatbread, pancake, fritters… it’s irrelevant. They are delicious. Dangerously so, I should add.

UTTAPAM
(slightly modified from Woodland Foods)

(makes 8 little pancakes)

1 cup Basmati rice
1/2 cup Ivory lentils
3/4 teaspoon sea salt
1 teaspoon sugar
1/2 teaspoon baking soda
1 cup peas (fresh or frozen)
1 Jalapeno pepper, minced
1/2 cup fresh cilantro, chopped
vegetable oil (I used grape seed)

Thoroughly rinse rice and lentils separately. Place each in large bowl of fresh water and soak for 2 hours.

Drain rice and lentils, and place in blender. Add salt, sugar and baking soda and grind mixture into paste. Add about 1/2 cup water, and continue blending to create thick batter. Transfer mixture to bowl, and set aside to ferment at room temperature for at least 4 to 12 hours.

Combine peas, Jalapenos and cilantro in a small bowl. Heat griddle or nonstick skillet over medium heat and brush with oil. Pour in 2 to 3 tablespoons batter and spread out with back of spoon to create circle 4 inches in diameter. Sprinkle some of pea mixture evenly on top. Cook until small bubbles appear on surface, then flip and cook other side until crisp and golden.

ENJOY!

to print the recipe, click here

Comments: I always feel a bit insecure making ethnic recipes I have zero experience with, but I must say this one turned out excellent, no problems, every step seemed to happen exactly as expected. Plus we both loved the texture and the taste of the little pancakes, that were served with a turkey chili. Sally again takes a ton of liberties with her dinner preparations. Chili made with turkey. Served with little flatbreads from India.  All enjoyed with no remorse whatsoever!


Pin me, pin me!


ONE YEAR AGO: Valentine’s Day Sweetheart Cookies

TWO YEARS AGO: Fesenjan, Fast-Food Style

THREE YEARS AGO: Lavender Macarons with White Chocolate Ganache

FOUR YEARS AGO: Raspberry Chocolate Truffles

FIVE YEARS AGO: Red Velvet Cupcakes

SIX YEARS AGO: Happy Valentine’s Day!

SEVEN YEARS AGO:  A Few Blogging Issues

EIGHT YEARS AGO: Dan Dan Noodles

NINE YEARS AGO:  Sophie Grigson’s Parmesan Cake

TEN YEARS AGO: Antibiotics and Food

PUFF BREAD BALLS, TWO SALADS AND A COOKBOOK REVIEW

Do people need cookbooks these days? Just think about it. You can find pretty much any recipe you want with a click of your mouse. Endless content online by food bloggers and food sites, free for you to grab and enjoy. Some virtual spots might annoy you a bit with pop-ups and advertisement, but it is a small price to pay to get that recipe to put your bottle of pomegranate molasses or the jar of rose harrissa to good use. I have a different view, though. I buy cookbooks because I want to support the authors and honor their hard work. For that reason, I never share a recipe from a cookbook unless I get permission to do so. Last month I bought  “DOUGH: Simple Contemporary Bread”, from Richard Bertinet, and immediately fell in love with it. His approach to making bread is straigthforward and very creative. It takes a lot for a cookbook to impress me enough to write a review about it. However, I could not wait to share my views on Bertinet’s and in fact I loved it so much I had to also bring his book “CRUMB: Bake Brilliant Bread” into  my life.  If you love bread baking and want to have recipes that make you go “why I never thought of this?” – this one is for you!

(to see a video of his slap and fold technique, click here)
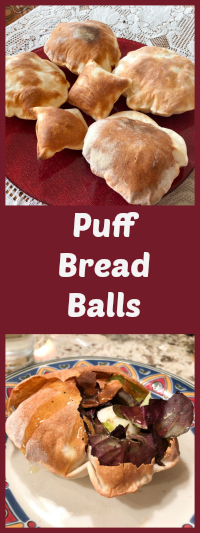
PUFF BREAD BALLS
(published with permission from Mr. Richard Bertinet)
from his cookbook DOUGH: Simple, Contemporary Bread)

10g yeast (fresh if possible) (I used 6 g dry instant yeast from King Arthur Flour)
500g bread flour
10g Salt
350g water

Heat oven to 475F.

If using fresh yeast, rub it into the flour using your fingertips as if making a crumble. Add the salt and water. Hold the bowl with one hand and mix the ingredients around with the other for 2–3 minutes until the dough starts to form. Knead the dough according to his method (see video link above) or use a KitchenAid type mixer for 2 minutes, then turn up to the next slowest speed and mix for a further 6-7 minutes until the dough becomes smooth and elastic.

Remove the dough from the bowl, transfer to a lightly floured surface and shape into a ball. Rest the dough  for about 20 minutes (the puff balls don’t need extensive proofing time).

Divide it into equal pieces (about 40g each).  Round each piece of dough into a small ball, cover with a tea towel and leave to rest for a further 5 minutes. Make sure there are no tiny pieces of dried dough on your work surface or rolling pin, as any particles that get into the dough will stop it from puffing up. Dust your work surface with some sifted flour (the idea is to avoid large particles at all cost).  

Roll out each piece of dough into a disc, turning it over a few times, and flouring well as you go. Continue rolling until the dough is very thin (1–2mm). You will need to bake the puff balls one or two at a time, depending on the size of your oven. I rolled them over parchment paper and simply carried the paper into the oven. It gets a bit yellow at the end of the baking time, but it does not burn. I find that if I try to place the thin dough over a wooden peel, it gets totally messed up in shape. If you are better at it, try it that way, which is the way Bertinet recommends. Bake for about 3–4 minutes. The puff balls should inflate very quickly and are ready when they are completely puffed up, golden brown and sound hollow if you tap them.

If you like to make pillows, use a square cutter, they puff just like the round balls, and are very cute.

Carefully remove each one from the oven and cool on a wire rack. The puff balls are at their best about 3–4 hours after baking, but can be kept for a couple of days in an air-tight container.

ENJOY!

to print the recipe, click here

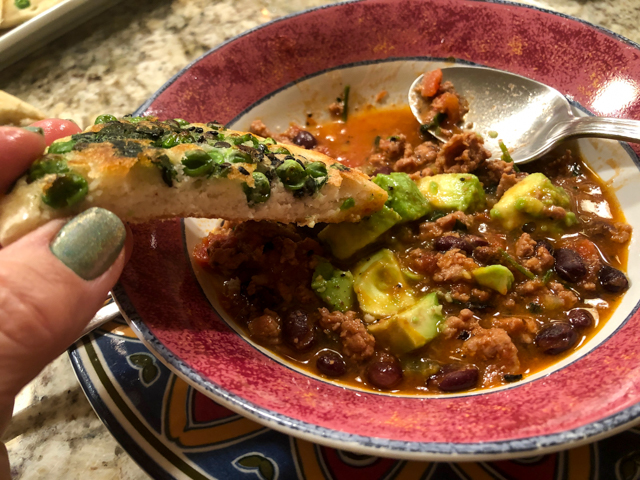
These were so much fun to bake! I managed to stick three at a time in our oven, but they bake so fast, it’s not big deal if you need to bake one or two only. The balls would be fun to serve at a cocktail party, especially if you make the little pillows, and let your guests break them in half, or small pieces, using them as spoons to dig into hummus or other dips. I will definitely be making this often, as they are ready so quickly.

SALAD IN A BREAD BALL

Greens of your choice
Diced Tomatoes
Diced Cucumbers
simple salad dressing (olive oil, lemon juice, mustard, salt and pepper)

Brush a small circle of the base with water to soften the crust, then carefully cut out this softened disc with a sharp knife. Just before serving push a good quantity of salad gently into each puff ball. Let everyone break the tops with a spoon or fork, add dressing, and eat with the pieces of broken bread ball.
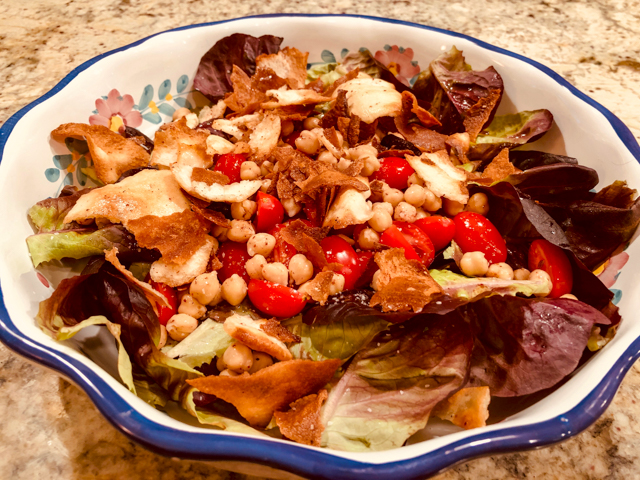
FATTOUSH-LIKE SALAD
(from the Bewitching Kitchen)

a couple of bread balls shattered into pieces
olive oil
1/2 tsp sumac
baby lettuce leaves
1/2 cup canned garbanzo beans, rinsed
smoked paprika
tomato pieces
cucumber pieces
for vinaigrette:
juice of 1 lime
1/4 cup olive oil
salt and pepper to taste
1/2 tsp sumac
1/8 tsp ground allspice

Heat the olive oil in a non-stick skillet, add the pieces of bread and sautee for a few seconds. Season with the sumac and reserve over paper towels to remove excess oil.

Prepare the garbanzo beans: coat them very lightly with olive oil, add smoked paprka, a touch of salt and microwave for 30 seconds. Remove from microwave and allow it to cool  before adding to the salad.

Make the vinaigrette by emulsifying all ingredients together. Assemble the salad in a large bowl, add the vinaigrette and pieces of seasoned bread.  Serve right away.

ENJOY!

to print the recipe, click here

Comments: This salad was a winner, all the way. Normally made with pita, I think the broken bread balls worked even better, they developed a very nice flavor, and got super crunchy. The garbanzo beans straight from the can, benefit from a quick visit to the microwave, a trick I saw somewhere online and stayed in my memory. You can use other spices, the idea is to just break that boring canned feel. It works!  You could saute them briefly in a pan but the microwave makes it even easier.

And now, without further delay, my thoughts on a great cookbook. Thank you, Mr. Bertinet for so quickly answering my request to publish this recipe. You made the life of this food blogger a lot easier!


REVIEW OF RICHARD BERTINET’S DOUGH: Simple Contemporary Bread

The book is based around the kneading technique favored by  Bertinet, which is quite more energetic than folding, because you will be slapping the dough around with considerable enthusiasm, but he does so in a way that incorporates air into the dough much more efficiently. It is almost like a dance, I cannot help but think of samba as I go through those moves. You get into the rhythm, and  soon the dough starts developing structure right under your fingers. Fascinating and fun.

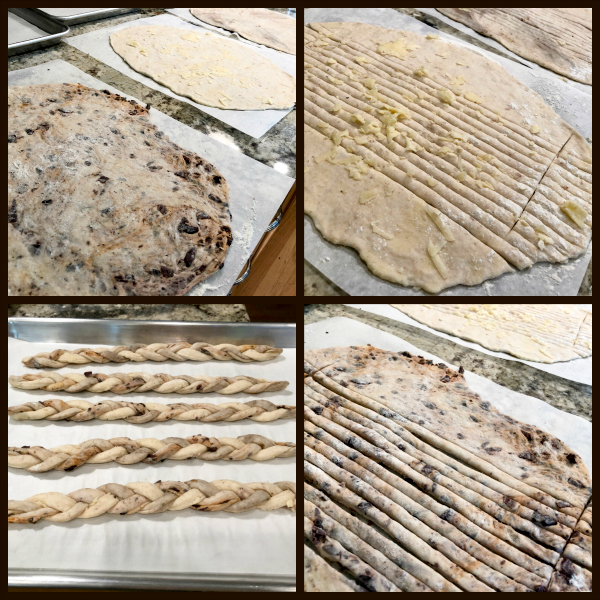
He organizes the book in 5 chapters according to the type of dough: White,  Olive, Brown, Rye, and Sweet Dough. Every bread in each chapter uses a single recipe for dough that he takes into unique directions, some will be familiar to you, others will intrigue and make you dream.  He uses fresh yeast, I have a hard time finding it where I live, so I use about 60% of the amount of instant dry yeast. I will list the recipes that called my attention in each of the chapters.

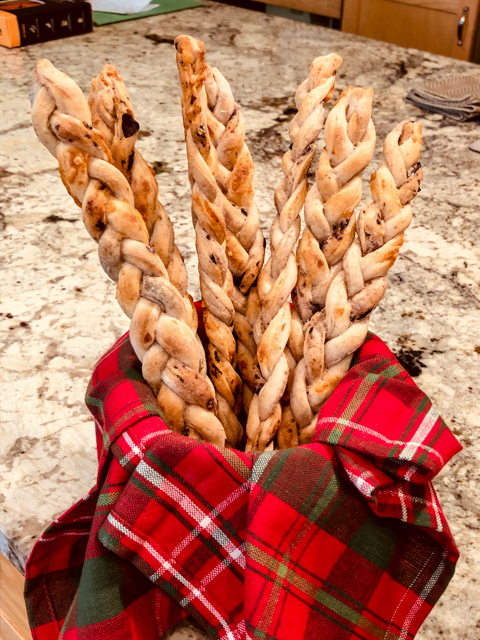
WHITE DOUGH. From this group I got the recipe for the cute bread puffs I shared today. But I loved the idea of “Bread Shots”, Sesame and Aniseed Breadsticks, Spicy Moroccan Rolls (OMG),  and also his Saffron Rolls.

OLIVE DOUGH. A departure from the first chapter, in this variation he adds a small amount of olive oil to the dough, which gives it more elasticity and softness.  Maybe you think that Tomato, Garlic and Basil Bread is too “common?” Wait until you see how he shapes it, and you will definitely re-consider.  How about making a soup bowl with your bread? He explains how, I cannot wait to try that soon, while soup weather is with us. I want to make a smoky tomato soup and serve it inside a cute bread bowl. And no, it’s not a round loaf with the crumb removed. This chapter has one cute idea after another, I was also taken by his Parmesan, Parma Ham, and Pine Nut Slices, they are shaped almost as cinnamon rolls. So so clever.

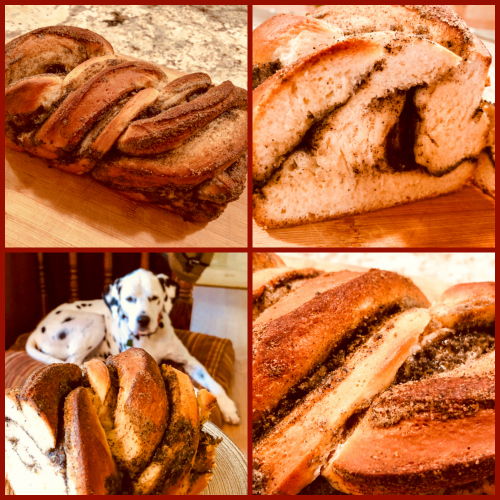
BROWN DOUGH. Honey and Lavender Loaf…. Cardamom and Prune Bread… Do I have your attention yet?  Those are two of the loaves that I definitely want to try, using what he calls brown dough as a starting point. As you may have guessed, it is a straightforward dough with a high proportion of whole-wheat flour in it. Once again his creativity shines in cute ways to shape bread, like his Poppy Seed Stars. Just lovely and you can definitely use that shaping in any bread dough you’d like.

RYE DOUGH. I really like his approach to rye. It is a tricky flour to work with, and the higher the proportion of rye in a dough, the worst it gets. Gummy, heavy, unpleasant to work with and not always ending on a happy note after baking. He uses a low proportion of rye so that you profit from its taste but it still handles as a regular dough during kneading and shaping. His Walnut Bread and Olive Bread are two that called my name pretty loud. They look hearty, rustic, and are both quite beautiful. Aniseed and Guinness Bread seems very intriguing and he also shares a recipe for Dark Rye Bread that flips the formula around, it is mostly rye with a touch of white flour. I should really give it a try, particularly with his kneading method. Could be fun…

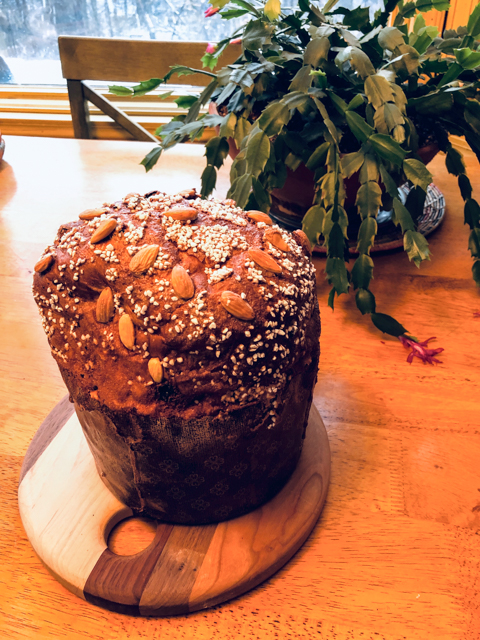
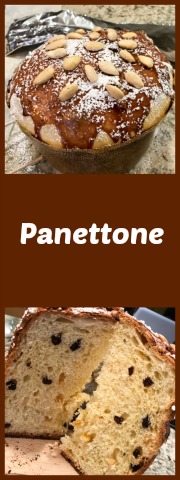
SWEET DOUGH. I thought about showcasing one of the recipes in this chapter but the puff bread was too cute not to share. The thing with his sweet dough is that it works both for sweet and savory concoctions, because it is not overly sweet. I love that. I am fascinated by all recipes in this chapter, so I will give you just the top four: Orange and Mint Loaf, Chocolate Buns (they look amazing!), Apricot and Almond Tart (yes, he uses his sweet dough to line a tart!), Pain Viennois.

Every recipe in the book is also adapted for a KitchenAid type mixer, so don’t worry if you prefer not to go the Samba-Knead route. There are no sourdough recipes in the book, so all you need is some commercial yeast and a little time. He shares a nice method to increase flavor, in which part of the dough is stored in the fridge and “refreshed” pretty much like a sourdough starter would.  Bakeries use that trick very often and it’s a simple way to pump flavor in the home kitchen.

If you love to bake bread, or if you would like to start but feel a bit intimidated, get his books (links to amazon in the beginning of the post; I make no profit from your acquisitions).

ONE YEAR AGO: Pistachio-Caramel and Apple Mousse Cakes

TWO YEARS AGO: La Couronne Bordelaise

THREE YEAR AGO: A Special Birthday Dinner

FOUR YEARS AGO: Duck Confit for a Special Occasion

FIVE YEARS AGO: Tuscan Grilled Chicken and Sausage Skewers

SIX YEARS AGO: Celebrate Wednesday with Pork Tenderloin & Apples

SEVEN YEARS AGO: Salmon Wellington

EIGHT YEARS AGO: The Green Chip Alternative

NINE YEARS AGO: Weekend Pita Project

TEN YEARS AGO: Let it snow, let it snow, eggs in snow


BREAD: EPISODE TWO OF THE GREAT AMERICAN BAKING SHOW

SPOILERS INSIDE!
If you have not watch the show yet,
save this post for later…

For those who are not familiar with GABS, Bread is Paul Hollywood’s “thing.” Everybody who’s been on the show over the years is afraid of baking bread for him, for obvious reasons. I am not too worried about bread in general, but bread sculpture is a whole different story. I don’t like it, in fact anything with the term sculpture makes me go into hyperventilation. When I got the assignment for Bread and the showstopper was a sculpture based on the Twelve Days of Christmas I considered buying a one-way ticket to Mongolia. And some ultra-heavy coats. But before that happened in the tent, we had a signature bake and a technical.  Let’s talk about those.

SIGNATURE BAKE  

HOT’N CRUNCHY BREADSTICKS

We were supposed to present 12 breadsticks, all uniform in size, with a certain minimal length and we could make them crunchy or soft, it would be up to our personal taste. I opted for crunchy and went with a three-stranded braid, made with three different flavored doughs. Which requires me to share a very important statement with you.

The assignment was to last for 1 hour and 45 minutes. That obviously includes proofing time and baking. What possessed me to go for 12 three-stranded braided bread sticks? Honestly I don’t know. Of course, I practiced at home, I did it twice. I felt that time wise it was a bit tight, but doable. What I did not take in consideration was the Theory of Tent Relativity (TTR),  in which time shrinks at different rates depending on the Daring Factor (DF) of your bake.

I am tweaking this post after having watched the episode, so I know they did not show one particular moment in which Paul and Sherry visited my flour covered station a second time to see how things were going, and those penetrating blue eyes stared into mine and asked “do you think you have enough time to finish them?”  The look on his face left little room for doubt. He thought I was doomed. He then grabbed Sherry’s arm and told her they should leave me alone to work. And that’s when I realized I had no idea of how much time was left, but I knew the finish line was a lot closer than I hoped for. With a shiver up my spine, I tried to keep calm and braid on.

Did I say keep calm? Yeah, right. I braided like the Energizer Bunny would with a brand new battery and a full can of Red Bull. I baked those breadsticks at a higher temperature and took them out of the oven with less than 30 seconds to spare.  I was shaking inside and really upset at myself for designing a bake with such high probability of failure. Live and learn.

Now if you watch the show, you know that the REAL touchdown was scored by Tanya who got “the handshake.”  Actually, our group is doing pretty good! Handshake on the very first episode to Sarita, and again on Bread.  Tanya’s breadsticks were gorgeous, elegantly twisted, with a sprinkle of cilantro all over, and deliciously hot. Yes, we get to taste each other’s bake once it’s all said and done. Rather… done and judged!

In the future I will share a modified version of this recipe in which I dealt with the problem of excessive moisture in the Kalamata olives. Stay tuned, these breadsticks are a bit labor intensive, but I now made them five times and everybody loves them.

TECHNICAL CHALLENGE

COB LOAF

Reading the recipe, I remember feeling so good about it, I felt I was going to surf through like a pro (famous last words). It is a simple, straightforward bread, just using what seemed like a huge, almost excessive amount of herbs (it was not, it tasted amazing!). I had no issues with mixing the dough, it proofed nicely, it shaped nicely. Then, in the final last step, slashing the surface in the criss-cross pattern, Sally had a bad, very bad intuition about it. I slashed it in a way that was probably perfect, but then I went back and essentially murdered it. Why did I do that? Because I thought that cob would indicate a flattish shape, pretty much like cobblestones that covered the streets of London in the 1700’s. Brilliant. I thought I was nailing it, when instead I was adding a nice nail to my own coffin. Even when I placed my poor specimen of Cob behind my picture, I was feeling good about it. But when Paul came in and described the perfect Cob as a plump round loaf, I felt a strange coldness inside my soul. Like a Game of Thrones “Winter is Coming” sensation.  So the last in technical was not surprising. But not very easy to take either.

Not everything was bad about the technical, though. How often do you see a 4ft 11 +1/2 inch female beat a former football player in arm wrestling? There you go.

Free entertainment for the viewers, thanks to a very sneaky camera I had no idea was in play. What? You think Mr. Spice let me win? Seriously? Nah… I cannot possibly take another blow to my ego.


SHOWSTOPPER CHALLENGE

GOLDEN ORNAMENTS CHRISTMAS TREE

I was not looking forward to that challenge at all. Coming last in technical the afternoon before made me very anxious, I knew I had to do a good job, because a bad bread sculpture would easily destroy any good performance brought by my breadsticks. Every person who gets last in technical is immediately at risk of being eliminated, so I went into the tent with a very heavy weight on my shoulders.

At home, I practiced the sculpture three times, which meant over 13 hours devoted just to one assignment of the show. The rings went from full braids to twists, back to double braids, the way to shape them and proof them was also a bit tricky. I wanted them to look as proportional as possible to the tree.

The tree posed problems to bake perfectly. That component I made in fact five times at home, trying to get a good balance of taste and proper texture for it to stand up. Not easy, and don’t think I got there at showtime. And the ring bases in the show could have a lot more fruit, but at least it allowed me to pass safely through another episode.

Sherry liked that the sculpture had movement, as the rings kind of bounced a bit as I walked to the stand. That bit did not make it in the final edition of the show, but it will stay in my mind as a gentle pat in the back.

And with that we come to the person being eliminated second.

My very dear Carlos, fellow South-American, kind, warm-hearted and oh-so-witty! Carlos brightened up our time in the tent and the very long hours off-filming hanging together in what could be called “the green room.” He always came up with ways to pass the time. For instance the first time we were sitting in those stools waiting for the technical judgment in CAKE, we were sitting there for a long time. Staring at our photos standing in front of us over the bench. So Carlos starts making up captions for the photos, trying to decide what each person looked like. It was hilarious and he hit all very very well. Here is mine:  Hollistic Alternative Medicine Therapist!  Me, of all people!  But I gotta admit, he hit it perfectly. Here are the others so you can pay attention next time the show is on…. Helen is running for Office…. Dana is running for City Council… Tanya hosts a Farm to Table Blog…. Marissa is ASB President….  Alex depicts the best Linkedln profile picture… Brother Andrew is a Missionary to indigenous unreached peoples, and Carlos (according to Marissa) is a contributor to High Times Magazine…

So, as you can see, we found plenty of ways to keep ourselves entertained, and Carlos was a huge part of it. He started his food blog recently, where he mixes recipes with pretty deep thoughts about himself and the world. A unique guy that I am so glad I had the chance to meet. I always tell him he could be a fantastic writer for stand-up comedian acts. We, and almost all bakers in the group have kept in touch pretty much daily since we left London, and there is not a day that goes by without Carlos making me laugh with a remark about something, from stuff that happened in the tent to things we are exchanging about our current bakes.  I feel lucky to be part of this small community of baker-addicts.  Yeah, that’s what we are…. Carlos, it was very sad to see you leave the tent… You are my favorite male Peruvian baker on this season! (wink, wink)

ONE YEAR AGO: Apple and Sobacha Caramel Dome Cake

TWO YEARS AGO: Cocktail Spiced Nuts

THREE YEARS AGO: How the Mighty Have Fallen

FOUR YEARS AGO: Festive Night at Central

FIVE YEARS AGO: The Perfect Boiled Egg

SIX YEARS AGO: Light Rye Sourdough with Cumin and Orange

SEVEN YEARS AGO: Homemade Calziones

EIGHT YEARS AGO: Plum-Glazed Duck Breasts

NINE YEARS AGO: Holiday Double-Decker

TEN YEARS AGO: New York Deli Rye


PANETTONE, WILD YEAST VERSION

It is almost that time of the year, my friends! I firmly believe that Brazil might be the number 2 country in the world with the highest consumption of panettone in the month of December, losing to Italy, but barely so. They are obsessed over there. Odd bird that I was, I did not care for it until I was about 30 years old.  Now, not only I love it, but I am partial to the authentic version. No chocolate chips for me. Of course, I won’t be mad if you modify this version to include them. I  am open-minded, your chocolate chips will be fine with me!

Timing for the process:
Mix and ferment first dough: 12.5 hours
Mix final dough: 30 minutes or longer
First fermentation of final dough: 1 to 1.5 hours, with folds every 20 – 30 minutes
Divide, rest, and shape: 25 minutes
Proof: 4 – 6 hours at 80F, or about 12 hours at room temperature
Bake: about 40 minutes
Hang/cool: several hours

Time consuming? Yes. Very involved process? Yes.
Worth it? TOTALLY!

PANETTONE
(very slightly modified from Wild Yeast)

yield: two large loaves, best if baked in paper molds
(available at amazon.com)

for starter:
20 g mature stiff (50%-hydration) sourdough starter
20 g flour
10 g water

Mix all ingredients and ferment at 85F for 4 hours. Repeat feedings at 4-hour intervals, each time discarding all but 20 grams of starter, and feeding it with 20 grams of flour and 10 grams of water.

To feed the starter for a whole night, use only 10 g starter with the flour and water, then leave until next morning. Make sure that the final feeding right before you make the dough happens 4 hours before, so that the starter is at its peak. When you are ready to make the final dough, prepare enough starter using these proportions to have enough to use (make a little over 100 g to allow for  eventual evaporation)

First Dough Ingredients:
346 grams flour
190 grams water
1 gram (1/3 teaspoon) osmotolerant yeast, or 1.3 grams (1/2 teaspoon) instant yeast
85 grams sugar
55 grams egg yolk
7 grams (1.5 teaspoons) diastatic malt powder
85 grams unsalted butter, at room temperature
90 grams sweet starter

Final Dough Ingredients:
all of the first dough
82 grams flour
5 grams (7/8 teaspoon) salt
25 grams egg yolk
1/2 tsp vanilla paste
zest of a medium orange
115 grams water, divided
82 grams sugar
126 grams unsalted butter, at room temperature (pliable)
20 grams honey
126 grams raisins
150 grams candied orange peel

Glaze Ingredients (optional)
42 grams granulated sugar
3 grams (2 teaspoons) ground almonds (or almond flour)
3 grams (3/4 tsp) vegetable oil
3 grams (1/2 tablespoon) cornstartch
3 grams cocoa powder
15 g egg whites
1/8 tsp vanilla paste

Topping (optional)
powdered sugar
Swedish pearl sugar
whole blanched almonds

Make the starter over a period of one to several days. Its final feeding should be given 4 hours before mixing the first dough.

Prepare the first dough the evening before baking: In the bowl of a stand mixer, mix all of the first dough ingredients just until combined. Cover the bowl and ferment for 12 hours at warm room temperature (about 72F), or longer for a cooler room. The dough should more than triple in volume.

Make the final dough: To the first dough in the mixer bowl, add the flour, salt, egg yolks, orange zest, vanilla seeds, and 40 grams of the water. Mix in low speed until the ingredients are just combined, about 3 minutes.

Turn the mixer to medium speed, mix for a minute or two, then continue to mix while slowly adding the sugar, in about 5 or 6 increments. Mix for one to two minutes between additions.

Continue to mix until the dough pulls away from the sides of the bowl and the gluten is almost fully developed. Turn the mixer back to low speed and add the butter. Mix for a minute in low speed, then in medium speed until the butter is completely incorporated into the dough and the gluten has reached full development (forms a nice windowpane when gently stretched).

In low speed, add the honey, and about half of the remaining water. Mix until the water is fully incorporated. Add the remaining water and mix until it is fully incorporated. At first it will seem very soupy, do not worry about it, keep mixing and it will end up very smooth and nice.

In low speed, add the raisins and candied peels, mixing just until they are evenly distributed. Place the dough in a lightly oiled container (preferably a low, wide one, to facilitate folding). Ferment at warm room temperature for about one hour, folding the dough after the first 30 minutes. If the dough seems very loose, fold it at 20-minute intervals instead.

Turn the dough onto a buttered surface. Divide the dough into two pieces, and form each piece into a light ball.

Allow the balls to rest (may be left uncovered) for 20 minutes. Meanwhile, if baking in paper molds (recommended) skewer them in the lower third portion with  two wooden skewers inserted in parallel. They will hold the panettone after baking upside down to keep the shape. Shape the dough into tight balls and place into the skewered molds.

Proof at 80F for 4 – 6 hours (or about 12 hours at room temperature), until the tops of the dough domes are even with the top of the molds and the sides are an inch or so below the tops. When the dough is nearly fully proofed, preheat the oven to 350F, with the rack in the lower third of the oven.

To mix the glaze, whisk all ingredients together. Pour, brush, or pipe the glaze evenly onto the top of the loaves. Sift powdered sugar generously over the tops, then sprinkle with pearl sugar and garnish with whole blanched almonds.

Place the loaves directly on the oven rack and bake for about 35 – 40 minutes, until the tops are dark brown and the internal temperature is 185F. If the tops are already quite dark after 25 – 30 minutes, turn the heat down to 325F.

While the panettone is baking, set up your hanging apparatus (See above). When the bread is done, hang them as quickly as possible. Allow the panettone to hang for at least four hours, up to overnight.

ENJOY!

to print the recipe, click here

Comments: I urge you to visit Susan’s site (Wild Yeast) for her original post on the subject, as she goes through many small details I omitted, just to make this post slightly shorter.  I actually made the panettone three times last year and had some issues when I baked using a regular metal tin (as shown in the composite picture above).  The issue was un-molding and having the baked product keep its shape. It simply did not happen. The crumb is very delicate as it comes out of the oven and in both situations I had the loaf forming a very unattractive fold, in which the crumb got compressed and deformed. Did it affect the taste? Not at all, but once that happened (twice), I decided that baking in paper molds is definitely better. It makes cooling – inverted in the mold – a lot easier.

Just make sure you have a large enough pan to hold it. I should also say that for this third bake I halved the full recipe and made one single large loaf. Panettone will always be bittersweet for me, as last year I baked one and shared with people from the lab, sent some to Aritri and she loved it so much I gave her a whole loaf later. At the time she was already quite sick and her parents were in the US to help take care of her. They all loved the panettone, I believe it was their first time trying it. If you’ve never baked one, don’t let the apparent complexity of the recipe scare you. Keep in mind it’s an enriched dough with a lot of goodies added to it, so the process must be taken slowly, if you try to speed it up, the final product won’t be as good. Patience is key.

Susan, I know you are not blogging anymore, and I really miss your bread-wisdom in the blogosphere, but maybe this post will give you a smile knowing that your recipe was baked several times in the Bewitching Kitchen! Thank you!

ONE YEAR AGO: Turkey Chili Under Pressure

TWO YEARS AGO: Tiramisu Macarons

THREE YEARS AGO: Cider Mini-Cheesecakes with Caramel Sauce

FOUR YEARS AGO: Rustic Ciabatta and Mini-Meatloaves

FIVE YEARS AGO: Green Rice

SIX YEARS AGO: Potato-Crusted Italian Mini-Quiches

SEVEN YEARS AGO: Beetroot Sourdough for the Holidays

EIGHT YEARS AGO: Cod Filet with Mustard Tarragon Crust

NINE YEARS AGO: Soba Noodles: Light and Healthy

TEN YEARS AGO: Potato-Rosemary Bread

BLACK SESAME JAPANESE MILK BREAD

Have you heard of the tangzhong method to make bread? It is a Japanese technique that cooks part of the flour before incorporating it into the dough, causing the starch to suffer a change in structure that retains water more efficiently, so the bread will be very soft and have a longer shelf life. This recipe was on my friend’s Dana blog and I jumped on it almost immediately because the way she spoke about the black sesame paste made me realize I needed that in my life. Badly. The bread ends up with airs of a showstopper creature, but it’s really not complicated to make. And the flavor? My gosh. You need that black sesame paste in your life also.

BLACK SESAME JAPANESE MILK BREAD
(slightly modified from Wakeandbakemama)

for the black sesame paste (can be made the day before):
½ cup toasted black sesame seeds, finely ground
½ cup granulated sugar
½ cup unsalted butter, softened

for the tangzhong:
6 tablespoons
water
2 tablespoons bread flour

for the dough:
1/4 cup whole milk
1 + 1/2 teaspoons active dry yeast
320 grams bread flour, plus up to 30 grams more
1 teaspoon salt
1/4 cup sugar
1/4 cup heavy whipping cream
1 tablespoon powdered milk (optional)
2 eggs, 1 for the dough and 1 for the egg wash
2 tablespoons butter, softened
splash of milk or water, for the egg wash

Make the sesame paste.Finely grind the black sesame seeds in a spice grinder. Add the sugar and softened butter. Pulse to make a paste. Transfer to a small bowl, cover, and set aside. You can refrigerate this in advance. Before using, bring to room temperature to ensure it has a spreadable consistency.

Make the tangzhong. In a small saucepan, whisk together 6 tablespoons of water and 2 tablespoons of bread flour until no lumps remain. Heat the mixture over medium-low heat, whisking constantly. It should thicken to a gel-like consistency after just a few minutes. As soon as lines appear in the mixture when stirred, remove it from the heat and transfer it to a small, clean bowl. Let cool to room temperature.

Make the dough. Heat the milk briefly to just above room temperature, about 110° F or lukewarm to the touch. Sprinkle the yeast over the milk and set it aside for 5 minutes for the yeast to activate.

In the meantime, whisk together 2 1/2 cups of the bread flour, salt, and sugar in a large bowl. In a smaller bowl or a measuring cup, whisk together the tangzhong, cream, milk powder (is using), and one egg.

Add the yeast mixture to the wet ingredients, and whisk gently, just to incorporate. Make a well in the dry ingredients and pour in all of the wet ingredients. Stir with a wooden spoon until the mixture forms a loose, shaggy dough, then switch to using your hands. Knead for 4 to 5 minutes, or until the dough forms a semi-smooth ball. The dough will be quite sticky — sprinkle the extra 1/4 cup flour, a tablespoon or so at a time, over the dough and your hands as you knead to keep it from sticking too much. I usually use at least 2 tablespoons and often up to the full amount, but you may not need it all.

Add the butter to the dough, one tablespoon at a time, kneading after each addition. Add the second tablespoon of butter only after the first has been evenly incorporated. The dough will be slippery and messy at this point, but just keep kneading and it should eventually form a soft and pliable dough that’s easy to work with. Knead for an additional 4 to 5 minutes, or until the dough becomes smooth and elastic. Place the dough in a large bowl and cover the bowl with plastic wrap or a damp towel. Let rise for 1 to 2 hours, or until doubled.

Once the dough is doubled gently deflate the dough and roll it out as a large rectangle. Spread the black sesame paste all over it, leaving a small border free of paste. Roll the dough from the long side, forming a cylinder, with the seam down. Using a sharp knife, slice the dough almost all the way through, and open the halves, exposing the center.  Twist the two strands around, making sure the inner layers are facing up.  Carefully drop it inside a loaf pan (9 x 5 in works fine), and allow it to rise covered for another hour, hour and a half.  Meanwhile, heat the oven to 350F.

Whisk your second egg with a splash of milk or water, and brush the egg wash over the dough. Bake for about 30 minutes, or until golden-brown on top. Internal temp should be 200 degrees F. Let it cool completely before slicing.

ENJOY!