CAKE PUCKS, MY NEW ADVENTURE!

My first time making these, after flirting for a long time with the concept, while staring at my molds in a state of paralysis. In a way, they are not too different from Chocolate-Covered Oreos – that I make often – but the level of complexity goes up a bit. With cake pucks, you can use all flavors and kinds of cakes, as well as cookie dough, rice crisps, as long as you adjust the consistency to make…. the PUCK component. I see many of those in my future… For my first time, I chose Red Velvet with a thin Oreo inside. Check them out!


RED VELVET CAKE PUCKS WITH THIN OREOS
(adapted from this recipe)

molds used: BENTYCAKES SET

1 red velvet cake mix
1 cup water
1/3 cup oil
2 eggs
1tsp vanilla
Oreo thins
1/2 cup buttercream
Ghirardelli melting wafers, dark chocolate

Combine cake mix, eggs, water, oil and vanilla until fully mixed. Pour mixture in a greased 9×13 baking pan and bake at 350 F until done, with toothpick coming out clean as tested in the center of the cake (about 25 minutes).

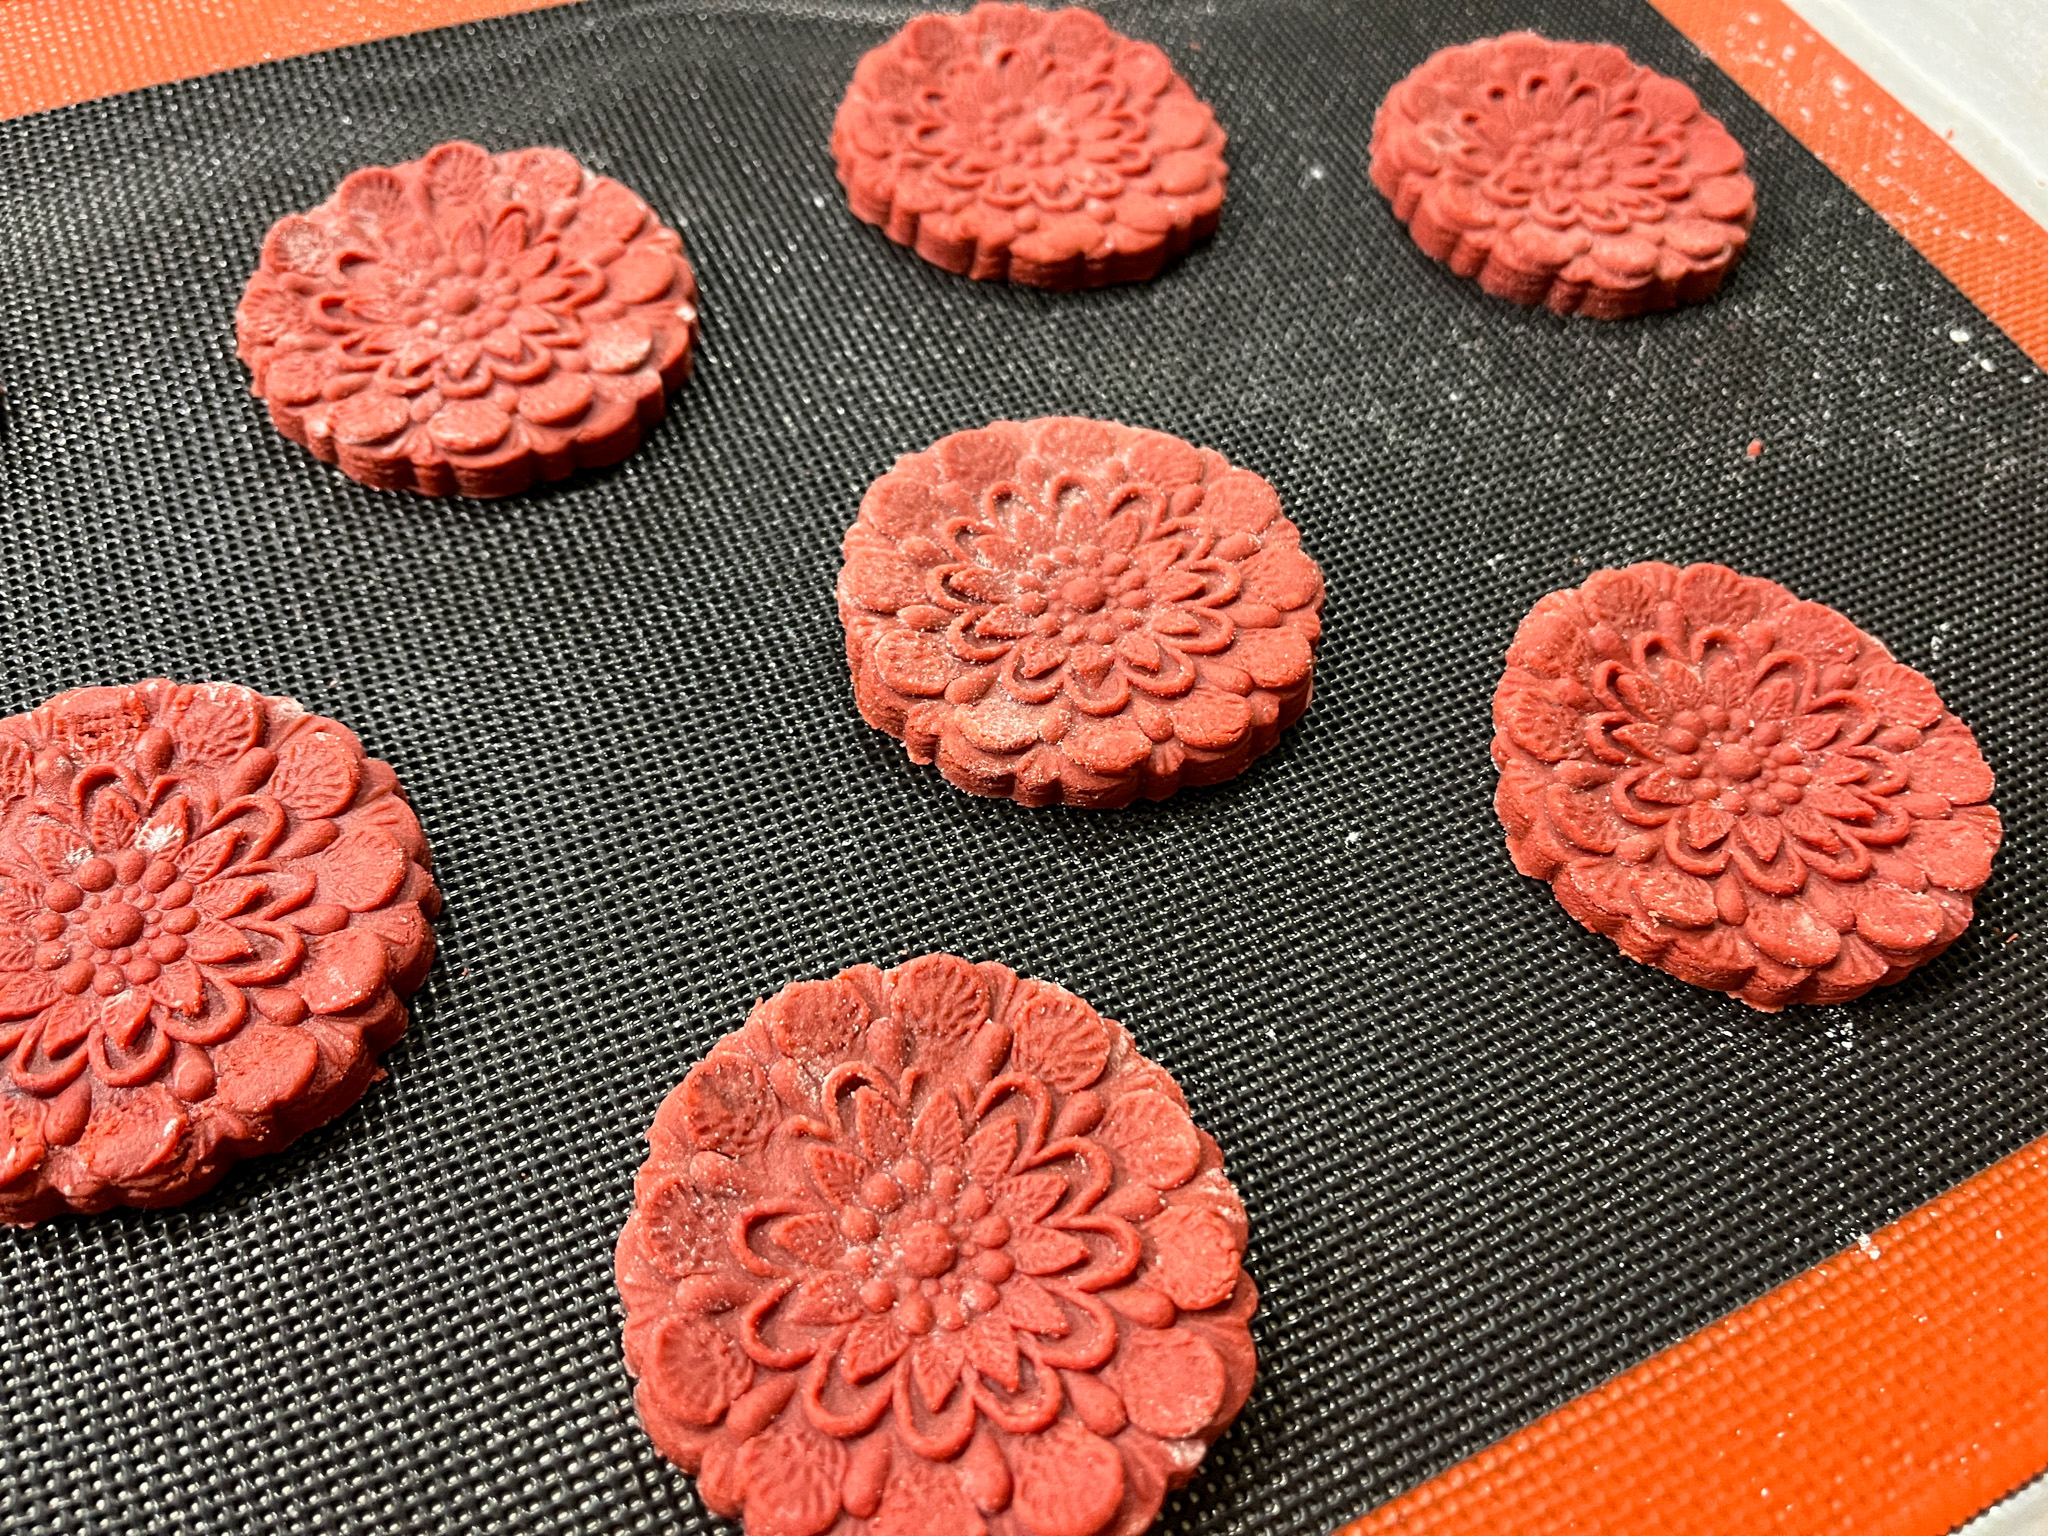
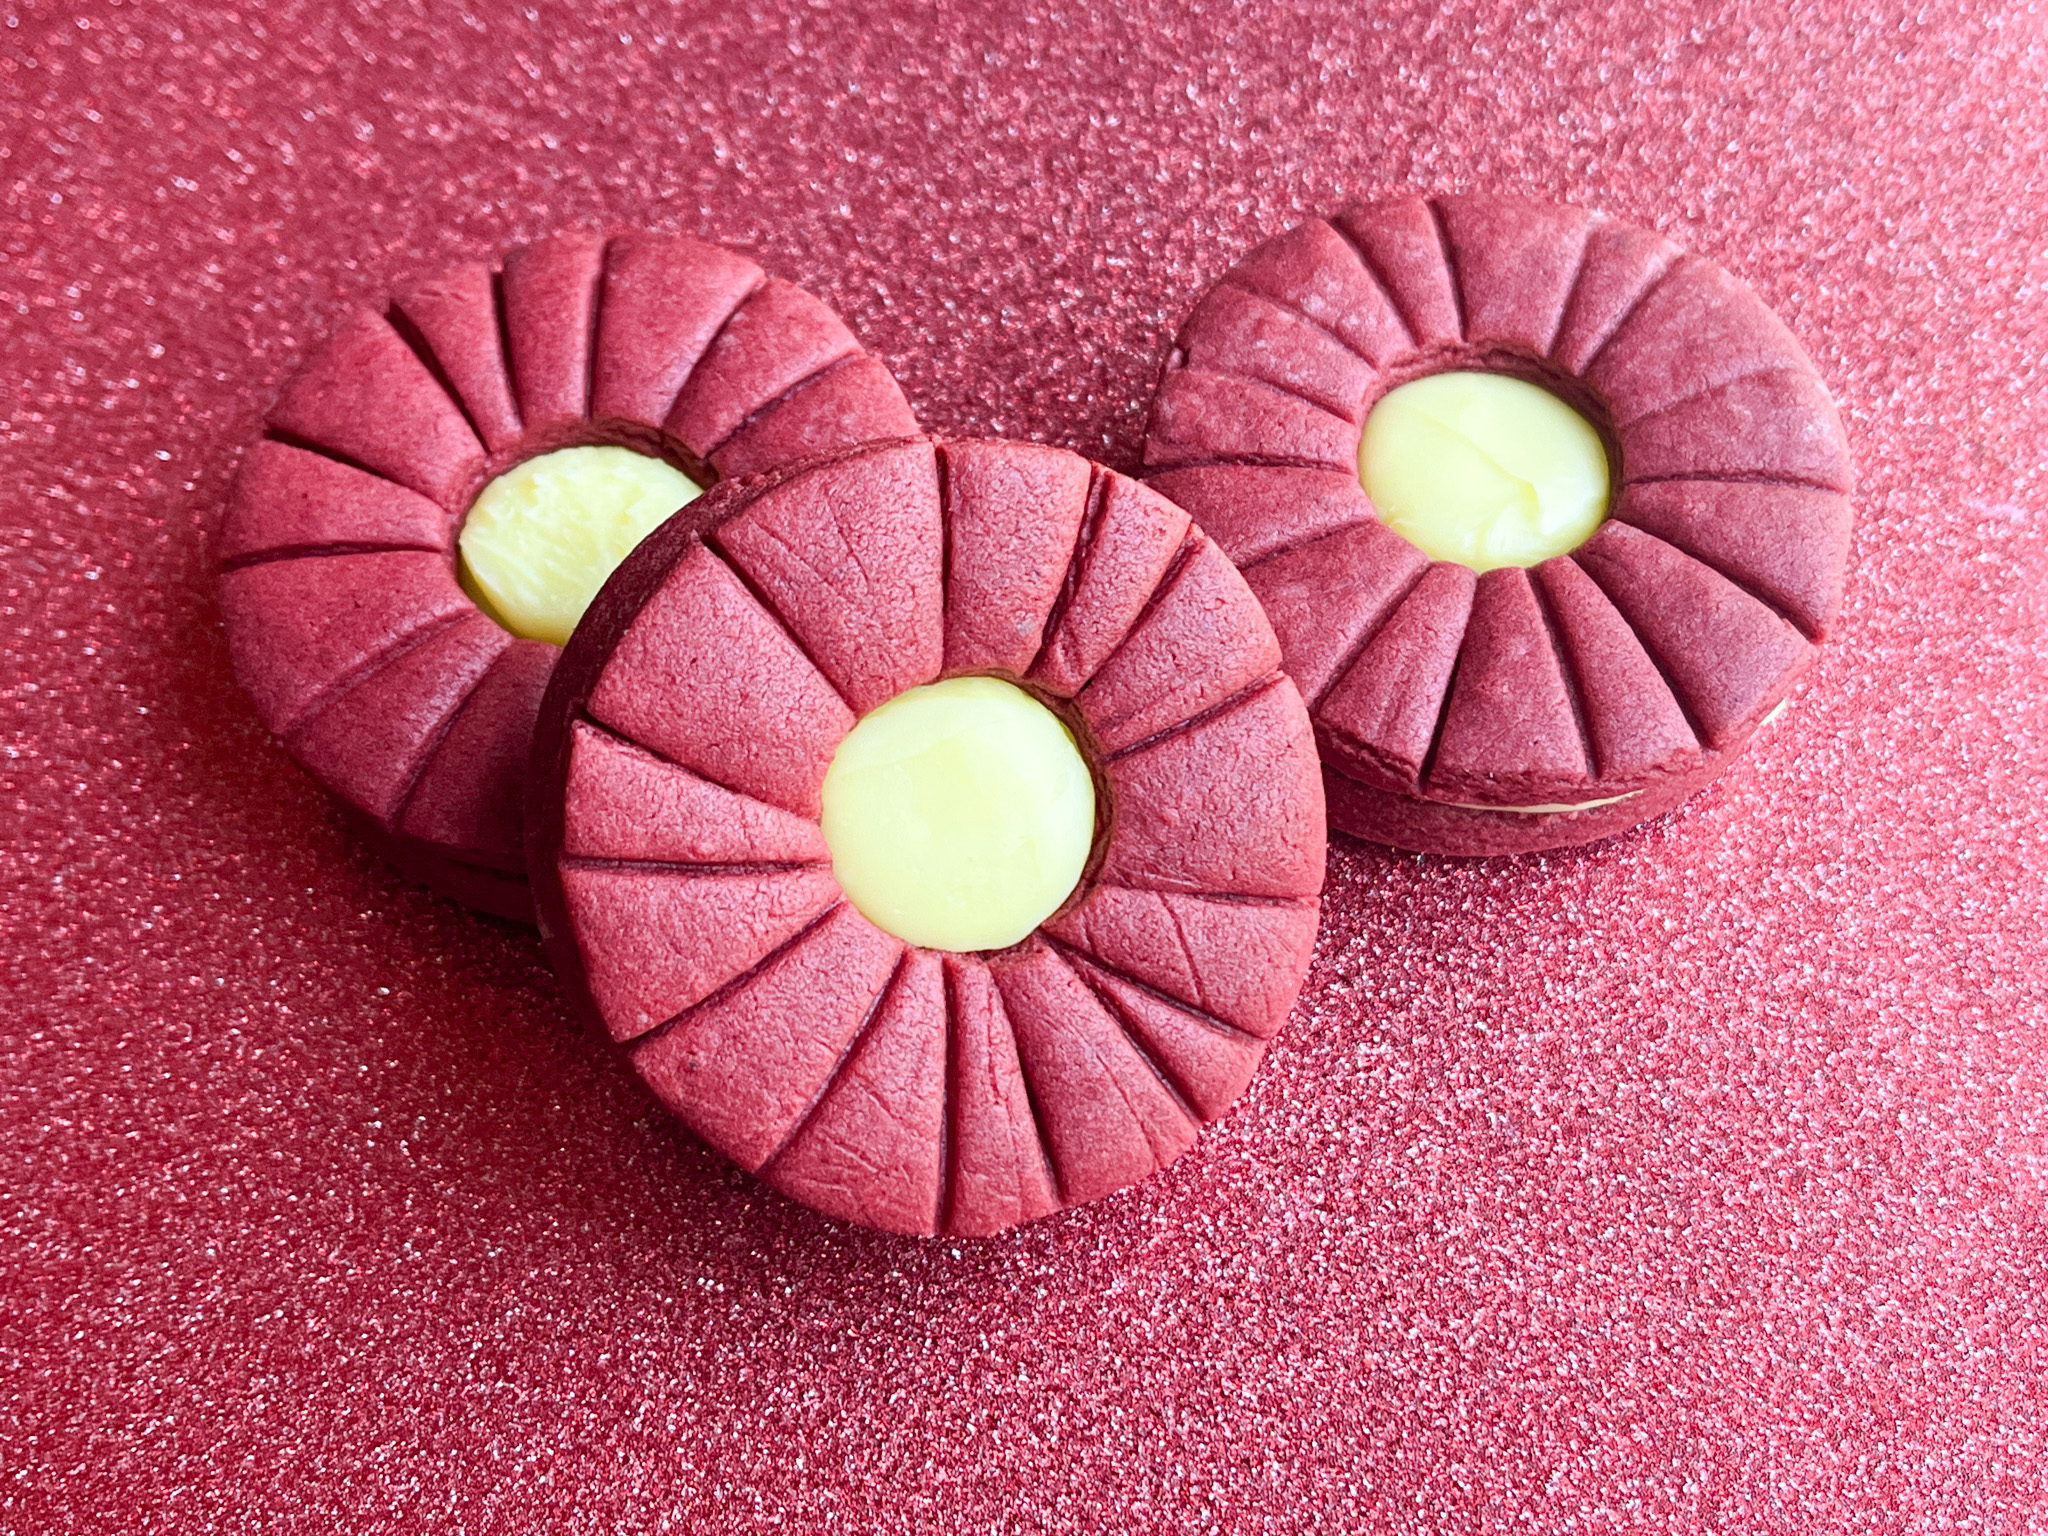
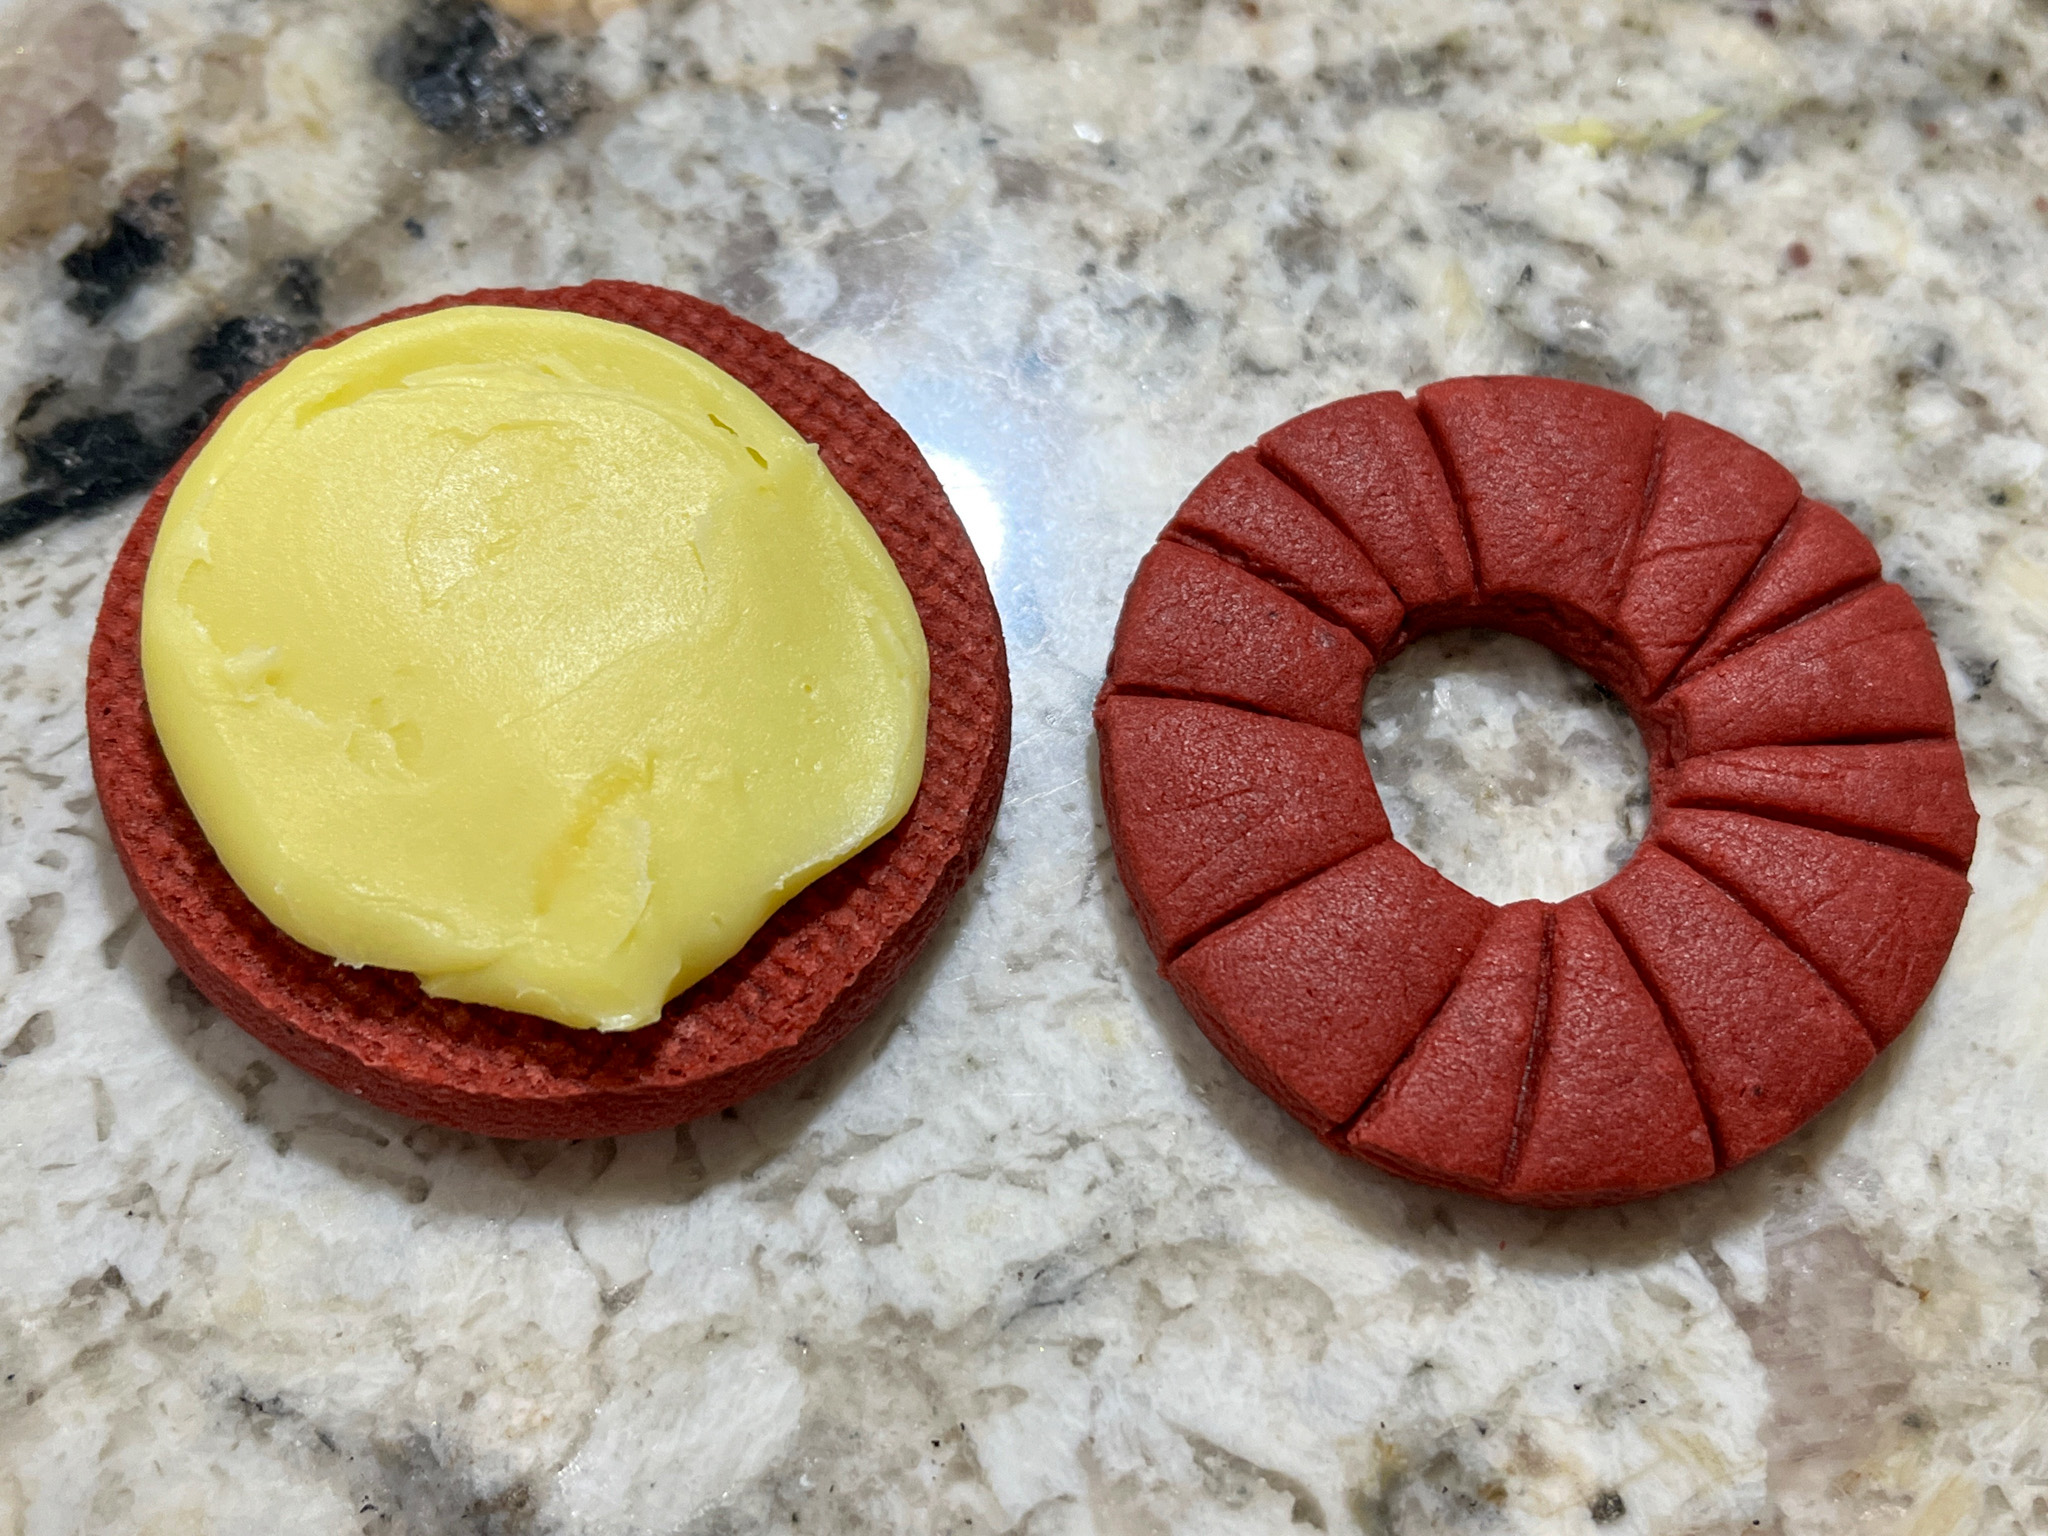
Allow cake to cool, then crumble and mix in buttercream. Add about a tablespoon of cake mix to your small cake puck mold. Place one Oreo thin on top of the mix and then continue to fill the mold with cake mix. Use bottom of a measuring cup to gently pat the top of the cake puck centers down so they are level with the mold. Scrape off any excess mix.

Place mold in the fridge for 3 hours or freezer (45 min) to chill.

Melt 17 ounces chocolate (or the amount compatible with the number of cakes you will make) with one tablespoon of refined coconut oil for 1 minute. Continue to microwave in increments of 20 seconds until chocolate is smooth and fully melted.

Fill cavities of larger mold with chocolate a little less than half-full. Place chilled center on melted chocolate. Gently apply even pressure as you slowly press the center down until chocolate comes up from the sides and covers the top of the center. Scrape off any excess chocolate. If there is not enough chocolate to cover the center. Add chocolate and scrape away excess. Tap the mold tray on the counter to eliminate air bubbles.

Place mold in freezer for 10 minutes, they should set quickly because the cake component is very cold. Un-mold and have fu decorating your little cake pucks!

ENJOY!

to print the recipe, click here

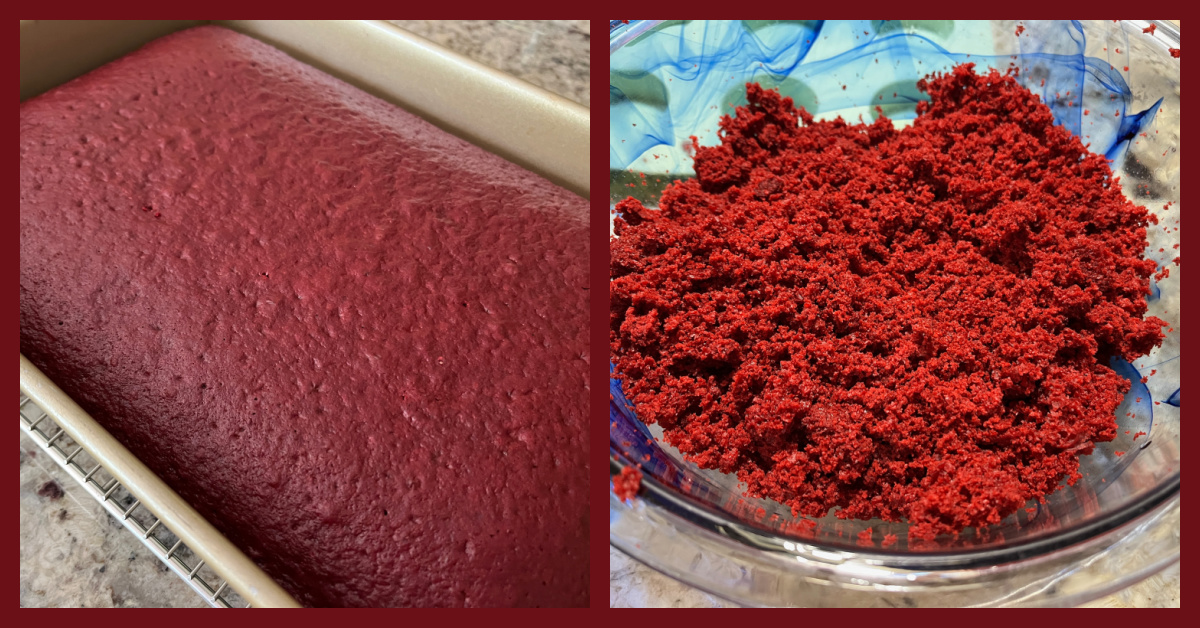
Comments: Before I started this new adventure, I joined this group on Facebook to see what others were doing and learn from their shared experiences. For the most part they use cake mixes for the “puck” component because home-made cakes can be overly moist. I decided to take that approach for my first time, as I was absolutely clueless about the whole thing. So I started from a boxed Duncan Hines Red Velvet, adapting the recipe as advised by the experts. Bake, let it cool, and crumble it. Mix with buttercream (I had some leftover from another project made with butter & cream cheese), add to the puck mold.

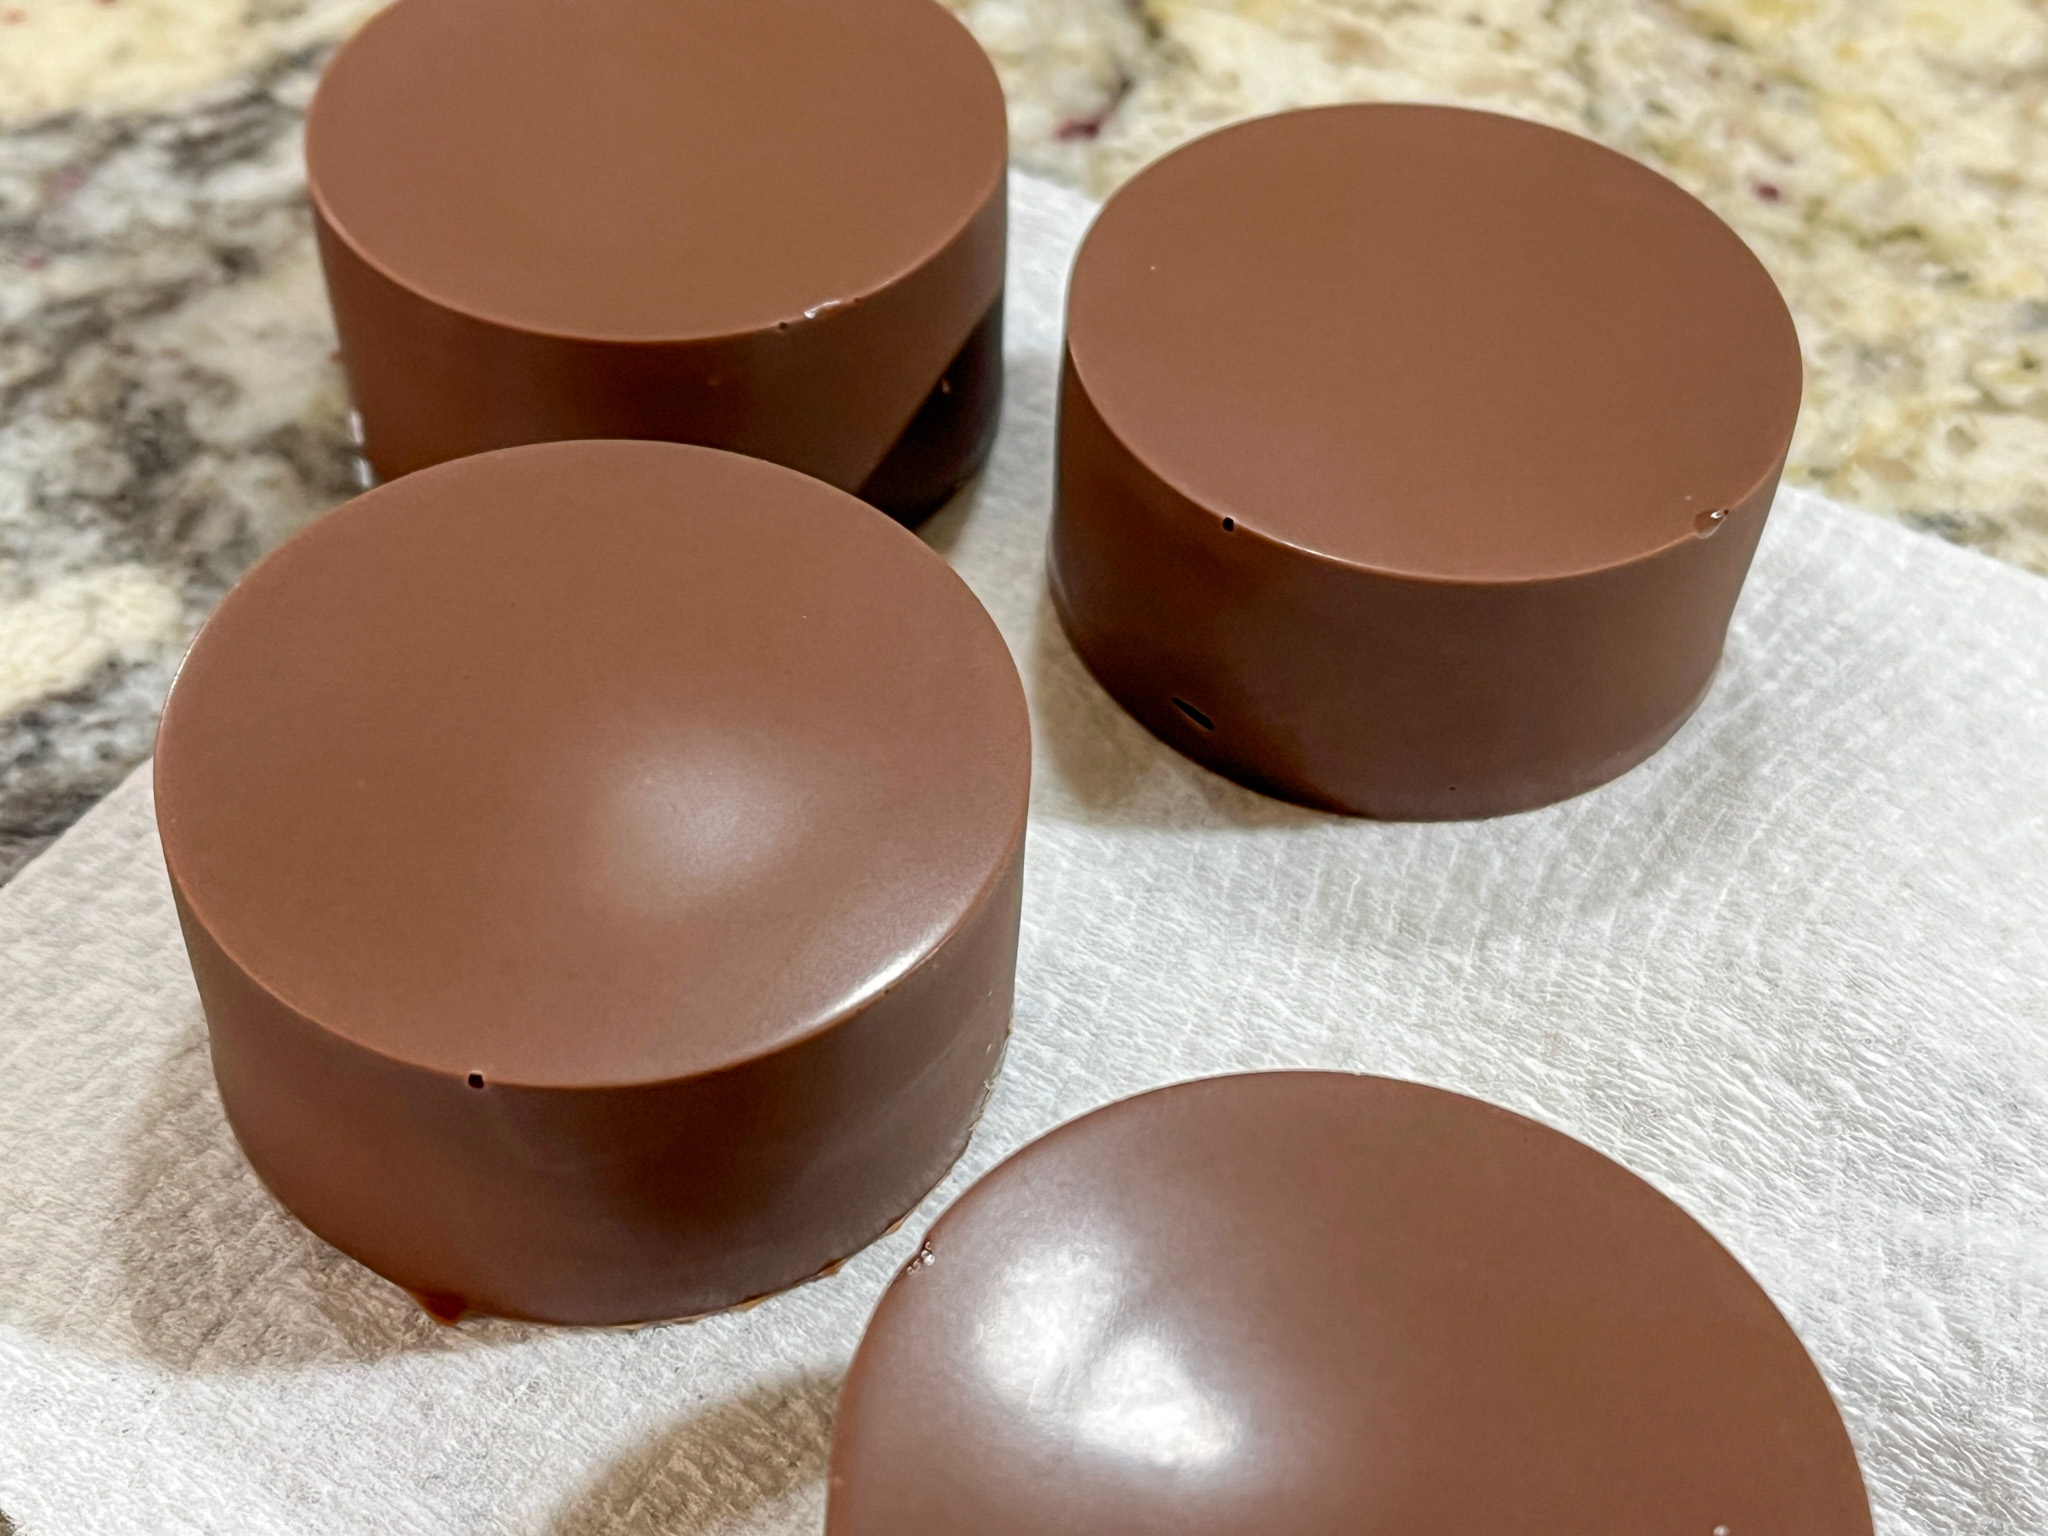
Then I used this set of molds from Bentycakes to make the pucks and later cover them with chocolate.

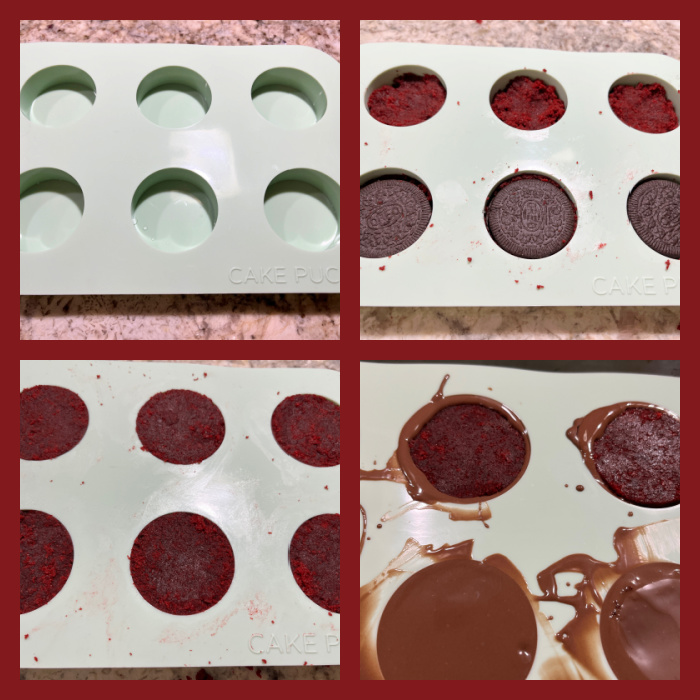
Once that part is done, marvel at how well they un-mold to reveal the smoothest little cake puck!

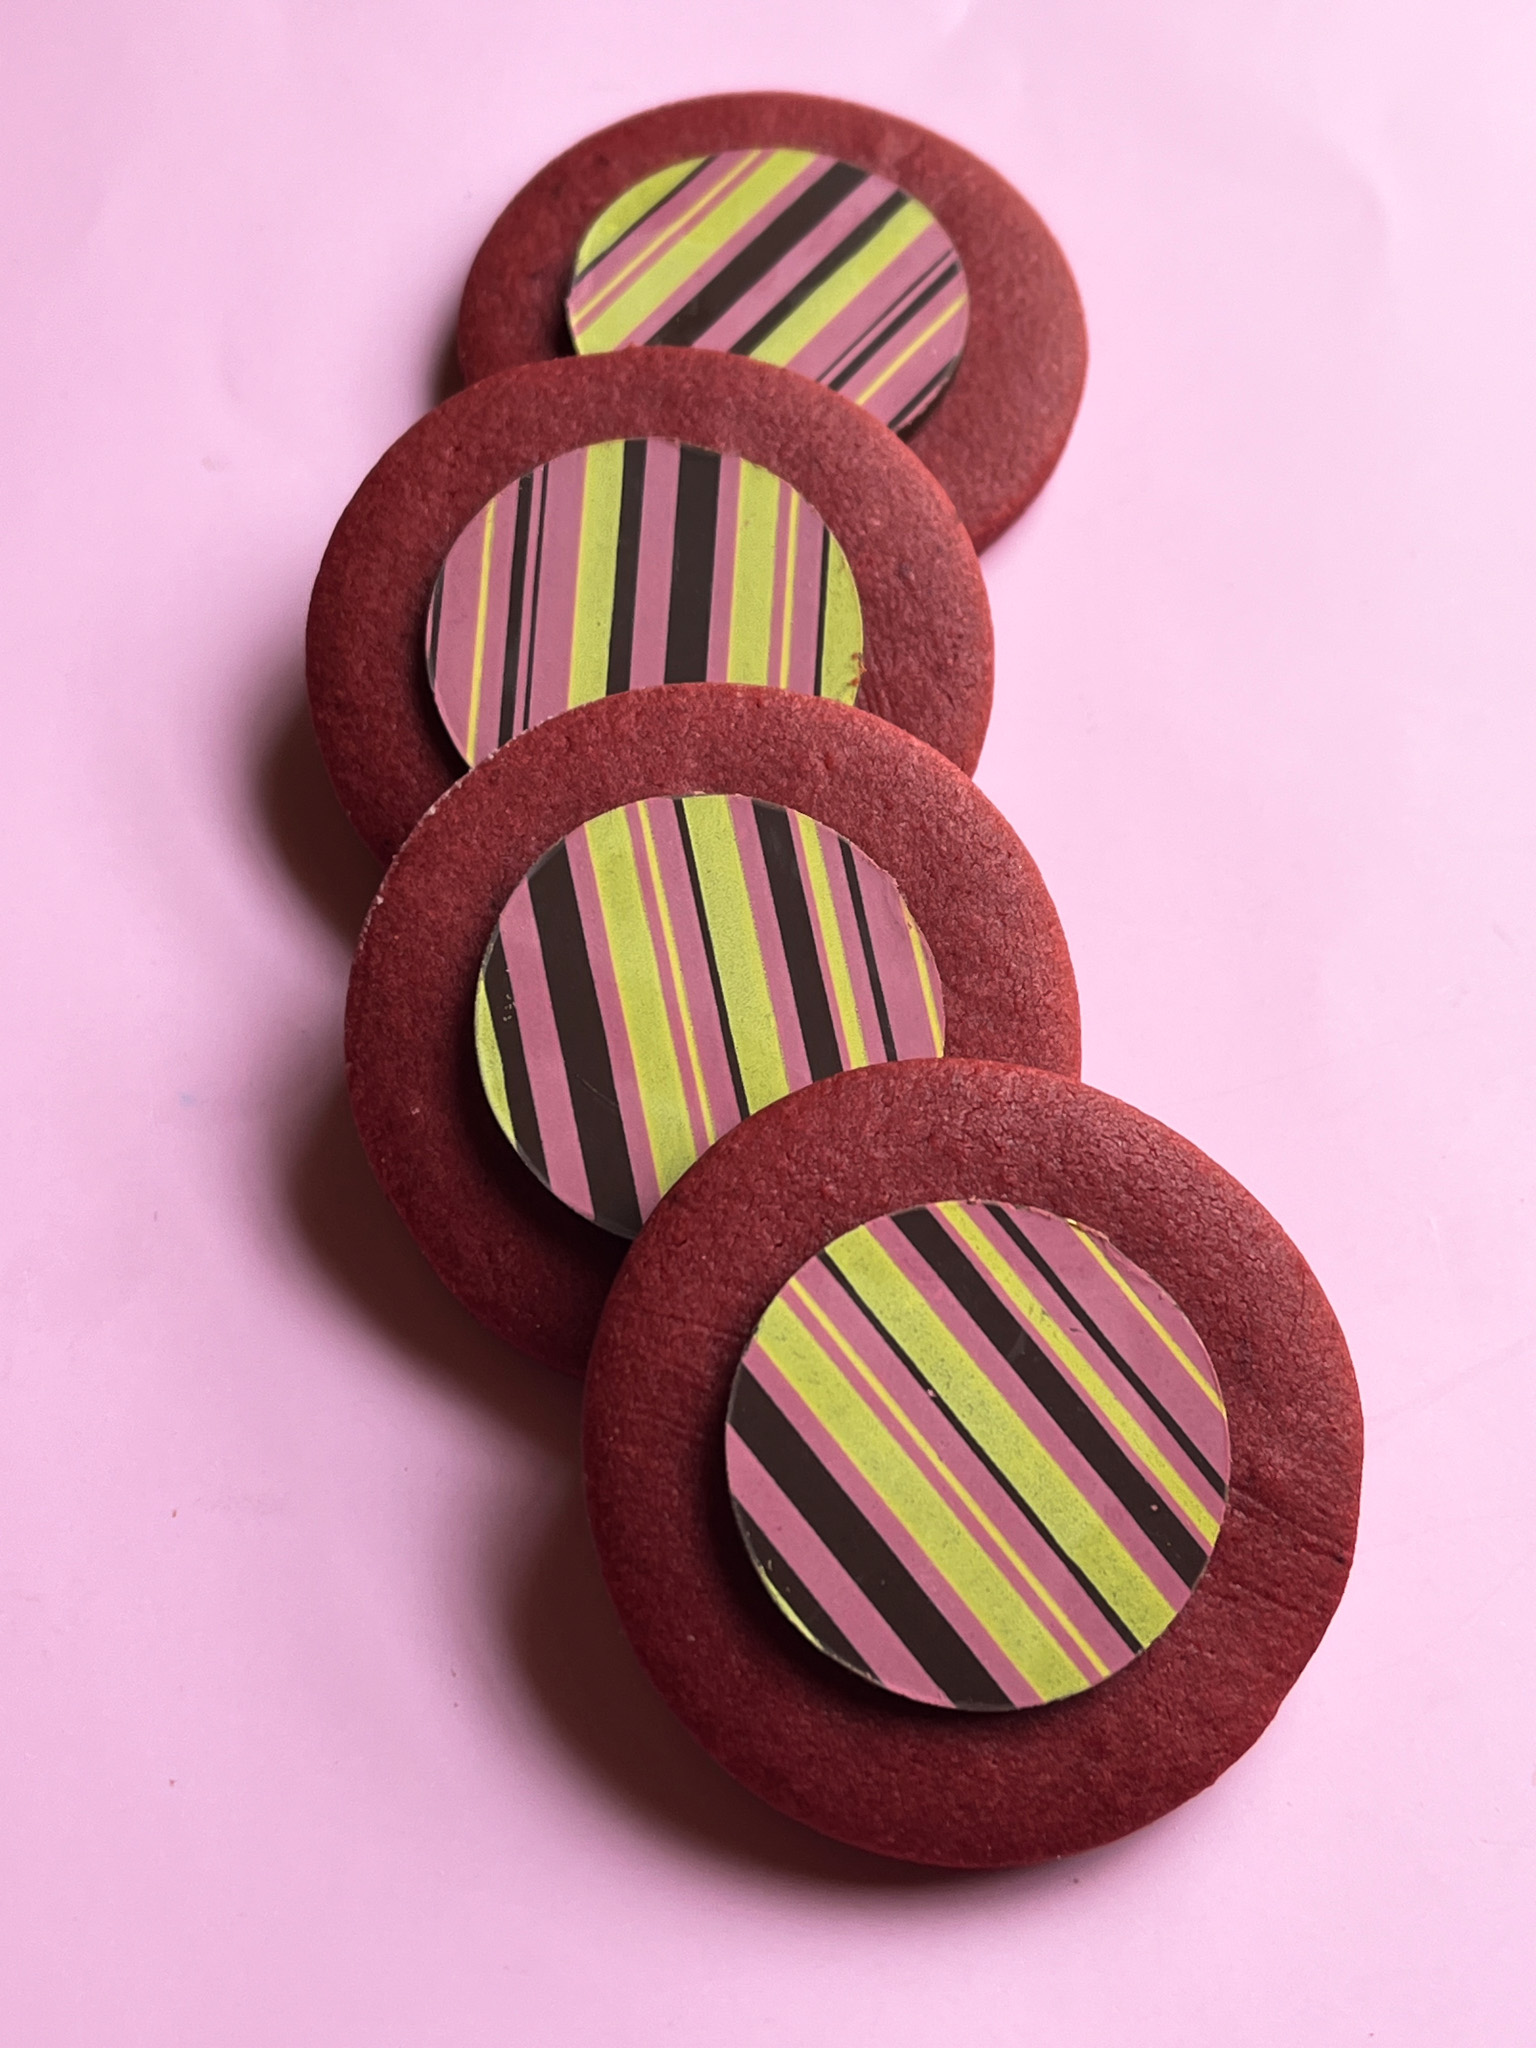
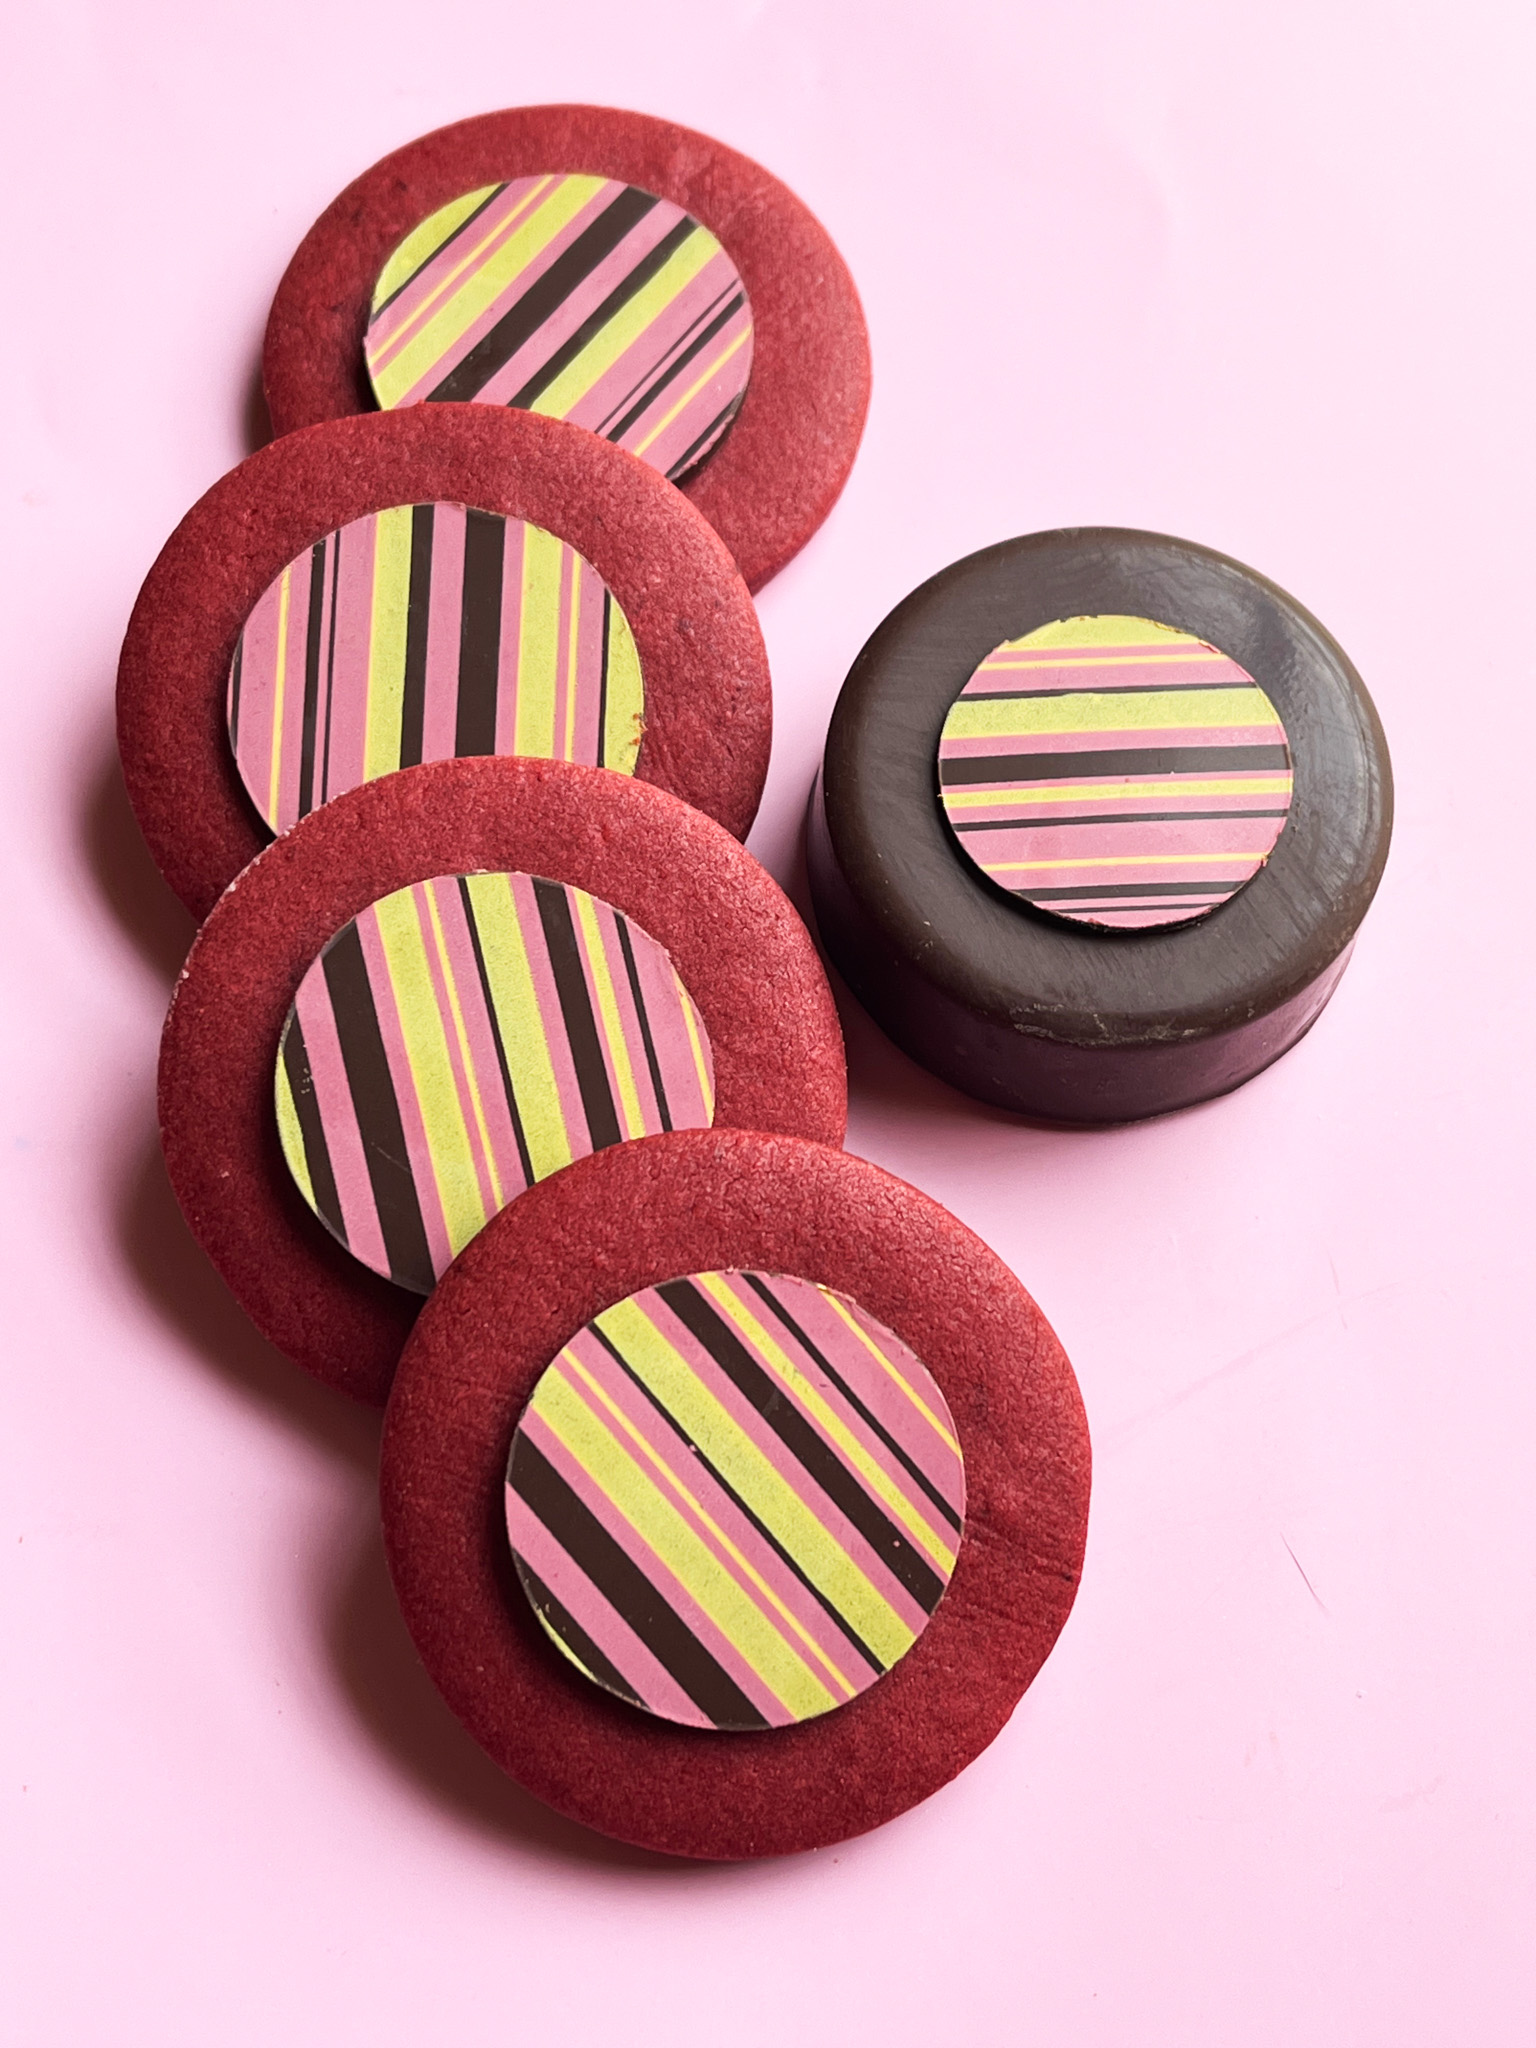
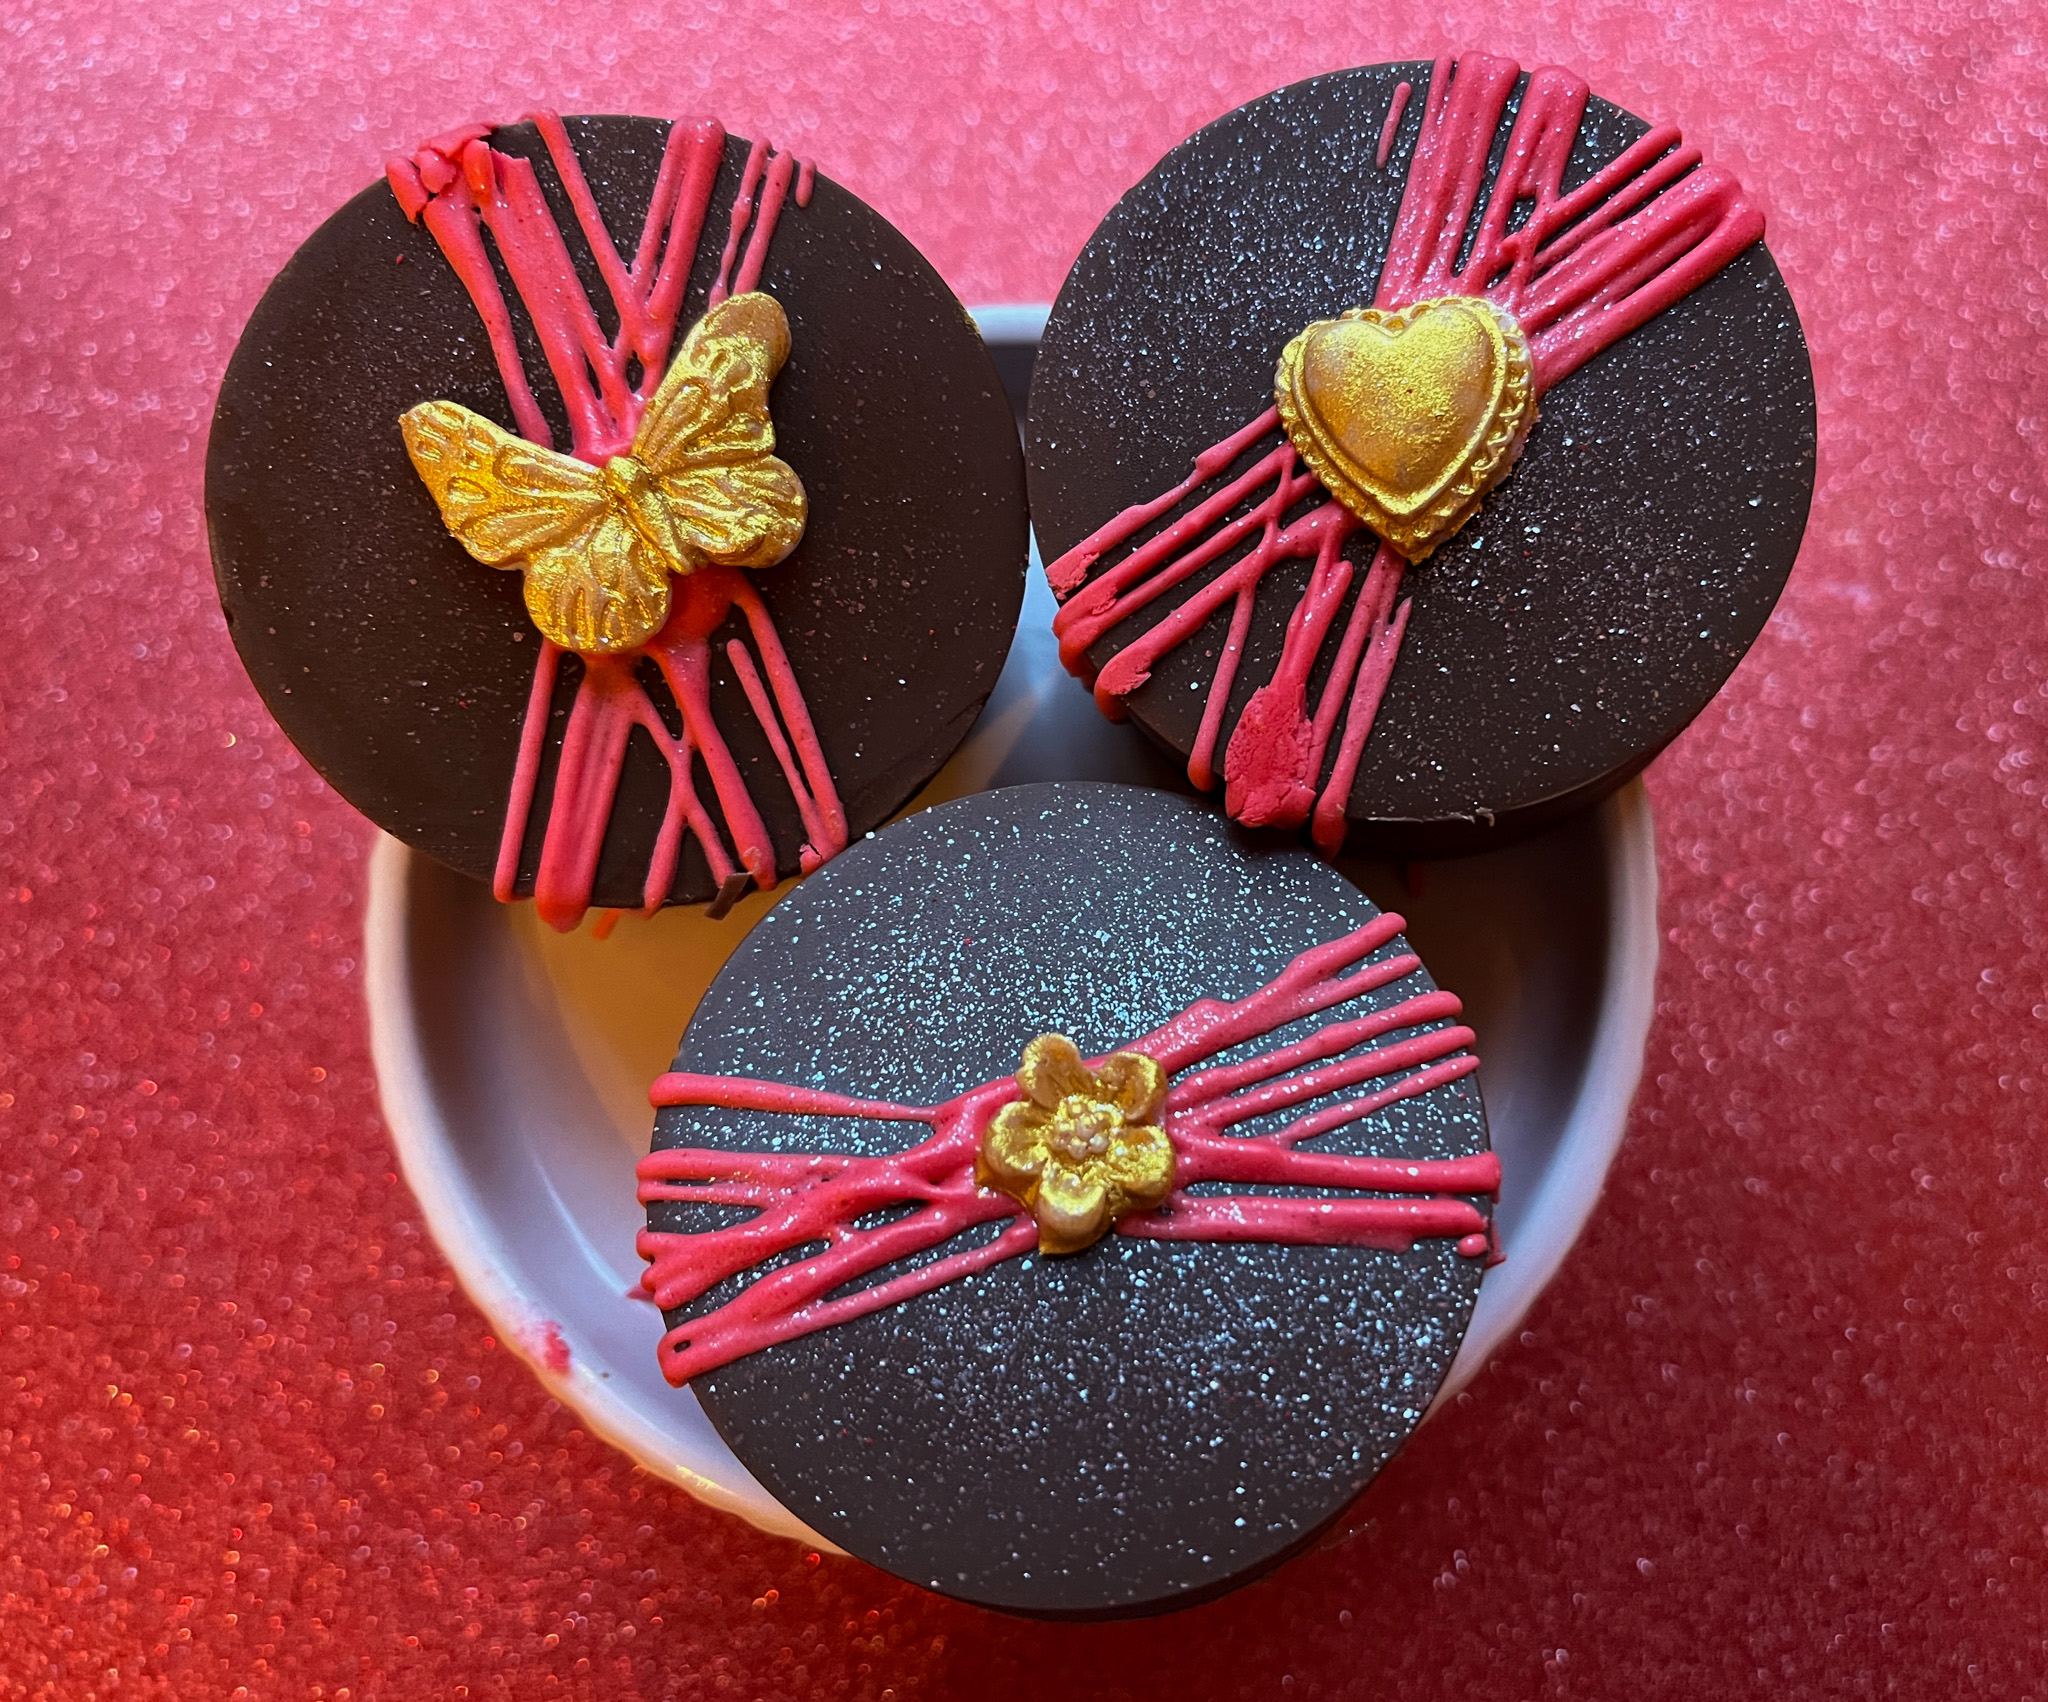
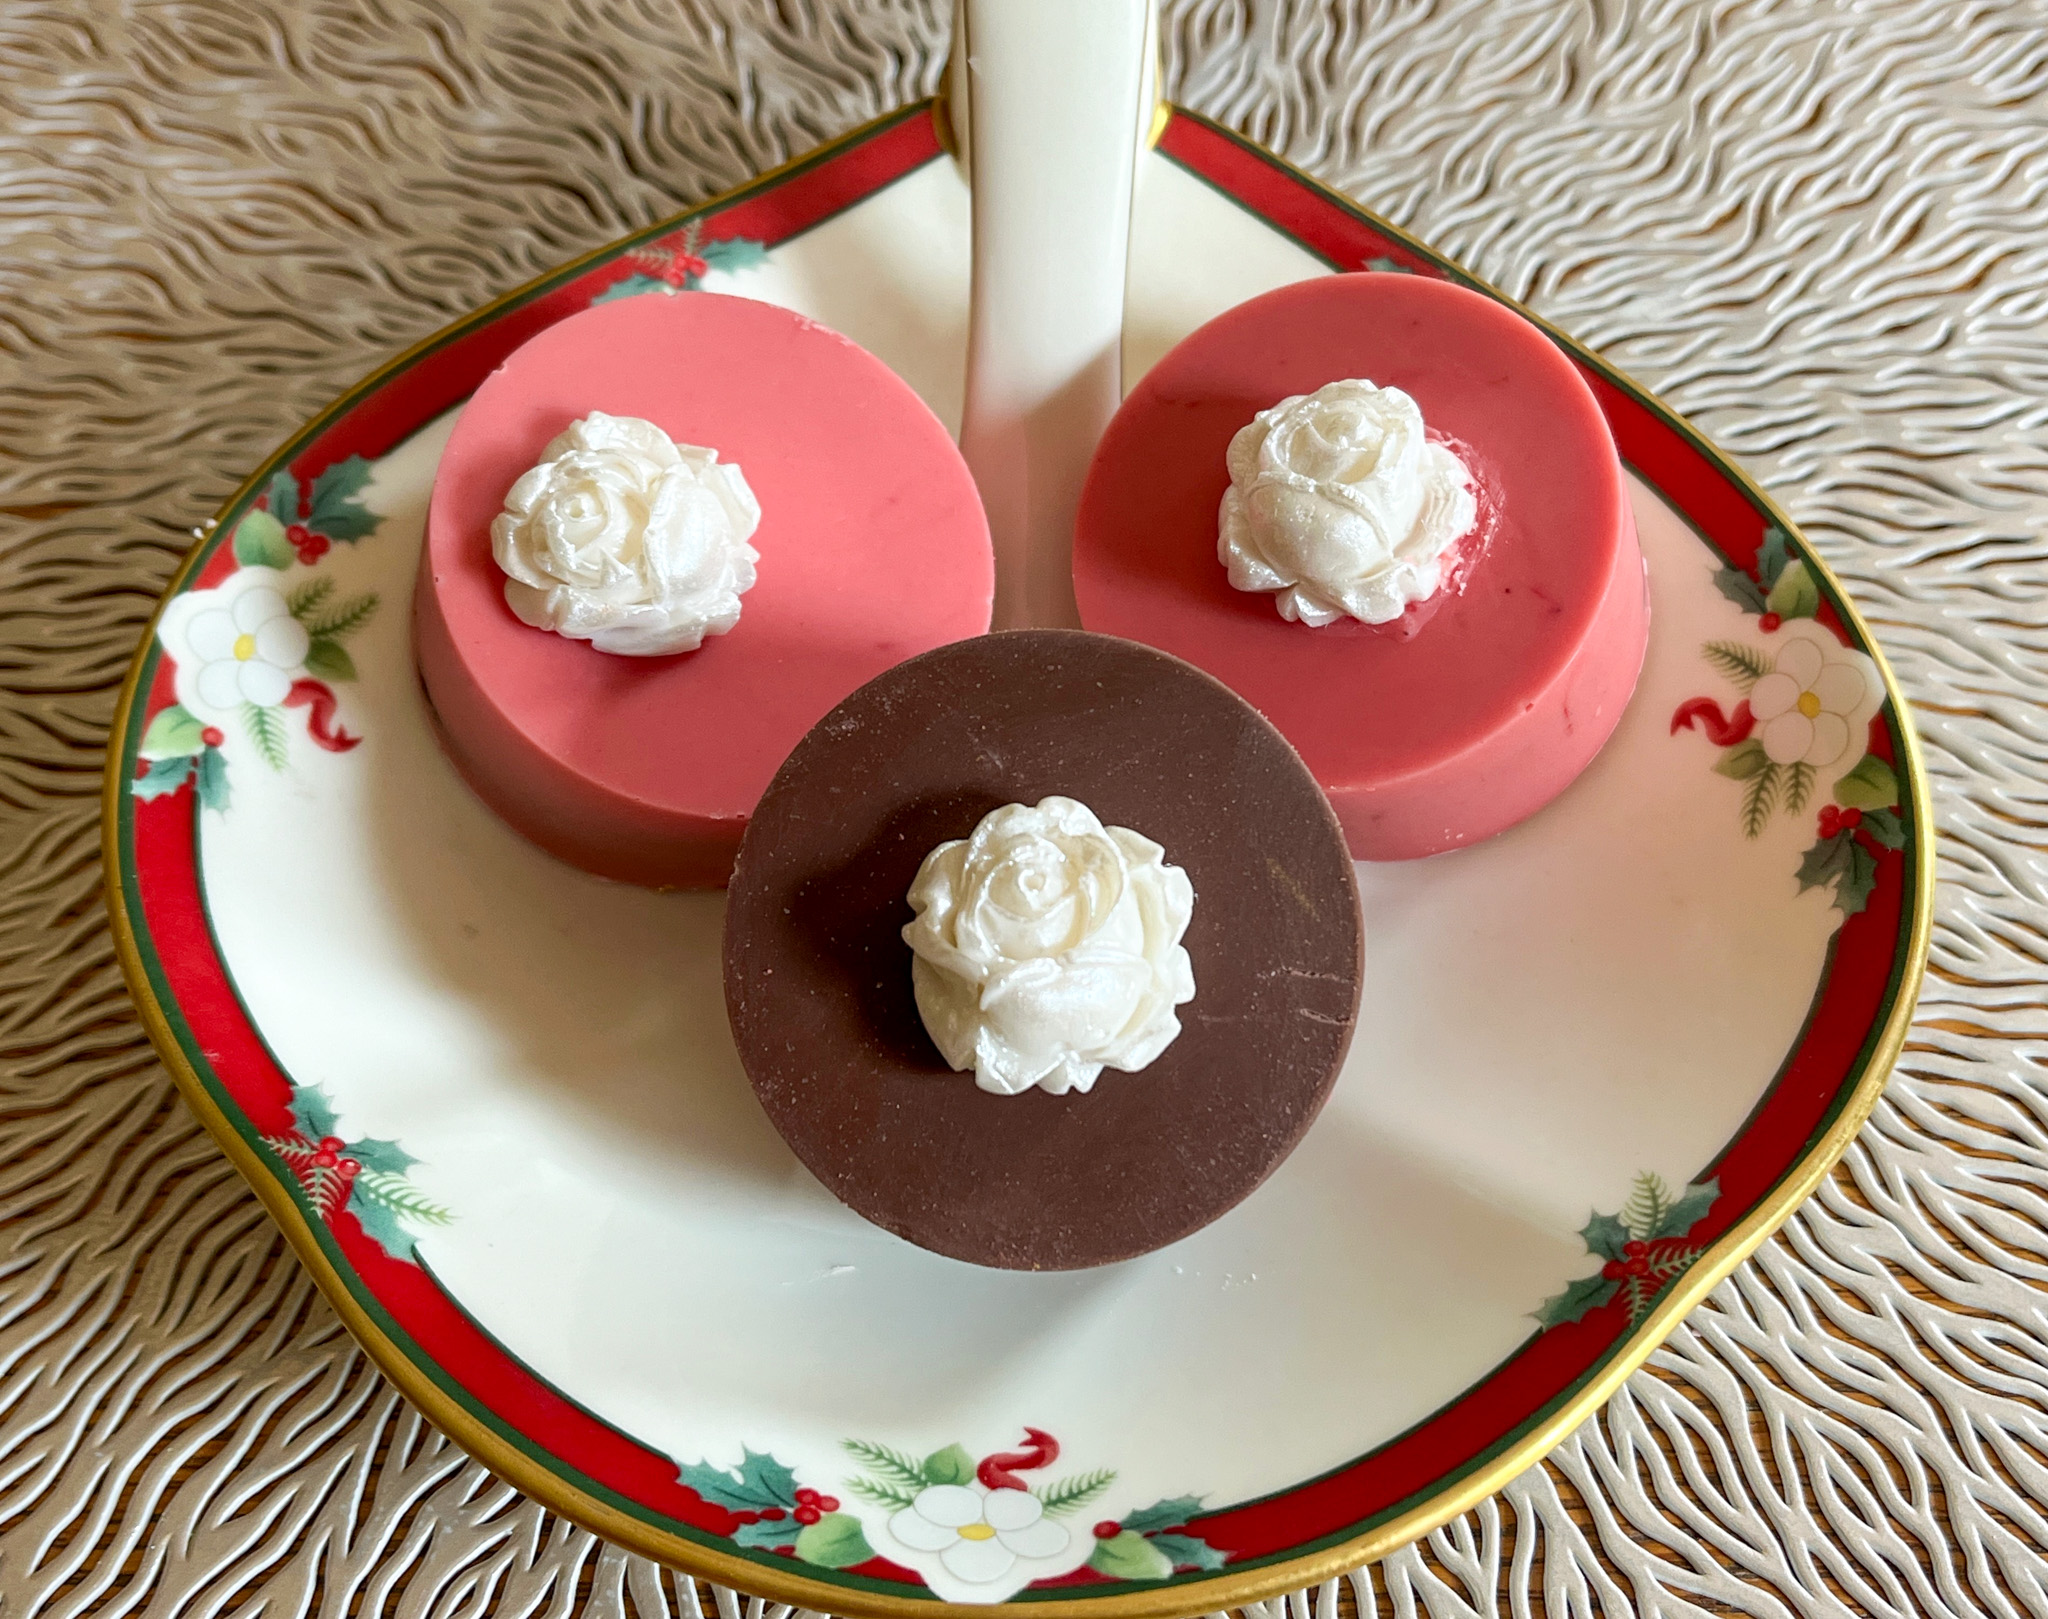
For the set covered with dark chocolate, I opted to decorate with Royal icing drizzle and molded fondant painted with luster powder gold + vodka.

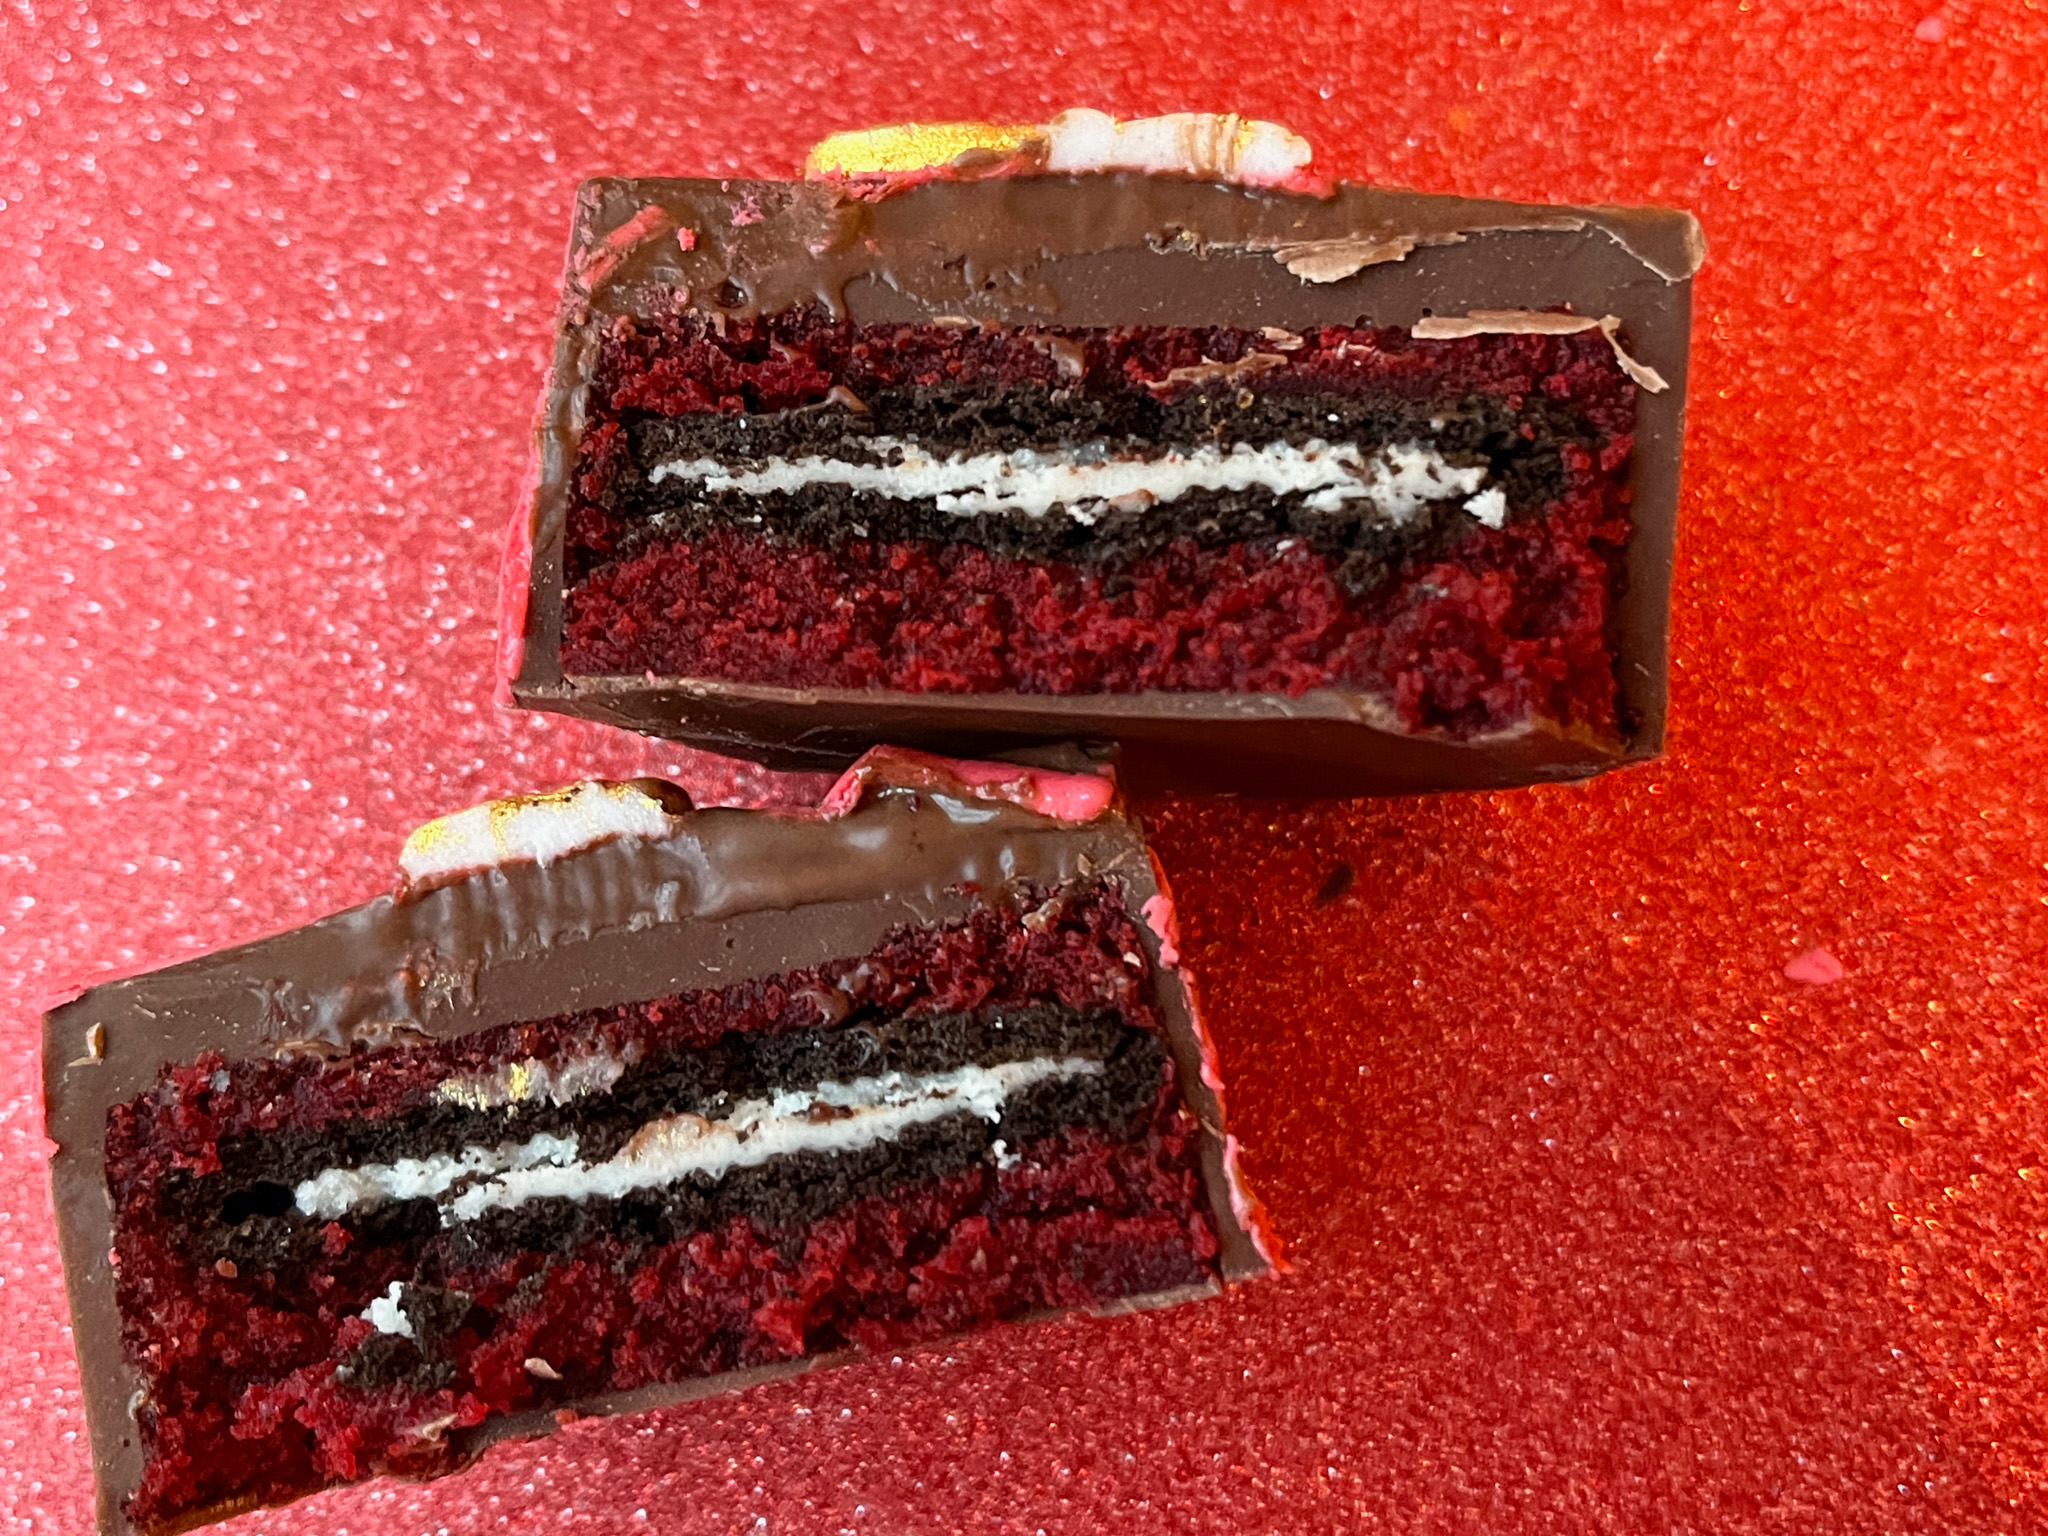
Once you cut through, the little Oreo inside adds a lot of cute to the equation… and of course, a bit more contrast in texture.

The ones covered with white chocolate dyed pink, got a simpler decoration, just the white fondant sprayed with PME luster pearl.

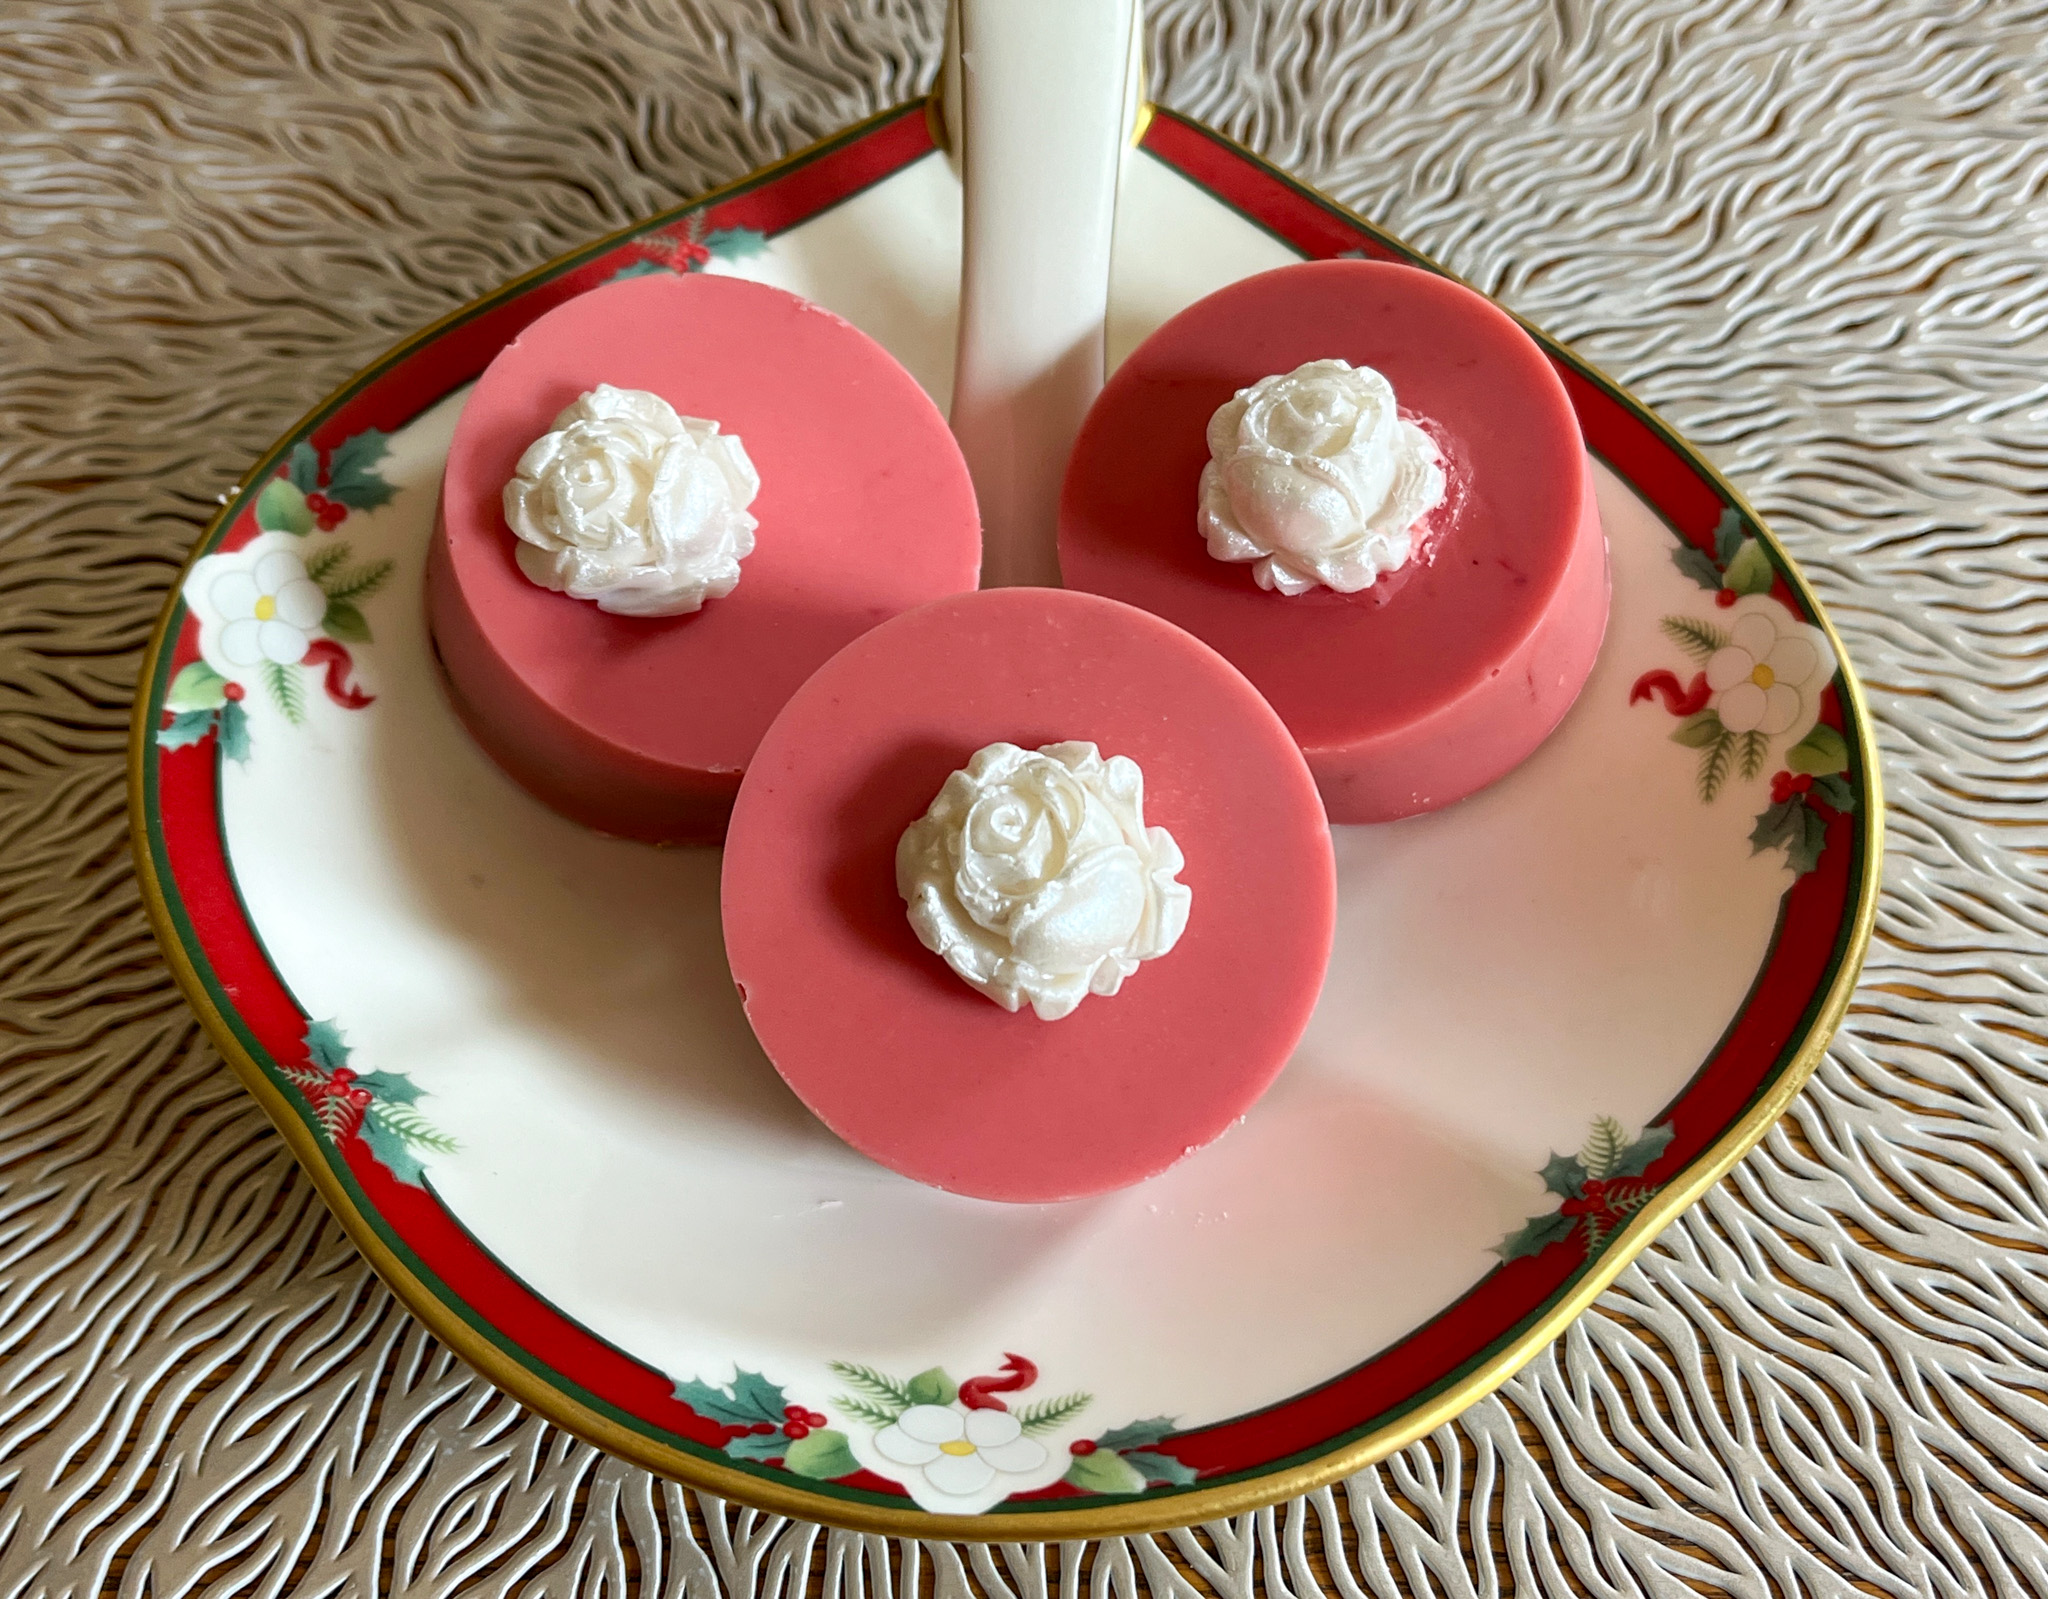
That decoration also works well on a dark chocolate background…

Of course, the possibilities to make other types of cake pucks are endless, and I am just getting started. My next goal is to use warm cake crumbled without adding buttercream, as I heard it can work well, and of course opens the horizons to cakes made from scratch. Stay tuned for more “pucking” adventures!


ONE YEAR AGO: Rolled Buttercream

TWO YEARS AGO:  Miso-Ginger Turkey Meatballs with Cabbage “Noodles”

THREE YEARS AGO: Smoked Shrimp Tacos with Roasted Jalapeño Salsa

FOUR YEARS AGO: Corn Fritters

FIVE YEARS AGO: Minnie Macarons

SIX YEARS AGO: Air-Fried Mexican Meatloaf

SEVEN YEARS AGO: Mimi’s Sticky Chicken, a Call from my Past

EIGHT YEARS AGO: Perfect Soy-Grilled Steak

NINE YEARS AGO: The Devil’s Bread

TEN YEARS AGO: Heart of Palm Salad Skewers

ELEVEN YEARS AGO: Potluck Frittata and Lavoisier

TWELVE YEARS AGO: Home-made Corn Tortillas

THIRTEEN YEARS AGO: Whole-Wheat Spaghetti with Peanut Sauce

FOURTEEN YEARS AGO: Brigadeiros: A Brazilian Party!

FIFTEEN YEARS AGO: Lemony Asparagus

A TYPICAL DINNER AT THE BEWITCHING KITCHEN

For the most part our food is super simple. We always opt for a main dish that involves meat (although about one day each week we go the vegetarian route), a starchy side, and veggies. We alternate cooking days, but both of us follow this approach for our meals. Today I share the exact dinner we had a couple of days ago, all preparations are simple and I’ve done them so often I don’t even need to look at the recipes.

.

STARTING WITH THE MAIN DISH

.


GRILLED CHICKEN THIGHS WITH YOGURT PAPRIKA MARINADE
(from The Bewitching Kitchen)

6 chicken thighs
1/2 cup yogurt (low-fat or full-fat)
1 tablespoon paprika
1 tsp salt
1 tablespoon agave nectar
squirt of lemon juice
drizzle of olive oil

Make the marinade by mixing all ingredients from yogurt to olive oil. Whisk well, add to the pieces of chicken, massaging them to coat well. Place in the fridge for at least a couple of hours.

When ready to grill, remove from the marinade, season lightly with additional salt (omit that if you ar not a “salt person”), and grill until done, on both sides.

ENJOY!

to print the recipe, click here

Comments: I make these all the time, actually. The paprika amount might seem excessive, but trust me, it is not. You can use part of it as smoked paprika, I just don’t like to use the full amount as the smoked version because I find it overpowering. They turned out very moist and tender. I tend to eye-ball everything, just making sure the pieces of chicken are well coated with the marinade until grilling time. If I remember, I go back and move them around a bit in the bag. Honey works in place of the agave nectar, and you can add garlic if you are a fan…

Moving on, the side dishes…

This is a total non-recipe. Slice juicy tomatoes, drizzle olive oil, balsamic vinegar, salt and pepper to taste. You are done! We are addicted to this, it shows up at our table very very often…

For the broccoli recipe, which I made probably once every week, click here. SIX MINUTES. Perfect broccoli every time. The version I make all the time is even simpler than the one from the past. After the broccoli is cooked for the total of 6 minutes, I transfer to a bowl, drizzle lemon juice and olive oil, eye-balling it all. Adjust seasoning with salt and pepper. DONE.

For my quick version of Persian rice, click here. Another constant presence at our table, as Phil simply adores it. So there you go, a typical dinner “chez nous”, I hope you incorporate some of these dishes into your weekly rotation!

ONE YEAR AGO: Rolled Buttercream

TWO YEARS AGO:  Miso-Ginger Turkey Meatballs with Cabbage “Noodles”

THREE YEARS AGO: Smoked Shrimp Tacos with Roasted Jalapeño Salsa

FOUR YEARS AGO: Corn Fritters

FIVE YEARS AGO: Minnie Macarons

SIX YEARS AGO: Air-Fried Mexican Meatloaf

SEVEN YEARS AGO: Mimi’s Sticky Chicken, a Call from my Past

EIGHT YEARS AGO: Perfect Soy-Grilled Steak

NINE YEARS AGO: The Devil’s Bread

TEN YEARS AGO: Heart of Palm Salad Skewers

ELEVEN YEARS AGO: Potluck Frittata and Lavoisier

TWELVE YEARS AGO: Home-made Corn Tortillas

THIRTEEN YEARS AGO: Whole-Wheat Spaghetti with Peanut Sauce

FOURTEEN YEARS AGO: Brigadeiros: A Brazilian Party!

FIFTEEN YEARS AGO: Lemony Asparagus


PIE POPS

What a completely fun concept! Bake a pie, but make it small. Really small. And don’t forget to get a stick going, for that pop experience… The idea comes from Cook’s Desserts Illustrated (available at amazon.com), which is a must-have for any baker out there. I cannot publish the exact recipe and method from the book, but let me share the overall process.

Get your favorite, preferably all-butter pie crust recipe, roll it out thin, and cut 3 inch rounds…


Transfer half of the rounds to a large rimmed baking sheet, add a stick to it, and one tablespoon of the filling of your choice (I used apple butter + cream cheese, as suggested in the book).

Freeze that for 10 minutes, then brush egg wash on the edges and add the second set of pie rounds on top. Crimp the edges, cut small slits with a sharp knife, brush with more egg wash…

and bake them at 375F for about 25 minutes…

You can conceivably use any filling but make sure it is not too wet. Keep in mind these are to be enjoyed just holding on the stick, no plate, nothing. You don’t want to have filling running all over the place. It is such a cute concept, and perfect to share! I hope you’ll give this method a try soon…

ONE YEAR AGO: Thai-Inspired Cucumber and Mango Salad

TWO YEARS AGO:  Dressing up the Roll Cakes

THREE YEARS AGO: Smoked Shrimp Tacos with Roasted Jalapeño Salsa

FOUR YEAR AGO: Corn Fritters

FIVE YEARS AGO: Minnie Macarons

SIX YEARS AGO: Air-Fried Mexican Meatloaf

SEVEN YEARS AGO: Mimi’s Sticky Chicken, a Call from my Past

EIGHT YEARS AGO: Perfect Soy-Grilled Steak

NINE YEARS AGO: The Devil’s Bread

TEN YEARS AGO: Heart of Palm Salad Skewers

ELEVEN YEARS AGO: Potluck Frittata and Lavoisier

TWELVE YEARS AGO: Home-made Corn Tortillas

THIRTEEN YEARS AGO: Whole-Wheat Spaghetti with Peanut Sauce

FOURTEEN YEARS AGO: Brigadeiros: A Brazilian Party!

FIFTEEN YEARS AGO: Lemony Asparagus

THE PIZZSALAD

Apologies. I admit, that kind of hurt. This is salad on pizza crust. I saw this recipe on the FoodTV show The Kitchen, that I used to watch all the time but then lost interest. Lately I’ve been adamant about NOT tuning into the news 24/7 because… well, I just can’t take it anymore. Soooo, I got into browsing all the stuff taped on our TiVo, and that episode was waiting for me. Katie Lee loves salad, and she came up with a way to join her love for salad and pizza on a single serving. I was intrigued. She used store-bough thin crust pizza (those sold in a tube), but I went with my default pizza recipe from the good and old Fine Cooking (click here for all details).


PIZZA SALAD
(inspired by Katie Lee’s recipe)

pizza dough (I used 1/4 of my default recipe)
olive oil, grated Parmigiano, Herbes de provence for crust)

dressing:
1/4 cup sherry vinegar or red wine vinegar
2 tablespoons chopped sun-dried tomatoes
1/2 teaspoon dried oregano
1 tsp honey
1/4 cup olive oil
salt and pepper to taste

For the salad:
arugula
mozarella pearls
tomatoes
black olives
avocados

For the dressing: In a blender, combine the vinegar, sun-dried tomatoes, oregano, and sugar. Pulse to combine. With the motor running, drizzle in the olive oil. Season to taste with salt and pepper.

For the pizza-cracker base: Heat the oven to 425 degrees F. Drizzle 1 tablespoon olive oil on a rimmed baking sheet. Use a pastry brush to evenly coat the baking sheet with the oil. Stretch the pizza dough to cover the baking sheet (I used a 9 x 13 size). Drizzle more olive oil on top and use a pastry brush to spread the oil evenly on the dough. Sprinkle with the cheese and Herbes de Provence. Bake until golden brown, about 12 minutes. Remove from the oven and let cool until just warm or room temperature on the baking sheet.

Assemble the salad over the pizza and drizzle the dressing all over. Toss is gently and wait about 15 minutes to serve it.

ENJOY!

to print the recipe, click here

Comments: This is messy to eat, I won’t lie to you. I advise you to allow the dressing soak on the pizza component a bit, it won’t make it soggy at all, if you bake it until it is crispy. But it will be a delicate balance – do not bake it too dark or it will be super hard and difficult to cut. If you go into the FoodTV website, some of the comments about Katie are very hurtful, and I find it all so sad. She is a very sweet person and I’ve tried and enjoyed many of her recipes. This salad reminded me of fatoush, which is a classic I am quite fond of. I don’t think I would serve it for company because it is a little tricky to eat, but if it is perfect for an informal meal. The dressing is absolutely delicious, and I recommend you give it a try on a regular salad, independent of the pizza part.

ONE YEAR AGO: Prosciutto-Wrapped Chicken Breasts with Pickled Jalapeños

TWO YEARS AGO: Dressing Up the Roll Cakes

THREE YEARS AGO: Roasted Carrot and Barley Salad

FOUR YEARS AGO: Ode to Halva

FIVE YEARS AGO: Brazilian Pao de Queijo (re-blogged)

SIX YEARS AGO: Apricot Linzer Torte

SEVEN YEARS AGO: A Trio of Air-Fried Goodies

EIGHT YEARS AGO: Focaccia with Grapes, Roquefort and Truffled Honey

NINE YEARS AGO: Moroccan Carrot Dip Over Cucumber Slices 

TEN YEARS AGO: White Chocolate Macadamia Nut Cookies

ELEVEN YEARS AGO: Cilantro-Jalapeno “Hummus”

TWELVE YEARS AGO:A Moving Odyssey

THIRTEEN YEARS AGO:
Hoegaarden Beer Bread

FOURTEEN YEARS AGO:
 Ancho-Chile Marinade: Pleased to Meat you!


FIFTEEN YEARS AGO:
 Shrimp Moqueca


RED VELVET SUGAR COOKIES, THREE WAYS

This dough will work well for stamps or to roll out thin or thick. Delicious, nice texture, and a very small amount of baking powder to make sure your design will stay nicely imprinted. Embossed rolling pins will be another option, so keep that in mind.

RED VELVET SUGAR COOKIES
(slightly modified from Fancy Flours)

1 cup butter at room temperature (226g)
1 + 1/2 cups powdered sugar (170g)
1 large egg
1 tablespoon Red Velvet Emulsion
1 tablespoon cocoa powder (I used Dutch processed)
1/4 cup melted chocolate chips
3 cups flour (360g)
1/4 tsp baking powder
1 tablespoon dry buttermilk powder
3/4 tsp salt

Mix flour, baking powder, buttermilk powder and salt in a large bowl. Reserve. Cream butter and sugar in the bowl of a standing mixer with a paddle attachment. Add egg. Mix in red velvet emulsion, vanilla, cocoa, and melted chocolate.

Blend in the dry ingredients reserved. Mix until dough pulls away from the paddle and begins to form a ball. Dust the surface of your counter and rolling pin with flour and roll out the dough to a thickness of approximately 3/8 inch to 1/2 inch. (If your dough is too soft to work with, refrigerate it for an hour or so.

Dust the surface of your dough and your cookie mold with flour. Press the mold into the dough just far enough down to fill the mold cavity. Remove your mold and cut out the cookie. Brush off the excess flour on the top of your cookie. Excess flour will appear white on the surface if not removed.
Place your cookies on a cookie sheet lined with parchment paper.

Freeze your cookies for 15 minutes, bake from frozen in a 350F oven until done, depending on the size, 10 to 13 minutes.

ENJOY!

to print the recipe, click here

Very simple to make, just roll, press the stamp and bake. I bake most of my cookies over a perforated mat. After baking, I sprayed a little bit of PME pearl luster over the surface, but that is optional.

.

I rolled them a little thinner, cut circles from half the cookies, and used a bench scraper to create a design on the cookies with a hole in the center. The lemon ganache I used is from this macaron post.

.

Cookies were simple rounds. To decorate them, I used compound chocolate spread over chocolate transfer sheets, a method I use often for Chocolate-covered Oreos. Let the chocolate set, cut circles smaller than the diameter of your cookies. Glue the disc to a cooled cookie with a bit of Royal icing or melted chocolate. Below the cookies and a little Chocolate-covered Oreo with the same “outfit”.

I love the texture and flavor of these cookies, and intend to use them often in the future. And guess what? You can also use Royal icing to decorate them! Designs inspired by The Graceful Baker.

ONE YEAR AGO: Lemon Macarons

TWO YEARS AGO: Thai Chicken with Peanut Sauce

THREE YEARS AGO: Baharat Flower Sourdough

FOUR YEARS AGO: Biscoitinhos de Canela

FIVE YEARS AGO: Salmon Tacos

SIX YEARS AGO: The Chignon

SEVEN YEARS AGO: Rack of Lamb Sous-Vide with Couscous Salad

EIGHT YEARS AGO: Focaccia with Grapes, Roquefort and Truffled Honey

NINE YEARS AGO: Moroccan Carrot Dip over Cucumber Slices

TEN YEARS AGO: White Chocolate Macadamia Nut Cookies

ELEVEN YEARS AGO: Cilantro-Jalapeno “Hummus”

TWELVE YEARS AGO:A Moving Odyssey

THIRTEEN YEARS AGO:Hoegaarden Beer Bread

FOURTEEN YEARS AGO:
 
Ancho-Chile Marinade: Pleased to Meat you!