BRAZILIAN CHICKEN AND HEARTS OF PALM PIE

I have two favorite ways out of culinary trouble: rustic and fusion. I am calling this fusion cuisine. The filling is a very traditional example of Brazilian cooking (Torta de Frango e Palmito), and the crust – hot water pastry – originates from England. They were a good match, shaping a dish that is perfect for chilly evenings (sigh). Leftovers keep well for a few days. The pastry is so sturdy that it does not suffer from being re-heated. Obviously, this is very filling, a small piece will be enough as a satisfying meal. You could make it vegetarian by adding a bunch of roasted veggies in place of the chicken, but make sure to double the amount of hearts of palm in that case, you want it to be a prominent flavor.

BRAZILIAN CHICKEN AND HEARTS OF PALM PIE
(from the Bewitching Kitchen)

equipment: 9-inch springform pan

for the pie crust:
400g all-purpose flour
150g bread flour
½ tsp fine salt
80g unsalted butter
100g lard
200ml water

for the filling:
3 chicken breasts, bone-in
2 tsp salt (divided)
1 tsp black pepper (divided)
3 Tablespoons olive oil
1 shallot, minced
squeeze of lemon juice
1 can diced fire-roasted tomatoes, drained (about 15 oz)
250-300 g hearts of palm, drained and diced
1/2 to 1 cup frozen green peas
3 tablespoons flour
½ cup whole milk
fresh parsley and cilantro, minced (to taste)
1/4 cup cream cheese
a few slices of fresh mozzarella (optional, see comments)
egg wash to brush the dough (1 egg + 1 tsp water, whisked well)

Make the filling. Poach the chicken breasts very gently in water seasoned with salt, pepper, and lemon juice. I like to bring the water to almost a boil, turn the heat off, and leave the chicken in the pan for 15 minutes. Keep in mind it will cook longer in the pie.  When chicken is poached and cool enough to handle, shred the meat with your fingers or a couple of forks. Reserve.

Sautee the shallot in olive oil with a touch of salt and pepper in a large skillet until fragrant. Add the shredded chicken breast, tomatoes, hearts of palm pieces and heat for a couple of minutes, stirring. Dissolve the flour in the milk, whisking well to avoid lumps. Pour into the meat mixture and heat until it starts to thicken.  Add the cream cheese, then the frozen peas and mix everything gently.  Adjust seasoning with salt and pepper if needed. Add the minced parsley and allow the mixture to cool completely before assembling the pie.

Make the pie dough. Place the flours, salt and pepper in a large mixing bowl. Place the butter, lard and water in a small saucepan and heat until boiling. Allow to cool slightly, then pour onto the flour mixture and stir with a large wooden spoon. Once it is cool enough to handle with your bare hands, knead the mixture until smooth and elastic. Roll out about 2/3 of the dough and cover the bottom and sides of the springform pan, making sure to take the dough all the way to the top. Unless your pan is a true non-stick pan, you will be better off by slightly greasing it with butter.

Add the cool filling, top with a few slices of mozzarella, and cover the pie with the remaining dough, rolled out a little bigger than the diameter of the pan. Join the bottom and top dough to seal the pie. Brush the surface with egg wash and make two or three cuts on top to allow steam to be released during baking.

Heat the oven to 400 F. Bake the pie for 30 minutes, reduce the heat to 350F and bake for 45 minutes. Remove from the oven and allow it to cool over a rack for 20 minutes before opening the springform pan and serving the pie.

ENJOY!

to print the recipe, click here

Comments: The combination of chicken, hearts of palm and green peas is a true classic in Brazilian cooking. Sometimes made as filling for appetizers called “empadinhas” – not to confuse with empanadas, another South American concoction but made with a different type of dough and usually much bigger.  Empadinhas are tiny, one or at most two-bite delicacies. I should make some before too long, although they are quite a bit of work to prepare.

Now, confession time. The real Brazilian version of this pie takes a type of cream cheese that is not available in the US, called “requeijão”.  I decided to use cream cheese, but completely forgot about it until I grabbed the cold filling and saw the package of cream cheese un-opened next to it. That is why I decided to add some mozzarella slices on top. I really like the way it turned out, so I included it in the recipe. Double cheese won’t hurt, I say go for it.

This was made back in July, so we enjoyed it with peak of the season tomatoes and cucumbers in a refreshing salad. For a winter meal, I suggest a fennel and orange salad, which will go perfectly with all the flavors in the pie.

Note to self: make empadinhas before the blog turns 10 years old!

say it as a native: 

ONE YEAR AGO: Roasted Butternut Squash with Walnuts and Tahini Sauce

TWO YEARS AGO: The Complicit Conspiracy of Alcohol

THREE YEARS AGO: Candy Cane Cookies

FOUR YEARS AGO: Macarons: Much better with a friend

FIVE YEARS AGO: Our Mexican Holiday Dinner 

SIX YEARS AGO: The Ultimate Cranberry Sauce

SEVEN YEARS AGO: Edamame Dip

EIGHT YEARS AGO: Gougeres

NINE YEARS AGO: Beef Wellington on a Special Night

DOMINIQUE ANSEL’S CHOCOLATE MOUSSE CAKE


Chef Dominique Ansel’s shout to fame materialized in 2013 when he created the cronut, a cross between a croissant and a doughnut. On the first day he started selling cronuts, a blogger from New York’s The Grub stopped by, had one, and raved about it in the popular blog. Poor Mr. Ansel had no idea that next morning a line of more than 100 customers would be screaming for a cronut.  You can read the whole story here. I have Ansel’s book “The Secret Recipes” which includes the method for his cronuts (they take three days to prepare).  I am not too fond of fried pastries – just don’t care for dealing with all that oil at home, and would prefer to stop by his bakery in New York and enjoy one “sur place.”  But I adore his cookbook. In the opening chapter he talks about one unusual “ingredient”: time. How important it is to consider time in a recipe and respect it. He illustrates the point with madeleines, that must be enjoyed within 3 to 5 minutes of baking. Being a timing fanatic, I was immediately captivated by his opening chapter. Today I share with you his chocolate mousse cake, with a modern look given by his unusual decoration: mini-meringues that he calls “mini-me’s.” I changed the look a bit, making the “mini-me’s” slightly bigger, and adding just a layer at the bottom of the cake, to allow the mirror glaze to shine. Sprinkled golden stars because… sometimes you need stars in your life.

CHOCOLATE MOUSSE CAKE
(from Dominique Ansel’s Masterclass online video)

I don’t have permission to publish the recipe,
so I will share a very simplified overview.

Chocolate cake component:  he uses a flourless chocolate base, starting with 11 eggs, separated in yolks and whites. The yolks are beaten with sugar until tripled in volume, then a French meringue is added to the yolks. Finally, some cocoa powder is gently mixed and the batter is distributed in two half-sheets for baking. You can use any chocolate concoction you like, a genoise like this one, or a Joconde like this one, as long as you have 2 circles of cake of similar thickness, 8 inches in diameter.

Chocolate Mousse: I started the mousse preparation by blooming 2 tsp gelatin in 30mL very cold water for 10 minutes. Then 310g of whole milk was brought to a boil and poured over 310g dark chocolate (70% cocoa). The ganache was emulsified well, then the bloomed gelatin added and gently but thoroughly mixed. Heavy cream (450g) was whipped to the consistency of melted ice cream, and gently folded in the chocolate ganache/gelatin. Mousse is ready to use to assemble the cake.

Chocolate Mirror Glaze: This is not the traditional mirror glaze with condensed milk and glucose, but a much simpler variation, similar to a pouring ganache used in Opera Cakes, for instance. It starts with blooming 12g of gelatin in 60g of water for at least 10 minutes. Then, 200g sugar is mixed with 140g heavy cream and heated until the sugar is fully dissolved. Water (150g) is mixed with 70g cocoa powder in a bowl to form a paste.  The bloomed gelatin is added to the hot heavy cream (make sure it is not hotter than 80 C), mixed well to dissolve. That is added to the cocoa powder paste and emulsified well. Ideally, the glaze should be stored in the fridge overnight and used next day to cover the cake.

Assembling the cake: I like to wrap the base of a tall 8-inch ring cake with plastic wrap, bringing it up along the sides (it is easier to do if you add a few drops of water to the outside of the ring). Add a piece of acetate inside the ring to facilitate un-molding later. Place the first cake layer at the bottom, cut to fit exactly inside the ring. Add mousse, the second cake layer, and mousse to cover. Freeze overnight.

Next day, bring the mirror glaze to room temperature, warm gently in the microwave until it reaches 90 to 95 degrees F. You must minimize bubbles in the glaze, either by using an immersion blender, or passing the mixture through a fine sieve. I actually do both things to make sure it is very smooth. Remove the cake from the freezer, un-mold, place over a rack on a baking sheet. Cover by pouring the glaze at the center in a circular motion.

Decoration: make small meringues using any Swiss meringue recipe you like. I used this one. I baked mine at 175 F for 40 minutes only, then let them in the oven turned off for 30 minutes with the door slightly ajar. Add the meringues to the sides of the cake or in any pattern you like. Sprinkle with stars or other sprinkles.  Leave in the fridge to de-frost for a couple of hours before serving.

ENJOY!

to print the recipe overview, click here

Comments: Just to make sure I made it clear, this recipe is NOT part of his cookbook. It is demonstrated online in his Masterclass video. Which, by the way, is excellent! He is very personable, and his attention to detail, even if not unexpected, is a joy to see in action. In the video he teaches how to make perfect madeleines, a fantastic apple tart, croissants, and this delicious cake. 

I had no issues to make the cake or assemble it. My favorite step – I am sure you won’t be surprised – is the final glazing. The cake was waiting in the freezer for 5 days, actually. We had a trip planned and the day after we arrived back we were supposed to attend a potluck dessert party, tradition of our department for the past few years. This was our contribution.

So, if you want to have a very easy time on the day you need to serve a special cake, consider this one. Everything can be made in advance (way in advance!), on party day you just need to make the glaze and the meringues. Which, by the way, are obviously not mandatory. The mirror glaze is so beautiful, you can add some sprinkles, or a drizzle of white chocolate and still have something super special to serve to your guests.

And… speaking of mirrors…

The day Sally photobombed her own shot!

The cake was very well-received at the party. I think it had the right level of sweetness and chocolate intensity, a very smooth and luscious mousse, with the tender cake to tease the palate. And the meringues!  Honestly, I think under-baking them a tad is the right way to go. As they sat on the side of the cake, they got a bit more creamy instead of crumbly and dry. I had quite a bit of meringues leftover.

Bogey Quit That ™ practices his paranormal telekinesis. 

😉

I close this post with a quote from Chef Ansel’s book…

We live in a world where every creation strives to be both instantaneous and eternal. To respect time as the supreme ingredient is a battle of breaking habits and changing perceptions. Nobody likes to wait; nobody likes to rush. But when you treat time as an ingredient, it changes everything.

ONE YEAR AGO: Slow-Roasted Eye of the Round Beef

TWO YEARS AGO: Steam-Roasted Indian-Spiced Cauliflower

THREE YEARS AGO: Creamy Zucchini-Mushroom Soup

FOUR YEARS AGO: Ken Forkish’s Pain au Bacon

FIVE YEARS AGO: Carrot and Cumin Hamburger Buns

SIX YEARS AGO: Potato Galettes a l’Alsacienne & Book Review

SEVEN YEARS AGO: Caramelized Carrot Soup

EIGHT YEARS AGO: Miso-Grilled Shrimp

NINE YEARS AGO: Pain Poilane


PORK TENDERLOIN ROULADE WITH PUMPKIN AND PECANS

This is a super simple recipe, but one that looks like you spent a considerable effort to bring to the table. I made it sous-vide, but you don’t have to do it this way, I offer alternatives for stove-top cooking. You can also use chicken breasts instead of pork, I made it both ways, not sure which one I prefer, I think the pork makes it easier to roll and looks a bit more tidy in the end. So that’s the one I picked to highlight today.

PORK TENDERLOIN ROULADE WITH PUMPKIN AND PECANS
(adapted from The Essential Sous Vide Cookbook)

2 pork tenderloins (about 1.2 pounds each)
Salt and pepper to taste
1/2 cup canned pumpkin purée
¼ cup chopped toasted pecans
2 tsp Southwest spice mix (I used Penzey’s)
3/4 cup chicken broth (divided)
¼ cup apple cider
2 tablespoons olive oil
1 tablespoon flour

Heat the water bath to 150°F.

Butterfly the pork tenderloins and use a rolling-pin or a meat mallet to flatten the meat to about 1/4 inch thick. Protect them with a plastic wrap and sprinkle the meat with a tiny amount of water before pounding. Season with salt and pepper all over.

In a small bowl, stir together the pumpkin purée, the pecans, the Southwest mix, and a smidgen of salt. Spread half the filling on each piece of meat, leaving a ½-inch border around it. Roll up each pork tenderloin jelly-roll style, starting at the narrow end, and tie with kitchen twine (use 4 or so pieces to cover the extension of the roll).

Pour ¼ cup of chicken broth and the apple cider into the bag. Add the roulades, and seal using the water displacement method. Place the bag in the water bath and cook for 5 to 6 hours. Remove the roulades from the bag, reserving the cooking liquid (pass it through a sieve if you prefer a smooth sauce in the end). Place the roulades on a paper towel–lined plate and pat them dry.

In a medium ovenproof skillet, heat the oil over a medium-high heat. Add the pork and brown on all sides. Transfer to a plate and keep warm.  If needed, add a bit more oil to the skillet, add the flour, cook it for a couple of minutes, then add 1 cup of chicken broth plus the reserved cooking liquid. Cook until thick, about 5 minutes. Remove the strings from the meat, cut in slices and serve with the gravy.

For non-sous vide cooking: make the roulades and start by browning them on all sides on a skillet with very hot olive oil. When golden brown, add the chicken stock and apple cider, cover, and simmer gently until cooked through, making sure the liquid comes at least to half the height of the roulades. Depending on the thickness of the roulades, it will take 45 minutes to 1 hour. Baste the roulades and turn them around on all sides during cooking.  Once done, reduce the cooking liquid by boiling, or if you like more of a gravy consistency, do the flour trick as described in the recipe.

ENJOY!

to print the recipe, click here

Comments: The temperature for cooking pork is a matter of taste. I’ve mentioned it before, we don’t care for pork still pink in the center, so I always go for 150F. You should do what suits your taste. The sous-vide has two advantages, the flexibility in time – you can even push the cooking time a bit further, if needed – and the way it keeps the roulade shape during cooking, even though it is not vacuum-sealed. Of course, the texture of the meat is perfect when made sous-vide, but you can still get a very nice meal on the stove-top, it just takes a bit more of tending during cooking. You don’t want to over-cook the delicate meat, or leave it uncooked in the center.  As I mentioned, I also used chicken breasts, and the rolled effect is not as nice, but it still tasted great. For chicken breasts, I reduced the cooking time to 4 hours, and used 148 F. Probably not much difference from 150F, but that’s what I did.


I love to find uses for canned pumpkin puree, because I often use some in a recipe and have leftovers staring at me later. Yes, it freezes well, but there is a limit to the number of little packages one can keep track in the freezer. I rather open a can, use it all up, and move on. When I made the recipe a second time, I did not even toast the pecans and it was still very nice, so a few shortcuts here and there don’t hurt. The sous-vide is perfect for working days. I can prepare it all the evening before, leave the bag in the fridge, set up the water-bath at lunch next day, and arrive home to a nice, almost effortless dinner. A couple of side dishes, and we are set.

ONE YEAR AGO: White-Chocolate Peppermint Macarons

TWO YEARS AGO: Shrubs, a fun alternative to alcoholic drinks

THREE YEARS AGO: Date Truffles 

FOUR YEARS AGO: Mascarpone Mousse from Baking Chez Moi

FIVE YEARS AGO: Pumpkin Brigadeiros

SIX YEARS AGO: Pumpkin Espresso Loaf

SEVEN YEARS AGO: Caramelized Carrot Soup

EIGHT YEARS AGO: Miso-Grilled Shrimp

NINE YEARS AGO: A Special Holiday Fruitcake

APPLE & SOBACHA-CARAMEL DOME CAKE


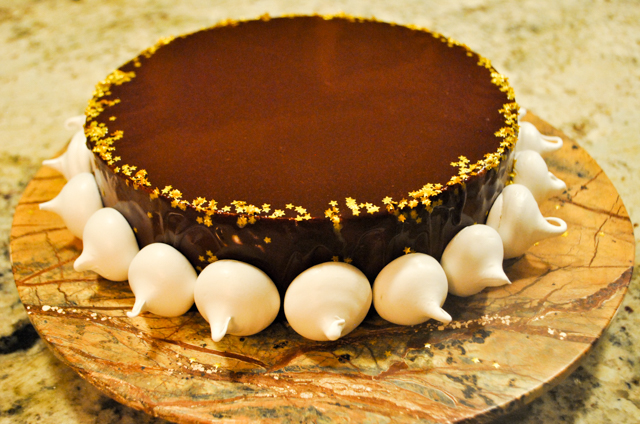
I absolutely adore individual dome cakes. They are small, cute, and if you gild the lily with a mirror-glaze, they have the potential to seriously awe your guests. For this version, I paired two classic flavors, apple and caramel, but the caramel was perfumed with sobacha tea. As I mentioned not too long ago, I am (still) in a Japanese-ingredient obsessive mode, which explains why sobacha made its way into our kitchen. I have to share another little obsession with you: online classes from Savour.com, an Australian website that is simply amazing. My favorite instructor is Kirsten Tibballs, but they have classes by other chefs, all worth every minute of your spare time. The sobacha caramel was an idea from Chef Jerome Landrieu, another instructor from Savour. I paired that with an apple compote, and a white chocolate mousse. All sitting together over a hazelnut sable cookie.

The fun can be spread over three days. On the first day, make the cookies and the apple-yuzu insert. On the second day, make the sobacha-caramel, the white chocolate mousse, assemble the cakes and freeze them. On the third day, make the mirror glaze and coat the cakes. Keep them in the fridge for at least one hour before serving.

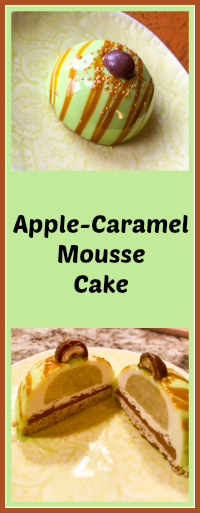
APPLE & SOBACHA-CARAMEL DOME CAKES
(inspired by Savour.com and other sources)

makes six to eight individual portions

You will need: half-sphere silicone pans, large and small (I used this and this)
round cookie cutter for sable base

for the sable cookie:
50g hazelnut flour
160g unsalted butter, cold
250g all-purpose flour
50g powdered sugar
50g granulated sugar
40g whole eggs

for the apple-yuzu insert:
300g granny smith apples
30g yuzu juice (or substitute lemon juice)
1/2 tsp vanilla paste
35g granulated sugar
4g NH pectin

for the sobacha-caramel:
120g heavy whipping cream
10g sobacha tea
cream to bring up to volume after infusing
150 g maple syrup
110 g brown sugar
75g sweetened condensed milk (about 1/4 cup)
85 g corn syrup (about 1/4 cup)
1/2 teaspoon salt
2 tablespoons unsalted butter 

for the white chocolate mousse:
6 g gelatin (200 bloom)
30 g cold water
175 + 200 g heavy cream (divided)
190 g white chocolate, finely diced
1 T fresh lemon juice

for the mirror glaze:
2½ sheets (4g) of Platinum grade sheet gelatine
120ml water
150 g liquid glucose
150 g granulated or caster sugar
100 g condensed milk
150 g white chocolate, chopped fairly small
1/2 tsp titanium oxide
yellow and green gel food coloring (about 3 to 1)
caramel gel food coloring
golden sprinkles and milk covered hazelnuts for decoration

Make the sable cookies. Add the butter and the hazelnut flour into a food processor. Process a few times until the  mixture looks like sand. Add the rest of the dry ingredients, pulse a few times. Do not over-process to the point it will come together as a dough. Now add the egg (beat one egg and add the exact weight called for in the recipe). Pulse the processor two or three times, stop immediately and finish the dough by hand. You want to bring the dough together without over-working because now that liquid was added (through the egg), working the dough too much will develop gluten.

Roll the dough quickly on a lightly floured surface to cover more or less the extension of a quarter-sheet baking pan, the thickness should be around 3mm. Place the rolled dough in the fridge for about one hour, then cut circles of the exact diameter of the dome pan you will use for the cakes. This dough won’t spread or shrink, so you can exercise precision.  Place the cookies on a baking sheet (perforated, if available), and bake at 350 F for about 12 minutes. They do not need to develop color, just fully bake.  Reserve.

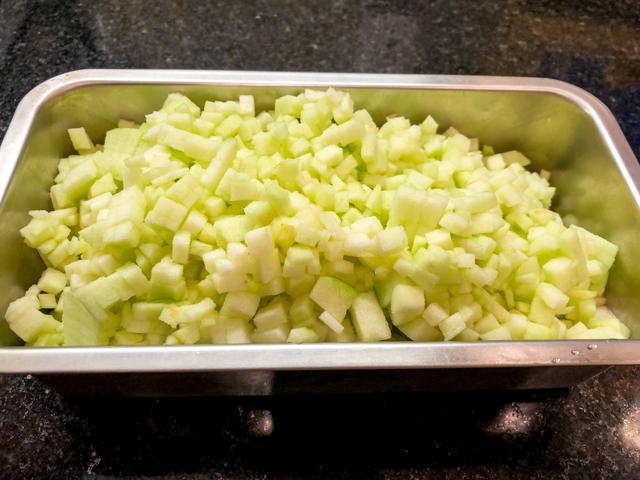
Make the apple-yuzu insert. Peel and dice the apples into 5 mm cubes. Combine the sugar and pectin in a small bowl and transfer to a saucepan. Add the yuzu or lemon juice to the saucepan and mix everything together. Turn the heat on to medium, add the apples and the vanilla. Cook very very gently with the lid on for 10 to 15 minutes or until the apples get translucent and start to melt down a bit. You will need to stir it often, so that the fruit does not burn at the bottom. Make sure the flame is really low for the whole cooking time. Place portions in a small mold that will work as an insert for the dome cake. You can alternatively spread the compote as a thick layer and cut small rounds to use as insert after it is frozen.  Freeze the molds containing the apple mixture for a few hours or overnight.

Make the sobacha-caramel.  Infuse the heavy cream with sobacha tea by bringing the heavy cream to almost a full boil and adding the tea. Turn the heat off, cover the pan and let it sit for 10 minutes. Drain the tea away, weigh the heavy cream and complete with fresh cream to restore the full 120g (some of it will be lost when the tea is sieved).

Combine the maple syrup, sugar, sobacha-cream, milk, corn syrup, and salt in a saucepan. Stir over medium heat until the mixture reaches 240 F (115 C). Remove from the heat and stir in the butter. Let it cool until it has spreadable consistency. You can place it in a piping bag (no piping tip needed) or use a small spatula to spread a very thin layer over the sable cookies that will be the base of the dome cake. Reserve in the fridge until ready to assemble the dessert.

Make the white chocolate mousse. Mix the gelatin with water and allow it to sit at room temperature for 10 minutes. Heat 175 g of heavy cream in a saucepan until bubbles appear around the edges.  Pour over the white chocolate, add the bloomed gelatin, stir gently until chocolate is dissolved. Add the lemon juice and reserve. Whip the remaining 200 g of heavy cream (very cold from the fridge) until it reaches the consistency of melted ice cream. Fold gently into the reserved white chocolate mixture.

Assemble the dessert. Add a bit of mousse to the bottom of the large half-sphere mold. Place a frozen apple-yuzu insert on top, don’t press too hard, so that it won’t show on the surface. Fill almost to the top with mousse, then place the caramel-coated sable floating on top, with the caramel side down. Flatten everything well, if needed add additional mousse on the edges. Freeze overnight.

Make the mirror glaze. Put the water, sugar and liquid glucose in a small pan and bring to simmering point, stirring occasionally to dissolve the sugar. Remove from the heat and let it stand for about 5 minutes. This is the base syrup for the glaze. Meanwhile, soak the gelatin in some cold water for about 15 minutes. Squeeze out the excess water and stir into the hot water, sugar and liquid glucose mixture to dissolve. Stir in the condensed milk.

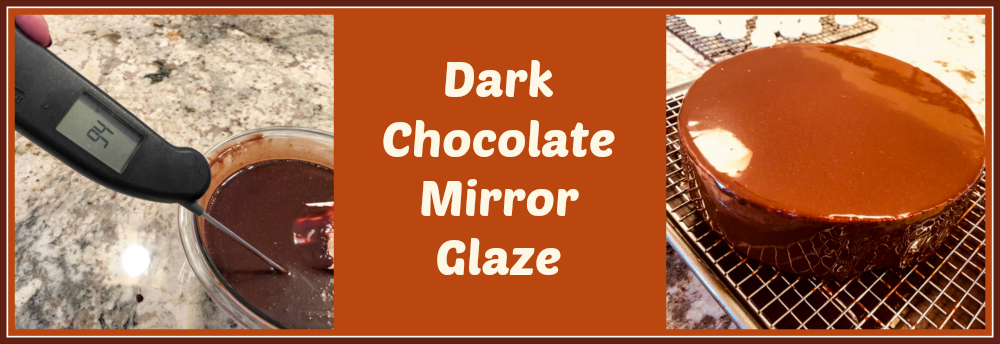
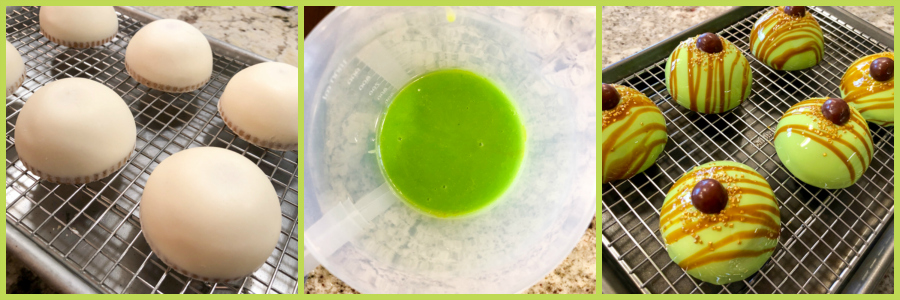
Put the chocolate in a medium bowl and pour this hot mixture slowly over the chocolate, stirring gently to melt it, avoid making bubbles. A stick immersion blender works great, but you must keep the blades fully submerged at all times. If bubbles are present, pass the mixture through a fine sieve. Add 1/2 tsp titanium oxide to the mixture, divide in two portions, one very large, one about 1/3 cup. Color the large amount light green, trying to mimic the color of a Granny Smith apple. Start with 3:1 yellow to green and adjust as you mix. Color the smaller amount with a caramel tone, and place in a squirt bottle.  Reserve both until they reach pourable temperature. The ideal temperature to pour the glaze is 92 to 94 F.  Once they reach that temperature, remove the cakes from the freezer, un-mold them and set them over a rack placed on top of a baking sheet. Glaze them with the light green mirror glaze, then make a drizzle with the caramel color.

If you want, add sprinkles and a chocolate-covered hazelnut on top. Keep in the fridge for at least one hour up to overnight before serving.

ENJOY!

to print the recipe, click here


Comments: I guess this is the longest recipe I’ve ever published, I am a bit tired just from reading it… The secret of this type of dessert that sounds like a culinary marathon, is dividing the work in several days. Once you do that, you wont’ feel overwhelmed at all. The toughest part of this recipe was dicing the apple, but it becomes a bit of a Zen thing. And when you look at the pieces later, it looks incredibly cool.

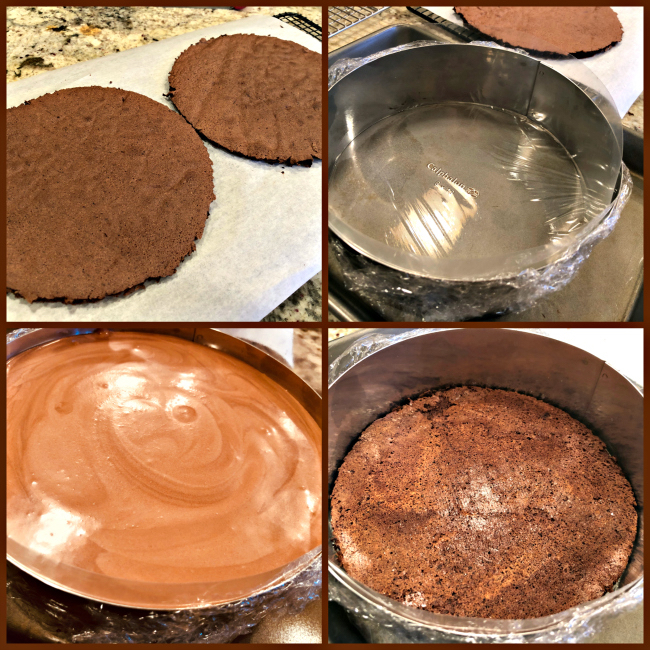
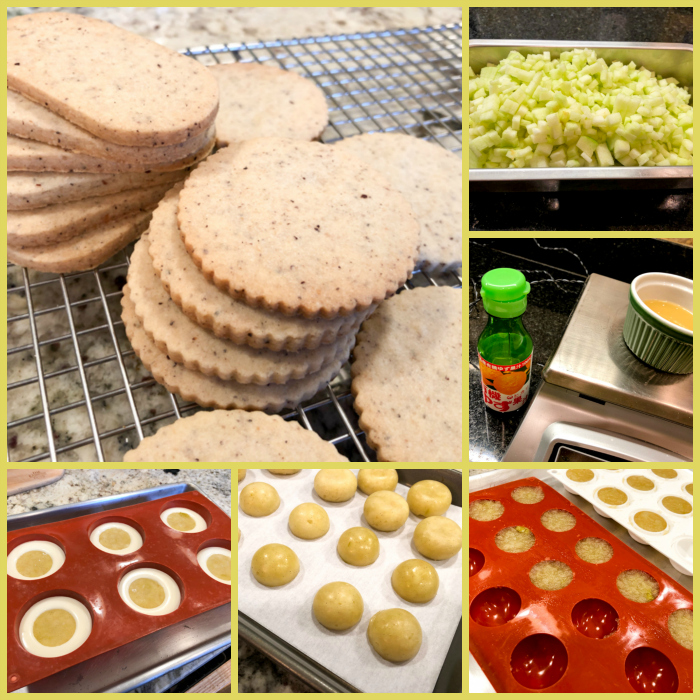
Yuzu juice. Tough to find, this time I had to resort to amazon, but if you live in a place with a well-stocked Japanese section, you might be able to get some. If you don’t have it, second best option would be Meyer lemon, or go for a mixture of lemon and lime juice (1:1) and call it a day. The yuzu adds a very intriguing citric flavor, so I advise you to try it at least once. As you can see from the first composite picture, I had two different sizes of molds for the inserts. The white one is a Silikomart “Stone”, and it ended up too big for the spheres I chose. Looking at the final dessert, I think that I could have made the insert even smaller, so that it would have more mousse. It’s a tough call. Phil liked it just the way it was.

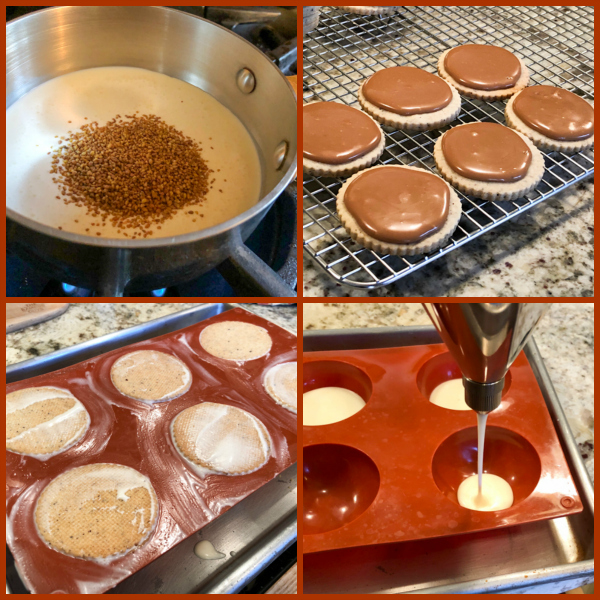
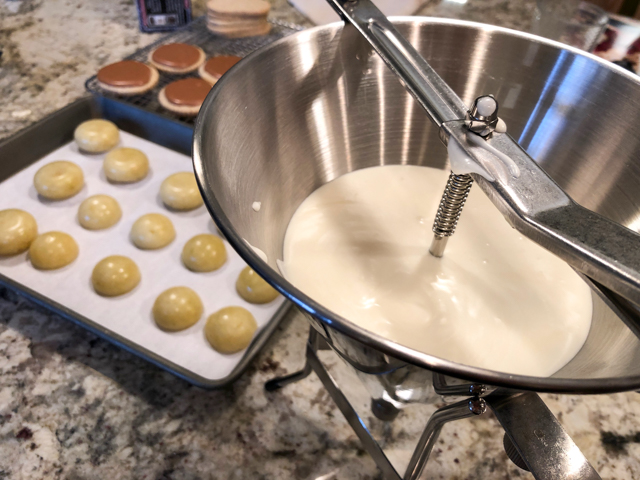
Sobacha tea. It is a buckwheat product also not very easy to find (in other words, must amazon-it). I made some as a regular tea to try, it has a pretty unique flavor, a bit smoky, maybe. It was spectacular in the caramel, added a lot to it. If you don’t find it, just make a regular caramel without it. Now did you notice the bottom right picture? It is my new toy, a batter dispenser… I am so in love with it! It makes a very messy job a lot less messy, although to take a picture of the action I got in considerable amount of trouble. My beloved was not around and I had to use all my coordination to get that shot. Things were not always smooth. I will spare you of all sordid details, but it’s amazing what a little mousse can do on black boots. You can see my stylish dispenser better in this shot:


Isn’t it a thing of pure beauty and functionality? It has three different sizes of opening at the bottom, I used the largest one for this job. They can be twisted on and off, and stored on the handle. I will showcase it better in my next In My Kitchen post. Stay tuned.

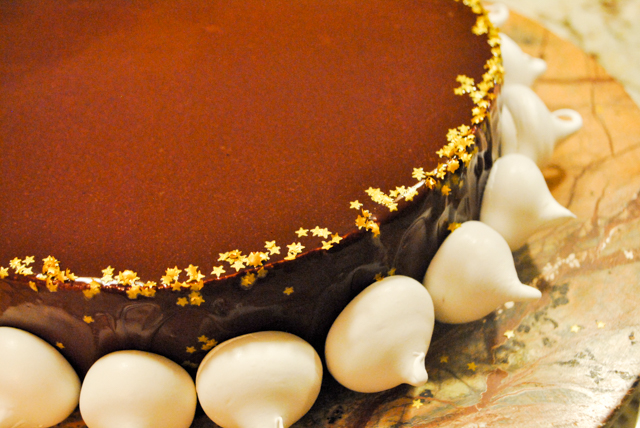
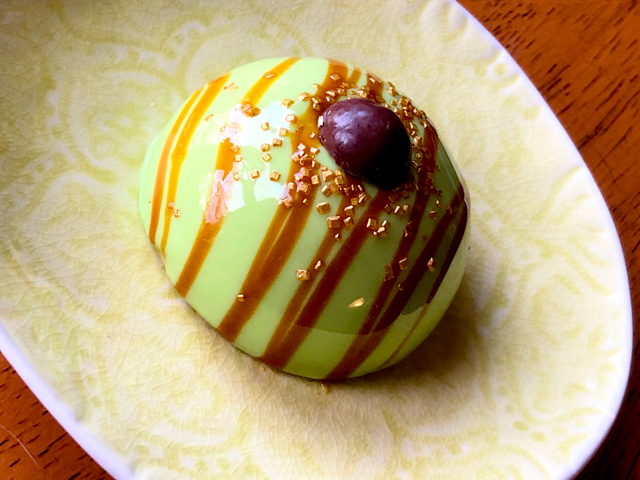
Mirror glaze: The dome cakes un-molded perfectly and had a very smooth surface. The most important thing is to coat them right away, to prevent condensation to form  as they sit at room temperature. Pour from the top in a circular movement, and make sure you do a 360 degrees check, because sometimes small bits at the bottom might not get covered. There is some room for tweaking and the amount of glaze I shared is more than enough to cover six to eight cakes.


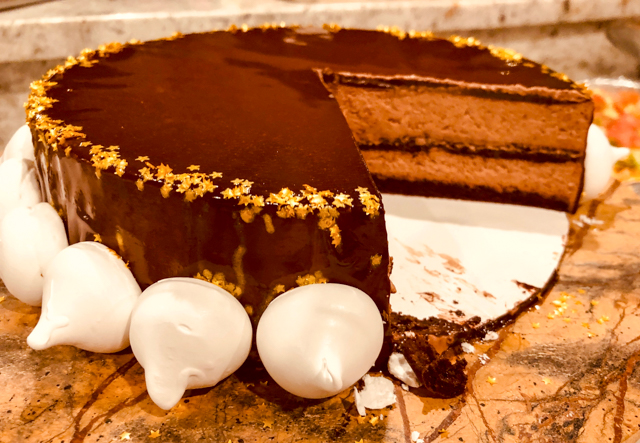
So here it is, my baby-dome cake sliced in half so you can see inside. I have a hard time deciding if the size of the insert is good as it is, or smaller would be better. The caramel layer is very sweet so a thin layer is all that you’ll need. The apple-yuzu compote stole the show… As you can see from the first composite picture, it made quite a few. In fact, I halved the recipe to share in this post, because it made so much. I have some ideas to use it in the future, will de-frost them and freeze again in a different size and shape for a future entremet type cake. For the time being, they are hibernating in the freezer, together with leftover mirror glaze. Best friends forever.

I hope you enjoyed this long post, and perhaps consider venturing in the world of mousse cakes. It is a lot of fun, the thrill of coating a cake with mirror glaze never seems to get old. I think it’s as addictive as baking macarons!

ONE YEAR AGO: Cocktail Spiced Nuts

TWO YEARS AGO: How the Mighty Have Fallen

THREE YEARS AGO: Festive Night at Central

FOUR YEARS AGO: The Perfect Boiled Egg

FIVE YEARS AGO: Light Rye Sourdough with Cumin and Orange

SIX YEARS AGO: Homemade Calziones

SEVEN YEARS AGO: Plum-Glazed Duck Breasts

EIGHT YEARS AGO: Holiday Double-Decker

NINE YEARS AGO: New York Deli Rye

BROCCOLI SOUFFLE

Some recipes can be intimidating, and soufflé is definitely part of the group. But honestly, it is very easy and flexible, in the sense that you can add pretty much anything you want to the basic formula. Plus, even if it does not rise as high as you would like, it’s always delicious. I guess the only way to really ruin a souffle is baking it to the point it dries out, but to get there the surface would be so dark, it would act as a warning sign. Of course, I suppose one could forget it in the oven. But, I digress. This version is a variation of my default recipe from Julia Child, a recipe that never let me down. Broccoli makes the egg mixture slightly more dense, so it won’t rise as much as a souffle prepared exclusively with cheese. But I will share a couple of tricks to maximize lift under the circumstances. Read on.

BROCCOLI SOUFFLE
(adapted from Julia Child’s Mastering the Art of French Cooking)

6-cup mold, buttered and sprinkled with grated Parmigiano cheese

Parmigiano cheese for mold (about 2 T)

3T butter
3T flour
1 cup hot milk
1/2 t salt
1/8 t pepper
pinch of cayenne pepper
4 egg yolks
5 egg whites + pinch salt
3/4 cup broccoli florets
1/4 to 1/2 cup mozzarella cheese, grated

Before you start, cook the broccoli florets. Place in a microwave-safe dish, season lightly with salt, and sprinkle some water. Cover with plastic wrap and microwave for 2 minutes. Immediately remove from the dish and lay on a plate to cool. Cut in pieces that are no more than 3/4 inch big. Reserve.

Melt the butter, stir in the flour and cook for 2 minutes, don’t allow it to brown.  Remove from the heat, and when the butter stops furiously boiling, add the milk all at once. Return to medium heat and cook, stirring constantly for a couple of minutes more. The sauce will thicken considerably. Add salt, pepper, and cayenne.

Remove from heat, allow it to cool for 5 minutes or so,  and add the egg yolks, one by one, mixing very well after each addition. This sauce can be prepared to this point and refrigerated; bring it to lukewarm before continuing. If you decide not to refrigerate it, then dot it with butter, cover it with a plastic wrap and go work on the egg whites.

Beat the egg whites with a pinch of salt until firm peaks form – depending on your mixer or the strength of your biceps it will take 2 to 5 minutes. Add 1/3 of this mixture to the sauce, to thin it slightly – add the cheese and mix well.

Now, add the remaining egg whites and fold into the sauce. You don’t need to mix it until it is all incorporated and totally homogeneous, because the “lift” of your souffle’ depends on the air present in the beaten egg whites. When it’s almost fully folded, add the broccoli florets and fold a few times, very gently.

Fill the souffle’ mold to 3/4 of its volume, place it in a 400F oven, reducing the temperature immediately to 375F. Cook the souffle’ for 30 minutes – do not open the oven door during the first 20 minutes. If you like it moist inside, serve after 30 minutes. I prefer to cook for 5 additional minutes, then the texture inside is perfect, not too dry, not too creamy.

Serve right away, souffle waits for no one!

ENJOY!

to print the recipe, click here

Comments: The best way to maximize lift when using a heavy vegetable such as broccoli, is to cut it in smallish pieces and add them to the base when you are almost ready to pour it into the baking dish. Some recipes will ask you to process the veggies, but I much prefer slightly larger pieces. For that very reason, blanching, steaming (or cheating and using the microwave) is also recommended. I’ve made the exact same recipe using raw broccoli and prefer it this way.

Here’s free advice for my readers: if you are the partner or family member of a food blogger, get out-of-the-way once the souffle is served. Yes, you will be eating it soon, but picture obviously trumps appetite. Obviously.


ONE YEAR AGO: Panettone Time!

TWO YEARS AGO: How the Mighty Have Fallen

THREE YEARS AGO: Festive Night at Central

FOUR YEAR AGO: The Perfect Boiled Egg

FIVE YEARS AGO: Light Rye Sourdough with Cumin and Orange

SIX YEARS AGO: Homemade Calzones

SEVEN YEARS AGO: Plum-Glazed Duck Breasts

EIGHT YEARS AGO: Holiday Double-Decker

NINE YEARS AGO: New York Deli Rye