ELAINE’S SOURDOUGH BOULE


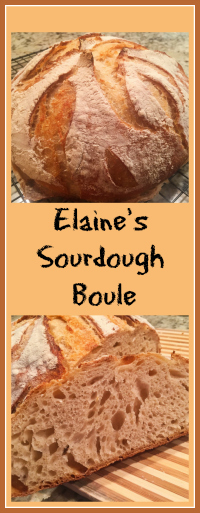
The recipe for this bread, also known as 500 g overnight sourdough,  is beyond tried and true. My dear friend Elaine has been baking this very recipe for years, probably at least twice every week, if not more often. Her very detailed blog post about it can be found here. You can also marvel at her slashing skills, which inspired me to become more adventurous. Remember?

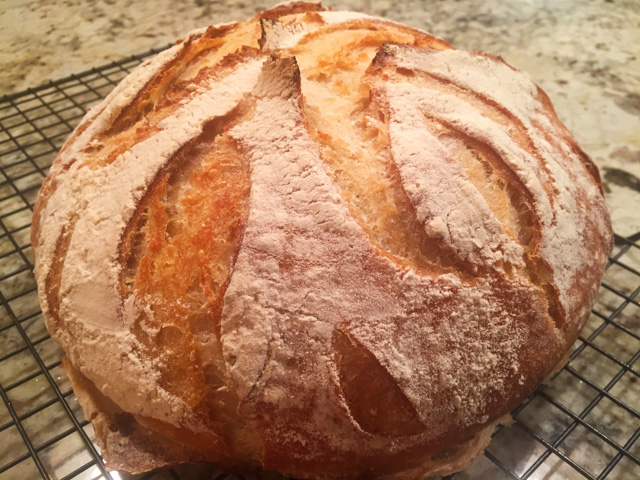
When you bake bread on a regular basis, it is nice to have a formula that is not overly complicated, one you can do it almost without effort. This is it. Of all sourdough breads I’ve baked, this is the one that I will go back to when I want a great loaf of bread, pure with regular bread flour, just that delicious sourdough tang, and a crumb that has the type of texture I enjoy. Some holes, but not a bread sieve. And add to that great crust too. All bases are covered.

Here is a simplified overview of the recipe. First, you need a bubbly sourdough starter, at 100% hydration, that is 50:50 flour to water ratio.

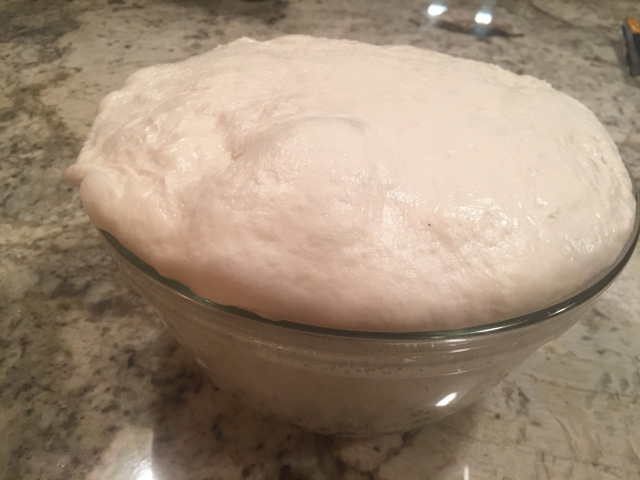
You’ll use 150 g of your bubbly sourdough and mix it with 285 g water, 500 g bread flour, and 9 g of salt. Incorporate it all with your hands, no need to work very hard.  Leave it for 30 minutes at room temperature, then knead it by folding a few times.  Let the dough proof at room temperature overnight. Mine was ready to walk outside and greet the world…

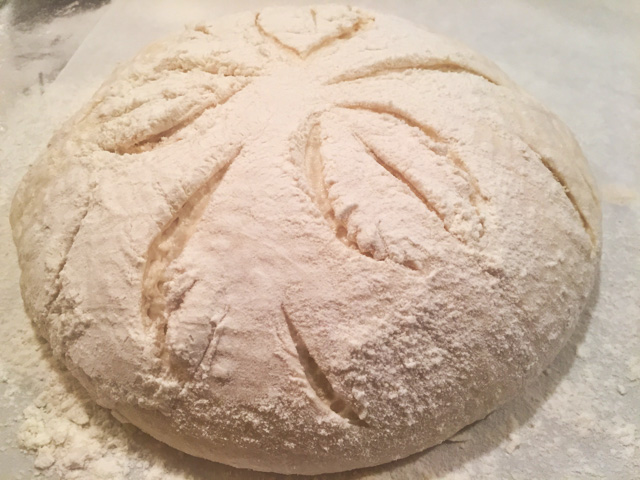
Pour the dough gently out on a floured surface, shape it.
Let it sit for 30 minutes, while you heat the oven to 450 F.
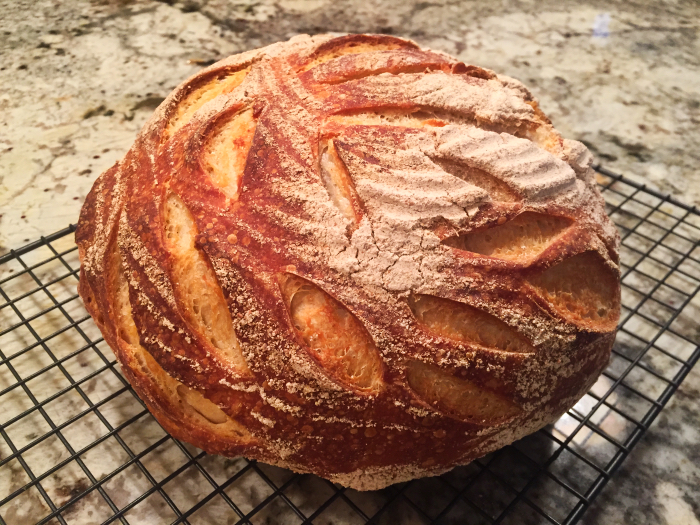
Slash it with enthusiasm…

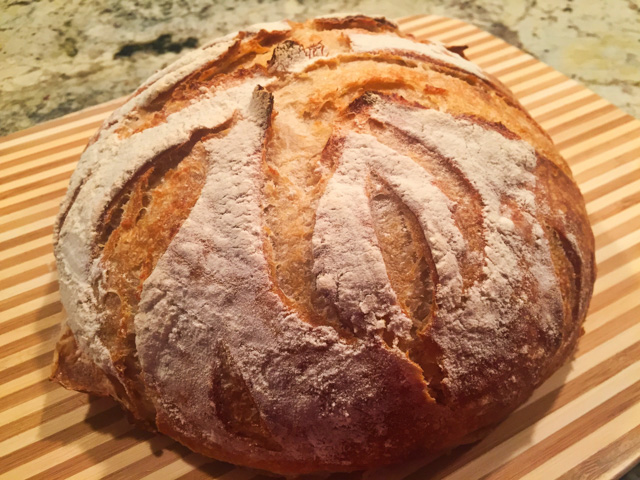
Bake for 45 minutes, leaving the bread covered for the first 30 minutes, generating steam whichever way you like.
I use the moistened lid of a Dutch oven.

To view the detailed recipe, visit Elaine’s site.

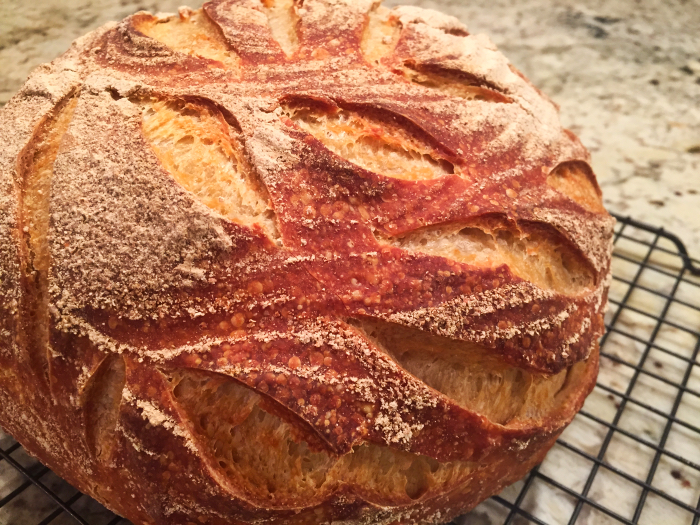
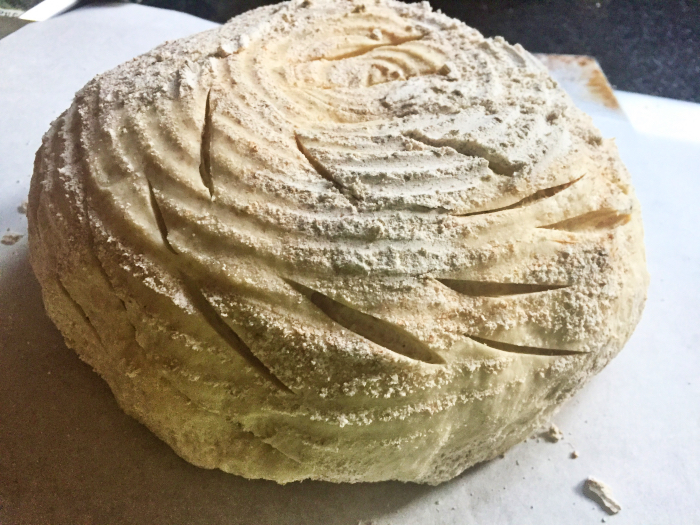
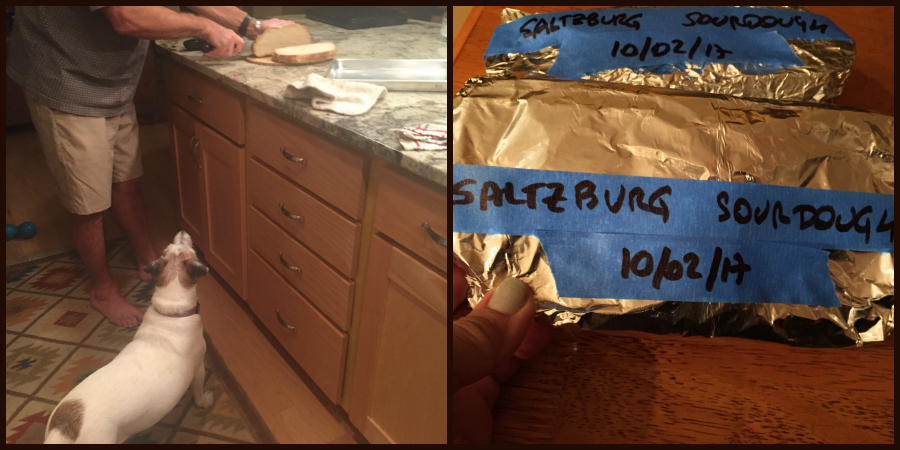
I loved this recipe so much, that I baked it twice in the same week, so that we had enough bread for a bunch of golfing buddies that visited us.  On my second time around, I went for a wheat-stalk design, but the bread had a mind of its own…
Still, it’s fun to try different patterns.

The goal… a few wheat stalks decorating the bread….

The outcome…  not exactly a wheat stalk, but it’s always nice to see a strong oven spring in action!

I can hardly wait to bake again, and try new slashing patterns on the bread.  For the wheat stalk, I think the key is to either omit the central slash of the stalk, or make it very delicate and shallow. Must practice…

Elaine, thanks for bringing sourdough baking back to my routine,
you are a constant source of inspiration!

ONE YEAR AGO: Zucchini, Lemon and Walnut Cake

TWO YEARS AGO: Paleo Energy Bars

THREE YEARS AGO: Pecan-Crusted Chicken with Honey Mustard Dressing

FOUR YEARS AGO: Mozzarella Stuffed Turkey Burgers

FIVE YEARS AGO:  Cashew Chicken Lettuce Wraps

SIX YEARS AGO: Clay-pot Pork Roast

SEVEN YEARS AGO: Panmarino

EIGHT YEARS AGO: A Classic Roast Chicken

SaveSave

SaveSave

SaveSave

SaveSave

SaveSave

SaveSave

PUMPKIN MACARONS

To Halloween or Not to Halloween, that is the question… 

 That’s up to you to decide. They can be very elegant served without any special decoration…

Or you can let your creative juices flow free…

PUMPKIN MACARONS
(adapted from several sources, including Craftsy.com)

for the shells:
198 g powdered sugar
113 g almond meal
113 g egg whites at room temperature
a pinch of cream of tartar
100 g granulated sugar
Orange Gel color from AmeriColor
¼ teaspoon pumpkin spice bakery emulsion (if unavailable, use  2 drops of vanilla extract)

for the filling:
3 tablespoons (40 g) unsalted butter, softened
1 cup (130 g) powdered sugar
1 tablespoon pure pumpkin puree
1 teaspoon milk
1/8 teaspoon ground cinnamon
pinch of salt

for decoration (optional):
luster dust in black and gold
1/8 teaspoon gin for each color

Line 2 or 3 heavy baking sheets with parchment paper or Silpat mats. Layer the powdered sugar and almond meal   in a food processor. Pulse until the mixture looks like fine meal, about 15 seconds. Pass through a sieve and transfer to a small bowl. Set aside.

Place the egg whites and pinch of cream of tartar in the bowl of a stand mixer fitted with the whisk attachment. Make sure that the bowl and the whisk are impeccably clean. Starting on medium speed, whip the whites with the cream of tartar until they look like light foam. The whites should not appear liquid. The foam will be light and should not have any structure.

Slowly rain in the granulated sugar, trying to aim the stream between the whisk and the side of the bowl. Turn the speed up to medium-high. Continue to whip the meringue until it is soft and shiny. It should look like marshmallow creme. Add the gel color and the pumpkin spice emulsion (or vanilla). Staying at medium-high speed, whip the egg whites until the mixture begins to dull and the lines of the whisk are visible on the surface of the meringue. Check the peak. It should be firm. Transfer the whites to a medium bowl.

Fold in the almond meal mixture in three increments. Paint the mixture halfway up the side of the bowl, using the flat side of a spatula. Scrape the mixture down to the center of the bowl. Repeat two or three times, then check to see if the mixture slides slowly down the side of the bowl. Put the mixture in a piping bag fitted with one of the tips listed above. Pipe on the prepared baking sheets.

Slam each sheet hard four to six times on the counter. Then fist bump each end of the sheet’s underside twice. Let the unbaked macarons dry until they look dull but not overly dry. Drying time depends on humidity. Ina dry climate, the macarons can dry in 15 to 20 minutes; in a humid climate, it can take 35 to 40 minutes.

While the macarons are drying, heat the oven to 330 F (170 C/gas mark 3). Bake one sheet at a time on the middle rack. Check in 11 minutes. If the tops slide, then bake for 2 to 3 more minutes. The macarons should release without sticking. Check one or two. If they stick, put them back in the oven for 1 to 2 more minutes. Let the macaroons cool for 10 minutes before removing from the pan.

Make the filling:  Cream the butter with the powdered sugar with a hand mixer, until incorporated and creamy. Add the other ingredients, continue beating until smooth. You should have the exact amount to fill this batch of macarons.

Assemble the macarons: find two macarons similar in size and add a good amount of filling to the bottom of one of them. Place the other on top and squeeze gently to take the filling all the way to the edge.  Paint decorations with luster dust dissolved in gin, if so desired. Let it dry and store the macarons in the fridge for 24 hours for perfect texture.

ENJOY!

to print the recipe, click here

Comments: These turned out so delicious! The pumpkin extract used in the shells gave them a subtle flavor that complemented the filling quite well. I found mine at Marshalls but included a link in the recipe for you to get it at amazon.com, if interested. These macarons scream Fall loud and clear. Once again I used my trustworthy recipe from Colette Christian over at Craftsy. I cannot praise her classes enough. During a recent sale event, I bought her Éclairs lesson, and it is simply outstanding. Plus, if you have any questions, she usually answers quite quickly. Very helpful, and very knowledgable. Yes, you read me correctly: éclairs are on my list of goodies to attempt in the very near future. Wish me luck…


I must thank Phil for saving the day with these Halloween-styled macarons. I had a different idea for decorating them, but let’s say it was a disaster. As I walked in circles around the kitchen, feeling miserable and hopeless, he suggested painting crazy faces on the shells, and we had a blast doing it together. Great project to do with kids, by the way. I used luster dust (available in amazon.com) in black and gold, mixed with a touch of gin. No worries, it evaporates, so these are kid-friendly. And approved by graduate students too…

ONE YEAR AGO: Slow-Cooked Whole Chicken

TWO YEARS AGO: Chocolate Zucchini Cake with Chocolate Frosting

THREE YEARS AGO: Pecan-Crusted Chicken with Honey-Mustard Dressing

FOUR YEARS AGO: Bewitching Kitchen on Fire!

FIVE YEARS AGO: Cashew Chicken Lettuce Wraps

SIX YEARS AGO: Chiarello’s Chicken Cacciatore

SEVEN YEARS AGO: Donna Hay’s Thai-Inspired Dinner

EIGHT YEARS AGO: Panettone


SaveSave

SaveSave

SaveSave

SaveSave

SaveSave

SaveSave

SaveSave

SaveSave

SaveSave

SaveSave

SaveSave

SaveSave

SaveSave

SaveSave

SaveSave

SOUP SATURDAY: REGIONAL SOUPS

Third Saturday of October, I’m joining the fun event hosted this month by Ashley from Cheese Curd in Paradise. She picked Regional Soups as theme, hoping we would all feature a soup that is typical of our state. Google is one of my best friends, but this time it let me down. No matter how hard I tried to trick it into giving me some variety for recipes from Kansas, it was set on…. Steak Soup. For someone born and raised in Brazil, the words steak and soup cannot be present in the same sentence. Unless the soup was a first light course for that juicy steak grilled medium-rare. But, in the name of joining the party, I asked Phil how he felt about it. His reaction:  No, thank you. I like my steak grilled. Medium-rare. See? We are very compatible, in case you did not notice. I had two options, decline to participate, or be a bit more flexible with definitions. Since you are reading this post, you already know my choice. Kansas has great corn. And after hitting “publish” on this post, I might need a great lawyer.

KANSAS CORN CHOWDER
(inspired by Cookin Canuck)  

1 tablespoon grapeseed oil
1 shallot, diced
1 stalk celery, diced
1 red bell pepper, diced
1 (4 oz.) can diced green chiles
2 + 1/2  cups chicken broth
1 cup + 1/2 corn kernels (from about 4 corn cobs)
3/4 teaspoon of salt, divided
1/4 tsp ground pepper
1/8 cup all-purpose flour
2 cups low-fat milk
3 cooked chicken breasts, boneless, skinless, shredded
3/4 cup shredded Cheddar cheese
fresh cilantro leaves

Heat the grapeseed oil in a large saucepan set over medium heat. Add the shallot, celery and red pepper and cook stirring very now and then until fragrant, 3 to 5 minutes. Add the green chiles and cook briefly. Add about 1/4 teaspoon of salt. 

Pour in the chicken broth, bring the mixture to a boil, then reduce heat add the corn and simmer for 5  minutes. Place the flour in a medium bowl and slowly whisk in the milk until the mixture is smooth. Slowly whisk the milk mixture into the soup, along with the remaining 1/2 teaspoon of salt and pepper. Cook, until the soup is thickened, about 5 minutes. Stir in the shredded chicken meat and the Cheddar cheese. Serve right away when the cheese melts, with some cilantro sprinkled on top. Adjust seasoning. 

ENJOY!

to print the recipe, click here

Comments: Since I had already pushed the envelope coming up with a chowder as a recipe for Kansas, I went even wilder and cooked the chicken sous-vide. How about that for breaking all rules? You simply cannot beat the perfect texture sous-vide does for boneless chicken breasts. Of course you can use leftover roast chicken, or regular top of the stove poached meat, it’s all fine. The shredded chicken is added just at the end, right before serving. You can also omit it for a full-veggie version, using vegetable stock or even water instead of chicken stock.  I had a lot of fun making this soup, even if the corn husk attacked me.

Felt very virtuous with my prep work!

I bought fresh corn and shucked it myself, to collect the beautiful kernels for my Kansas Soup. As I was shucking the very first corn, while pulling the husk back, it caught the fingernail of my little finger. Pulled it upwards and back almost breaking it midway into the tip of the finger. Have you ever done that? I tell you, it hurts. I saw many of the constellations of the Milky Way passing fast in front of my eyes. Or so it seemed. Stuck my finger in an ice bath, cut the fingernail as close as possible to the finger, and moved on.

Corn 1 x 0 Sally

This soup turned out quite amazing!  I think next time a little cayenne pepper will be added, I’d like slightly more heat. I swirled a little Sriracha over my bowl, just because. You can do the same.  Compared to many corn chowder recipes around, this one is a little more restrained in terms of calories, as I used a lot less flour to thicken the soup, and also opted for low-fat milk instead of a load of heavy cream. Trust me, this was luscious enough the way I made it. We were very happy with it, and the chicken makes it a full meal.


If you’d like to see what my virtual friends prepared for their Regional Soups, click on the link at the very bottom of the post. Ashley, thanks for hosting!

Guess what, folks? Next month yours truly will be hosting the event!  I can hardly wait!

ONE YEAR AGO: Impossibly Cute Bacon and Egg Cups

TWO YEARS AGO: Pulling Under Pressure

THREE YEARS AGO: Cooking Sous-vide: Two takes on Chicken Thighs

FOUR YEARS AGO: Miso Soup: A Japanese Classic

FIVE YEARS AGO: On my desk

SIX YEARS AGO: A must-make veggie puree

SEVEN YEARS AGO: Vegetarian Lasagna

EIGHT YEARS AGO:  Brazilian Pão de Queijo

SaveSave

https://static.inlinkz.com/cs2.js

SaveSave

SaveSave

SLOW-ROASTED TOMATOES

This could very well go into the Simplicity Files, could not be any easier to prepare. They are scrumptious, it is amazing how a few hours in a low oven can concentrate flavors, and with this method, the texture is not harsh like in so many examples of bottled sun-dried tomatoes.

First you need to start with the most gorgeous Roma tomatoes you can find…

Then, slice them in half, and remove the seeds. You don’t want them in there, it will make the tomatoes very watery and it will take a lot longer to dry. To help speed things up – even though this is a slow recipe by definition – you can let the tomatoes rest over a double layer of paper towels, cut side down for an hour or so. It is not mandatory, you can definitely omit this step.

Now, place them in a bowl and drizzle some olive oil, season with salt, pepper, and Herbes de Provence. Lay them on a roasting pan covered with parchment paper and stick them in a 200 F oven. Some recipes call for a drizzle of balsamic, but I prefer to leave that out, the flavor of the tomato comes through with no distractions.

Walk away for a few hours. After 3 hours you can start checking back to see when they reach the consistency you like. Mine actually took 5 hours to get there, but it’s a very nice culinary project to tackle on a Sunday.

They are ready when they are ready…


You can nibble on them, but I advise against it. If you start, you might find yourself staring at an empty bowl. Much better to put them to use in all sorts of recipes.

For instance….

A departure on Caprese salad, in which Phil paired them with mozzarella cheese, olives, and a basil dressing….

Remember our Brunch Burger?  There they are, a few slices of slow-roasted tomatoes underneath the turkey patty.

and they pair well with avocados!  Just lay half a tomato inside it, and a squeeze of lemon juice…. Simple, and so delicious!

Another tasty idea: make tomato rice… Just saute a couple of slow-roasted tomatoes until they threaten to melt in the olive oil, add rice, cook a little longer, add the water and in less than 20 minutes you have a very flavorful side dish. We still have amazing tomatoes for sale at the grocery store, so I already made two huge batches, and see a third one in the near future.

ONE YEAR AGO: Spicy Cotija and Black Olive Sourdough

TWO YEARS AGO: Apple Cinnamon Oatmeal Cake

THREE YEARS AGO: Sourdough Rye Bread with Flaxseeds and Oats

FOUR YEARS AGO: PCR and a Dance in the Mind Field

FIVE YEARS AGO: October 16: World Bread Day

SIX YEARS AGO: The US Listeria Outbreak 2011

SEVEN YEARS AGO: 36 Hour Sourdough Baguettes

EIGHT YEARS AGO: October 16 is World Bread Day


SaveSave

SALZBURG SOURDOUGH

So many months without baking a single sourdough bread! The problem is we don’t eat a lot of bread. One bake lasts us for a long time, as after enjoying a couple of slices, the rest goes straight to the freezer. But I am still quite passionate about bread baking, and have a list of recipes I intend to try. They just sit and wait, poor things. Like this one, from Discovering Sourdough Part II, by Teresa Greenway. In theory, you need a specific sourdough strain from Austria, but I used my good American sourdough, born 9 years ago in Oklahoma, and headed to his teenage years in Kansas. I am sure Teresa will forgive me. But, did you know you can actually buy many sourdough starters from all over the world? Pretty amazing. Take a look at this site. Of course, over a long period of time a sourdough might change and incorporate yeast and bacteria from the new environment, but it’s fun to start from a pure culture born in some exotic, distant place. In the site, they actually dispute the claim that cultures change, but until I see solid scientific evidence it’s all a bit in the air (pun intended).


SALZBURG SOURDOUGH
(printed with permission from Teresa Greenway)
(I modified slightly to make a single loaf and use my preferred method of baking)

1 cup Austrian sourdough starter at 166% hydration  (9 oz)
3/4 cups water  (6 oz)
3 oz  evaporated milk
0.6 oz  rye flour
14 oz bread flour
2 teaspoons salt

Mix all ingredients, except salt, just until incorporated and then allow the dough to rest for 20 minutes (autolysis).

After autolysis, add salt and mix dough on low-speed for about 2 minutes. Then let the dough bulk ferment (first rise) for 6 hours or until doubled. Fold it once each hour during the six-hour bulk fermentation. After bulk fermentation, place the dough onto a lightly floured surface and knead enough to gather into a ball.  Shape it into the general shape you wish and then allow the dough to rest for 5 – 10 minutes (bench rest). After benching shape loaves into their final shapes and put them into the proofing baskets, pans, or couche. Cover the dough with plastic bag and refrigerate overnight.

In the morning, allow the dough to final proof for 2 – 3 hours (whenever the dough looks about 1 ½ times its size and is spongy) then turn dough out on peel and slash, cover with roasting lid moistened with water, and bake in a 425F degree oven for 30 minutes. Alternatively, use your favorite method to generate initial steam. After 30 minutes, remove roasting lid, turn down the oven to 400F degrees and continue baking for about 10-15 more minutes, turning halfway for even browning. Bread is done when the internal temperature reaches 200-205F.

Take out loaf and cool on a rack.

ENJOY!

to print the recipe, click here


Comments: Inspired by my friend Elaine,  I decided to be a bit more daring and creative with the slashing. Elaine always comes up with amazing patterns on her bread. So I took a deep breath and went at it with a razor blade. I love the way the bread turned out, and intend to keep practicing, as the slashes on top were not exactly the way I wanted.

My sourdough ended up quite assertive this time – it was hibernating in the fridge for a very long time, so I refreshed it and fed it daily for a full week before making the bread. Not sure if that affected the level of acidity, but it was really good. Teresa’s recipes all call for 166% hydration, which is easily translated into equal volumes of flour and water. It is easy because you won’t even need a scale to keep the starter going, simply pick your desired volume, and mix half and half.  I refreshed it using 1/2 cup water and 1/2 cup flour. It ends up close enough to 166% hydration. For the final starter, I just made a bit more than needed for the bread, so I could keep it for the next baking adventure.

And once again, we have great bread stored in our freezer, although some members of our home hoped that one or two slices would fall to the floor instead… Or at least a few crumbs…

Teresa, thanks for giving me permission to publish this great recipe!


ONE YEAR AGO: If I had One Hour

TWO YEARS AGO: Apple Cinnamon Oatmeal Cake

THREE YEARS AGO: Sourdough Rye Bread with Flaxseeds and Oats

FOUR YEARS AGO: Apricot-Raspberry Sorbet: A farewell to Summer

FIVE YEARS AGO: Marcela’s Salpicon

SIX YEARS AGO: Pork Kebabs

SEVEN YEARS AGO: Fondant au Chocolat

EIGHT YEARS AGOGot Spinach? Have a salad!

SaveSave

SaveSave

SaveSave

SaveSave

SaveSave