THAT TURKEY BREAD

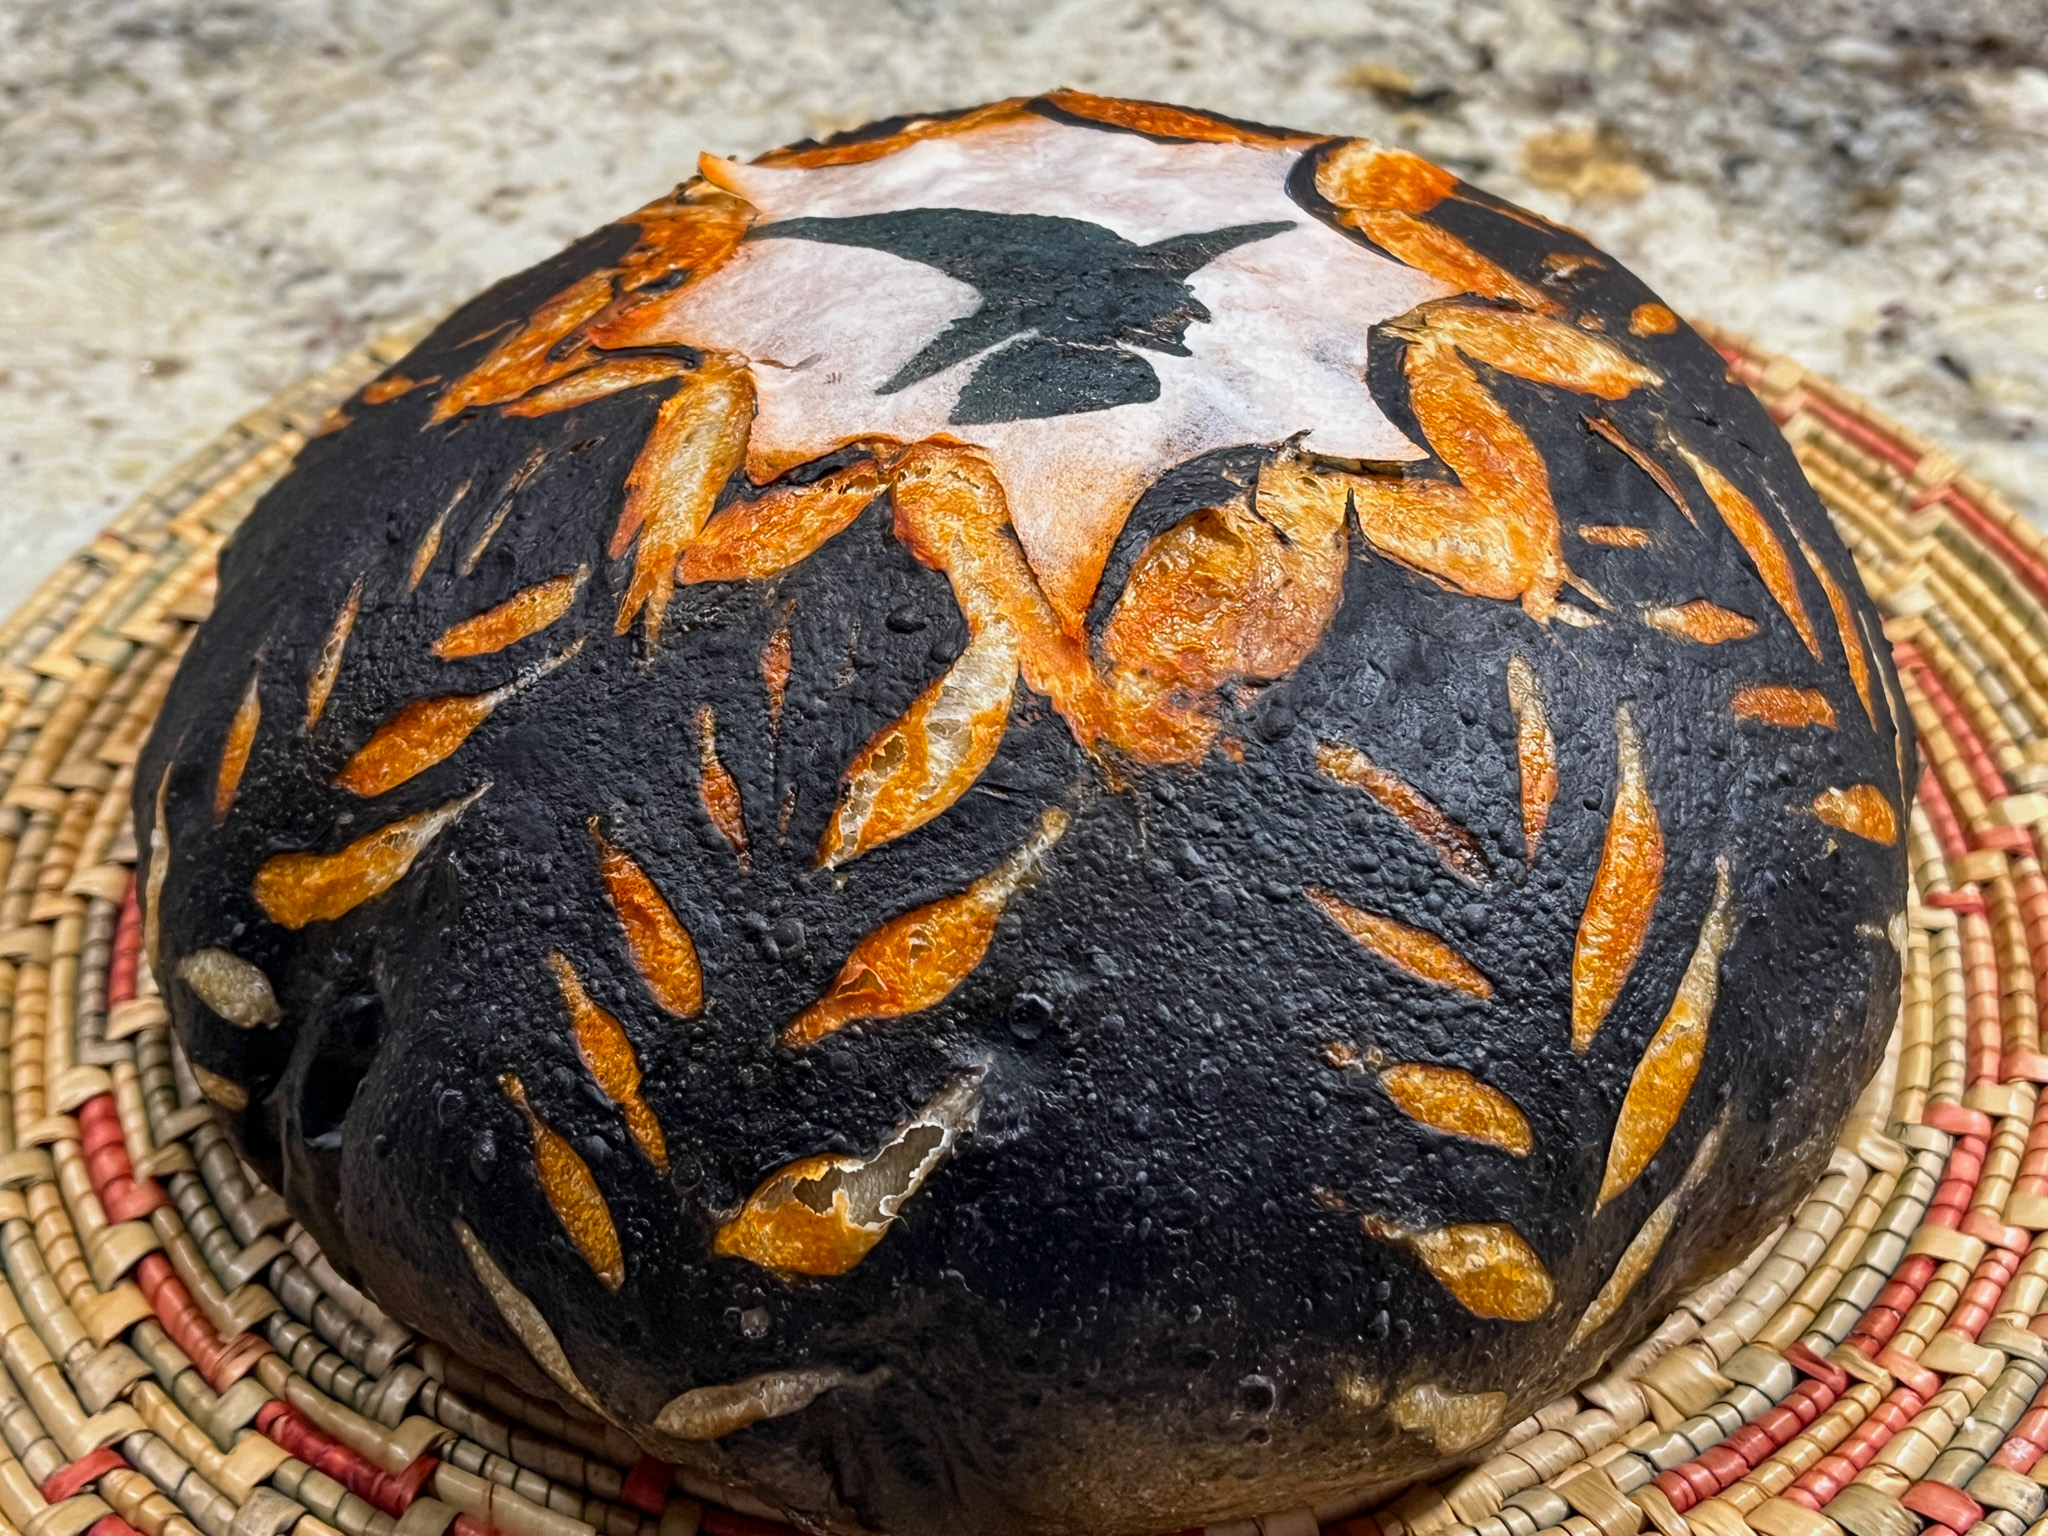
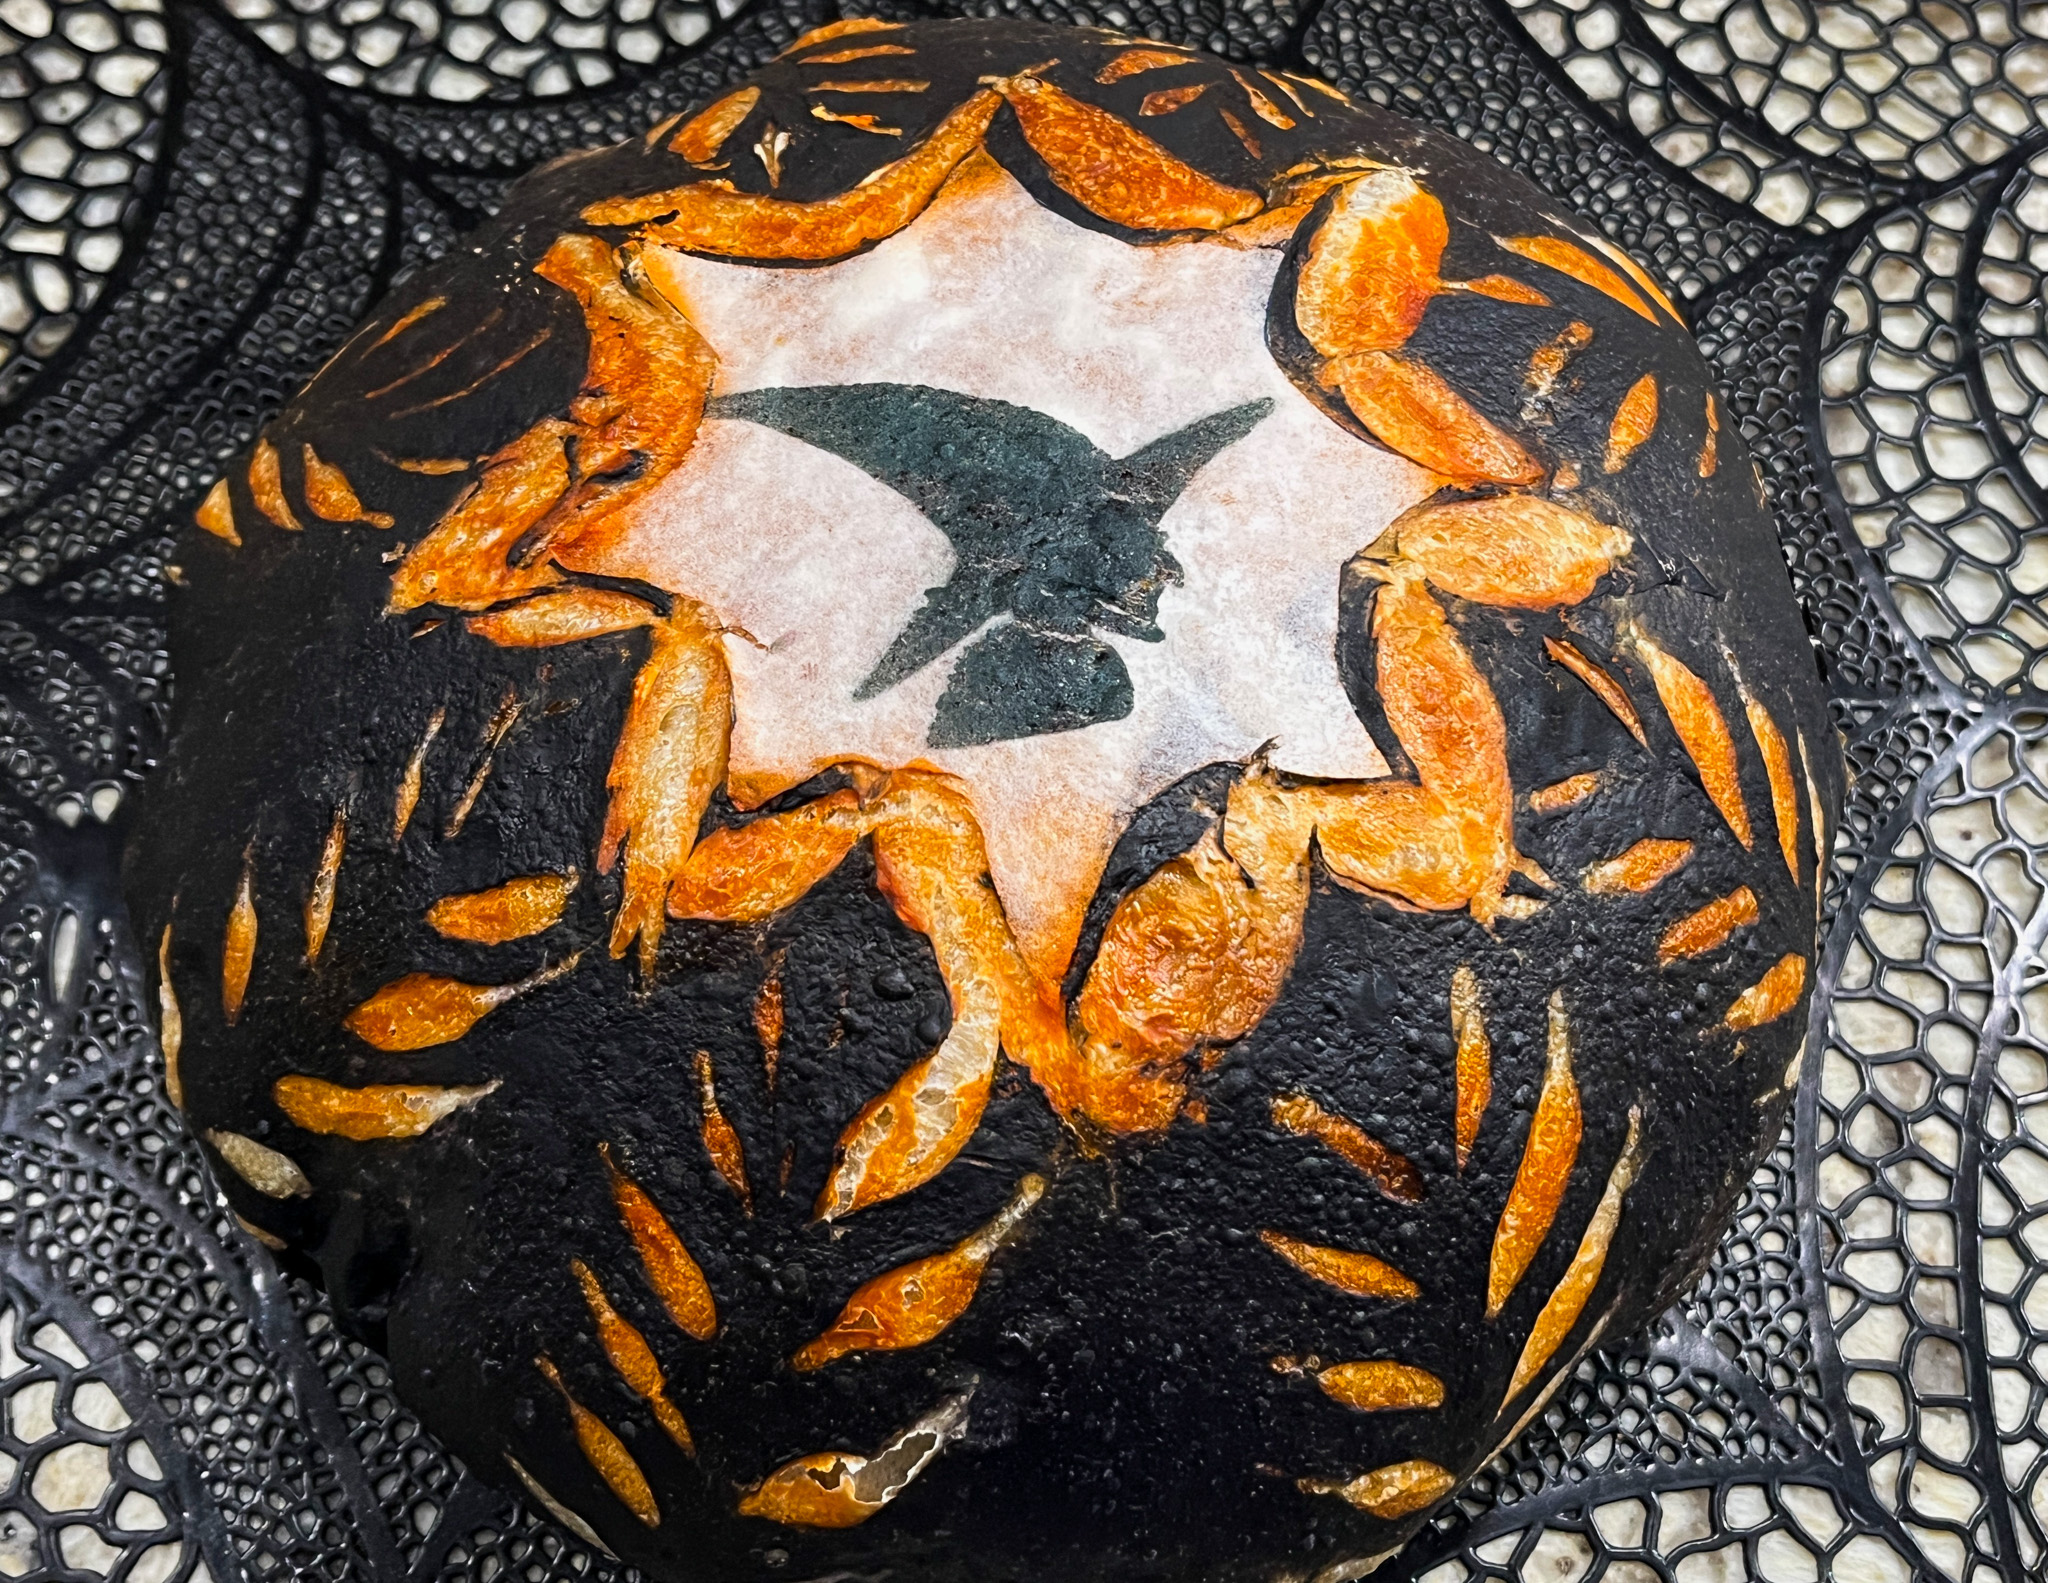
For the most part I am not wild about baking things that everyone is baking… You know, the pumpkin-shaped bread in the Fall, or other hot items of a particular moment. Pie on March 14th? No, not interested. But, how could I resist trying my sourdough with a little turkey? I could not. So if you are tired of seeing those around, apologies, but I have one more for you!

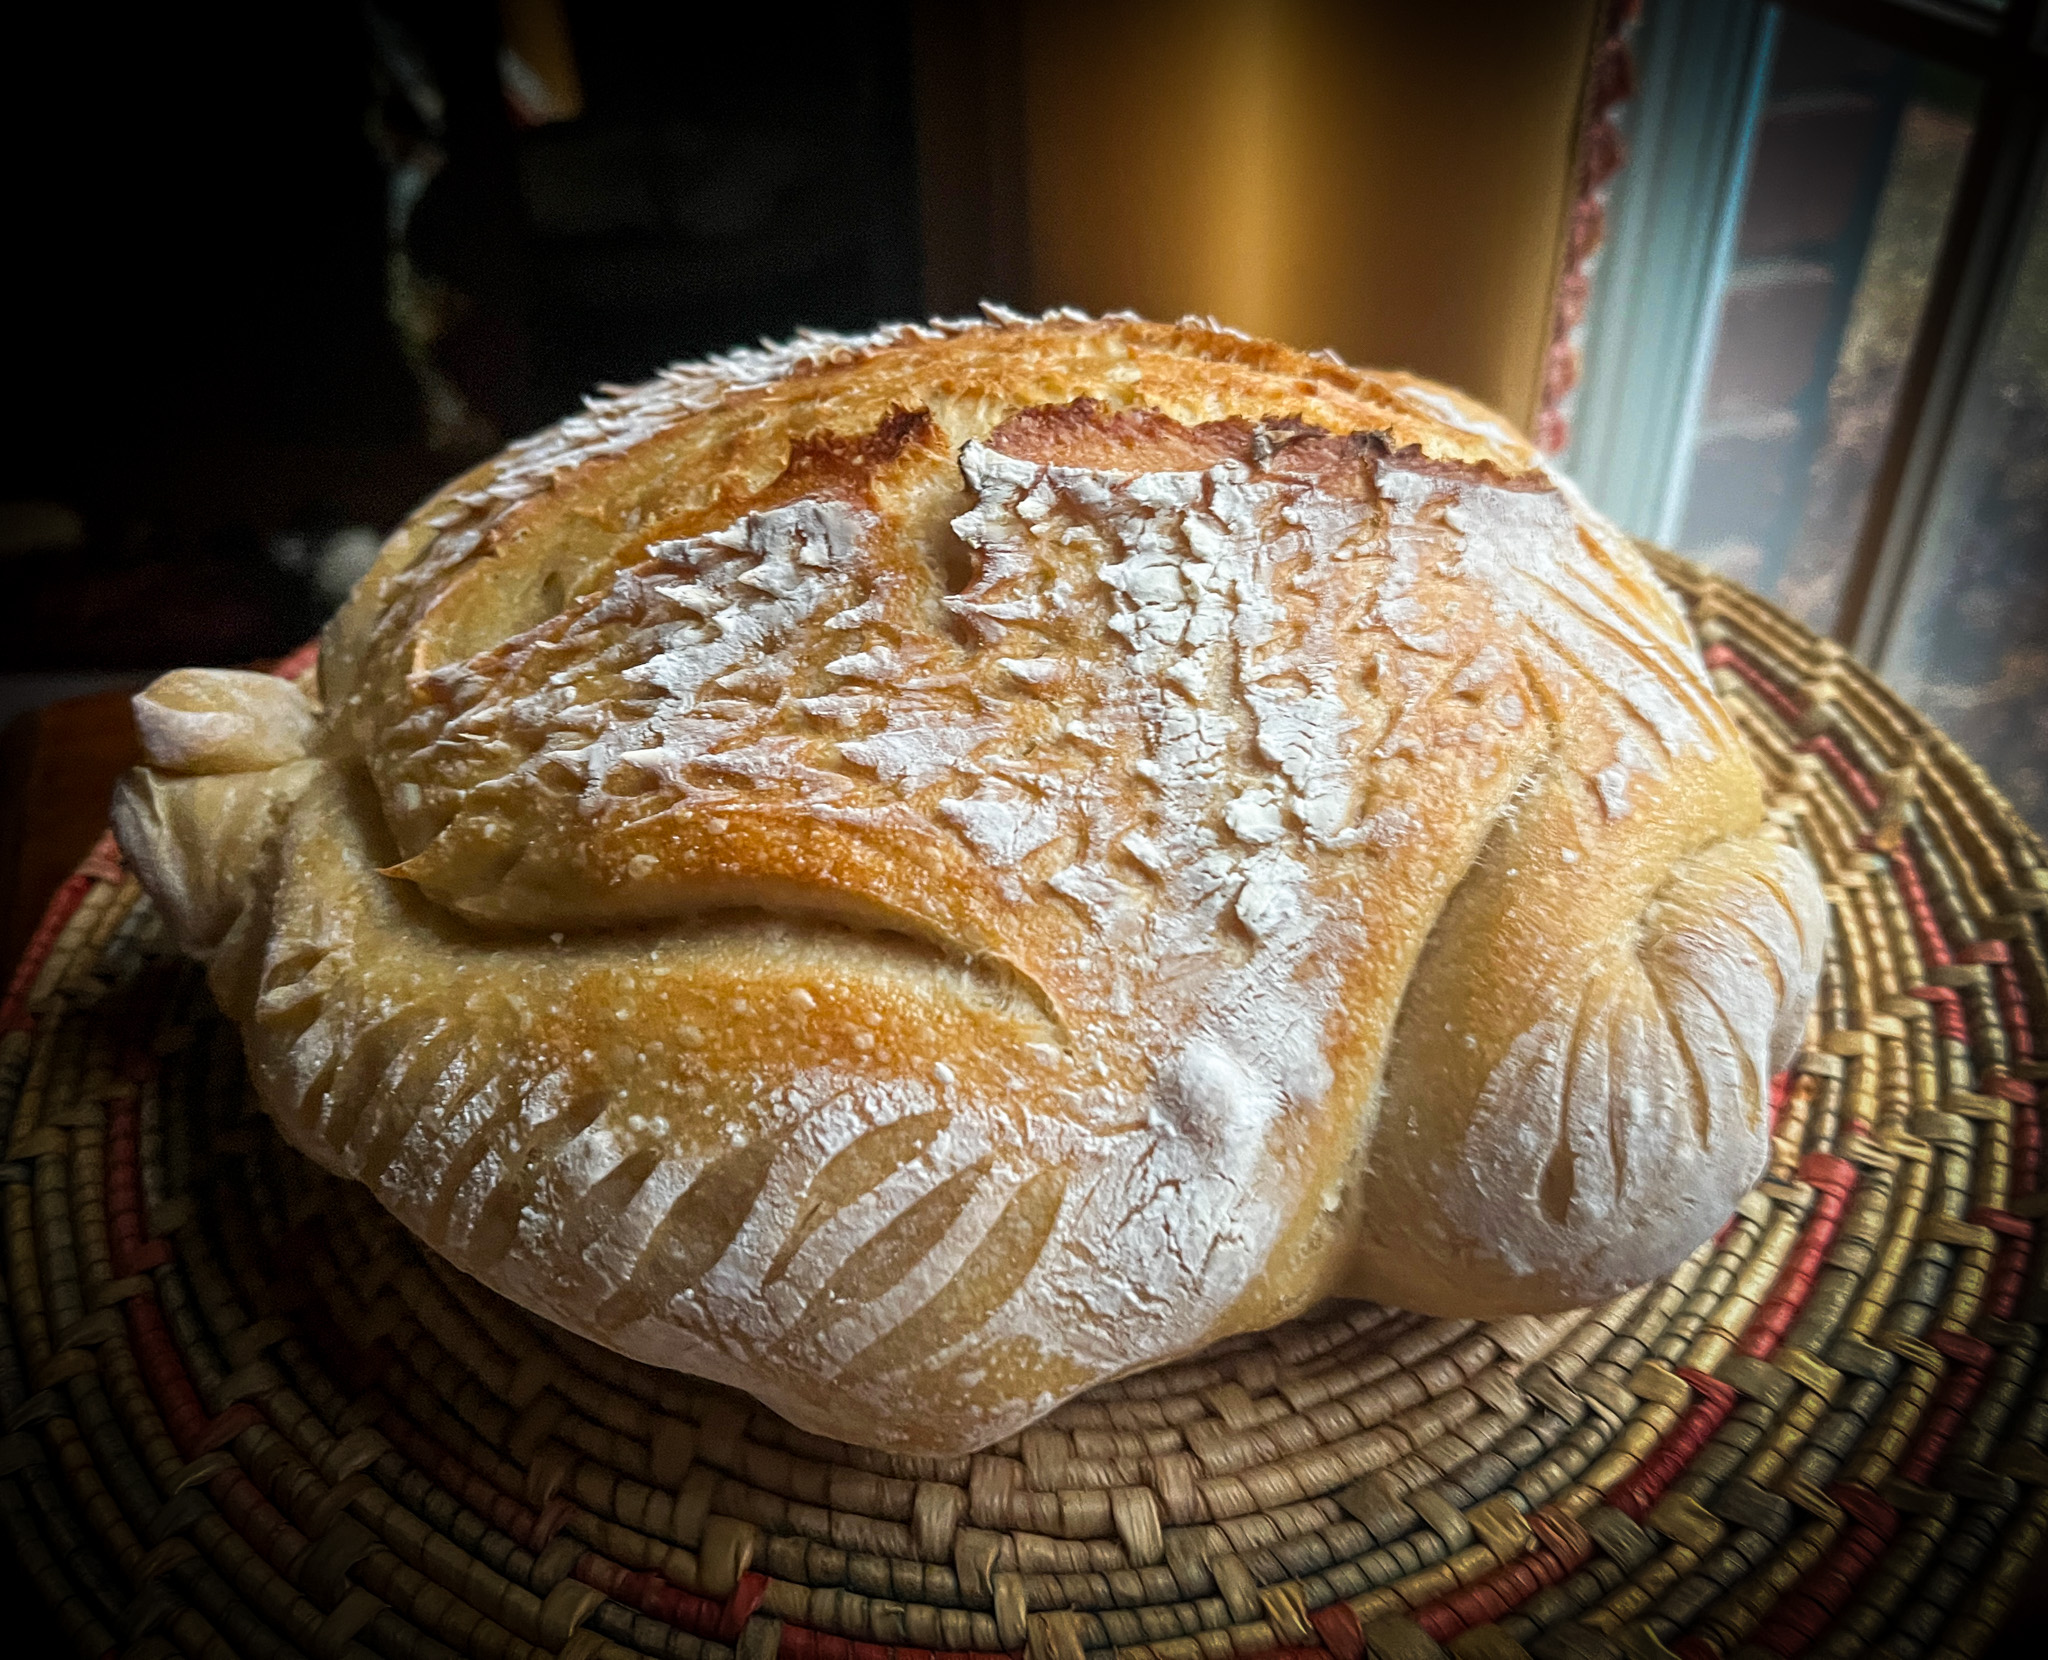
I used a basic sourdough recipe (500 g bread flour, 75 g sourdough at 100%, 345g water, 9g salt, 1/2 tsp paprika). Did my usual method that starts with a 4-minute ride in the KitchenAid at low speed, then folds every 45 minutes for 4 and half hours. Shaped, into the fridge it went for its beauty sleep. Next morning, the fun began, shaping it as a small bird. Most of the examples I’ve seen around turn out with the legs and wings away from the body and I thought it was a little awkward to slice and eat. I decided to contain it all in a more round shape. Maybe it did not end as “turkey-ish” as some, but I like it this way.

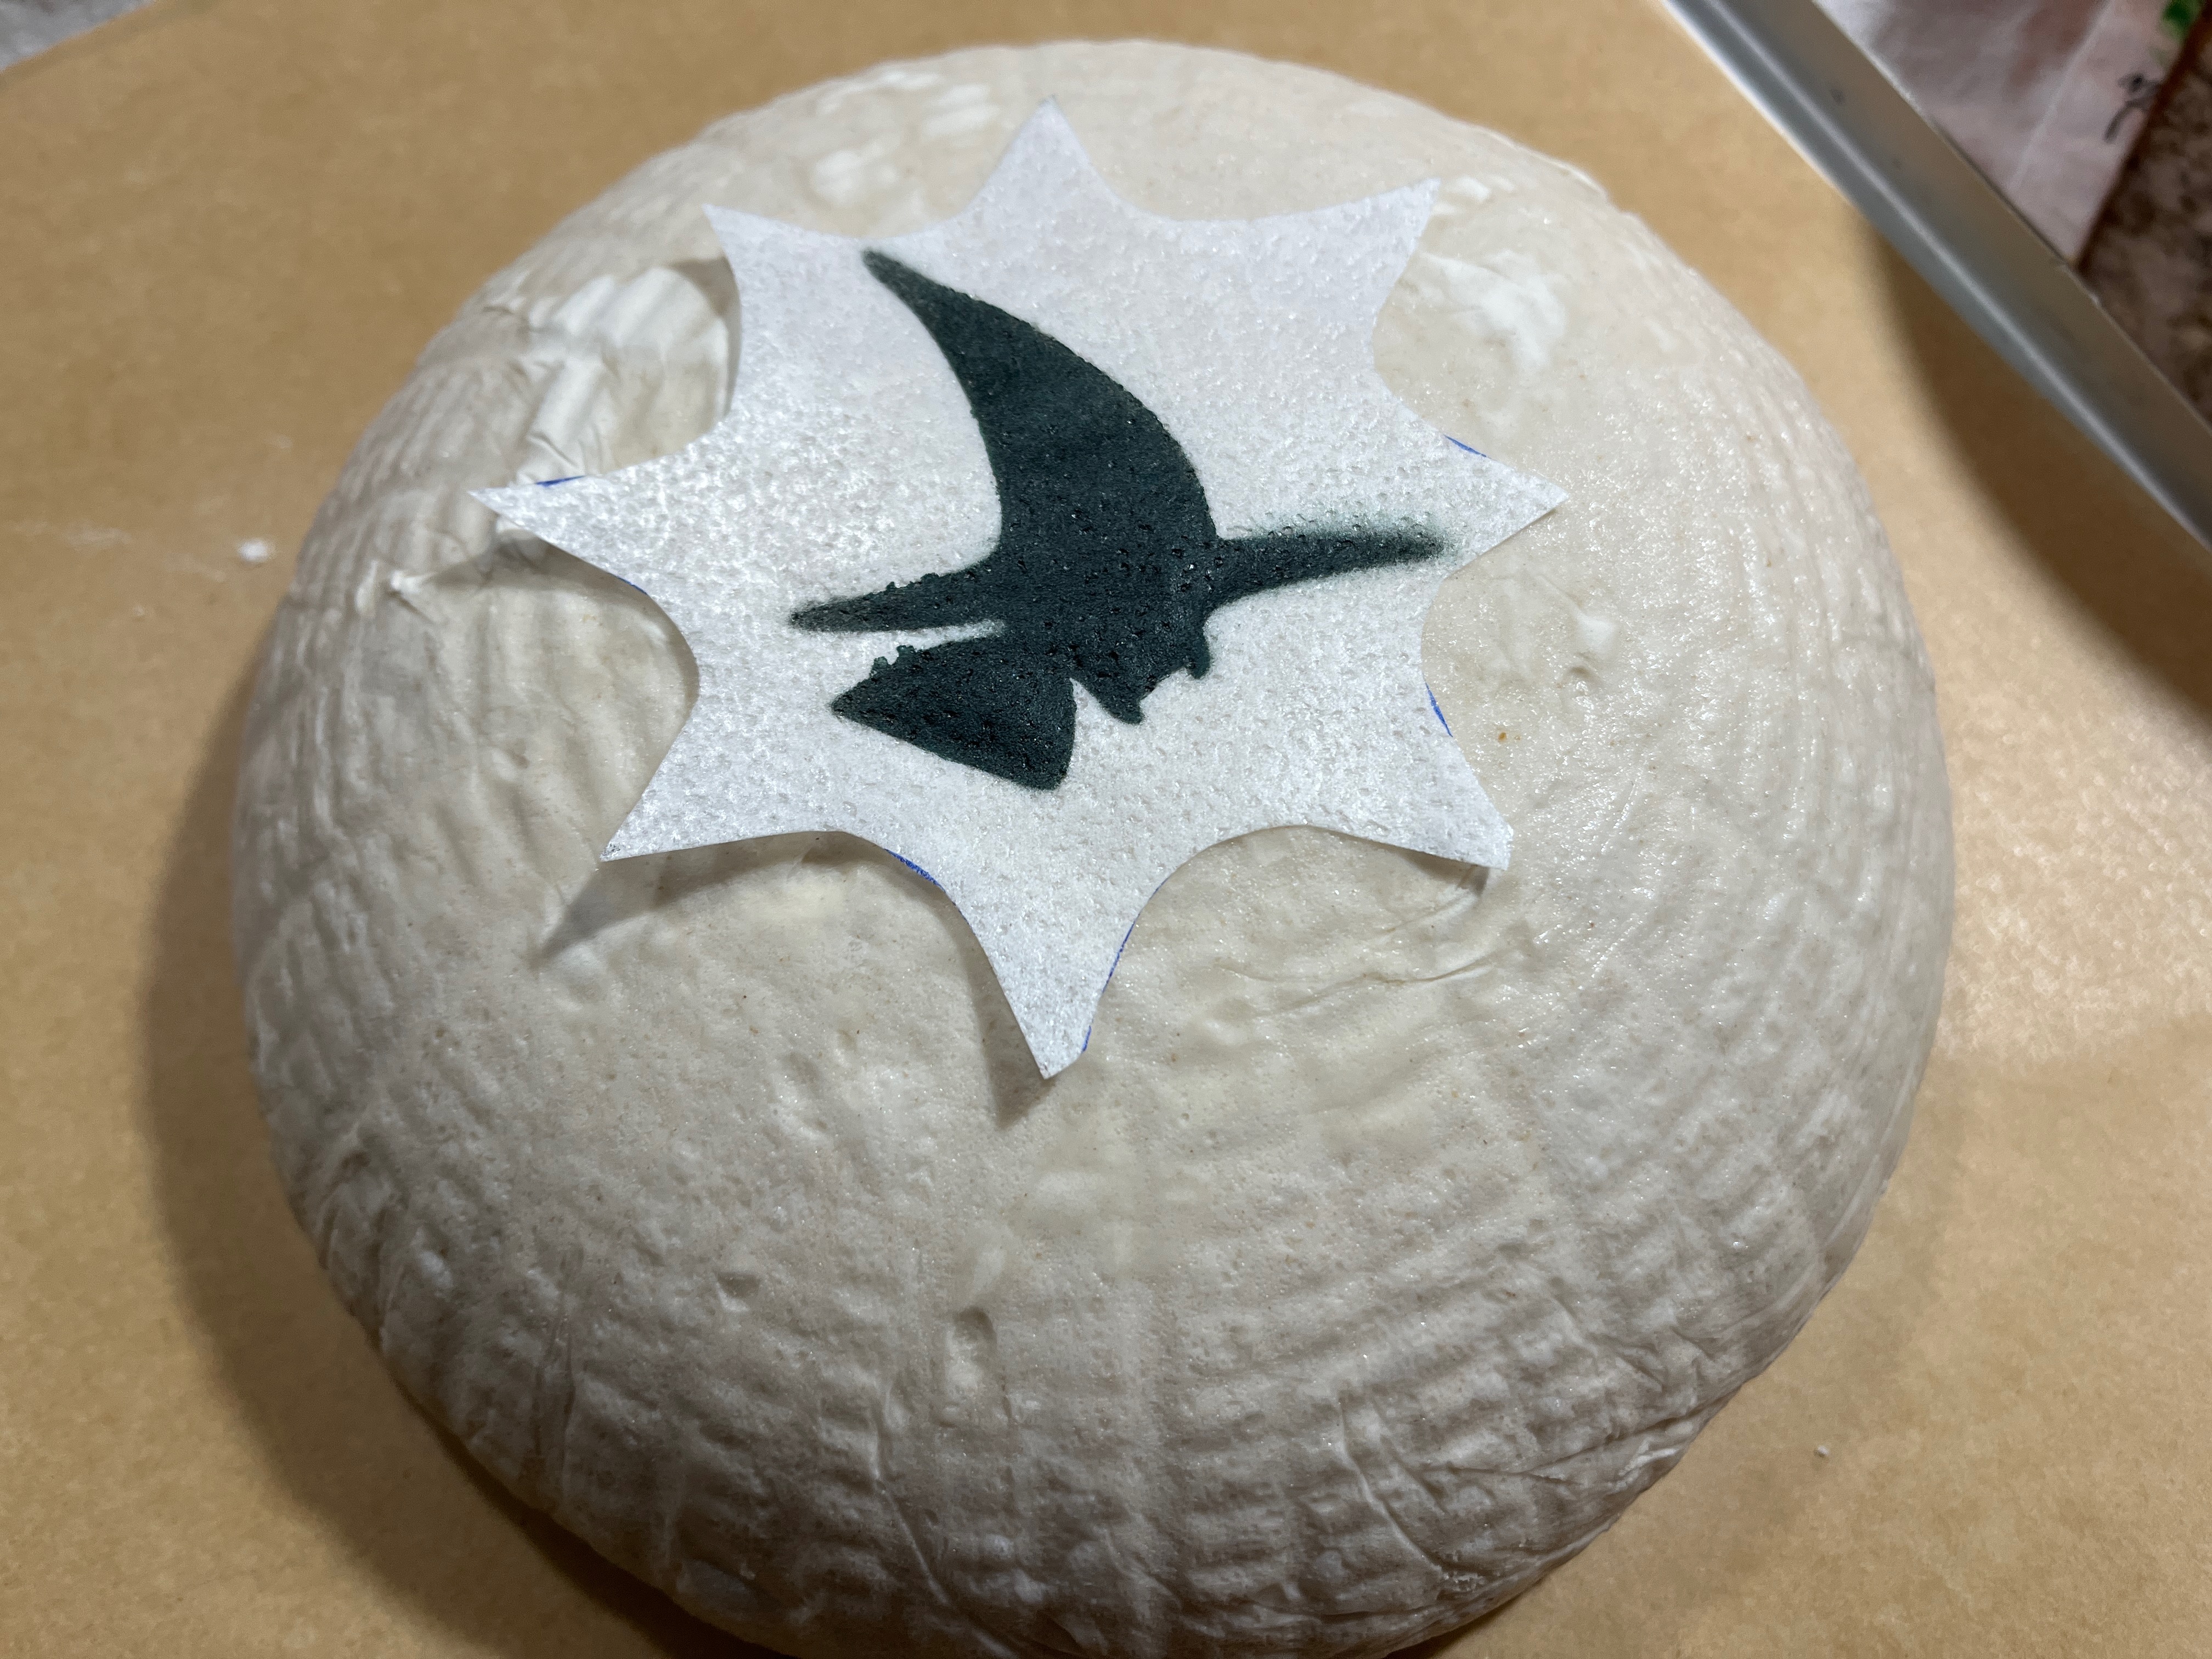
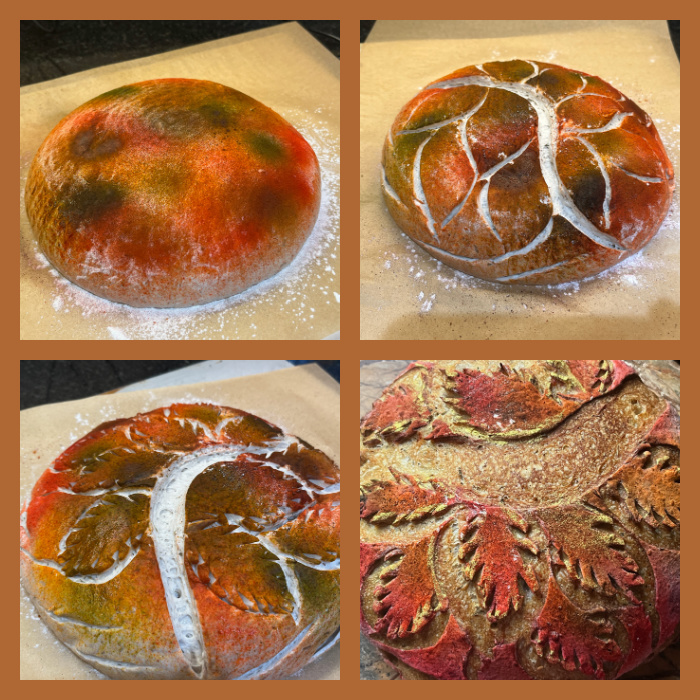
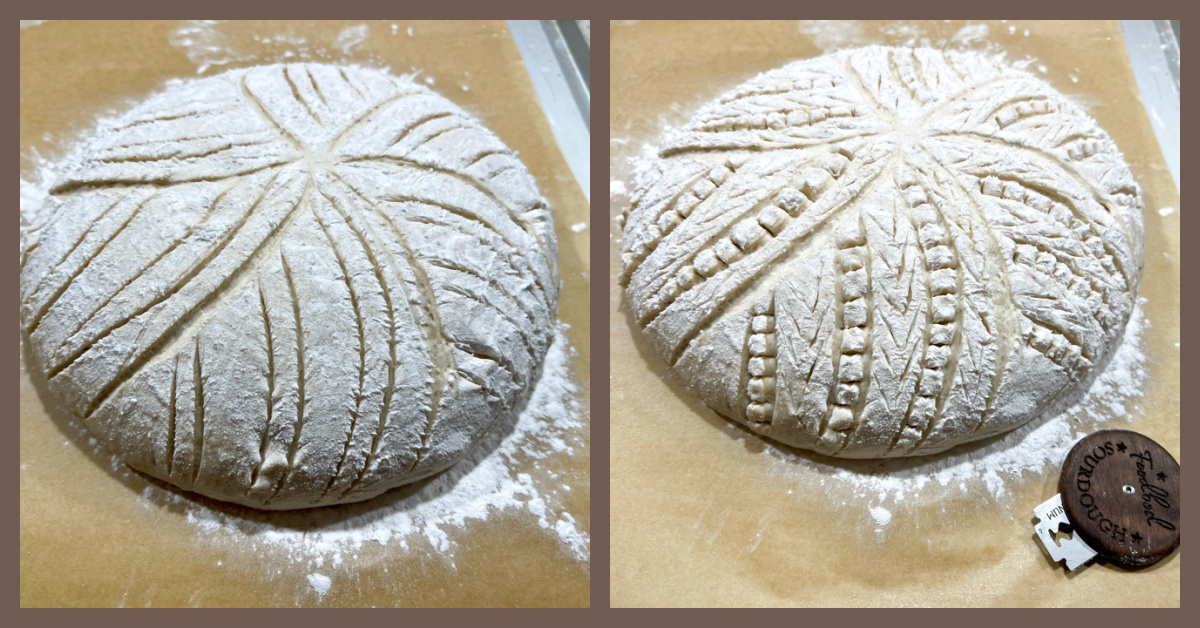
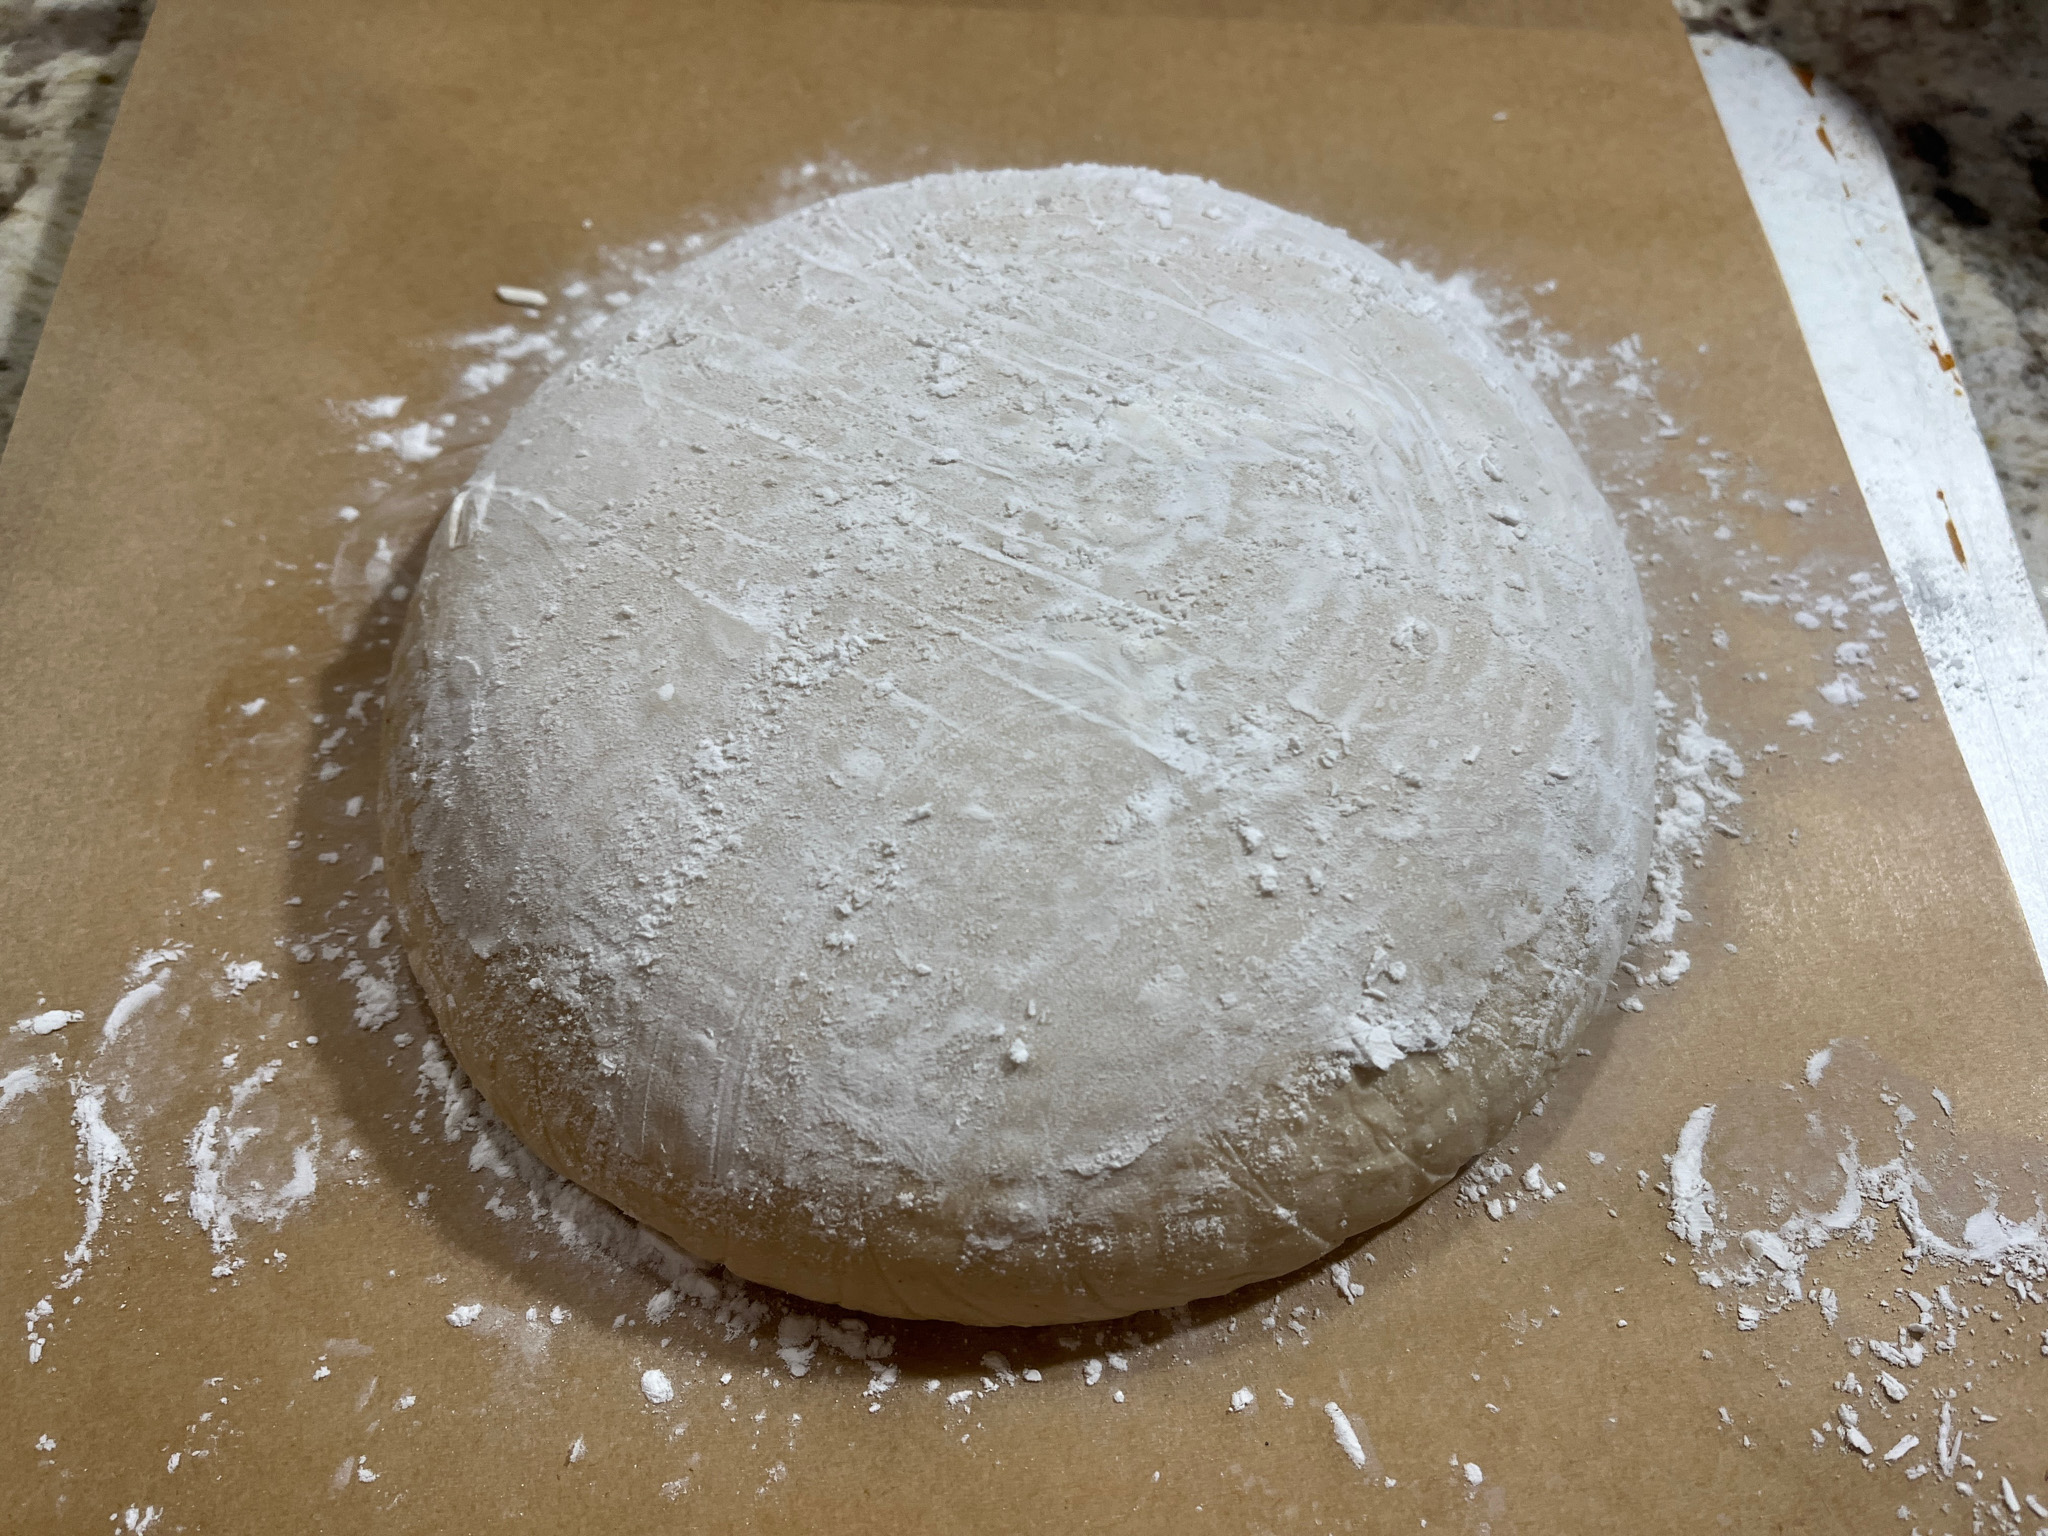
Start from a round proofed dough, dust with flour (I like to use tapioca flour).

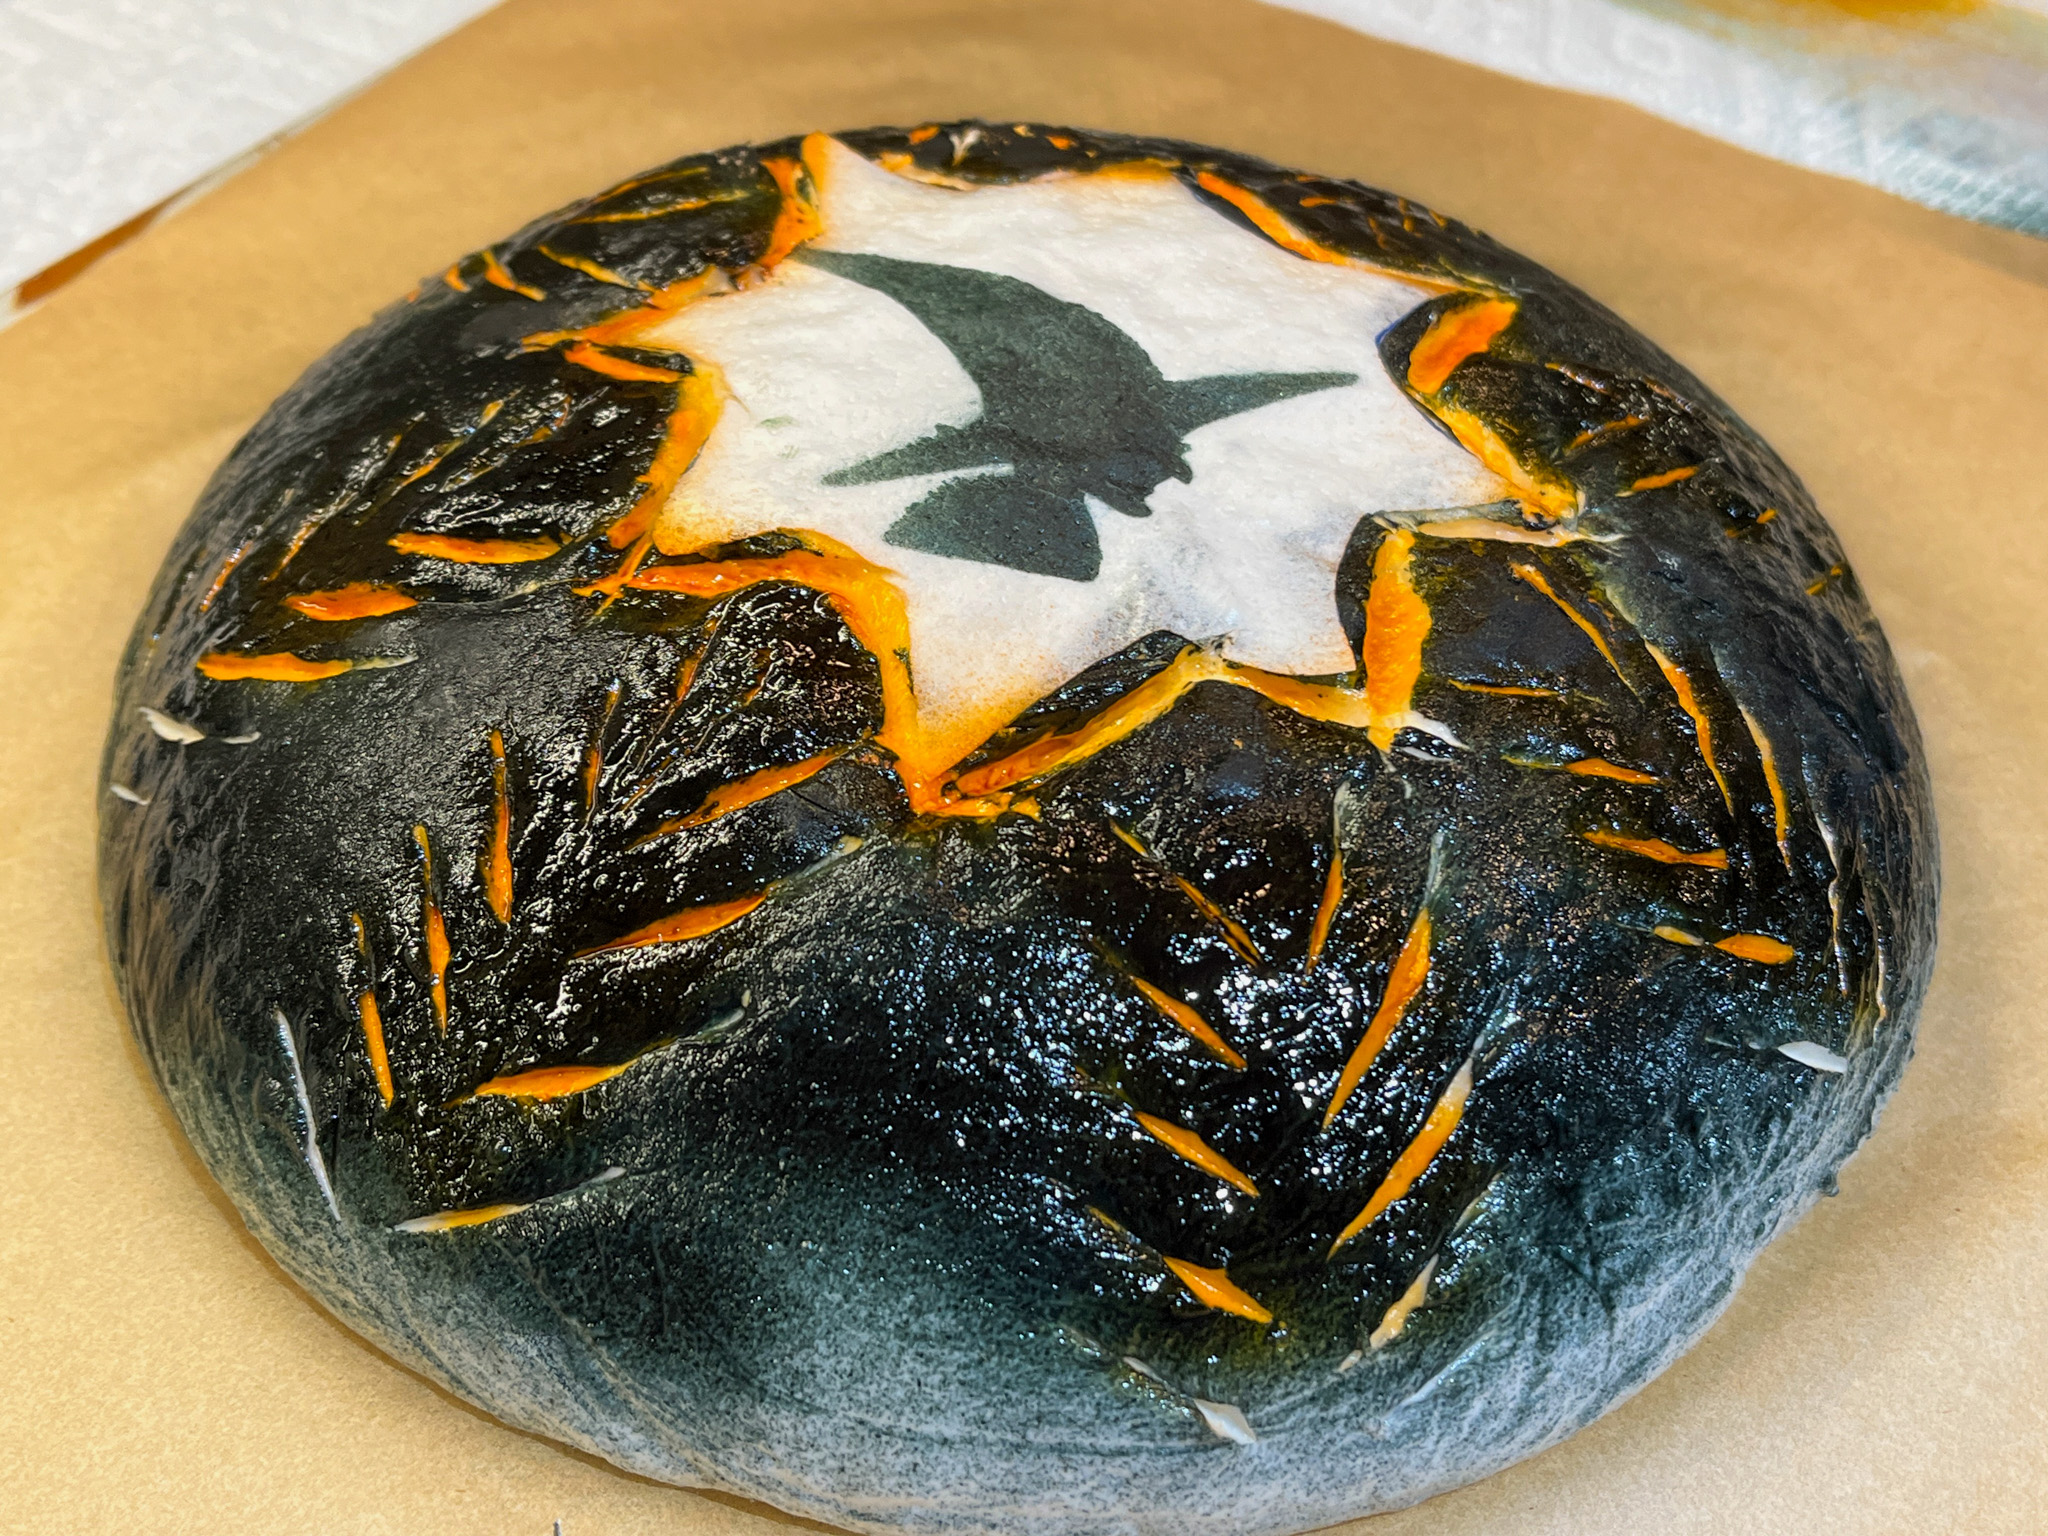
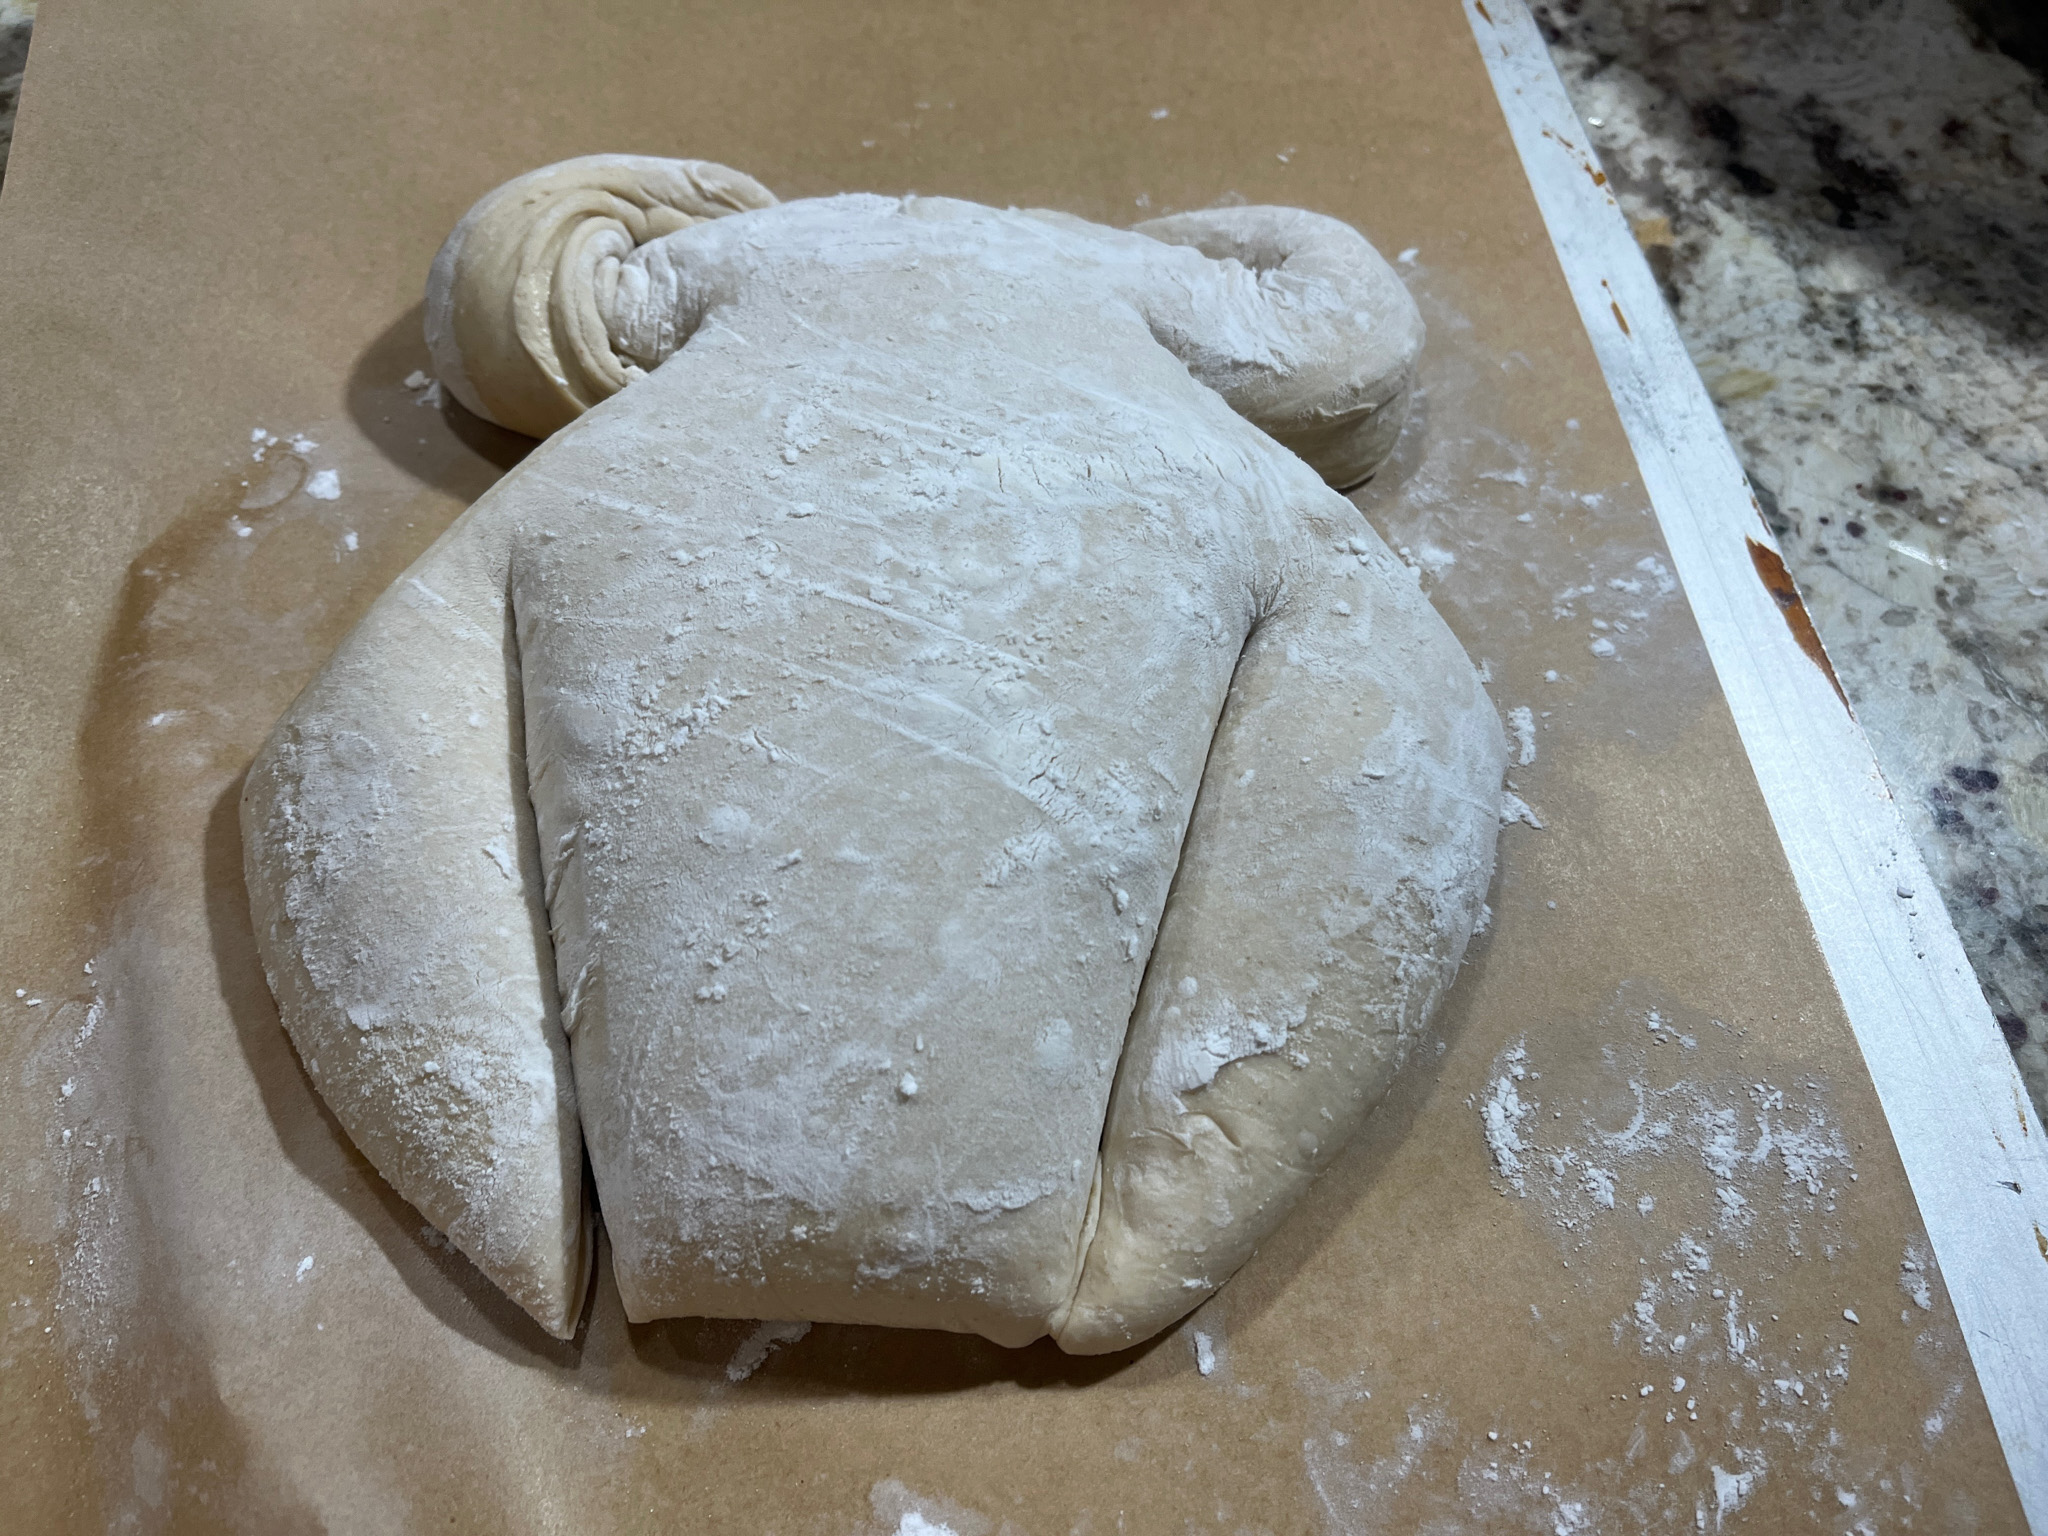
Cut two small slits on top for the wings…

Then shape those twisting gently and tucking under the body. Next, cut the larger slits for the legs…


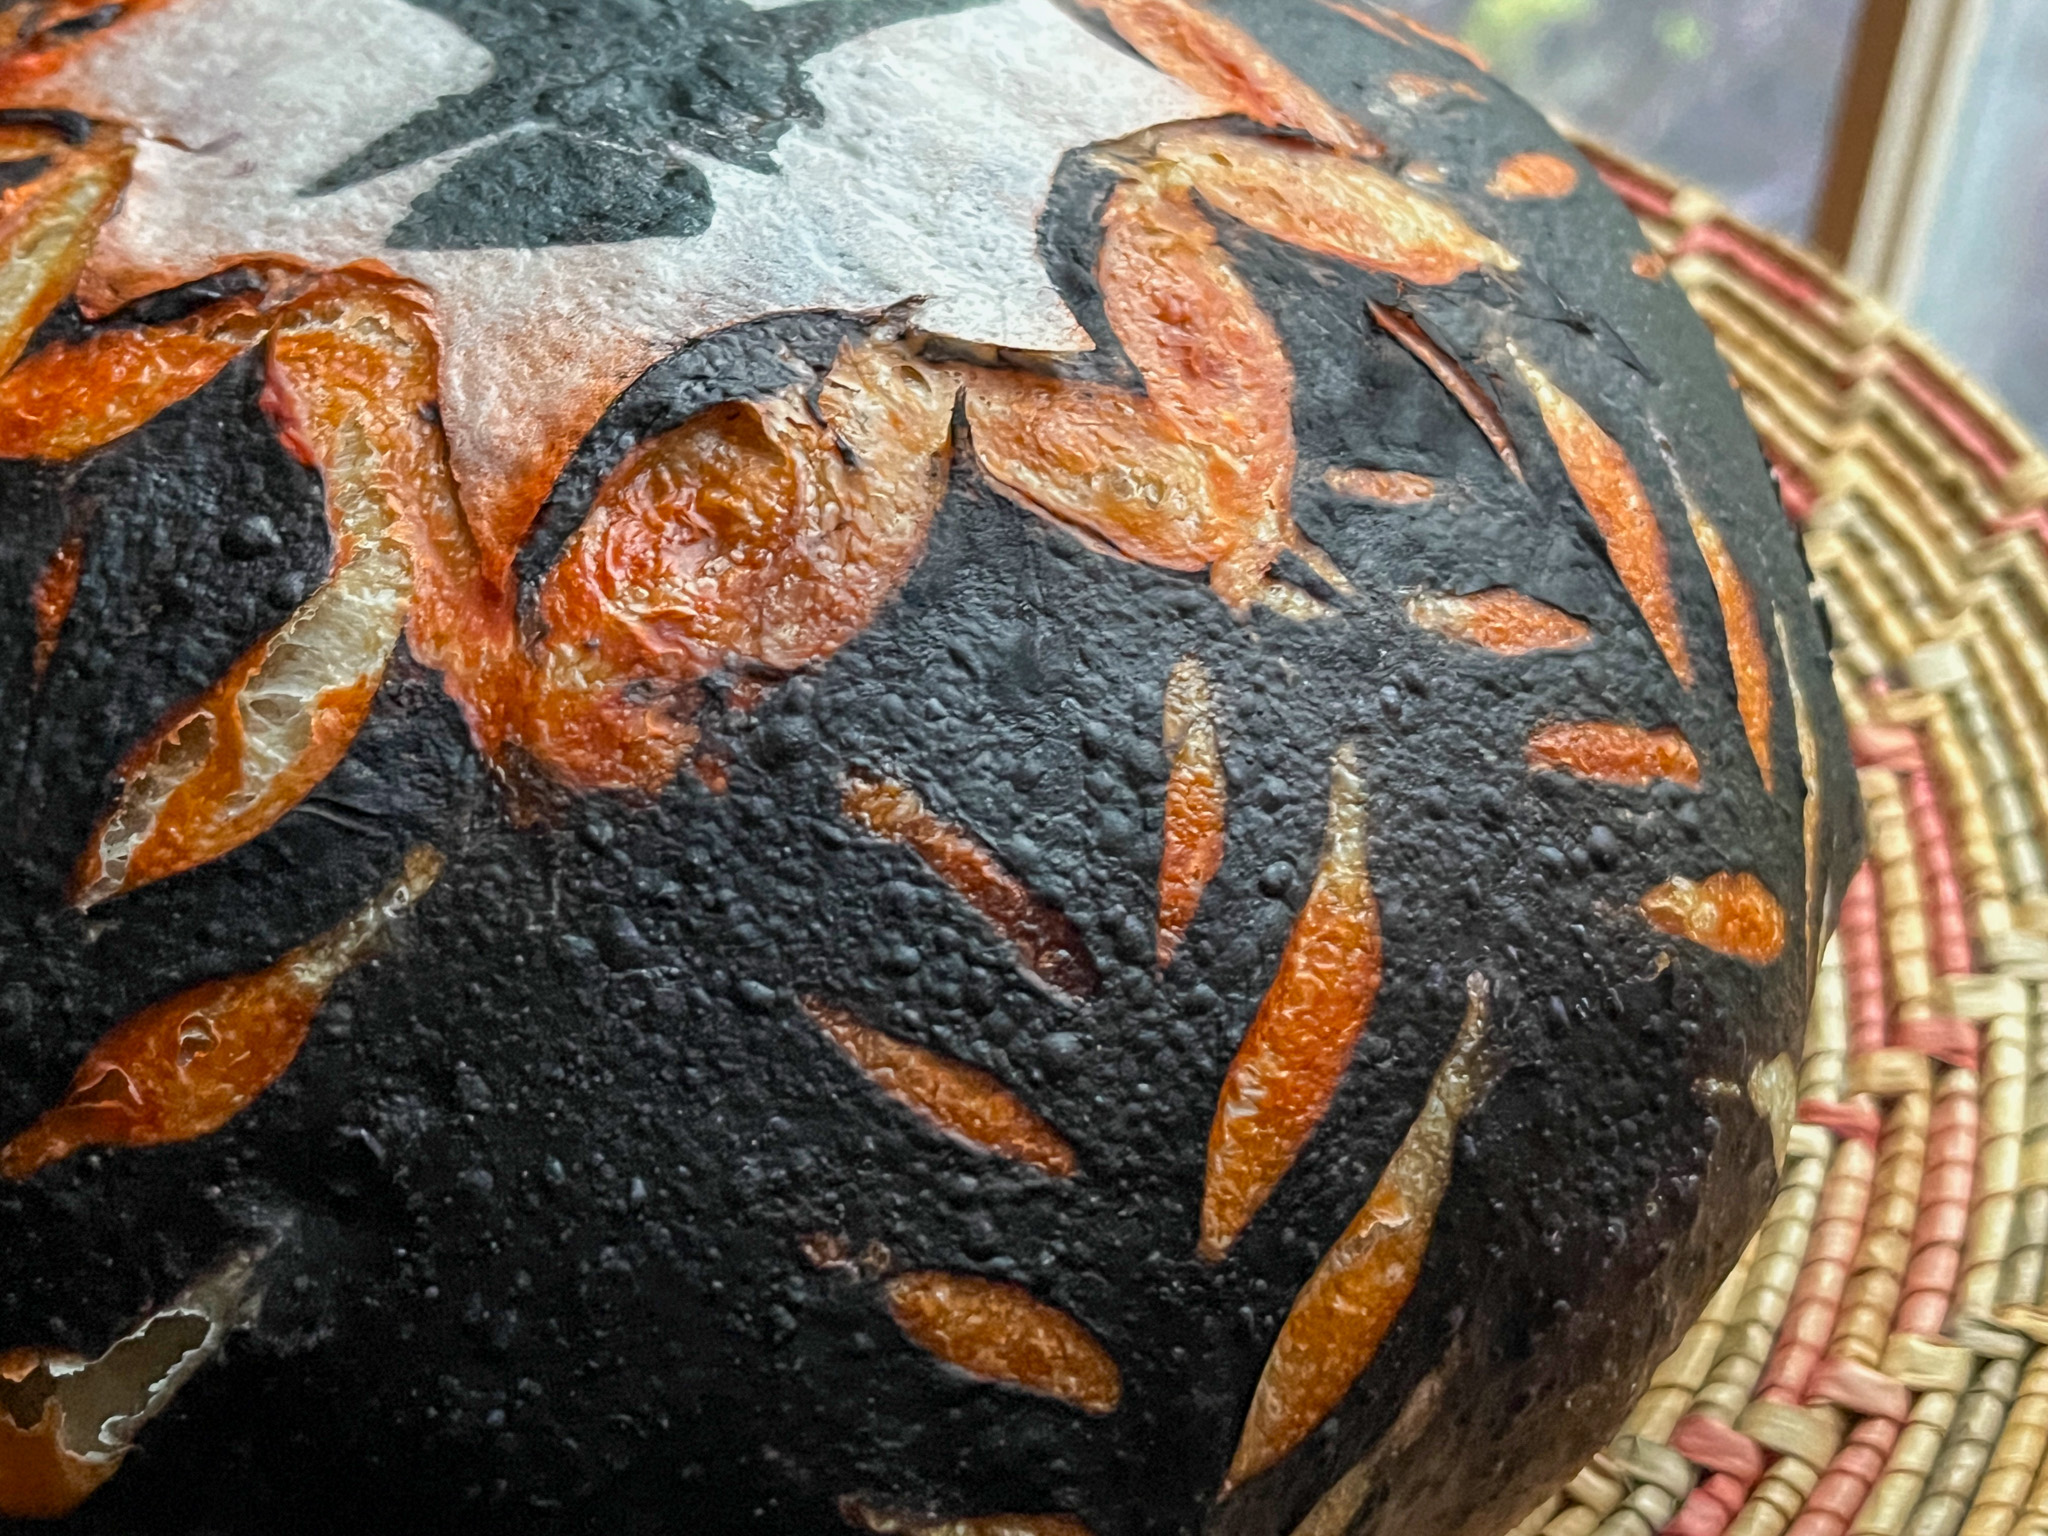
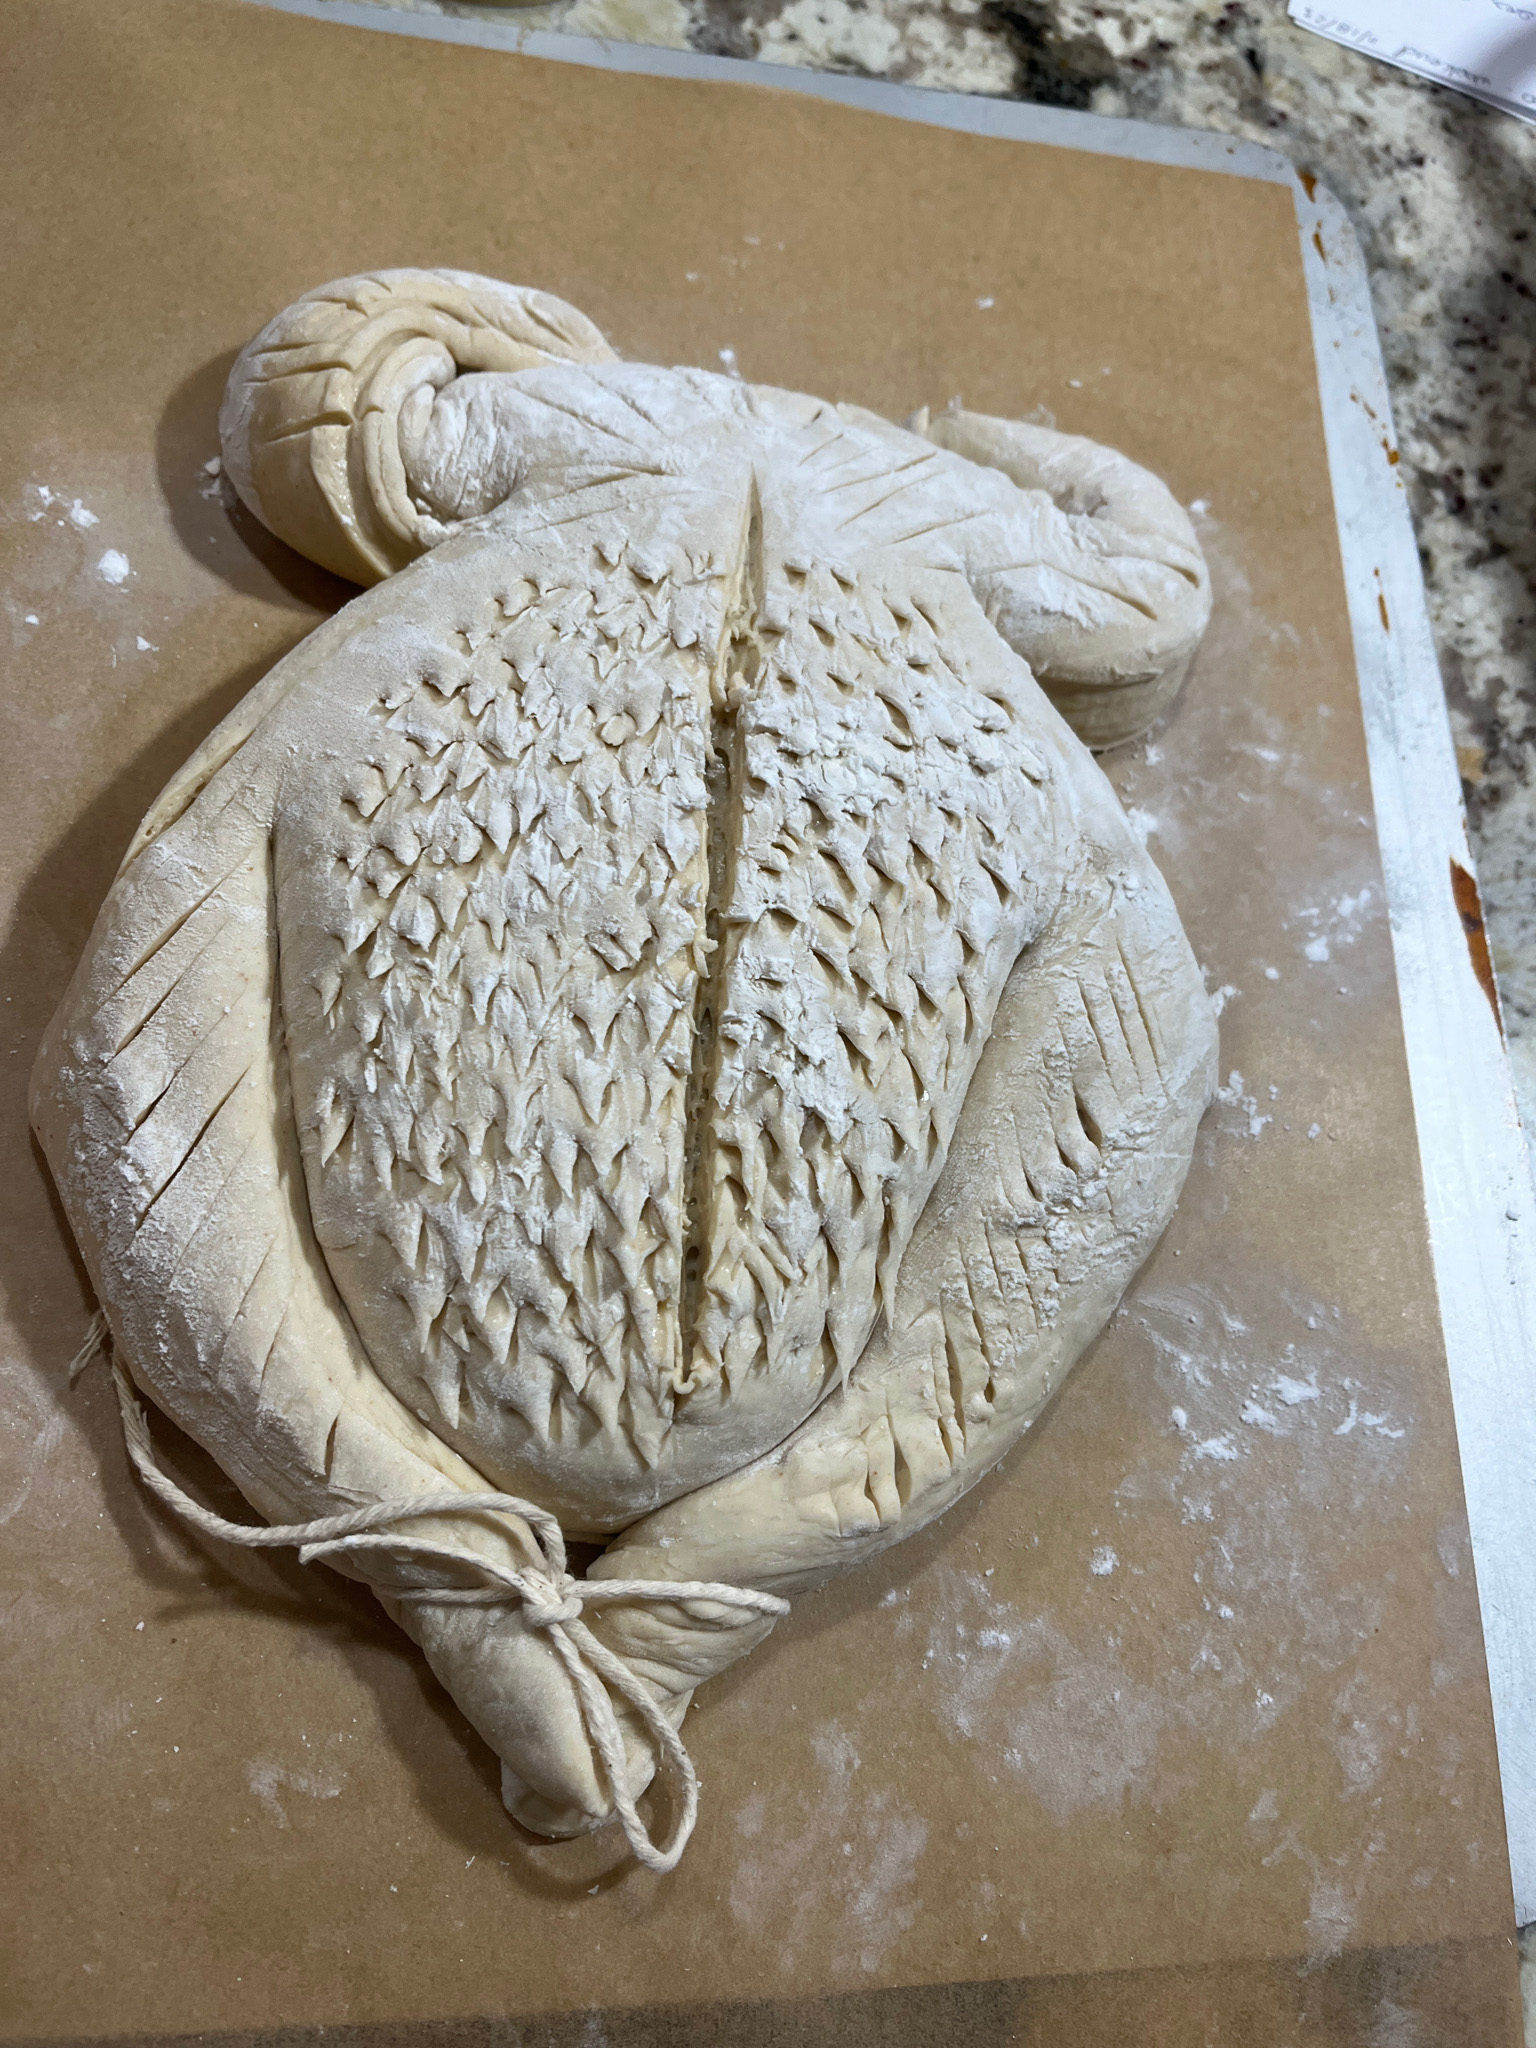
Shape them, tie them with a string, and do a little decorative slashing with small scissors and a razor blade…

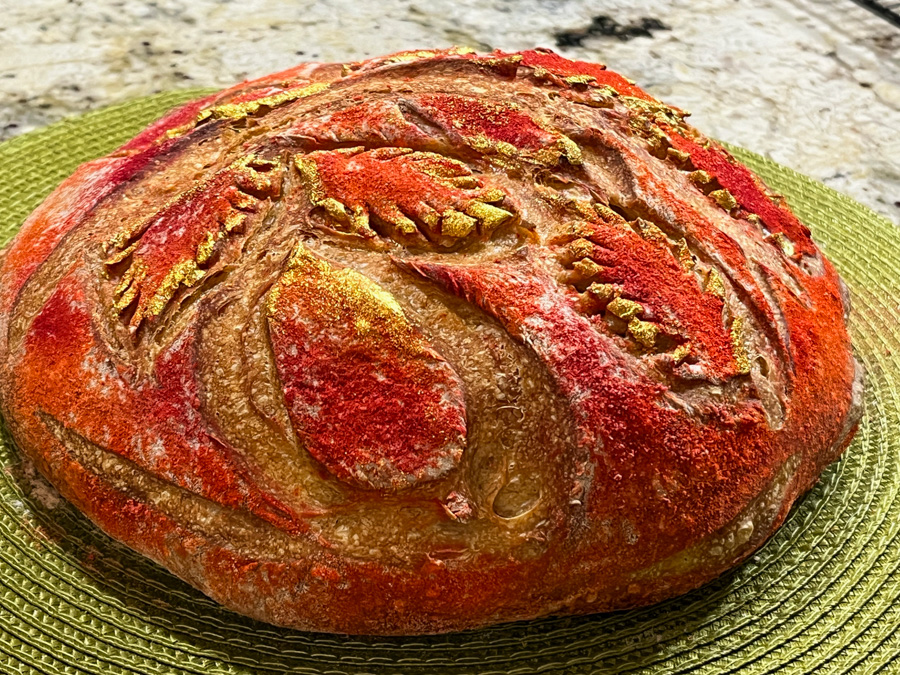
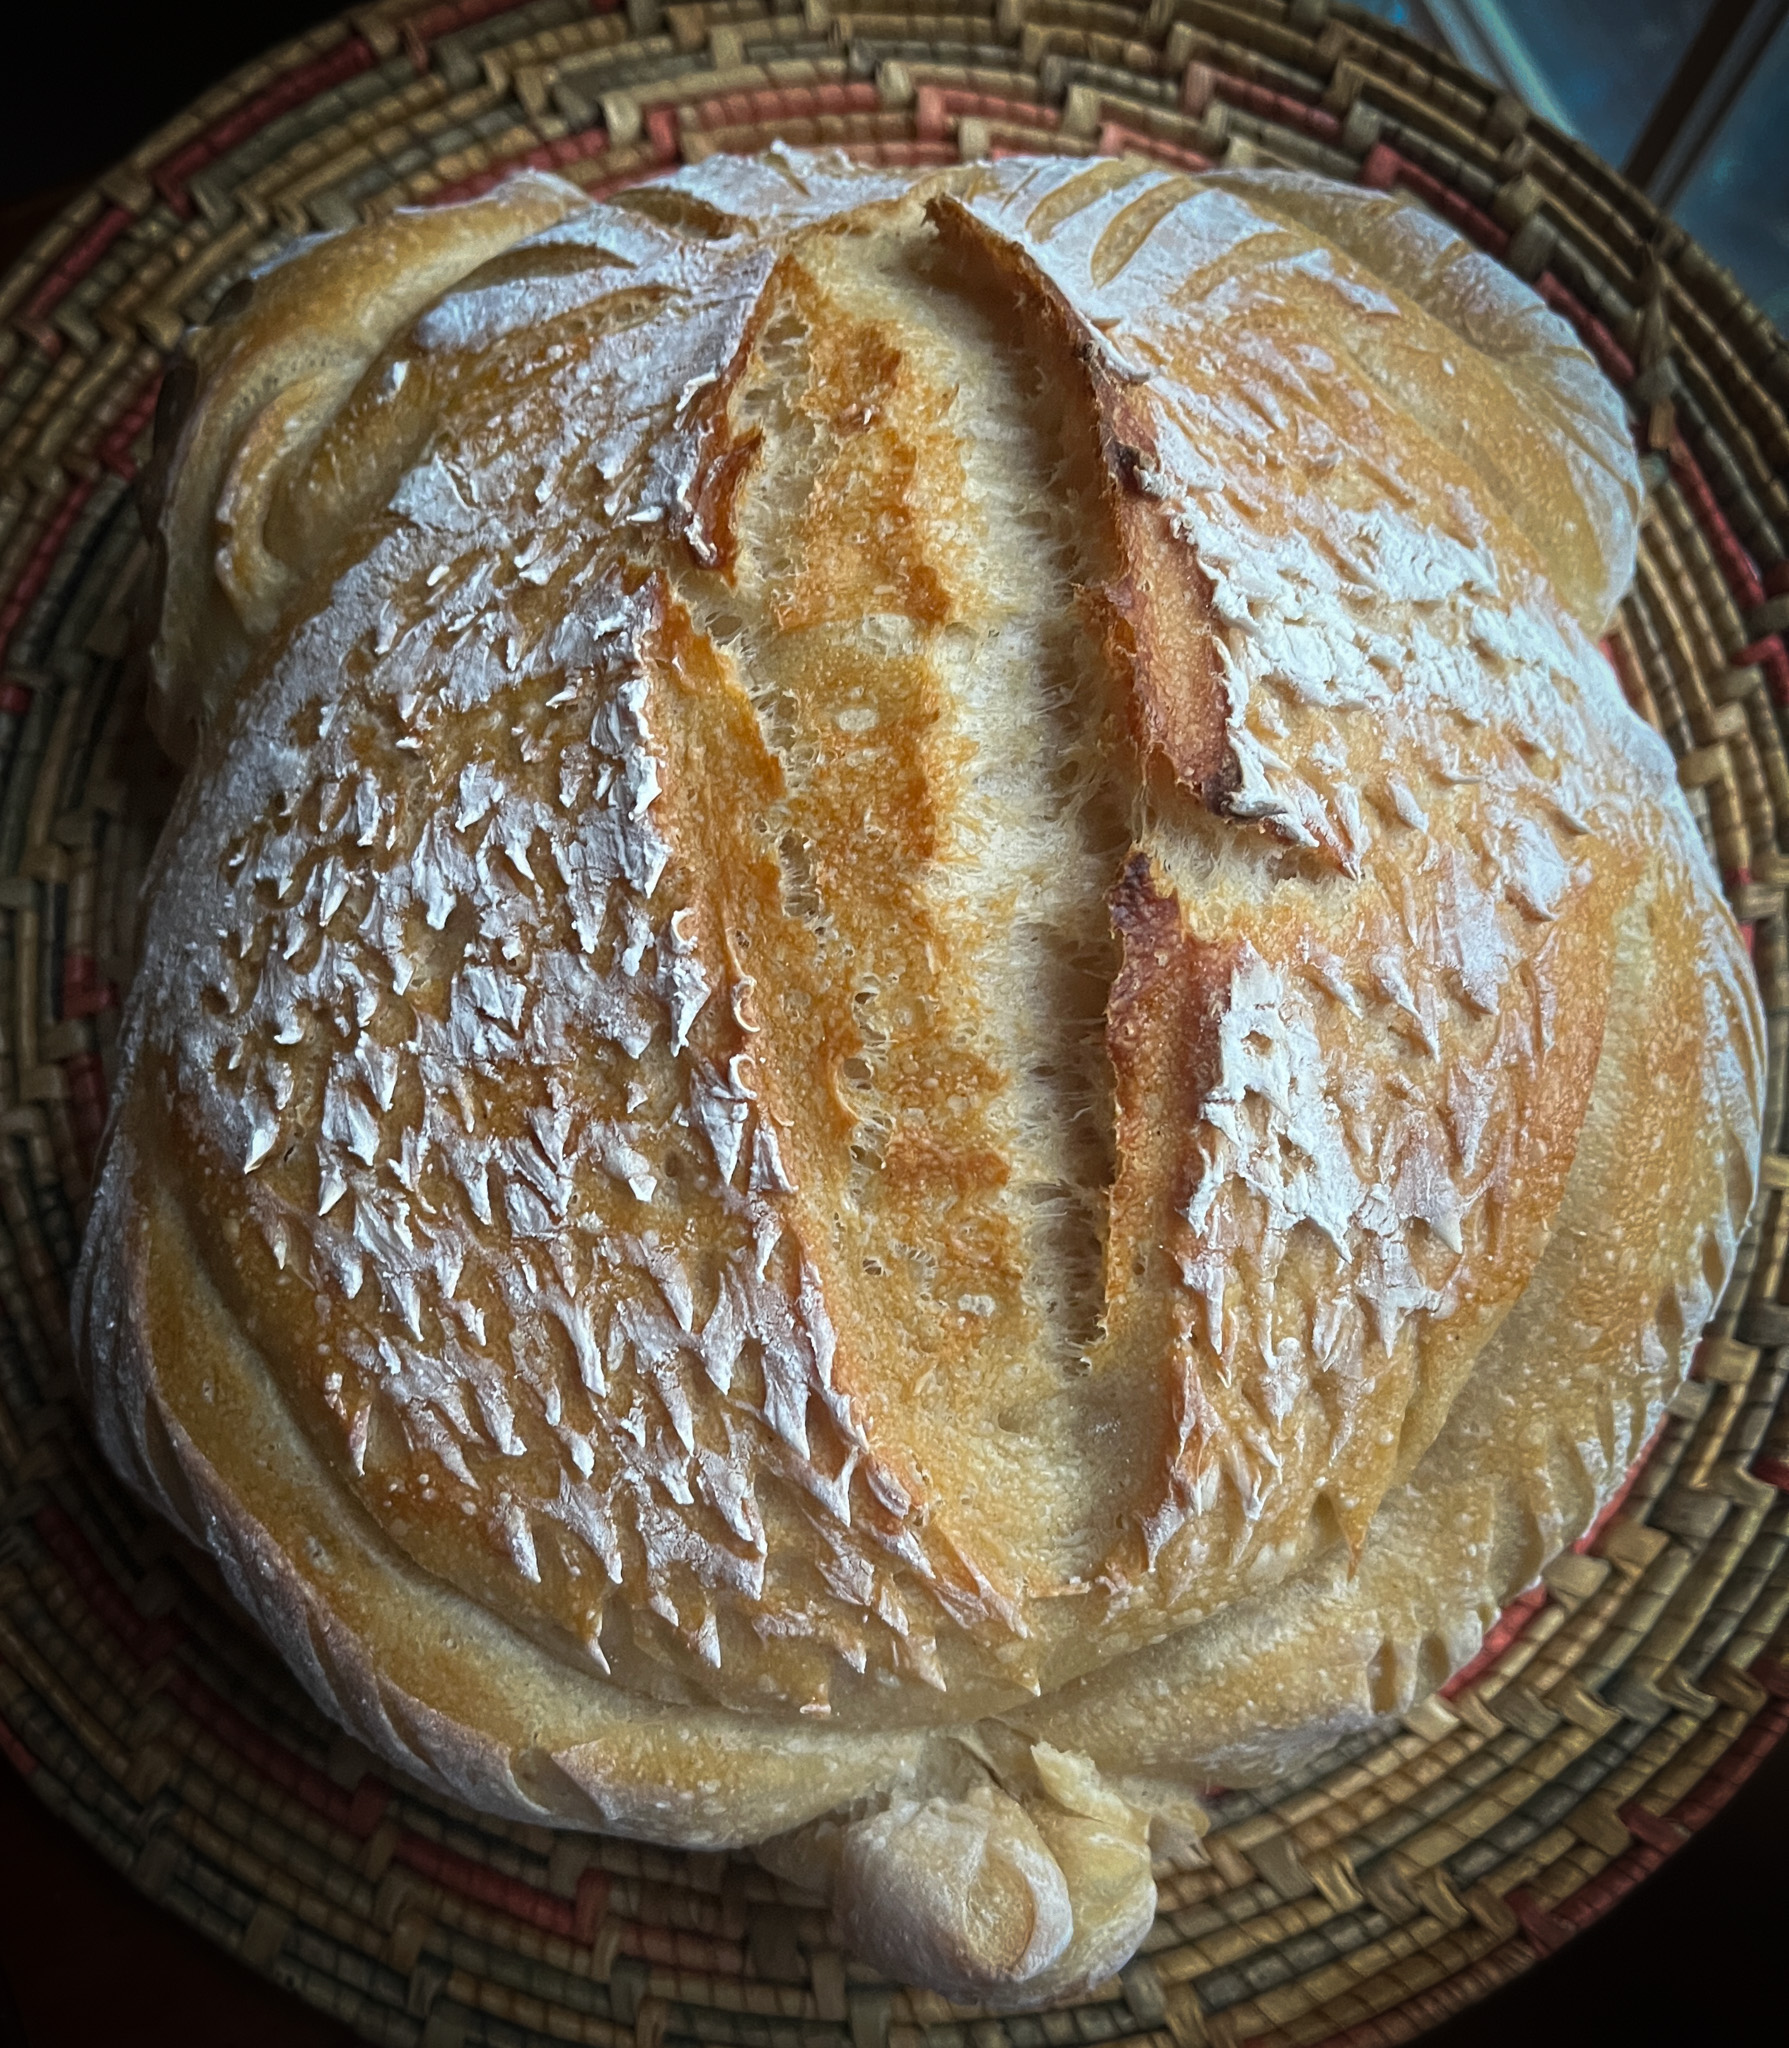
Bake at 450F inside a Dutch oven, covered for 30 minutes, uncover and bake for 15 to 20 minutes more. Your turkey is DONE!

ONE YEAR AGO: Compressed Eggplant and Gruyere Slices

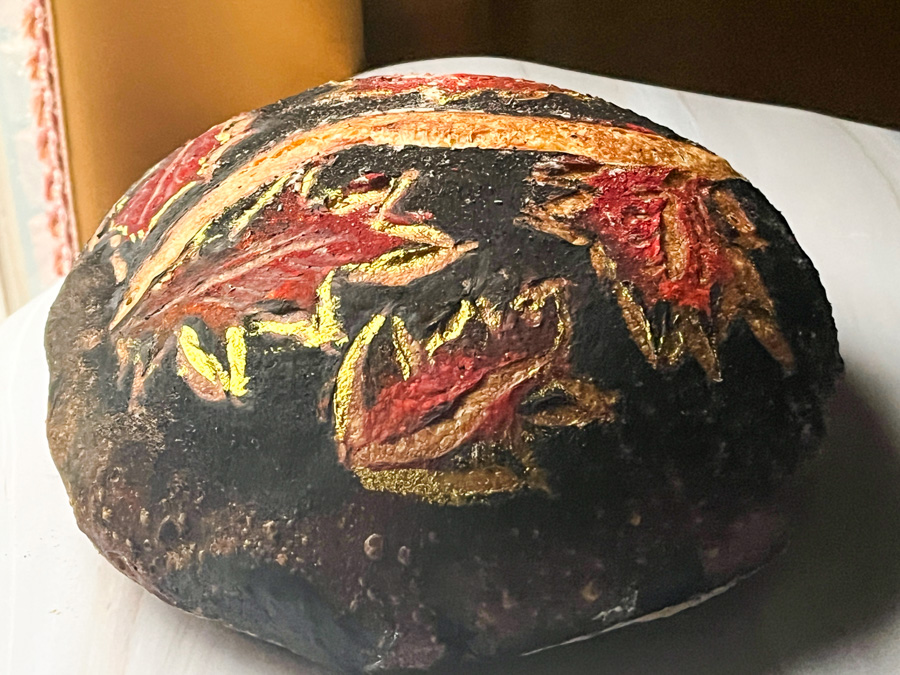
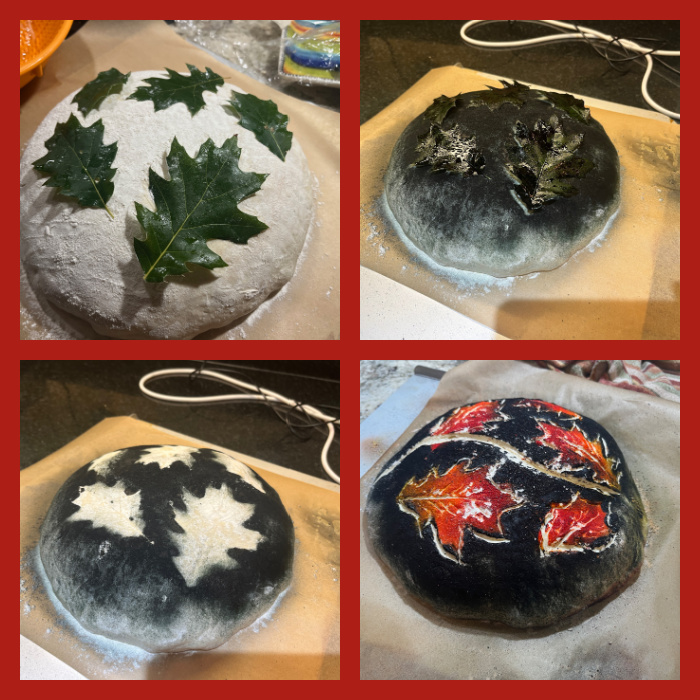
TWO YEARS AGO: Charcoal-Painted Spelt Sourdough

THREE YEARS AGO: Lime-Ganache Bonbons

FOUR YEARS AGO: The Dobos Torte

FIVE YEARS AGO: Coffee-Caramel Entremet Cake

SIX YEARS AGO: Fennel Soup with Almond-Mint Topping

SEVEN YEARS AGO: Eataly

EIGHT YEARS AGO: Spaghetti Squash Perfection

NINE YEARS AGO: Skinny Eggplant Parmigiana

TEN YEARS AGO: Supernova Meets Wok

ELEVEN YEARS AGO500 Posts and The Best Thing I ever made

TWELVE YEARS AGO: Back in Los Angeles

THIRTEEN YEARS AGO: White House Macaroni and Cheese

FOURTEEN YEARS AGO: Korean-Style Pork with Asian Slaw

IT’S SOURDOUGH, WITCHES!

Once again I put a little wafer paper to work for some bewitched sourdough bread. I used just a basic recipe with my default method described many times in this blog of mine (click here). I lowered the hydration a bit to try to control the expansion of the design (for 500g total flour I used 335g water).

I was inspired by a Halloween bread from Kelsey (@3catsandapig) to come up with my design.
She is an incredibly talented bread artist.

It all starts with cutting the wafer paper in the spider web shape, and painting a little witch’s design (I used a stencil and air-brushing). Make sure to cut the wafer paper shape twice, as you will use one of them to cover the dough as you either rub cocoa powder or air-brush with black all over. Then you will peel that off and place a clean one on that spot, proceeding with the scoring around it.

After covering the surface with black, score the design with a razor blade, and then immediately spray some orange (or red) air brush color in the cuts. That will give a nice contrast, but of course you can omit this step.

Bake the bread normally, I do 30 minutes with the lid on, and 15 minutes without the lid. Allow it to cool completely before slicing.

I find that air-brushing the whole surface makes the crust a bit soft, so depending on how you like your bread, rubbing with cocoa powder or charcoal might be better. What I dislike about those options is that they rub off on your hands as you cut the bread later. But it is not a big deal, really.

.

ONE YEAR AGO: Raw Zucchini and Chickpea Salad with Tahini Yogurt

TWO YEARS AGO: Black Tahini Shortbread Cookies

THREE YEARS AGO: A Fruitful Trio (of Macarons)

FOUR YEARS AGO: Halloween Entremet Cake

FIVE YEARS AGO: Pork with Prunes, Olives and Capers

SIX YEARS AGO: Kansas Corn Chowder

SEVEN YEARS AGO: Impossibly Cute Bacon and Egg Cups

EIGHT YEARS AGO: Pulling Under Pressure

NINE YEARS AGO: Cooking Sous-vide: Two takes on Chicken Thighs

TEN YEARS AGO: Miso Soup: A Japanese Classic

ELEVEN YEARS AGO: On my desk

TWELVE YEARS AGO: A must-make veggie puree

THIRTEEN YEARS AGO: Vegetarian Lasagna

FOURTEEN YEARS AGO:  Brazilian Pão de Queijo

AUTUMN LEAVES SOURDOUGH


Fall is here, and to celebrate one beautiful season with sourdough bread, I tried a new technique, coupling air-brushing with leaf shapes. You can use any recipe you like, these were flavored with either Za’atar, Smoked Paprika, or Herbes de Provence.

AUTUMN LEAVES SOURDOUGH
VERSION #1

I started air-brushing a mixture of three colors, red, orange and green…

However, the green was totally lost during baking, so in my second attempt I skipped that color and went with red, orange and yellow instead….

AUTUMN LEAVES SOURDOUGH
VERSION #2


I also got a little more assertive with the gold painting of the edges, which happens after baking.

For my last version, I changed things around and used real leaves to mask parts of the dough. Spray-painted black all over, then came back with the air-brush to highlight the leaves with red and yellow.

AUTUMN LEAVES SOURDOUGH
VERSION #3

It is by far the most dramatic, and what I like about air-brushing is that contrary to charcoal or cocoa powder, the black color won’t run on your fingers as you touch the bread to slice it.

Stay tuned for more adventures with air-brushing and bread, so many possibilities! A lot of inspiration available on Instagram and Pinterest, it is hard to decide what to try next…

ONE YEAR AGO: Dog Cookies

TWO YEARS AGO: Sugarprism Watercolor Macarons

THREE YEARS AGO: Dutch Macarons and a cookbook review

FOUR YEARS AGO: Yogurt Tart

FIVE YEARS AGO: Grilled Lamb-Stuffed Pita Bread

SIX YEARS AGO: Elderflower Macarons

SEVEN YEARS AGO: A Duet of Sorbets

EIGHT YEARS AGO: Sobering Peach Sorbet

NINE YEARS AGO: Spiralizer Fun

TEN YEARS AGO: Beer-Marinated Grilled Skirt Steak

ELEVEN YEARS AGO:  Secret Recipe Club: Corn Chowda

TWELVE YEARS AGO: Page-A-Day Calendar (Pits and Chief 5 minutes of fame…)

THIRTEEN YEARS AGO: Home Sweet Home (our beloved Pits in one of his last photos)

FOURTEEN YEARS AGO: Marbled Rye

SONIC BLADE SOURDOUGH SCORING


I am so excited to share this new method with you! Perhaps you’ve noticed that I talked about a little mysterious gadget in my previous post, and today I explain what it does. It is an adaptor for a razor blade to be used with a Sonic type toothbrush, You need to have the right model, in which the head is pushed into the toothbrush, not screwed in. I’ve had a Phillips Sonic toothbrush for many many years and was quite intrigued about using it to slash sourdough. Works like a dream. As one user described, “it is like having one of those lightsabers from Star Wars”. It does feel very smooth and efficiently goes through the surface without ripping the dough. You can read all about it here. Nicola, the person behind the invention is super nice and responsive, plus she is amazing at making all sorts of designs on her bread, available on youtube or IG. The website I linked has all the info to her social media.

Here is a little video of one of my recent adventures with Sonic scoring… It is 8X faster than real time. I followed one of the designs by Nicola to make this particular one.

TO ORDER YOUR SONIC BLADE ADAPTER, CLICK HERE

As to the breads, I will share just one recipe because I used olive oil infused with fresh oregano to flavor it, and a little bit of dry oregano in the dough. It turned out absolutely delicious.


FRESH OREGANO SOURDOUGH
(from The Bewitching Kitchen)

1/3 cup olive oil
fresh oregano leaves, a big bunch
475 g bread flour
25 g spelt flour
60-70 g sourdough starter at 100% hydration
340 g water
10 g salt
1 tsp dried oregano

Make the infused olive oil by heating the oil in a small saucepan, adding the fresh oregano and simmering for a minute or so. Turn off the heat, cover the pan and let the oil sit for half an hour. Pass through a sieve to remove the leaves, pressing them well. Reserve the oil, allowing it to cool to room temperature or barely warm. 

Mix all the ingredients and 2 to 3 tablespoons of the infused oil in a KitchenAid type mixer fitted with the dough hook.

Turn the mixer on with the hook attachment and knead the dough for 4 and a half minutes at low-speed all the time. If the dough is too sticky, add a little flour, you want the dough to start clearing the sides of the bowl, but still be sticky at the bottom.

Remove from the machine, and transfer to a container lightly coated with oil. Cover lightly with plastic wrap and allow it to ferment for 4 hours, folding every 45 minutes or so. After four hours bulk fermentation, shape the dough as a ball, and place, seam side up, in a lightly floured banetton. Leave at room temperature one hour, and then place in the fridge overnight, from 8 to 12 hours.

Next morning, heat the oven to 450F. Invert the dough over parchment paper, rub gently tapioca flour on the surface. Score with the pattern of your choice and bake at 450F for 45 minutes, preferably covered for the first 30 minutes to retain steam. Cool completely over a rack before slicing.

ENJOY!

to print the recipe, click here

It is quite amazing to use that blade, you just need to be careful when placing it in the adaptor, for obvious reasons, it is sharp, very sharp. I like to add the adaptor to the toothbrush first, and then screw the bade in, because I find it safer to do it this way.


I love the clean cuts the blade does, and will be using it often in future breads, so stay tuned!

ONE YEAR AGO: Happy 4th of July!

TWO YEARS AGO: Happy 4th of July!

THREE YEARS AGO: 4th of July Inspired Baking

FOUR YEARS AGO: In My Kitchen, July 2019

FIVE YEARS AGO: Brigadeiros for the 4th of July

SIX YEARS AGO: Kaleidoscopic Macarons

SEVEN YEARS AGO: Zucchini Noodles with Sun-dried Tomato Pesto

EIGHT YEARS AGO: In My Kitchen, July 2015

NINE YEARS AGO: Sous-vide Pork Chops with Roasted Poblano Butter

TEN YEARS AGO: Roasted Strawberry-Buttermilk Sherbet

ELEVEN YEARS AGO: Amazing Ribs for the 4th of July!

TWELVE YEARS AGO: Baby Back Ribs on the 4th of July

THIRTEEN YEARS AGO: Blueberry Muffins

FOURTEEN YEARS AGO: A Pie for your 4th of July

ALMOND FLOUR SOURDOUGH

No, this is not a gluten-free bread, it is a regular sourdough with a small amount of almond flour (natural kind, with skin on during processing). You won’t be able to tell exactly what is in it, but the almond gives it a nice flavor component.

ALMOND FLOUR SOURDOUGH
(from The Bewitching Kitchen)

470g bread flour
30g almond flour
20g spelt flour
10g salt
365g water
80g sourdough starter at 100% hydration
tapioca flour for dusting dough

Make the levain mixture about 6 hours before you plan to mix the dough. It should be very bubbly and active.

When you are ready to make the final dough, place the water in the bowl of a KitchenAid type mixer and dissolve the starter in it, mixing with a spatula briefly, then add the three types of flour, and the salt. Turn the mixer on with the hook attachment and knead the dough for 4 minutes at low-speed all the time. If the dough is too sticky, add 1/4 cup bread flour, you want the dough to start clearing the sides of the bowl, but still be sticky at the bottom.

Remove from the machine, and transfer to a container lightly coated with oil, cover lightly with plastic wrap and allow it to ferment for 4 hours, folding every 45 minutes or so. After four hours bulk fermentation, shape the dough as a ball, and place, seam side up, in a lightly floured banetton. Leave at room temperature one hour, and then place in the fridge overnight, from 8 to 12 hours.

Next morning, heat the oven to 450F. Invert the dough over parchment paper, dust with tapioca flour and slash with a new razor blade, in any pattern you like.

Bake at 450F for 45 minutes, preferably covered for the first 30 minutes to retain steam. Cool completely over a rack before slicing.

ENJOY!

to print the recipe, click here

Comments: I went a little blade-crazy with the scoring, using my new blade, this beauty with the logo of my dear friend Elaine, Foodbod Sourdough. Click here to get yours. The square cuts I made with small scissors, the same I use for cutting piping tips, very small blade.

A delicious bread, with a slightly softer crumb, as the almond flour contributes some fat and helps retain moisture.

ONE YEAR AGO: Grilled Romaine Lettuce with Tahini Dressing and Chickpeas

TWO YEARS AGO: Asparagus and Snow Peas with Walnut Crumbs

THREE YEARS AGO: Yin and Yang Viennoise Bread

FOUR YEARS AGO: Extreme Chocolate Cupcakes

FIVE YEARS AGO: Sunflower Seed Kamut Sourdough

SIX YEARS AGO: The Joys of Grating Squash

SEVEN YEARS AGO: Auberge Pecan-Walnut Bread

EIGHT YEARS AGO:Gluten-free and Vegan Raspberry Bars
.

NINE YEARS AGO:Lasserre, a French Classic
.
TEN YEARS AGO:Sourdough Bread with Walnuts and Dates
.
ELEVEN YEARS AGO:Braised Brisket with Bourbon-Apricot Glaze
.
TWELVE YEARS AGO: The Real Vodka Sauce
.
THIRTEEN YEARS AGO:Pork Tenderloin and Blue Cheese