FALL-INSPIRED VANILLA CUPCAKES

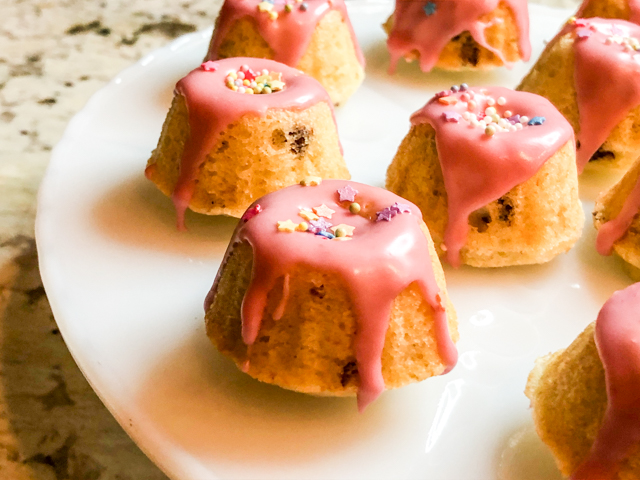
It’s been a while since I made cupcakes to include in the donations I make on Fridays. I like to keep things simple, especially in a busy week, and these cupcakes are actually the definition of simple: I use a method that mixes butter with flour from the beginning, no creaming needed. It makes a soft crumb, tender cake, and it is lightening fast to prepare. What’s not to like?

VANILLA CUPCAKES
(adapted from several sources)

for the buttercream use this recipe

120g all-purpose flour
150g granulated sugar
40g butter, unsalted, removed from the fridge for 30 minutes
1 large egg
120mL milk
1 + 1/2 tsp baking powder
1/2 tsp vanilla paste or extract
1/4 tsp salt

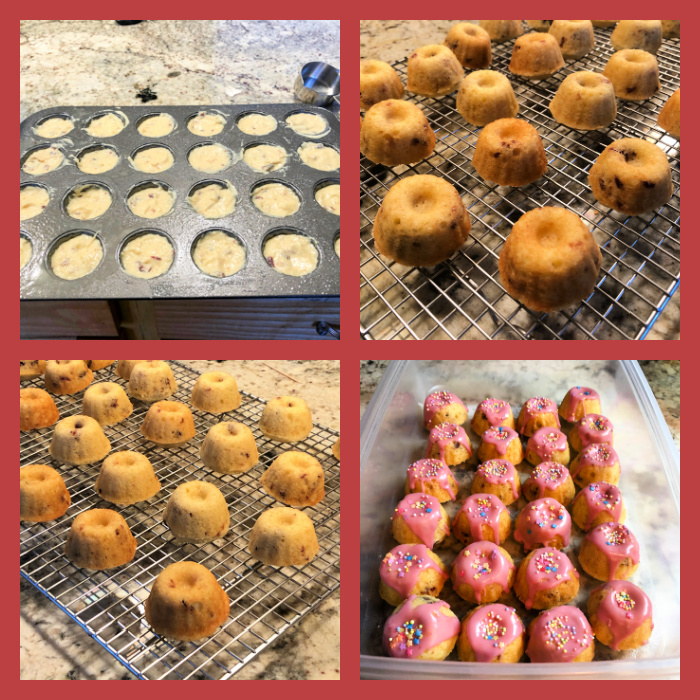
Heat the oven to 350F and line a cupcake pan with paper baking cups. Recipe makes 9 to 10 cupcakes.

Put the flour, baking powder, sugar, salt and butter cut in small pieces in the bowl of a KitchenAid type mixer fitted with the paddle attachment. Mix on medium-low until the butter is in very small pieces, almost like sand.

Whisk the egg with the milk and vanilla, add slowly to the mixer running in low-speed. Once it is almost smooth, increase the speed to high for a couple of minutes, scraping the bottom of the bowl once.

Stop the mixer and make sure the batter is fully smooth, mixing by hand with a spatula. Add batter to the 9 cupcakes, filling half-way full only. Bake for 15 to 18 minutes, until a toothpick comes out clean when inserted in the center.

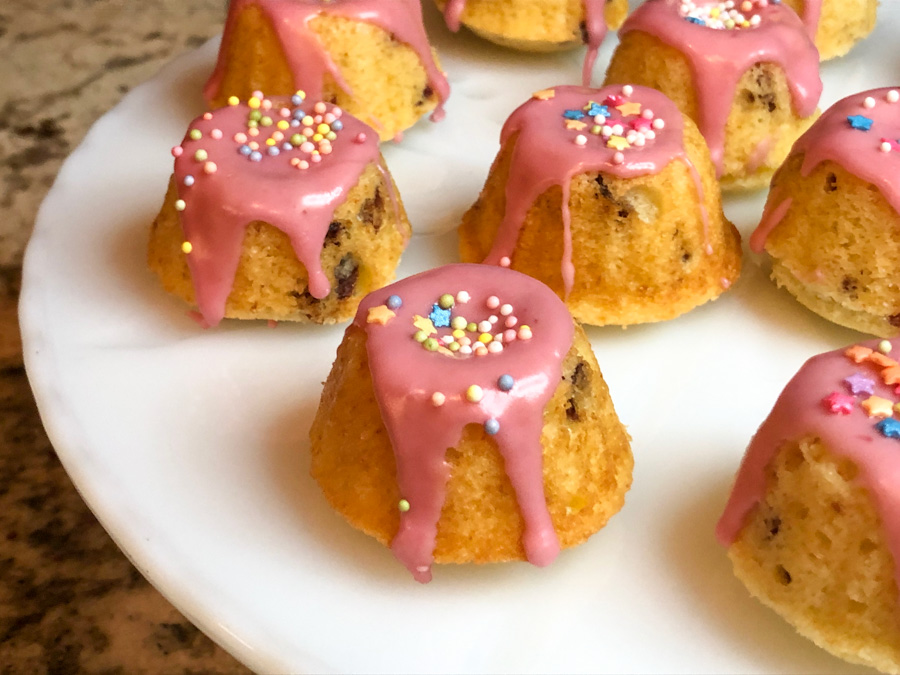
Leave cool completely before decorating.

ENJOY!

to print the recipe, click here


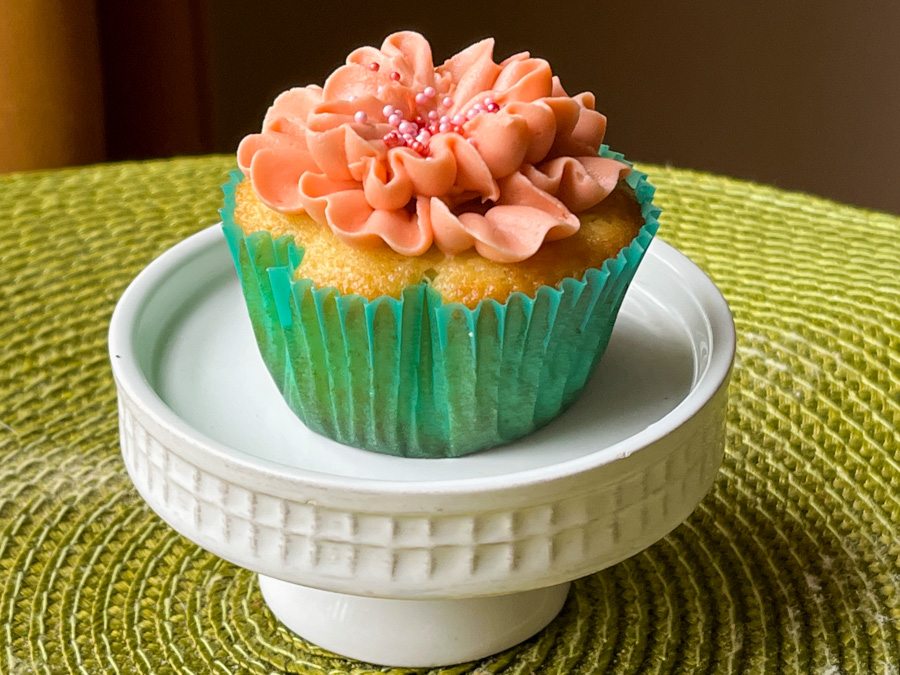
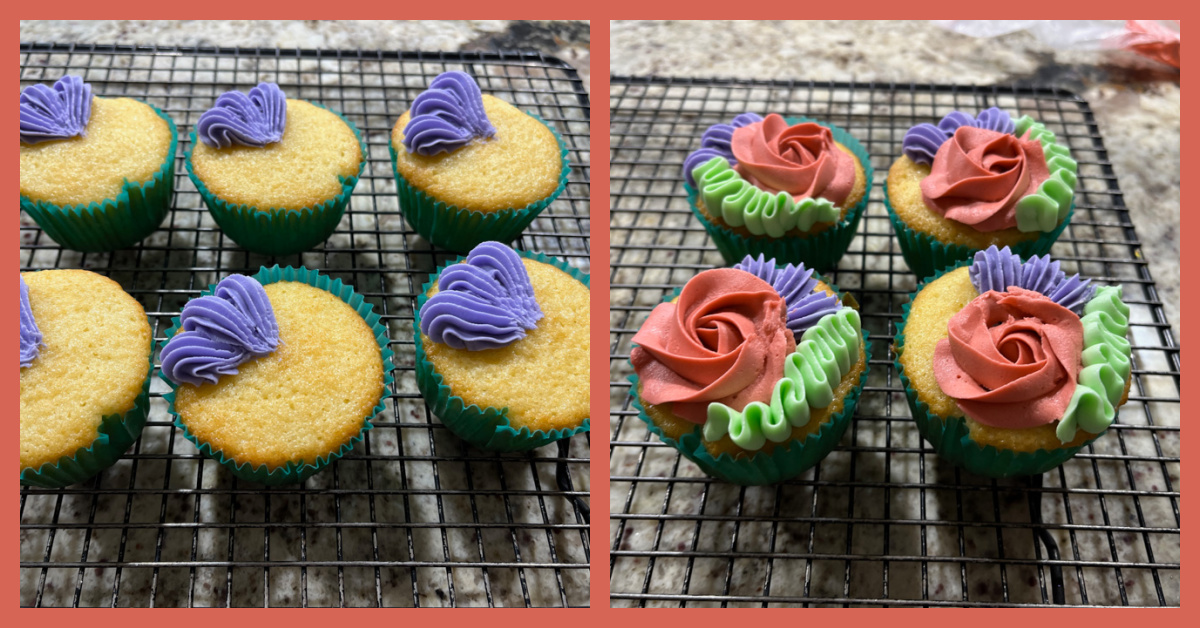
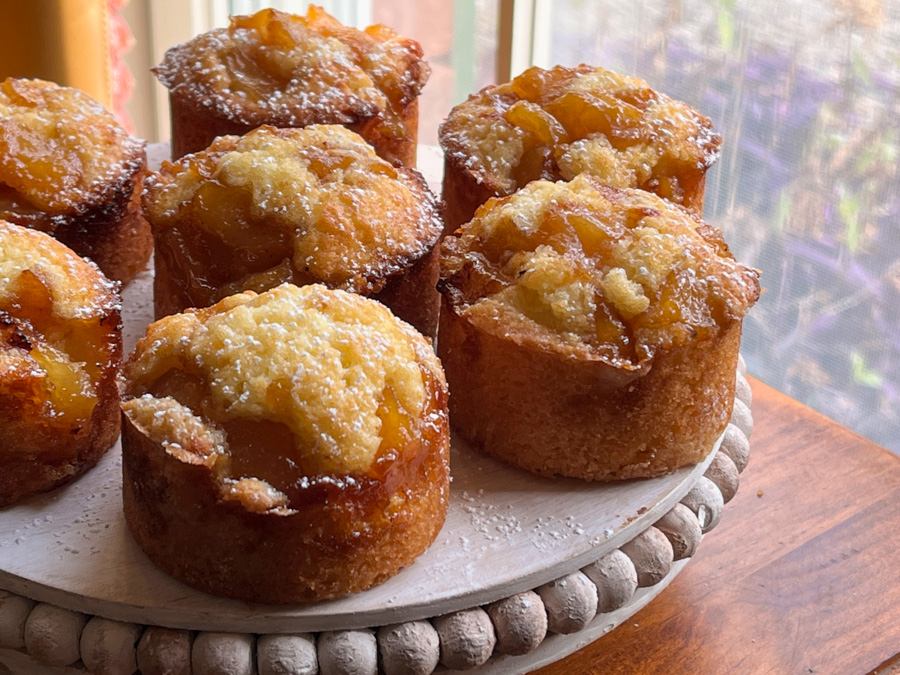
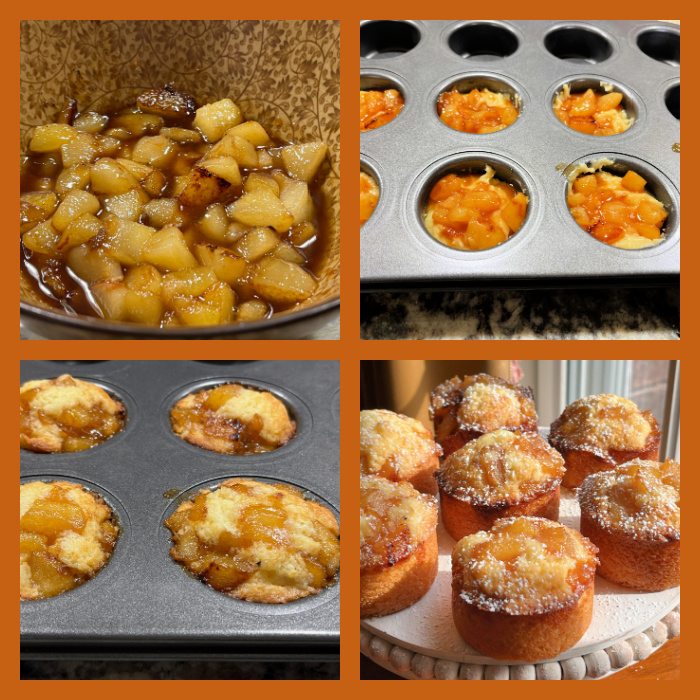
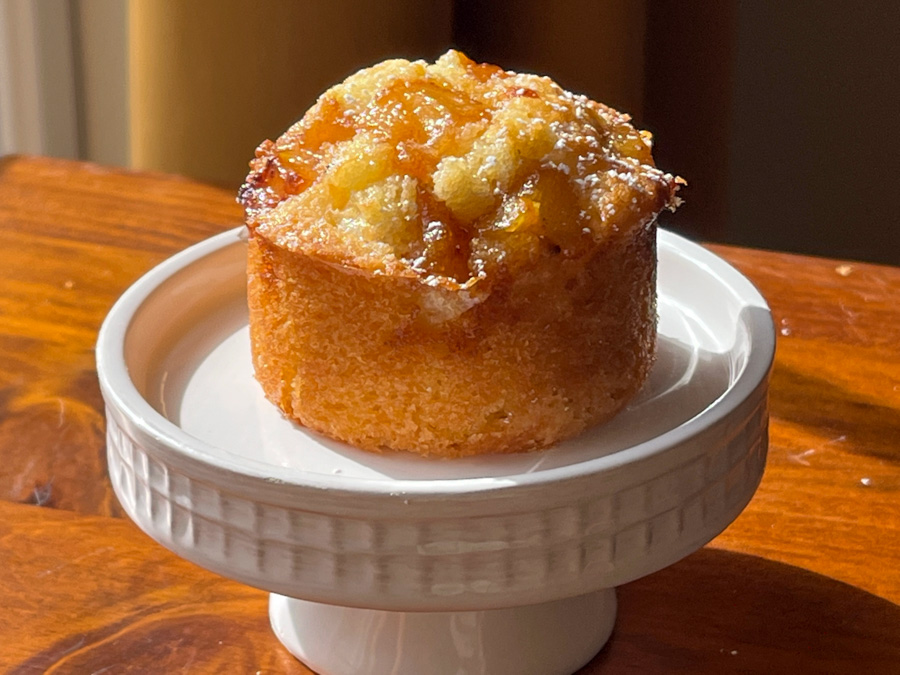
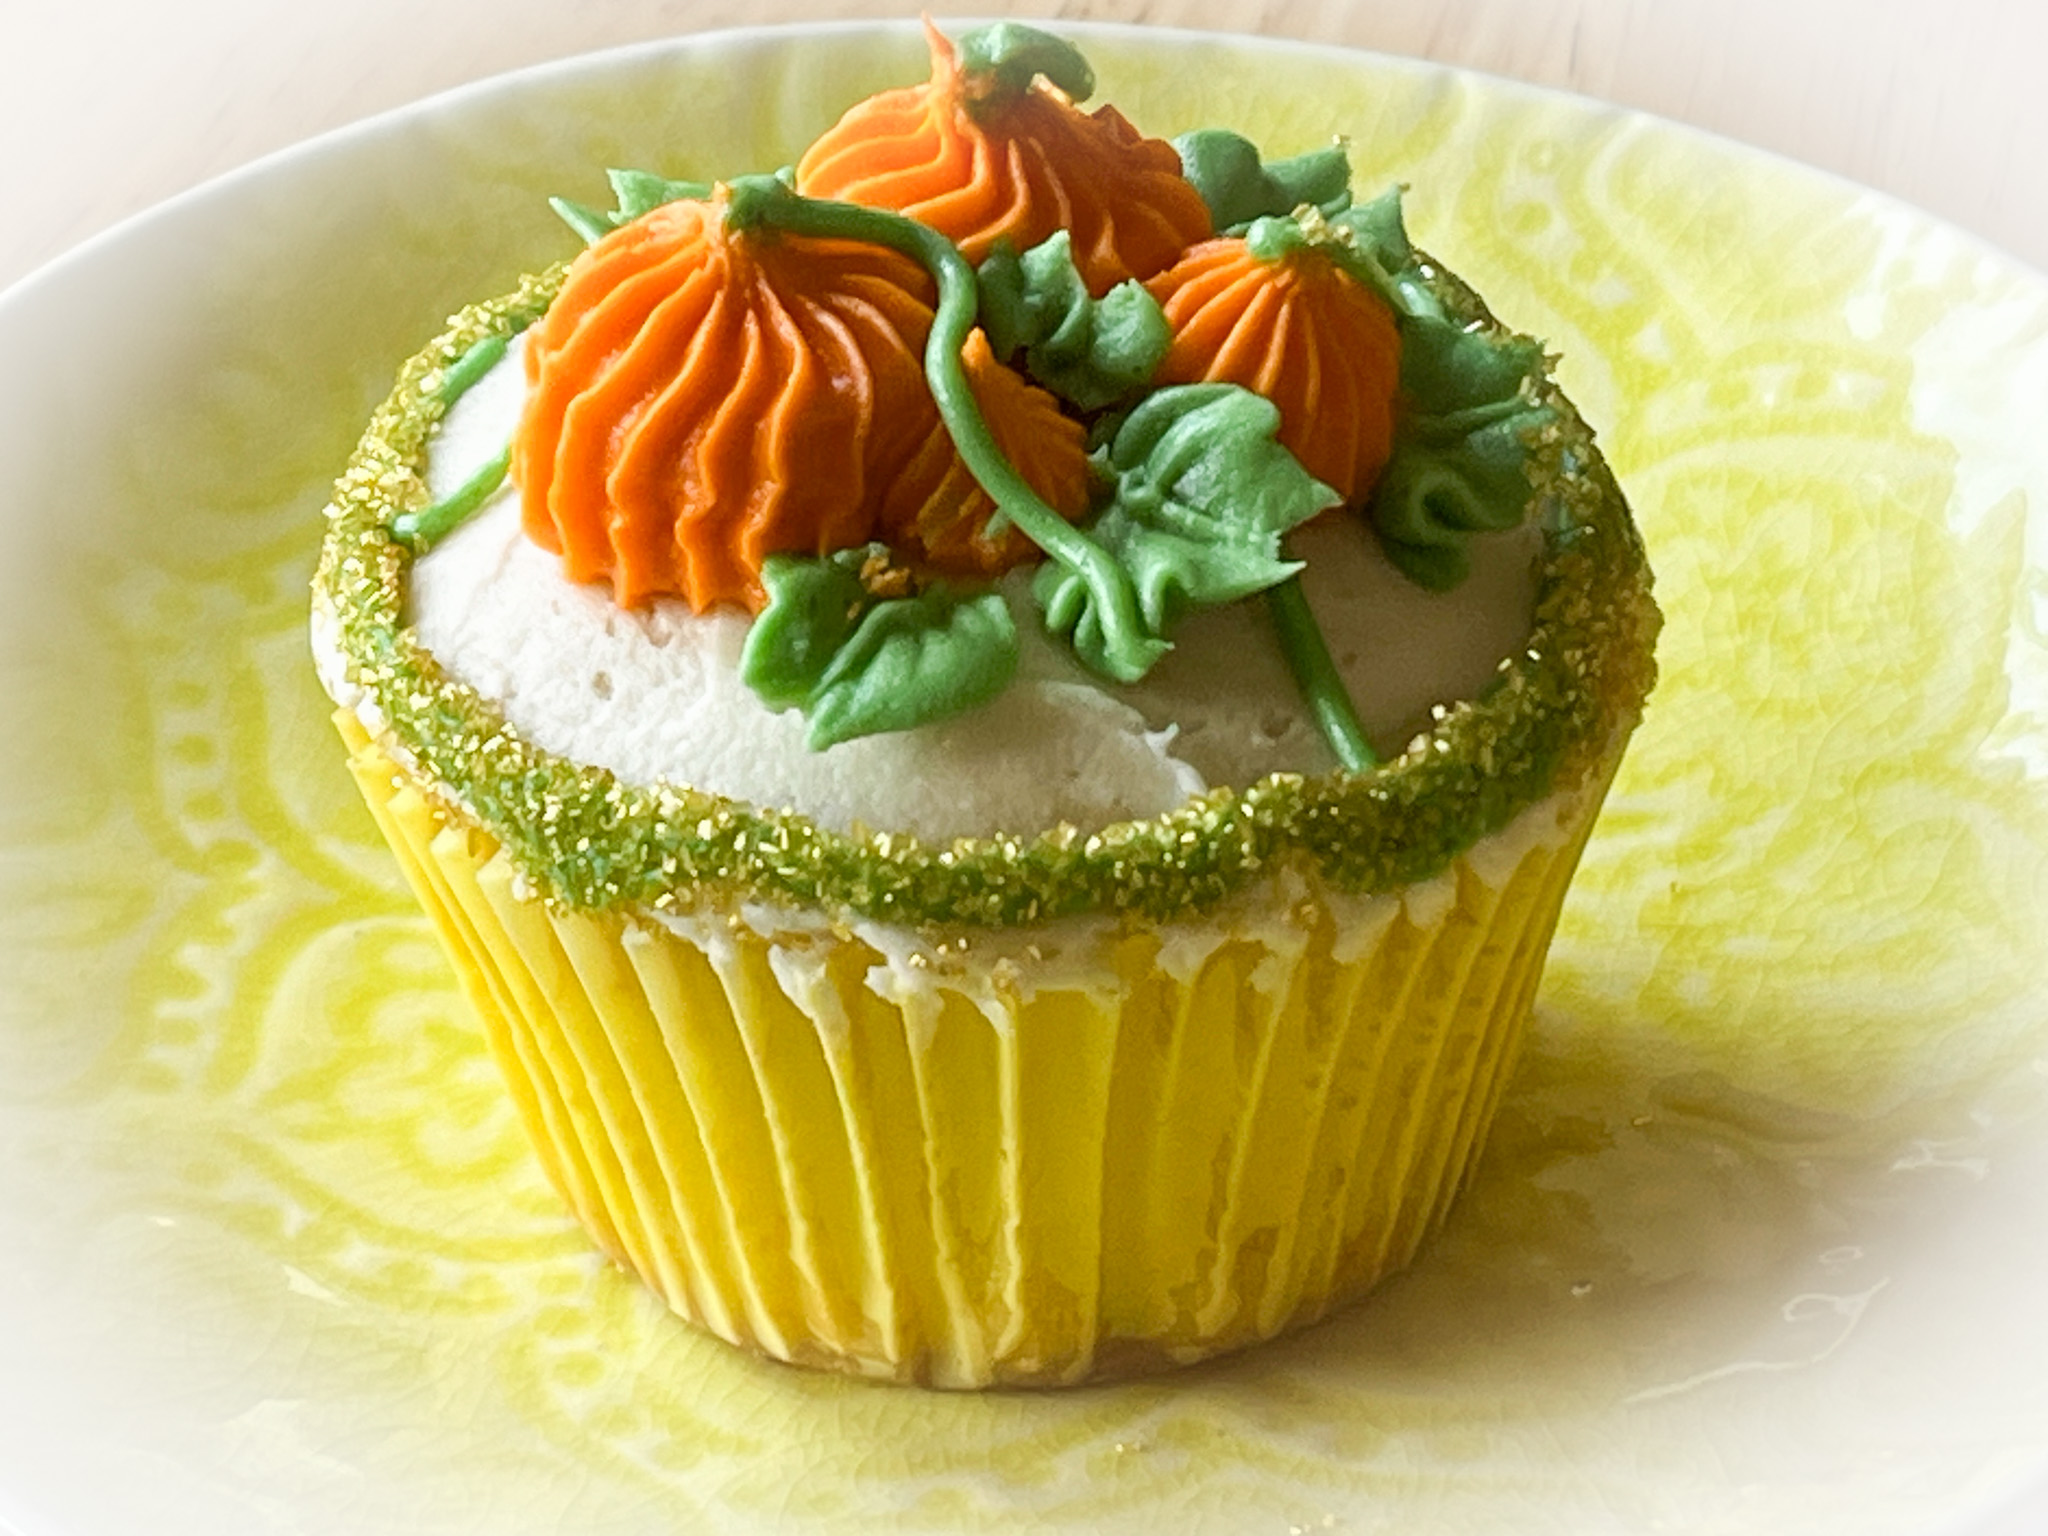
Comments: Leave a small portion of the buttercream without any color, and cover the top of the cupcakes. Dye one part orange and one part green (I used a mixture of Avocado and Leaf Green). For the design, my inspiration was a recent post by Chef Faye that she shared to make gorgeous mini-loaf cakes (check them out here). I used a medium size open star tip for the pumpkin, a small leaf tip and a PME #2 for the vines. A little golden sanding sugar for the border.

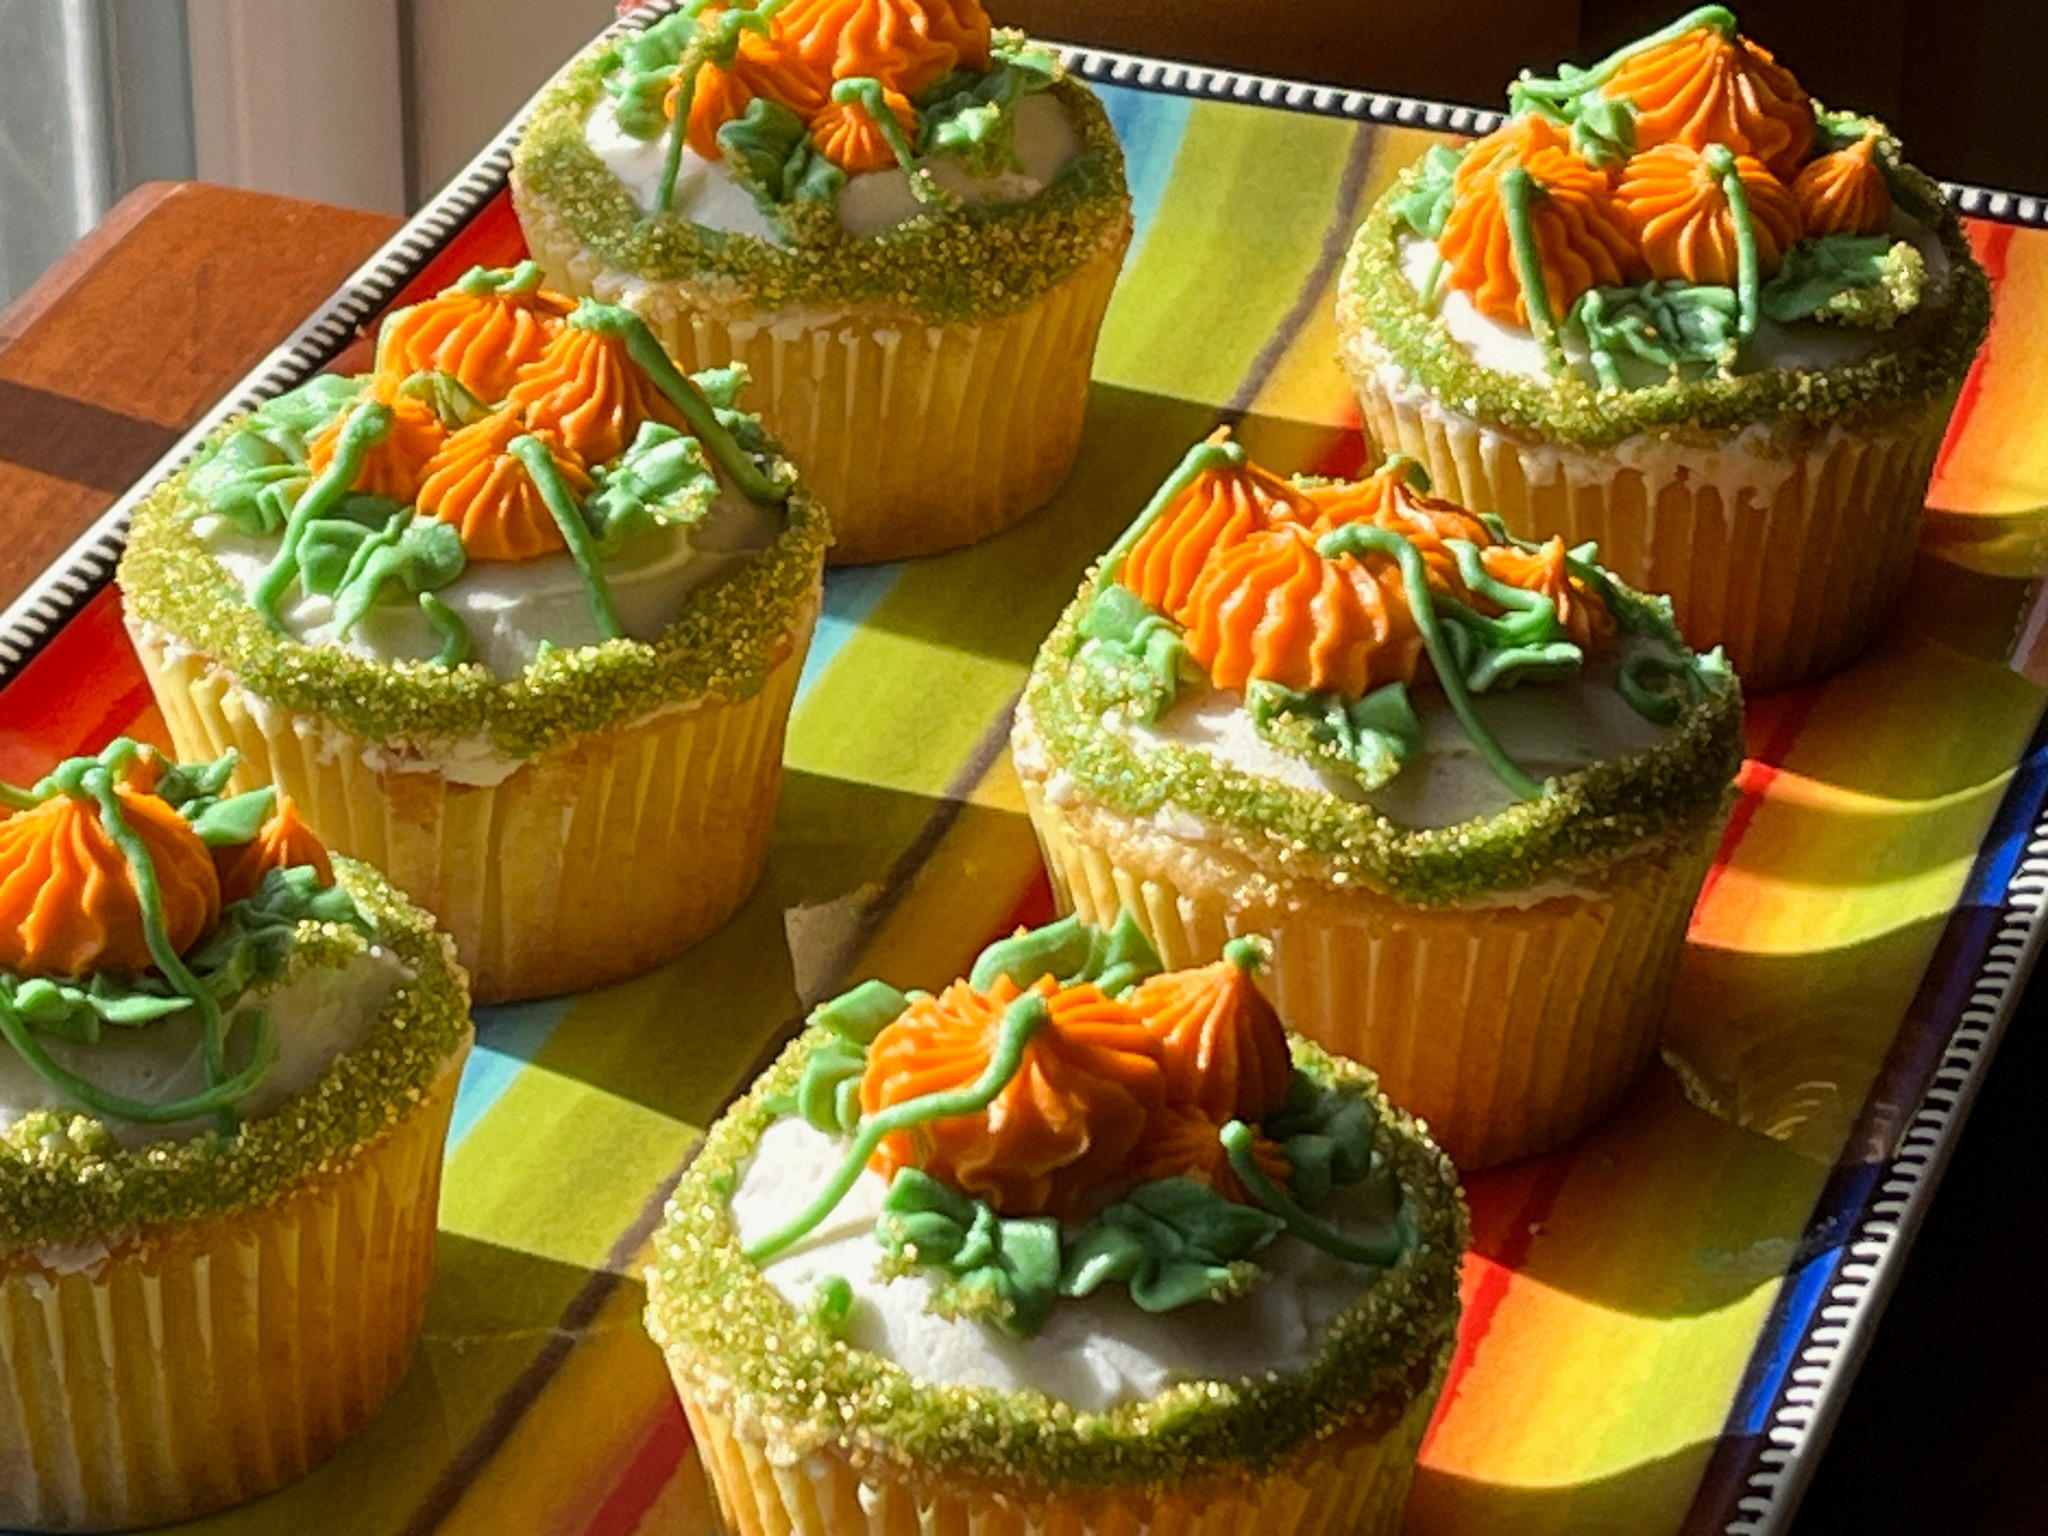
Really loved how these turned out and hope they made someone smile…

ONE YEAR AGO: Bake it Better with a Friend

TWO YEARS AGO: Bison a la Mode de Bourgogne

THREE YEARS AGO: Masala Mashed Potatoes

FOUR YEARS AGO: Lessons from Tanya: Sugar Cookie Silhouettes

FIVE YEARS AGO: Cherry-Chipotle Chicken Thighs

SIX YEARS AGO: White Chocolate Mini-Mousse with Sugared Cranberries

SEVEN YEARS AGO: You Say Ebelskiver, I say Falafel

EIGHT YEARS AGO: Happy Thanksgiving!

NINE YEARS AGO: Two Takes on Raspberries

TEN YEARS AGO: Spice Cake with Blackberry Puree & The Global Pastry Review

ELEVEN YEARS AGO: Own Your Kitchen with Cappuccino Panna Cotta

TWELVE YEARS AGO: Chicken Parmigiana, the Thriller

THIRTEEN YEARS AGO: Wild Mushroom Risotto

FOURTEEN YEARS AGO: Tartine Bread:  Basic Country Loaf 

FIFTEEN YEARS AGO:  Pugliese Bread

MINI-CAKES, TWO WAYS

This is a wonderful, simple recipe that works well even in very small silicone molds, as you can see further down in my article. For the mini cakes below, I used the pan featured in this post from my past.


MINI-RASPBERRY CAKES WITH RUBY RED GANACHE FILLING
(from The Bewitching Kitchen)

250g butter, soft, at room temperature
200 grams of sugar
1 tsp vanilla paste
pinch of salt
5 large eggs, at room temperature
250g all-purpose flour
2 tsp baking powder
3 tablespoons milk at room temperature
25g freeze-dried raspberries – finely crushed

for ruby red ganache:
100 g ruby red chocolate (from Godiva)
110 g whipping cream

Make the ganache. Heat the whipping cream in the microwave until very hot, and pour over the pellets of ruby chocolate. Allow to sit 5 minutes at room temperature, then stir gently until fully dissolved. Reserve at room temperature.

Heat the oven to 350F.

Mix the flour, baking powder and salt in a bowl and set aside. Cream the butter and sugar until the sugar is fully dissolved and the butter turns lighter and fluffy, about five minutes in a Kitchen Aid type mixer with the paddle attachment. Add the eggs one by one, mixing for about 30 seconds before you add each egg. Gently fold the flour mixture and then the milk. Once that is incorporated, add the freeze-dried raspberry powder.

Fill the mold of choice to 3/4 of their capacity. Bake for 15 to 20 minutes, depending on the size of your mold. Let the cakes cool completely before removing them, at least 45 minutes. Fill the center with ruby red ganache. Wait until it sets before serving.

ENJOY!

to print the recipe, click here

MINI-HEARTS RASPBERRY CAKES

Use the same recipe for the cake, distribute the batter into the cavities of this mold. Use store-bought or home-made raspberry jam to fill the center of the cakes. 

These are soft, moist and delicious little cakes. The hear-shaped ones are tiny, as you can see in this close-up picture.

Two bites, and you are done! They were a huge success with colleagues from our department. The cakes filled with ganache are richer (and considerably bigger, although still small). I do love ganache so maybe my heart moves more in the direction of those, but if you prefer the sharp taste of raspberry jam to pair with the sweet cake, consider making a batch of the tiny hearts. 

ONE YEAR AGO: Earl Grey Shortbread Cookies

TWO YEARS AGO: Summertime Macaron Duet

THREE YEARS AGO: Pain de Mie Dressed up for Party

FOUR YEARS AGO: Five-Stranded Bread

FIVE YEARS AGO: Green Olive Salad

SIX YEARS AGO: Coffee Macarons Dressed up to Party

SEVEN YEARS AGO: Blogging Hiatus

EIGHT YEARS AGO: Tomato Tatin

NINE YEARS AGO: Headed to Colorado!  

TEN YEARS AGO: Farofa Brasileira

ELEVEN  YEARS AGO: Thai-Inspired Pork Tenderloin

TWELVE YEARS AGO: A yummy Brazilian cake: Bolo de Fuba’

THIRTEEN YEARS AGO:  Summer’s Tomatoes

FOURTEEN YEARS AGO: Leaving on a jet plane… 

SPRINGTIME CUPCAKES

Spring is taking its time to show up, we even had a light snow the other day, but apparently now things are headed in the correct direction (knock on wood). These cupcakes celebrate the season. You can use any recipe you like for the cake component. I went with a very basic vanilla concoction. The frosting is your humble American buttercream. Honestly, I don’t see the need to go through the extra work of a Swiss buttercream to cover cupcakes. It crusts well, so transporting the cakes (which matters a lot to me) is not a problem. They also stand well to sitting at room temperature for an hour or more.

The basic formula is simply 1X amount of butter + 2X amount of powdered sugar. Change the starting weight of butter according to how many cupcakes and how many colors you’ll need, as you will see in the individual cupcakes after the recipe.

BASIC BUTTERCREAM FOR CUPCAKES
(from The Bewitching Kitchen)

226g butter, unsalted, softened
452g powdered sugar
pinch of salt
Vanilla extract, about 1 tsp or more to taste
a couple or more tablespoons of milk (to adjust consistency)

Place the softened butter in the bowl of a KitchenAid type mixer with the paddle attachment, add the pinch of salt, and whip at high speed for about 7 minutes. It needs to be really soft and lighter. Stop the mixer. Eyeball the amount of powdered sugar, add 1/3 and mix at low speed at first, once the sugar is starting to get incorporated, increase the speed to medium-high.

Add the second portion of the sugar, and incorporate the same way. Add the final portion, start at low speed, clean the sides of the bowl well with a spatula, add the vanilla and increase the speed slowly all the way to high. Whip it until very smooth. Add milk to desired consistency. If desired, add any flavoring ingredients, about 1/4 cup (Nutella, jam, teaspoon of emulsions). If working with different colors, divide the buttercream into small bowls and dye each one with food gel color.

Fill piping bags fitted with the icing tips of your choice. Ice fully cooled cupcakes.

ENJOY!

to print the recipe, click here

LUCK OF THE IRISH CUPCAKES

For 12 cupcakes my starting point was 150g butter + 300g powdered sugar, plus 1/4 cup Nutella as flavoring.
I used 1M tip to make rosettes, and gilded the lily with sprinkles and a fondant clover.

HYDRANGEA CUPCAKES

For these cupcakes, I made buttercream with 200g butter + 400g powdered sugar. Divided in three portions and dyed them very very lightly with pink, lavender, and blue. The colors were spread as bands over plastic, and a little sausage was formed, then dropped in an icing bag with the1M tip. To make the flowers, I piped small blobs all over anda second layer going up towards the center.

RUFFLED FLOWER CUPCAKE

These cupcakes were made together with the last one (multiple colors) so for the full batch (12 cupcakes) I used the recipe as published (226g butter). I was playing with several colors and did not want to run out of any of them. A more experienced baker might get by with a smaller amount of icing to start with.

This flower was made with the petal tip 104, laying very flat on the surface of the cake, in two rows to give more lift and volume. Sprinkles added just because. You could make a center with buttercream dots in a contrasting color, if you prefer.

MULTICOLOR FLORAL CUPCAKES

I divided the buttercream in four batches and dyed them pink (toned down with a touch of brown), purple, green and yellow. Four tips were used. Wilton 1M for purple, closed star for flower (Wilton 2D), petal tip for green (Wilton 104), and a small open star for the yellow (Wilton 18).

Inspiration to decorate these cupcakes came from this video available on youtube.

Cupcakes are so much fun to decorate….
ALMOST as much as cookies!

ONE YEAR AGO: Eggplant-Hummus Phyllo Rolls

TWO YEARS AGO: Happy Easter!

THREE YEARS AGO: Brioche Pepin

FOUR YEARS AGO: Sakura Buche du Printempts

FIVE YEARS AGO: Clay Pot Roast Chicken

SIX YEARS AGO: In My Kitchen, April 2017

SEVEN YEARS AGO: Secret Recipe Club: Chicken Korma and a Bonus Recipe

EIGHT YEARS AGO: Josey Baker’s Olive Bread

NINE YEARS AGO: Almonds, A Cookbook Review

TEN YEARS AGO: Pomegranate-Molasses Glazed Carrots

ELEVEN YEARS AGO: Codruta’s Rolled Oat Sourdough Bread

TWELVE YEARS AGO: Roasted Corn and Tomato Risotto

THIRTEEN YEARS AGO: Light Rye Bread

BLOOD ORANGE & CRANBERRY MINI-CAKES

Some say these would be more appropriate for winter, but I will respectfully disagree… too adorable to restrict to a single season… Very easy to make, the mini format is impossible to resist.

BLOOD ORANGE AND CRANBERRY MINI-CAKES
(adpated from several sources)

for the mini-cakes:
130g all-purpose flour
1 tsp baking powder
1/4 tsp salt
57g butter, softened (4 tablespoons)  tablespoons
100g granulated sugar
1 egg
1 Tablespoon blood orange zest
1/2 cup milk
1/3 cup dried cranberries, cut in pieces 

for the icing:
1 cup powdered sugar
2 Tablespoons blood orange juice
sprinkles

Heat oven to 325F.

Mix flour, baking powder and salt in a medium bowl. Reserve. 

Cream the butter with sugar in a KitchenAid type mixer. Add egg and zest. Add 1/3 flour mixture, half of the milk, 1/3 flour, the rest of the milk, and end with the final third of the flour. Mix well to incorporate. Fold the cranberries, add batter to mini-cake pan, bake for about 13 minutes, until toothpick comes out clean.

Cool for  minutes in pan,  and invert on a rack. Make the icing by whisking all ingredients, if you want stronger color, add  a tiny drop of pink food gel. Cover cooled cakes with icing, add sprinkles while still wet. 

ENJOY!

to print the recipe, click here

Comments: These are soft, sweet and tangy at the same time. Two little bites of heaven, covered with the blood orange icing that, together with sprinkles make them all so festive. I suppose you could use raisins instead, but cranberries are perfect in this setting.

ONE YEAR AGO: Simnel Cupcakes

TWO YEARS AGO: Oat and Sesame Seed Sourdough

THREE YEARS AGO: Moroccan Turkey Pie with Olive Oil Crust

FOUR YEARS AGO: Another Twisted Sister of the Shepherd’s Pie 

FIVE YEARS AGO: Cashew Chicken, My Way

SIX YEARS AGO: Two Deliciously Simple Salads

SEVEN YEARS AGO: In My Kitchen, April 2016

EIGHT YEARS AGO: Spring has Sprung with Suzanne Goin

NINE YEARS AGO: Chai Brownies

TEN YEARS AGO: Pomegranate-Molasses Glazed Carrots

ELEVEN YEARS AGO: Braised Brisket with Bourbon-Peach Glaze

TWELVE YEARS AGO: The Real Vodka Sauce

THIRTEEN YEARS AGO: Spring Rolls on a Spring Day

VANILLA MINI-CAKES WITH HONEY PEARS

The cake batter for these cupcakes is very simple to make, the only other step needed is preparing the pear topping, but if you want to make your life real easy, you can do that the day before and keep it in the fridge. They don’t need anything but a light shower with powdered sugar.


VANILLA MINI-CAKES WITH HONEY PEARS
(adapted from several sources)

for the pear topping:
2 tablespoons (1/4 stick) butter
4 Anjou pears, peeled, cored, cut in small cubes
1/3 cup (65g) golden brown sugar
2 tablespoons honey


for the cakes:
3/4 cup (185g) unsalted butter, room temperature
1 cup (200g) sugar
4 large (200g) eggs
1 teaspoon vanilla extract
1 + 1/3 cups (160g) all purpose flour
1 teaspoon baking powder
1/2 teaspoon salt

powdered sugar


Melt butter in a large non-stick skillet, add the pears and sauté for 5 minutes, until tender. Add brown sugar and honey, cook until pears are evenly coated, about a minute or so. Transfer to a small bowl, cover and put in the fridge until needed.

Heat oven to 350°F. Coat 8 mini-cake pans with non-stick spray. Beat butter and sugar until smooth. Add eggs, one at a time, beating constantly. Add the vanilla. Which the flour, baking powder and salt in a bowl, and sift that mixture into the butter/egg, mixing gently until combined.


Divide the batter among cups, filling a little more than half-full. Spoon 1 to 2 tablespoons of the pear mixture on top of the batter. Bake until a toothpick inserted in the center comes out mostly clean, about 25 minutes. Let rest 15 minutes before un-molding. Right before serving, add a little powdered sugar on top with a sieve.

ENJOY!

to print the recipe, click here

Comments: For the cakes, I used one of my favorite pans, which I bought a long time ago on eBay. I have not been able to find a source to get it in the US, but you can see it here. It is the same pan I’ve used for mini Victoria cakes (flash back post here). It bakes like a dream, and since the bottom is loose, you can push the cakes out easily. I love the look of the mini-cakes, they get perfectly straight edges. If you don’t have a similar pan, use a regular cupcake pan. Maybe the number and size of your cakes will be different but it will work.

The same approach will work with other fruits, and I also think pineapple could be wonderful, so that’s an idea for future adventures…

ONE YEAR AGO: Buttermilk Roast Chicken

TWO YEARS AGO: Cauliflower and Sweet Potatoes in Yogurt-Curry Sauce

THREE YEARS AGO: Panettone, Wild-Yeast Version

FOUR YEARS AGO: Turkey Chili Under Pressure

FIVE YEARS AGO: Tiramisu Macarons

SIX YEARS AGO: Cider Mini-Cheesecakes with Caramel Sauce

SEVEN YEARS AGO: Rustic Ciabatta and Mini-Meatloaves

EIGHT YEARS AGO: Green Rice

NINE YEARS AGO: Potato-Crusted Italian Mini-Quiches

TEN YEARS AGO: Beetroot Sourdough for the Holidays

ELEVEN YEARS AGO: Cod Filet with Mustard Tarragon Crust

TWELVE YEARS AGO: Soba Noodles: Light and Healthy

THIRTEEN YEARS AGO: Potato-Rosemary Bread