Strawberries are delicious right now, so I share two ideas to put them to great use (apart from just grabbing the fresh fruit and taking a nice juicy bite). Cake or macarons? You decide. You can always make them both!
.
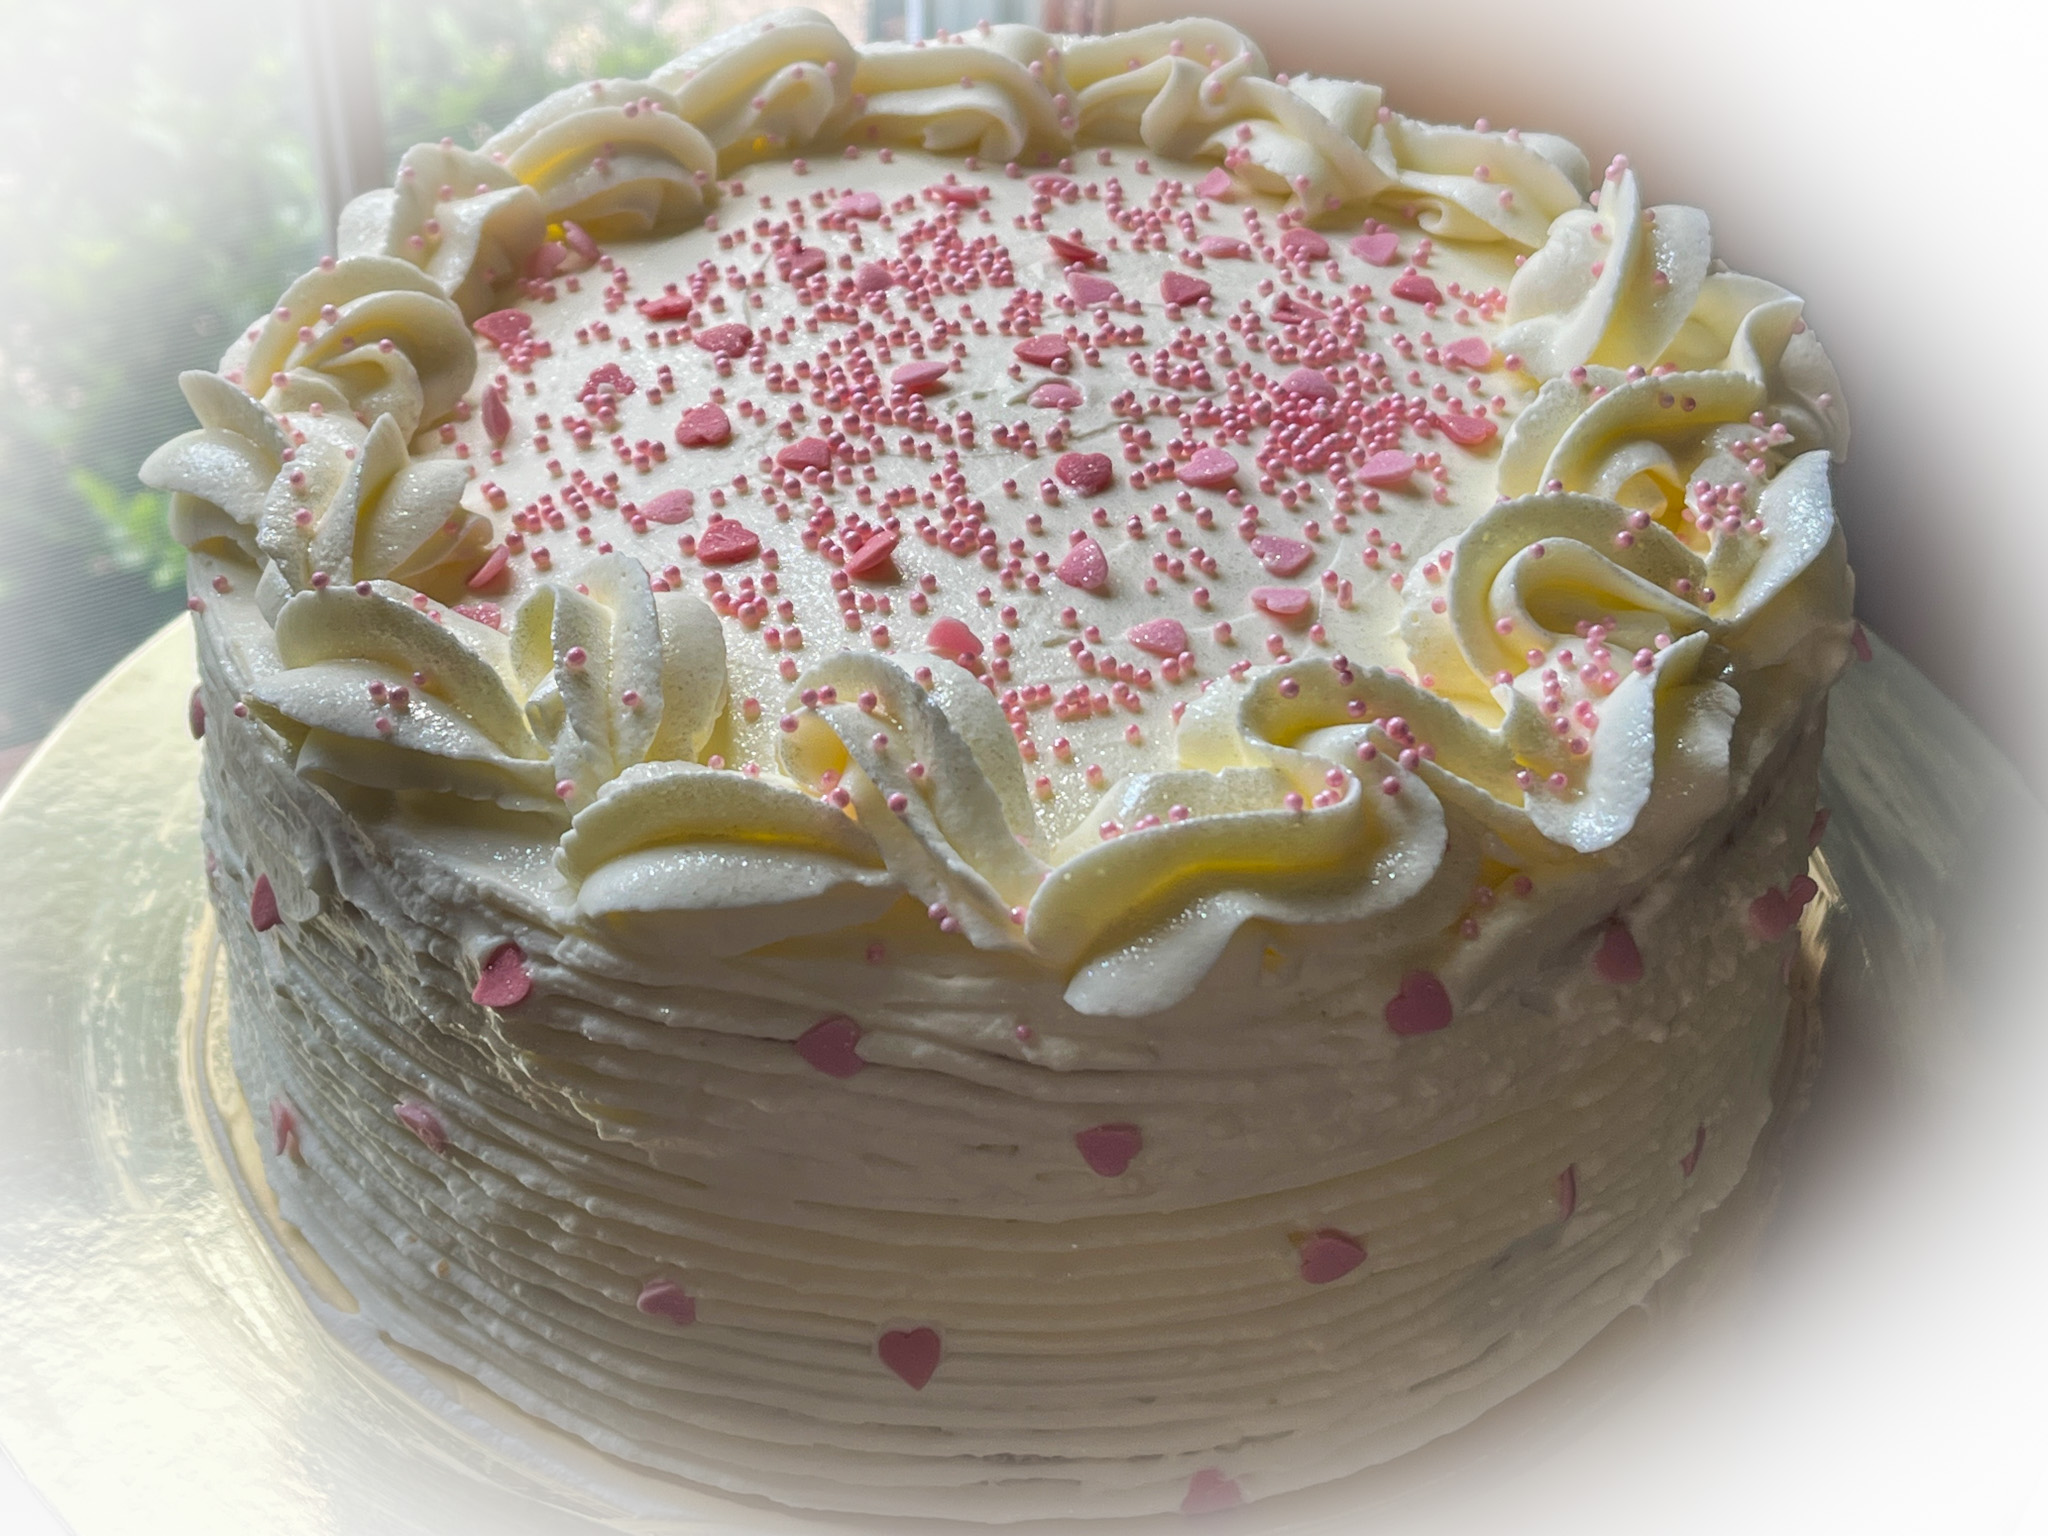
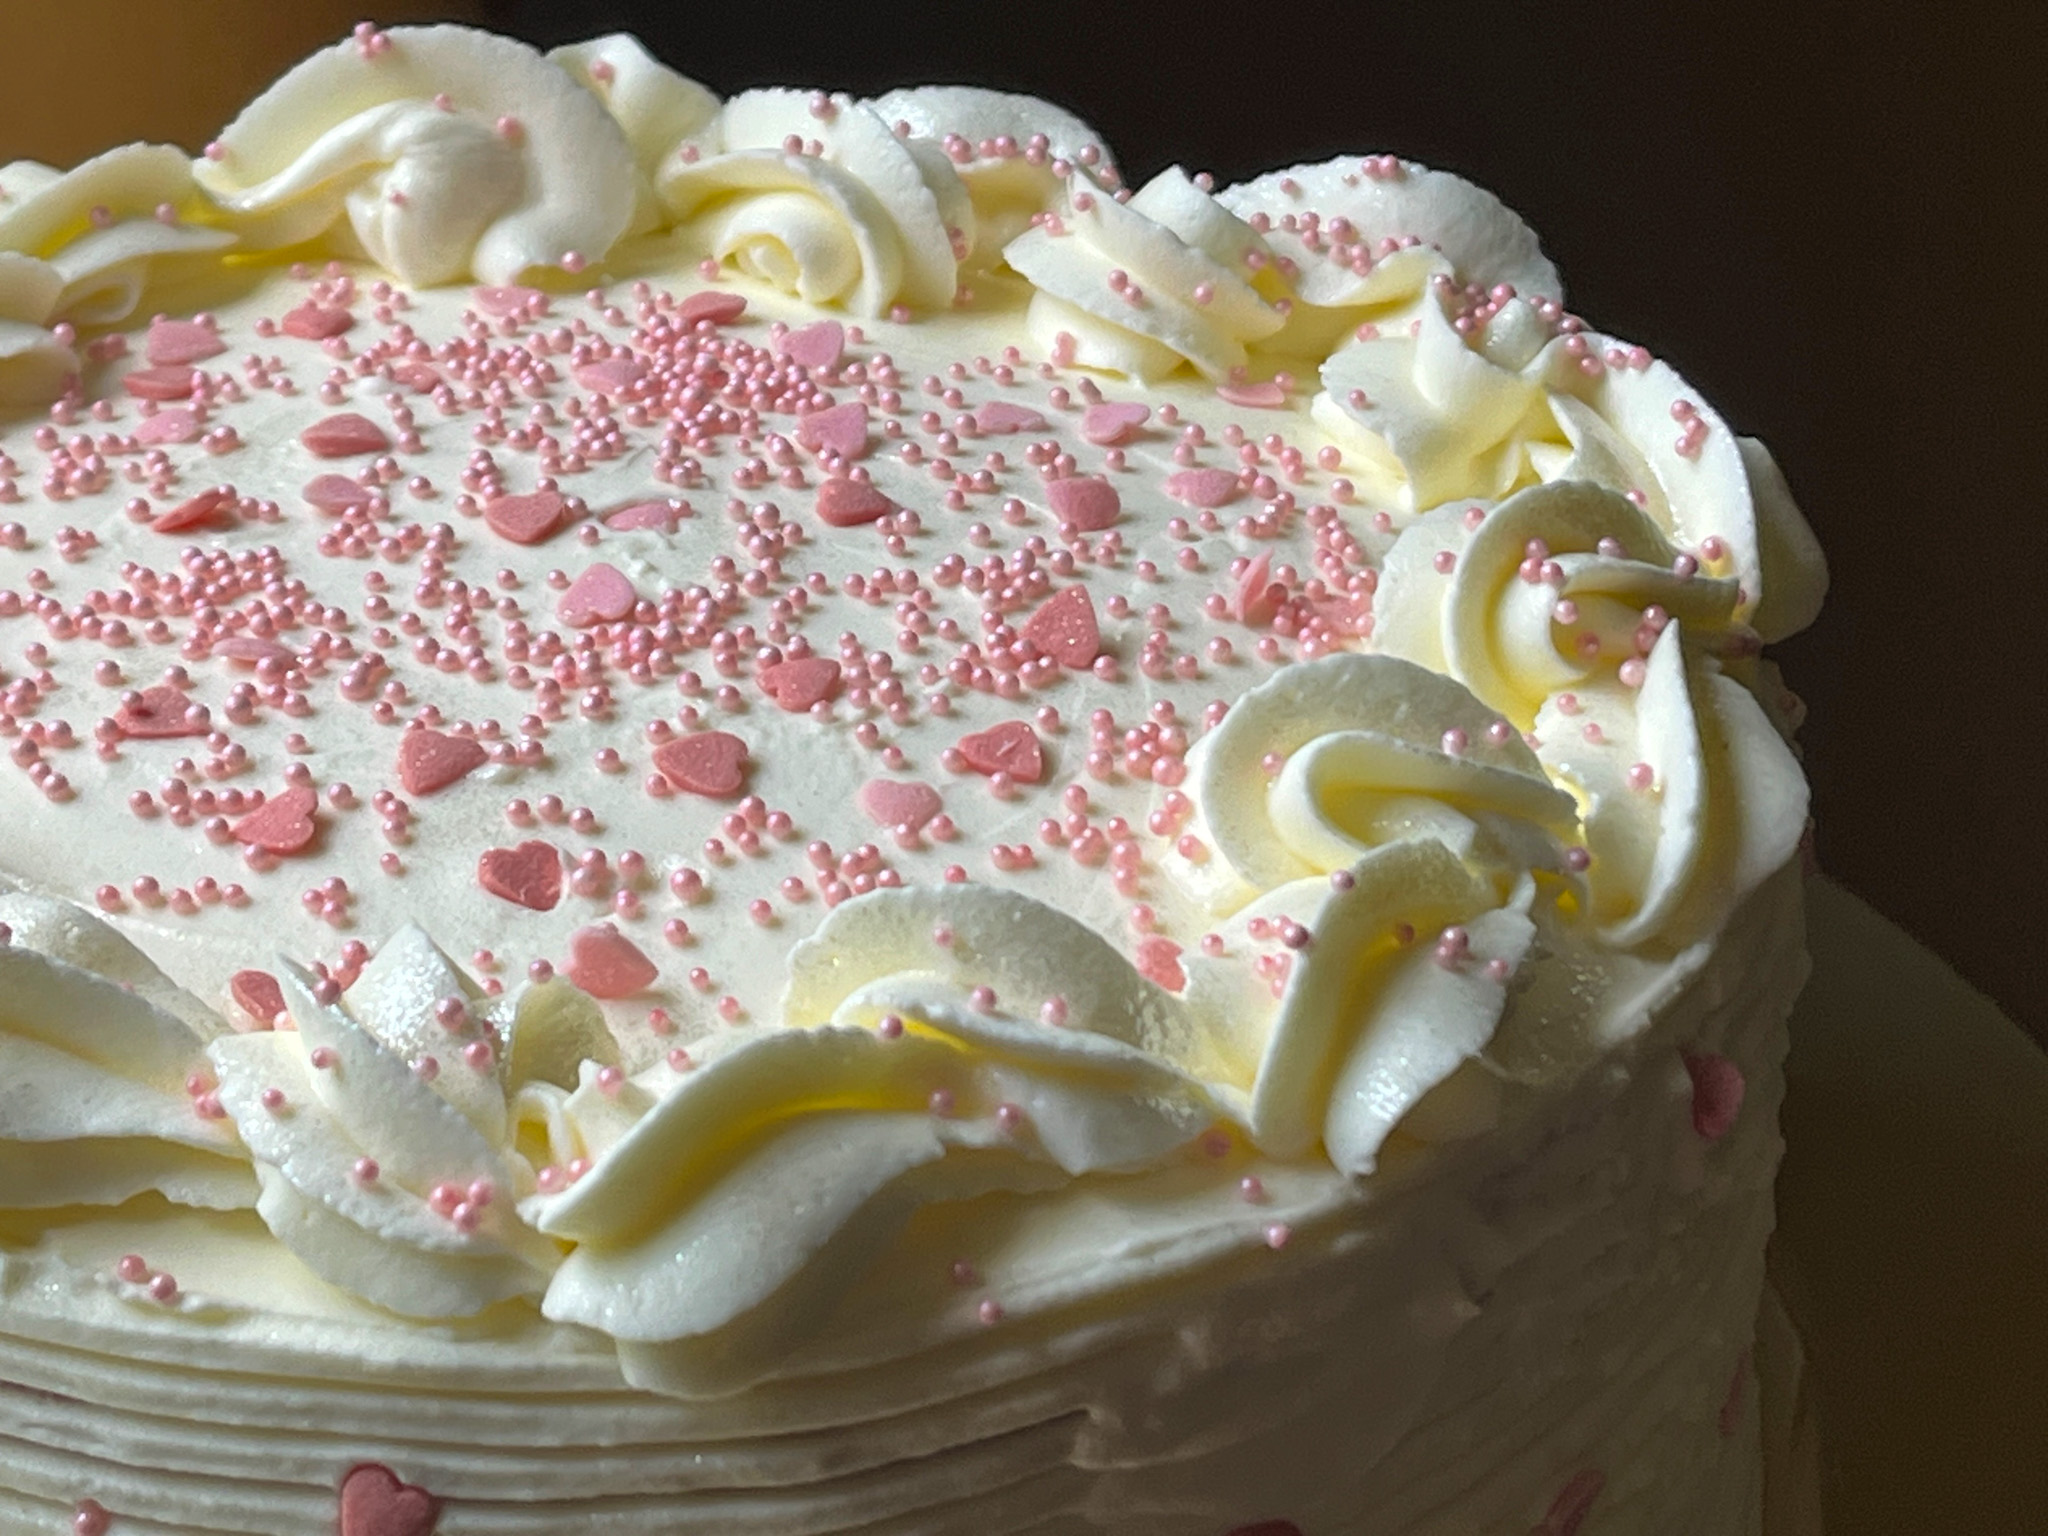
STRAWBERRY LAYER CAKE
This cake was described by Helen as “a little slice of heaven”, and judging by the feedback I got, it is highly appropriate. For the full recipe with step-by-step photos and detailed explanations, visit her blog with a click here.
My only modification was in the technique, not the recipe. I used the food processor to make the whipped cream, as I was very intrigued about it and have been meaning to try it for the longest time. Basically, add the ingredients (exact amounts Helen used) to the bowl of a food processor and process for a full minute. Stop, check consistency. You may need a few more cycles of processing, each one no more than 20 seconds long. For me, nice piping consistency was achieved with 1 min + 3 cycles of 15 sec. I really like the way it piped.
I got slightly carried away with the sprinkles, as the lid of the bottle malfunctioned on me. There are worse problems in life, so I went with the flow. Literally.
.
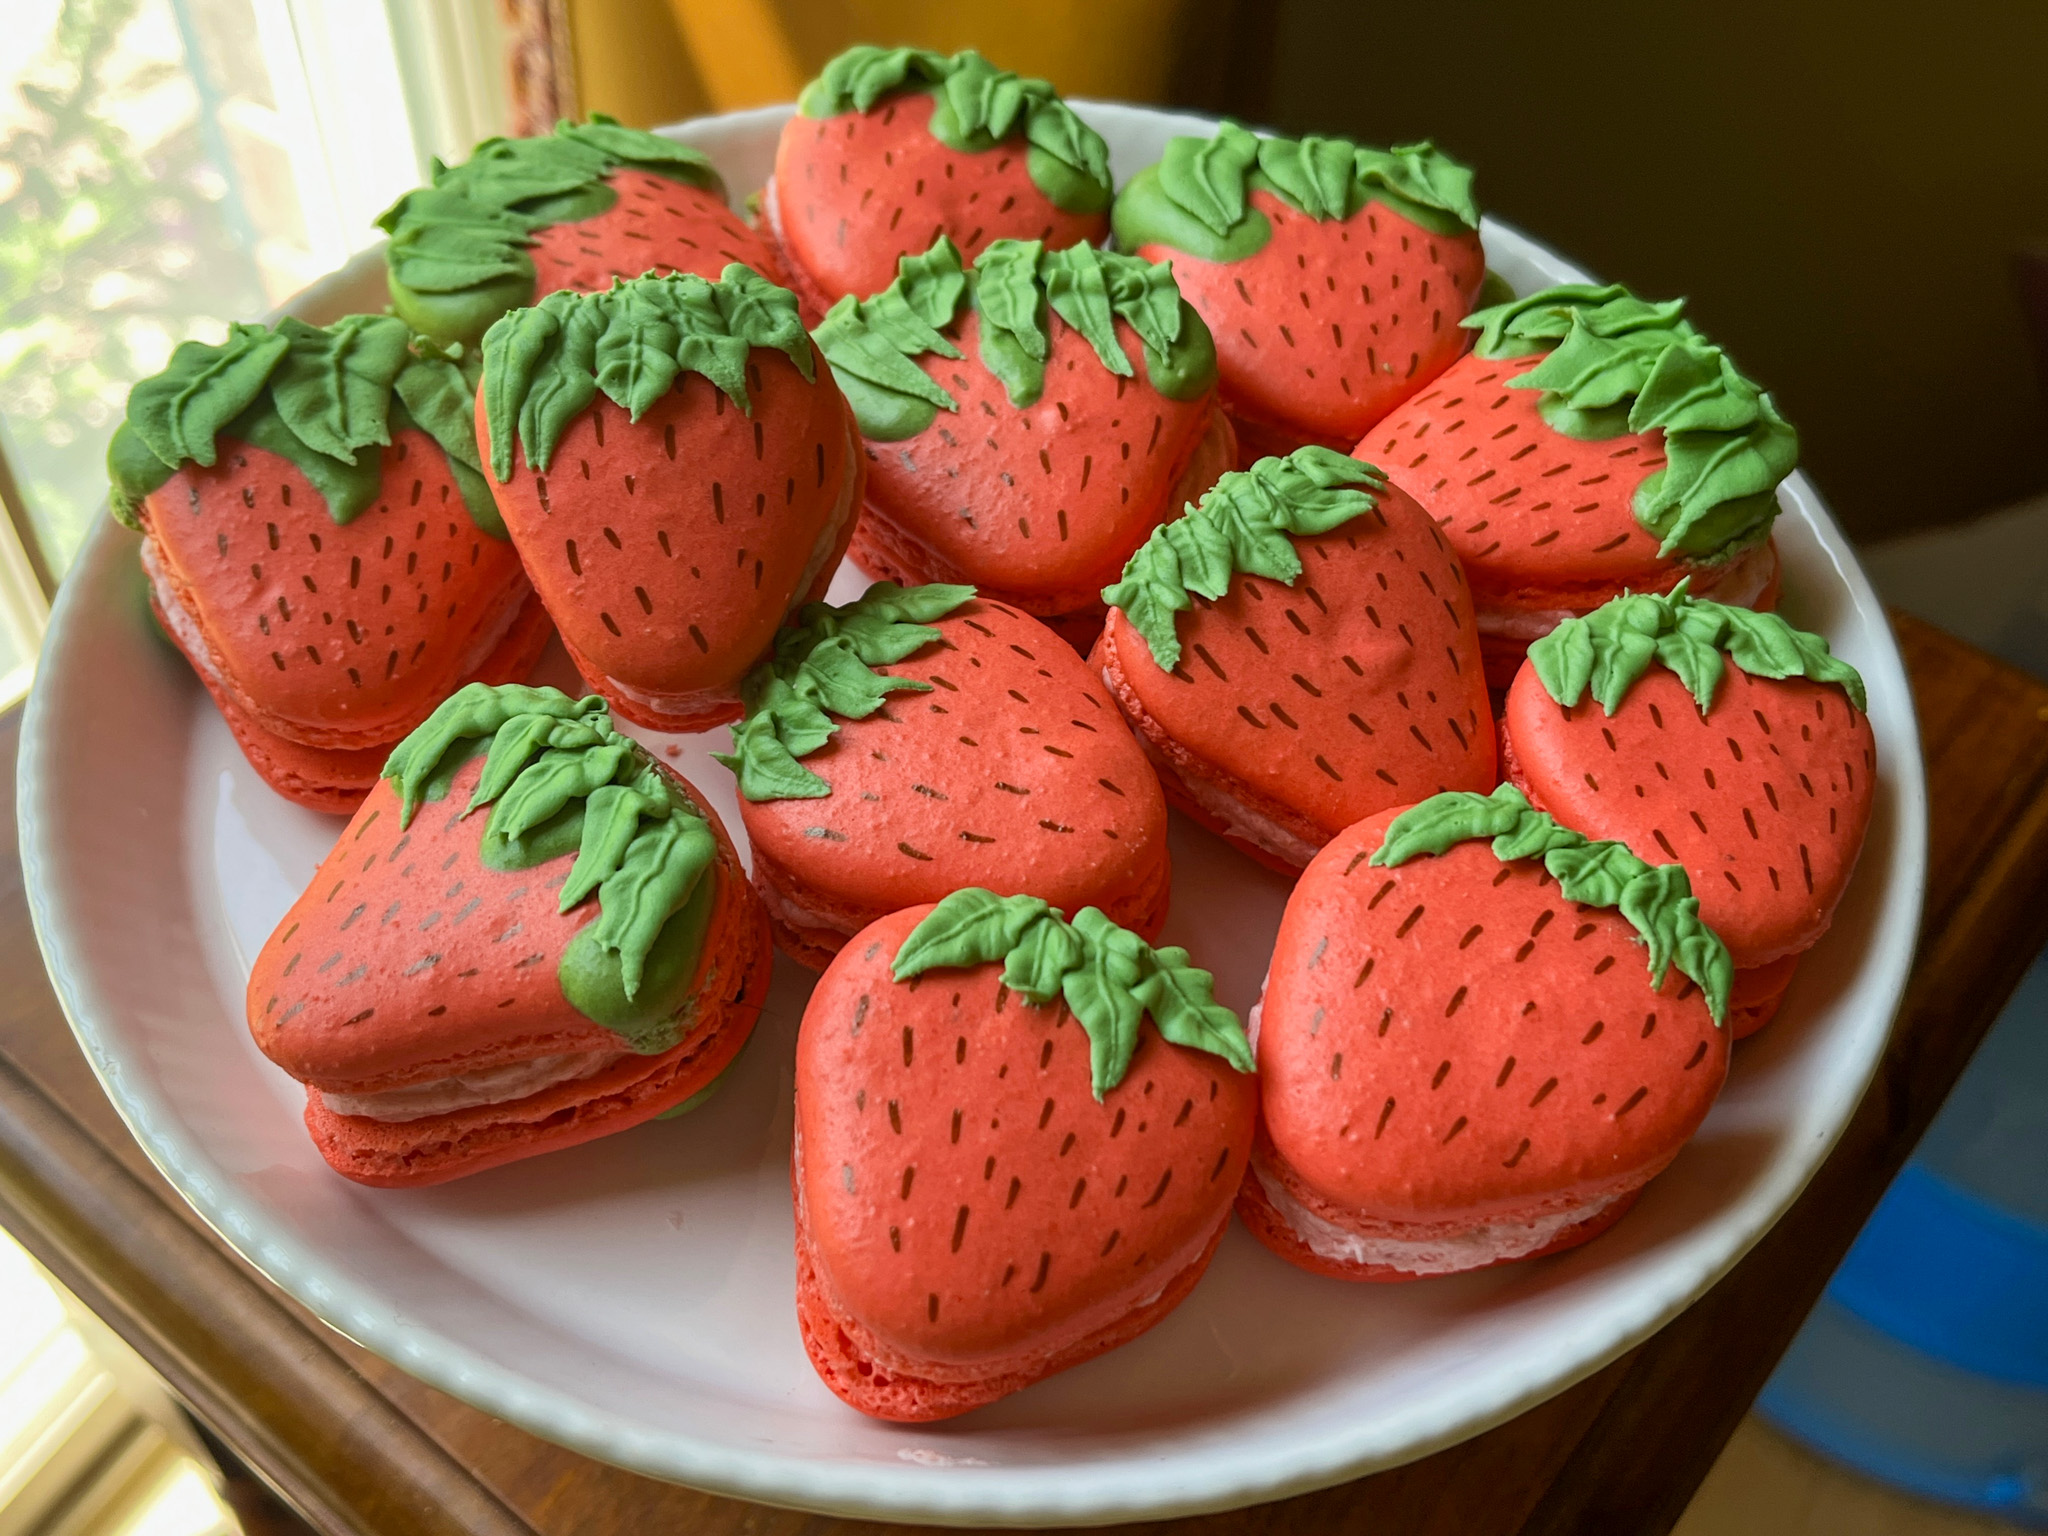
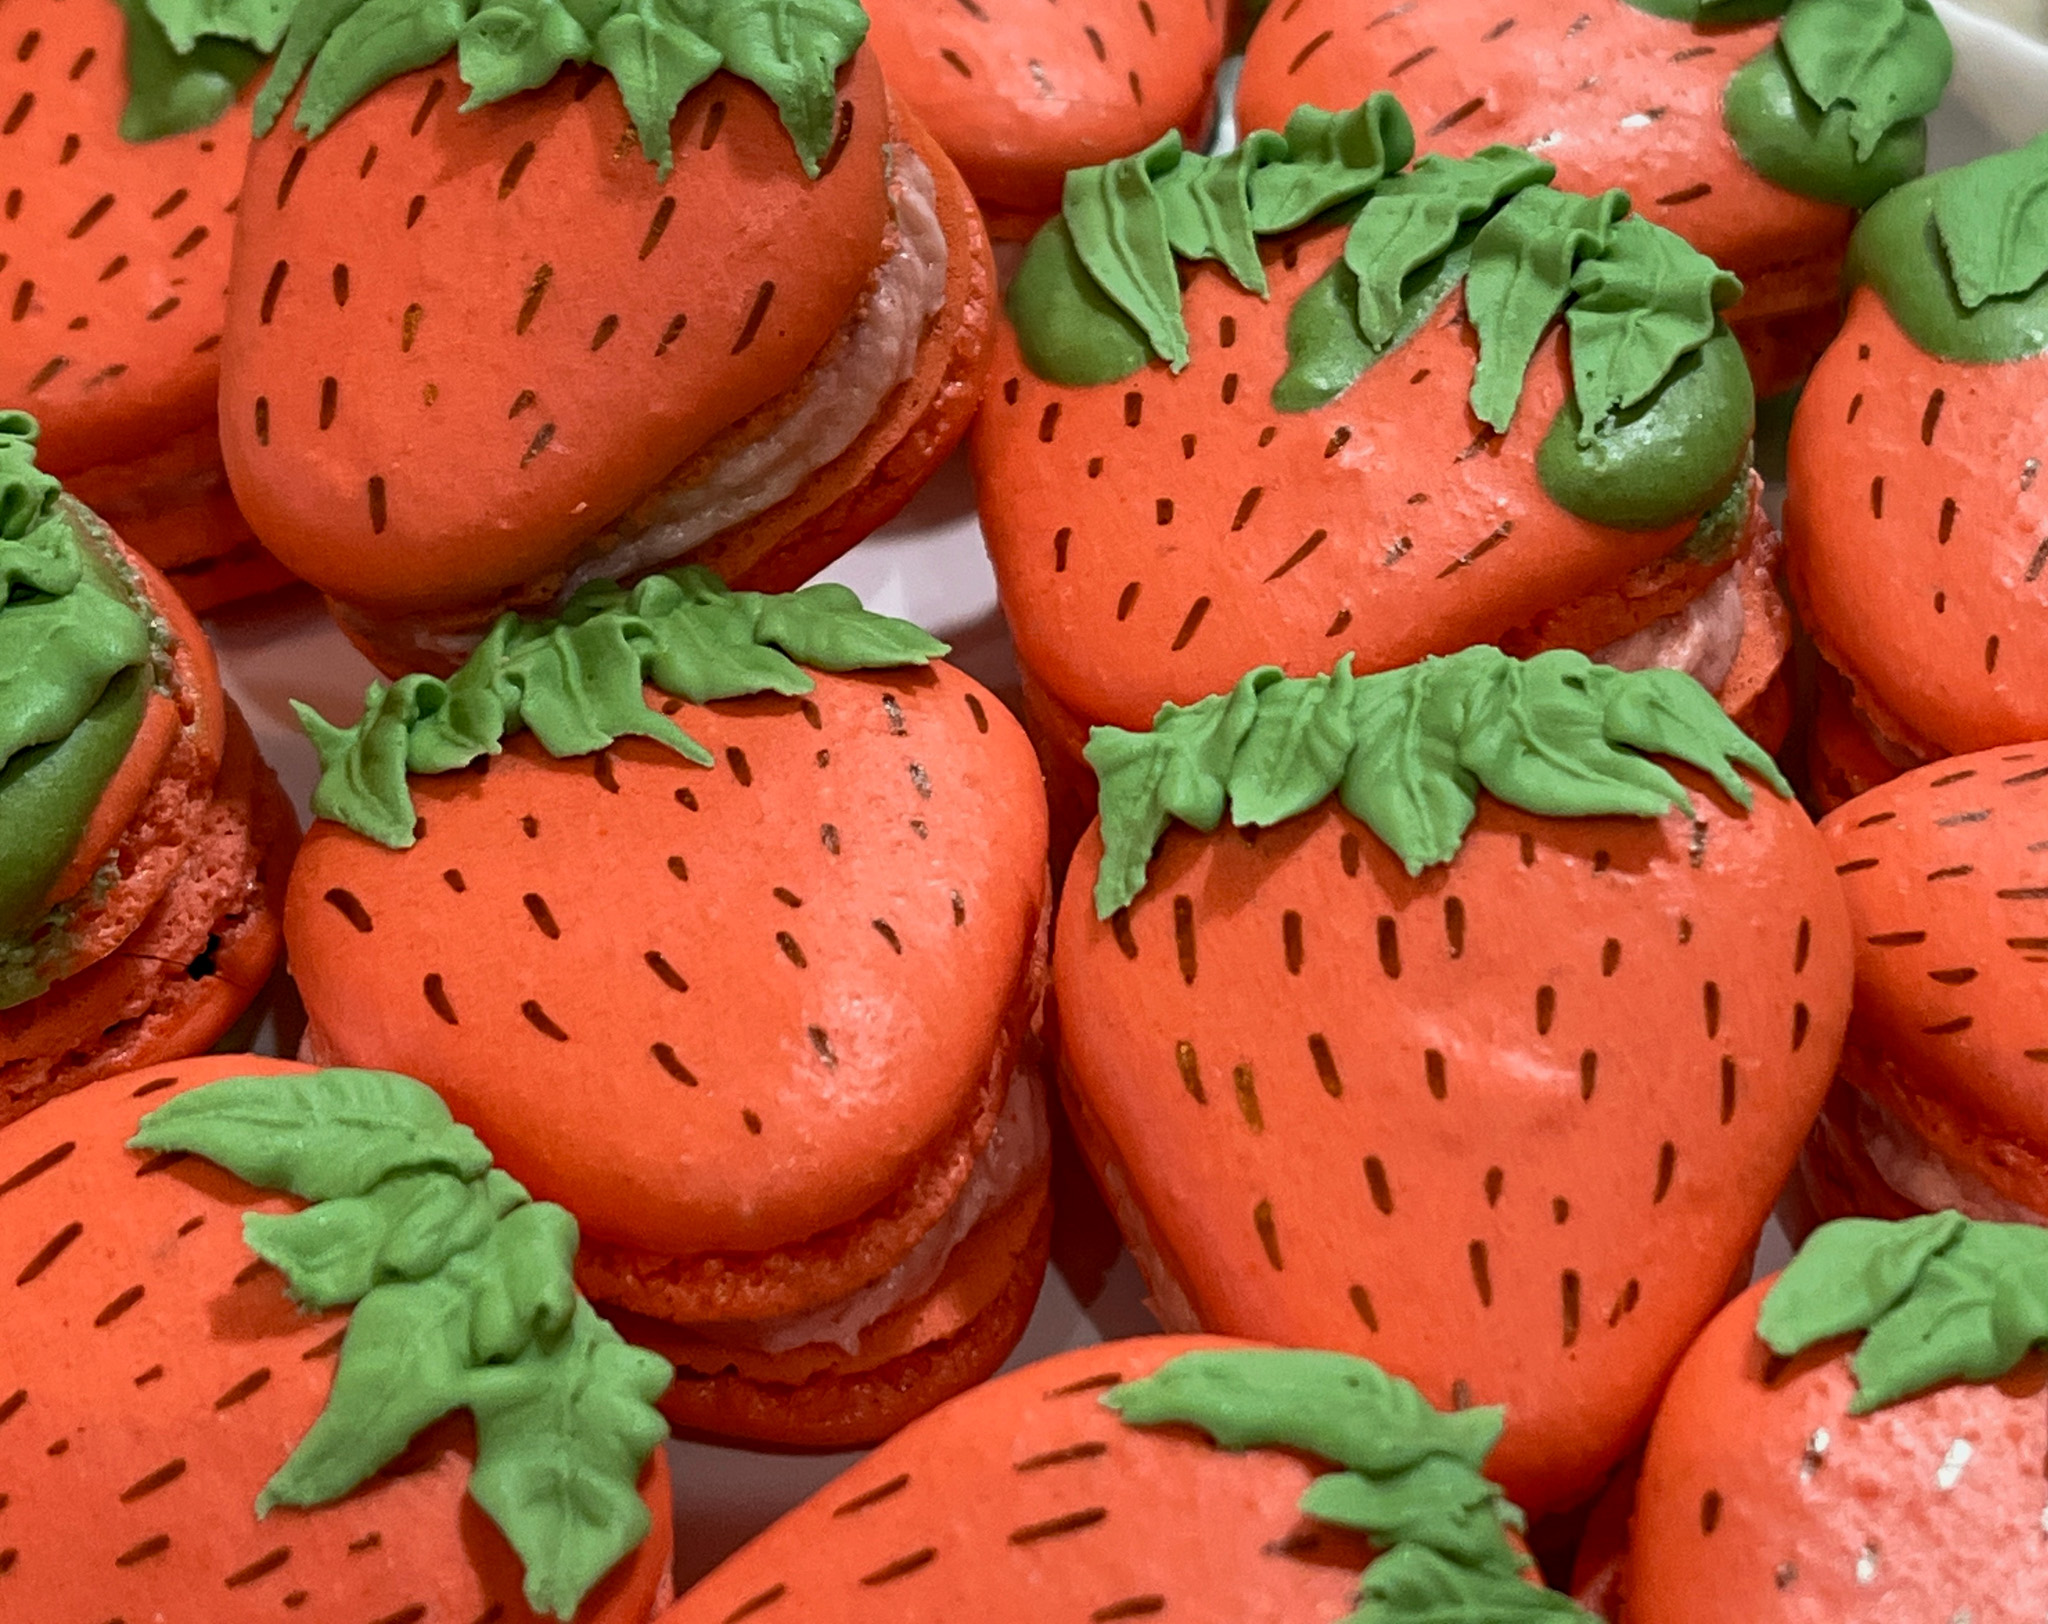
STRAWBERRY MACARONS
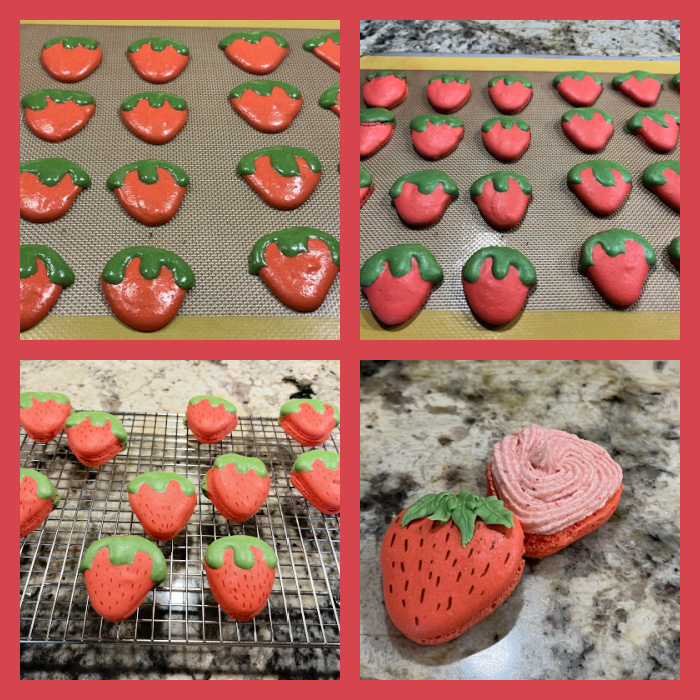
For the shells, I used my default recipe, separated in two portions, most of it dyed with a mixture red and orange, a small amount dyed green. I piped the shells improvising a strawberry shape, waited five minutes and piped the leaf area with green. The filling was exactly the same buttercream from Helen’s cake, using freeze-dried strawberries. I made half the amount listed in the cake (so I started with 1/4 cup butter and scaled it all down).
“Seeds” were added with a brown food pen. However, I was not too happy with the look of the greenery on top. I skipped that for some shells and added Royal icing with a leaf tip after baking. I liked that a lot better, so I added the same detail to all shells.
Next time I won’t bother dividing the batter into portions. Will simply pipe all shells with strawberry color, and use Royal icing for the tops.
I hope you liked this duet of strawberry recipes, and in case you’ve missed it, check out my most involved baking project ever, which also centered on this wonderful fruit.
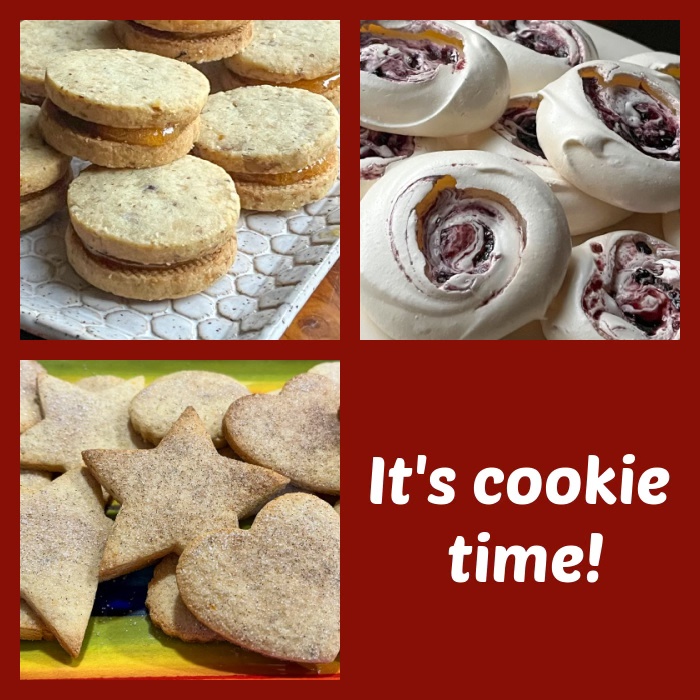
The holiday season is all about baking, so today I offer three ideas for cookies that may not be on your radar. I start with a recipe recently shared by the baking queen extraordinaire, Helen Fletcher.
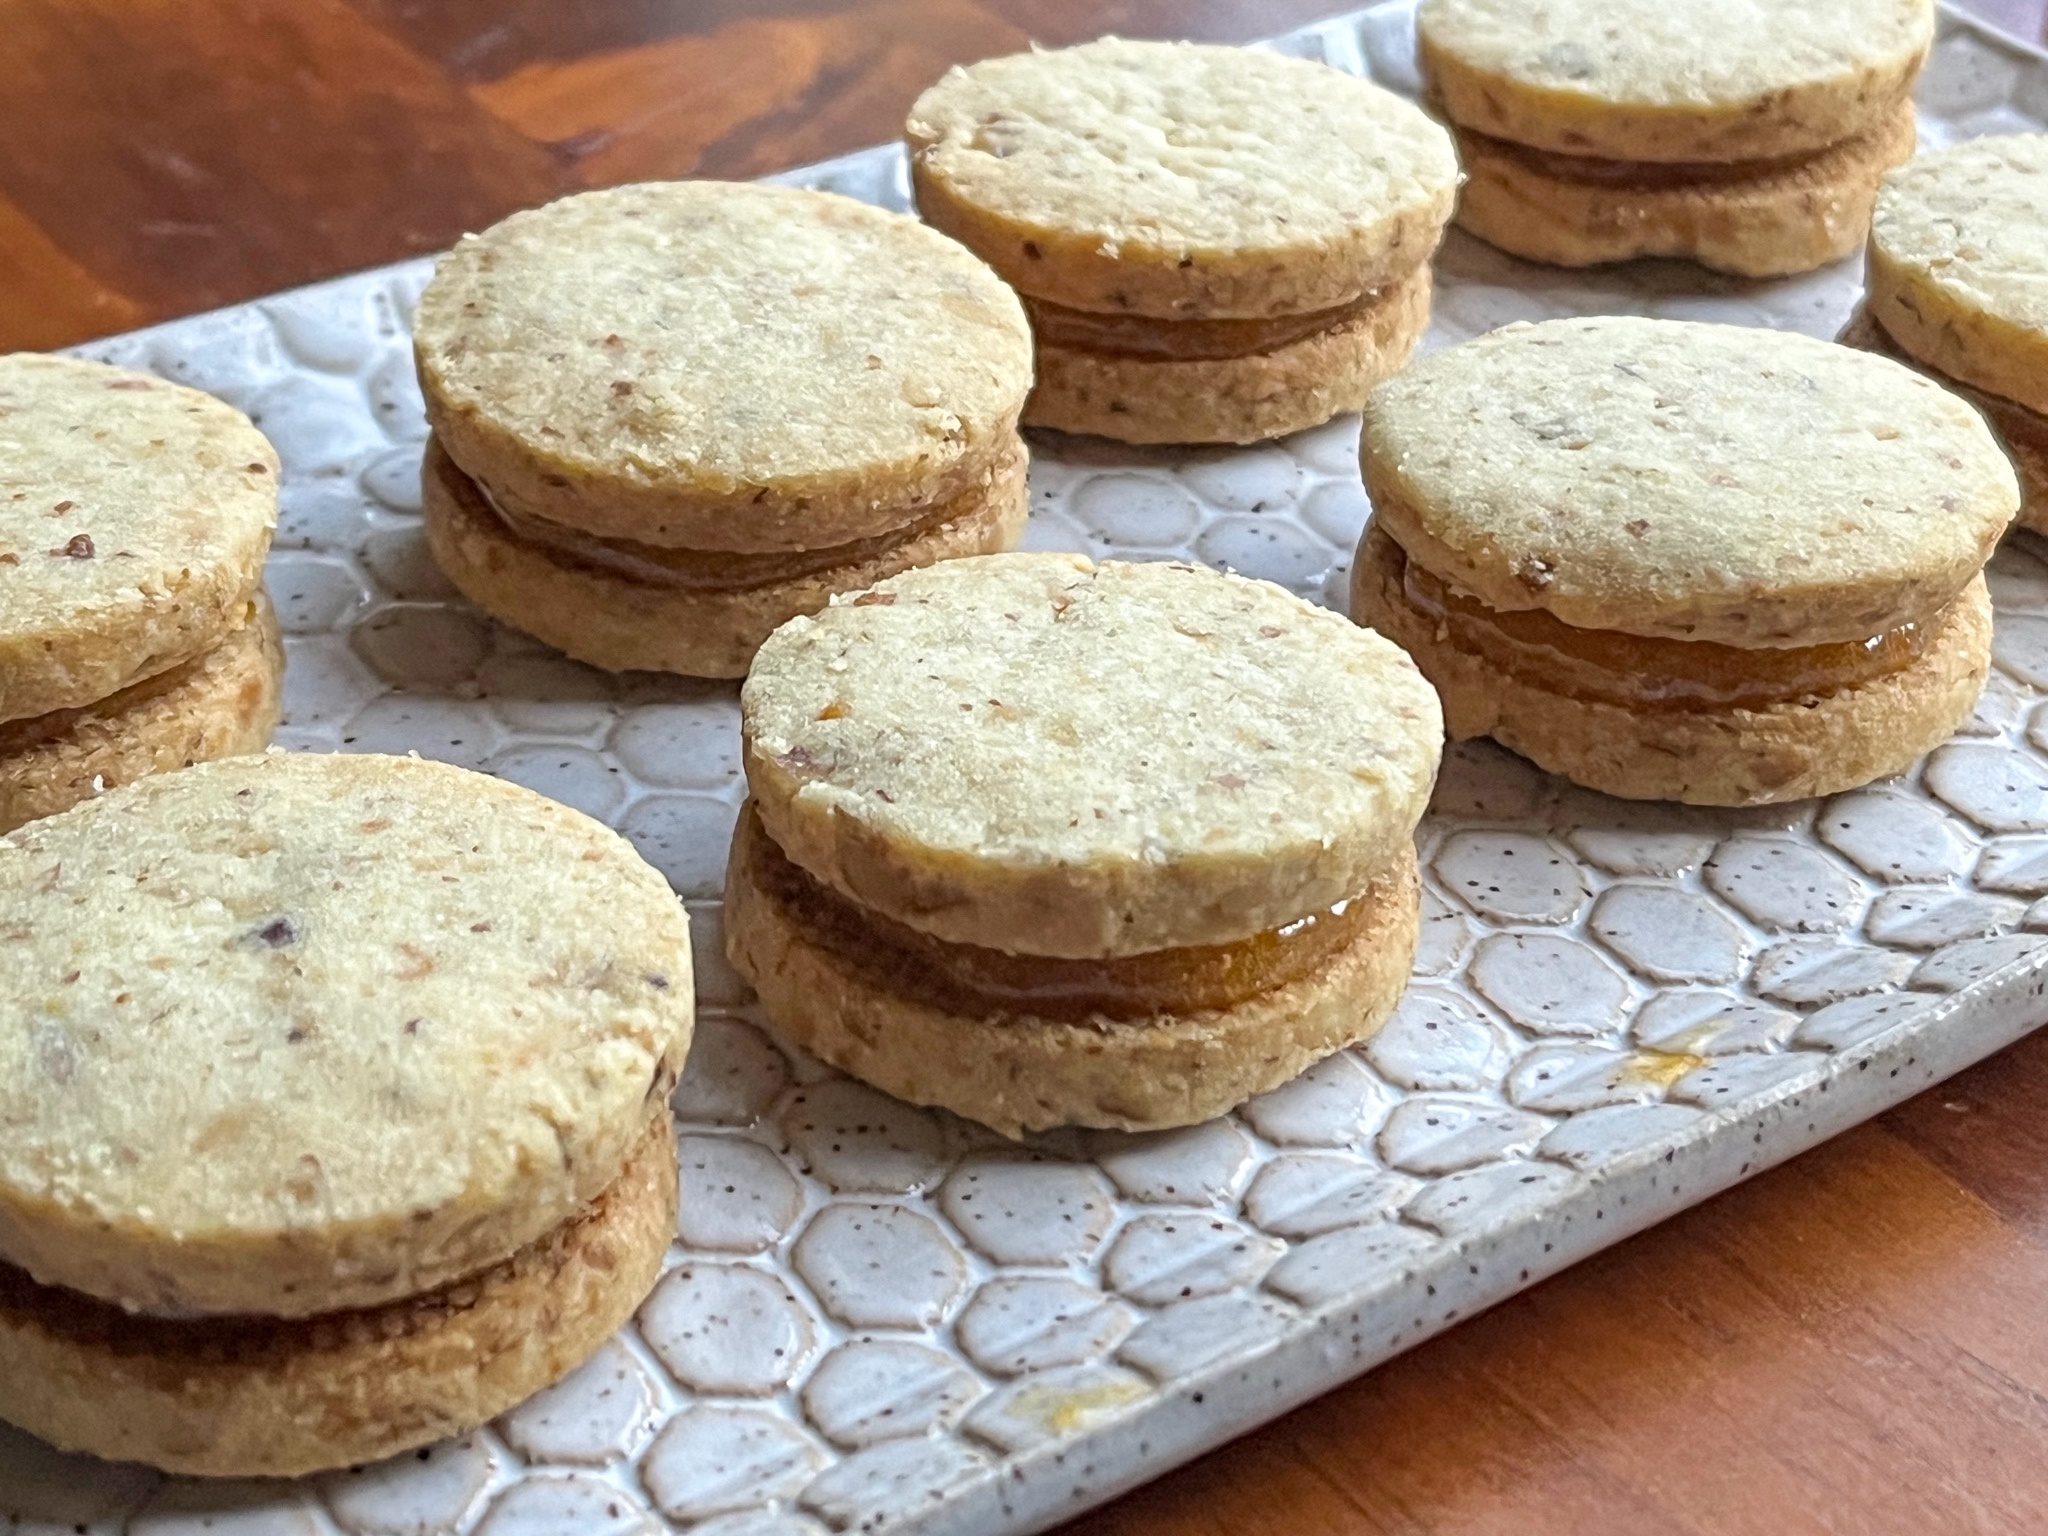
for the filling: ¾ cup apricot preserves 1 ½ teaspoon gelatin 1 tablespoon cider vinegar
for the cookies: 1 cup walnuts (114 grams) ½ cup unsalted butter, softened (114 grams) 1 cup + 1 T granulated sugar (75 grams) 1 large egg yolk 1 ½ teaspoons vanilla 1 ¼ cups all-purpose flour (175 grams) 2 cups powdered sugar (260 grams)
Make the filling, if you prefer, a few days in advance. Place the apricot preserves in the bowl of a processor. Process until smooth. Dissolve the gelatin in the vinegar in a very small bowl. Heat the preserves just to a simmer. Remove from the heat. Tear the gelatin into about 6 pieces and immediately add it to the hot preserves. Wait for a minute or two until you can see the gelatin has liquified. Stir it into the preserves. Transfer to a small container and refrigerate until needed.
Make the cookies: Heat the oven to 325°F. Line a couple of baking sheets with parchment paper and set aside. Place the walnuts on a rimmed baking sheet and toast for 7 to 10 minuts until fragrant and slightly browned. Cool completely. When cool, place the walnuts and flour in the bowl of a processor. Process until the nuts are finely ground and instinguishable. Set aside.
Place the butter and sugar in the bowl of a mixer. Beat until light. Add the egg yolk and vanilla and beat to combine. Add the flour mixture and beat on low just until completely incorporated. The dough should be good to roll out but if it is too soft, refrigerate briefly. Place the dough between two large pieces of waxed or parchment paper. Roll the dough to abut ¼” thick. With a 1 ½” round cutter, cut the cookies out, keeping them close together.
Remove the top piece of waxed paper and, keeping the cookies on the bottom pieces of paper, transfer the whole thing to a baking sheet. Freeze until rock hard. When frozen, punch them out and place them on a cookie sheet. Bake for 15 to 17 minutes from the frozen state until lightly browned and firm. Cool completely.
Assemble the cookies: Stir the filling vigorously to smooth it out. Turn half the cookies upside down and fill with about ¾ teaspoon apricot filling. Place the tops on the cookies. Allow the filled cookie to set up on a rack overnight to tighten the filling. Store in an airtight container for a week or 10 days.
Comments: These cookies are so delicious that they can stand on their own without the filling: nutty, great texture, not too sweet. I advise you to stop by Helen’s site so you can see all the detailed pictures and step by step instructions. I love the way she adds gelatin to a store-bough concoction to make it perfectly set in the sandwich cookie. I don’t like fillings that ooze out when you hold or bite into the cookie. She definitely knows all the great tricks in the baking world… I omitted the showering with powdered sugar, as they are easier to box and share without the sugar coating. Excellent cookies, make sure to give this recipe a try. As I’ve said many times over the years, you cannot go wrong baking with Helen!
.
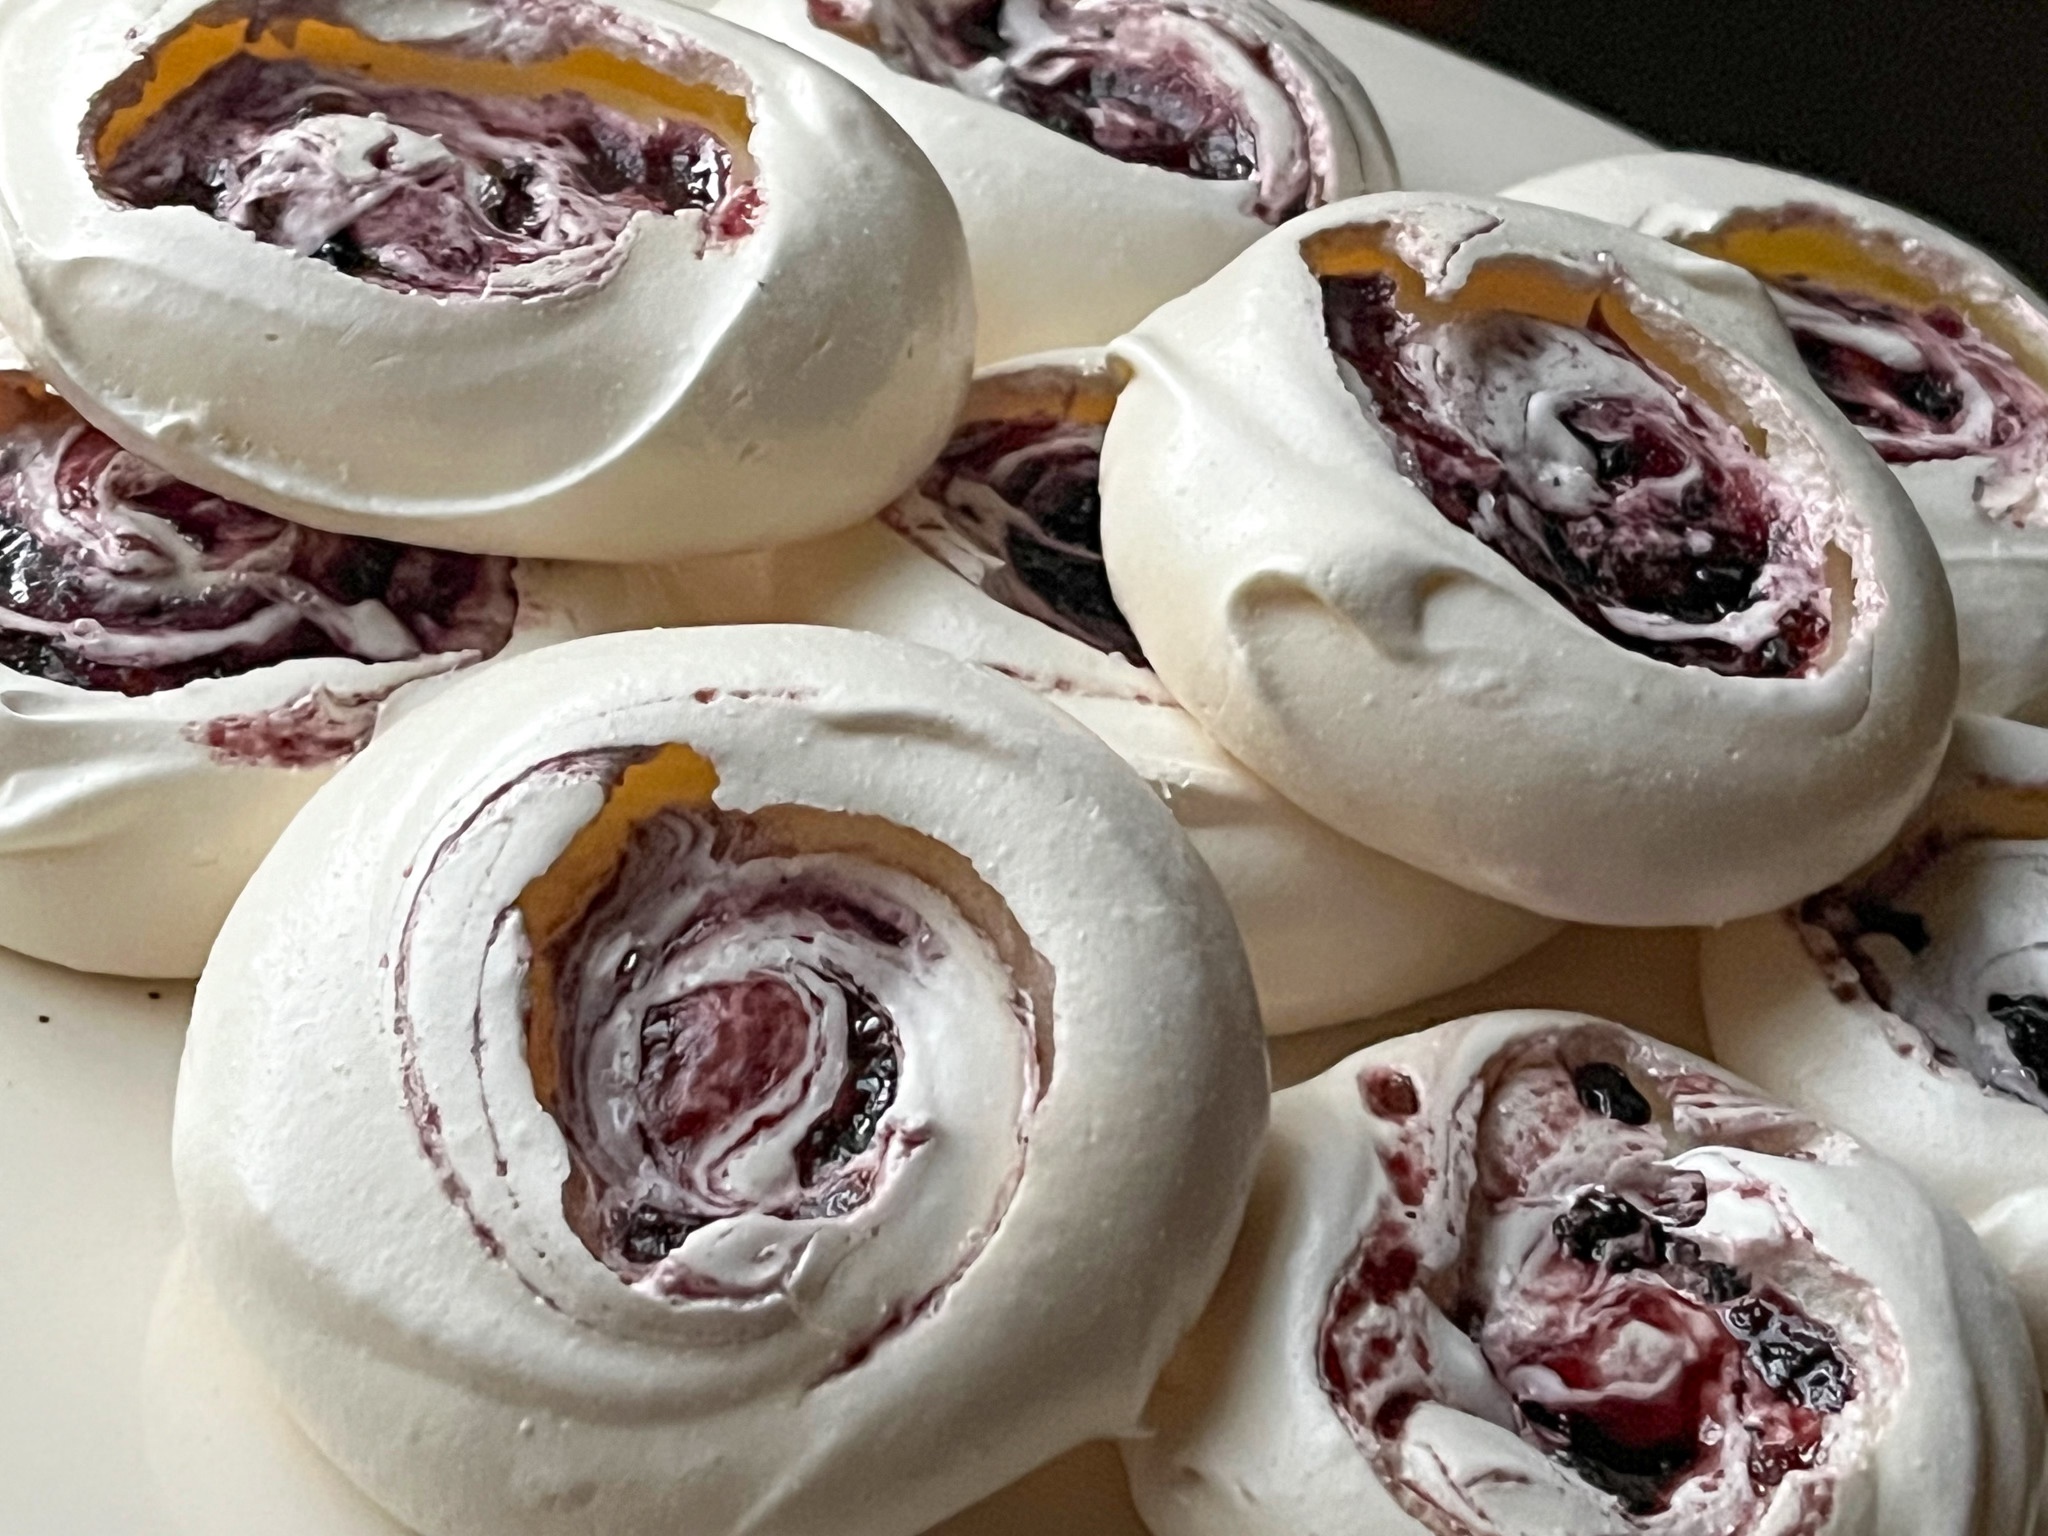
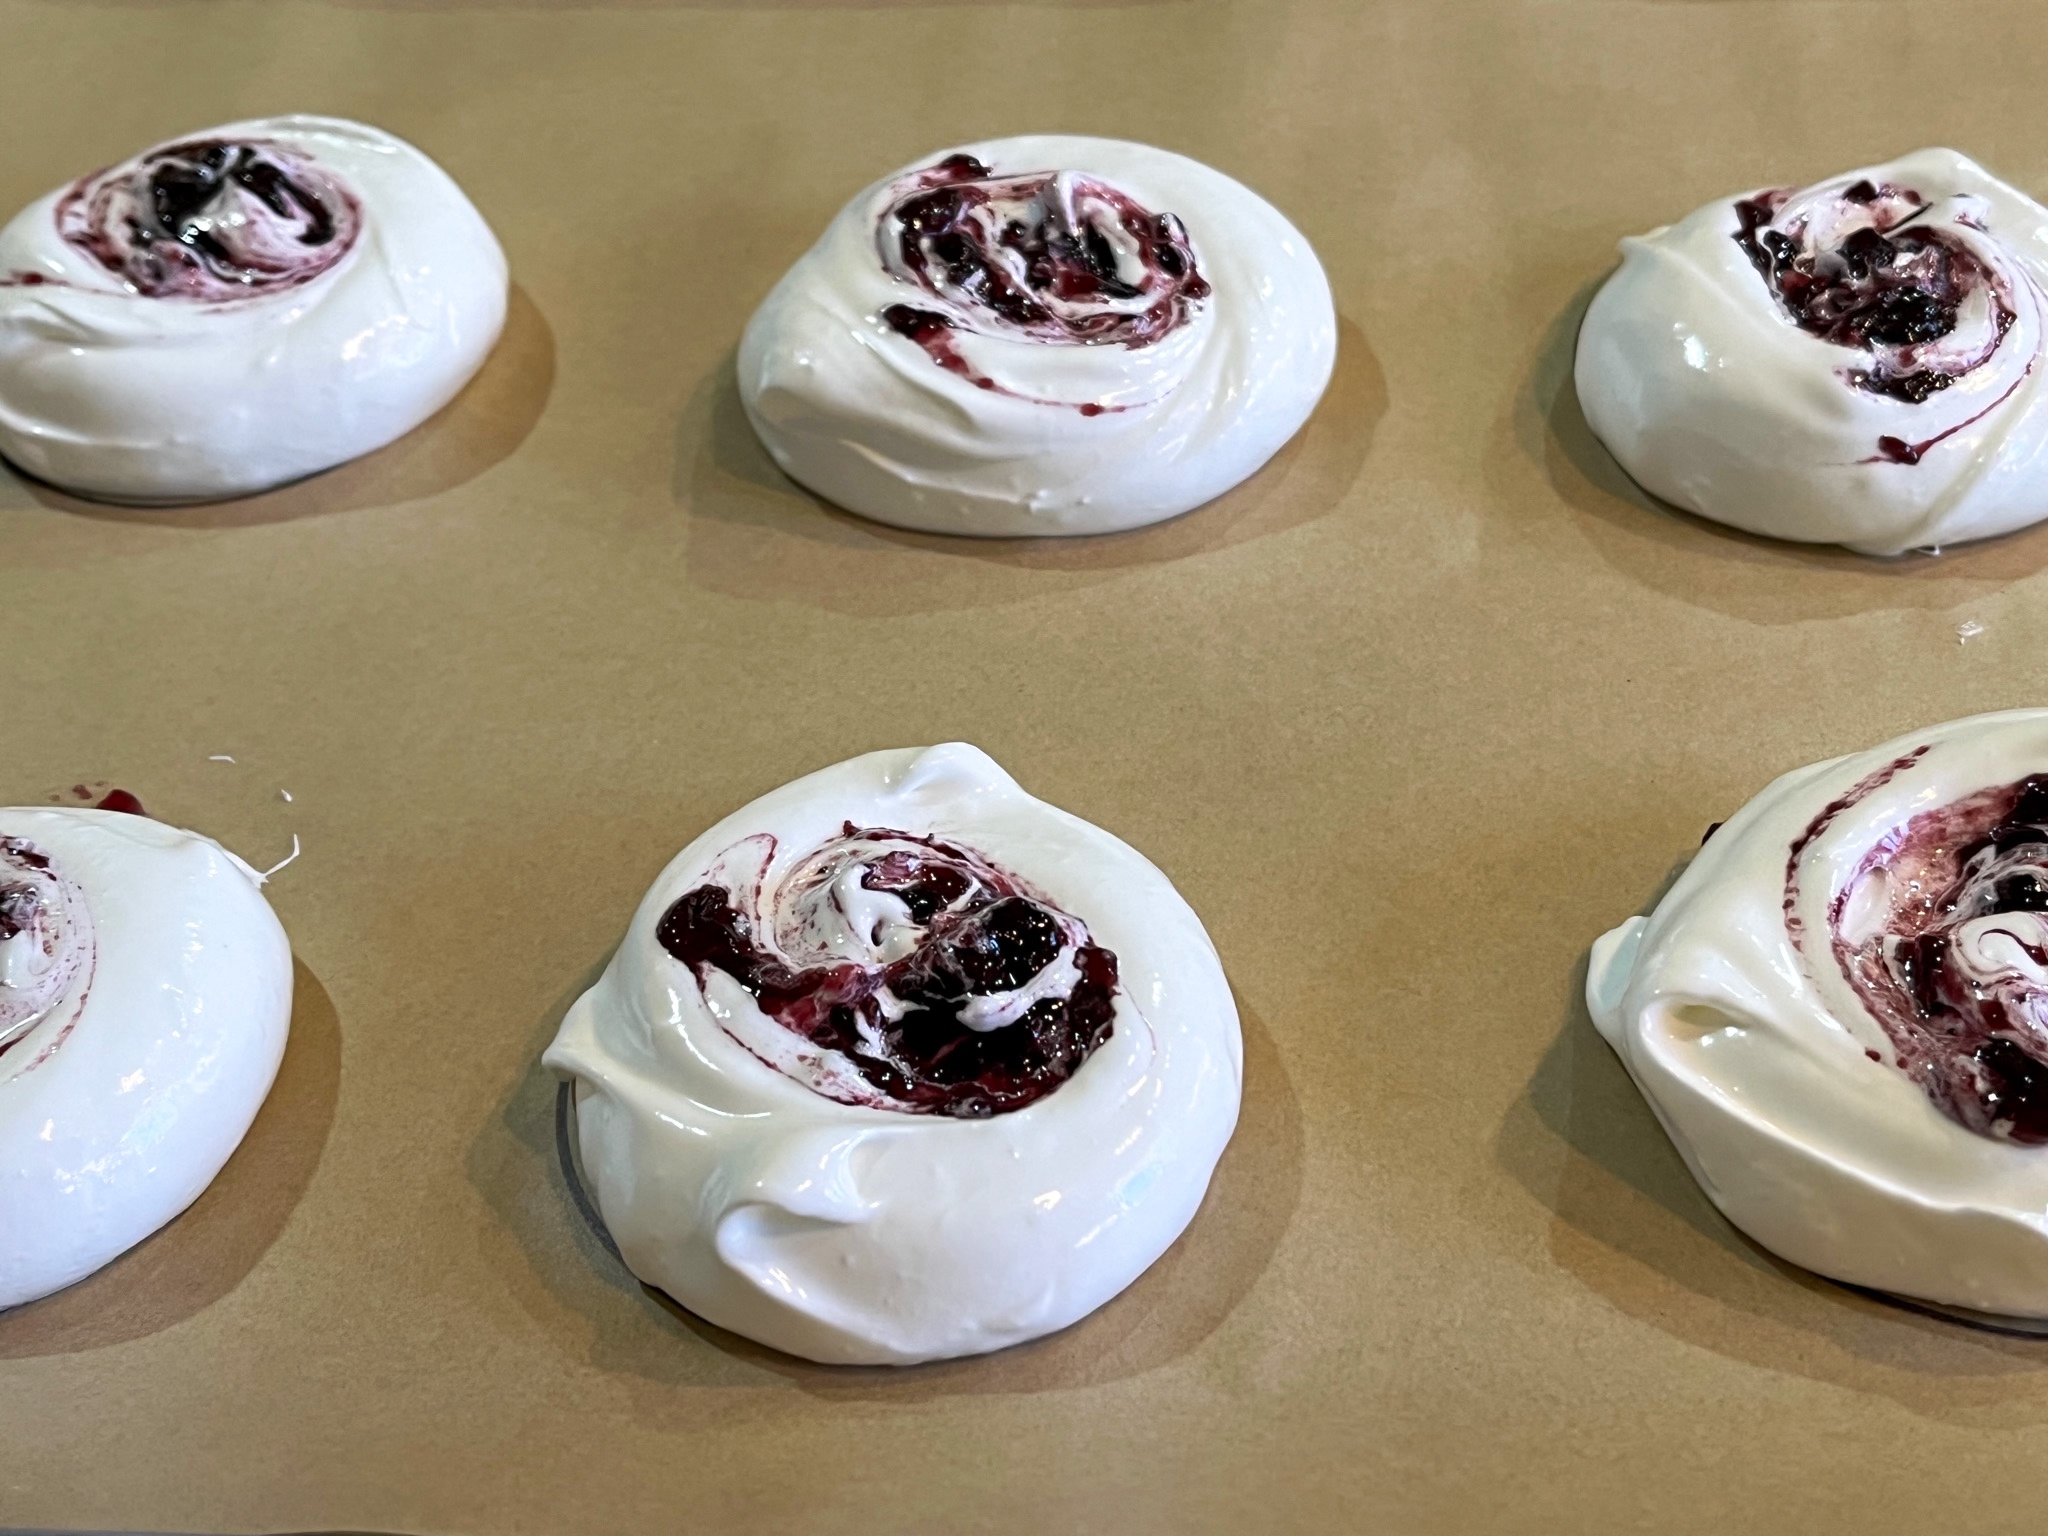
BLUEBERRY SWIRL MERINGUE COOKIES
BLUEBERRY SWIRL MERINGUE COOKIES (from The Bewitching Kitchen)
120g egg whites 1/4 tsp cream of tartar pinch of salt 200 g sugar (about 1 cup) 2 tsp cornstarch 1 tsp vanilla paste blueberry jam, about 1 cup
Heat oven to 200°F and line two baking sheets with parchment paper. Combine the egg whites, cream of tartar, and salt in the bowl of a stand mixer fitted with the whisk attachment. Whisk on low to combine, then turn the speed up to medium and whip until frothy. With the mixer is still running, add the sugar in small increments. Once all the sugar has been added, turn the speed up to high and whip until the meringue is glossy, thick, and holds stiff peaks, about 3 minutes.
Sprinkle the cornstarch and vanilla on top and fold gently to combine. Divide the meringue into 12 equal rounds, using a cookie or ice cream scoop or two spoons. Spoon a small amount of blueberry jam on top of the meringue and use a chopstick to gently swirl it. Bake the meringues for 2 hours, then turn the oven off and allow the meringues to cool gradually inside the oven for another hour. Store leftover meringues in an airtight container at room temperature for up to 3 days.
Comments: These are pretty amazing, and you can add different jams and I imagine it would work well with Nutella also! Make them big, I think they turn out better this way.
½ cup (113 grams) unsalted butter, at room temperature ¾ cup (150 grams) sugar 1 tablespoon anise seeds 1 large egg 1 tablespoon grated orange zest 2 teaspoons vanilla paste or vanilla extract 2 cups (260 grams) all-purpose flour 1 cup (116 grams) yellow masa or finely ground yellow cornmeal 1½ teaspoons baking powder ½ teaspoon coarse kosher salt 2 tablespoons rum or brandy (optional)
FOR THE TOPPING: ½ cup (100 grams) sugar 1 teaspoon ground cinnamon Small pinch of coarse kosher salt (such as Morton)
Prepare the dough: In the bowl of a stand mixer with the paddle attachment beat softened butter with sugar on medium-high until well combined, about 2 minutes. While butter is creaming, toast the anise seeds in a small skillet on medium heat for 30 to 35 seconds until fragrant, just to open up the flavor. Transfer to a mortar and pestle, or crush under a heavy pan, and grind to medium fine.
Add the egg, toasted anise seed, orange zest and vanilla to the butter mixture and beat for 2 to 3 more minutes, scraping the sides, until well combined. In a separate bowl, combine the flour, masa, baking powder and salt.
In two additions, with the mixer on low speed, add the dry ingredients to the butter mixture, scraping down the sides of the bowl each time. Increase speed to medium-high and beat until well combined but crumbly. Add rum or brandy, if using, and beat for another 30 seconds to 1 minute, until the dough comes fully together.
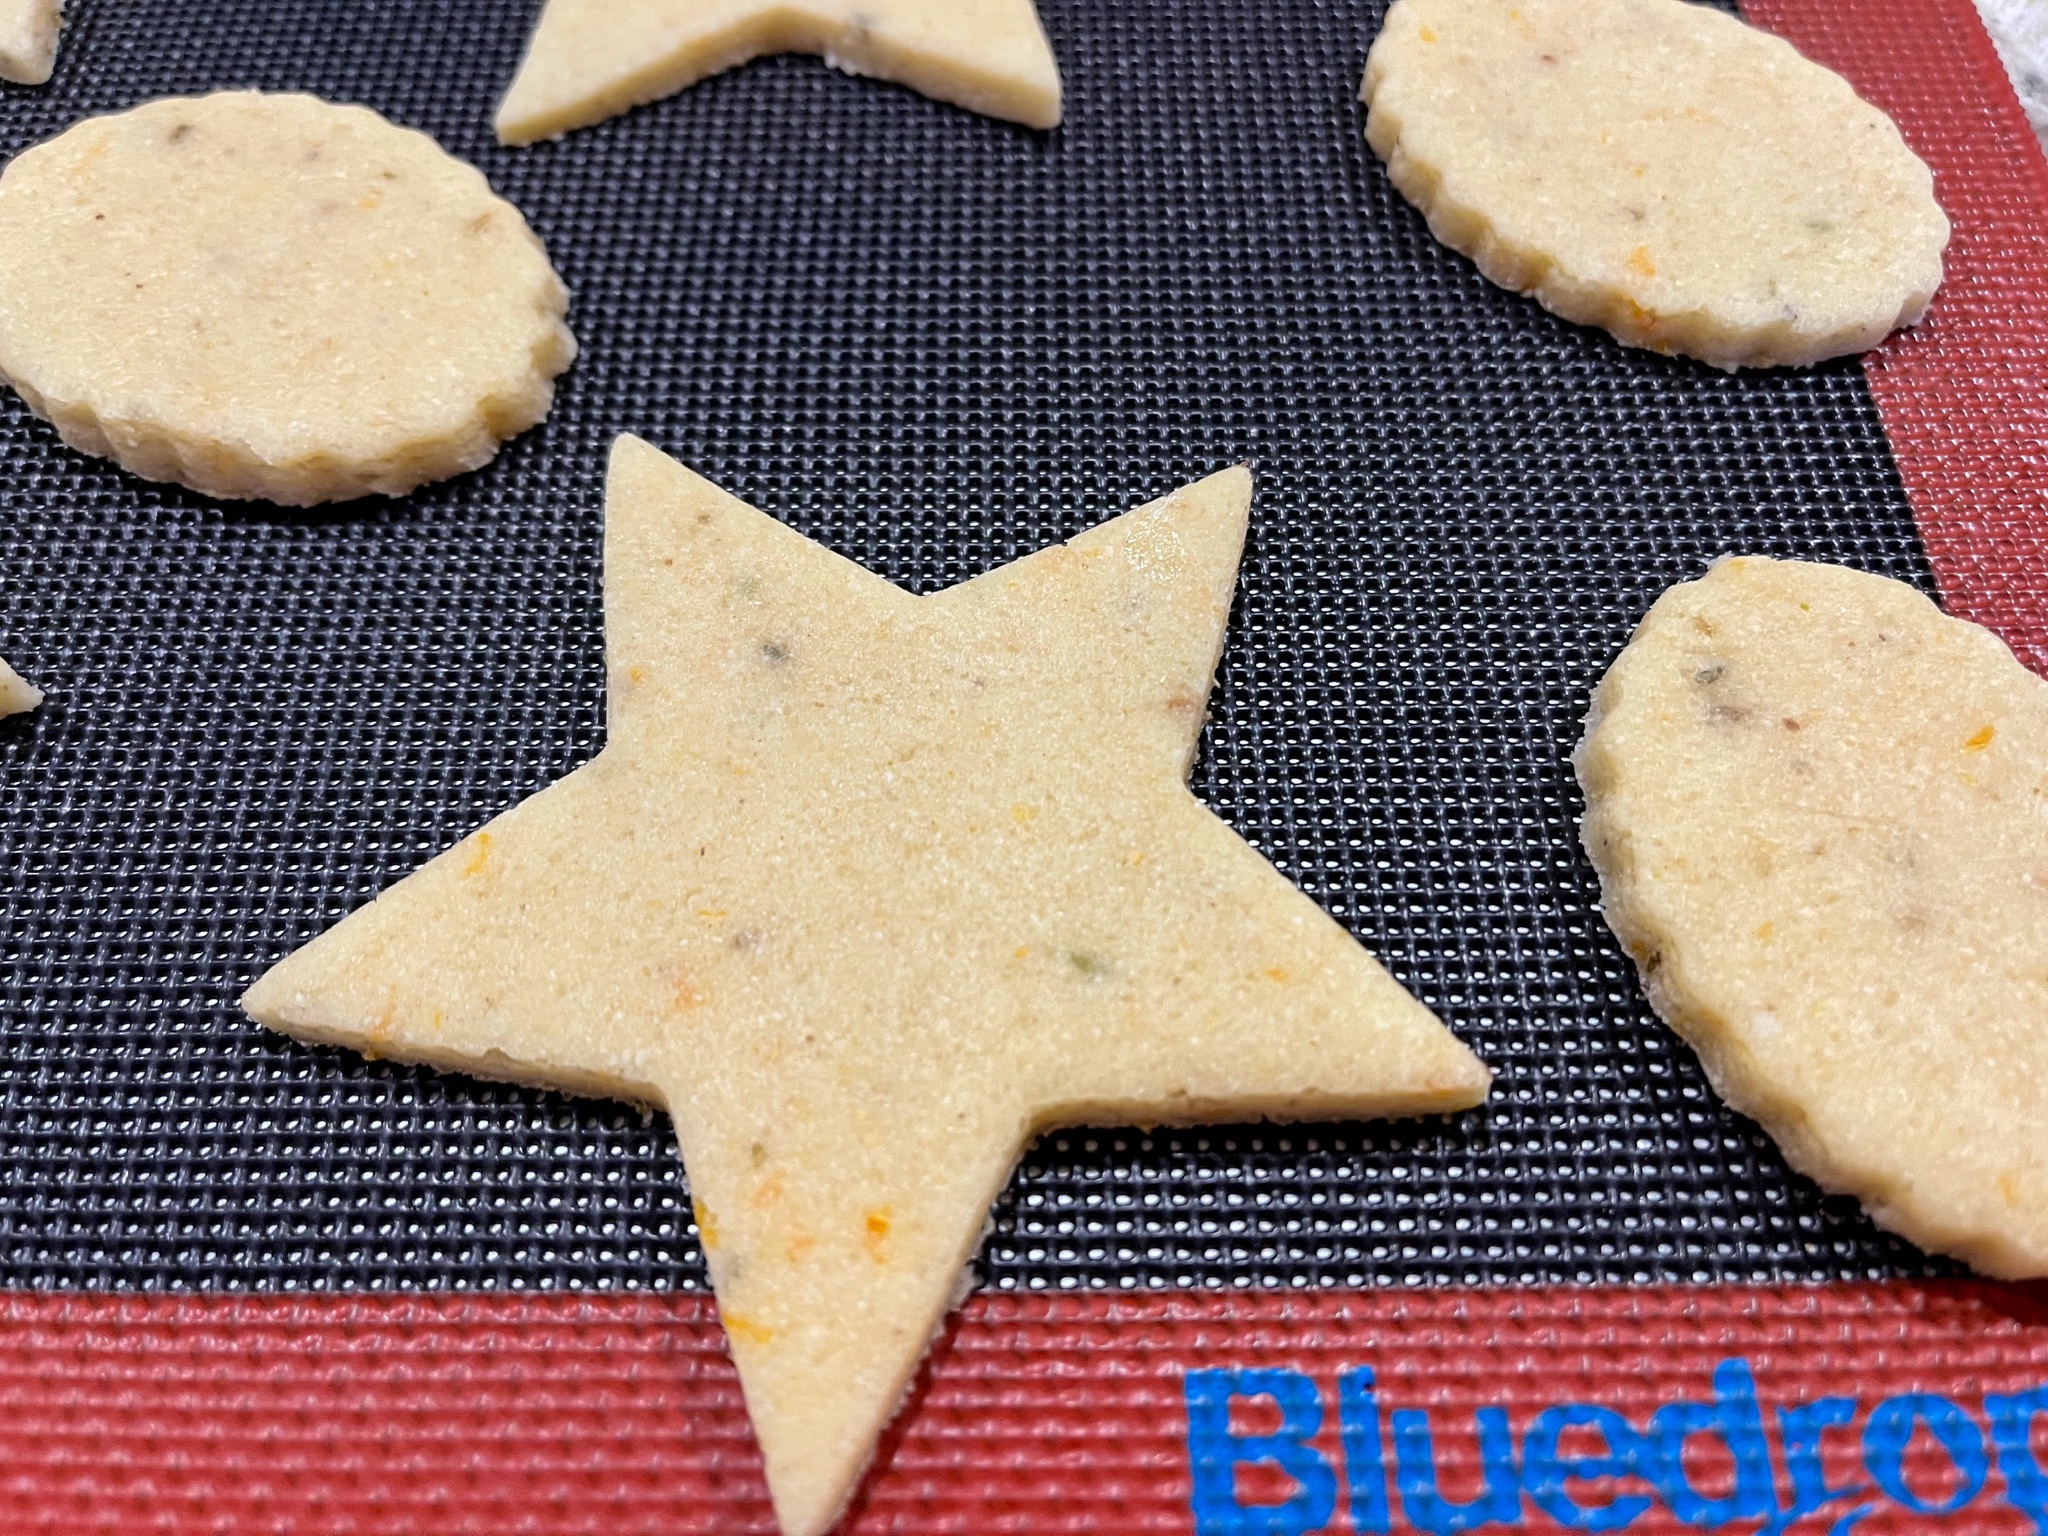
Place the cookie dough between two pieces of parchment paper and roll out evenly to ¼- to ½-inch thickness. Freeze for at least 10 minutes, or refrigerate for 20 to 30 minutes. The cookies will keep a sharper shape depending on how cold they are when they go into the oven.
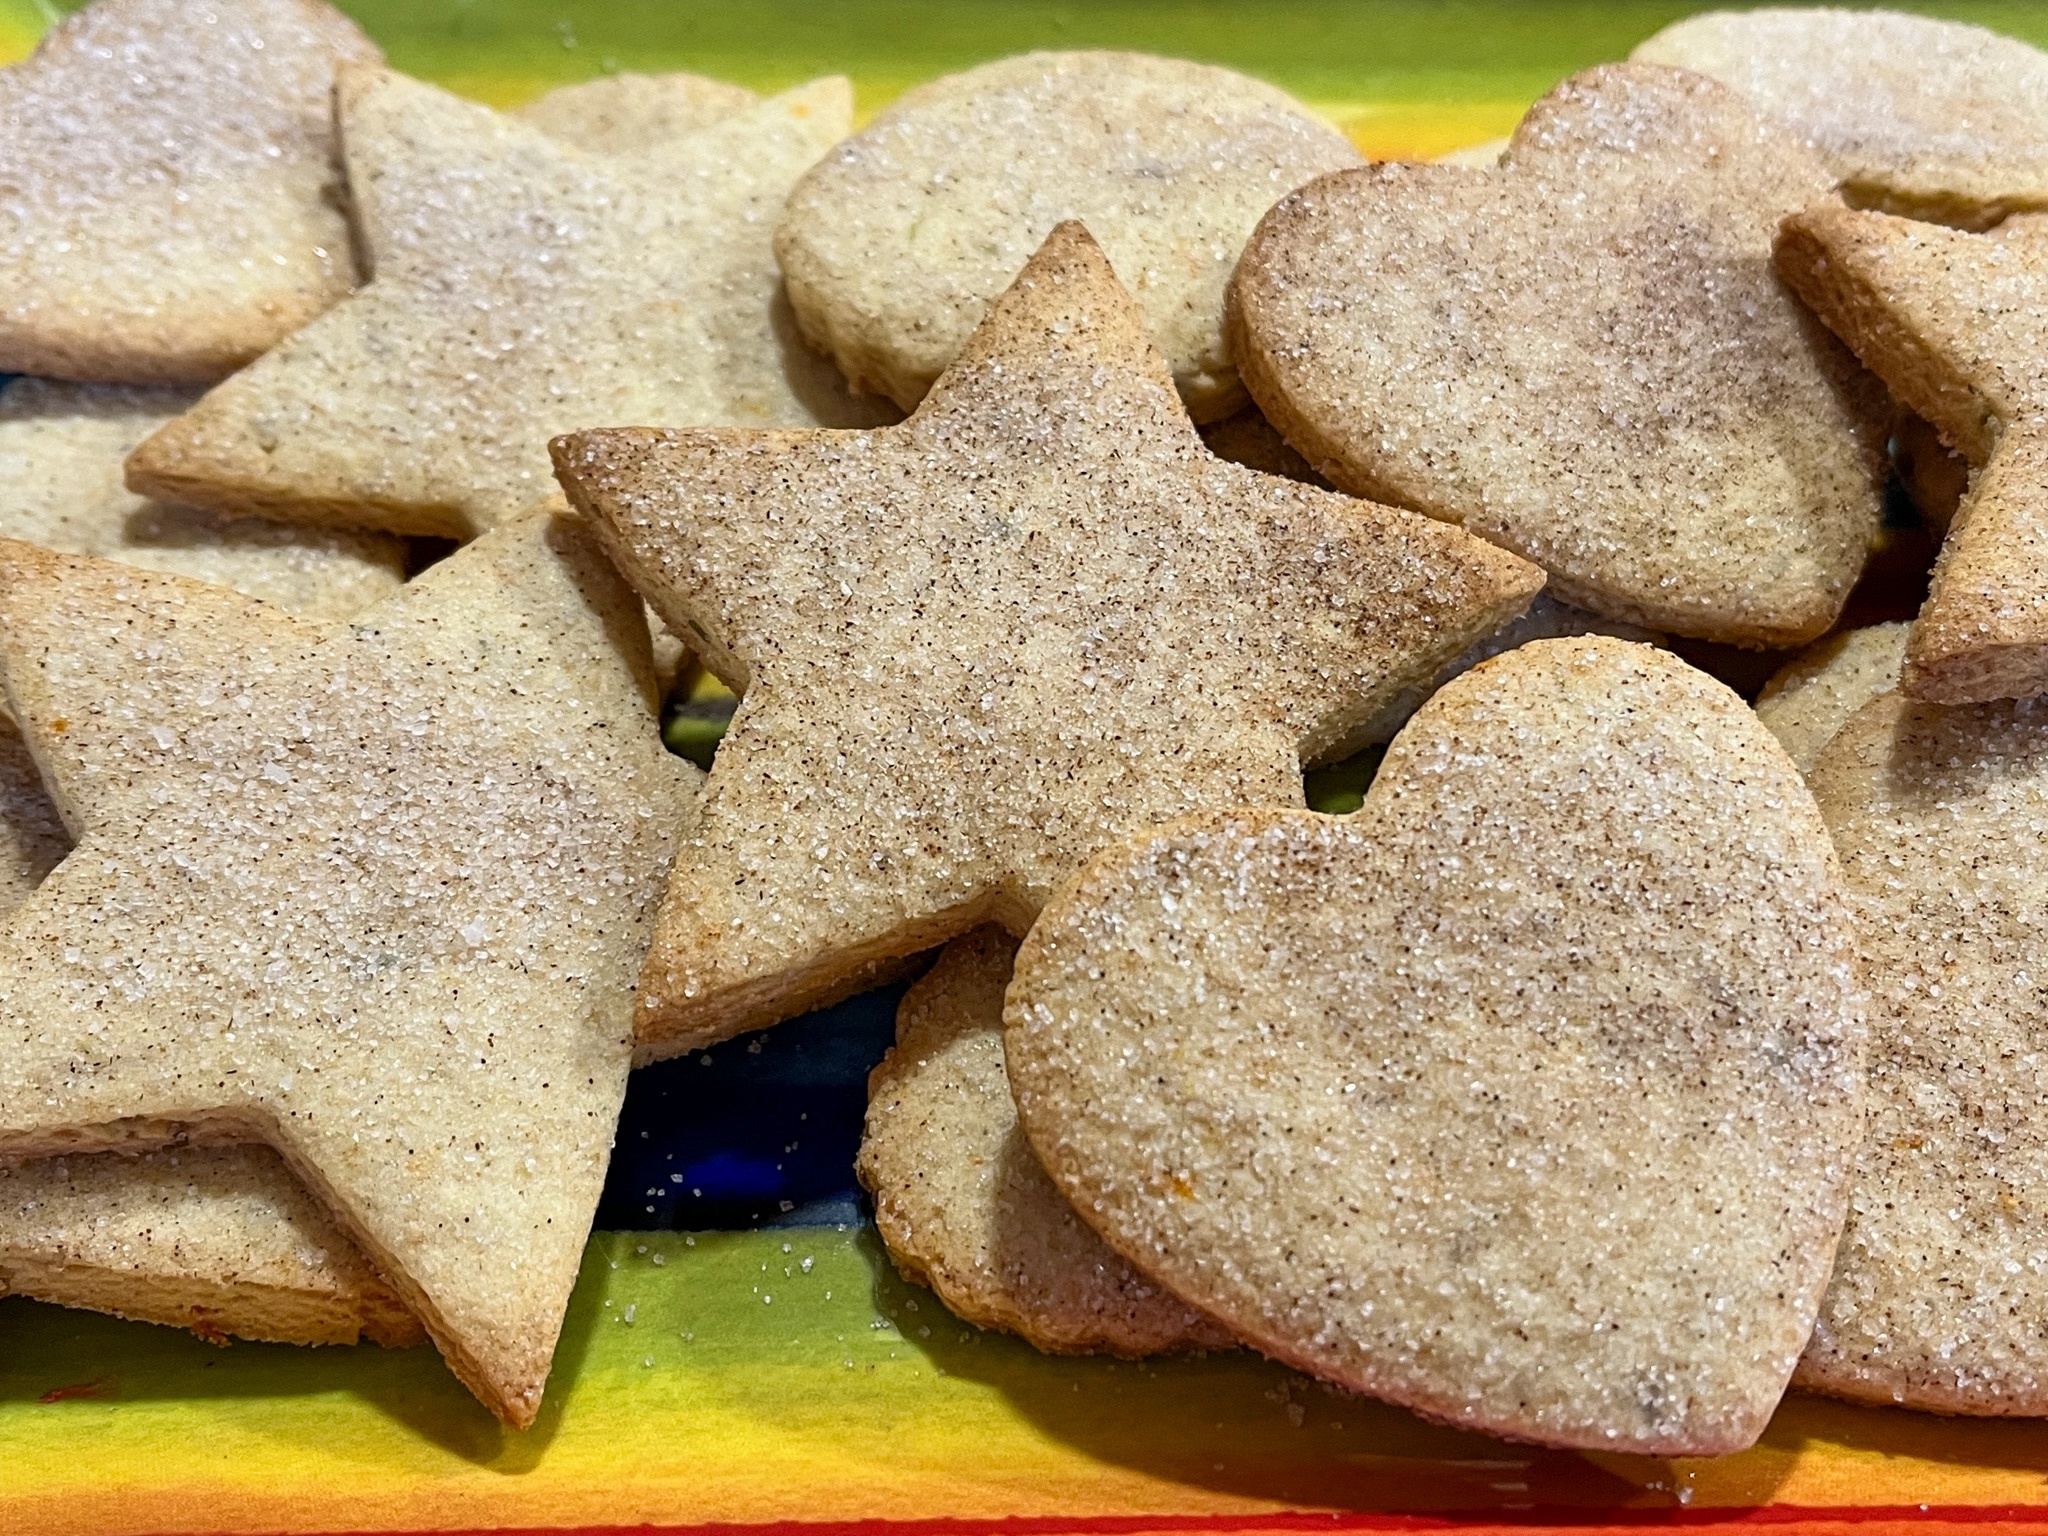
Heat the oven to 350 degrees. Make the cinnamon sugar topping: In a small bowl, whisk together the sugar, cinnamon and salt; set aside. Once the oven is at temperature, remove the dough from the freezer, remove the top parchment layer and cut the dough with a cookie cutter into your preferred shapes, such as stars. Gather any dough scraps and combine them into a disk. Roll and repeat the cookie-cutting process, chilling as necessary. Line 2 large baking sheets with nonstick baking mats or with parchment. Transfer cut cookies, spacing 1 inch apart, to the prepared baking sheets. Sprinkle the cookies with the cinnamon sugar topping.
Bake the cookies, rotating the sheets after 8 minutes, until the cookies are light brown around the edges but still pale in the center, 13 to 15 minutes total. Cool the cookies on the sheets for 3 to 5 minutes, then transfer to a wire rack to cool completely. Store the cooled cookies in an airtight container for up to 3 days.
Comments: These are very unusual and quite addictive. I was surprised by how sharp the edges turned out even though there is quite a bit of baking powder in the recipe, made me wonder about adding a touch of masa harina to sugar cookies and see what happens. A friend of mine made this recipe and it turned out hard to roll out, very crumbly, so if that happens to you, add some milk to the dough to make it smoother. Probably less than a tablespoon is all you’ll need. I love their flavor and texture, I hope you also give this recipe a try during the holidays, they are perfect to include in a cookie box, as they are quite sturdy and last well. at room temperature.
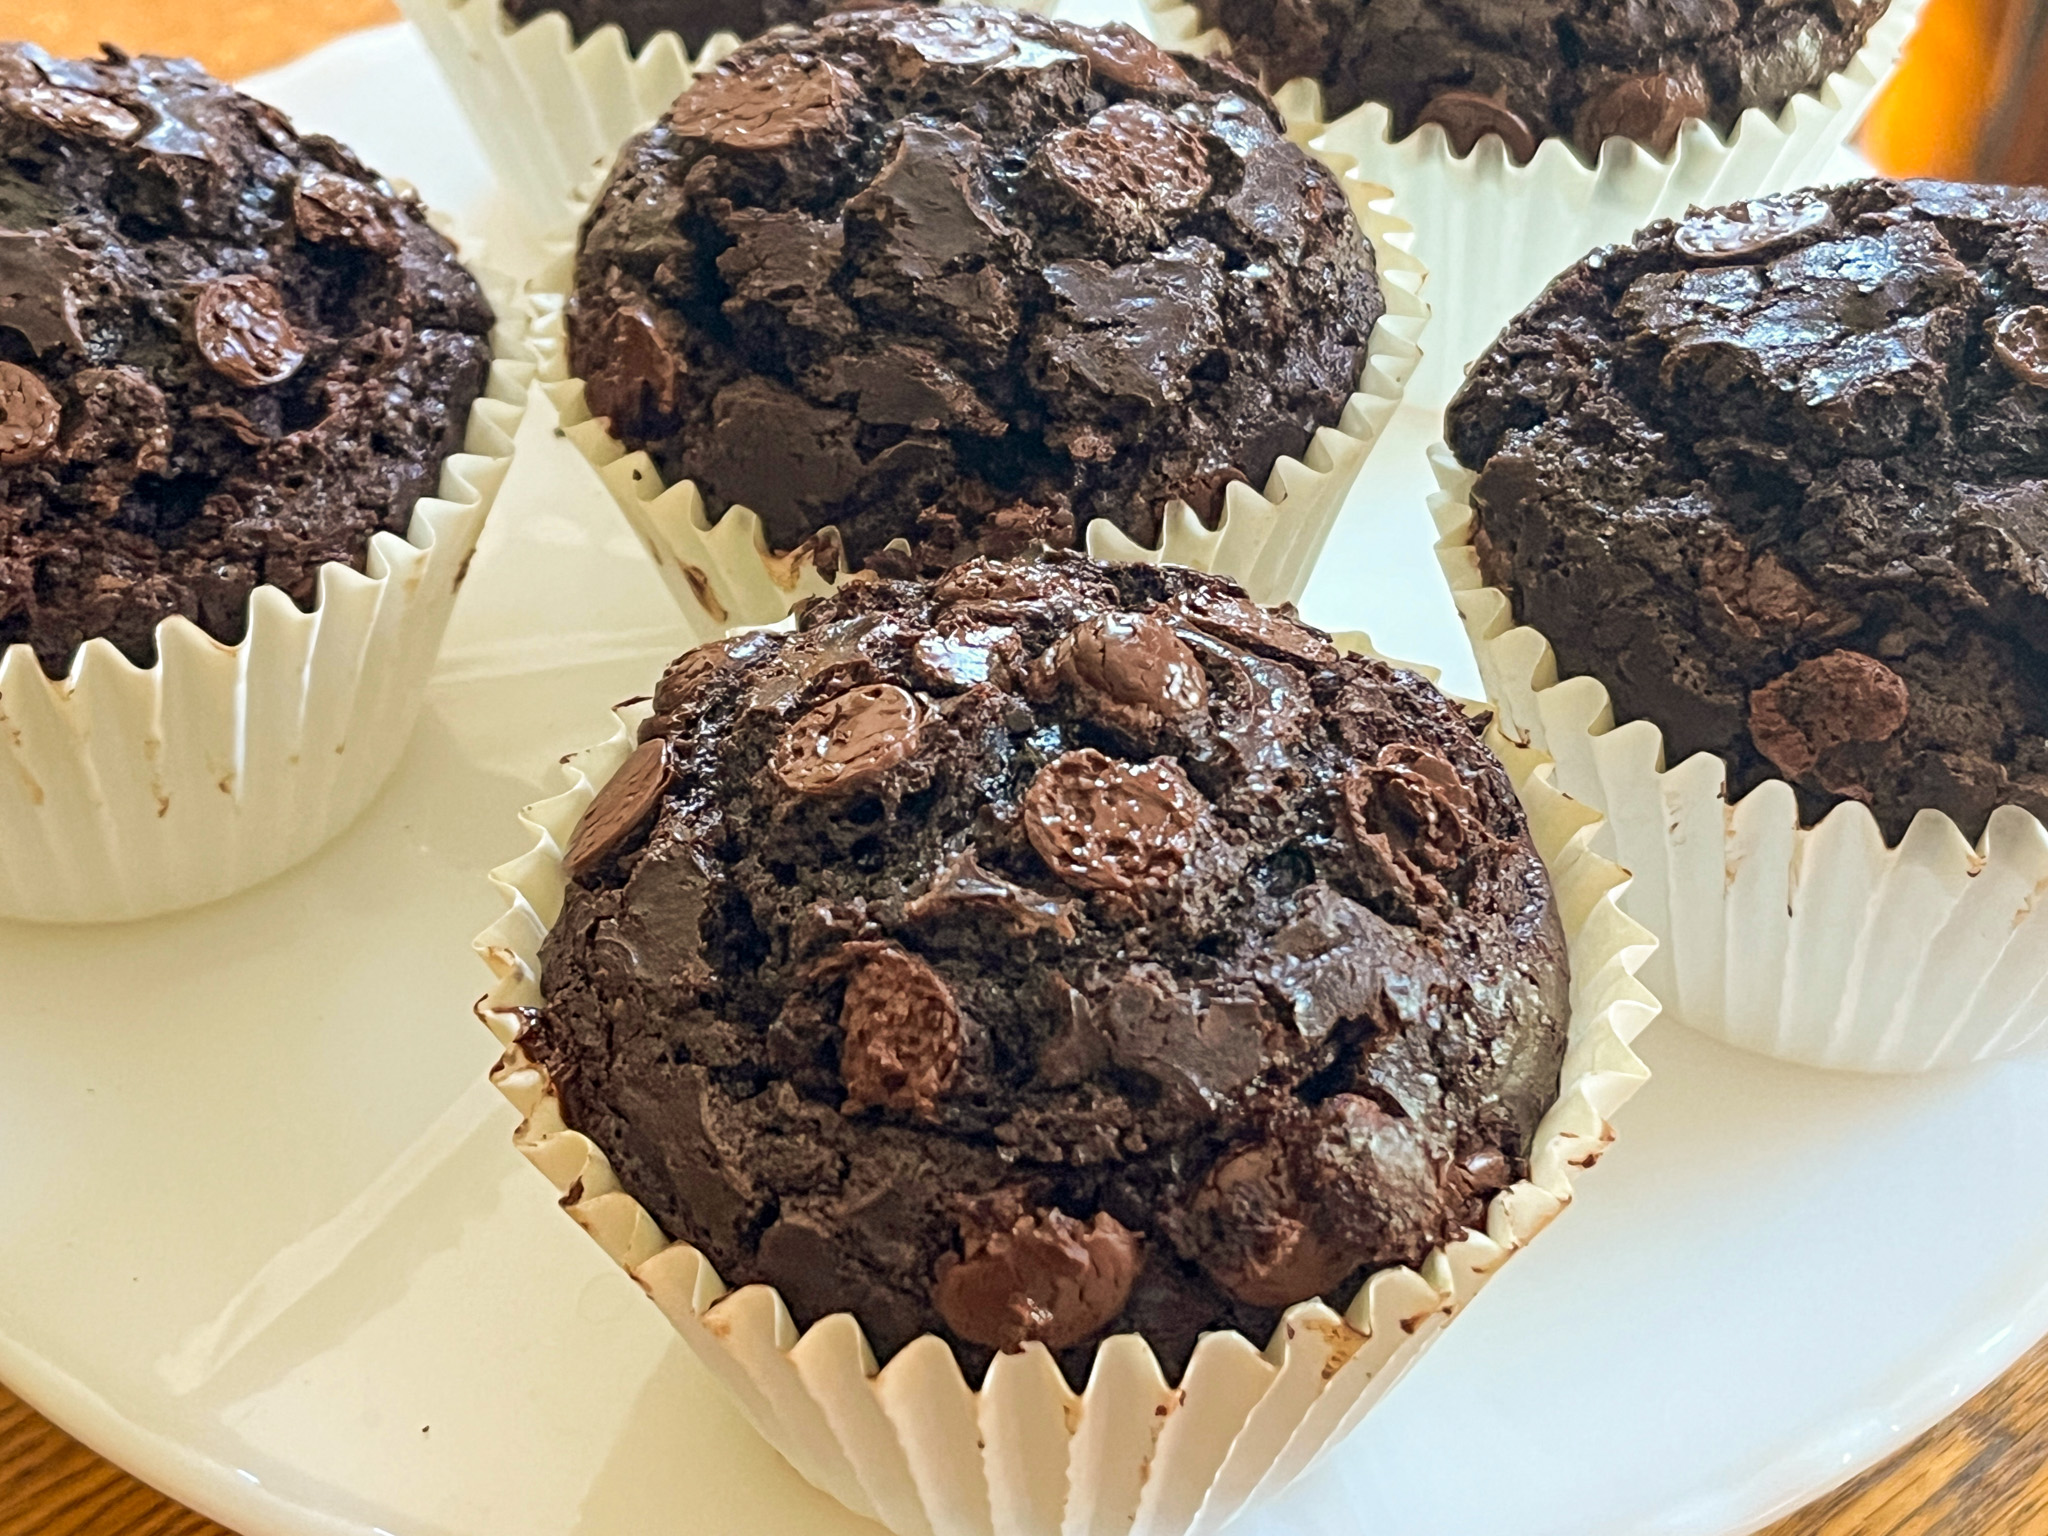
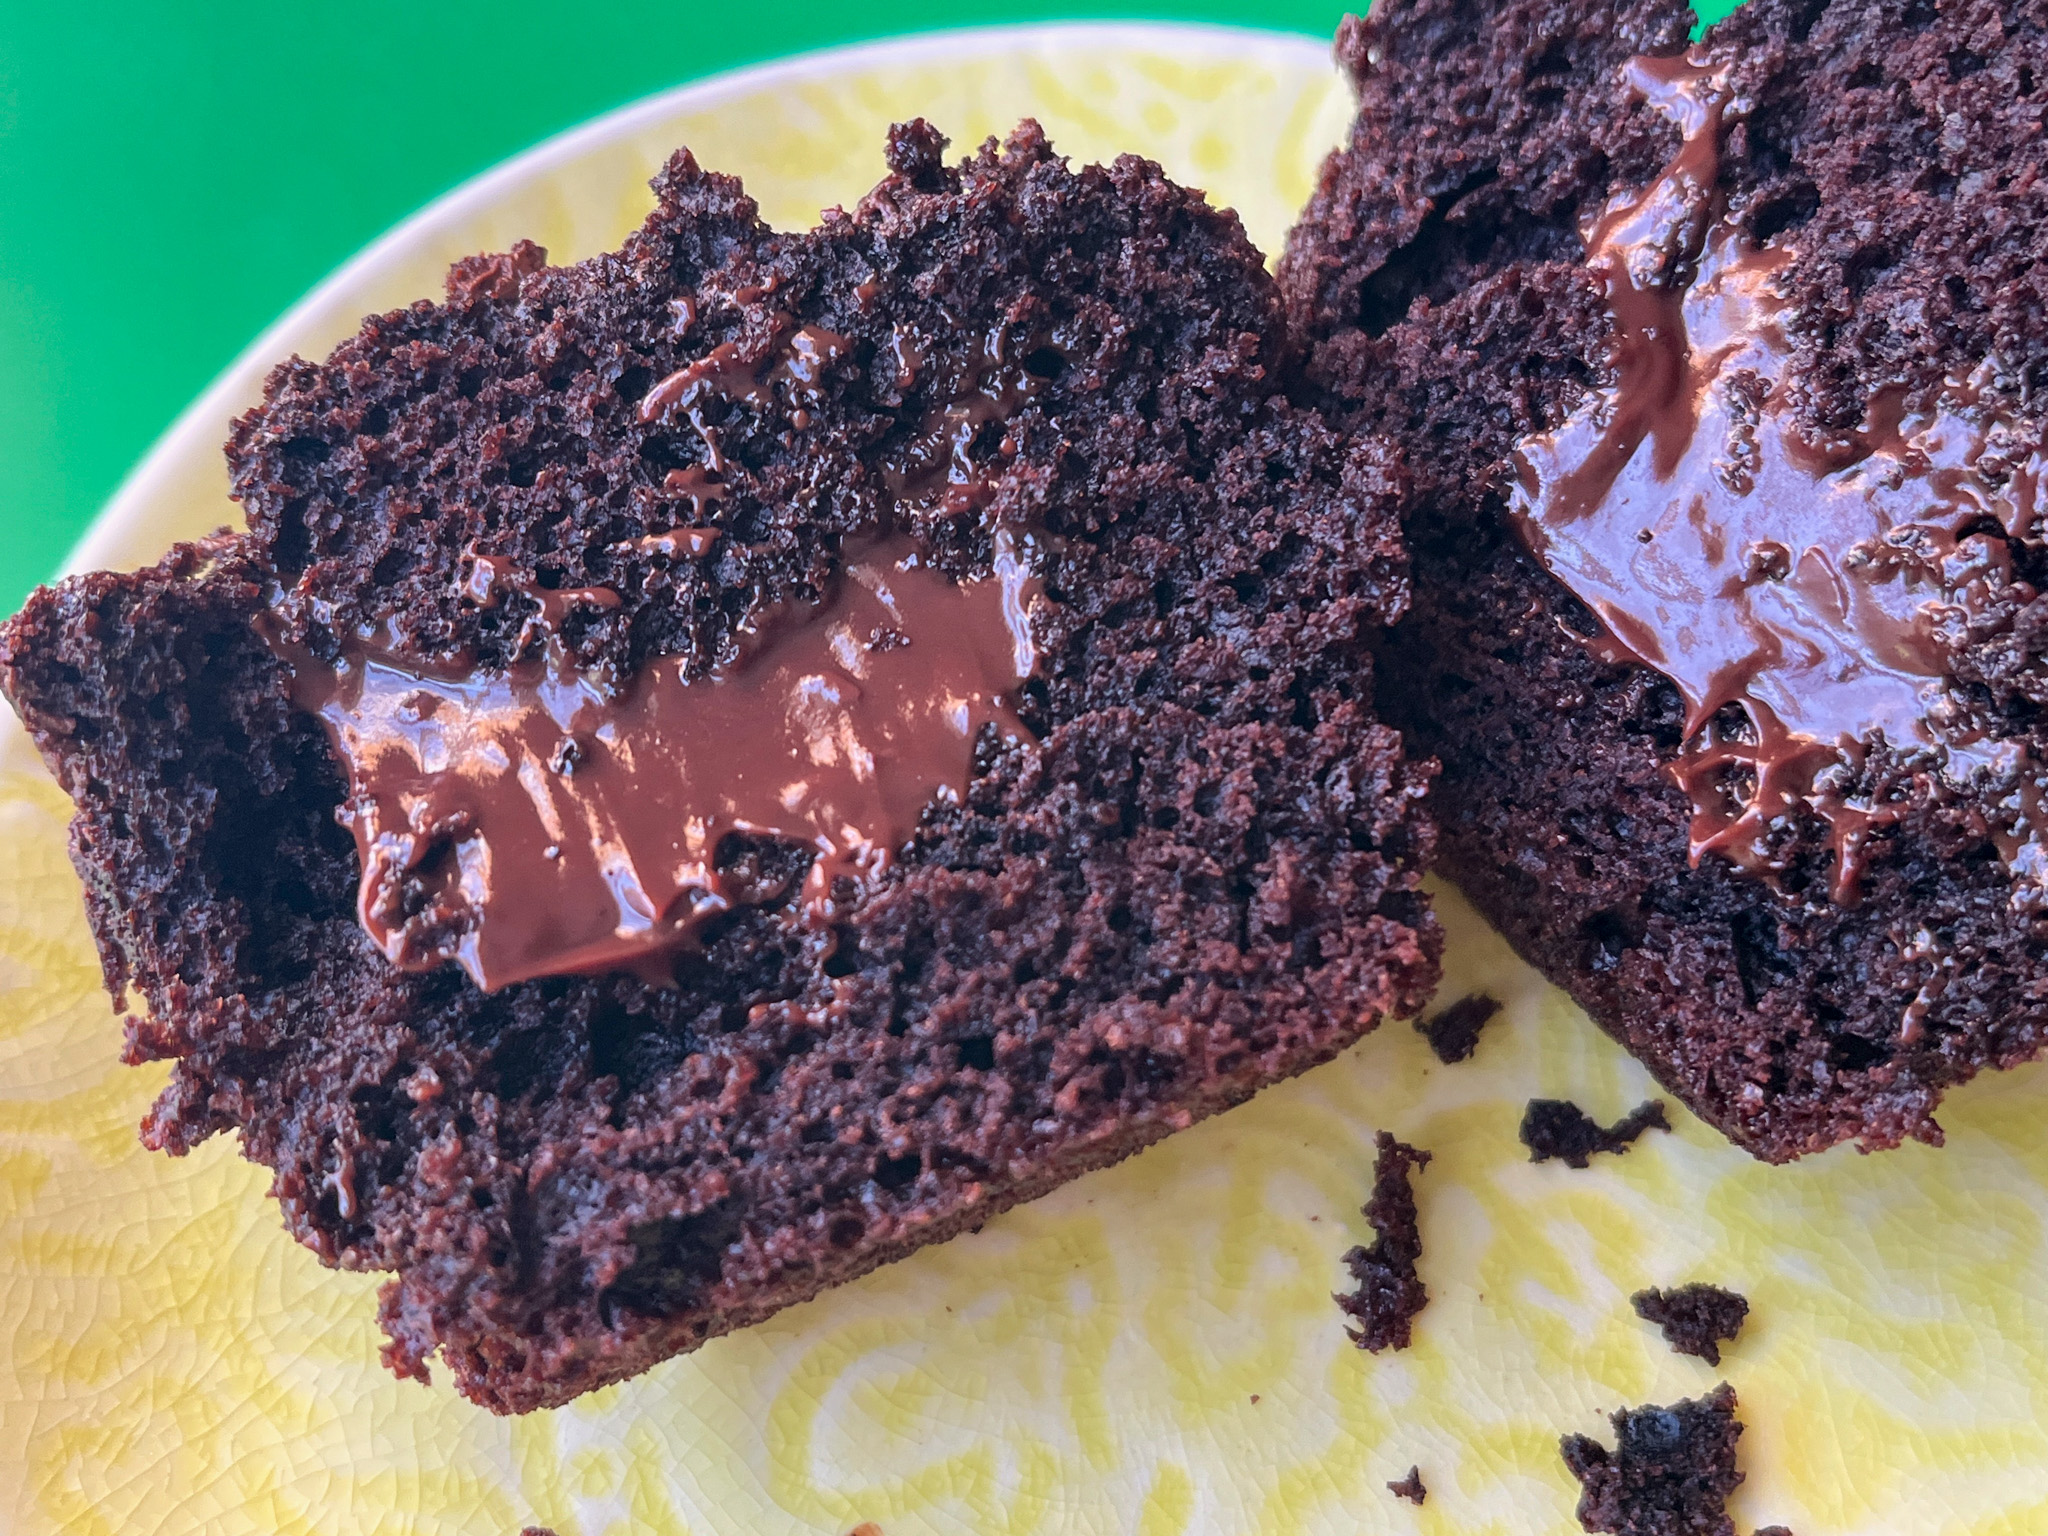
Today I share three delicious recipes that center on that dreamy ingredient that almost every human being loves: chocolate. I have known a few members of our species who claim to “hate” chocolate, and my hope is that they get their genomes sequenced to solve the mystery. Anyway, I digress. The first recipe comes from my favorite baker-instructor-guru, Helen Fletcher. These are beyond amazing and not for the faint of heart. Rich. Decadent. Luscious. Special. They are Double Chocolate Truffled Muffins!
For the truffle component: ½ cup heavy cream 2 tablespoons unsalted butter (30 grams) 2 tablespoons granulated sugar (25 grams) 5 ounces semisweet or bittersweet chocolate (140 grams) 1 teaspoon vanilla extract
for the muffin component: 1 ½ cups all-purpose flour (210 grams) 1 cup Dutch cocoa (85 grams) ¼ teaspoon baking powder ¾ teaspoon baking soda 1 teaspoon salt (I use table salt) 1 ⅓ cups brown sugar, either dark or light (265 grams) ½ cup whole milk ¾ cup canola or vegetable oil 2 large eggs 1 cup sour cream (225 grams) 1 tablespoon vanilla 1 teaspoon instant coffee or espresso powder 1 cup chocolate chunks (114 grams)
Start by making the truffle filling: Heat the cream, butter and sugar together in a small saucepan just until steamy. Do not let it come to a boil. Submerge the chocolate under the cream mixture and let it sit for 3 or 4 minutes. Whisk until smooth, making sure to get into the corners. Using a rubber spatula, go around the edges of the pan and bottom to make sure all of the chocolate is incorporated. Add the vanilla. Cover the surface with plastic wrap and set aside to cool.
Make the muffins: Line 9 jumbo muffin holes with paper liners. Set aside. Heat the oven to 425°F.
Sift the flour into a large bowl. Sift the cocoa, baking soda, baking powder and salt on top of the flour. Whisk together to mix well. In a very small bowl stir together the coffee or espresso and vanilla until the coffee or espresso is dissolved.
In a third smaller bowl, whisk together the milk, canola oil, eggs, sour cream, and coffee mixture. Pour the liquid ingredients over the dry ingredients and stir with a spoon or fold together with a rubber spatula just until everything is mixed well. Do not over mix.
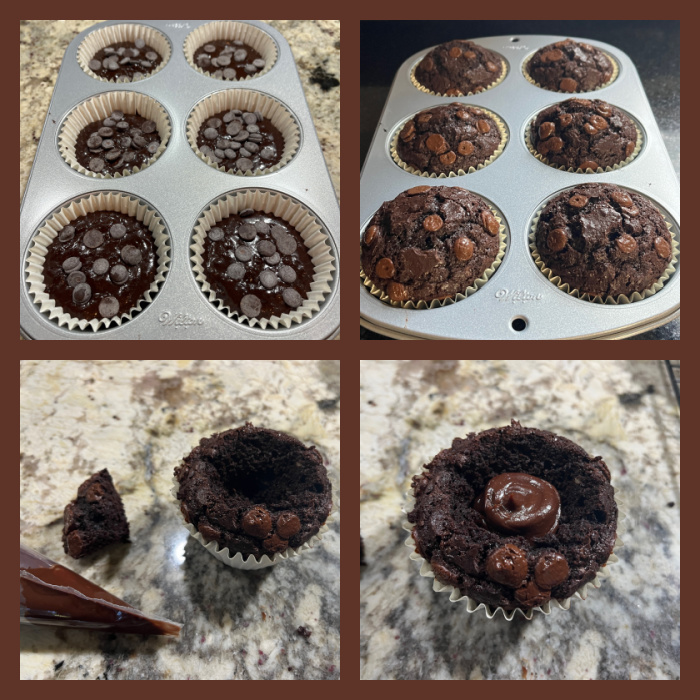
With a #8 disher/scooper or a ½ cup measure, drop the batter into the paper lined muffin cups for the jumbo muffins. Top generously with the chocolate chunks. Bake at 425°F for exactly 6 minutes for the jumbo and lower the temperature to 350°F. Continue to bake for about 20 minutes or until a tester comes out clean. Cool the muffins.
Starting about ½” from the edge of a muffin, insert a paring knife slanted towards the middle of the muffin and go all the way around the muffin. Remove the wedge shaped cake and set aside intact. To enlarge the hole for more filling, use a small spoon and scoop out additional cake.
Fit a piping bag with a ½” tip, fill with the truffle filling and pipe into the hole almost up to the top. Alternately, spoon the filling in. Replace the wedge shape piece pushing it into the filling.
Comments: Please make sure to read Helen’s blog post about them, as she gives detailed explanation of their origin and how she adapted the recipe to make it more user-friendly without any loss of deliciousness (I can testify to that, they are spectacular). The pictures do not make it justice, as so often is the case with brown food. Their texture is superb, and that filling is unreal! Thank you thank you thank you, Helen!
.
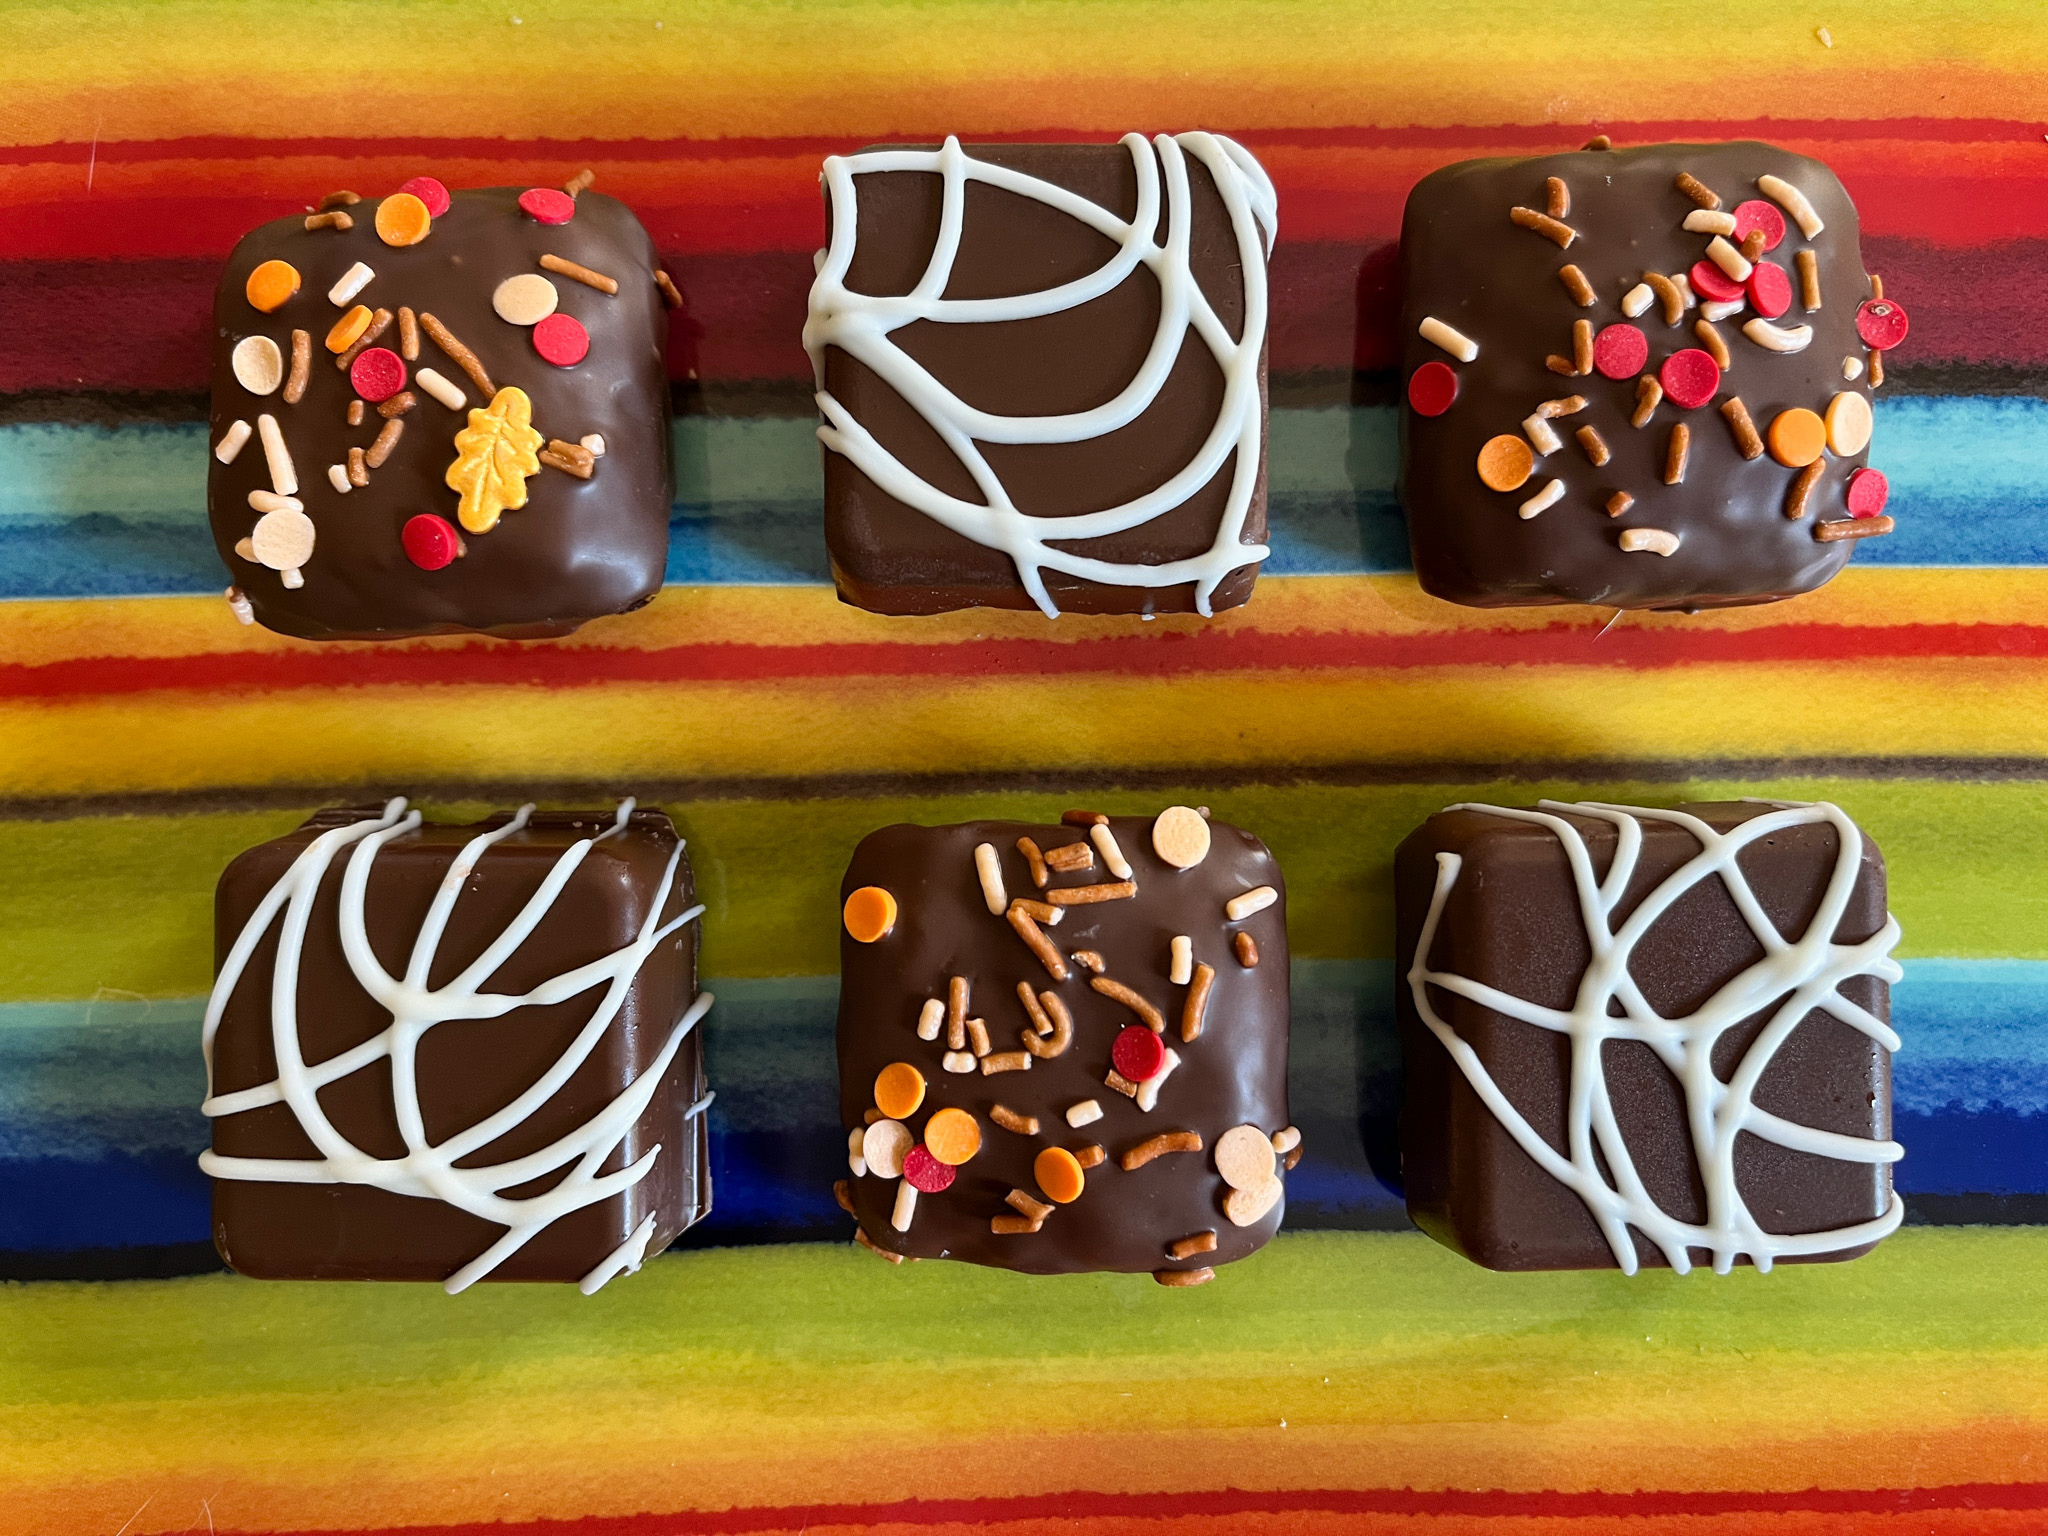
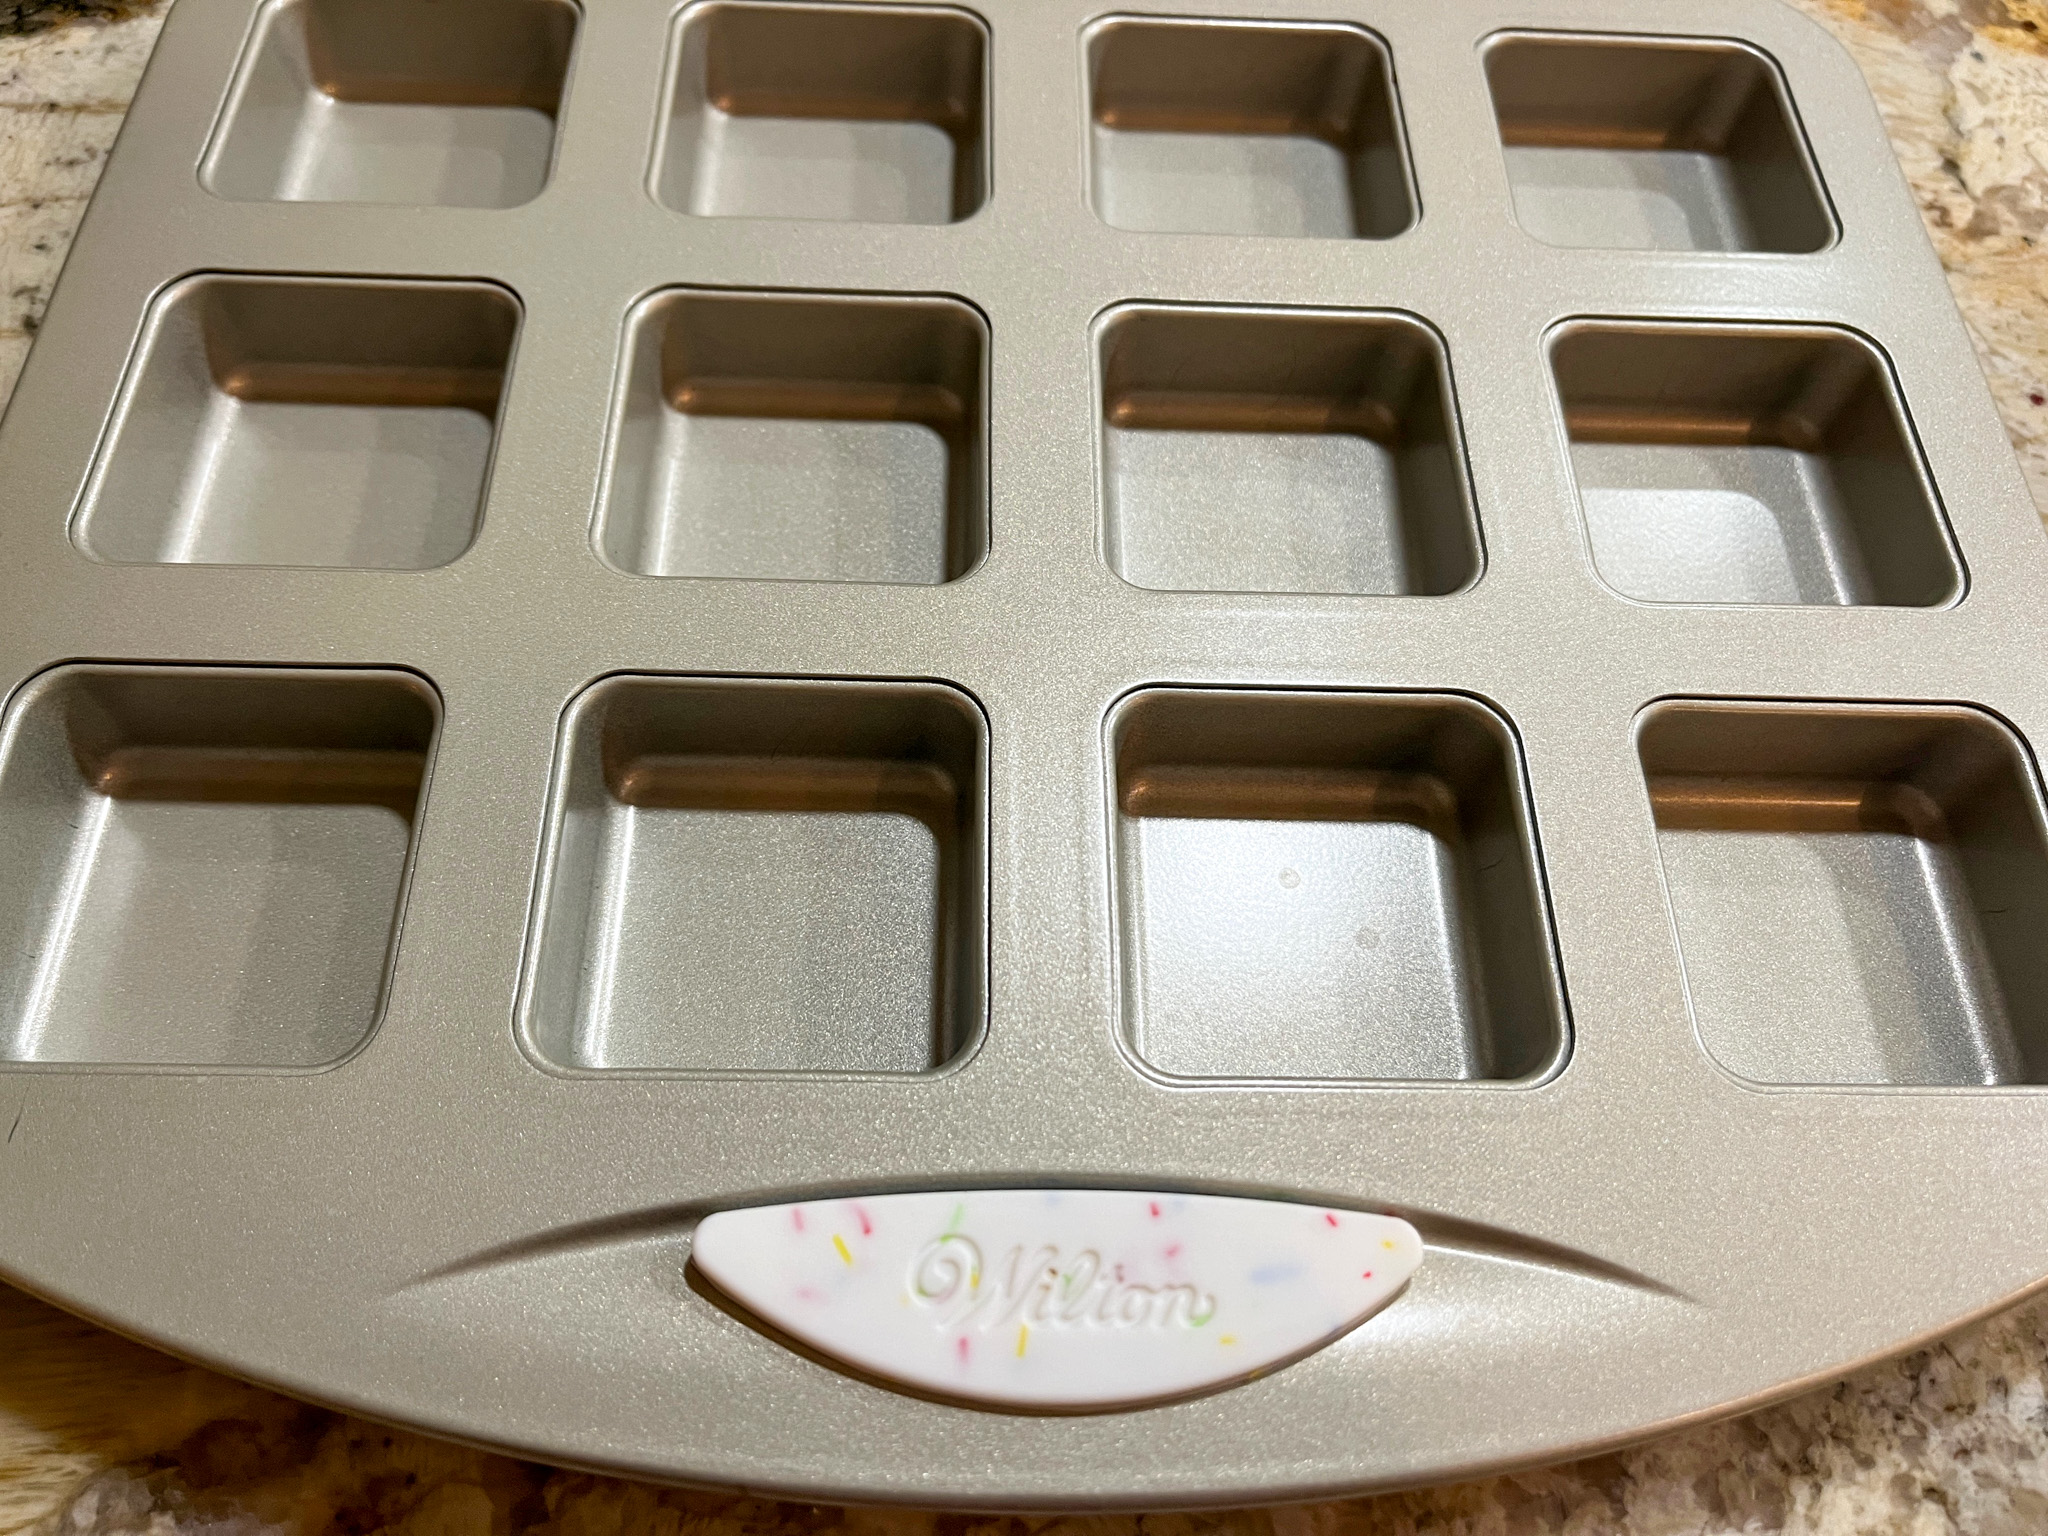
Moving on to the second recipe, credit goes to my beloved husband, who suggested that instead of coating Oreos with chocolate, I could do small pieces of brownies. I used a very small pan from Wilton to bake them. Without further ado…
1 cup all-purpose flour (130g) 1 cup granulated sugar (200g) 1/3 cup cocoa powder (35g) 1/2 teaspoon baking powder 1/4 teaspoon salt 1/2 cup vegetable oil 1 egg, lightly beaten 3 tablespoons milk 1/2 teaspoon vanilla extract
to coat: compound chocolate like Candy Melts or Almond Bark to decorate: sprinkles (optional)
Heat the oven to 350°F. Prepare the pan with baking spray.
In a medium bowl, whisk together flour, sugar, cocoa powder, baking powder and salt. Add vegetable oil, egg, milk and vanilla extract; stir well until smooth. Divide batter evenly between cavities, smoothing into an even layer (about 1 tablespoon per cavity). Bake for 13-16 minutes, or until edges are set and a toothpick inserted in the center comes out almost clean. Cool in pan on a cooling rack 5-10 minutes, loosen edges if necessary, and remove. Let cool completely on the rack.
Melt the compound chocolate until smooth using gentle power in the microwave. If too thick, add a small amount of coconut oil (refined). Coat the bites and decorate right away, or after setting, if going with drizzles of melted compound chocolate.
Comments: I got this pan at a sale in Jo-Ann store in town, and of course, could not resist it (info here). You can use silicone pans, or any other type of pan that makes mini-cakes. To coat, you can use two different methods. First, just melt the chocolate in a bowl and dip the cake to coat. That will give a rustic appearance, and you can add sprinkles right away. Second method will require you to clean the pan, then add melted chocolate in each cavity and quickly place the cake inside, pressing a bit so that the chocolate moves up along the sides. You can coat the bottom or not. Let it harden, remove from the pan, and if desired, make decorations with swirls of melted chocolate, I used white for that. Below you can see the different outcome.
And now for the last recipe, what might seem like your regular chocolate chip cookie, but it is truly special, due to the inclusion of an unexpected ingredient: buttermilk. You must give this recipe a try!
BUTTERMILK CHOCOLATE CHIP COOKIES
BUTTERMILK CHOCOLATE CHIP COOKIES (slightly modified from Yesterfood blog)
2 cups flour (260g) 1/2 teaspoon baking soda 1/2 teaspoon salt 1/2 cup butter, unsalted, melted 3/4 cup cocoa powder (75g) 1 + 1/2 cups sugar (300g) 1 teaspoon vanilla 2/3 cup buttermilk 1 (12 oz.) bag semi-sweet chocolate chips (about 2 cups)
Heat oven to 350 degrees. Line cookie sheets with parchment paper. Set aside. In a medium bowl, combine flour, baking soda, and salt. Whisk to combine. Set aside. In a large bowl, whisk the cocoa powder and melted butter until very smooth. Stir in the sugar, vanilla, and buttermilk until well combined.
Add the flour mixture to the chocolate mixture in thirds, stirring each time just until combined. Stir in the chocolate chips.
Scoop cookie dough onto prepared cookie sheets by heaping tablespoonfuls about 2″ apart. Bake for 10 to 12 minutes, until cookies are puffed, edges are set, and center is still moist. Place cookie sheets on wire racks for 5 minutes, then remove cookies onto wire racks to cool completely. Store tightly covered.
Comments: These cookies will definitely please any chocolate lover out there. It almost feels as if you are having a brownie. Excellent texture, I reduced the sugar from the published version and I think it was a good move. I do hope you give it a try…
So, that’s all for now, three real nice recipes celebrating chocolate!
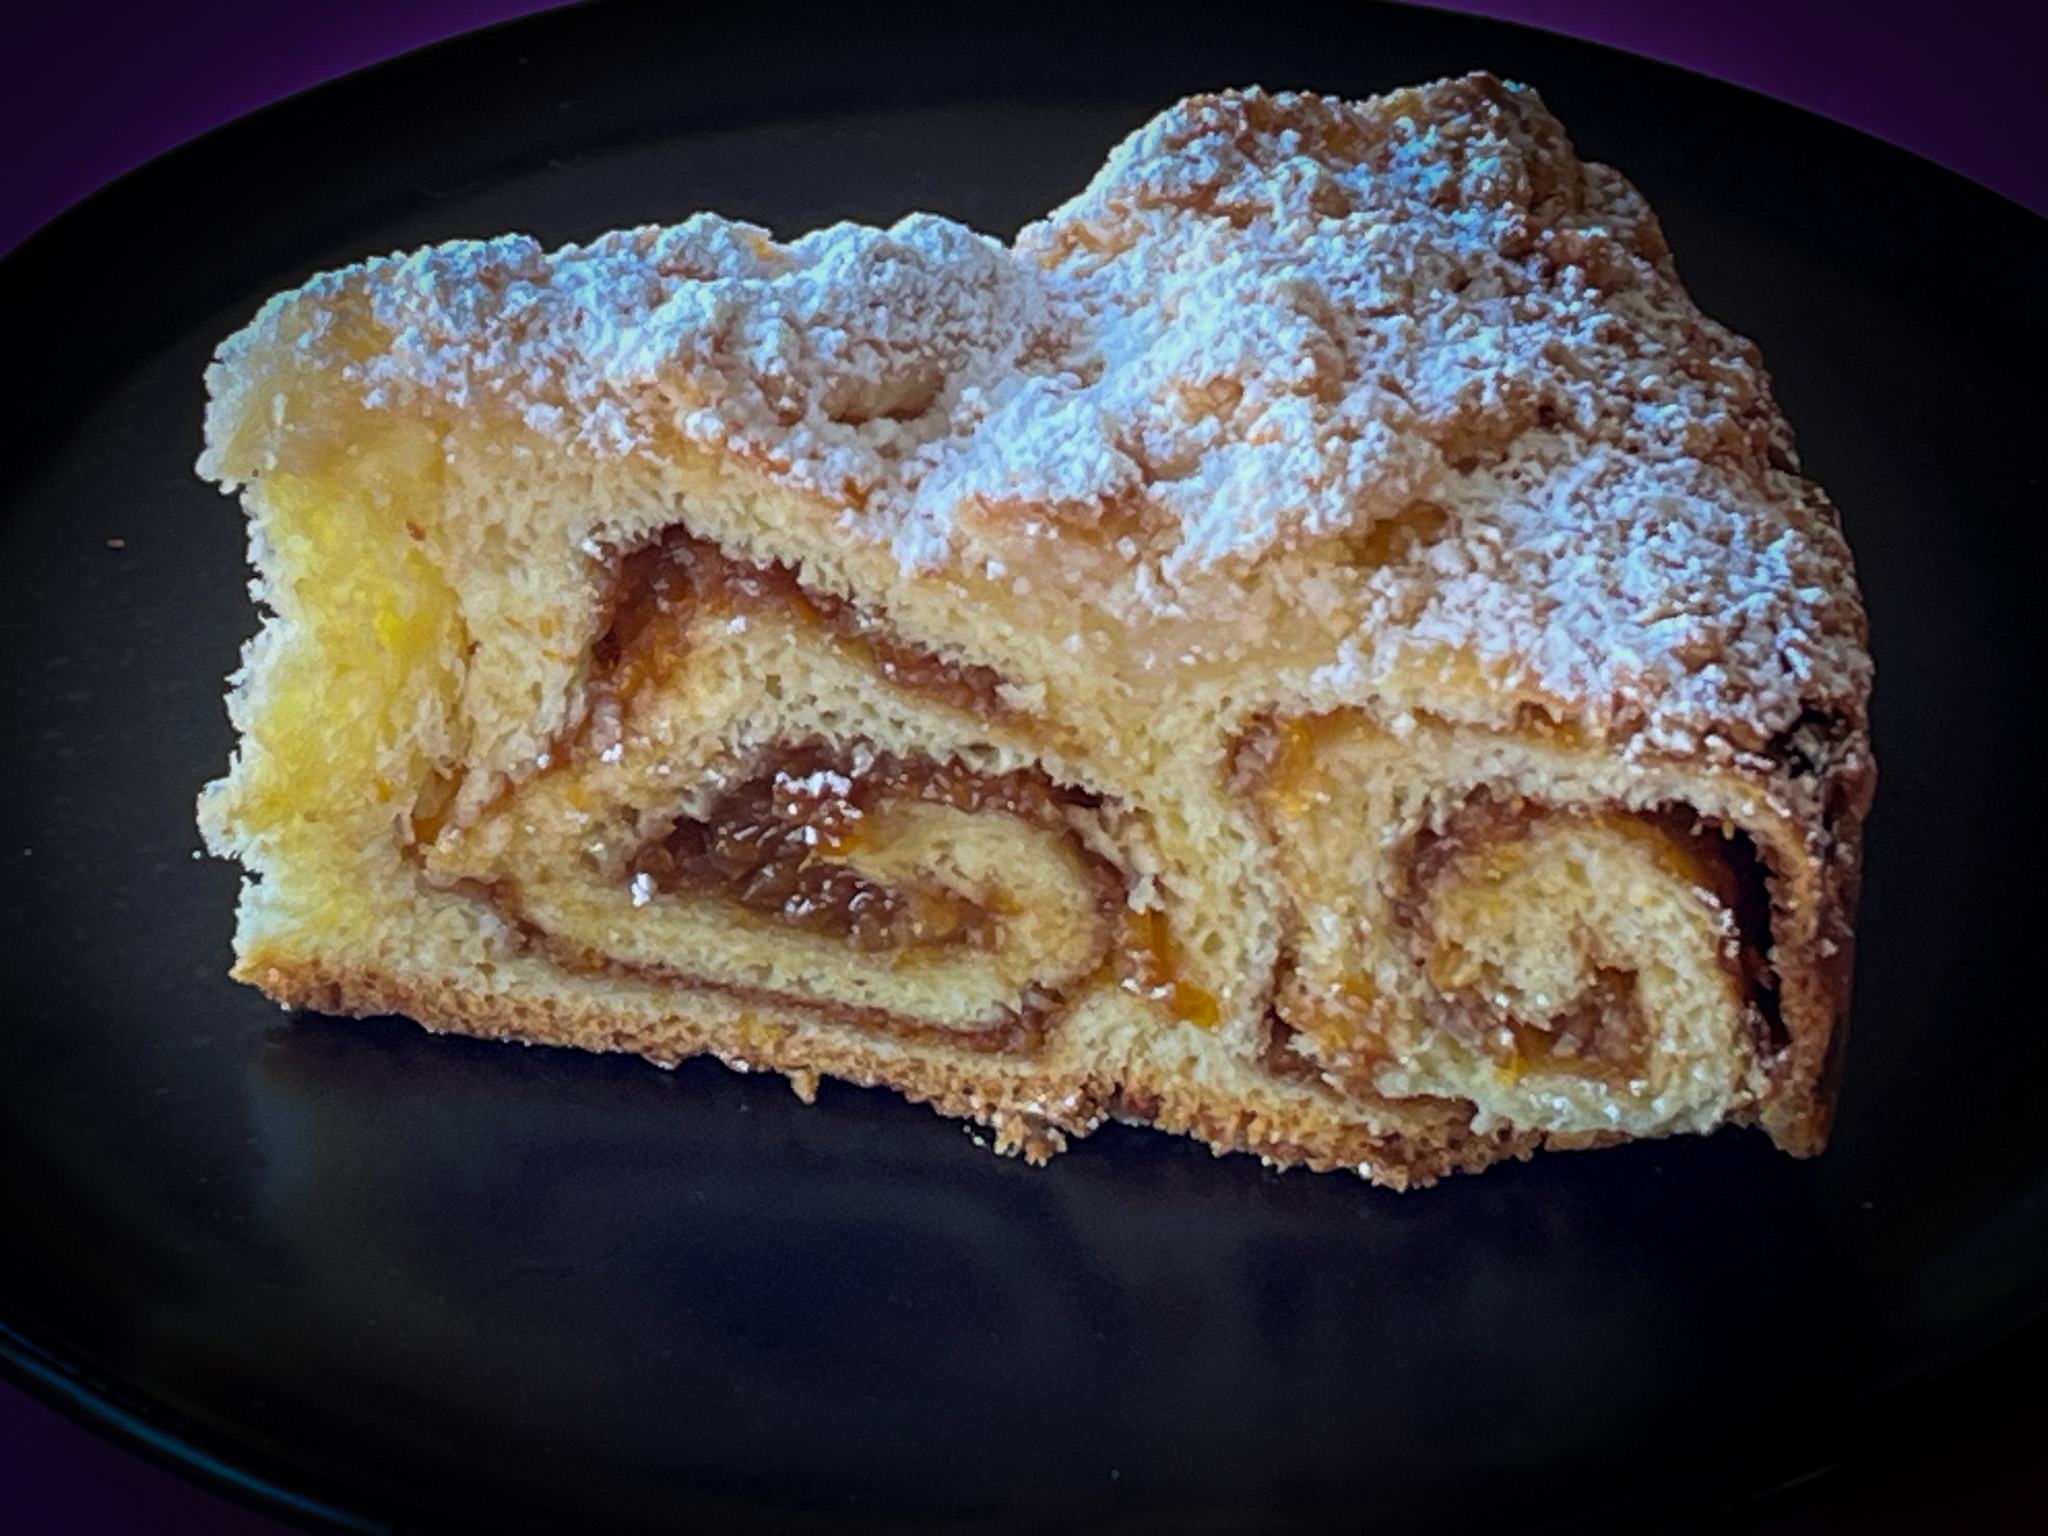
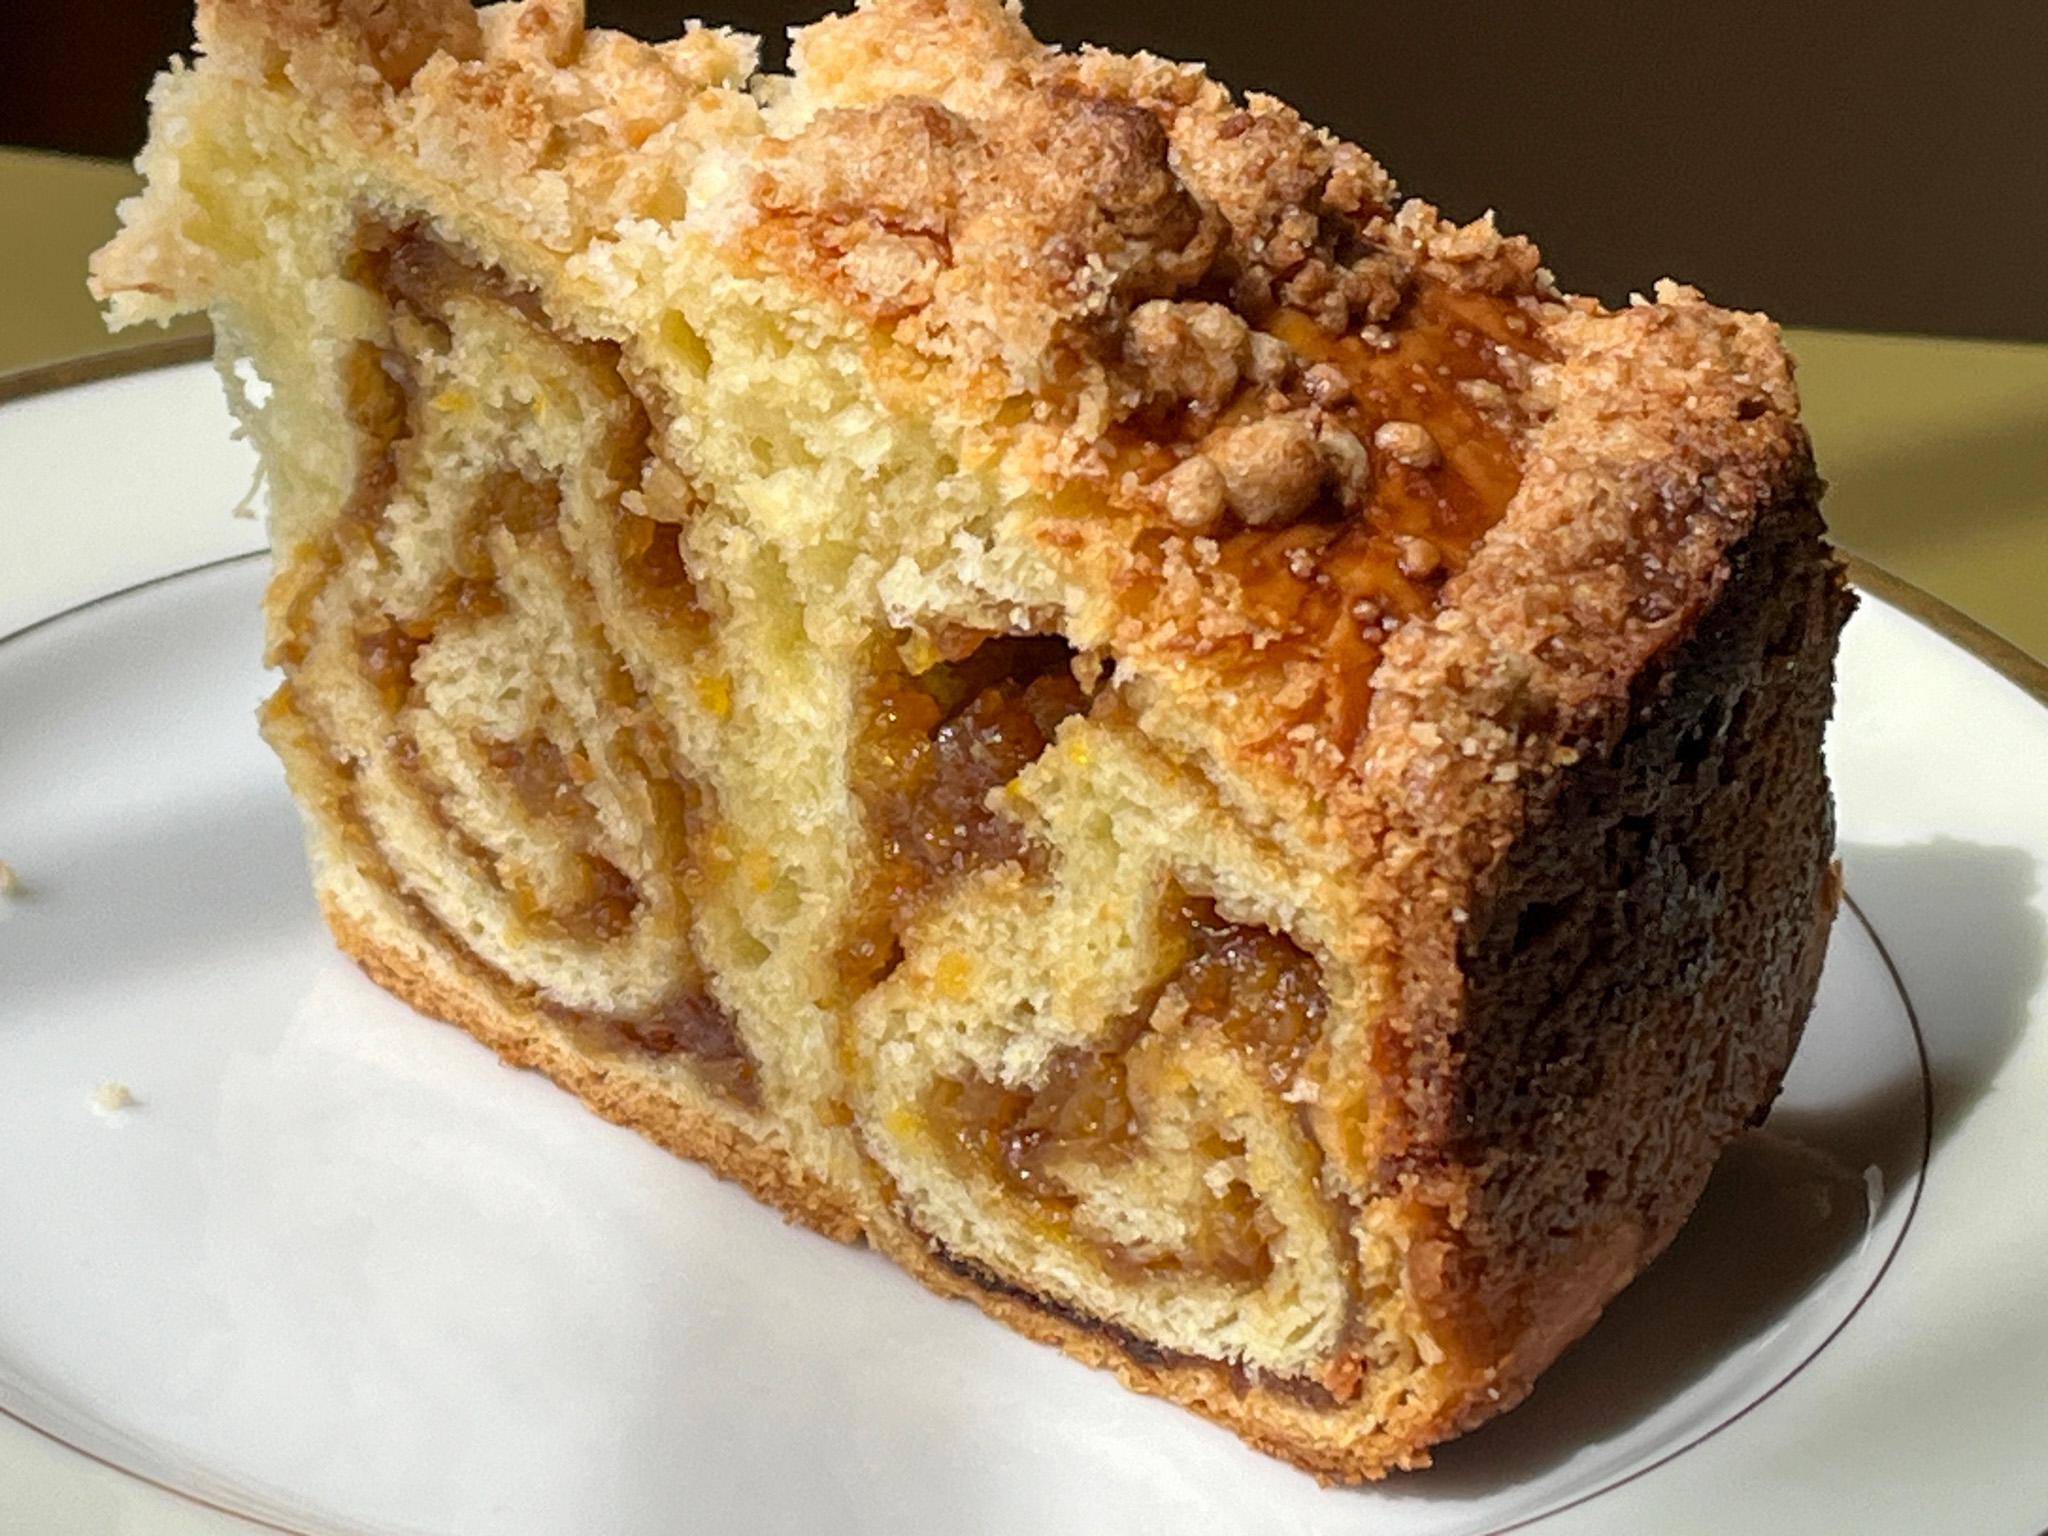
Is it a cake? Is it a sweet bread? Is it heaven on a plate? Yes to all! Another amazing recipe from Helen Fletcher, this is a bit involved but absolutely worth it… Slicing through it to reveal the coiled pattern inside is just too cool!
¾ cup unsalted butter (170 grams) 1 teaspoon active dry yeast 3 tablespoons warm water Pinch granulated sugar 2 ¼ cup bread flour (315 grams) 1 ½ tablespoons granulated sugar ½ teaspoon salt 3 large eggs, room temperature ¼ cup half and half (or heavy cream)
Filling ¾ pound dried apricots 1 cup water 5 tablespoons butter (75 grams) ½ cup powdered sugar (65 grams) 1 ½ teapoons vanilla 2 teaspoons cocoa
Almond Paste Crumb Topping 1 cup cake flour (125 grams) ½ cup almond paste (125 grams) ⅔ cup granulated sugar (130 grams) ½ cup unsalted butter (114 grams)
Assembly 1 large egg, well beaten
Make the brioche dough: Cut the butter into small pieces by cutting the stick in half lengthwise, the cutting it into half inch pieces. Place it back in the refrigerator to keep cold. Make a sponge by dissolving the yeast and pinch of granulated sugar in the 3 tablespoons warm water. Add 3 tablespoons flour from the measured amount of 2 ¼ cups flour. Stir together to completely mix the ingredients. Cover with film and set aside to double or more while preparing the rest of the ingredients.
In the processor bowl fitted with the steel blade, place the remaining flour, salt and sugar. Process 5 seconds to mix. Place the cold butter in a circle over the flour. Process the butter until it is indistinguishable, about 20 seconds. Scrape down and process about 5 seconds more. Place the eggs in a circle over the dry ingredients, pour the half and half or cream over the eggs, and add the sponge, also in a circle. Process approximately 20 to 25 seconds until the ball which initially forms breaks down into a creamy, evenly dispersed batter in the processor bowl. Do not stop processing until the batter is formed, as the motor may stall when you try to restart it. If the ball doesn’t break down, that’s fine as long as everything is mixed well.
Remove from the processor bowl and place in an ungreased bowl. Cover securely with plastic wrap and allow to rise until double in bulk about 2 to 2 ½ hours. Stir down and refrigerate overnight. Punch down and use as directed. It can stay in the refrigerator for up to 3 days before using.
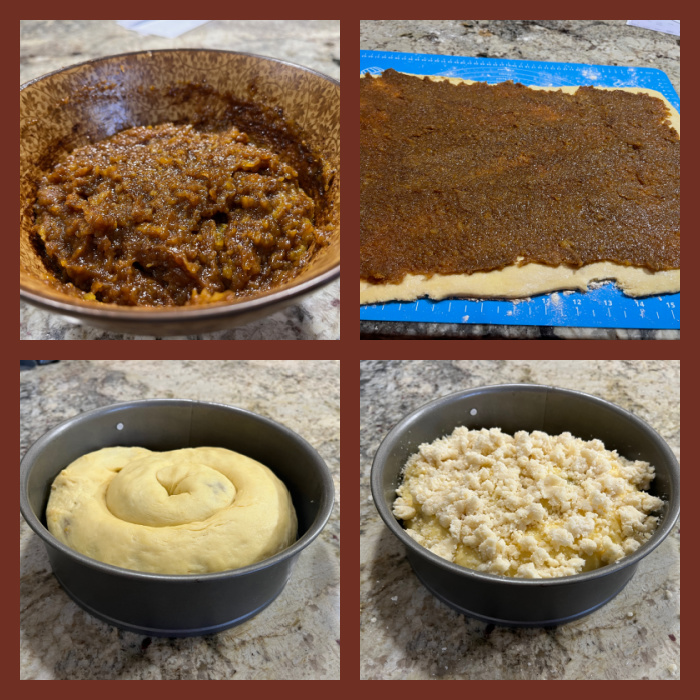
for the filling: Place the apricots and water in a small saucepan and bring to a boil. Reduce to a simmer and, stir frequently until most of the water is gone. Place the apricots and remaining ingredients, except the cocoa, in a processor bowl and process until smooth. Set aside to cool. Stir the cocoa in. This may be made a week ahead and stored in the refrigerator. Remove to room temperature before using.
for the crumb topping: Place the flour and almond paste (either home made or bought) in the bowl of a processor. Process until the almond paste is indistinguishable. Add the sugar and butter and process until it begins to form crumbs. Switch to pulses and pulse only until large crumbs form. Remove them to a bowl and refrigerate until needed.
To assemble the coffee cake: Spray a 9×3″ cheesecake or springform pan with a non-stick baking spray. Set aside. Remove the brioche from the refrigerator, punch down, pat into a rectangle on a lightly floured surface and roll into a 20×11 inch rectangle so the long horizontally in front of you to make rolling up easier. Spread the filling evenly over the brioche within ½” of the edges. Roll up tightly from the 20″side and pinch the seam securely together. Roll and gently stretch it until it is 30″ long. If it is very soft at this time, coil it up on a parchment line baking sheet and chill to firm up. Do not let it freeze.
Starting in the middle of the pan, coil the roll around towards the outer edge of the pan. Press it down to flatten and fill the pan. Cover with a towel and let rise until doubled in bulk. Because everything is cold, this could take 4 to 4 ½ hours to rise.
Heat the oven to 375F. When the coffee cake is full risen, brush it with the beaten egg and distribute the almond paste crumbs evenly over the brioche. Bake for 45 to 55 minutes until the top is browned. A tester is difficult here because the filling stays moist and clings to the tester. If the top begins to brown too quickly, tent it with foil. Cool until barely warm and release the cake. Dust with powdered sugar to serve.
Comments: Helen’s method to make a brioche in the food processor is something I’ve been meaning to try for the longest time, and it works so well, I will keep it as my method of choice from now on. It considerably speeds up the preparation of the dough, and you cannot beat the texture. A pleasure to work with. I could have done a better job keeping the coil leveled on all sides of the pan, if you look at the bottom left photo of the composite above, you’ll see that my coil got a bit lopsided. Other than that, no issues. I highly recommend you visit Helen’s site (click here) because she goes over every little step with pictures and you get a better idea of what to expect as you make this recipe.
The crumb topping is irresistible, so I advise you to stop nibbling on it and use it exclusively to top the cake. I made my own almond paste, following Helen’s detailed recipe, and it turned out perfect! I used her simple syrup method. You can read her post about it clicking here. My little concoction looked exactly like hers – or the ones you can buy at the store – but my picture was badly out of focus, so you will have to take my word for it. I loved making this crumb cake, now I dream of variations, maybe some black sesame paste in the filling could be fantastic also!
I am going to say something quite daring, so here it goes: this might very well be the best thing I’ve baked in a whole year! If you follow my blog, you probably know I am quite fond of Helen’s recipes, because not only they always work, but her explanations are crystal clear, and make you comfortable to try something even if it seems complex or out of your skill level. I had never made kolache, but following the method described in this post, I had no issues. They turned out fantastic! Check her post for all sorts of variations for the filling, or go with the one I chose: pineapple. Tart, bright, fresh, perfect contrast with the slightly sweet bread dough. A winner. I promise you.
for the pineapple filling: 1 cup well drained crushed pineapple ⅓ cup sugar 1 teaspoon potato starch or cornstarch 1 teaspoon lemon juice 1 tablespoon melted butter
Whisk together the sugar and potato starch or cornstarch. Combine all ingredients in a small pan and bring to a boil over medium heat. Boil for 1 minute. Cool completely. Refrigerate until needed.
for the dough: ½ cup butter (1 stick, 114 grams) ½ cup sugar (100 grams) 1 teaspoon salt 1 cup sour cream (225 grams) 2 teaspoons instant yeast ½ cup lukewarm water 2 eggs 4 cups all purpose flour (560 grams)
Cut the butter into pieces and place in a small saucepan along with the sugar and salt. Heat until the butter is melted. Remove from the heat and let it sit until it is lukewarm. Add the sour cream. Whisk it into the butter mixture. Add eggs and yeast, whisk them in. Lastly, add the water. Transfer to the bowl of a mixer. Add the flour and, beat until it comes together. Knead in the machine for 3 minutes, turning after about 1 ½ minutes as the dough will adhere to the top of the dough hook and not get beaten. The dough will be very soft and more of a batter.
Place it in a greased bowl or container, cover with plastic wrap and allow it to rise until doubled, about 2 ½ hours. After it has risen, punch it down, re-cover it and refrigerate overnight so the butter can firm up.
for shaping and baking: Refrigerated dough 1 egg, well beaten pineapple filling
Line three baking sheets with parchment. Set aside. Punch the dough down if risen and divide the dough in half (585 grams each). Shape each piece into a rectangle. Wrap each piece in plastic wrap and refrigerate for 10 to 15 minutes. Remove one piece of dough from the refrigerator and roll it out so it is ½ inch thick. The dough will be very firm. With a 3″ cookie cutter (or whatever size you want) cut out rounds and place them on the parchment about 1 inch apart. Repeat with the second piece of dough. Reroll and cut additional rounds. Cover them with tea towels and allow to rise until almost doubled.
Preheat the oven to 375°F. With your fingers, make a deep well in the rounds about ½ inches in from the edge of the dough but do not go through the dough. Start by making a hole in the center. Expand the well by pressing the dough down. Brush the top edges of the Kolache with the beaten egg. Fill the wells with 1 to 1 ½ tablespoons of filling. Bake on a double pan for about 20 minutes for the 3″ size until the top of the dough is well browned. Reduce the time for smaller pastries.
Makes about 20 – 3″ rolls with re-rolling the dough.
Comments: I highly recommend you visit Helen’s site to get her step-by-step photos and instructions, especially if you’ve never made enriched bread dough. The dough is very nice to work with, a bit sticky, but I urged the temptation to add more flour and all ended well in the end. I was intrigued by the pineapple filling because I rarely use pineapple in baking, but it was much better than I expected. I made the filling the day before, right after mixing the dough and placing it in the fridge for overnight proofing. Next day the whole thing was a breeze, just rolled the dough, cut circles, filled and baked. I donated them all, but sampled one for “quality control”. It was hard to stop, but I exercised herculean self-control.
Helen, cannot thank you enough for so many great recipes I’ve made from your site!