Do you follow Lisa is Cooking? She writes cookbook reviews and is the person I blame for quite a few of my acquisitions, which are usually Kindle versions, so I feel less guilty. Her latest post centered on a book called East: 120 Vegan and Vegetarian Recipes from Bangalore to Beijing, by Meera Sodha. I ordered it within minutes of reading the blog post. I modified one of the recipes quite a bit, and share my version with you today.
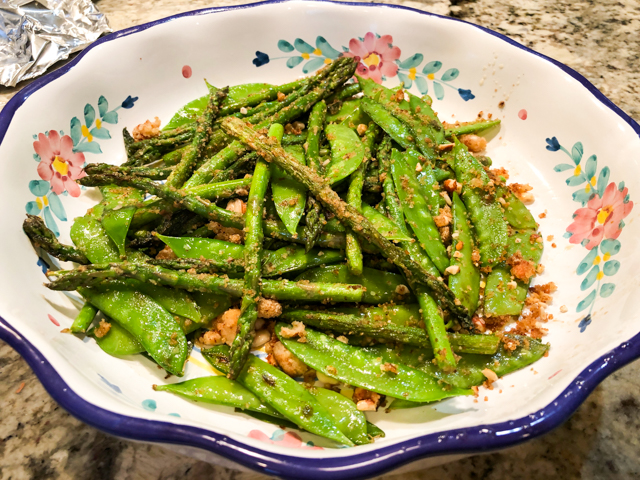
ASPARAGUS AND SNOW PEAS WITH WALNUT CRUMBS
(adapted from Meera Sodha’s East)
1 bunch thin asparagus, tough ends trimmed
Snow peas (about 1/4 pound)
1/4 cup grapeseed oil, divided
1/3 cup walnuts, coarsely ground
1/2 cup bread crumbs, preferably homemade (Panko works too)
1 Serrano pepper, very finely minced
salt and pepper to taste
zest and juice of 1 lemon (I used Meyer Lemon)
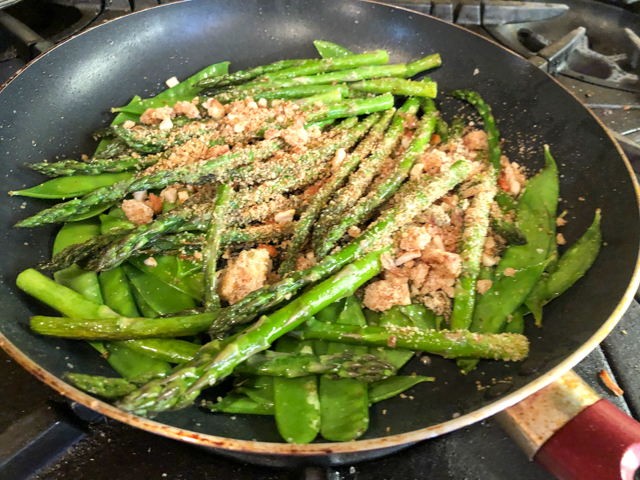
Start by making the crumb component. Heat 2 tablespoons of oil in a large non-stick skillet and add the walnuts and Serrano pepper, season lightly with salt and pepper. Stir-fry for a minute or two, add the bread crumbs, cook until fragrant and getting toasted. Immediately squirt the juice of 1/2 lemon, mix well and transfer to a bowl. Reserve.
Add one tablespoon of oil to the skillet, and cook the asparagus, making sure they form a single layer in the pan with not much overlapping. Season lightly with salt and pepper. Cook in high heat for a couple of minutes, cover the pan, reduce the heat and allow it to cook in its own steam for another minute or so. Transfer to a bowl, and add a little more oil to the skillet. Now add the snow peas and cook in high heat for a couple of minutes. Add the asparagus and the reserved crumbs to the skillet, warm everything together moving it often. Squirt the juice of the remaining half of the lemon, adjust seasoning, and serve.
ENJOY!
to print the recipe, click here
Comments: If you need inspiration to prepare vegetables in creative, unusual ways, this book is a must-have. But Lisa reviewed it in the best possible way, so just jump to her blog for details. I made the original version of this recipe that used peanuts and quite a bit more of the crumb component, but to my taste it was a bit much. I toned it down and also liked it better using walnuts in place of peanuts. I think a drizzle of walnut oil to finish the dish could be excellent, and I am kicking myself because I did not try it, as I do have walnut oil in the fridge. Best laid plans.
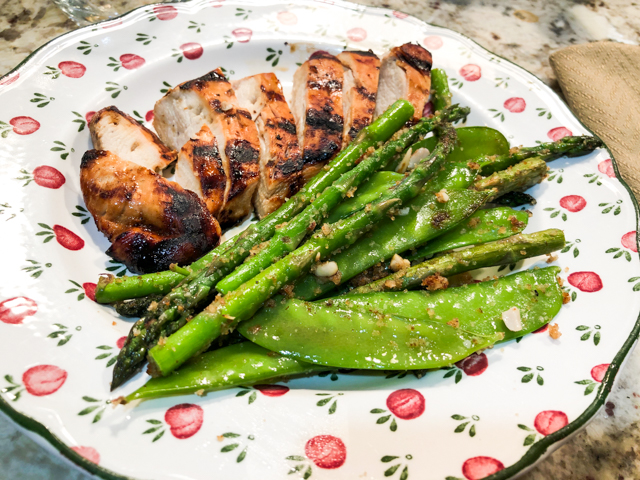
The book is full vegetarian and vegan, but I will use it mainly as a source for side-dishes. This delicious salad (she calls it a salad, although it is served warm), was enjoyed with juicy grilled chicken breasts, a recipe that quickly became a regular in our kitchen. It was a bonus recipe featured in this post from my recent past.
ONE YEAR AGO: Yin and Yang Viennoise Bread
TWO YEARS AGO: Extreme Chocolate Cupcakes
THREE YEARS AGO: Sunflower Seed Kamut Sourdough
FOUR YEARS AGO: The Joys of Grating Squash
FIVE YEARS AGO: Auberge Pecan-Walnut Bread
SIX YEARS AGO:Gluten-free and Vegan Raspberry Bars
.
SEVEN YEARS AGO:Lasserre, a French Classic
.
EIGHT YEARS AGO:Sourdough Bread with Walnuts and Dates
.
NINE YEARS AGO:Braised Brisket with Bourbon-Apricot Glaze
.
TEN YEARS AGO: The Real Vodka Sauce
.
ELEVEN YEARS AGO:Pork Tenderloin and Blue Cheese