SEA SCALLOPS WITH PEA PUREE & CILANTRO GREMOLATA

Preparing this dinner was not easy.  It was probably not very wise to make it during the kitchen hellnovation, but I was craving a nicer meal to make our Sunday evening feel special.  It can be very stressful to be in a house undergoing renovation, so having a slightly fancier meal seemed like a good idea.  However, what used to be a kitchen is now an almost empty space with no finished floors or appliances.  We are lucky to be able to keep the fridge turned on in our garage, and to have improvised two cooking areas: one in the laundry room, another in our enclosed patio.  Still, pantry items are in boxes, a few dishes are piled in the dining room for our daily use, a few pans at close reach, but not that many.  I wish you could see a video of me preparing this meal.  Actually, I am very glad there is no video documenting the process.  It involved me dashing a few times across rooms, forgetting that some passages are blocked by heavy plastic.  It involved a mildly twisted ankle while balancing scallops on a baking dish and “almost” losing them all to a floor covered in rough concrete bits. It also involved a scorched pan,  but the pea puree, even after subjected to torture tasted absolutely awesome!  So, allow me to share with you one of the toughest meals I prepared in the past year, a recipe that I first saw on a favorite food blog of mine, Taste Food.  Yes, I cooked from Lynda’s blog before…  😉

served1

SEA SCALLOPS WITH GINGERED PEA PUREE AND CILANTRO GREMOLATA
(adapted from Taste Food)

for the scallops:
12 sea scallops
salt and pepper to taste
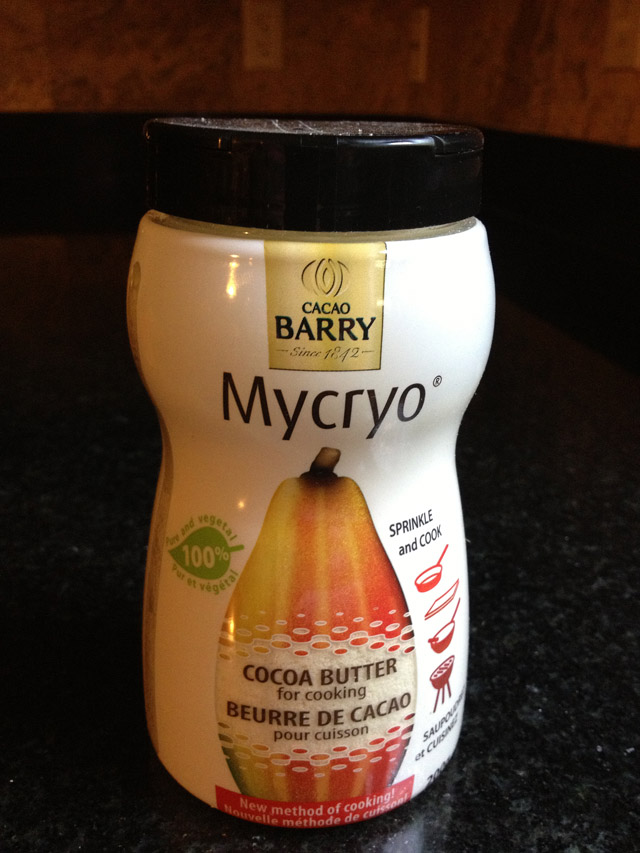
sprinkle of Mycryo

for the pea puree:
2 cups shelled English peas
salt
1 tablespoon freshly grated ginger
2 tablespoons extra-virgin olive oil
2 tablespoons freshly squeezed lemon juice
freshly ground black pepper
pinch of cayenne

for the gremolata:
1 cup cilantro leaves, chopped
1 garlic clove, minced
2 tablespoons finely grated lemon zest
1/2 teaspoon salt
1/2 teaspoon freshly ground black pepper

Make the gremolata by combining the cilantro, garlic, lemon zest, salt and pepper in a small bowl. Set aside.

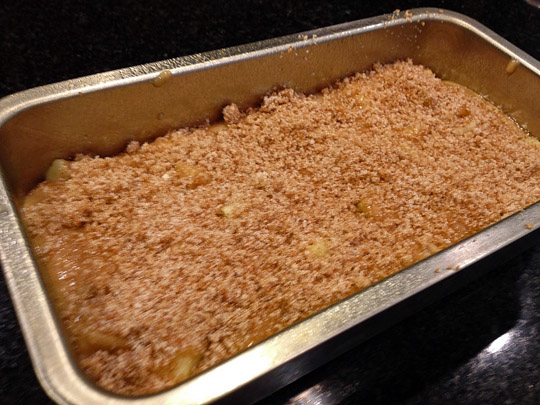
Bring 4 cups water to a boil in a large saucepan. Add 2 teaspoons salt and the peas. Cook until peas are tender. Remove from heat and drain peas, reserving 1 cup cooking liquid.

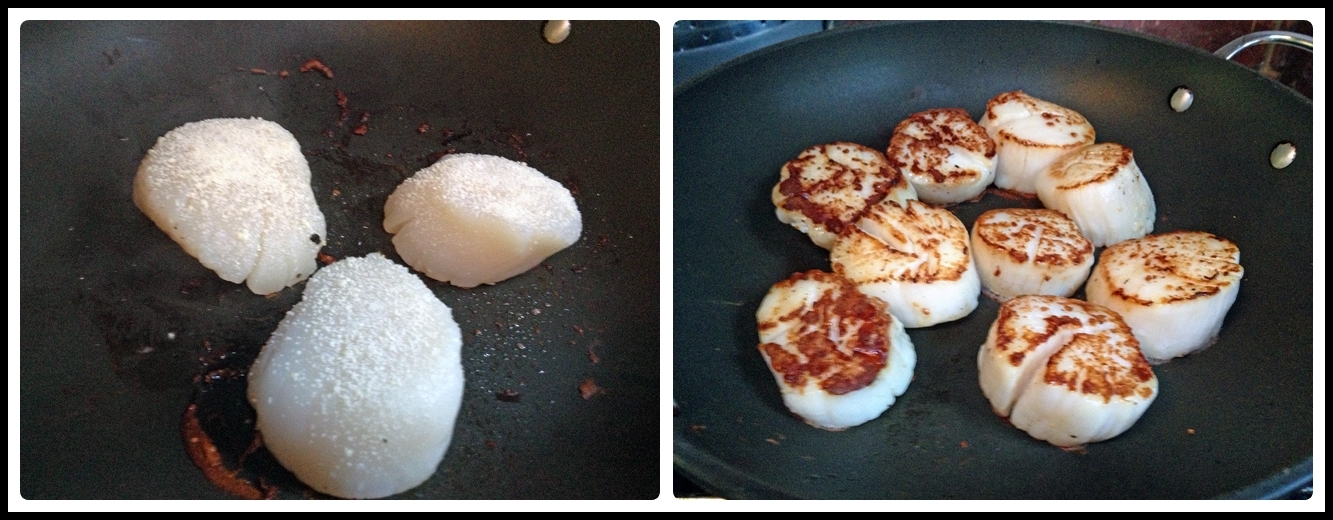
Combine peas, ginger, olive oil, lemon juice, 1 teaspoon salt, 1 teaspoon black pepper and cayenne in bowl of food processor. Purée until smooth. Add some of the reserved water (approximately 1/4 cup) to thin to desired consistency; the purée should not be too thin. Discard remaining water. Transfer purée to a bowl and keep warm. Pat scallops dry and sprinkle all over with salt and pepper. Add a sprinkle of Mycryo right before cooking. Heat a non-stick skillet over medium-high heat. Add half of the scallops, taking care not to overcrowd the pan. Cook, turning once, until brown on both sides and just cooked through, about 4 minutes. Transfer to plate and keep warm. Repeat with remaining scallops.  No need to add any oil to the pan, just the sprinkle of Mycryo will be enough.

To assemble, spoon pea purée on serving plates. Top with scallops. Sprinkle scallops and purée with gremolata.  Serve immediately.

ENJOY!

to print the recipe, click here

peapuree

Comments:  Mycryo is a great product with a poorly chosen name, if you ask me.  The word –  Mycryo – makes me think of tears, sadness, despair.  But that could not be farther from the truth:  they gave sea scallops THE most perfect brown ever, even though they were prepared in THE most rudimentary cooking conditions available to a cook (the Drama Queen says hello). I even conducted a small experiment by preparing two batches of sea scallops.  One cost a small fortune, they were the ultra-special, huge dry sea scallops.  The other was a frozen type that while thawing released a gallon of white milky liquid.  No bueno.   With a light sprinkle of Mycryo (and no oil added to the non-stick pan), all scallops browned like a Brazilian under the tropical sun!   We could not tell the difference in texture or taste between the two types, which was quite amazing to me.   Great product! You can order here, they shipped very quickly, contrary to what I heard from customers who got it through amazon.com.

composite11

The pea puree competed heavily with the scallops to win the spotlight of this meal.   Bright flavor with the ginger and just a slight heat from the cayenne.  Lynda really came up with a perfectly balanced side dish.

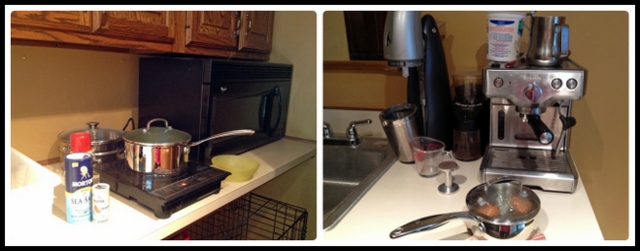
I close this post with a little snapshot of our laundry room.  In one side we installed the induction cooktop + microwave. On the other side, where we do have a large sink, we stuffed together the coffee machine, coffee grinder, and our beloved Penguin Sodastream.  It’s cozy in there, folks. Cozy.

cookingcomp

ONE YEAR AGO: Mediterranean Skewers with Balsamic Dressing

TWO YEARS AGO: Five Grain Sourdough Bread

THREE YEARS AGO: The Nano-Kitchen

FOUR YEARS AGO: Kaiser Rolls

BLUEBERRY-BANANA BREAD

Back when my site was a young baby, I blogged about one of the greatest classics in American cooking, the banana bread. I had no idea that a few months down the line, that recipe would be part of a fun quest to find the world’s best banana bread, and what’s even more amazing, it tied for first place! To me, that matter was solved. No need to even bother trying another recipe. Then, on a quiet Saturday morning, while checking FoodTV episodes taped during the previous week, I saw Giada cheerfully making a blueberry banana loaf. Blueberries and bananas, baked together until the blueberries get all soft and intensely sweet… I decided that my blog can handle a second take on a classic, especially one with a purple twist! 😉

readyBLUEBERRY-BANANA BREAD
(from Giada de Laurentiis)
.
Butter, for greasing the loaf pan
1 + 1/2 cups all-purpose flour, plus extra for dusting the loaf pan
1 teaspoon baking soda
1 teaspoon salt
1/2 teaspoon baking powder
1/2 teaspoon ground cinnamon
1/2 teaspoon ground nutmeg
1 cup sugar
1/2 cup vegetable oil
2 large eggs, beaten
2 teaspoons vanilla extract
2 ripe bananas, mashed (about 3/4 cup of mashed banana)
1 cup (about 4 ounces) fresh blueberries
.

Heat the oven to 350 degrees F. Butter and flour a 9- by 5- by 3-inch loaf pan. Set aside. In a bowl, whisk together the flour, baking soda, salt, baking powder, cinnamon and nutmeg. In a large bowl, beat the sugar, oil, eggs and vanilla until blended. Stir in the bananas and blueberries. Add the dry ingredients and stir just until blended.
.
Pour the batter into the prepared loaf pan. Bake until a cake tester inserted in the center of the loaf comes out clean, about 1 hour. Cool for 15 minutes. Remove the loaf from the pan and cool completely on a wire rack, about 2 hours.
.
ENJOY!
.
to print the recipe, click here
.

slicerow2.
Comments
:  I decided to make this loaf around 9pm on a Monday night.  It was a dark and stormy night… ooops, no, that’s the beginning of a bad novel…   It was actually a nice and warm summer night, but one in which I had to be in the lab at midnight to get some bacteria growing for an experiment early next day.   I wanted to make sure I would  not fall asleep in the middle of a Law and Order episode, and baking definitely gets my adrenaline going.  Side benefit?  Taking banana bread to the department, to make the life of the early birds a little sweeter…    😉
.

closeup2
This banana bread (or cake, or loaf, whatever you want to call it) is a breeze to make! I followed Giada’s advice and did not even use the electric mixer, was left with only a whisk plus two bowls to clean.  Awesome!

ONE YEAR AGO: Busy Times (one year since we moved our lab to KSU!)

TWO YEARS AGO: Oriental-Style Turkey Patties

THREE YEARS AGO: Sourdough English Muffins

FOUR YEARS AGO: Kaiser Rolls

IN MY KITCHEN – SEPTEMBER 2013

Time for another little tour of our Bewitching Kitchen, to join the virtual party started by Celia, from Fig Jam and Lime Cordial.

LET ME START WITH THREE SPECIAL GIFTS…

blackberriesFreshly picked blackberries from a colleague at KSU…  As you might remember from a recent post, they were put to excellent use in a blackberry-cherry sorbet... Hummmmmmm…..

vanillapodVanilla beans straight from France, a surprise package, courtesy of the same dear friend who sent me a huge  load of saffron in the past… My first use of one of these incredibly potent pods was the Apple-Cinnamon Bread you read about last week.


oven
A Hamilton Beach electric oven, surprise gift from Phil, who found it on ebay… the thing is huge, and the temperature control pretty accurate.  I’ve baked bread in it (the Black Sesame Sourdough),  I’ve used it to roast the meat for our French Dip sandwich...     Very nice option to keep the house cool during the hot months.  His name is Mr. Hamilton, and our patio is his new home.
.

AND MOVING ON TO OTHER STUFF GOING ON IN THE BEWITCHING KITCHEN…


peppers111Roasted bell peppers made in Mr. Hamilton.  I like to cut the peppers and seed them first, the peel comes off very easily after, no need to run under running water or do all sorts of manipulations needed with the whole pepper.  Try it, you might adopt this technique too!


composite1When we spent the sabbatical year in Los Angeles  the house we rented had beautiful Italian dishes from Jennifer Moore.  We loved them!  Ever since we left L.A. Phil has been actively searching for places that sell them.  Thanks to his persistence, we now have several pieces to remind us of the months spent in California.


glasses
We normally prefer clear glasses, but these are so delicate and beautiful with a light pink body and green stems!  Those are my favorite glasses to sip some Portuguese green wine. Another great ebay find by Phil, by the way… 

Mycryo
A new product, Mycryo…  If you haven’t heard anything about it, be ready to be amazed!  It is a cocoa butter-derivative, that you sprinkle on food to be sautéed.   It has fewer calories than any other type of fat, and is supposed to brown the food like nobody’s business.  Fantastic on scallops, by the way, you don’t even have to worry about drying them.   Yes, there will be a blog post about it…. stay tuned!


compositepizza111
Preparations for one of our favorite ways to entertain: a pizza party!  We provide the dough, the toppings, and if needed a quick lesson on how to open the dough. After that, our guests can have a lot of fun creating their own versions and “sharing the love”…  Artichoke hearts, fresh mozzarella, sautéed mushrooms, grilled zucchini, and of course those roasted red and yellow bell peppers were also part of this feast.

partycomposite


sourdoughchips2Another way to preserve sourdough starter, inspired by Celia and Joanna, two of my bread baking gurus who definitely know how to handle their starters!    I dried a very active batch of Dan, and stored several “chips” in ziplock bags at room temperature.

AND WRAPPING UP, A QUICK HELLO FROM OUR FOUR-LEGGED FRIENDS…

SNOsky


buck1What do you mean “You cannot have dark chocolate?”

I hope you enjoyed the visit to our Bewitching Kitchen… if you’d like to participate of the In My Kitchen series, compose a post and link to Celia’s site. The more, the merrier!  😉

ONE YEAR AGO: Raspberry Sorbet at Summer’s End

TWO YEARS AGO: When three is better than two (2 years with Buck in our home!)

THREE YEARS AGO: Grating Tomatoes (and loving it!)

FOUR YEARS AGO: A Peachy Salad for a Sunny Day

TLAYUDA, A MEXICAN PIZZA

Every once in a while a photo makes no justice to the dish. Case in point: tlayuda. But this recipe turned out soooo delicious that I must share right now, I don’t want to wait until I make it again.  It is tastier than you would imagine from its simple ingredients put together. Very quick to prepare, perfect to make a weeknight feel special…  The recipe was recently featured by Marcela Valladolid in her show Mexican Made Easy.  It comes from the Oaxaca region in Mexico and her description of the place made me want to buy a ticket and fly there.  Tlayudas are a typical street food, and everybody loves them.   I can tell you, the combination of refried beans with the Oaxaca cheese, the lettuce and Mexican crema is spectacular!  The chorizo adds a lot to it, but if you are vegetarian, simply omit it, the tlayuda can shine on its own without it. Avocados on the side (or sliced on top) would be amazing too…

served1

TLAYUDA
(adapted from Marcela Valladolid)

 for topping:
1 tablespoons vegetable oil
5 ounces raw pork chorizo
One 16-ounce canned refried pinto beans

for tortilla base:
2 cups instant corn masa
1/4 teaspoon salt
1 + ¼ cup water
1 tablespoons vegetable oil

for final assembly:
1/2 cup Oaxaca cheese
Iceberg lettuce, shredded
Salt and freshly ground black pepper
Crumbled queso fresco
Mexican crema

For the chorizo and bean topping: In a large heavy saute pan, heat 1 tablespoons oil on medium-high heat. Add the chorizo and cook until crisp, about 6 minutes. Remove from the heat and reserve. Heat the beans on low heat or in a microwave until very hot and easy to spread.  Reserve, keeping warm.

For the tortillas: Combine the corn masa, 1 cup of water and salt in a large mixing bowl. Mix thoroughly by hand to form a soft dough, about 2 minutes. If the dough feels dry, add more water (one tablespoon at a time).  You may not need to use the full amount of water left.

Heat a 12-inch cast-iron or heavy skillet. Place a piece of parchment paper on a flat surface. Put half of the dough onto the parchment paper and place another piece of parchment paper on top. Using a rolling-pin, roll out the dough until it is 1/4-inch thick and 10 inches in diameter.  Drizzle the oil into the hot skillet and place the rolled out masa dough into the skillet to cook for about 2 minutes. Turn over to cook on the other side.

Spread 1/2 cup of the warm refried beans onto the cooked side of dough. Add 1/4 cup Oaxaca cheese and 1/2 cup cooked chorizo. Continue to cook for until the cheese is melted, another 2 to 3 minutes. Remove the pizza from the pan onto a round serving platter. Top with the iceberg lettuce. Season with salt and pepper.  Sprinkle with crumbled queso fresco and a drizzle of Mexican crema. Cut into wedges and serve immediately. Repeat with the remaining half of dough and toppings.

ENJOY!

to print the recipe, click here

Comments: The recipe makes two 10-inch discs. I did not use the full amount of the dough, and instead  made two 8-inch discs. They were perfect for our dinner, with a little slice leftover.  If you make the full recipe, it could be a wonderful appetizer for a get-together, cutting each tlayuda in squares.  That is exactly the suggestion for serving as published in the FoodTV website, by the way.

The only challenging part of making tlayuda is transferring the rolled out dough to the hot skillet.  My first production reminded me of a book I was quite fond of growing up, Le Petit Prince, by Saint-Exupéry.  Quite a popular book in Brazil at the time. Yes, that was more or less the shape of my first tlayuda.

petitprince

Undeterred, I moved on to the second pizza, and managed to get a round enough shape to justify the name.  Oh, well. Taste is more important than looks, and even the elephant-shaped concoction was devoured with gusto. Plus, cutting the odd-shaped tlayuda in 4 pieces is a nice way to exercise your brains. And knife skills.

The dough is of course quite similar to a tortilla, but thicker and absolutely perfect for a pizza-like base.  I will definitely keep this recipe in mind to improvise with other types of toppings, including options traditionally associated with Italian pizza.

_____________________________________________________________________________________________________________________________________________

“Voici mon secret. Il est très simple: on ne voit bien qu’avec le cœur.

L’essentiel est invisible pour les yeux.”

Antoine de Saint-Exupéry, Le Petit Prince

_____________________________________________________________________________________________________________________________________________

ONE YEAR AGO: Paradise Revisited

TWO YEARS AGO: Feijoada, the Ultimate Brazilian Feast

THREE YEARS AGO: Vegetable Milhojas

FOUR YEARS AGO: Italian Bread

SECRET RECIPE CLUB: APPLE-CINNAMON BREAD

The month of August is coming to an end. The last Monday of this busy month brings with it a special revelation: which blog was I assigned to cook from as a member of The Secret Recipe Club? And who is posting something from my blog?  Which recipe was chosen? So much excitement, so much fun… This month I was paired with a food blog Queen:  Amy, the hostess of “Fearless Homemaker” has even been on TV!   You can read about her first cooking demonstration by clicking here.   And now, here I am, cooking a recipe from her blog.  Too cool for words. If her blog is new to you, I strongly recommend you to stop by.  Not only she has loads of wonderful recipes, but side-stories that are truly special, like her surprise wedding party.  She and her partner invited friends over for a nice get-together, and all of a sudden both disappeared, changed into their wedding outfits, and next thing their guests knew, an orchestra was playing, a priest was arriving , and the party turned into their wedding!  Now the family got bigger, as she and her husband recently welcomed the arrival of   “The Fearless Baby“…  Congratulations, Amy!

I had quite a few recipes on my final list to cook for the Secret Recipe reveal day: her Vegetable and Quinoa Pilaf, her Honey-Chipotle Turkey Meatballs, her Chicken Bolognese, and also her Nutella-Swirl Pound Cake.  But, in the end, I went with an Apple-Cinnamon Bread, with chunks of apple permeating the cake.   Yes, you guessed it, I took it to our department on a sunny Monday morning…    😉

SRCAugust1

APPLE-CINNAMON BREAD
(from Fearless Homemaker)

1 + 1/2 cups all-purpose flour
1 teaspoon baking soda
1/2 teaspoon salt
2 teaspoons cinnamon
1/2 teaspoon allspice
1/4 teaspoon ground cloves
2 large eggs
1/4 cup canola oil
1/4 cup applesauce
pods from 1 vanilla bean
1 cup granulated sugar
2 cups chopped Granny Smith apples, skin removed

for topping:
2 tablespoons brown sugar
1 tablespoon sugar
1 teaspoon cinnamon

 Heat the oven to 350 degrees F.  Spray an 8 by 4 loaf pan with cooking spray and set aside.

In a medium bowl, whisk together flour, baking soda, salt, cinnamon, allspice, and cloves.  Reserve.

In the bowl of a stand mixer fitted with the paddle attachment, add the eggs and beat on medium speed for about 30 seconds. Add in oil, applesauce, vanilla,  mix until smooth.    Add the sugar and mix until well combined.

Slowly add in the flour mixture, incorporating until the flour is barely combined. Gently fold in the apple chunks. pour batter into prepared loaf pan.

Prepare the topping: in a small bowl, mix together brown sugar, sugar, and cinnamon. Sprinkle this topping over the batter in the loaf pan. Bake for 50-55 minutes, or until loaf is golden, and a toothpick inserted into the center comes out clean.

Cool bread in pan for 10 minutes. loosen sides of the loaf with a knife and invert carefully.  Cool the cake completely on a rack before slicing.

.
ENJOY!

.
to print the recipe, click here

.apple

.
Comments:
  As Amy pointed out in her post, this bread smells WONDERFUL while it bakes.  Cinnamon seems to do just that, fill the house with intoxicating aroma of deliciousness to come…    I am not sure why I’ve been picking sweet recipes for the past few Secret Recipe Club adventures, but I’m enjoying the phase.  And I suppose the members of our department don’t mind that either!   😉

___________________________________________________________________________________________________________________________________________________

Amy, it’s been great to spend time on your blog, reading your stories, marveling at your photos.  

I hope you enjoyed this month’s assignment as much as I did!

___________________________________________________________________________________________________________________________________________________

To see what the other members of my group cooked up for today’s Reveal Day, click on the blue amphibian smiling at the bottom of the post.  And if you are wondering who got my blog and the recipe chosen, go visit Karen’s site at Lavender and Lovage!  😉

ONE YEAR AGO: Secret Recipe Club: Blueberry Galette

TWO YEARS AGO: In My Kitchen, August 2011

THREE YEARS AGO: Journey to a New Home

FOUR YEARS AGO: Friday Night Dinner (very tasty pork medallions)