SECRET RECIPE CLUB: GREEN RICE

THREE YEARS AS A MEMBER OF THE SECRET RECIPE CLUB!

Last Monday of the month. You probably expect me to whine about the cold, but guess what?  As you read this post, I should  be far, far away in Brazil, enjoying balmy temperatures, wearing shorts, t-shirts, and recharging my batteries to face the frigid months ahead.  But the last Monday means fun, because it’s Reveal Day for The Secret Recipe Club! I was paired with the blog “A Day in the Life on the Farm“, hosted by Wendy. Her story is fascinating: she and her husband were police officers in a large city (which of course meant a ton of trouble in their hands…), but when they retired they moved to a tiny little town of 4,000 people, and bought a house on 12 acres of land.  They raise meat chickens, turkeys, and pigs, and Wendy – to fight her empty nest syndrome  –  decided to host foreign students in their place.  Now she works part-time for the World Heritage, placing students into homes for a year of schooling here in the US.  Being in academia and therefore often exposed to the troubles that foreign students face (plus, I was one myself), I know how important this type of work can be.  Please, stop by her about page and read more about their life on the farm, and how on top of everything she also takes care of her Mom, who suffers from Alzheimer’s. She actually devotes a section in her blog to talk about it, under Life with Mom. Beautiful, touching, and at times funny.

We had so much going on this past month, that I needed to jump on my assignment right away.  The recipe I set my eyes on was a drool-inducing dessert, a Caramelized Almond Apple Upside Down Cake. But, I decided against it.  Why? With Thanksgiving saying hello, then the holidays, a lot of heavy food will be popping everywhere.  I did not want to start early with the excesses, so this cake shall wait. Sorry, folks, but better safe than sorry.  Then, I almost went with her cute Pretzel Dogs. Finally it was a tough decision between Zucchini Enchiladas, or Green Rice.  As you can see, I went green.  Green is good for you, and this was one of the most flavorful rice dishes I’ve made.
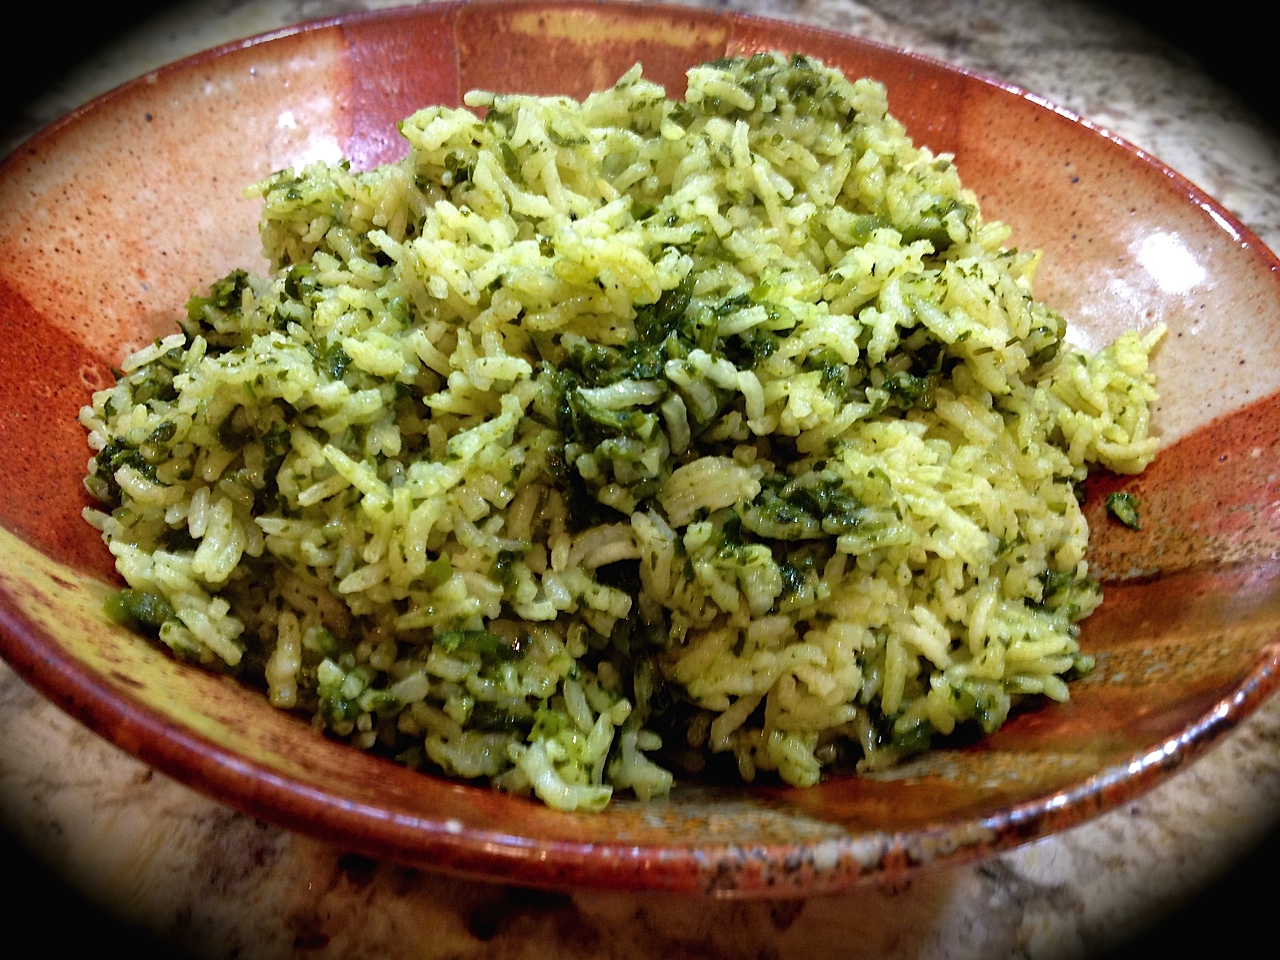
Green Rice

GREEN RICE
(very slightly modified from A Day in the Life on the Farm)

2 poblano chile peppers
1 green pepper (I used half a Serrano)
1 cup long grain rice
1 large bunch of cilantro
1 small bunch of flat leaf parsley
2 cups chicken stock
1/2  teaspoon salt
2 Tablespoons olive oil (I used grapeseed)
1 small shallot, minced
Dry roast the peppers in a griddle pan (or on a grill), turning frequently so the skins blacken but the flesh doesn’t burn.  Place in a strong plastic bag, seal and set aside for 20 minutes
.
Put the rice in a heat proof bowl, pour in boiling water to cover and let stand 20 minutes.
.
Drain the rice, rinse well under cold water and drain again.  Remove the peppers from the bag and peel off the skins.  Remove any stems, then slit the peppers and scrape out seeds with a sharp knife.
.
Put the peppers in a food processor, strip the leaves from the cilantro and parsley and add to peppers.  Pour in half the chicken stock and process until smooth.  Add remaining stock and puree again.
.
Heat oil in a saucepan, add the rice and minced shallot and fry for 5 minutes over med heat until the rice is golden and the shallot is translucent.  Add the salt, stir in the green puree, lower heat, cover and cook for 25-30 minutes or until all the liquid is absorbed  and the rice is just tender. Taste and adjust seasoning, if needed.
.
ENJOY!
to print the recipe, click here
 
Comments:  Lately I’ve been quite smitten with poblano peppers.  Very little heat, but so much flavor! Our stove did a great job charring them, I don’t think I was ever able to get such a beautiful blackened skin with almost no effort.   Using a paper towel to remove the charred skin was also a great move, a tip I got from watching Marcela Valladolid in her show Mexican Made Easy.  I never liked the idea of rinsing the peppers because there’s quite a bit of flavor loss if you do that.  The paper towels removed just the skin and I could leave little bits here and there for an extra smoky flavor.   Aren’t they cute?

compositePeppers

Adding boiling water to the rice and waiting for 20 minutes was also something I had never done, and I liked the texture of the finished product.  If you are a cilantro-hater, this rice is not for you, its flavor is obviously very prominent.  You could substitute spinach.

GreenRiceServed
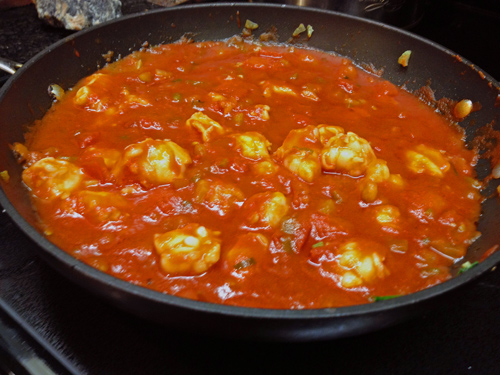
This was a delicious dinner!  Green rice, simple roasted carrots, and for our protein a few slices of center-cut pork chops, cooked sous-vide, and finished off on the grill.   Life is good!

Wendy, I hope you had a great time this month with your assignment!  It was wonderful to browse through your site, I read all your posts about your Mom, and am still in awe of your ability to do so much Everyday in your Life on the Farm… 

For my readers: if you want to see what my fellow Secret Friends cooked up this month, give a little click on the blue frog at the end of this post.   Normally Groups C and D would take a break in the month of December, but apparently me and Dorothy from Shockingly Delicious whined so much about withdrawal syndrome, that The Secret Recipe Club will have a little surprise reserved for both groups.  It will be awesome, so stay tuned!

ONE YEAR AGO: Potato-Crusted Italian Mini-Quiches

TWO YEARS AGO: Beetroot Sourdough for the Holidays

THREE YEARS AGO: Cod Filet with Mustard Tarragon Crust

FOUR YEARS AGO: Soba Noodles: Light and Healthy

FIVE YEARS AGO: Potato-Rosemary Bread

SECRET RECIPE CLUB: TACO SALAD

This is the last Monday of August.  We are about to say goodbye to Summer, and I cannot stand the thought of it.  Only Reveal Day of The Secret Recipe Club can bring me some joy under the circumstances. My assignment this month was Flying on Jess Fuel, and I had a blast stalking it and making a list of possibilities to blog about today.  Jess met her husband Nick at a Mexican restaurant, and apparently he went nuts over her jalapeno-eating skills. What a great way to fall in love! They lived in many different places while Nick went to flying school for the Navy, including Enid, a location quite close to Norman, our former home in Oklahoma.

For some reason, I usually pick sweets for my Secret Recipe assignments, but this time I took the road less traveled and went with her Taco Salad, considering that Mexican food would be a fun way to celebrate the way they met.  I find it amusing that some recipes that I order in restaurants on a regular basis are never part of my own cooking at home. Taco Salad is one of those.  For the most part, Tex-Mex restaurants offer dishes over-loaded with cheese, and served with a humongous portion of rice, beans, plus a few flour tortillas for good measure.  Taco Salad is my default request to avoid feeling like a bloated whale as I leave the restaurant.  I made just a few changes in her recipe, and decided to pump up the presentation by making my own tortilla bowls.  Now, that was a ton of fun, but some unexpected problems were encountered.  As I was frantically trying to figure out which cups would be appropriate to shape the tortillas, one of my custard cups fell from the cabinet and crashed on the granite (yes, glass flew everywhere), but not without first hitting my head. OUCH!  And, going on with my usual modus operandi in the kitchen, I burned myself not once, but twice baking those tortilla bowls.  Sometimes I even amaze myself… However, I can tell you it was all worth it!  This recipe rocks, my friends….

TacoSalad

JESS’ TACO SALAD
(slightly modified from Flying on Jess Fuel)

1/4 cup sour cream
1/4 cup yogurt
1/2 cup salsa
1 Tablespoon grapeseed oil
1 lb ground beef
2 tablespoons bulk taco seasoning mix (or 1 packet)
1 can black beans, rinsed and drained
1 large head romaine, chopped
4 tomatoes, chopped
1 bunch scallions, chopped
Black kalamata olives, chopped (to taste)
Shredded Mexican blend cheese (to taste

To make the dressing, combine sour cream, yogurt and salsa in a small bowl. Set aside.

Heat the oil on a skillet and cook the meat for a few minutes. Season with salt (in case your taco seasoning doesn’t have salt already), then add either a packet of store-bought taco seasoning or 2 Tbs of a bulk product such as Penzey’s. Cook for a couple of minutes, add the amount of water recommended by the mix, and cook further just to thicken it slightly. Add the beans to the pan in the last 2 minutes of cooking.

If serving cold, let the meat and bean mixture cool to room temperature. In a large bowl, place half the lettuce, half the tomatoes, half the scallions and half the olives. Top with half the dressing. Top with the meat and bean mixture (you can reserve a little bit for decorating the top, if you want to be fancy). Sprinkle half the cheese on top. Add the rest of the veggies, dressing, and cheese (and meat mix if you reserved some). You can also serve it warm, adding the cold ingredients to the hot meat/beans mixture.

ENJOY!

to print the recipe, click here

IMG_5215

Here you can see some photos of my burning adventure with tortilla cups. You can do this in several ways, but I recommend the muffin tin + custard cup combo.  Using the two custard cups nested together requires that they both fit just right not to tear the tortilla, and also makes it a lot harder to remove the top cup to brown the tortilla in the final moments of baking.

compositeShells

MAKING TACO BOWLS:  Warm a corn tortilla very quickly over an open flame on your stove (I heard you can also use the microwave, but I haven’t tried it).  Spray both sides of the warm tortilla very lightly with canola or olive oil spray.  Immediately place in the muffin tin (or over a custard cup), and place another container on top to keep the shape.  Bake in a 375 F for about 15 minutes, removing the custard cup in the final 5 minutes. Let cool over a rack.

We loved this recipe!  Actually, Phil was raving about it non-stop, and begging me to make it again, and do it soon.  The tortilla cups make it very festive, but the taco stands on its own without any problem, it is fresh, bright, the dressing mixing sour cream and salsa was incredibly tasty!  I used a home-made salsa given to us by Mr. and Mrs. K (thank you, guys!), and it had just the right amount of heat.  Use any store-bought salsa you are fond of, or make your own if you have a chance.

Jess, I loved being assigned to your blog!  This has been one super busy month for us, but I made sure to compose this post within one week of getting the email notification. I fell in love with this recipe right away, and you can bet this will be in a regular rotation in our Bewitching Kitchen! 

To my readers: if you want to see what the other members of my group cooked up this month, poke the blue frog at the end of the post.

ONE YEAR AGO: Semolina Sourdough Boule 

TWO YEARS AGO: Forgive me, for I have sinned

THREE YEARS AGOCracked Wheat Sandwich Bread

FOUR YEARS AGO:  Au Revoir, my Bewitching Kitchen

FIVE YEARS AGO:  French Bread

TLAYUDA, A MEXICAN PIZZA

Every once in a while a photo makes no justice to the dish. Case in point: tlayuda. But this recipe turned out soooo delicious that I must share right now, I don’t want to wait until I make it again.  It is tastier than you would imagine from its simple ingredients put together. Very quick to prepare, perfect to make a weeknight feel special…  The recipe was recently featured by Marcela Valladolid in her show Mexican Made Easy.  It comes from the Oaxaca region in Mexico and her description of the place made me want to buy a ticket and fly there.  Tlayudas are a typical street food, and everybody loves them.   I can tell you, the combination of refried beans with the Oaxaca cheese, the lettuce and Mexican crema is spectacular!  The chorizo adds a lot to it, but if you are vegetarian, simply omit it, the tlayuda can shine on its own without it. Avocados on the side (or sliced on top) would be amazing too…

served1

TLAYUDA
(adapted from Marcela Valladolid)

 for topping:
1 tablespoons vegetable oil
5 ounces raw pork chorizo
One 16-ounce canned refried pinto beans

for tortilla base:
2 cups instant corn masa
1/4 teaspoon salt
1 + ¼ cup water
1 tablespoons vegetable oil

for final assembly:
1/2 cup Oaxaca cheese
Iceberg lettuce, shredded
Salt and freshly ground black pepper
Crumbled queso fresco
Mexican crema

For the chorizo and bean topping: In a large heavy saute pan, heat 1 tablespoons oil on medium-high heat. Add the chorizo and cook until crisp, about 6 minutes. Remove from the heat and reserve. Heat the beans on low heat or in a microwave until very hot and easy to spread.  Reserve, keeping warm.

For the tortillas: Combine the corn masa, 1 cup of water and salt in a large mixing bowl. Mix thoroughly by hand to form a soft dough, about 2 minutes. If the dough feels dry, add more water (one tablespoon at a time).  You may not need to use the full amount of water left.

Heat a 12-inch cast-iron or heavy skillet. Place a piece of parchment paper on a flat surface. Put half of the dough onto the parchment paper and place another piece of parchment paper on top. Using a rolling-pin, roll out the dough until it is 1/4-inch thick and 10 inches in diameter.  Drizzle the oil into the hot skillet and place the rolled out masa dough into the skillet to cook for about 2 minutes. Turn over to cook on the other side.

Spread 1/2 cup of the warm refried beans onto the cooked side of dough. Add 1/4 cup Oaxaca cheese and 1/2 cup cooked chorizo. Continue to cook for until the cheese is melted, another 2 to 3 minutes. Remove the pizza from the pan onto a round serving platter. Top with the iceberg lettuce. Season with salt and pepper.  Sprinkle with crumbled queso fresco and a drizzle of Mexican crema. Cut into wedges and serve immediately. Repeat with the remaining half of dough and toppings.

ENJOY!

to print the recipe, click here

Comments: The recipe makes two 10-inch discs. I did not use the full amount of the dough, and instead  made two 8-inch discs. They were perfect for our dinner, with a little slice leftover.  If you make the full recipe, it could be a wonderful appetizer for a get-together, cutting each tlayuda in squares.  That is exactly the suggestion for serving as published in the FoodTV website, by the way.

The only challenging part of making tlayuda is transferring the rolled out dough to the hot skillet.  My first production reminded me of a book I was quite fond of growing up, Le Petit Prince, by Saint-Exupéry.  Quite a popular book in Brazil at the time. Yes, that was more or less the shape of my first tlayuda.

petitprince

Undeterred, I moved on to the second pizza, and managed to get a round enough shape to justify the name.  Oh, well. Taste is more important than looks, and even the elephant-shaped concoction was devoured with gusto. Plus, cutting the odd-shaped tlayuda in 4 pieces is a nice way to exercise your brains. And knife skills.

The dough is of course quite similar to a tortilla, but thicker and absolutely perfect for a pizza-like base.  I will definitely keep this recipe in mind to improvise with other types of toppings, including options traditionally associated with Italian pizza.

_____________________________________________________________________________________________________________________________________________

“Voici mon secret. Il est très simple: on ne voit bien qu’avec le cœur.

L’essentiel est invisible pour les yeux.”

Antoine de Saint-Exupéry, Le Petit Prince

_____________________________________________________________________________________________________________________________________________

ONE YEAR AGO: Paradise Revisited

TWO YEARS AGO: Feijoada, the Ultimate Brazilian Feast

THREE YEARS AGO: Vegetable Milhojas

FOUR YEARS AGO: Italian Bread

CLASSIC SHRIMP GOBERNADOR TACOS

Another great recipe coming straight from the adorable  Marcela Valladolid, these tacos can be prepared very quickly. Plus, if you make the shrimp filling the day before, the meal will be ready in less than 15 minutes. I tried hard to find the specific origin for Gobernador Tacos, no luck. Then, a dear friend sent me a link with the whole story behind it. (Thank you, Dr. G!). These tacos are very popular in Baja California.  I can guarantee they will be equally popular in your home!  😉

closeup111
CLASSIC SHRIMP GOBERNADOR TACOS
(adapted from Marcela Valladolid)

1 tablespoon olive oil
1 small shallot, minced
2 tomatoes, seeded. chopped
1 red bell pepper, stemmed, seeded, and diced
1 pound shrimp, peeled and deveined, chopped
1 cup canned tomato puree
1 teaspoon Mexican oregano
1 bay leaf
1/2 teaspoon smoked paprika
Salt and freshly ground black pepper
8 corn tortillas
1/2 cup shredded Oaxaca or mozzarella cheese
Lime wedges and hot sauce for serving
.
In a large heavy saucepan, heat the olive oil over medium-high heat. Add the minced shallot and cook until translucent, about 3 minutes. Add the tomatoes and bell pepper and cook for 3 minutes. Add the shrimp and cook for a couple of minutes.  Stir in the tomato puree, oregano, bay leaf, and smoked paprika. Cook for another couple of minutes, remove the pan from the heat and reserve.  Adjust seasoning with salt and pepper. Remove and discard the bay leaf.
.
Heat a large heavy skillet over medium-high heat. Lay 2 tortillas, flat on the bottom of the pan, side by side. Put a small mound of cheese on 1 side of each tortilla. Wait until the cheese melts slightly,  and then add about 2 tablespoons of the shrimp mixture to each tortilla. Fold the tortillas over into half-moon shapes and cook to melt the cheese completely, another 1 to 2 minutes. Transfer to a platter and keep warm.Repeat with the remaining tortillas, cheese, and shrimp mixture. Arrange the tacos on a serving platter and serve with lime wedges and hot sauce on the side.
.
ENJOY!
to print the recipe, click here
.

sauce
The shrimp sauce, so tasty as the taco filling, is equally wonderful as a main dish.  Just add a little white rice and some guacamole to complete the meal…

served

Deliciously messy to eat, this is a great recipe for a warm summer night!  One extra tip: do not cut the shrimp too small, keep the pieces in large chunks. If you want to splurge, chunks of  lobster tails in these tacos will be absolutely awesome!  Expensive, yes, but awesome!  😉

If you like Mexican food, tune into Mexican Made Easy, it’s always fun to watch Marcela preparing classic dishes,  often with a healthier approach.  Not much else appeals to me in the FoodTV these days, and that’s a little sad.

ONE YEAR AGO: A Walk Towards the Sunset

TWO YEARS AGO: In My Kitchen

THREE YEARS AGO:  Heavenly Home-made Fromage Blanc

FOUR YEARS AGO:  A Perfect Sunday Dinner

CINCO DE MAYO DINNER CELEBRATION

Dancers at the annual Cinco de Mayo Festival i...

Image via Wikipedia

If you love Mexican food, then Cinco de Mayo is a perfect excuse to invite some  friends over and make a tasty dinner at home. The holiday is celebrated with more enthusiasm by Mexicans living in the US than by their compatriots in Mexico. Contrary to popular belief, it has nothing to do with Mexican independence (that happened in 1810), but instead celebrates a huge Mexican victory over the French army in the Battle of Puebla,  36 years later.  Outnumbered and outgunned,  all odds were against the Mexicans, but they pulled off a spectacular victory, and now celebrate the date with all the pride it deserves.

Because we are living in California this year, I want to make a special dinner with a truly authentic recipe that’s appropriate for Cinco de Mayo.  Mexican cuisine is famous for moles : sauces that may be complex, time consuming to prepare, and a bit intimidating for the unfamiliar (such as myself).   After a lot of research I settled on  a recipe for chicken in peanut mole sauce, and made a “trial run” this past weekend.   Tasty, tasty, tasty….  And, by the way, if you throw a Cinco de Mayo party, make sure to serve a batch of guacamole for starters.  My husband’s recipe es muy deliciosa!

POLLO EN MOLE DE CACAHUATE
Chicken in Peanut Mole Sauce
(adapted from Better Homes and Gardens Mexican Cooking)

1 (4-pound) stewing chicken, cut up
8 cups water
4 stalks celery with leaves
1 medium carrot, sliced
1 small onion, diced
2 sprigs parsley
2 teaspoons instant chicken bouillon granules
1 tsp salt (+ more for final seasoning)
1/4 teaspoon pepper
1 can (10-ounce) tomatoes with green chiles, drained
2 slices white bread, torn in pieces
3 Tablespoons creamy peanut butter
4 whole cloves
3 whole black peppercorns
1 (1/2-inch stick) cinnamon
3/4 teaspoon chili powder
1 small clove garlic, minced

Place the chicken pieces in a large pan or Dutch oven with water. Add celery, carrot, onion, parsley, bouillon granules, salt, and pepper. Bring to a boil, cover, and cook over very gentle heat for 2 hours or until the chicken is tender. Don’t let the water boil, make sure it stays at a constant simmer.

Take the chicken pieces from the pan (remove the skin if you like) and season it lightly with salt. Place the pieces in a baking dish. Strain the broth; skim off fat. Reserve 1 + 1/2 cups of the broth for the sauce. Let it cool slightly before proceeding with the recipe.

Make the mole sauce: in a blender or food processor place the reserved chicken broth, tomatoes with green chiles, bread, and peanut butter. Cover and blend until completely smooth. Place in a saucepan.

With mortar and pestle (or in a spice grinder) crush cloves, peppercorns, and cinnamon well; add to saucepan along with chili powder and garlic. Bring to a boil. Reduce heat and simmer, uncovered, 15 to 20 minutes or until thickened, stirring often.

Spoon the peanut mole sauce over the chicken pieces in casserole. Bake, covered, in 350-degree F. oven 30 to 40 minutes or till heated through. Remove the cover and run it under the broiler for a few minutes if you want a little more color.  Serve the chicken over white rice.

ENJOY!

to print the recipe, click here

for an oldie but goodie from Cake, click here

Comments:  Don’t use a small, fryer-type chicken for this recipe, or you’ll  end up with dry and tasteless meat.  You need a stewing chicken, in all its plumpness, to stand up to the long cooking;   at the same time it will give the broth an intense, deep flavor.  You can freeze the leftover broth for use later, just remember it has a little salt already added to it.  Even using the correct size of chicken, make sure the cooking liquid is kept at only a gentle simmer.  I’d say this is the most important point to keep in mind when making this recipe.

The mole sauce seemed a tad too spicy when it finished simmering, but it mellowed during the final baking. The small amount of bread gives it that extra substance, so that the dish, as my husband stated quite well,  “is Mexican comfort food at its best.”

My first mole adventure will definitely not be the last…

HAPPY CINCO DE MAYO!

ONE YEAR AGO: Thom Leonard’s Country French Bread

Add to FacebookAdd to DiggAdd to Del.icio.usAdd to StumbleuponAdd to RedditAdd to BlinklistAdd to TwitterAdd to TechnoratiAdd to Yahoo BuzzAdd to Newsvine