I am a creature of habit. Every three months I invite you for a virtual tour of our kitchen, and that time has arrived. In My Kitchen is a fun tradition started by Celia and now hosted by Sherry, from Sherry’s Pickings. Stop by their virtual spots to say hello…
I like to start by sharing the gifts that found their way into our kitchen….
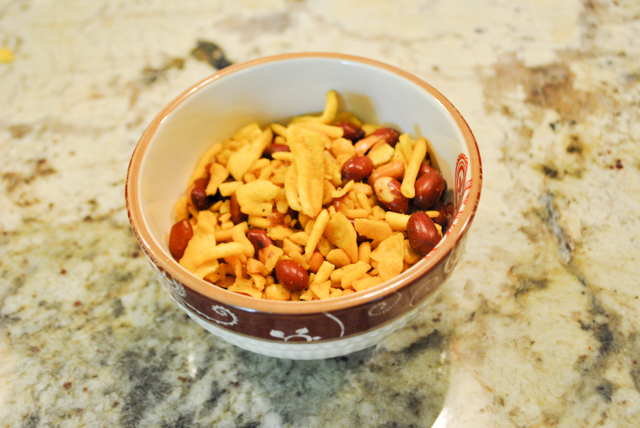
From Somnath and Aritri, a gift brought by her Dad all the way from India…

This is Chanachur… a mixture of peanuts with some incredibly tasty and spicy (but not too hot) fried little thingies made from lentils and chickpea flour. You can read all about it here. Apparently this is very popular in Bengali region. The batch they offered us is considered the very best, sold in one spot only, people form lines to get it. Yeah, lucky me. It is addictive. We usually put just a small bowl with it and keep the rest away. They gave us a lot! Now, you know what I did, and I hope they won’t hold it against me? I processed a bit of it in the food processor and used together with bread crumbs for eggplant parmigiana. Oh, my….
From our departmental colleague Dr. P….

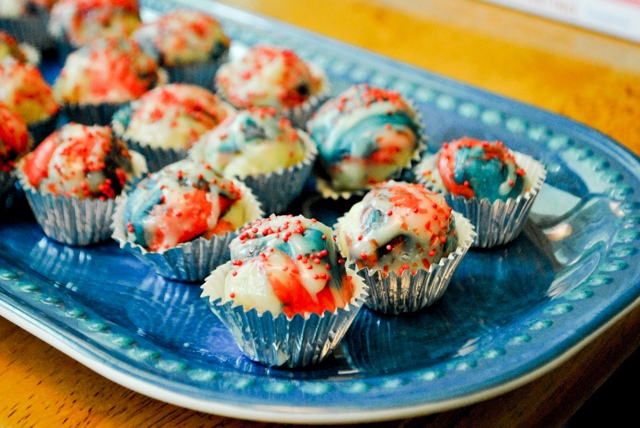
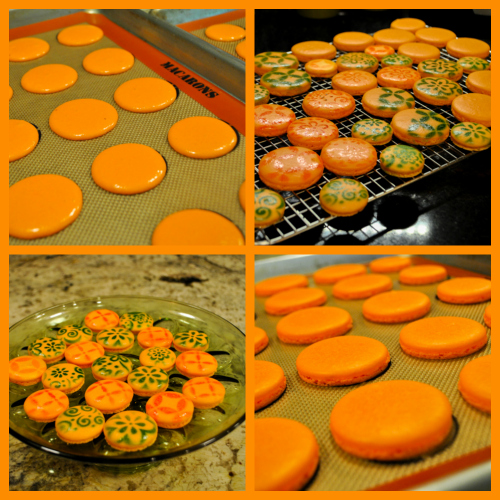
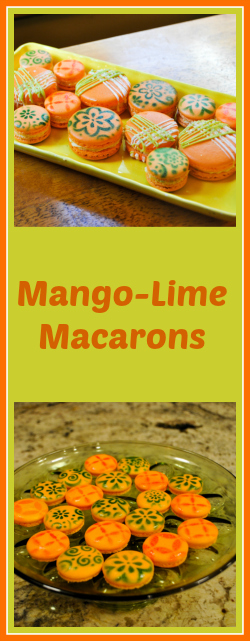
Amazing mangoes! He knows an importer in Kansas City, these beauties arrived from India and were at the peak of their juiciness… The smell! Brazil has delicious mangoes, but I must say these are hard to beat. Some of their flesh went straight into macaron filling, remember my recent post?
From my beloved hubby…

Can I call it a gift? Well, he makes me coffee every single morning, and sometimes a second one at lunchtime (weekends only, I am a creature of habit as I told you). He is my favorite barista. The cappuccino he makes beats any other made in the world! It is a daily gift that I cannot be without.
In our kitchen….

A foamer thingie, which I learned about last year in Kelly’s blog. She raved about it, but only recently I caved and got one. It works wonders, making a super creamy foam in a minute. According to Kelly, it also works on cold milk, and you can also foam liquids like coconut milk for a change. Imagine the possibilities!
In our kitchen…

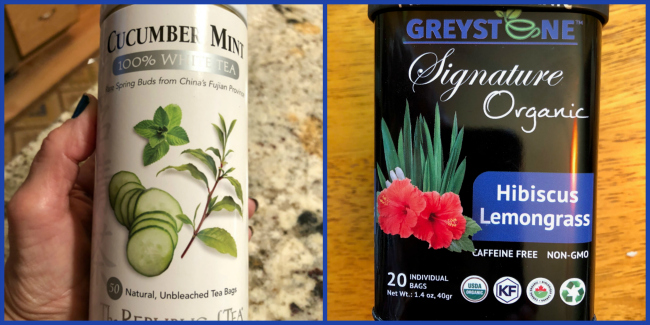
Special tea blends that are perfect for the summer months. Cucumber-mint, super refreshing, and Hibiscus-Lemongrass, a beautiful color and very exotic taste. Love them both, either straight, or diluted with carbonated water with a glass cube or two.
In our kitchen….

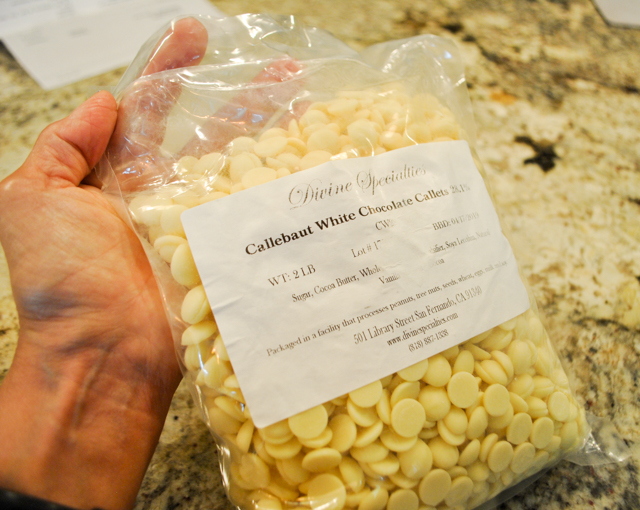
As you know, I’ve been baking a lot lately, so I decided to invest in a real good white chocolate and ordered this bag before the weather got so hot that shipping would be problematic. It is absolutely delicious! The only problem is not grabbing a handful or three every time I bake with it. I adore white chocolate… it is truly one of my weaknesses.
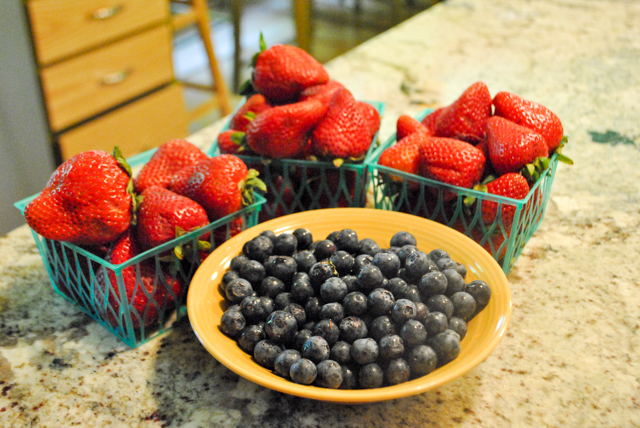
In our kitchen…

Great fruit from one of the markets in town. Strawberries are in fact from California. We eat local here. Everything comes from Planet Earth. Absolutely everything (wink, wink).
In our kitchen…

Haven’t tried these yet, but found them at Hobby Lobby and well, they jumped into my shopping cart. I tried to negotiate with them, “please, leave me leave me”, but they refused. I now must absolutely learn how to temper chocolate so I can play with my new toys. I imagine the learning curve to be a bit steep. But that’s part of the fun.
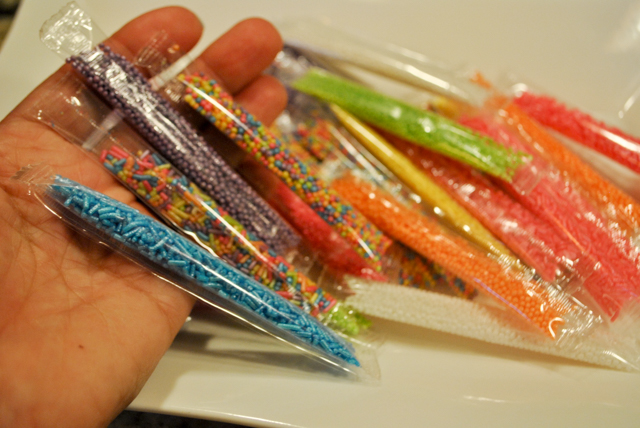
In our kitchen…

Also from Hobby Lobby. Can you resist these little packages? They are so adorable, each has just a small amount of sprinkles which will be perfect for certain French cookies called macarons. In case you suffer from Macaron-Obsession. Like some people.
In our kitchen…

A knife sharpener recommended by America’s Test Kitchen. We are divided in our opinion about this gadget. I really like it. Phil won’t use it. He always grabs that sharpening file that comes with knife sets, ours is probably over 10 years old, but he loves it. Oh, well.
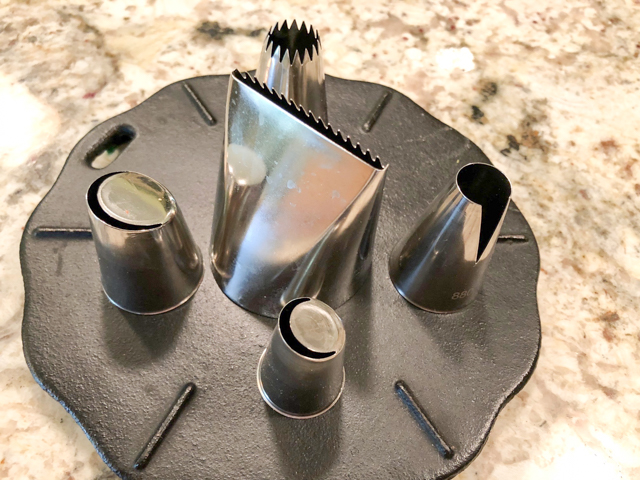
In our kitchen…

A few special piping tips. Large star tip, great for meringues, the one with the cut on the side is a St. Honoré tip, perfect for that beautiful cake, but also great in topping pies with swiss meringue, for instance. The two medium-sized can be used to pipe leaves and also some exotic flowers. I am not even close to attempting those yet.The larger one in the center is perfect to add buttercream to cakes, as it covers a nice surface quickly. You can then work the offset spatula to make things perfect. Or almost. I am a beginner. Enthusiastic, but beginner regardless.
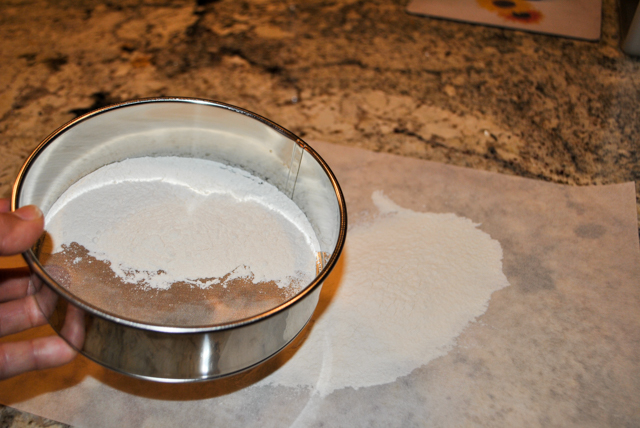
In our kitchen…

A 6-inch metal sifter. This thing is money. It is the perfect size for any job, and the mesh is fine enough that you can use to sprinkle a light coating of flour on breads, for instance. I am totally in love with it.
In our kitchen…

Liquid glucose. This is a very special ingredient used in concoctions like the famous mirror glaze. I won’t lie to you, it is a pain in the butt to measure, it is the messiest ingredient in the known universe, but sometimes you need to go through clouds to see the light. Like in a mirror. Mirror glaze. See what I did? (I am easily amused).
In our kitchen…

An assortment of stencils that come in handy to decorate certain cookies. But of course, they can be used on all sorts of productions, from cakes to… breads! Why not, right?
In our kitchen…
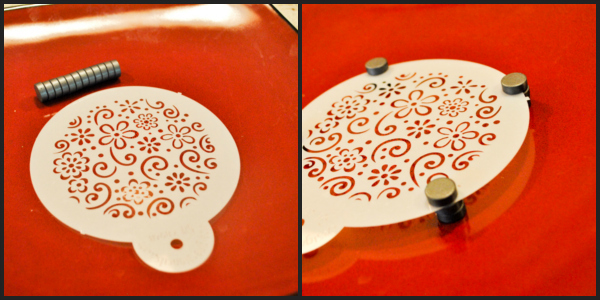
These are too cool for words! A set of small but powerful magnets. You can use them to firm your stencil in place, and then all you have to do is slide the cookie underneath to use the air-brush, or a regular brush. Very cute idea, amazing what people come up with.
In our kitchen…

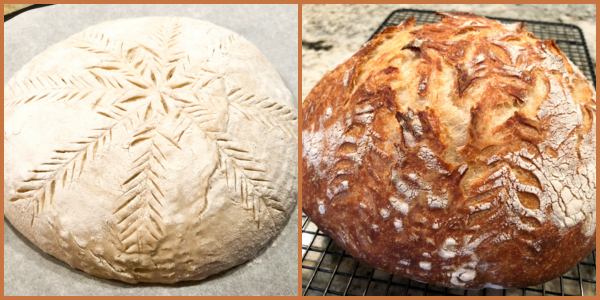
A not so successful attempt at artistic bread slashing. This was a sourdough bread made with a small amount of sprouted wheat flour. It definitely had a mind of its own as far as slashing goes… Still tasted great, so we were fine with it.
In our kitchen…

A set of Ateco round cookie cutters, in all sizes you might need. Love them… And they don’t work only for cookies either (stay tuned).
In our kitchen…

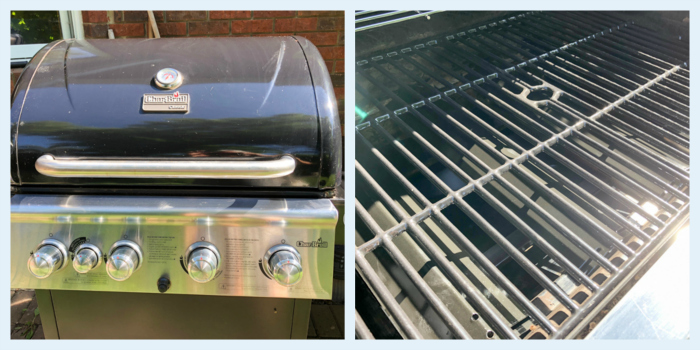
Thanks to the labor of love of my beloved husband, our grill is totally refurbished. He put new burners and burner covers, new grill grates, new gas tubing. All that while wearing a sling on his right arm due to shoulder injury. Awesome is his middle name…
BUT, BUT, WAIT!
What’s this incessant noise I hear? Seems like whining, moaning, mixed with… yes, barking… quite a bit of barking, actually. Pups are impatient. Say that I’ve been wasting the time of my readers for too long. Fine. Let them bark their piece.
Buck and Bogey firmly believe that a big nose is a must. Big noses sniff better, inspect the food bowl better, and are easier for Mom and Dad to hold and admire.

Oscar, however… is not buying it.

Truth is, we love them equally, no matter the size of their sniffers.
Each got their own chance to shine and be immortalized in our kitchen wall.

Handsome and I know it…

Cute, and I know it…

Here they are, The Magnificent Trio!
(artwork from iCanvas.com)

Unfortunately, they are not always on the top of their game. Mom and Dad were excited about Movie Night, but The Magnificent Trio was not particularly interested in the plot. They demand a different genre next time. Featuring some squirrels, and perhaps a mailman chase with a real happy ending.

Bogey works on his paranormal activities…

That does not seem to work very well, so he often gives up and takes a nap instead.

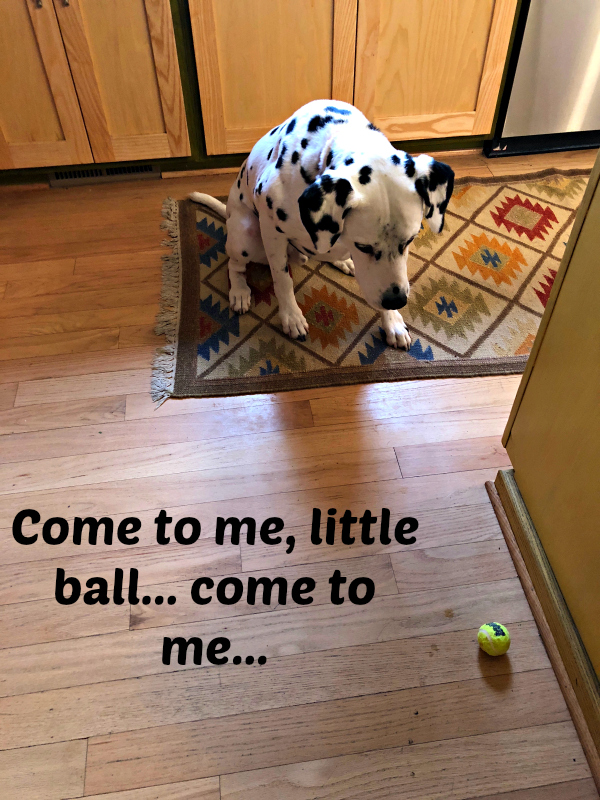
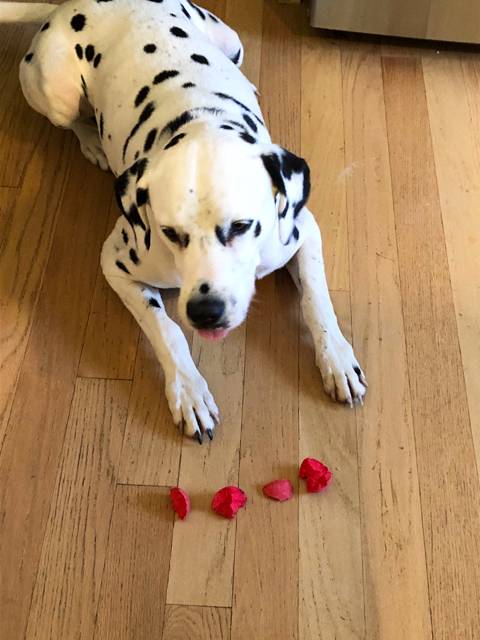
Which clearly gives him the needed energy to destroy what was sold as a “super-long-lasting ball for the strongest doggie in your loving home.” Yeah, right.
But even the cutest pups in the world have some Karma going their way….

Bath? Did anyone say bath? What for? I smell awesome! I worked so hard to develop my unique fragrance… and now this!

That does it. I am not having anything to do with ANY of you.
You can all TALK TO THE TAIL!
(special thanks to Dorothy from Shockingly Delicious for the “talk to the tail” caption).
You think THAT’s Karma?

I need a doggie lawyer! Please send help!
Osky definitely seeks revenge by rubbing his freshly shaved body into Mom’s precious yoga mat…

Never a dull moment, folks…

Oscar insists he is not interested in bananas, even if he sees his brothers going crazy for a little piece. I am not a monkey. So do not expect me EVER to eat this fruit. And please, remove it from my resting area. The sooner, the better.

Obviously, I am very selective as far as my food intake. And no, I would never eat grass.
What makes you think otherwise?

The pups adore their Daddy, and compete for his attention…
Truth is, they all believe to be the center of the universe, and think they can prove it.

Of course I am The One! They got this rug to match my fur…
See? I can make my tail disappear in it!

What’s the big deal in matching a rug? I am The One! I match Mom’s coolest looks!

Need I say anything?

That’s all for now, folks… We hope to see you again soon!

ONE YEAR AGO: In My Kitchen, July 2017
TWO YEARS AGO: Secret Recipe Club: Falafel and a Bonus Recipe
THREE YEARS AGO: Chocolate Toffee Banana Bread
FOUR YEARS AGO: In My Kitchen, June 2014
FIVE YEARS AGO: Strawberry Frozen Yogurt
SIX YEARS AGO: Baked Coconut and “The Brazilian Kitchen”
SEVEN YEARS AGO: Honey-Glazed Chicken Legs
EIGHT YEARS AGO: French-Style Rolls
NINE YEARS AGO: Chicken Breasts, Coffee, and Serendipity
SaveSave
SaveSave
SaveSave
SaveSave
SaveSave
SaveSave
SaveSave
SaveSave
SaveSave
SaveSave
SaveSave
SaveSave
SaveSave
SaveSave
SaveSave
SaveSave
SaveSave
SaveSave
SaveSave
SaveSave
SaveSave
SaveSave
SaveSave
SaveSave
SaveSave
SaveSave
SaveSave