This will certainly break all the records as far as taking my sweet time goes. I first heard of this amazing recipe in the show Taste hosted by David Rosengarten from 1994 to 2001. Those were truly the golden years of FoodTV, before it became centered on cooking competitions. I was fascinated by the recipe and always considered trying it. However, we never wanted to take a risk making this quite unusual recipe for guests, not knowing if it would work as expected. But, if there is one year that calls for all craziness to come out and play, 2020 is it. Big time. Plus, being just the two of us, we could always laugh at the disaster and chalk it to experience. Without further ado, I share the strangest, and most convoluted recipe I’ve ever made.


To see the big reveal, click here
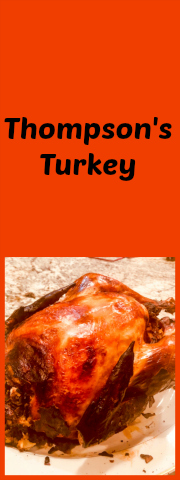
THOMPSON’S TURKEY
(adapted from David Rosengarten)
1 turkey, 16-22 pounds, with giblets
For basting:
5 ½ cups water
Salt, freshly ground pepper, vegetable oil
1 large bay leaf
1 teaspoon each: paprika, salt
½ teaspoon ground coriander
1 qt apple cider (hard cider if you prefer)
for stuffing:
1 Granny Smith apple, cored, unpeeled, diced
1 medium orange, diced
1 can (20 ounces) crushed pineapple, undrained
zest of 1 lemon
1 can (8 ounces) water chestnuts, sliced, drained
6 ribs celery, minced
2 Vidalia onions, minced
1 red bell pepper, seeded, chopped
¼ cup minced fresh parsley
1 tablespoon celery seed
2 tsp dried sage
2 tsp dried thyme
2 tsp dried oregano
2 tsp each dry mustard (Coleman’s)
2 tsp caraway seeds
2 tsp poppy seeds
1 tsp sesame seeds
1 tsp freshly ground black pepper
½ tsp turmeric
½ tsp dry summer savory
2 dashes hot red pepper sauce (I used Sriracha)
2 + 1/2 cups bread crumbs
1 pound ground pork
1 stick (½ cup) butter, softened
for paste:
8 egg yolks
1 tablespoon dry mustard
1 tablespoon onion juice
1 tablespoon lemon juice, or more as needed
1 teaspoon salt
¼ teaspoon ground red pepper
1/3 to ½ cup flour
Rub turkey inside and out with salt and pepper. Spray turkey skin thoroughly with vegetable oil. Set liver aside. Chop gizzard, neck and heart; put in saucepan with 5 cups of the water, bay leaf, garlic, paprika, salt and coriander. Simmer, uncovered, about 1 hour, while proceeding with rest of recipe.
For stuffing, combine apple, orange, pineapple, lemon zest, and water chestnuts in medium bowl; set aside. Mix celery, onions, cloves, bell pepper, parsley, celery seed, oregano, dry mustard, caraway seeds, poppy seeds, sesame seeds, black pepper, turmeric, summer savory, and hot red pepper sauce in another bowl; set aside. In a third (very large) bowl, mix bread crumbs, pork, and butter; incorporate them well. Add contents of the other two bowls; mix by kneading well.
(Thompson advised: “Mix it with your hands. Mix it until your forearms and wrists ache. Then mix it some more. Now toss it enough so that it isn’t any longer a doughy mess.”)
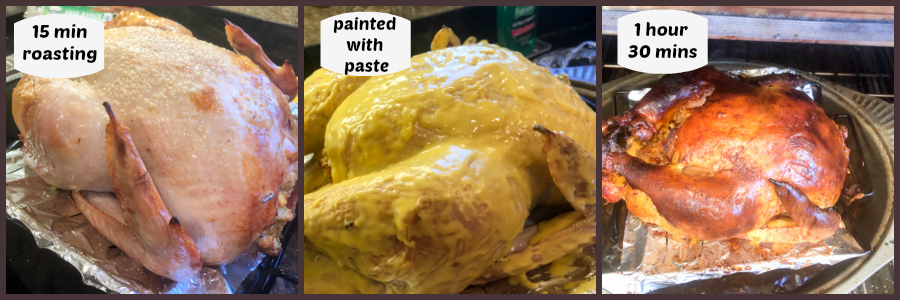
Remove battery from smoke detector. Heat oven to 500 degrees. Lightly fill turkey body and neck cavities with stuffing. Skewer closed. (Place remaining stuffing in a 3-quart greased casserole; cover. Refrigerate; bake later at 325 degrees until it registers 165 degrees on a thermometer, about 1 hour.) Place turkey, breast down, on rack in large roasting pan. Cook about 15 minutes. Remove; turn breast-side up. Cook 15 minutes. Meanwhile for paste, combine egg yolks, mustard, onion juice, 1 tablespoon of the lemon juice, salt and red pepper. Add enough of the flour to make a paste.
Turn oven down to 325 F. Paint turkey all over with the paste, using a kitchen brush. Return turkey to oven 3-5 minutes, until paste sets. Paint again; return to oven. Repeat this painting every 3-5 minutes, adding lemon juice to the paste as necessary to keep from drying out, until paste is used up. Meanwhile, add the reserved turkey liver and 1 cup of the cider to the simmering basting liquid. Cook until liver is no longer pink, about 30 minutes; remove liver. Pass liquid through a sieve, discard giblets. Keep liquid on simmer.
Roast turkey, basting every 15 minutes and adding more cider to basting liquid as needed, until a meat thermometer reads 180 degrees in the thigh, 170 degrees in the breast, about 4 hours. Let turkey stand at room temperature 30 minutes before carving. Remove blackened paste coating from turkey using a spatula or tweezers. Remove stuffing to serving bowl. Carve turkey; serve.
ENJOY!
to print the recipe, click here

Comments: If you want to know more about Thompson’s Turkey, I suggest this article. Essentially, you make a stuffing that requires using every single spice available in a well-stocked pantry, and proceed to paint the bird with a paste that will turn absolutely black and hard once roasting is over. By the time you remove it from the oven, you will be sure it’s not fit for consumption. But then, you break that crust and reveal the most beautiful roasted bird, with a dark copper tone in the skin, and a stuffing that is out of this world delicious. To see the big reveal, click here
The best part of the turkey for me was the stuffing. The pineapple comes through as the most prominent taste, but then it gets all complex on you, and different from any stuffed turkey I’ve ever enjoyed for Thanksgiving. It made our Christmas Day meal quite special and festive.
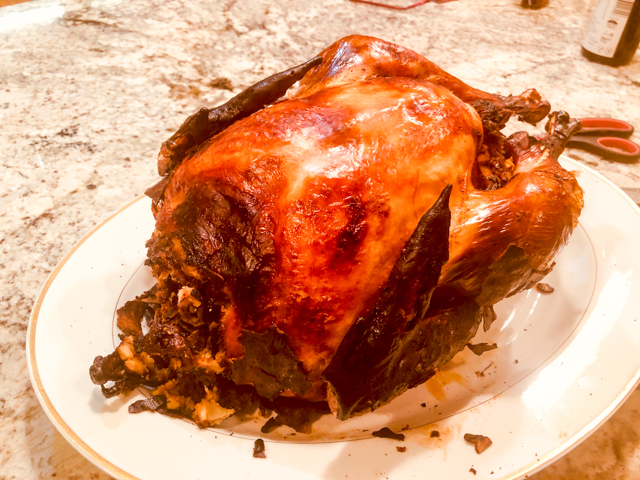
Breaking the crust is quite exciting! I read a few articles written by those who attempted this culinary marathon, and some said that the crust can glue to the skin and get it removed with it, which is a shame. The way to avoid that is to oil the skin before applying the paste, and I incorporated that in the recipe. Also some methods tell you to keep turning the bird breast-up then down as you paint it and place it in the oven to set for a few minutes. Don’t do it, it is not necessary and it is a messy job. The only thing I missed about the turkey was gravy. Husband is the gravy maker and he did not think the juices accumulated in the bottom of the roasting pan were particularly fit for it. I might have allowed it to get a bit too burned, so maybe next time I can plan accordingly.
So, if you want to have a very unusual and exciting meal for your next big celebration, consider making this one. It is very labor-intensive, but also a lot of fun to bring to the table. I would definitely serve it for guests, knowing now that there is a nice bird underneath that darkness…
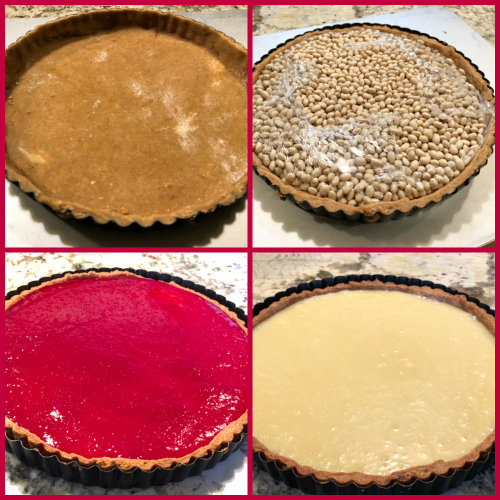
ONE YEAR AGO: Episode 5 of GABS, Citrus Tart, Napoleons and a Personal Nightmare
TWO YEARS AGO: Brazilian Chicken and Heart of Palm Pie
THREE YEARS AGO: Roasted Butternut Squash with Walnuts and Tahini Sauce
FOUR YEARS AGO: The Complicit Conspiracy of Alcohol
FIVE YEARS AGO: Candy Cane Cookies
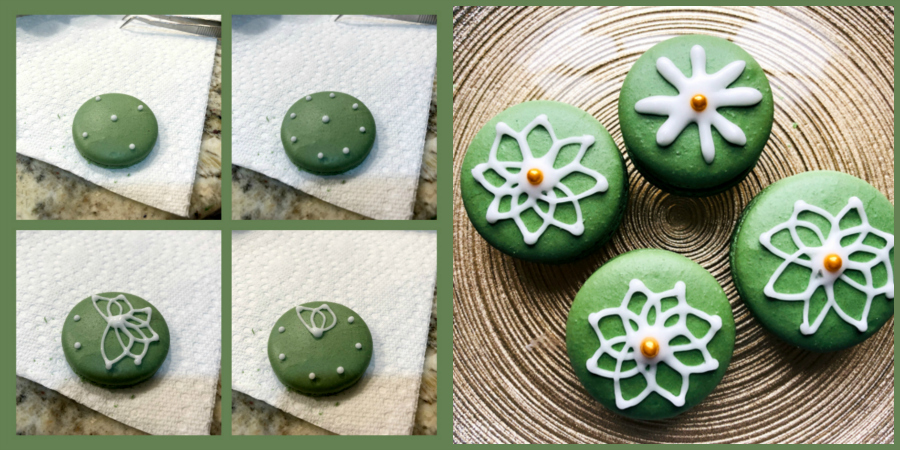
SIX YEARS AGO: Macarons: Much better with a friend
SEVEN YEARS AGO: Our Mexican Holiday Dinner
EIGHT YEARS AGO: The Ultimate Cranberry Sauce
NINE YEARS AGO: Edamame Dip
TEN YEARS AGO: Gougeres
ELEVEN YEARS AGO: Beef Wellington on a Special Night