HAVE A CRAN-MERRY CHRISTMAS!

For those who celebrate, Merry Christmas!  

For those who don’t, Happy Holidays!  

When I first arrived in the US  for my post-doc (bringing with me a pretty broken English), I thought that a straight translation from Portuguese (Feliz Natal) would work quite well to greet my friends. I had no idea that Merry Christmas is the greeting of choice. There is a very interesting story behind it, if you are fond of this type of trivia click here.  At any rate, if you happen to know a foreigner who is new to the US of A, do him or her a favor and make this point clear. My American colleagues were very sweet and graciously accepted my Happy Christmas,  until a good soul pushed me to the side and explained that even though there was nothing fundamentally wrong with happy, merry was the way to go. Now, would it be too bad to wish you a Cran-Merry Christmas? I hope not.  Cranberries are everywhere these days, they are appropriately red, cute, plump, go well in sweet and savory dishes, they are festive, and… I love them. Since it is the season of giving, I share not one but two recipes. Let’s start by sweetening up this festive day, shall we?

CranberryChristmasCake

CRANBERRY CHRISTMAS CAKE
(from Barefeet in the Kitchen)

3 eggs at room temperature
2 cups sugar
3/4 cup butter, softened
1 teaspoon vanilla
2 cups all-purpose flour
12 oz fresh cranberries

Heat oven to 350 degrees. With a mixer, beat the eggs with the sugar until slightly thickened and light in color, about 7 minutes. The mixture should almost double in size. The mixture should form a ribbon when you lift the beaters out of the bowl. Add the butter and vanilla; mix two more minutes. Stir in the flour until just combined. Add the cranberries and stir to mix throughout.

Spread in a buttered 9×13 pan. Bake for 45 to 50 minutes, or until lightly browned and a toothpick inserted near the center of the cake comes out clean. Let cool completely before cutting into squares.

ENJOY!

to print the recipe, click here 

baked
Comments: This cake is a must-make. Period. First there will be a bit of a surprise from the sharp tartness, but then everything mellows down into the perfect amount of sweetness. Quickly you’ll realize that behind its adorable face lies danger. One piece will very likely lead to a second one. Maybe a third… I baked it around 6pm for a small reception we were hosting a couple of hours later, so I could not quite let the cake cool completely before slicing it. No harm was done, though.  Next day it was even better, I think the flavor of the cranberries permeated the crumb a little more. It was perfect to start the day with a cup of coffee.  So there you have it, a very simple cake to prepare, huge pay-off in taste. You are very welcome….

divider

And now that we got the sweetness taken care of, let’s take cranberries on another culinary adventure: Cranberry Sauce, a mandatory side dish at Thanksgiving.  So tasty that it should never be limited to one day of your year. When it comes to cranberry sauce, you will find countless versions, often using ingredients like Port wine, dried figs, pomegranate molasses, all sorts of exotic additions that promise to make it truly memorable. Not that theres’s anything wrong with it, I even have one such version in the blog.  However, when I saw Dorothy’s recipe and read her comments about it, I knew I had to try it myself. She went through many recipes, always coming back to this one. Simplicity, few ingredients, 15 minutes of your time.
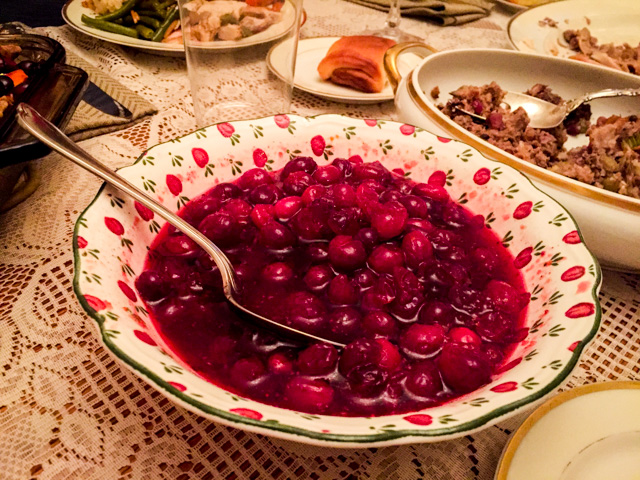
Cranberry Sauce-2
BEST EVER CRANBERRY SAUCE
(from Shockingly Delicious)

1 1/4 cups granulated sugar
3/4 cup water
1/4 teaspoon ground cloves
1/4 teaspoon ground allspice
1/2 teaspoon ground cinnamon
1 (12-ounce) bag fresh cranberries
Zest of 1 orange (orange part only)

In a large, heavy saucepan, add sugar, water and spices and cook, stirring often, until sugar dissolves, syrup is clear and comes to a rolling boil, about 3 minutes. In a colander, rinse and pick over the cranberries to remove any mushy ones. Add cranberries to boiling syrup and continue cooking, uncovered, just until they begin to pop, about 2-3 minutes (set the timer). Be careful not to cook them too long or they will get mushy.

Remove from heat, stir in orange zest and cool to room temperature, uncovered. Ladle into clean jars or plastic containers, label and refrigerate until serving time.

Makes about 2 1/2 cups sauce, enough to serve 6-8.

ENJOY!

to print the recipe, click here

Comments: I had no intention to blog on this recipe until I tried the sauce. It was everything Dorothy promised it to be. The spices are just right, and the texture of the cranberries spot on. I think I’ve always over-cooked my cranberries thinking that was the way to do it. Trust Dorothy’s directions, set the timer, stop the cooking even though you think it’s not nearly enough. We had one vegetarian guest at our  home for Thanksgiving who arrived from India just a few months ago, so it was his first Thanksgiving and first contact with cranberry sauce. He absolutely loved it, in fact I almost wanted to take a picture of his plate, he had a bit of mashed potatoes and this humongous amount of cranberry sauce all around it… Made my day!

divider

ONE YEAR AGO: Merry Christmas!

TWO YEARS AGO: The Avocado Mousse that Stole the Show

THREE YEARS AGO: Sourdough Popovers

FOUR YEARS AGO: Merry Christmas!

FIVE YEARS AGO:  Sourdough Focaccia, with a twist

SIX YEARS AGO: Merry Christmas!

POACHED WHITE ASPARAGUS WITH LEMON AND PISTACHIOS

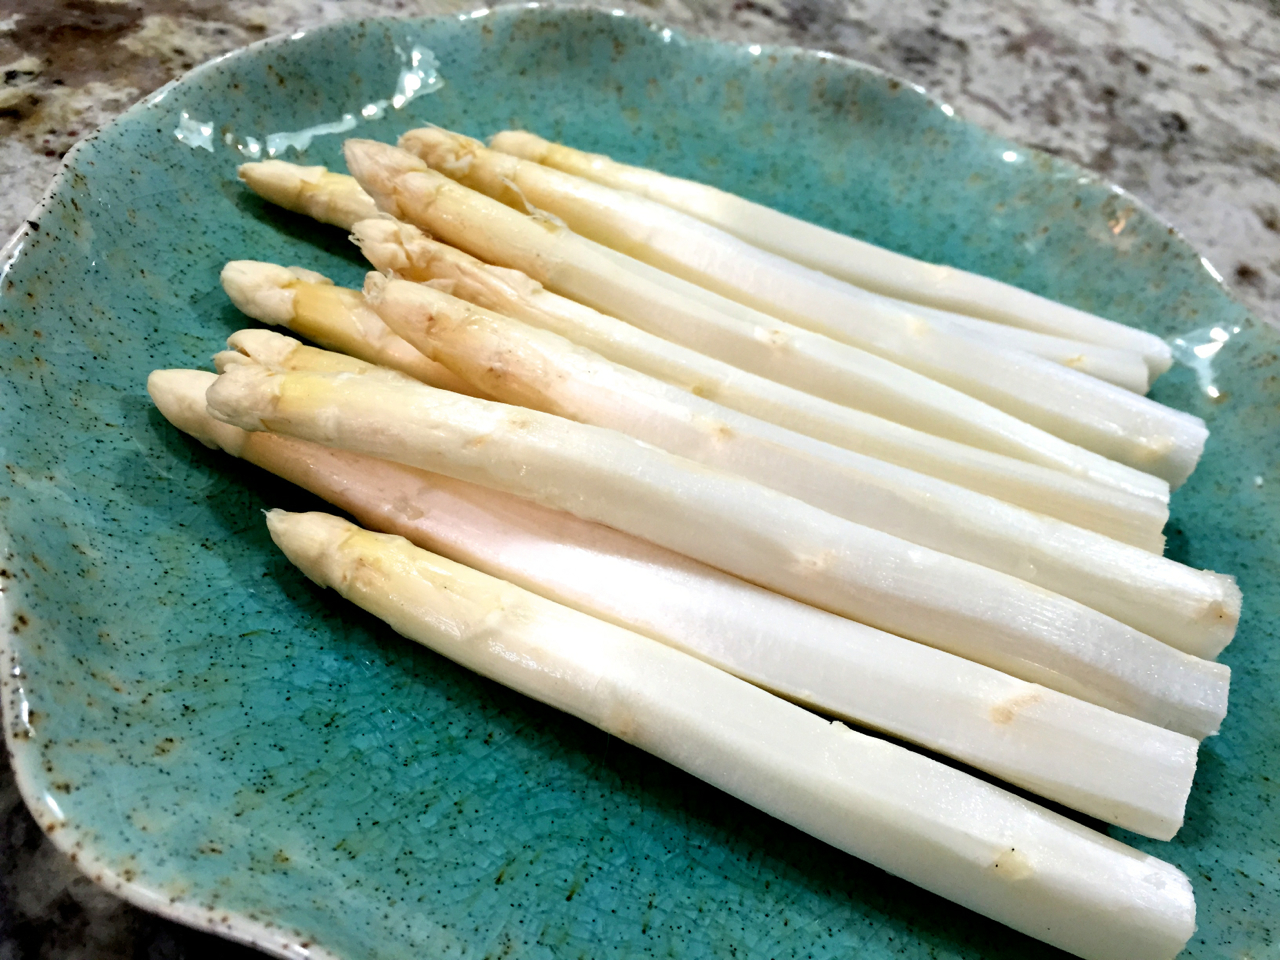
I have a cookbook recommendation for you: Rose Water and Orange Blossoms, by Maureen Abood, who runs a gorgeous food blog I’ve been following for a while. As I browsed through my Kindle version, I was surprised by the number of recipes I bookmarked, a feature I love in the Kindle reader, actually. Makes it so easy to go back to favorites. So I did that A LOT. I also love when a cookbook mixes just the right amount of prose. Don’t make each recipe a reason to pour your soul out and tell me all about your childhood and that of your close friends, but give me enough to dream about, to make me understand why that recipe is special for you, special enough that you chose to include in your cookbook.  Maureen does just that. The first recipe I made from her cookbook is simple yet very elegant. Poached white asparagus with pistachios. She used pistachio oil to drizzle the dish, I decided to go with my recent acquisition, a blood orange-infused olive oil.  I am quite fond of its color, a soft reddish tone, and I think the taste matched the white asparagus very well.

White Asparagus with Pistachios

POACHED WHITE ASPARAGUS WITH LEMON AND PISTACHIO OIL
(from the cookbook Rose Water and Orange Blossoms)
reprinted with permission from Maureen Abood

Makes 4 servings

1 pound / 450 g white asparagus
Juice of 1 lemon
1 teaspoon kosher salt
2 tablespoons shelled roasted, salted pistachios
4 teaspoons pistachio oil (I used blood orange infused olive oil)
Fine sea salt, to finish

Trim the asparagus by snapping the ends off at their natural break. Peel them from just beneath the tip to the end with a vegetable peeler. Cover the asparagus with water in a large sauté pan. Squeeze the lemon into the pan and add the teaspoon of salt.

Cover the pan and bring the water to a boil, and then reduce the heat to medium-low and simmer for about 20 minutes, or until a spear can be easily cut with a knife and fork. Drain and set the asparagus aside to cool. Remove the thin papery skin on each pistachio to reveal the bright green nut underneath by rubbing the skin off of each nut between your fingers and thumb. Coarsely chop the pistachios.

Divide the asparagus among four individual salad plates, or pile them, all facing the same direction, on a platter. Sprinkle the pistachios across the center of the asparagus crosswise, forming a line. Drizzle everything with pistachio oil, and finish with the sea salt.

ENJOY!

to print the recipe, click here

whiteasp

Comments: White asparagus will always make me think of a trip to Germany many years ago. We were living in Paris at the time, and went for a little scientific mission to a couple of cities in Germany. We arrived at the peak of asparagus season and one restaurant in particular had pretty much all dishes centered on them. I still remember a gratin of white asparagus and ham that blew my mind, it was superb! Until I got Maureen’s book, I confess to butchering my share of white asparagus when trying to cook them at home. It never occurred to me that these pale white creatures need to be treated differently from their siblings, the ones allowed to grow under full sun. Maureen gives two simple tips for success: peel them all the way from the bottom to the region right below the tips. And cook them gently but for a longer time. I was amazed at the difference these two little modifications brought to my culinary life.

rwob_cookbook

Now, back to Maureen’s book. So many dishes I want to cook from it, it’s not even funny…  Doesn’t “Flower Water Syrup” make you go in a dreamy daze? Many of her recipes are simple but join unexpected flavors, leaving you with that feeling of “why didn’t I think of that?” For instance, Warm Dates with Almonds and Lime Zest… I just know it will be an amazing recipe. Or… Tahini Avocado?  Za’atar Roasted Tomatoes? It all sounds perfect.  And to me, nothing is better than a great kibbeh, I love it. She shares her classic version of Baked Kibbeh, and one particular recipe I had a few times in Brazil and find spectacular: Yoghurt-Poached Kibbeh.  You may think it is strange, but trust me, it is the best kind. I guess I was lucky to grow up in São Paulo where we have many great Lebanese restaurants, some pretty close to the university where I studied. Still on the kibbeh front, Maureen offers several variations that were unknown to me: Fried Kibbeh with Mint Butter, Vegan Tomato Kibbeh, and Potato & Spinach Kibbeh. But I will tell you what will be my next recipe for sure: Whipped Hummus with Minced Lamb. One little tip she gives in that recipe is worth my weight in chickpeas. But I share no more. You will have to invite her book to join your collection, and that will be a very wise move. Go for it with a simple click here.

Maureen, thank you for allowing me to publish your recipe, and best of luck with your cookbook!

ONE YEAR AGO: Dan Lepard’s Saffron Bloomer

TWO YEARS AGO: Fesenjan & The New Persian Kitchen

THREE YEARS AGO: Quinoa Salad with Roasted Beets

FOUR YEARS AGO: Pasta Puttanesca

FIVE YEARS AGO: Miche Point-a-Calliere

SOMEBODY STOP ME!

I simply cannot help it. I’m about to share yet another recipe for cauliflower-in-disguise. But, believe me, this one will change your life. Have I ever promised to change your life with a recipe? No. So trust me, because I never lie. Cross my heart, etc etc. The whole thing starts as 99% of the cauli-rice recipes do: process the florets into bits.  But then, the twist: instead of boiling or simmering it, you will roast the riced cauliflower. Yes, straight into the oven with a delicate coating of coconut oil. And here I am, salivating just by the thought of how great this recipe turns out. Every. Single. Time Perfection, my friends. Perfection. I am so in love with cauliflower that Phil could be a bit jealous of it.

Cauli-Rice with Asparagus and Almonds

BAKED CAULI-RICE WITH ASPARAGUS AND ALMONDS
(adapted  from  The Clothes Make the Girl)

1 head of cauliflower, any color you like
1 tablespoon coconut oil, melted
3/4 teaspoon of salt
ground black pepper to taste
sautéed asparagus
toasted slivered almonds

You will basically process the cauliflower into bits, then roast it with the coconut oil in a 425 F oven. For all the details of the recipe, click here. 

Meanwhile, prepare your asparagus using any favorite recipe and mixture of spices. Toast some almonds lightly seasoned with salt.  When the cauli-rice is baked, transfer it to a serving bowl, top with the asparagus and almonds, and serve right away.

ENJOY!

composite

Comments:  The difference this method makes in the final product is hard to imagine. The cauli-rice gets all loose and with the exact amount of moisture, not soupy and lifeless. The coconut oil will be barely noticeable. I suspect that even if you don’t care for its taste in this preparation you won’t object. Perfect marriage.

You can take this dish into so many different directions: make it Mexican with the right mixture of spices, add a nice home-made salsa on top. Make it Indian with a curry blend, make it Italian, Brazilian, Korean, it is truly a superb blank canvas to work on.

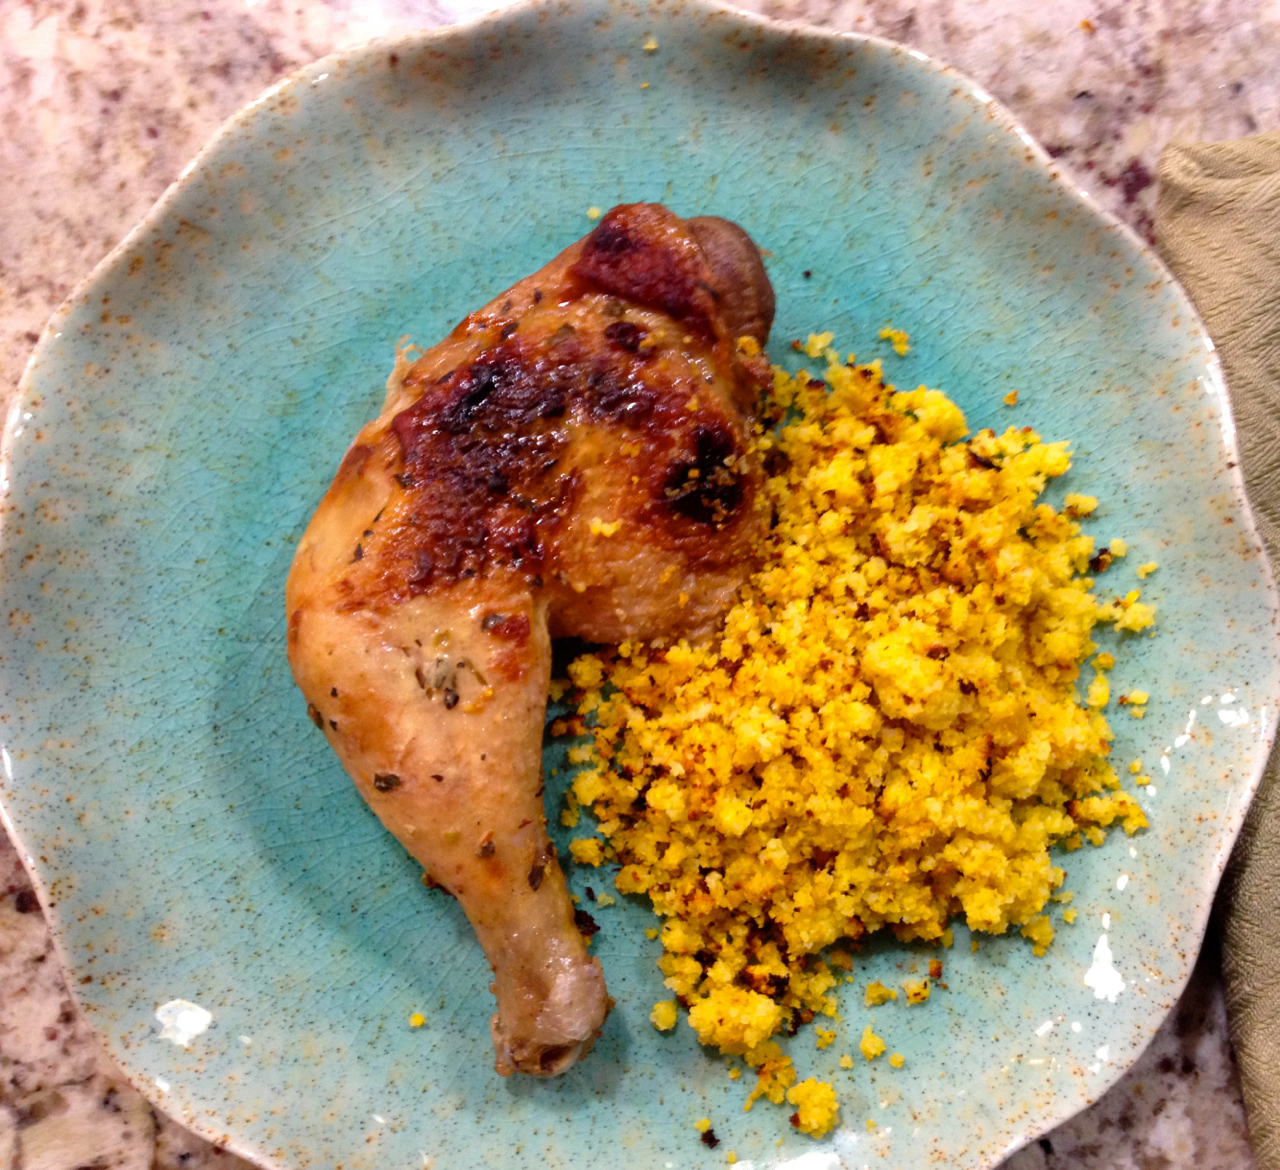
I’ve made it several times so far, and also used a yellow-orange cauliflower for a show-stopper of a side-dish. I love it. Love it. Period.  Here it is, next to a roasted chicken leg made with a marinade that included a certain ginger syrup of my past.

CauliRiceOrange
I say goodbye with the firm intention of not blogging on cauliflower for at least a week!. I’ve got will power, I’ll nail this. Although….

ArtichokeFlirt11

ONE YEAR AGO: Zucchini Pasta with Cilantro-Cashew Pesto

TWO YEARS AGO: Bran Muffins, Take Two

THREE YEARS AGO: Brown Butter Chocolate Chip Cookies

FOUR YEARS AGO: Mogo Mojo

FIVE YEARS AGO: Slow-Roasted Chicken Thighs: an Ice-Breaker


SECRET RECIPE CLUB: GREEN RICE

THREE YEARS AS A MEMBER OF THE SECRET RECIPE CLUB!

Last Monday of the month. You probably expect me to whine about the cold, but guess what?  As you read this post, I should  be far, far away in Brazil, enjoying balmy temperatures, wearing shorts, t-shirts, and recharging my batteries to face the frigid months ahead.  But the last Monday means fun, because it’s Reveal Day for The Secret Recipe Club! I was paired with the blog “A Day in the Life on the Farm“, hosted by Wendy. Her story is fascinating: she and her husband were police officers in a large city (which of course meant a ton of trouble in their hands…), but when they retired they moved to a tiny little town of 4,000 people, and bought a house on 12 acres of land.  They raise meat chickens, turkeys, and pigs, and Wendy – to fight her empty nest syndrome  –  decided to host foreign students in their place.  Now she works part-time for the World Heritage, placing students into homes for a year of schooling here in the US.  Being in academia and therefore often exposed to the troubles that foreign students face (plus, I was one myself), I know how important this type of work can be.  Please, stop by her about page and read more about their life on the farm, and how on top of everything she also takes care of her Mom, who suffers from Alzheimer’s. She actually devotes a section in her blog to talk about it, under Life with Mom. Beautiful, touching, and at times funny.

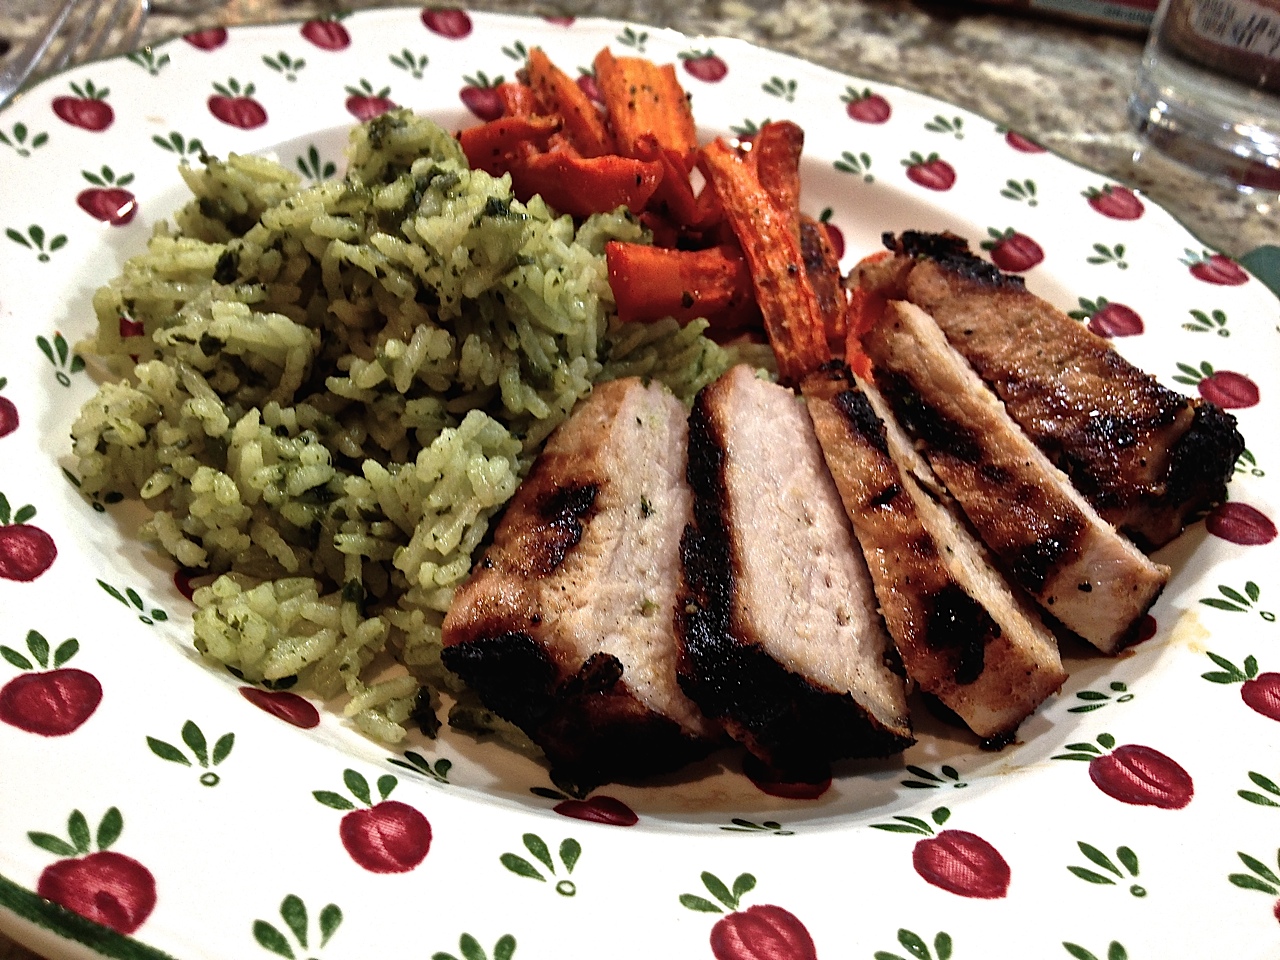
We had so much going on this past month, that I needed to jump on my assignment right away.  The recipe I set my eyes on was a drool-inducing dessert, a Caramelized Almond Apple Upside Down Cake. But, I decided against it.  Why? With Thanksgiving saying hello, then the holidays, a lot of heavy food will be popping everywhere.  I did not want to start early with the excesses, so this cake shall wait. Sorry, folks, but better safe than sorry.  Then, I almost went with her cute Pretzel Dogs. Finally it was a tough decision between Zucchini Enchiladas, or Green Rice.  As you can see, I went green.  Green is good for you, and this was one of the most flavorful rice dishes I’ve made.

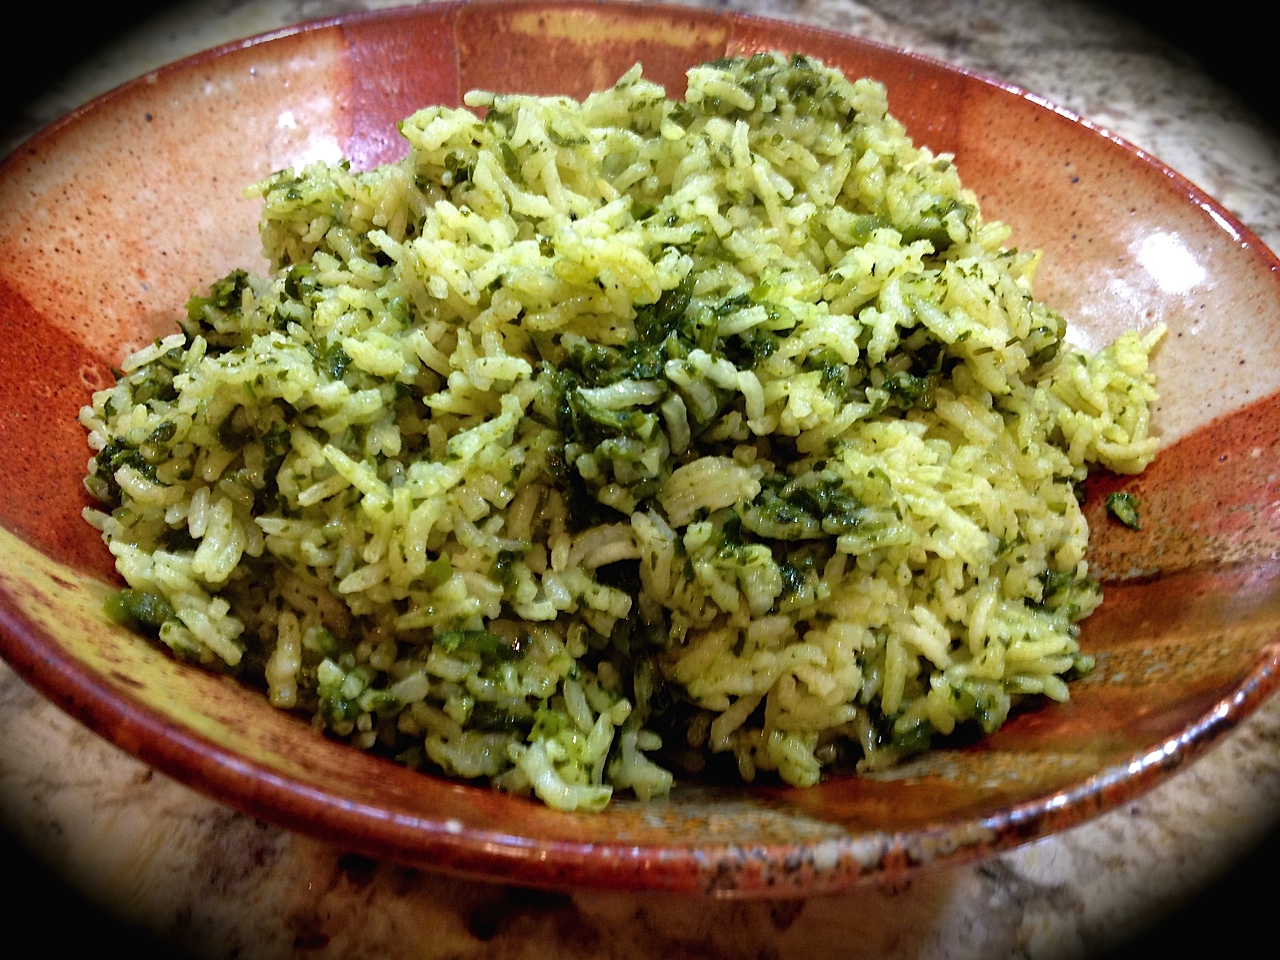
Green Rice

GREEN RICE
(very slightly modified from A Day in the Life on the Farm)

2 poblano chile peppers
1 green pepper (I used half a Serrano)
1 cup long grain rice
1 large bunch of cilantro
1 small bunch of flat leaf parsley
2 cups chicken stock
1/2  teaspoon salt
2 Tablespoons olive oil (I used grapeseed)
1 small shallot, minced
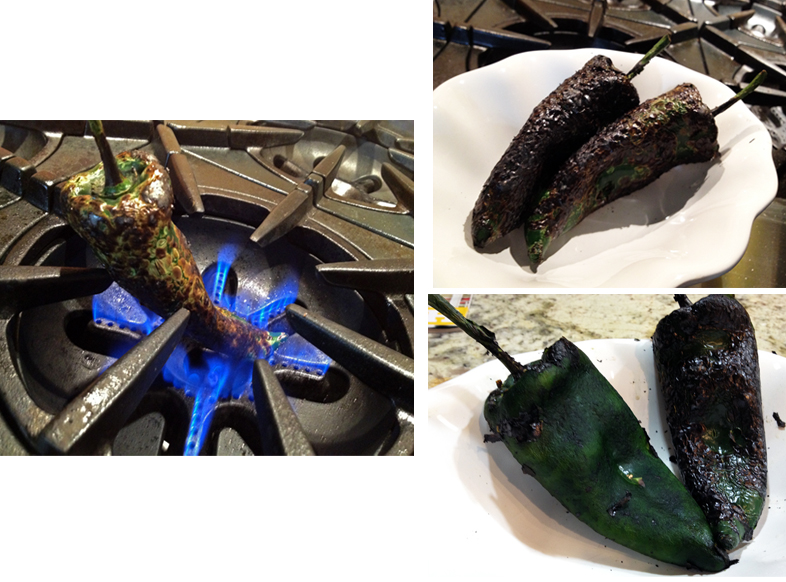
Dry roast the peppers in a griddle pan (or on a grill), turning frequently so the skins blacken but the flesh doesn’t burn.  Place in a strong plastic bag, seal and set aside for 20 minutes
.
Put the rice in a heat proof bowl, pour in boiling water to cover and let stand 20 minutes.
.
Drain the rice, rinse well under cold water and drain again.  Remove the peppers from the bag and peel off the skins.  Remove any stems, then slit the peppers and scrape out seeds with a sharp knife.
.
Put the peppers in a food processor, strip the leaves from the cilantro and parsley and add to peppers.  Pour in half the chicken stock and process until smooth.  Add remaining stock and puree again.
.
Heat oil in a saucepan, add the rice and minced shallot and fry for 5 minutes over med heat until the rice is golden and the shallot is translucent.  Add the salt, stir in the green puree, lower heat, cover and cook for 25-30 minutes or until all the liquid is absorbed  and the rice is just tender. Taste and adjust seasoning, if needed.
.
ENJOY!
to print the recipe, click here
 
Comments:  Lately I’ve been quite smitten with poblano peppers.  Very little heat, but so much flavor! Our stove did a great job charring them, I don’t think I was ever able to get such a beautiful blackened skin with almost no effort.   Using a paper towel to remove the charred skin was also a great move, a tip I got from watching Marcela Valladolid in her show Mexican Made Easy.  I never liked the idea of rinsing the peppers because there’s quite a bit of flavor loss if you do that.  The paper towels removed just the skin and I could leave little bits here and there for an extra smoky flavor.   Aren’t they cute?

compositePeppers

Adding boiling water to the rice and waiting for 20 minutes was also something I had never done, and I liked the texture of the finished product.  If you are a cilantro-hater, this rice is not for you, its flavor is obviously very prominent.  You could substitute spinach.

GreenRiceServed
This was a delicious dinner!  Green rice, simple roasted carrots, and for our protein a few slices of center-cut pork chops, cooked sous-vide, and finished off on the grill.   Life is good!

Wendy, I hope you had a great time this month with your assignment!  It was wonderful to browse through your site, I read all your posts about your Mom, and am still in awe of your ability to do so much Everyday in your Life on the Farm… 

For my readers: if you want to see what my fellow Secret Friends cooked up this month, give a little click on the blue frog at the end of this post.   Normally Groups C and D would take a break in the month of December, but apparently me and Dorothy from Shockingly Delicious whined so much about withdrawal syndrome, that The Secret Recipe Club will have a little surprise reserved for both groups.  It will be awesome, so stay tuned!

ONE YEAR AGO: Potato-Crusted Italian Mini-Quiches

TWO YEARS AGO: Beetroot Sourdough for the Holidays

THREE YEARS AGO: Cod Filet with Mustard Tarragon Crust

FOUR YEARS AGO: Soba Noodles: Light and Healthy

FIVE YEARS AGO: Potato-Rosemary Bread

PAN-CHARRED VEGGIES FROM COOKING LIGHT

Cooking Light magazine, in their April 2014 issue published a nice article about pan-charring veggies for a boost in flavor. More than simply offering a recipe, they shared a general method to deal with veggies like asparagus and green beans. Veggies that can take the heat, so to speak. All you need to do is choose three basic components: the fat to coat the veggies after the initial charring, the acidic ingredient to brighten things up and the herbs added right before serving.  No matter which veggies you are dealing with, they will be ready in no time.  I know I sound like a broken record, but when I get home from work and it’s my turn to cook, the last thing I want is a side-dish that takes 45 minutes to prepare.  Give me something fast and flavorful, and I am game!

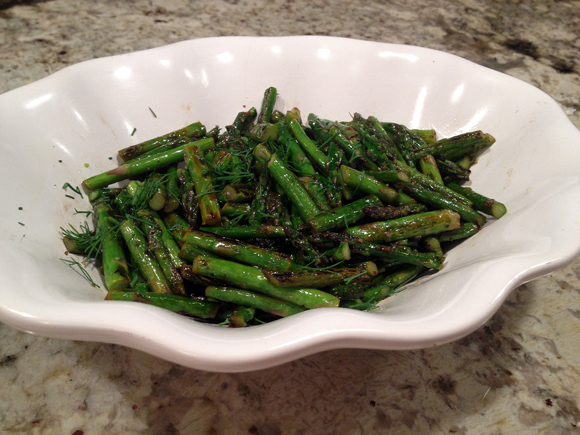
So here is my take number one on this method: charred asparagus flavored with lemon juice and fresh dill at the end… Before you accuse me of the capital culinary sin of non-seasonal cooking, let me say that this dish was made last May, not too long after I got the magazine. As usual, it takes me a while to go from table to blog. But, since last week I used this method to cook delicious green beans, I am taking the opportunity to talk about both dishes. Clearly, it’s all about the char…

AsparagusDill

PAN-CHARRED ASPARAGUS
(adapted from Cooking Light, April 2014)

Cooking spray
8 ounces asparagus, cut in pieces
1 + 1/2 teaspoons walnut oil
2 teaspoons lemon juice
2 teaspoons chopped fresh dill
1/4 teaspoon salt
.
Heat a medium, heavy skillet (not nonstick) over high heat for 2 minutes.

Coat pan with cooking spray. Immediately add asparagus pieces to pan, shaking them into a single layer; cook, without stirring, 2 minutes or until asparagus is very lightly charred. Cook asparagus 5 more minutes or until crisp-tender and evenly charred, tossing occasionally.

Remove pan from heat. Let asparagus rest 1 minute. Add walnut oil; toss to coat asparagus pieces. Add lemon juice; toss. Turn on heat if necessary to evaporate most of liquid. Sprinkle asparagus with dill and salt; toss. Serve right away.

ENJOY!

to print the recipe, click here

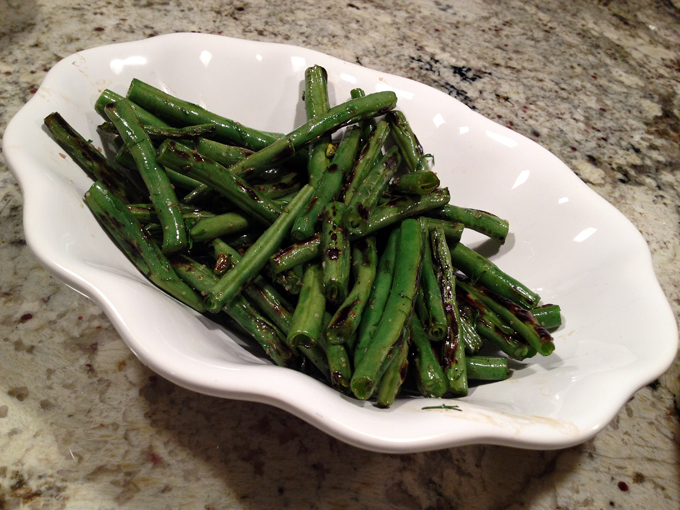
And here is my take number two: the exact same method, using olive oil to coat green beans, a touch of apple cider vinegar as the acidic component, and fresh tarragon added at the end. Tarragon straight from the garden of our friend Cindy, who recently visited us with her husband. Remember, I am the lucky woman with the super generous friends…

GreenBeansTarragon2
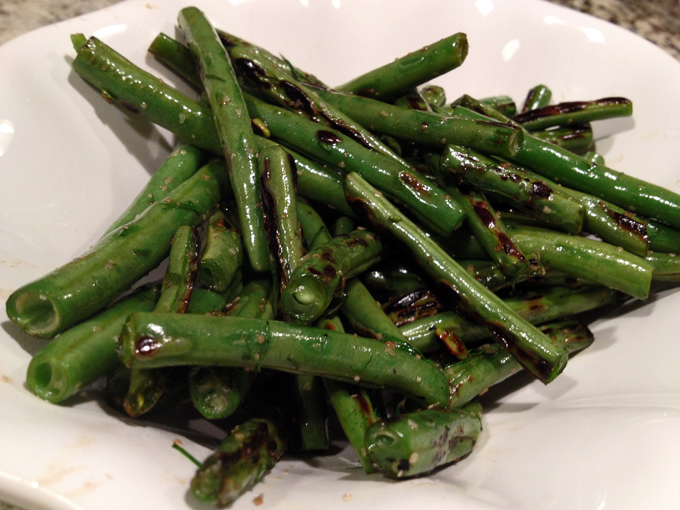
Now, as I mentioned, this is all about the char… Look at these dark spots, aren’t they making you crave some green beans?

GreenBeansTarragon

Back in 2010 I  wrote a blog post about “Blasted Broccoli“, stove-top version. We loved that recipe so much that I went through a long phase of cooking it weekly. I can see that this method could be adapted for broccoli too. Or sugar snap peas.  Avocado oil, coconut oil, use your imagination (and your pantry) and play with this method.  You won’t be disappointed…

ONE YEAR AGO: Pomegranate Chicken Thighs and Carrot Mash

TWO YEARS AGO: The Many Faces of Kale

THREE YEARS AGO:  Short and Sweet

FOUR YEARS AGO: Ciabatta, a Classic Italian Bread

FIVE YEARS AGO: Magical Lamb Stew