Valentine’s Day is coming up, so if you are cooking at home, this would be a perfect side dish… A little bit tricky to get the timing of everything right the first time, but we absolutely loved this recipe.
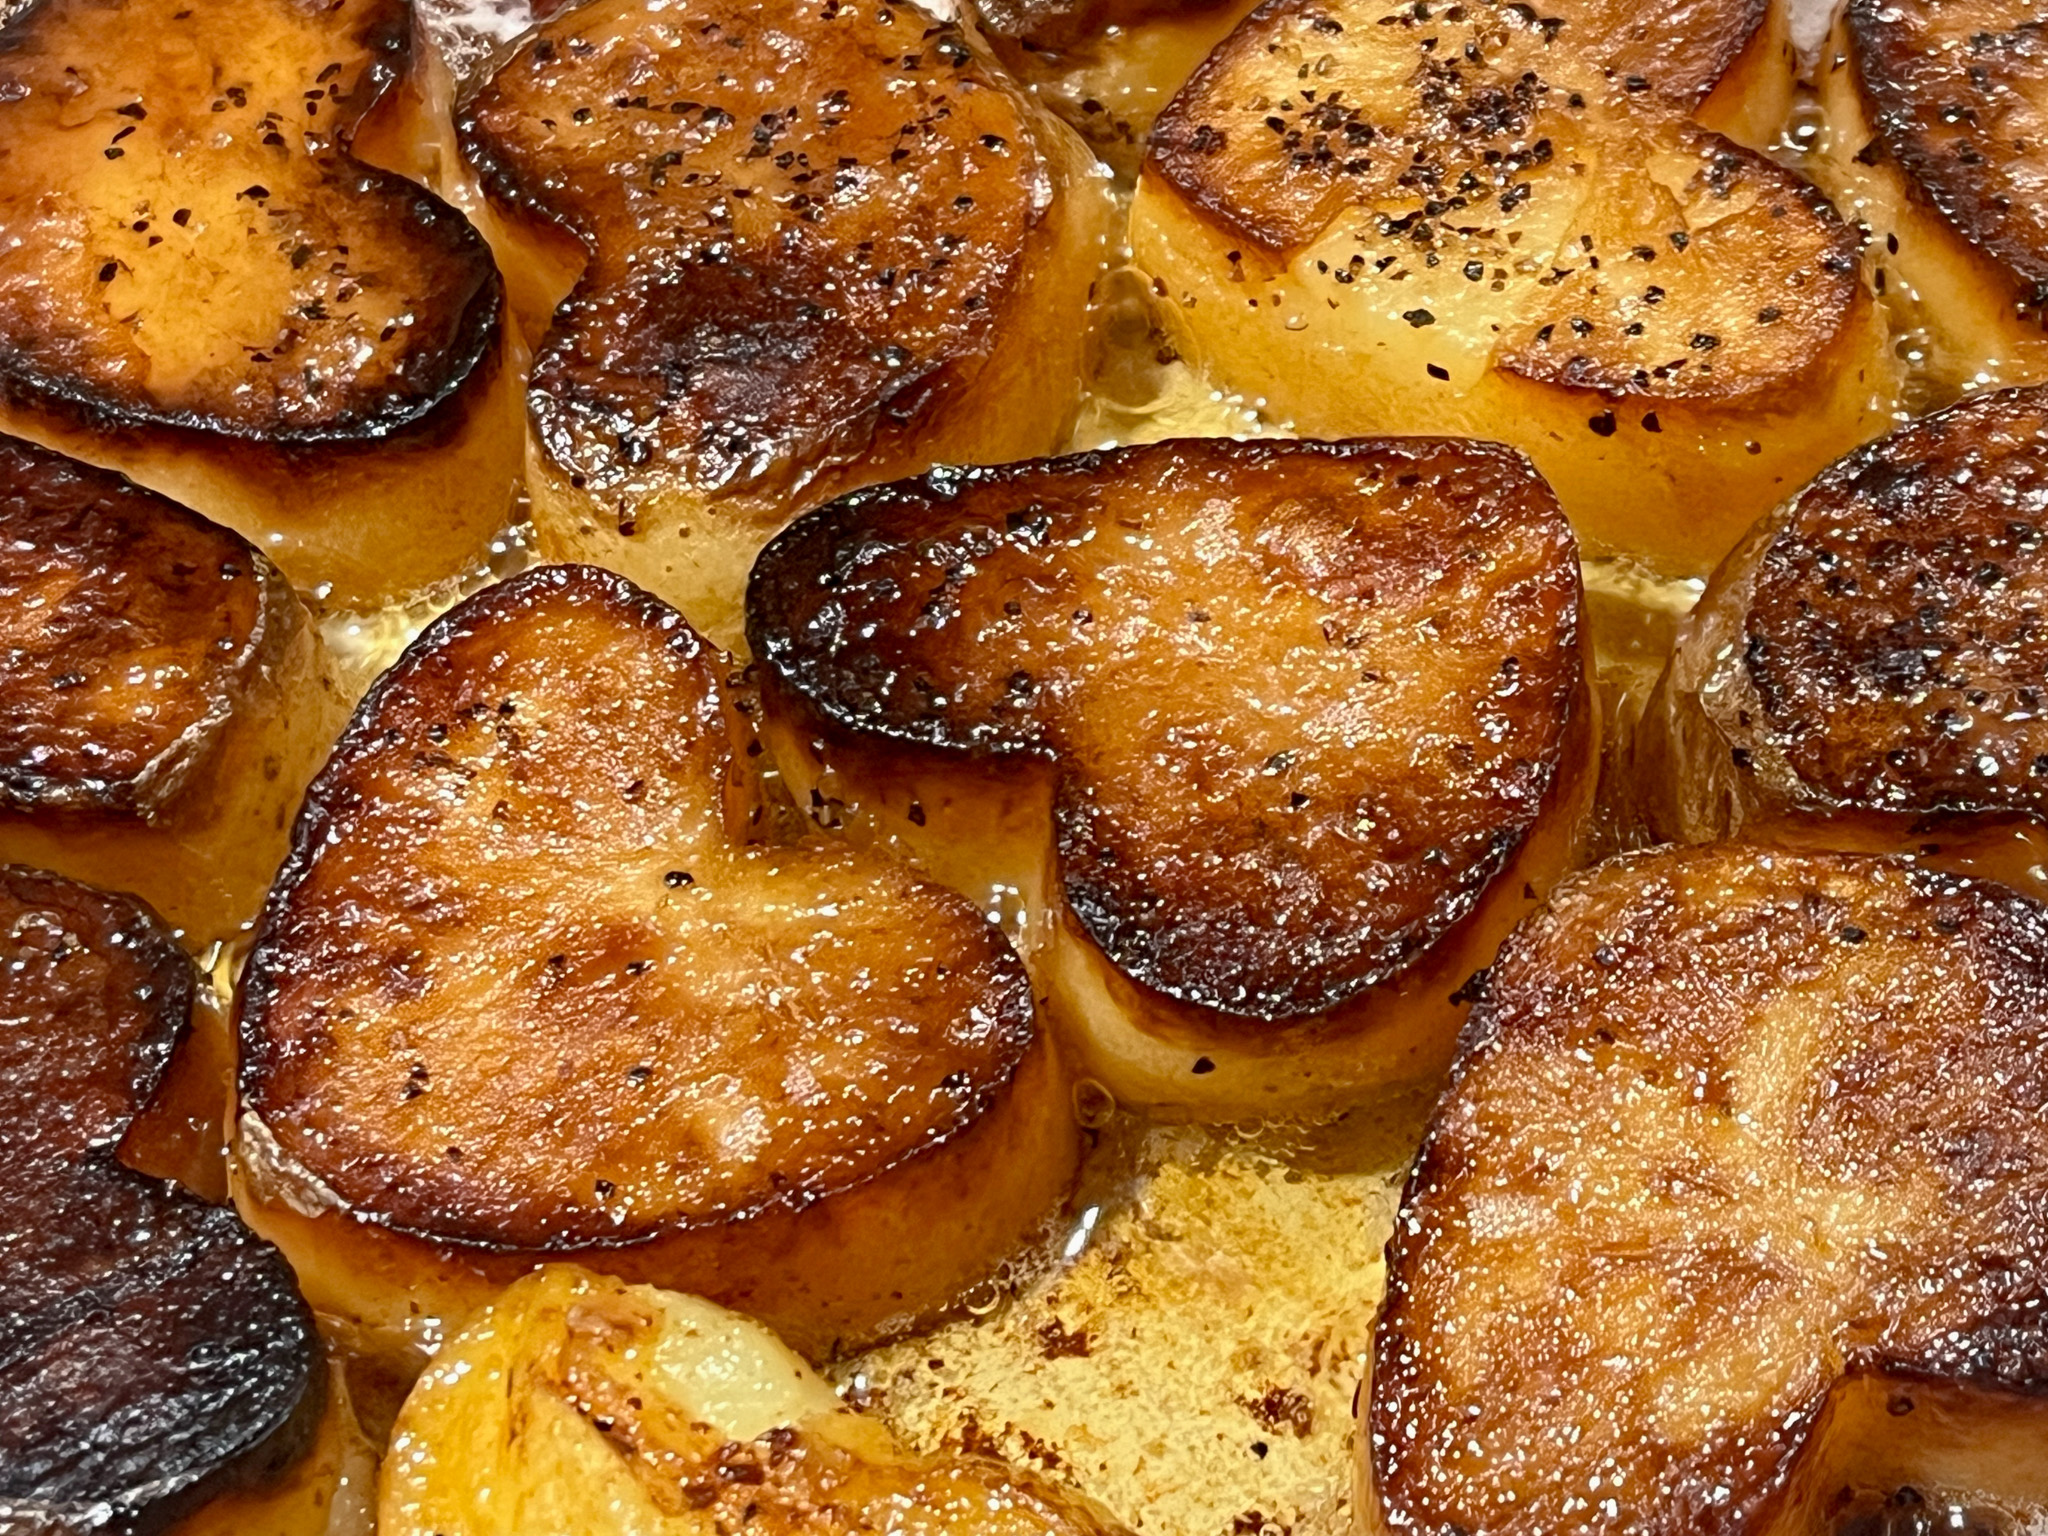
HEART-SHAPED FONDANT POTATOES
(from The Bewitching Kitchen)
Medium-large Yukon Gold Potatoes
1 quart warm water
4 tsp salt
2 tablespoons olive oil
salt and pepper to taste
2 tablespoons butter
1 to 2 cups chicken broth
sprigs of rosemary and thyme
1 heart shaped cookie cutter, preferably metal
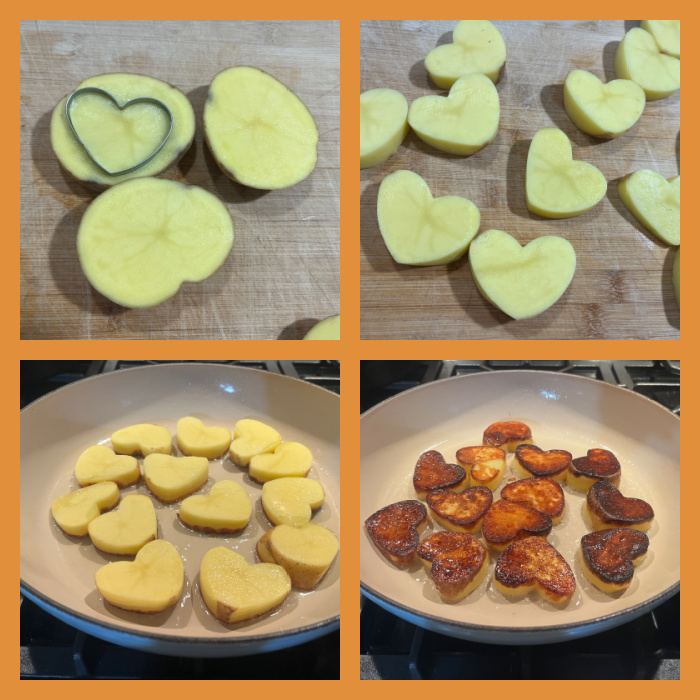
Cut the potatoes in slices as thick as your cookie cutter. Use the cookie cutter to get heart shapes, as many as you want and will fit an oven-safe skillet in one single layer. Place the slices of potato in a bowl with the warm water and salt for 2 to 6 hours.
Remove the potatoes from the brine, dry them well. Heat the olive oil in a skillet, when really hot, add the slices of potato and let the first side brown well. Season with a little pepper, you might want to skip the salt due to the brining. Brown the first side for about 4 minutes. Flip the slices over, add the butter, once it melts, remove the pan from the heat and carefully add the chicken stock, to about half the height of the potatoes. Add the rosemary and thyme.
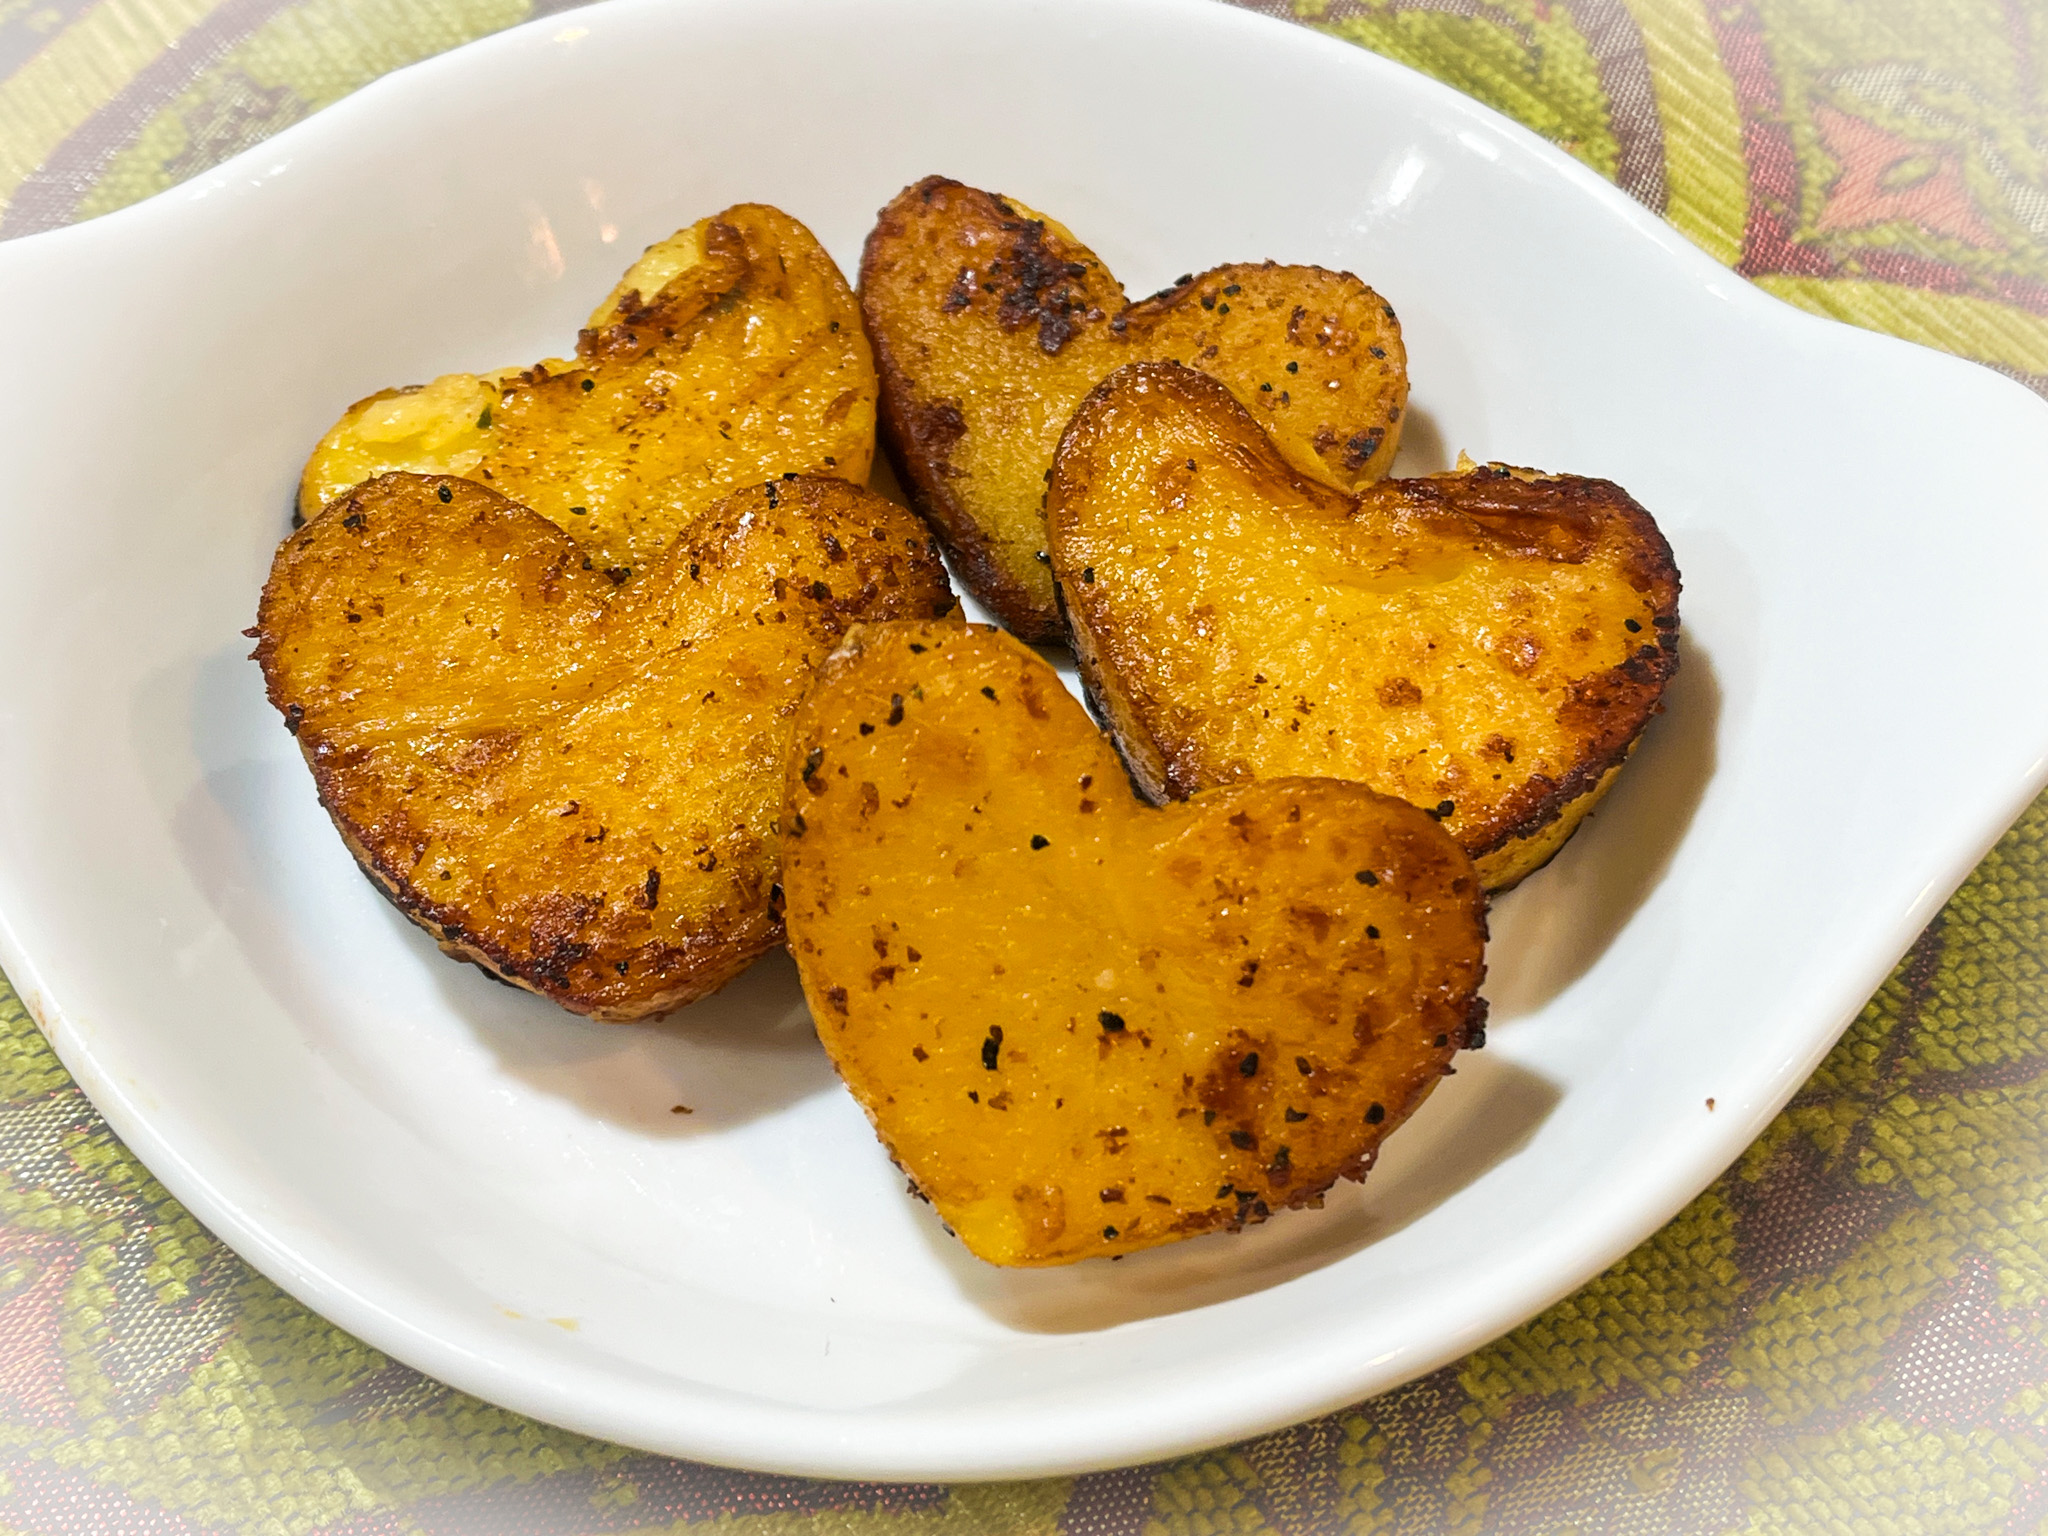
Cover the pan and transfer to a 400F oven for 25 to 30 minutes. Remove the sprigs of herbs, and spoon some of the cooking liquid over the potatoes. Serve immediately.
ENJOY!
to print the recipe, click here
Comments: Fondant potatoes are a classic, but as you might imagine, I had to reduce a little bit the amount of butter. It did not compromise the taste, they were melt-in-your-mouth tender and super flavorful. In the classic version, cubes of potatoes much larger are used, and the cooking time is longer. It is al little tricky to make it work with thinner slices, but worth the trouble. Leftovers, in case you are wondering were spectacular still two days later. We enjoyed them with beef tenderloin and asparagus. Ate like Royalty. Not surprising, since a Prince lives with us…
ONE YEAR AGO: Coconut Cupcakes get Frosty
TWO YEARS AGO: Mexican Bolillos
THREE YEARS AGO: Brazilian Style Banana Cake
FOUR YEARS AGO: Tiger Shrimp in Chili Sauce
FIVE YEARS AGO: Tangzhong Hamburger Buns
SIX YEARS AGO: Potato Soup with Spicy Shrimp
SEVEN YEARS AGO: Rose-Harissa Chicken Thighs
EIGHT YEARS AGO: Caramel-Chocolate Tartlets
NINE YEARS AGO: Chicken Korma-ish
TEN YEARS AGO: Sunday Gravy with Braciola
ELEVEN YEARS AGO: In My Kitchen, February 2015
TWELVE YEARS AGO: Avocado and Orange Salad with Charred Jalapeno Dressing
THIRTEEN YEARS AGO: Green Olive, Walnuts and Pomegranate Salad
FOURTEEN YEARS AGO: Romanian Flatbreads
FIFTEEN YEARS AGO: Ziti with Artichokes and Meyer Lemon Sauce
SIXTEEN YEARS AGO: Blasted Broccoli, Stove-top version