Last time I shared Incredibly Simple recipes was 7 months ago, so it’s been a while… The first three are embarrassing simple. The fourth will surprise you. Read on, my friends!
INCREDIBLY SIMPLE #1
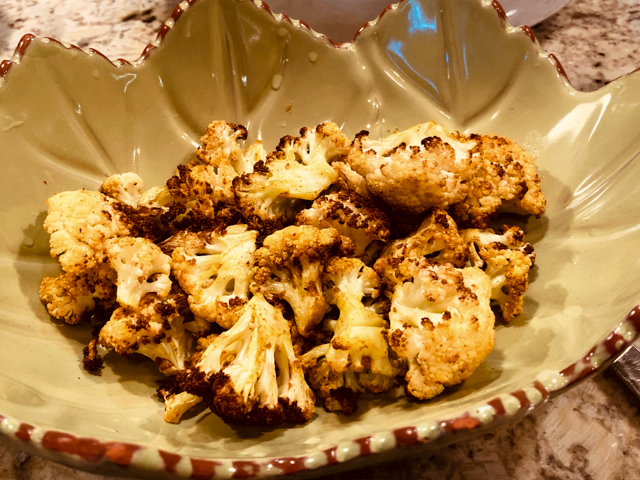
AIR-FRIED CAULIFLOWER FLORETS
I admit that the picture is not that great. The problem is I had no intention of blogging about it, until I realized I made it three weeks in a row, and now it’s pretty hard for me to prepare cauliflower any other way. The air-fryer is the perfect environment to get crispy, tender inside florets, in 20 minutes. Yes, 20 minutes start to finish. No mess, no fuss. Perfect results every single time.
Toss the florets in a large bowl with a little grapeseed oil (you can use olive oil if you prefer), season with salt, pepper, and when you want to rock your world a bit, go for smoked paprika, maybe a touch of curry. Set your fryer to the highest temperature (mine is 390F), and let it roast for 20 minutes, shaking the basket once or twice.
INCREDIBLY SIMPLE #2
HARD-BOILED EGGS, THE AIR-FRYER WAY
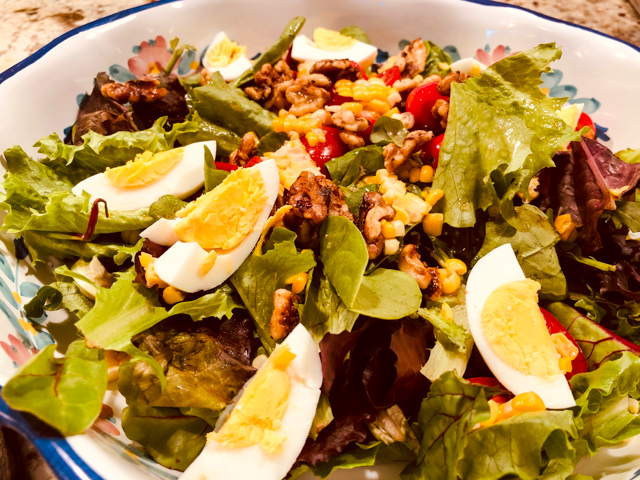
If you own an air-fryer and want to expand your horizons to use it more often, hard-boiled eggs are a great option. Place as many eggs as you want in the basket. Set it to 270F (or around that temperature, depending on your model) and set the timer to 15 minutes. You might need a little adjustment in the time. For my fryer and my taste in hard-boiled eggs, that combination hits the spot. If you want to have soft-boiled eggs, reduce the time to 8 to 10 minutes, but again you’ll have to tweak the conditions. The eggs peel like a dream, by the way.
INCREDIBLY SIMPLE #3
SWEET AND SPICY WALNUTS (or PECANS)
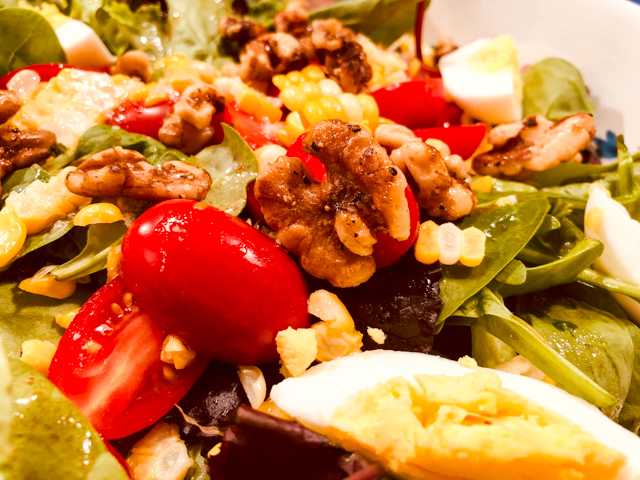
Phil came up with this idea and now we do it all the time for our salads. Grab a handful of walnuts or pecans. Coat a non-stick small skillet with a tiny tiny tiny amount of olive oil. Heat, and add the nuts. Season with salt and pepper, or if you like to change things a bit, go for a touch of paprika. When the nuts start to get fragrant, drizzle a very small amount (maybe 1 tsp) of maple syrup. Everything will bubble furiously. Shake the pan to move the walnuts and coat them with the syrupy mixture. Immediately remove from the heat and transfer them to a small bowl to cool down a bit. Add to your salad. Any salad. Try to refrain from picking those babies from the bowl when no one is looking
INCREDIBLY SIMPLE #4
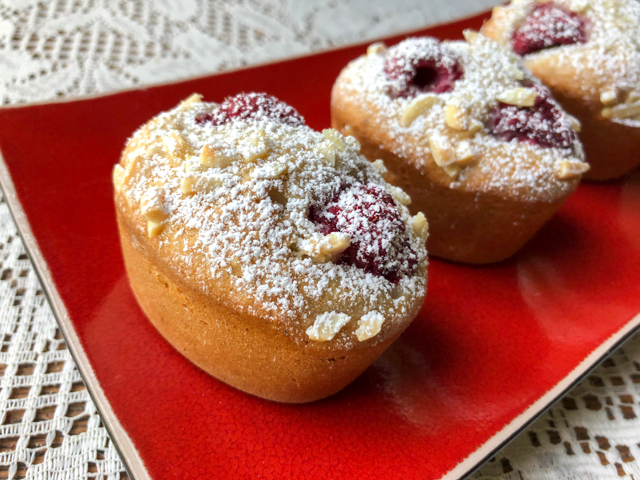
FRIANDS
You may ask yourself… “Has she lost her mind?” BAKING in Incredibly Simple? Nope, I did not lose my mind (at least not for this particular reason). This is a recipe that a 5 year old can make with minor supervision as the young child will need to operate a food processor.
Melt 1 stick (113g) of butter and place in the bowl of a food processor together with 90g all-purpose flour 110g almond flour (or finely ground almonds) 3/4 tsp baking powder 5 egg whites 190g powdered sugar 1 tsp vanilla
Process for 1 minute. It will be very foamy. Spoon the mixture in non-stick muffin tins (or friand molds), filling each cavity no more than 3/4 full. Place two raspberries in each portion, top with some slivered almonds. Bake at 325F for 18 to 20 minutes, until the edges start to get golden. Let them cool for 10 minutes, remove from the molds and when fully cold, dust with powdered sugar.
Comments: I hope that if you consider yourself a non-baker, or worse yet, a bake-o-phobe (like I used to be), you will still grab the ingredients and try this recipe. You can vary the nut flour by adding some hazelnuts or even ground pistachios in some proportion together with almond flour. Or you can bake this simple version. They are delicate, moist, fragrant, absolutely perfect with a cup of tea. And so incredibly simple to prepare! Make sure to surprise whoever is around and when you bring those to the table, say very non-challantly… “I’ve made some friands for you”… Work on your best French accent, it is a must in this case.
I cannot think of a better dessert for Christmas or New Year’s Eve. Cranberries and white chocolate go very well together, as the former is so tart and the latter is often accused of excessive sweetness. Join to this pair a crust made from what is essentially a gingerbread cookie, and as you savor it, all thoughts of pandemics and politics and whatever else troubled 2020 will vanish in thin air. I promise you.
CRANBERRY AND WHITE CHOCOLATE TART (recipe published with permission from Chef Eve)
for gingerbread crust: 178g all-purpose flour 2 Tablespoons brown sugar 113g cold, cubed, unsalted butter (1 stick) 1 tsp. ground cinnamon 1/2 tsp. ground ginger 1⁄4 tsp. ground allspice A pinch ground cloves 1⁄2 tsp. salt 1 tbsp. molasses 1⁄2 tsp. vanilla extract 2 Tbsp cold water
for white chocolate ganache: 340g white chocolate 170g (3/4 cup) heavy cream 2 tbsp. room-temperature unsalted butter, cubed pinch of salt
for cranberry jelly: 3 cups (340g) whole cranberries, washed and picked through 1 medium-sized apple, peeled and grated 200g granulated sugar 1/2 cup water pinch of salt 1 tsp. vanilla extract shaved white chocolate and sprinkles for decoration (optional)
for a 9-inch tart pan
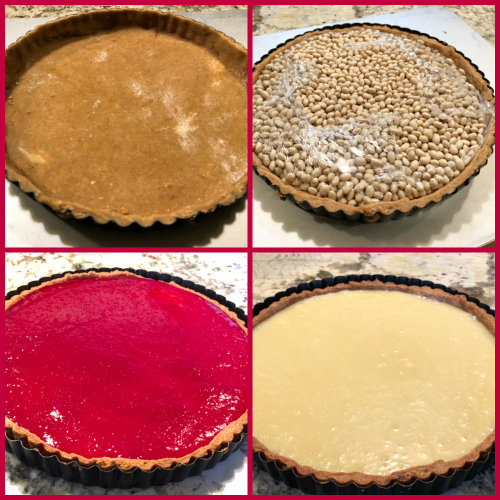
Mix dry ingredients together in the bowl of a stand mixer fitted with the paddle. Add in cold, cubed butter and ginger, and mix until crumbly, and butter is no larger than pea-sized. Mix together cold water, molasses, and vanilla, then stream into pie dough and mix just until dough starts to come together and no dry flour remains in the bottom of the bowl. Do not overmix. Chill the dough for 30 minutes, then roll into a 1⁄8-inch thick round. Use the tart pan to make sure the dough is big enough to come up the sides of the pan with a little overhand. Chill 30 minutes more (the dough is very soft, it needs the extra time in the fridge), then line the tart mold. Chill in the freezer for 10 minutes, then trim the edges of the pie dough using a paring knife. Reserve dough scraps in case you need to patch any cracks that form as the tart bakes.
Line the tart crust with a sheet of parchment paper (or plastic wrap, which is what I do) and fill with baking weights that come up to the edge of the tart. If using a plastic wrap, make sure to fold it over the top of the beans, so that the plastic won’t touch the metal pan. Bake at 350°F for 15 minutes, then carefully remove the pie weights and bake another 10-15 minutes, until the crust is golden brown at the edges, and the center of the tart dough is completely baked. Cool to room temperature.
Make the chocolate ganache. Bring cream to a simmer. Put chocolate and salt in a food processor and pulse to break up into small pieces. When cream simmers, pour over chocolate and let sit one minute to start melting the chocolate. Pulse until smooth. When the chocolate is fully melted, add in butter cubes, and blend to incorporate. Pour into the cooled pie crust. Chill in the freezer to set for about 1 hour as you make the jelly. Make sure the tart is sitting nicely leveled.
Make the cranberry jelly. Put all ingredients except vanilla in a saucepan. Bring to a boil, then lower to a simmer. Cook until all of the cranberries explode, stirring occasionally, about 10 minutes. Remove from heat, add vanilla, and press through a mesh strainer. Cool for 30 minutes at room temperature, then carefully pour over the very cold from the freezer white chocolate layer. Chill at least 30 minutes in the fridge for the layer to set.
Optional decoration: shave some white chocolate on half of the surface, add sprinkles and sugared cranberries on top.
Comments: As some of you may have already noticed, this year there won’t be a Great American Baking Show. They could not make it happen with all the restrictions due to the pandemics. It was tough enough to produce the British show, but the American production had to be canceled. The producers decided that this month they would feature on their Instagram page holiday-inspired bakes from contestants of previous seasons. This was my contribution. You can browse through all the entries from other tent-bakers clicking here. Be ready to be amazed…
Back to the tart .The combination of cranberry jelly and chocolate ganache is superb but not the only thing I loved about this dessert. The crust is just perfect and quite different from any other tart I’ve ever made. Lastly, for my taste the proportion of crust and topping also hit the jackpot. When I make it again, I might use some gelatin to get the top layer a little more set, so that the sliced piece would have more defined layers, but it’s more a cosmetic point, not really that big a deal.
Chef Eve, thank you so much for allowing me to share your delicious recipe!
Halloween is such a nice theme for baking! Unfortunately, it is coming to an end, so I will share my last round up of all things spooky for 2020, the spookiest year ever. Cookies, cakes, eclairs, all frightfully delicious.
I will start with a very special recipe that reconnected me with a food blogger from my past, Helen Rennie. I used to read her food blog, called “Beyond Salmon” long before I considered starting my own site. The other day I was discussing eclairs with my tent-baker friend Carlos, and he told me his default recipe comes from a chef called Helen with a very popular youtube channel. That Helen is the same Helen from Beyond Salmon! She quit blogging years ago and now concentrates on her tutorials on youtube and her cooking school in Boston. She is a wonderful person, and her videos on all things cooking from baking to sous-vide are a fantastic source of information. I followed her recipe for eclairs to make my mummies. Quite an odd statement, I admit. But aren’t they cute? I particularly love the wonky-eyed.
MUMMY ECLAIRS (recipe and method from Helen Rennie)
for the pate a choux: 120g water 120g whole milk 1/2 tsp table salt 1 tsp sugar 113g butter at room temp, cut into 8 pieces 142g bread flour, sifted 230g eggs beaten with a fork
for diplomat cream: (best made the day before) 100g eggs 32g cornstarch 242 g whole milk 242 g heavy cream 100g granulated sugar 1/2 tsp vanilla paste pinch of salt 40 g unsalted butter, cut in pieces whipped cream, amount to taste
for icing decoration: 250 g Icing Sugar 15-25 ml water candy eyes
Make pate a choux: Mix water, milk, salt and butter in a saucepan with a heavy bottom. Heat until the butter melts completely and the mixture comes to a full boil. Remove from the heat and add the flour all at once. Mix until the flour is all incorporated, put it back into the heat, and set your timer for 5 minutes. Cook moving the dough constantly. At the end of 5 minutes you should see a film forming in the bottom of the pan.
Transfer the dough to a food processor, blitz for 10 seconds to allow steam to escape. With the process running, add the eggs in a stream, and process for 30 more seconds. The dough will be ready to use, but it’s best to place it in a piping bag and wait until it cools to around 80F, then it will be very easy to pipe in a baking sheet lined with parchment paper.
Pipe lines with the size you like. Spray the surface with a little water and bake in a 375F oven, but reduce the temperature to 350F as soon as you place the sheet in the oven. Bake for about 40 minutes, do not open the oven door during baking. Eclairs should be fully firm and golden brown. Cut small holes in the bottom to fill them later.
Make diplomat cream. In a medium bowl, whisk eggs with cornstarch until fully combined. Place milk and heavy cream in a saucepan. Remove 1/4 cup of this mixture and add to the eggs (this helps the cornstarch dissolve).
Add vanilla, sugar and pinch of salt to the saucepan with the milk/cream mixture. Bring to a full boil, add a few tablespoons to the egg mixture to temper it, whisking it well. Place the saucepan back in the stove, then add the tempered egg mixture to the saucepan. It should thicken very quickly. Make sure it is at full boil, then cook for 30 seconds longer. You need that to deactivate amylases present in the egg yolks, that would thin the sauce once it’s refrigerated.
Pass the cream through a sieve into a bowl, add the butter, and allow it to cool completely. To make diplomat cream, simply fold whipped cream, very cold, into the cold pastry cream and use it to fill the eclairs. You can vary the amount, I like around 25% whipped cream, but you can go 50:50 if you prefer. Fill the eclairs.
Make the icing decoration: sift the icing sugar into a bowl wide enough to allow you to dunk the eclairs. Add the water gradually until you have a thick consistency, you might not need all of the water, you don’t want it too thin. Dip the tops of the eclairs, place them in a rack and immediately add the eyes. Wait for 30 minutes or so before drizzling with the icing (place in a piping bag, no need for an icing tip, simply cut a small opening).
Comments: Helen’s video is very detailed, so if you’ve never baked eclairs (or choux pastry in general) and would like to give it a go, sit down with a cup of tea and you will soon be baking perfect examples of this classic French delicacy. You don’t need a star shaped piping tip, but I like the ridges they generate. I also followed her tutorial for pastry cream, which deals with two of the main issues when making it: grainy texture and thinning after refrigeration. When I had to prepare choux buns for the Great American Show, my worst fear was to see Paul or Sherry bite into one and have pastry cream dripping down the chin. But I was eliminated before that stressful situation ever materialized. Silver linings… (wink, wink).
SPOOKY SPICED SUGAR COOKIES (from the Bewitching Kitchen)
Mix the flour with salt, baking powder and all the spices and reserve. Cream the butter with both sugars in the bowl of a Kitchen Aid type mixer. Add the egg slowly and mix until incorporated. Add the flour and mix until a dough starts to form.
Remove from the mixer, pat into a disc and roll out to your desired thickness, depending on the type of cookie you intend to bake. Cut the cookies and freeze them for 10 minutes (or several hours) before baking.
Bake at 350F for about 12 minutes, until edges start to brown. Cool on a rack before decorating.
Make Royal Icing in black and orange colors. My favorite recipe can be found at Tanya’s site with a click here.
To make the stenciled cookie, I flooded the whole cookie with orange Royal Icing, and allowed it to fully set for a couple of hours. I don’t have one of those magnetic gadgets to hold the stencil firmly on top of the cookie, so I improvised. I placed a cookie cutter on top of the stencil, and that was enough to get a sharp design with the air-brush, using black dye. Allow the design to dry for a couple of hours and you’ll be ready to enjoy your spooky cookie!
All other designs were made with regular flooding and piping with small size tips.
Moving on…. CUPCAKES!
SPOOKY CARROT CUPCAKES (adapted from several sources)
to decorate: very small amount of buttercream (store-bought or home-made) fondant stencil of your choice + airbrushing (optional)
Heat oven to 325°F. Line standard muffin tins with paper liners. Whisk together carrots, eggs, buttermilk, sugar, oil, and vanilla. In another bowl, whisk together flour, baking soda, baking powder, salt, and spices. Stir flour mixture into carrot mixture until well combined.
Divide batter evenly among lined cups, filling each three-quarters full. Bake until a toothpick inserted in the center comes out clean, 25 to 30 minutes. Cool cupcakes in the pan for 10 minutes then invert them out to cool completely.
Roll out fondant, decorate with the stencil of your choice, or generate a pattern with a rolling pin. Use a cookie cutter to make circles large enough to coat the top of each cake. Spread a very thin coating of buttercream on the top of each cupcake, then place the circle of fondant on top.
Comments: Two details matter in using marzipan on top of cupcakes. First, you must roll it thin, so that it won’t be a heavy layer on top. Second, you must cut it large enough to wrap all the way to the edges. I had never attempted to air-brush marzipan, and ran into some problems. It was hard to place the stencil firmly on top without it glueing on the surface and making a mess when lifting it. I probably should have allowed the marzipan to dry a little more before decorating it, but I was afraid it would then crack when I tried to top the cake with it. That led me to switch to plan B: I gathered the messed up marzipan discs, re-rolled them and used a patterned rolling pin to decorate. I like the way it turned out, the little bit of orange dye from the air-brushing ended up as a marbled effect. As you can see in the photo above, I managed to get one cupcake with the stencil in reasonable good shape.
120g all-purpose flour ½ teaspoon baking powder ½ teaspoon salt 120g unsalted butter 113g (4 ounces) unsweetened chocolate, finely chopped 250g granulated sugar 2 eggs, room temperature 1 teaspoon vanilla paste
for the icing: 50g whole milk zest from one orange ½ teaspoon orange extract (I use Olive Nation) 175g confectioners’ sugar, sifted drop of orange food color (optional)
tempered dark chocolate to decorate
Heat oven to 350°F. Line muffin tins with paper liners. Whisk together flour, baking powder, and salt. Melt butter and chocolate over a pan of simmering water; stir until smooth. You can also use a microwave at 50% power. Remove from heat, and let cool slightly.
With an electric mixer on medium speed, beat chocolate mixture and sugar until combined. Add eggs, one at a time, beating until each is incorporated, then add the vanilla paste. Add flour mixture, and beat until just combined.
Divide batter evenly among lined cups, filling each two-thirds full. Bake until a toothpick inserted in centers comes out clean, about 25 minutes. Transfer to wire racks to cool completely.
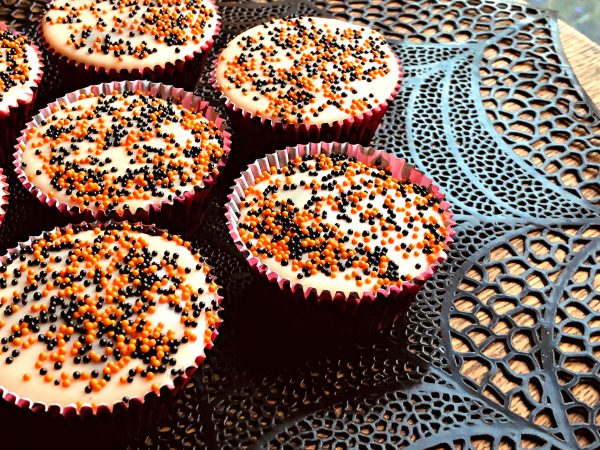
Make the icing: Bring milk and orange zest to a simmer in a saucepan. Turn off the heat, cover the pan and let milk infuse for 10 minutes with the zest. Add orange extract, and pass the milk through a sieve into a bowl. Add the powdered sugar to get a thick enough consistency to cover each cupcake with a thin layer, and a drop of orange color if you so desire. Let it set completely for a couple of hours, then add a spider web made in tempered chocolate on top. Alternatively, you can use Royal Icing to draw a web, or simplify it and add just some sprinkles, orange and black.
Comments: These brownie cupcakes are extremely versatile, in fact I am planning a full post about them. They bake flat, which makes it easy to decorate with this type of simple icing that you can take in several directions. You can infuse flavors into the milk such as tea, lavender, or other extracts. Tempering chocolate is a bit involved, so if you prefer to simplify, just add halloween sprinkles. It will be totally fine.
FRIENDLY GHOST PUMPKIN CHOCOLATE MARBLED CAKE (adapted from Recipe Girl)
for the pumpkin batter: 85g cream cheese, at room temperature 1 tablespoon unsalted butter, at room temperature 100g granulated white sugar 1 large egg 80g canned pumpkin puree 1 teaspoon vanilla extract 1/2 teaspoon ground cinnamon 1/2 teaspoon ground ginger 1 tablespoon all purpose flour
for the chocolate batter: 150g semisweet chocolate, chopped 170g unsalted butter, cut into pieces 4 large eggs, at room temperature 250g granulated sugar 1 teaspoon vanilla extract 1/4 teaspoon salt 170g all-purpose flour
to decorate: fondant 1/4 cup powdered sugar warm water, just enough to make a thick paste with the sugar
Heat the oven to 350°F. Spray a 13×9-inch baking dish with nonstick spray and coat with parchment paper.
Make the pumpkin batter: In a small bowl, use an electric mixer to combine the cream cheese with the butter until smooth. Beat in the sugar until well incorporated. Beat in the egg, and then add the pumpkin puree, vanilla, cinnamon and ginger. Stir in the flour. Reserve.
Prepare the chocolate butter: In a medium bowl, combine the chocolate and butter. Set the bowl over a saucepan with 1-inch of simmering water and stir occasionally until melted. Remove from heat. In a separate bowl, combine the eggs with the sugar, vanilla and salt. Beat at low speed until light and fluffy, about 4 minutes. Fold in the melted chocolate. Sift the flour over the batter and fold it in just until combined.
Spread the chocolate batter evenly in the bottom of the prepared pan. Using a tablespoon, drop dollops of the pumpkin batter all over the top. Using chopsticks, wirl the pumpkin batter slightly into the chocolate. Bake for 25 to 30 minutes until a toothpick inserted into the center comes out clean. Let the brownies cool completely, then cut into squares.
To decorate, roll out fondant very thinly. Cut ghost shapes with a cookie cutter, then draw eyes with a black food pen, or royal icing. Make a little paste with powdered sugar and water, then use it to glue the decoration on each piece of cake.
Comments: Fondant is not a crowd-pleaser, but I wanted something as white as possible, so marzipan was not the best option. I decided that fondant haters could always peel the decoration off and enjoy the cake without it. The cake is very delicious, moist and tender, quite simple to prepare.
That’s all for now, my friends… I really had a lot of fun with Halloween-baking this year, and it’s a bit sad to see it end. Let’s hope 2021 will bring a bit of normalcy to our lives, with in-person trick or treating, Halloween parties, and a certain virus as a scare of the past.
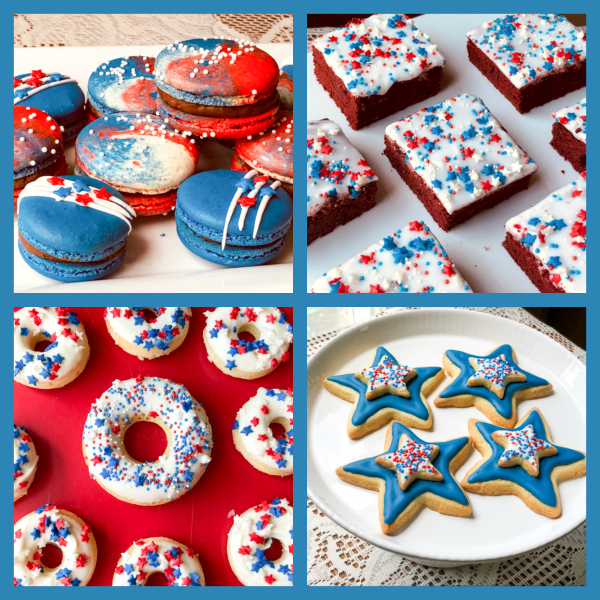
Just a couple of days ago I celebrated 11 years of my naturalization! It always gives me a smile the fact that it fell so close to such an important holiday. Today I share four bakes that celebrate the occasion: macarons, sugar cookies, red velvet brownies, and baked donuts. The common denominator? Sprinkles. I bet you are not surprised.
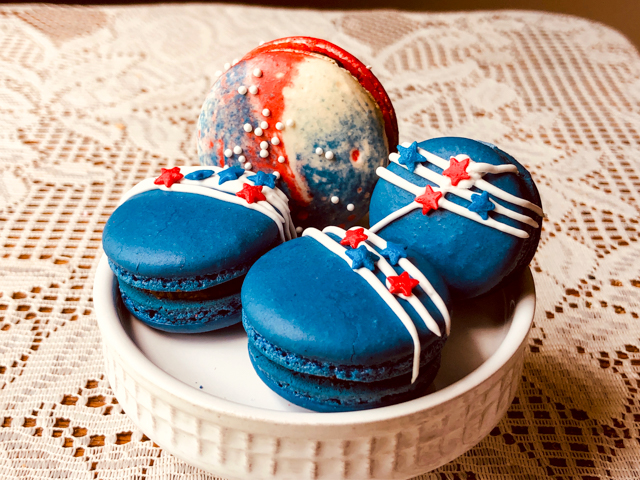
4th OF JULY MACARONS WITH CHOCOLATE COCONUT FILLING (from the Bewitching Kitchen)
For the shells:
200g powdered sugar
115 g almond flour
115 g egg whites at room temperature (approx. 4 eggs)
1/8 tsp of cream of tartar
100 g granulated sugar
¼ tsp vanilla paste or extract
red, blue, purple and black food gel dye
for the chocolate-coconut ganache:
180g cream of coconut
1/8 tsp salt
200g chocolate, cut in small pieces (II used 70% Lindt)
to decorate: white non-pareils
Make the shells:
Line 3 heavy baking sheets with parchment/baking paper or Silpat mats. Layer the powdered sugar, and ground almonds in a food processor. Pulse until the mixture looks like fine meal, about 12 pulses. Pass through a sieve and transfer to a small bowl or to a sheet of parchment/baking paper. Set aside.
Place the egg whites and cream of tartar in the bowl of a stand mixer fitted with the whisk attachment. Make sure that the bowl and the whisk are impeccably clean. Starting on medium speed, whip the whites with the cream of tartar until they look like light foam. The whites should not appear liquid. The foam will be light and should not have any structure.
Slowly rain in the granulated sugar in five additions, trying to aim the stream between the whisk and the side of the bowl. Turn the speed up to high. Continue to whip the meringue until it is soft and shiny. It should look like marshmallow creme (marshmallow fluff). Add the vanilla. Whip the egg whites until the mixture begins to dull and the lines of the whisk are visible on the surface of the meringue. Check the peak. It should be firm. Transfer the whites to a medium bowl.
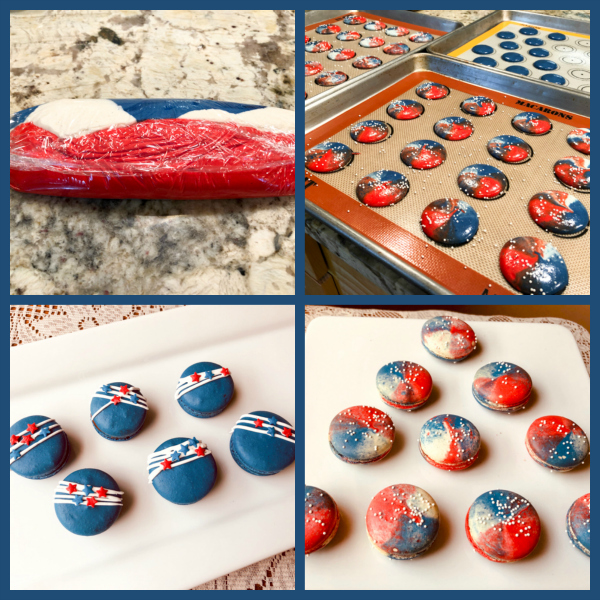
Fold in the ground almond/almond meal mixture in two increments. Paint the mixture halfway up the side of the bowl, using the flat side of a spatula. Scrape the mixture down to the center of the bowl. Repeat two or three times, then check to see if the mixture slides slowly down the side of the bowl. Divide the batter in three parts, dye 1/3 red, dye 1/3 blue (using a mixture of blue, purple and black to get the tone of blue you like). Leave the final third white. Pour the three batters side by side over plastic wrap, enclose them wrapping the plastic around like a sausage. Drop the bag with the three colors inside a piping bag fitted with a round piping tip. If you want to make a set of solid color, divide the batter to get a bigger amount of that color and place some of it in a separate piping bag.
Pipe rounds over Silpat or parchment paper in a half-sheet pan and then slam each sheet hard four to six times on the counter. Add sprinkles, if like. Let the unbaked macarons dry until they look dull but not overly dry. Drying time depends on humidity. In a dry climate, the macarons can dry in 15 to 20 minutes; in a humid climate, it can take 35 to 40 minutes.
While the macarons are drying, heat the oven to 300 F (150 C/130C Fan oven/Gas Mark 2). Bake one sheet at a time on the middle rack. Check in 11 minutes. If the tops slide or move (independently of the ‘feet’ when you gently twist the top), then bake for 2 to 3 more minutes. Check one or two. If they move when gently touched, put them back in the oven for 1 to 2 more minutes until they don’t move when touched. Let the macaroons cool for 10 minutes before removing from the pan. The macarons should release without sticking.
Make the ganache.Bring the coconut puree and salt to the boil in a small pan. Remove from the heat and pour over the chocolate in a bowl. Stir well with a whisk until combined. Cover the ganache with plastic wrap touching the surface and leave at room temperature for at least 1 hour. Do not place in the fridge. Whip with a handheld blender for a minute or so to get a slightly thicker consistency for piping.
Match shells and add the filling (I used a piping bag cut open, no piping tip). Decorations for the small macarons were made with Candy Melts (white) and star-shaped sprinkles. Place the macarons in the fridge overnight to mature before enjoying or freezing them for later.
Comments:For the tie-dye color effect, add the three batters to the same bag. The easiest way to do that is to open a large piece of plastic film on your countertop, lay the different colors in three large stripes, side by side. Roll the plastic wrap as a sausage and drop it inside a piping bag fitted with your favorite tip. That will make sure the colors get a random mixing as you pipe the shells. I reserved some blue batter to make smaller macarons, all blue. If you want the colors to be more separated, with clear margins (also a very cool effect), simply place them in three separate piping bags and drop them inside a larger one, after cutting their tips (easy to forget, don’t ask me how I know).
4th OF JULY CARDAMON-ORANGE COOKIES (from the Bewitching Kitchen)
360 g all-purpose flour
2 teaspoons baking powder
215 g sugar
¼ tsp salt
227 g cup butter, cold and cut in pieces
1 egg
3/4 tsp Fiori di Sicilia extract
zest of 1 large orange
1/2 tsp cardamom
for the Royal Icing:
80 g egg whites
420 g powdered sugar
blue gel food dye
MAKE THE COOKIE DOUGH. Heat oven to 350 F. Combine the flour, baking powder and salt, set aside. Add the orange zest to the sugar and rub it all with your hands to release the fragrant oils. Cream the sugar and butter. Add the egg, Fiori di Sicilia and cardamom, mix well. Scrape the sides of the bowl. Add the flour mixture and beat just until combined.
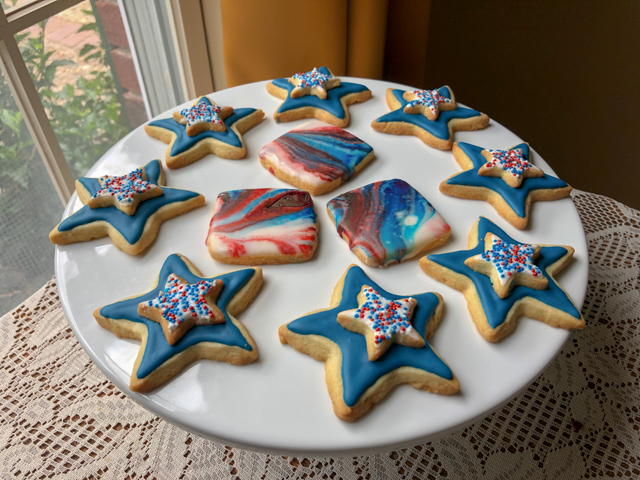
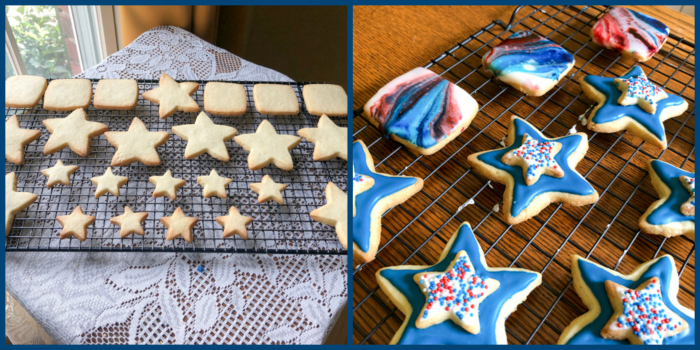
Dough can be rolled right away in between sheets of parchment paper. Roll to about 1/4″ thick, and cut into shapes. I used large stars, small stars, and rectangles. Place on parchment-lined baking sheets, freeze for 5 to 10 minutes. Bake for about 12 minutes. Transfer to cooling rack and cool to room temperature before icing.
MAKE THE ROYAL ICING: whisk the egg whites and powdered sugar using a KitchenAid type mixer until fully smooth. Adjust if needed with sugar or a little milk. Color half of it blue, keep the other half white. Make the small stars first, flooding them with white icing. Add the sprinkles before the icing sets. As they sit on a rack, flood the large stars with blue icing. Keep the very center empty, all you need is a little icing to glue the small star on top. Since it is going to be a bit heavy, if you flood the whole extension of the cookie, it will risk pressing is too much and running down the edges. Place the small star on top and allow them to dry overnight.
Comments: This basic recipe for sugar cookies is the one I had planned to use in the Great American Baking Show. I’ve made it so many times now, that I don’t even need to look at the recipe anymore. It always works. My only advice for you is to use regular American butter, like the simple, humble Land-O-Lakes. That butter seems to be the best in terms of less spreading and less fat leaking during baking. And the cookies taste as good as those made with higher fancier brands. Come to think of it, if I had made it in the tent, who knows how they would turn out? I shiver to think. 😉
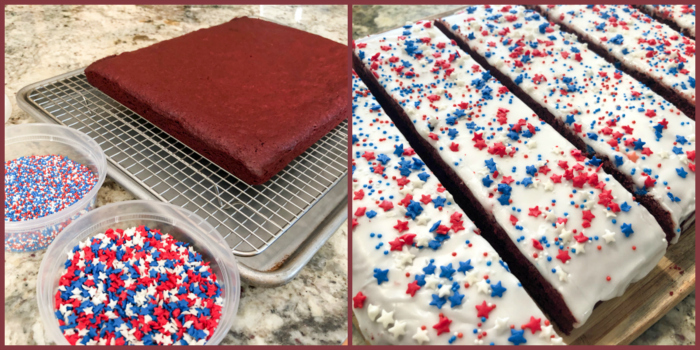
RED VELVET BROWNIE CAKE (slightly modified from Mary Berry’s Fast Cakes)
300g semi-sweet chocolate, broken into pieces
200g butter
200g sugar
4 large eggs
1 tsp vanilla paste
150g all-purpose flour
1 + 1/2 tsp baking powder
pinch of salt
8 g red gel color (I used Americolor Super Red)
for icing:
300g powdered sugar
3 tbsp very hot water
squeeze of lemon juice sprinkles
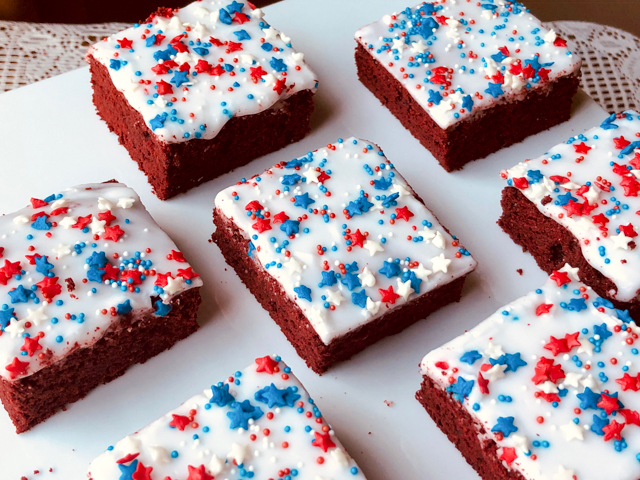
Heat the oven to 325 F. Grease a 12 x 9 in pan tin and line with parchment paper. Sift the flour with the baking powder and the salt. Reserve. Gently melt the chocolate and the butter together. Let it cool slightly and add the sugar, eggs, vanilla and red gel dye. Mix well until smooth and shiny. Add the flour mixture, stir until no dry bits remain.
Pour the mixture into the pan and level the top. Bake for 35–40 minutes, or until risen and a crust has formed on the surface. The middle should feel just firm when pressed with your fingertips. Leave to cool in the pan, then remove it.
Make the icing: Mix the powdered sugar, water and lemon juice together in a bowl to make a smooth paste, adjust consistency as needed. Spread over the cold cake and top with sprinkles. Cut in pieces to serve.
Comments: Pretty much everything I bake these days go for Common Table meals, and they need to be wrapped individually. I am always tweaking the recipes so that they bake as flat and uniformly as possible, and if they have some type of icing, it is not too soft. Crusting buttercream and powdered sugar-based icings are the best. I tend to use less baking powder than the recipes call for, so feel free to up a little the amount (up to 2 + 1/2 tsp) if you don’t mind a certain dome effect in the center of your cake. For this recipe a 13 x 9 will give a cake a bit too thin, if that’s the only size you have, perhaps a 10 inch square pan will work better.
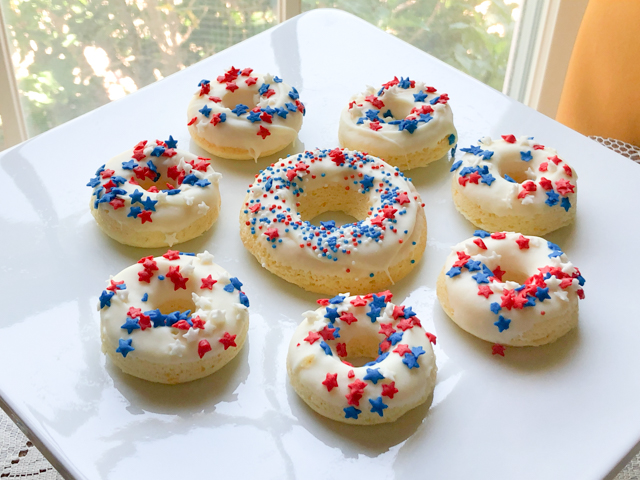
4th OF JULY BAKED ORANGE DONUTS (from the Bewitching Kitchen)
100g granulated sugar
Zest of 1 large orange
160 g cake flour, sifted
1 + ¼ tsp baking powder
1/4 tsp salt
½ cup buttermilk
1 egg
1 tbsp butter, melted
½ teaspoon vanilla paste
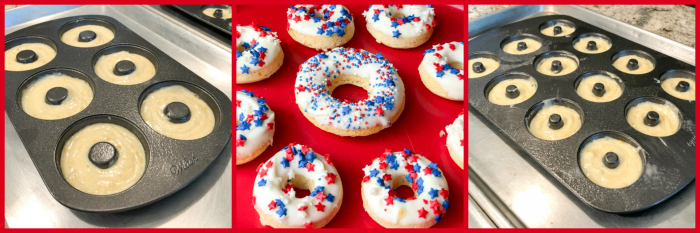
Spray your donut pans with a very light coating of baking spray. I used one mini donut pan and one regular size. Heat oven to 400 F.
In a small bowl combine sugar and orange zest until the sugar is moistened and fragrant. In a large mixing bowl, sift together cake flour, baking powder, and salt. Stir in sugar mixture.
Add buttermilk, egg, butter, and vanilla and stir until just combined. Add batter to a piping bag and fill each donut cup approximately one-half full.
Bake for about 10 minutes or until the top of the donuts spring back when touched.
Let cool in pan for 4–5 minutes before removing. Finish the donuts with melted Candy Melts and add sprinkles before it sets.
Comments: I’ve made these donuts about a month ago using orange blossom water instead of vanilla paste, and to me they tasted a bit artificial. So this time I kept the orange theme exclusively in the zest. Maybe it depends on the brand of orange water you have. At any rate, they are very simple to prepare and have a nice texture. Fiori di Sicilia would probably be quite nice also, but I did not want to have two exact same flavors in the weekly bake. All these goodies were included in the same Common Table meal of July 3rd.
I hope you enjoyed this small collection of 4th of July bakes, and that you are having a nice weekend. Please stay vigilant, observe social distance, and wear a mask when outside. It is not a political issue, it is a matter of your health and that of those around you.
A mask is a sign that you care.
For a recent review on staying safe during this pandemic, visit this post.
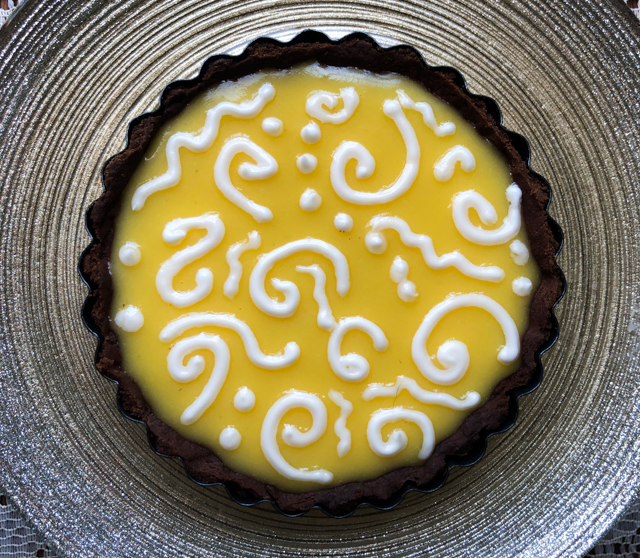
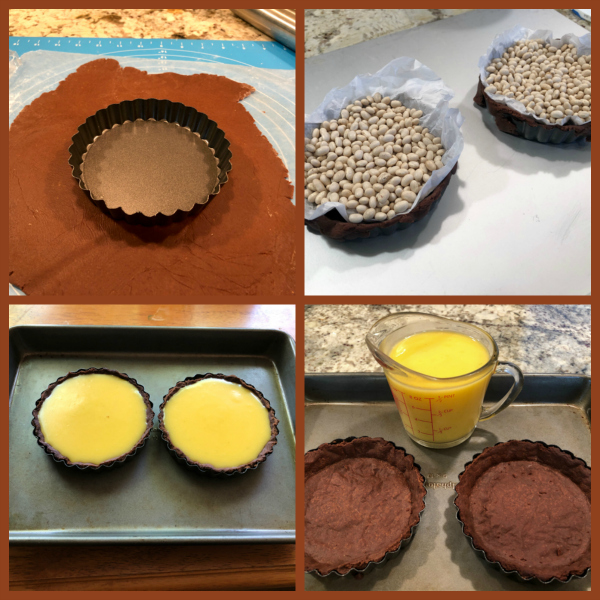
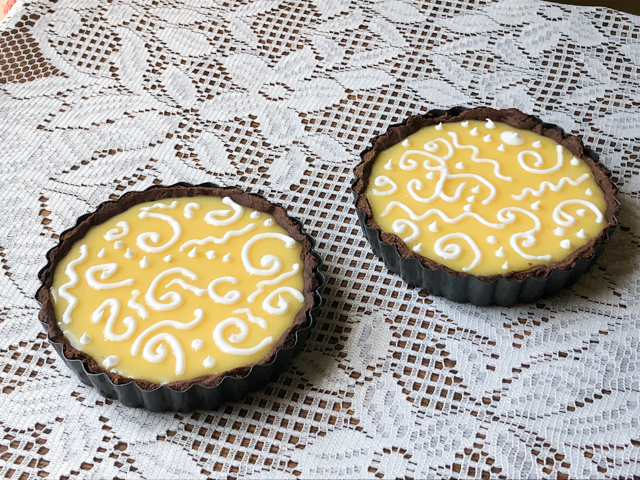
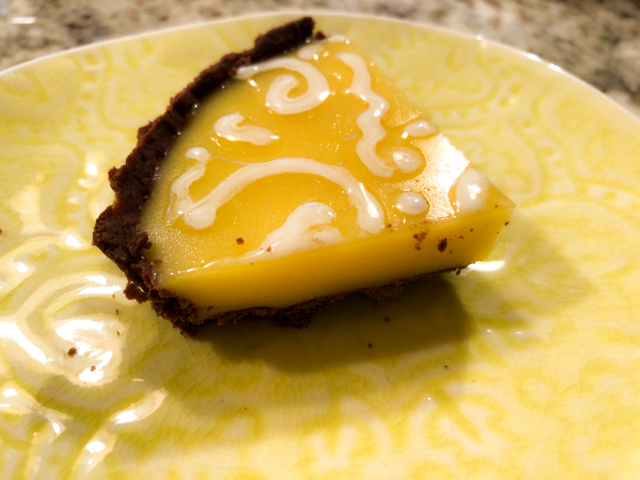
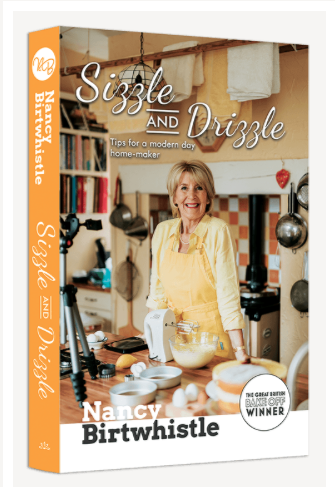
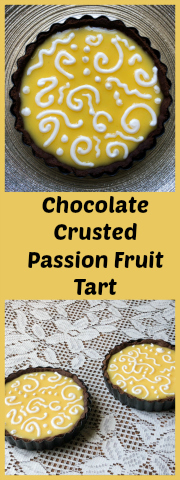
This review is long overdue. I first contacted Nancy Birtwhistle to ask permission to blog on a recipe from her first cookbook, Sizzle and Drizzle, in December last year. But a lot happened to all of us. Life turned upside down, and it will quite likely never go back to what it used to be. To that normal I suppose we all took for granted. Better late than never, I am sharing today a recipe that feels very special to me. Nancy made it in a certain tent during the Great British Bake Off and I remember falling in love with it the first time I watched that episode. How could I not? It joined chocolate and passion fruit. And she decorated it in a simple yet very elegant way. Instead of making a single, larger tart, I made two individual portions. In isolation times, we have no one to share this type of dessert with, so a smaller portion was the ticket.
1 tart pan, 9 inch (23 cm) in diamater, preferably fluted edges, loose bottom
for the crust:
125g flour
20g cocoa powder
90g salted butter, cold, cut in small dice
30g powdered sugar
1/2 tsp Chinese five-spice mixture (optional)
2 Tablespoons egg yolks, beaten
for the filling: (use half if making two individual size tarts)
6 eggs
200g granulated sugar
100g softened butter cut into dice
200mL passion fruit juice
5 gelatin leaves (I used Platinum)
for the decoration:
1 egg white
100g powdered sugar, sifted
Heat oven to 400F.
Make the tart crust. Place the flour, cocoa, sugar and spice in the food process and blitz to mix. Add the cold butter and process until everything is combined, this will take just a few pulses. With the motor running, pour the egg yolks and process until it starts to come together. Stop and gather everything over a plastic wrap. Press into a flat disk and refrigerate for 30 minutes.
Roll the pastry very thin (I like to do it over wax paper and with a plastic wrap on top), then use it to cover your tart pan. Freeze for 10 minutes. Cover the bottom with parchment paper and fill with pie weights, beans or rice. Blind bake for 10 minutes, remove the beans and bake for 5 minutes more. Trim the edges with a serrated knife, and allow to cool completely.
Make the filling. Soak the gelatin leaves in cold water. Mix the sugar and passion fruit juice in a sauce pan, heating it gently until it fully dissolved. In a bowl, whisk the egg yolks vigorously, then add the warm juice slowly, whisking non-stop. Put the mixture back in the sauce pan and heat to 185 F (85 Celsius). Be careful and keep whisking, remove from heat if needed for a few seconds to make sure no curdling of egg yolks happen.
Remove from heat, add the drained gelatin sheets, pass it through a sieve. Add the butter, whisk very well to emulsify. Allow the curd to cool slightly then pour into the pastry case all the way to the top. It is better to do this already in the fridge so you don’t have to move the tart around.
When the tart is set, decorate with the Royal icing mixture that you make by whisking the sugar and egg white together for about 4 minutes in a KitchenAid type mixture. Adjust the consistency to make it right for piping. Serve at room temperature.
Comments: I used the full amount of dough but made smaller tarts, I find it easier to work with larger amounts and not get into pie dough anxiety as I’m rolling it out and trying to make sure it covers the whole surface of the pan. I halved the amount of filling, so if you are considering making just two small tarts, pay attention to that. Of course, the passion fruit curd is delicious and having some extra hanging around in the fridge is not a bad idea.
Nancy gives two important tips: roll the pastry thin, as thin as you can do it. And transfer the empty blind-baked shells to the fridge to fill them. That ensures you can fill them to the top and not spill over the side as you try to carry them to the fridge. Small details matter. As I was piping the swirls, I transported my mind back to the tent, and imagined Nancy grabbing the piping bag with the Royal icing, taking a deep breath and knowing she had to do as perfect a job as possible, with the cameras on her, and the shiny surface of the passion fruit curd ready and waiting. She did such a beautiful job! No wonder she went on to win the whole thing!
This was absolutely delicious, and I urge you to make it if you have access to passion fruit (you will need 8 to 9 fruits to make the full amount of filling). I have still quite a bit of frozen passion fruit pulp, and it worked well for this purpose.
If I had to define the book with a simple statement, I would summarize it as “superb baking instruction and tips with Nancy’s personality shinning through the whole book.” One of the things that was evident from her performance in the show, is that she has a ton of self-confidence and knowledge. She tested her recipes and was not afraid to stand up to Paul. Just one small example, she defended her method to speed up proofing of an enriched dough using the microwave. To Paul, of all people, the Bread King… And I loved when she was proved right (sorry for the lousy pun). In the book, she mentioned that her first show-stopping challenge in the Great British Bake Off was making 36 mini-cakes. Everybody had butter over their counters (remember, the recipes are all submitted in advance and they set up the ingredients). Nancy was THE ONLY ONE with margarine. She felt a little “wobble in her confidence” but then said to herself – my cake tastes good. I have nothing to worry about. Guess what? She was Star Baker that week. We should all keep her experience in mind when that inner voice starts nagging us with self-doubt.
Her cookbook was entirely conceived, written, photographed, and published by her. And it has a very nice feature (she calls it “Let me show you”): you get access to videos in which she demonstrates parts of her recipes, by using your smartphone to decode a little bar printed on the pages. Very VERY cool. Here is an overview chapter by chapter with a few examples from each. Every chapter starts with her top tips for success.
BISCUITS AND SCONES.I pretty much would like to bake every single item of this chapter. Her approach is to use less sugar than most recipes would call for, and also keep the dough a bit on the dry side, rolling always in between plastic sheets. My favorites would be Lemon Shortbread, Spiced Christmas Shortbreads, Brandy Snaps, Rose and Chocolate Macarons (how can I resist those?), Rye and Fennel Thins, Cherry Bakewell Scones, and Cheese Scones. Every single recipe has the “Let me show you” link available so you can watch her making it. Just amazing!
BREADS.“It is better to over bake than under bake bread.” Music to my ears. I see so many pictures that people share online of breads that clearly needed another 10 to 15 minutes in a hot oven to really shine. From this chapter, I want to bake her Crusty Topped Bloomer (remember Tiger Rolls? this is similar), her Hot Cross Buns, Stromboli, and Yorkshire Teacakes (adorable).
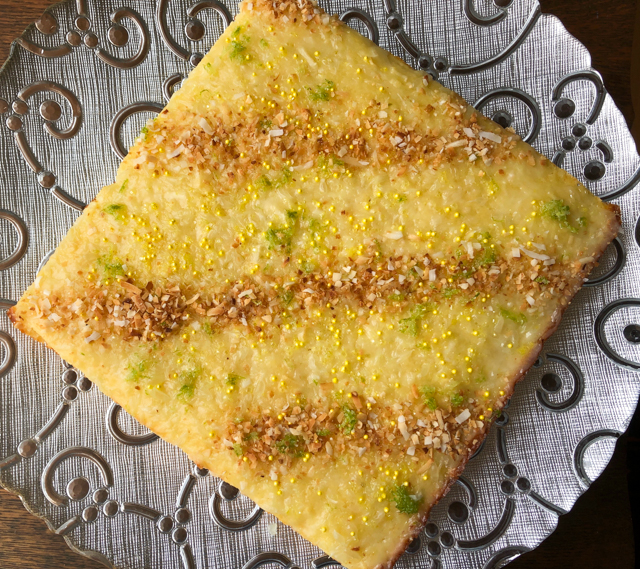
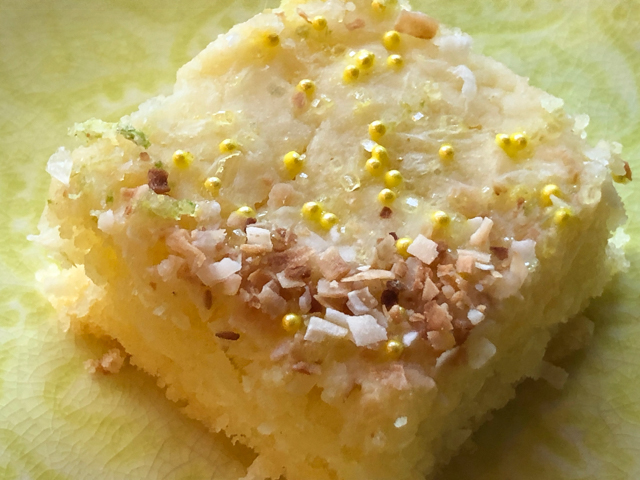
CAKES.“An over baked sponge will have a dark crust on its sides, bottom, and maybe even the top. The perfect sponge should be the same color all over.” Yes, yes, and YES! Might be my favorite chapter. Chocolate Fudge Cake (with tips on what to do if your fudge separates), the classic Lemon Drizzle Cake,Pistachio and Raspberry Ripple Swiss Roll, Simnel Cake (on my list to do!), Raspberry Ripple Cupcakes, Gluten-Free Coffee and Walnut Cake (she swears you cannot tell it’s gluten-free), Vegan Lemon Cake. But let me tell you that I baked one of her cakes and will include it here as a teaser. A Coconut and Lime Traybake. Absolutely delicious!
PASTRY. I lied. This is my favorite chapter. Nancy learned pastry from her Grandma, a huge influence in her life. Her initial description on how to make the perfect shortcrust pastry is worth the whole book, in my opinion. The featured recipe was from this chapter. My other favorites: School Dinners Meat Pie (gorgeous), Courgette Quiche (stunning presentation), Single Serve Whole Apple and Blackberry Pies, Rich Chocolate Tart, Luxury Mince Pies (plenty of tips on how to pull perfect ones, plus her great video tutorial), Choux Pastry, Puff Pastry, Eclairs, Sausage Rolls…
PUDDINGS AND DESSERTS. This chapter stretched my horizons a bit, as I am not too familiar with some of the UK classics. I am very intrigued by Steamed Treacle Sponge (it does look great), Nancy’s Christmas Pudding,Eve’s Pudding, and obviously at some point I need to make the Queen of Puddings, as it was a technical I missed because a gingerbread sculpture collapsed and I was shown the exit door of a beloved tent (insert discreet tears). Half Sugar Almond Meringues are also calling my name, as well as Summer Lemon and Elderflower Cheesecake, and a stunning Raspberry and White Chocolate Bundt Cake.
HOME TIME. In this closing chapter, she goes over her way of life, growing a lot of the things she eats, preserving things, coming up with clever systems for cleaning that avoid strong chemicals or store-bought products. Everything with the videos ready and waiting for you.
I hope you enjoyed this little review. Her cookbook was clearly a labor of love form page 1 to page 416. Nancy is an author who wants you to succeed in the kitchen, she wants to make sure you can bake every single one of those recipes without issues. I will never forget her last showstopper challenge in the tent, in which she made a Moulin Rouge sculpture with sugar work. To conceive that was amazing, but to pull it all IN THE TENT, with the “male judge” hovering nearby, just blows my mind. So I am thrilled that a person with so much talent decided to share it in a cookbook, and we can all profit from it.
Thank you, Nancy, for giving me permission to share the Passion Fruit Tart recipe, and for your support….