As those who follow my blog might know, every Friday I donate a box of sweets for a homeless meal in our town. Some items are mandatory: decorated cookies, regular cookies and chocolate-covered Oreos come to mind. Then, I like to include some variety. Little tartlets, brownies, cupcakes. Or… donuts!
VANILLA DONUTS WITH STRAWBERRY GLAZE (adapted from several sources)
1 + 3/4 cups all-purpose flour 1 cup granulated sugar 3/4 teaspoon kosher salt 1 teaspoon baking powder 1/2 teaspoon baking soda 1 large egg 1/2 cup buttermilk 1/4 cup grape seed oil 1/2 teaspoon vanilla extract 1/4 cup water
for the glaze: 1 + ¼ cups powdered sugar 2 tablespoon freeze-dried strawberries, crumbled 2 tablespoon whole milk 1/4 teaspoon vanilla extract sprinkles to decorate (optional)
Heat the oven to 375 F. Spray a 12-cavity donut pan with cooking spray and set aside.
Whisk together the flour, sugar, salt, baking powder and baking soda in a large bowl. Whisk together the egg, buttermilk, oil, vanilla and water in a medium bowl. Whisk the wet mixture into the dry mixture and stir to combine. Fill a piping bag with the batter and pipe the batter into the donut pans, filling each cavity halfway, as the batter will expand quite a bit.
Bake until a toothpick inserted into a donut comes out clean, about 15 minutes. Cool in the pan for 5 minutes. Remove to a rack and cool completely.
Make the glaze: Whisk the sugar and dried strawberries in a shallow bowl. Slowly stir in milk and vanilla extract to make smooth, pourable glaze. Dip each donut in the glaze and place back on cooling rack. Add sprinkles before the glaze sets. Allow glaze to set for 30 minutes before serving.
Comments: This is a very simple recipe and produces donuts that are soft and delicate. Make sure not to fill the pan more than halfway. The glaze is also quite straightforward. It relies on freeze-dried strawberries that these days are available in most grocery stores. I do have a harder time finding freeze-dried raspberries… Those could go perfectly here also.
Plump, soft, sweet, with a little sharpness of the strawberry, these are a crowd-pleaser!
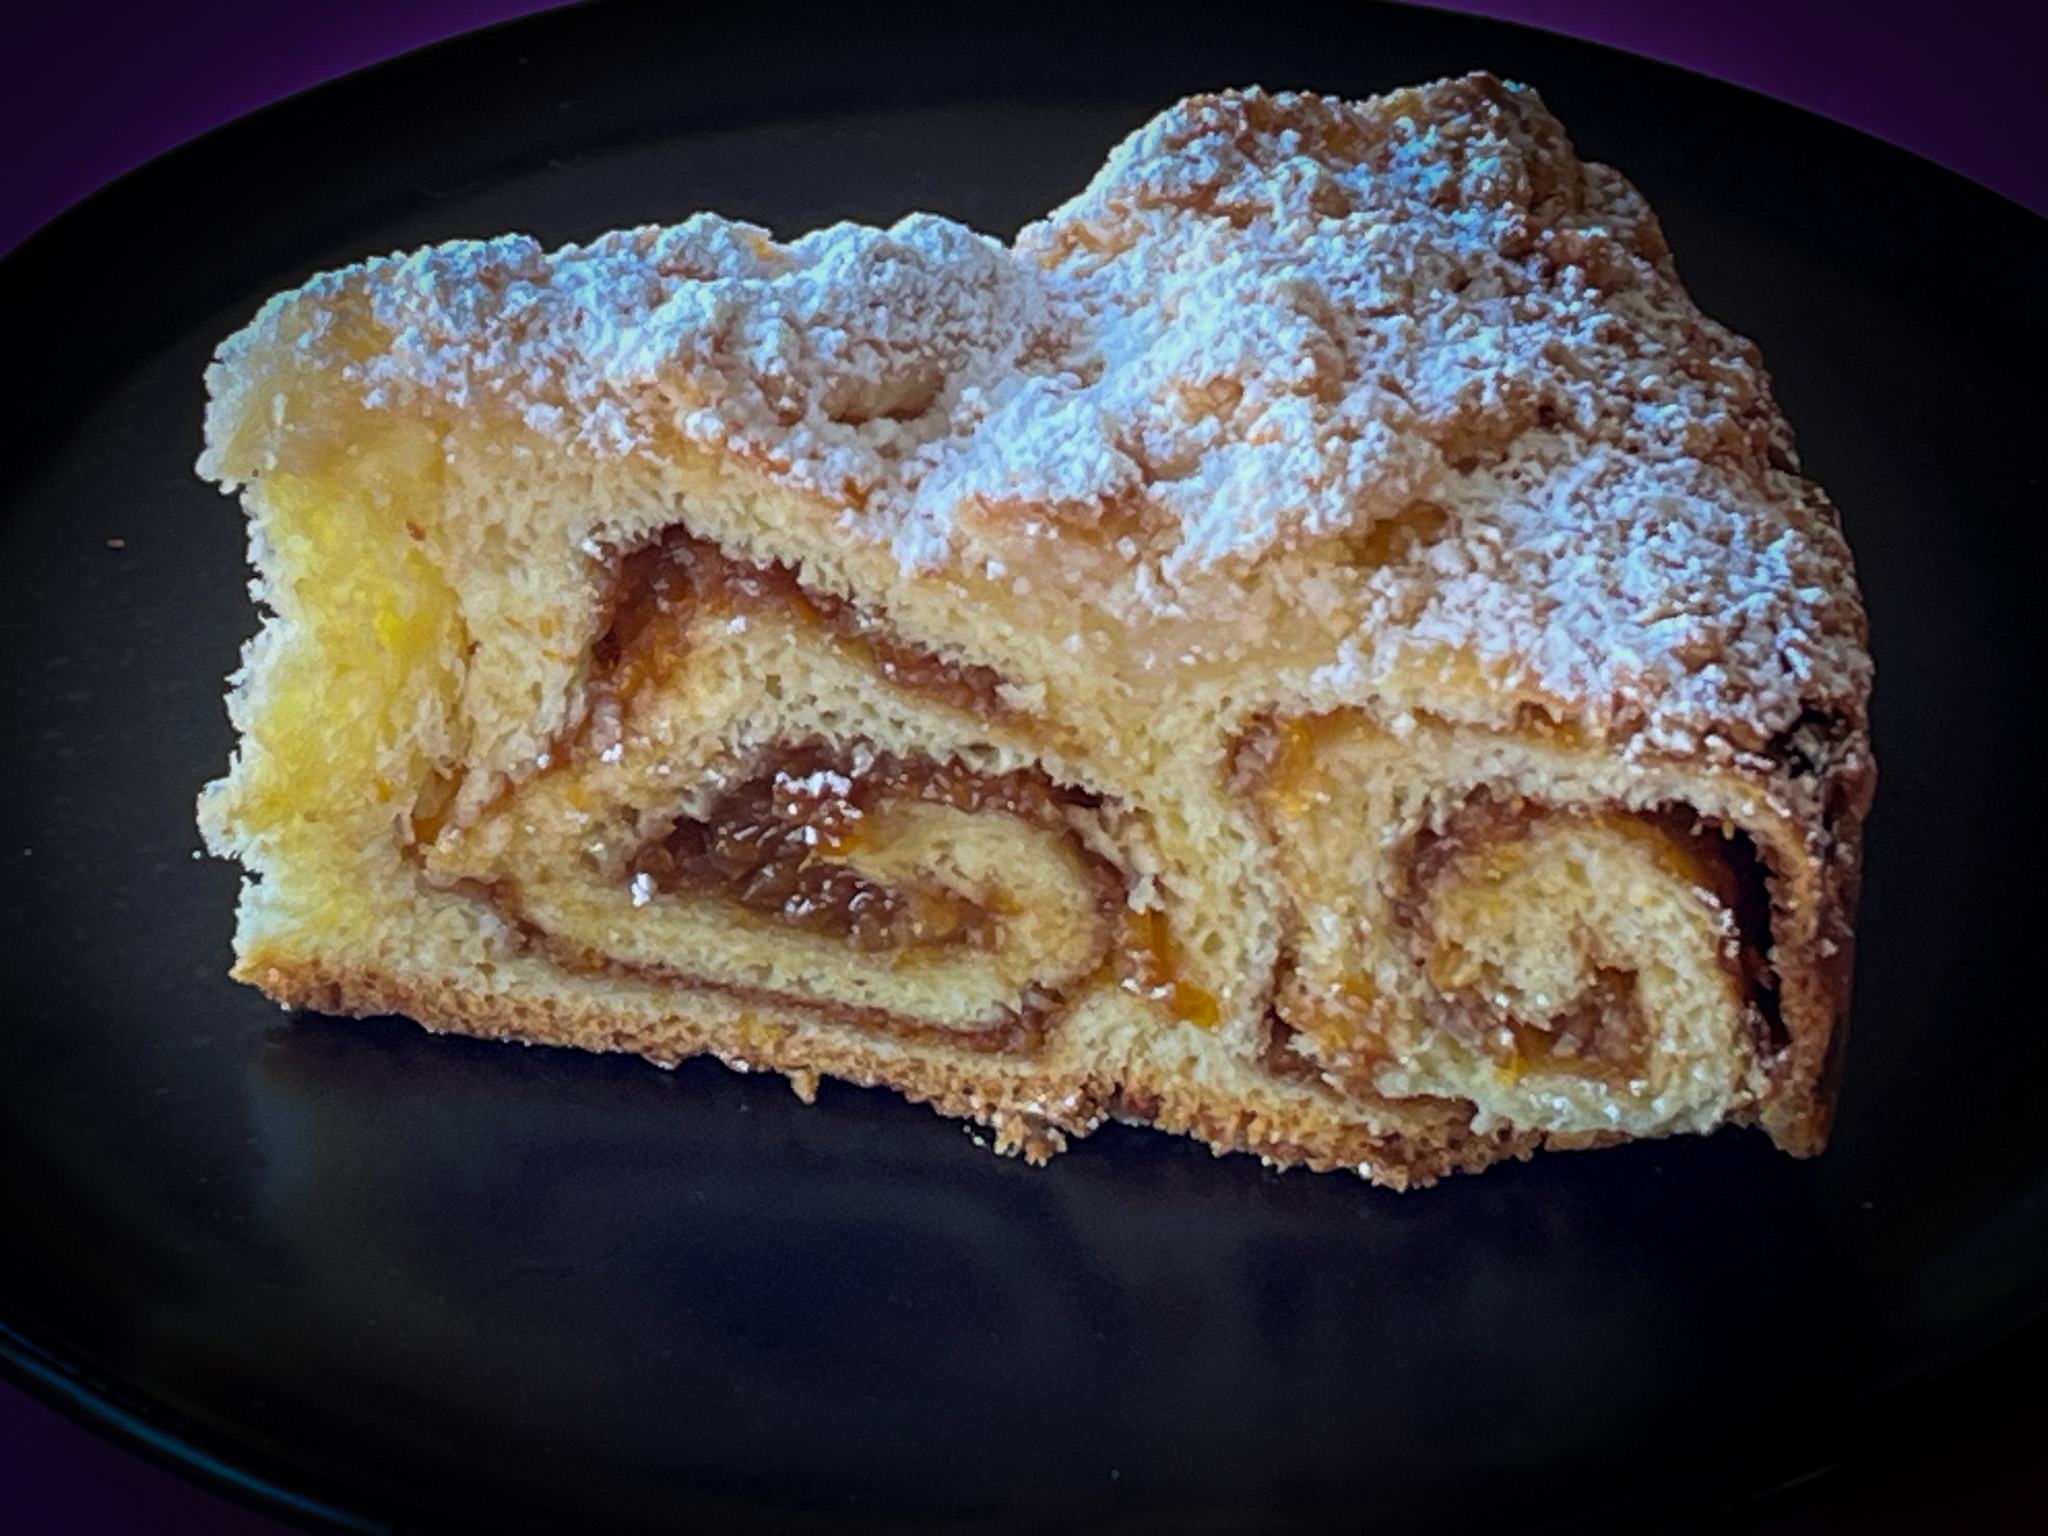
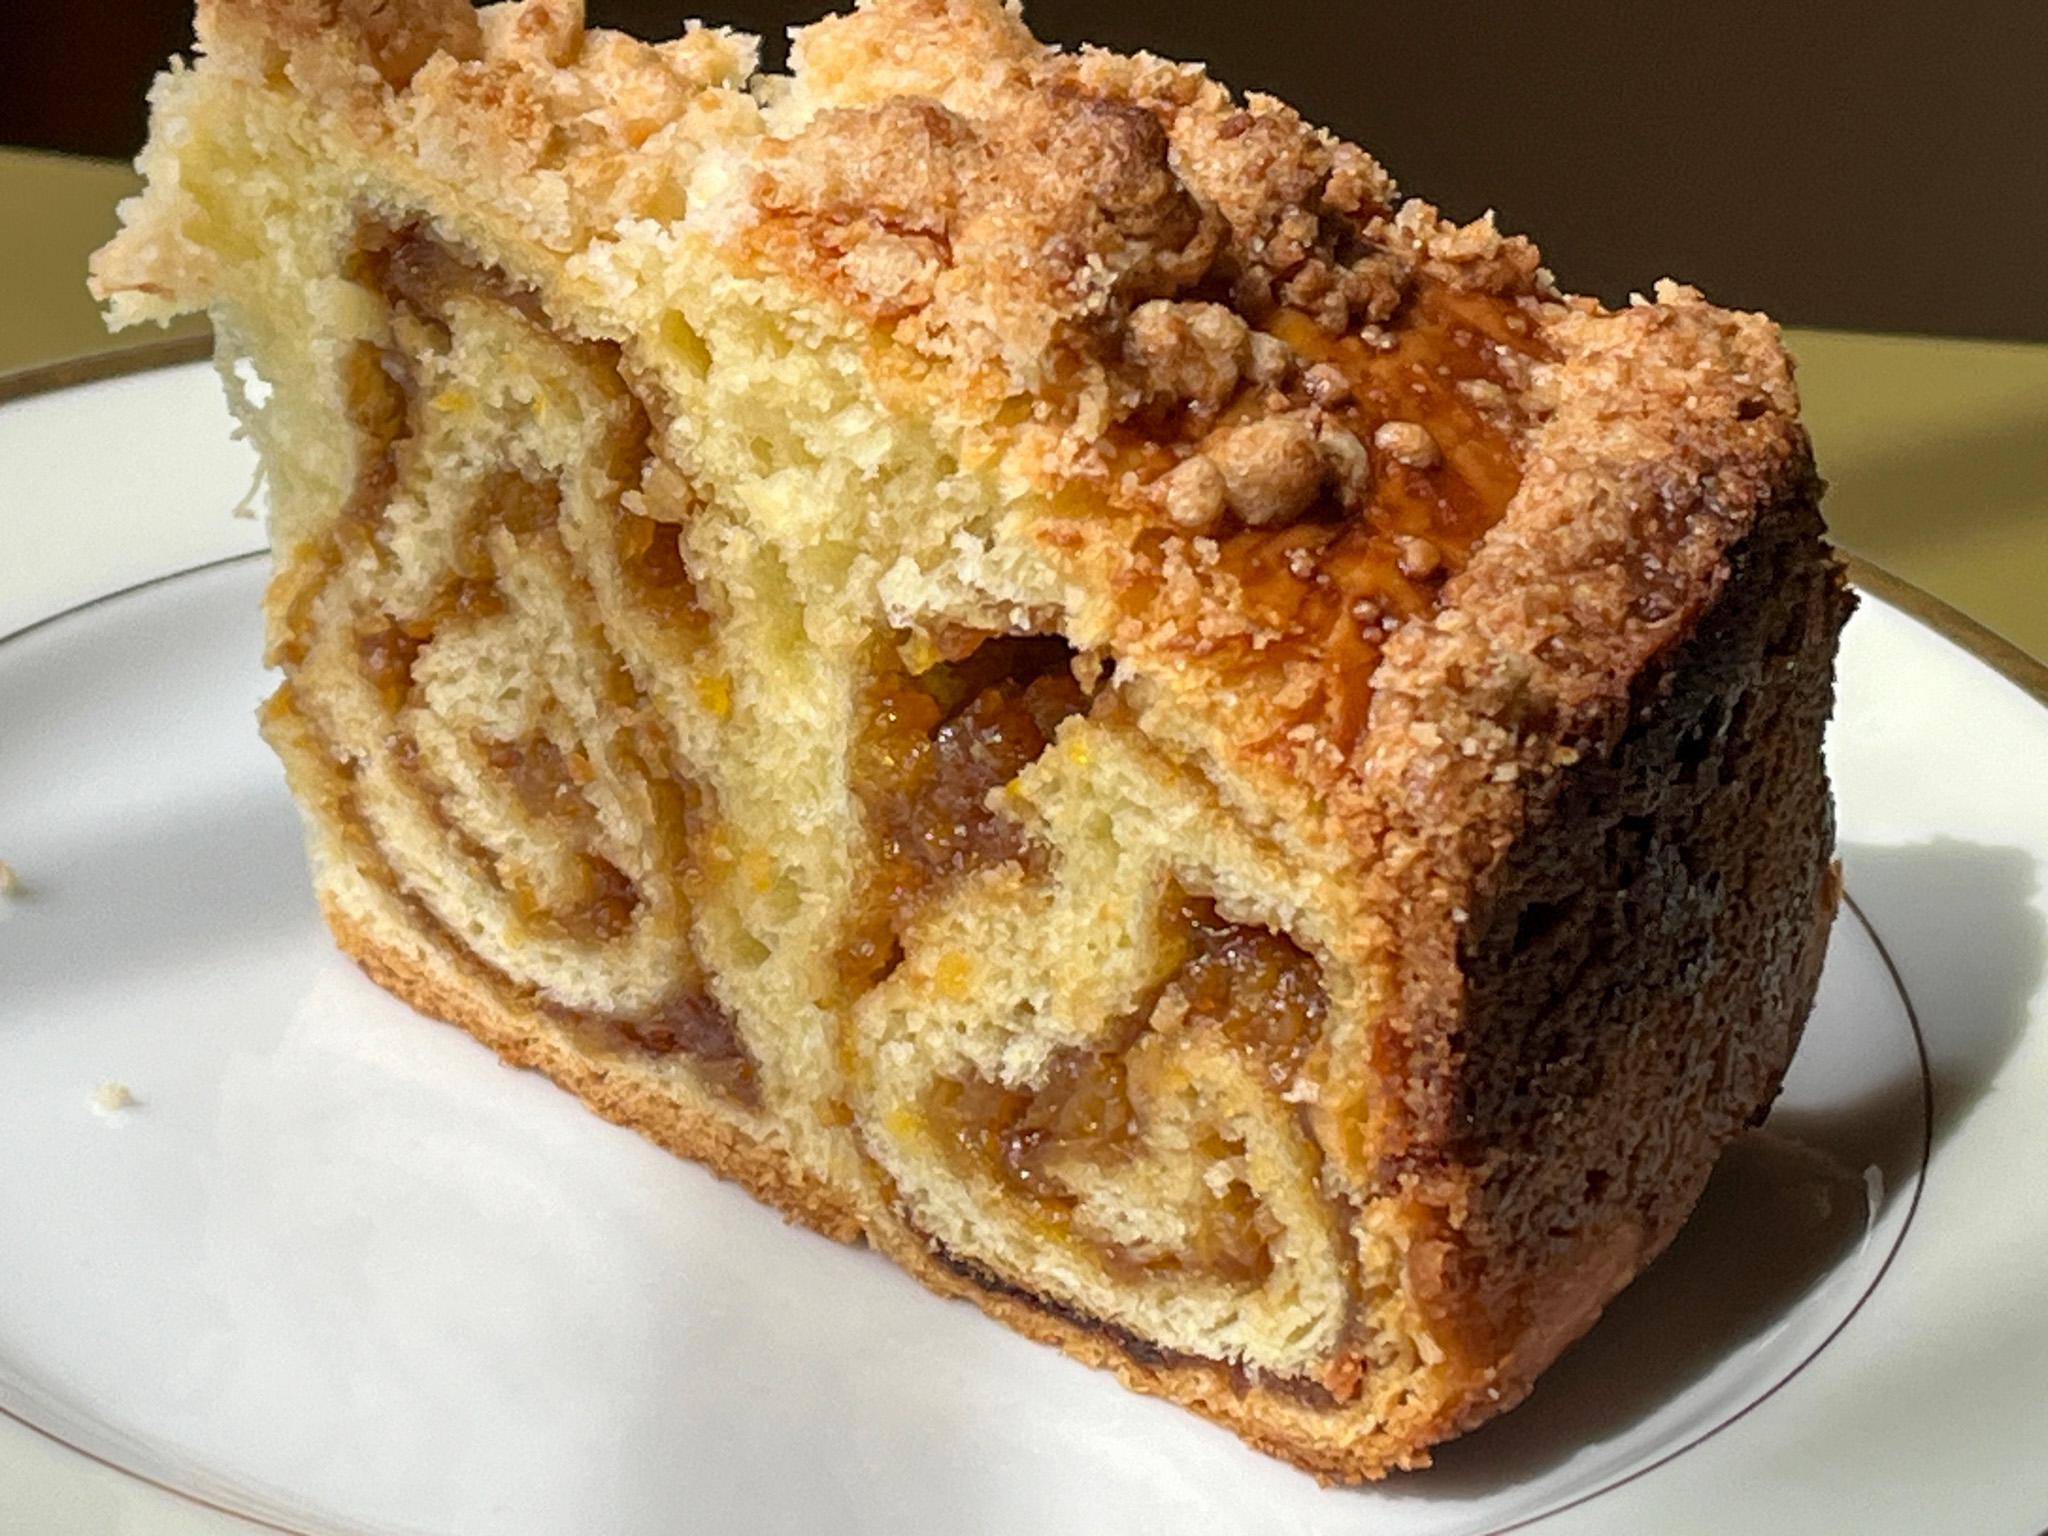
Is it a cake? Is it a sweet bread? Is it heaven on a plate? Yes to all! Another amazing recipe from Helen Fletcher, this is a bit involved but absolutely worth it… Slicing through it to reveal the coiled pattern inside is just too cool!
¾ cup unsalted butter (170 grams) 1 teaspoon active dry yeast 3 tablespoons warm water Pinch granulated sugar 2 ¼ cup bread flour (315 grams) 1 ½ tablespoons granulated sugar ½ teaspoon salt 3 large eggs, room temperature ¼ cup half and half (or heavy cream)
Filling ¾ pound dried apricots 1 cup water 5 tablespoons butter (75 grams) ½ cup powdered sugar (65 grams) 1 ½ teapoons vanilla 2 teaspoons cocoa
Almond Paste Crumb Topping 1 cup cake flour (125 grams) ½ cup almond paste (125 grams) ⅔ cup granulated sugar (130 grams) ½ cup unsalted butter (114 grams)
Assembly 1 large egg, well beaten
Make the brioche dough: Cut the butter into small pieces by cutting the stick in half lengthwise, the cutting it into half inch pieces. Place it back in the refrigerator to keep cold. Make a sponge by dissolving the yeast and pinch of granulated sugar in the 3 tablespoons warm water. Add 3 tablespoons flour from the measured amount of 2 ¼ cups flour. Stir together to completely mix the ingredients. Cover with film and set aside to double or more while preparing the rest of the ingredients.
In the processor bowl fitted with the steel blade, place the remaining flour, salt and sugar. Process 5 seconds to mix. Place the cold butter in a circle over the flour. Process the butter until it is indistinguishable, about 20 seconds. Scrape down and process about 5 seconds more. Place the eggs in a circle over the dry ingredients, pour the half and half or cream over the eggs, and add the sponge, also in a circle. Process approximately 20 to 25 seconds until the ball which initially forms breaks down into a creamy, evenly dispersed batter in the processor bowl. Do not stop processing until the batter is formed, as the motor may stall when you try to restart it. If the ball doesn’t break down, that’s fine as long as everything is mixed well.
Remove from the processor bowl and place in an ungreased bowl. Cover securely with plastic wrap and allow to rise until double in bulk about 2 to 2 ½ hours. Stir down and refrigerate overnight. Punch down and use as directed. It can stay in the refrigerator for up to 3 days before using.
for the filling: Place the apricots and water in a small saucepan and bring to a boil. Reduce to a simmer and, stir frequently until most of the water is gone. Place the apricots and remaining ingredients, except the cocoa, in a processor bowl and process until smooth. Set aside to cool. Stir the cocoa in. This may be made a week ahead and stored in the refrigerator. Remove to room temperature before using.
for the crumb topping: Place the flour and almond paste (either home made or bought) in the bowl of a processor. Process until the almond paste is indistinguishable. Add the sugar and butter and process until it begins to form crumbs. Switch to pulses and pulse only until large crumbs form. Remove them to a bowl and refrigerate until needed.
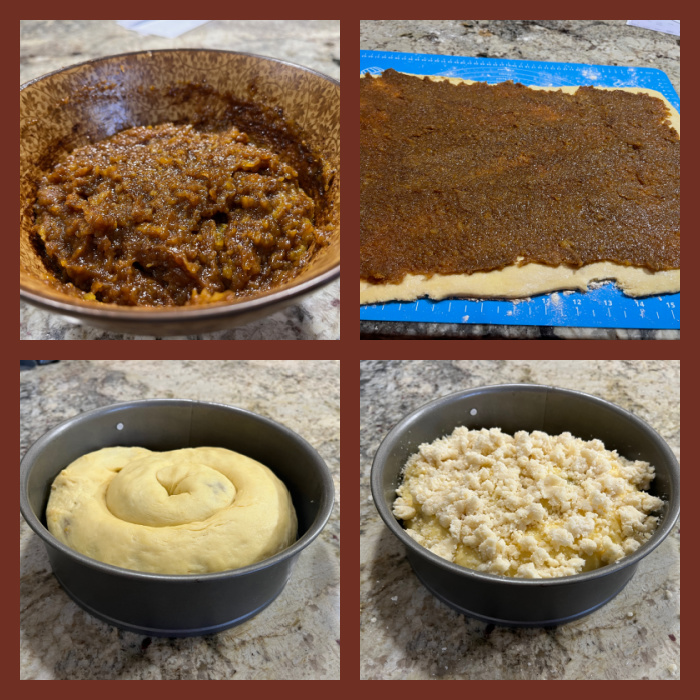
To assemble the coffee cake: Spray a 9×3″ cheesecake or springform pan with a non-stick baking spray. Set aside. Remove the brioche from the refrigerator, punch down, pat into a rectangle on a lightly floured surface and roll into a 20×11 inch rectangle so the long horizontally in front of you to make rolling up easier. Spread the filling evenly over the brioche within ½” of the edges. Roll up tightly from the 20″side and pinch the seam securely together. Roll and gently stretch it until it is 30″ long. If it is very soft at this time, coil it up on a parchment line baking sheet and chill to firm up. Do not let it freeze.
Starting in the middle of the pan, coil the roll around towards the outer edge of the pan. Press it down to flatten and fill the pan. Cover with a towel and let rise until doubled in bulk. Because everything is cold, this could take 4 to 4 ½ hours to rise.
Heat the oven to 375F. When the coffee cake is full risen, brush it with the beaten egg and distribute the almond paste crumbs evenly over the brioche. Bake for 45 to 55 minutes until the top is browned. A tester is difficult here because the filling stays moist and clings to the tester. If the top begins to brown too quickly, tent it with foil. Cool until barely warm and release the cake. Dust with powdered sugar to serve.
Comments: Helen’s method to make a brioche in the food processor is something I’ve been meaning to try for the longest time, and it works so well, I will keep it as my method of choice from now on. It considerably speeds up the preparation of the dough, and you cannot beat the texture. A pleasure to work with. I could have done a better job keeping the coil leveled on all sides of the pan, if you look at the bottom left photo of the composite above, you’ll see that my coil got a bit lopsided. Other than that, no issues. I highly recommend you visit Helen’s site (click here) because she goes over every little step with pictures and you get a better idea of what to expect as you make this recipe.
The crumb topping is irresistible, so I advise you to stop nibbling on it and use it exclusively to top the cake. I made my own almond paste, following Helen’s detailed recipe, and it turned out perfect! I used her simple syrup method. You can read her post about it clicking here. My little concoction looked exactly like hers – or the ones you can buy at the store – but my picture was badly out of focus, so you will have to take my word for it. I loved making this crumb cake, now I dream of variations, maybe some black sesame paste in the filling could be fantastic also!
1 cup flour 1/2 tsp baking soda 1/8 cup vegetable oil 1/4 cup natural peanut butter (Do NOT use a peanut butter with Xylitol, as it is very toxic for dogs) 3/4 cup applesauce go with plain, unsweetened 1/2 cup pumpkin puree 1 egg FROSTING 1/2 cup plain Greek yogurt 1/4 cup peanut butter
Heat oven to 350 degrees F. In a large bowl, combine flour and baking soda. In a separate bowl mix together vegetable oil, peanut butter, applesauce and pumpkin puree. Once combined, mix in egg and mix well. Mix wet and dry ingredients and stir until no dried bits of flour are visible.
Pour mixture into an 7 inch square pan that has been greased with oil. Bake for 20 to 25 minutes or until a toothpick inserted into the center comes out clean and the cake springs back when pressed lightly. Allow to cool on a wire rack prior to removing from pan. After cooling, add frosting if desired.
For the frosting: Mix Greek yogurt and peanut butter until well combined. Spread over cake. If not serving immediately, store in refrigerator.
Comments: This is a super easy treat to bake, and we actually tried the cake (without the frosting) and it is not bad at all! We cut three circles to offer the pups, and the leftover was cut in cubes and saved for later. Tiny Milk Bones to decorate are optional, but dog-appreciated… Our Birthday girl gave it two paws high up!
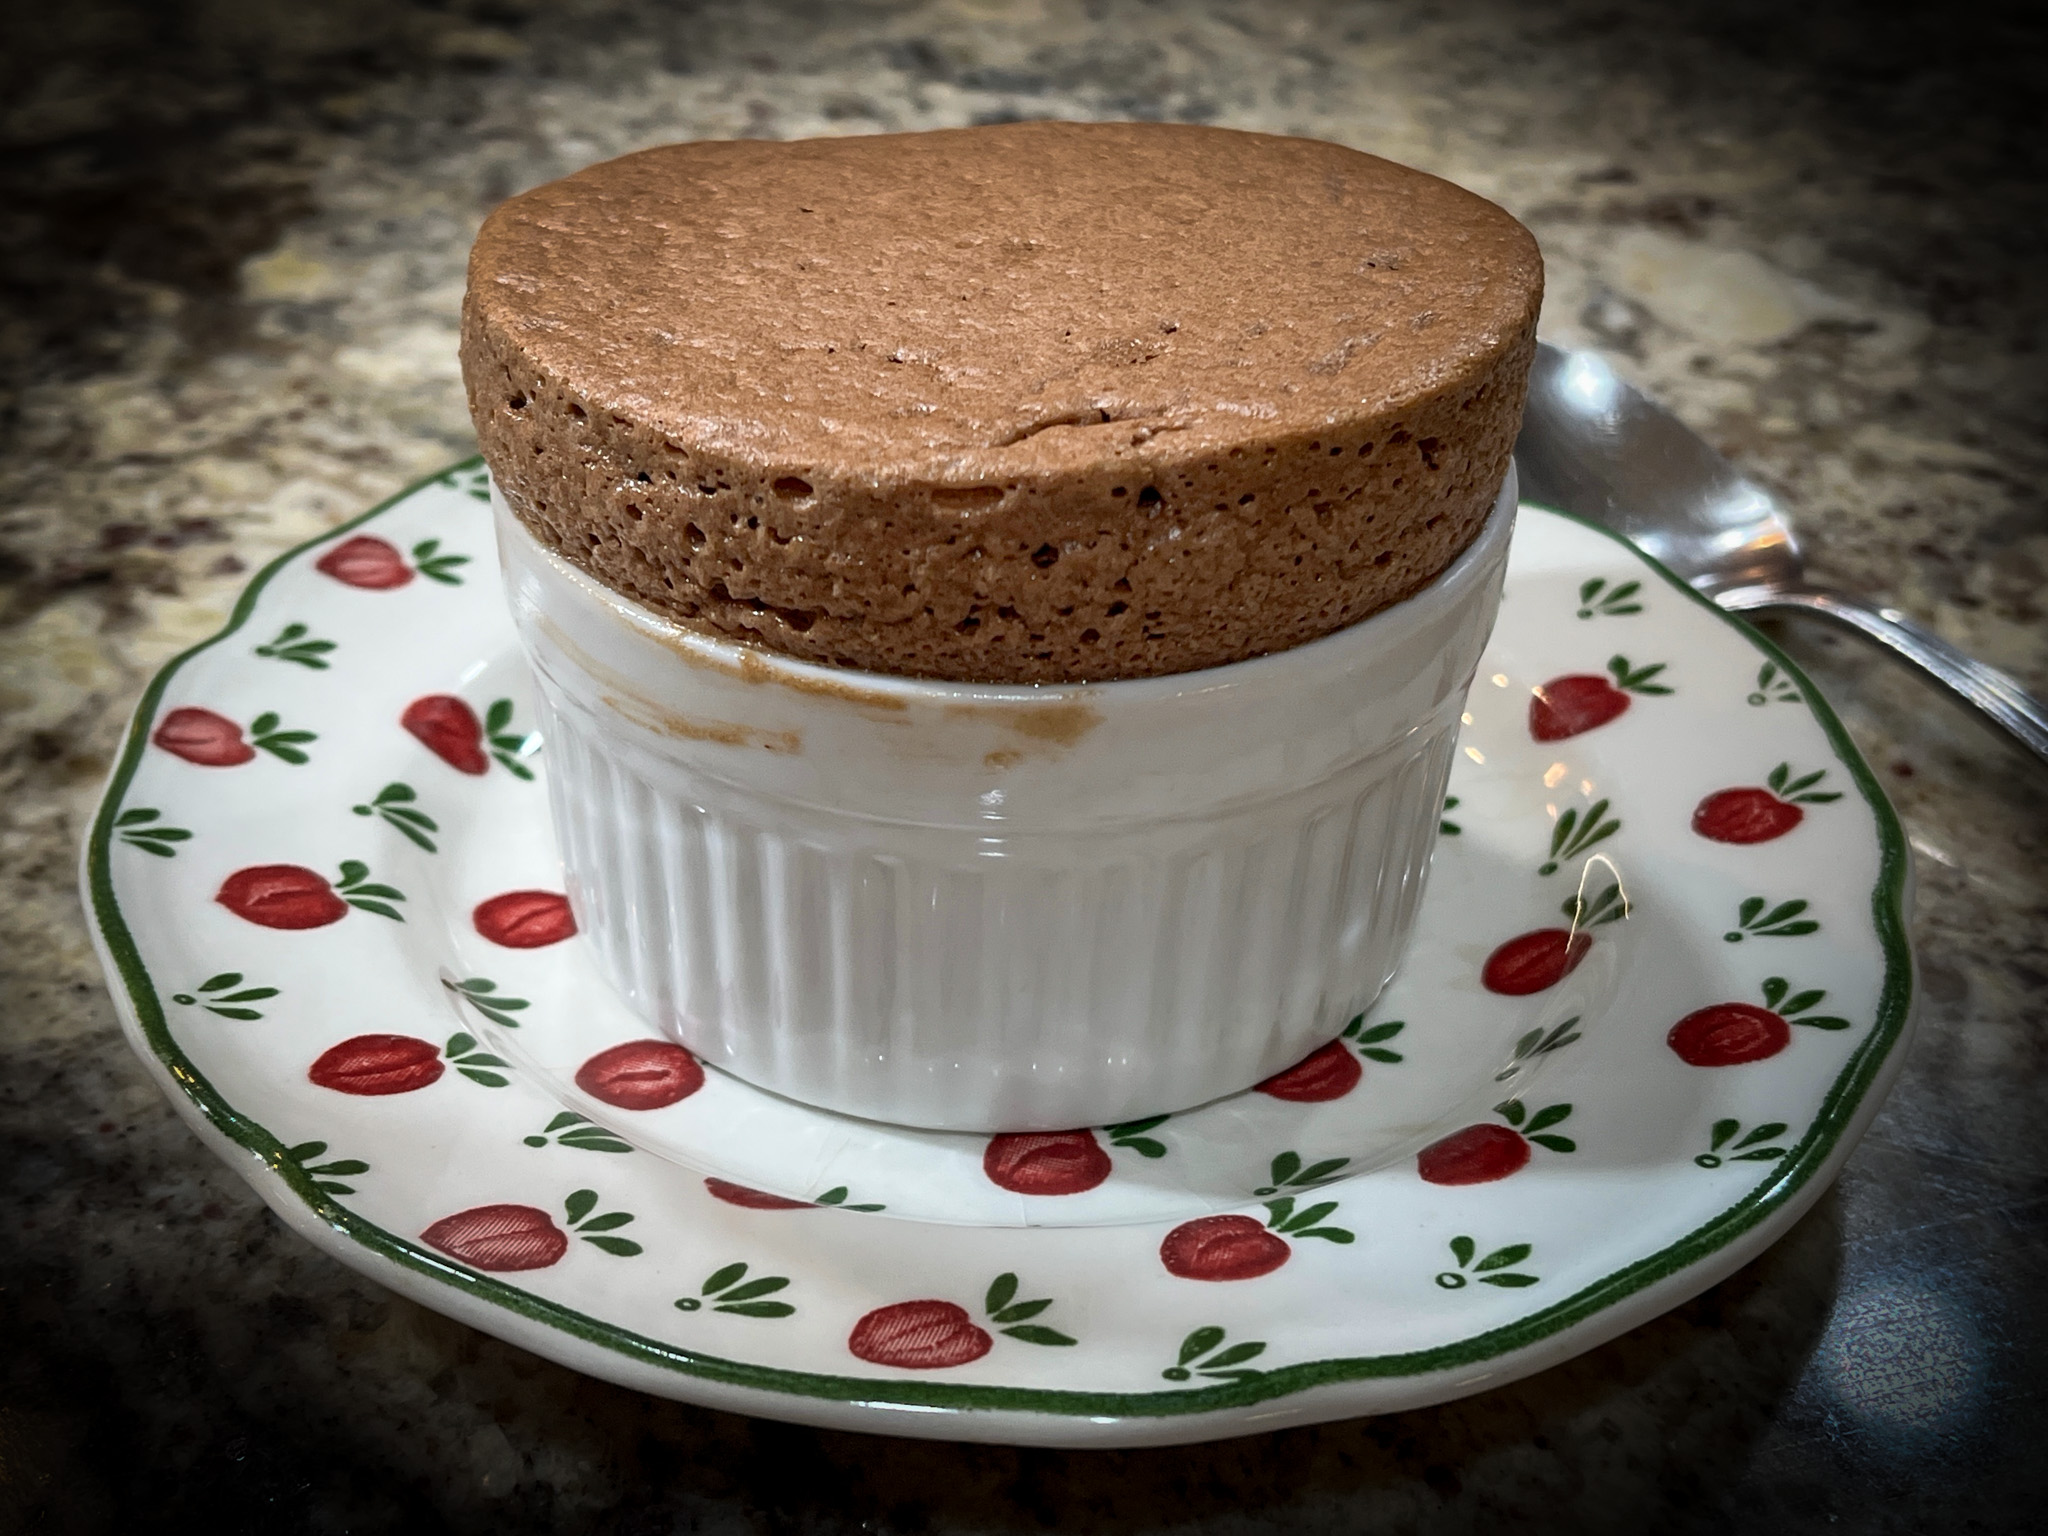
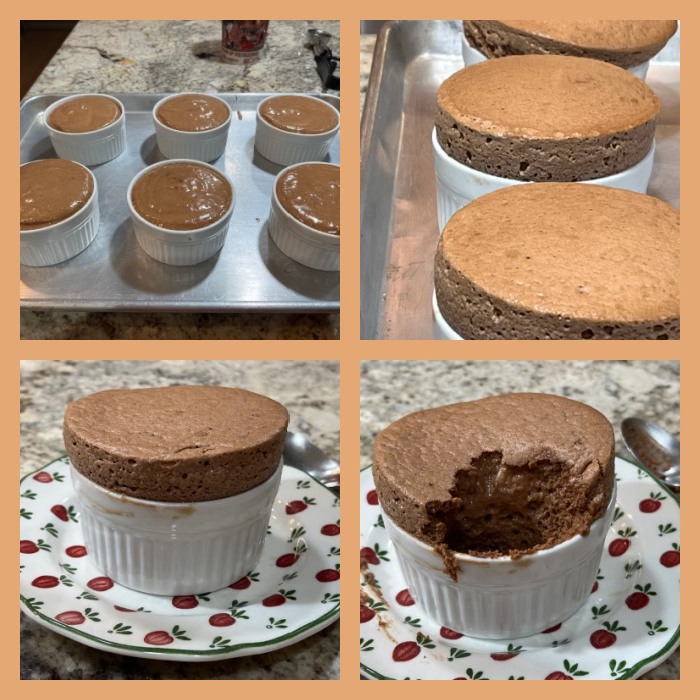
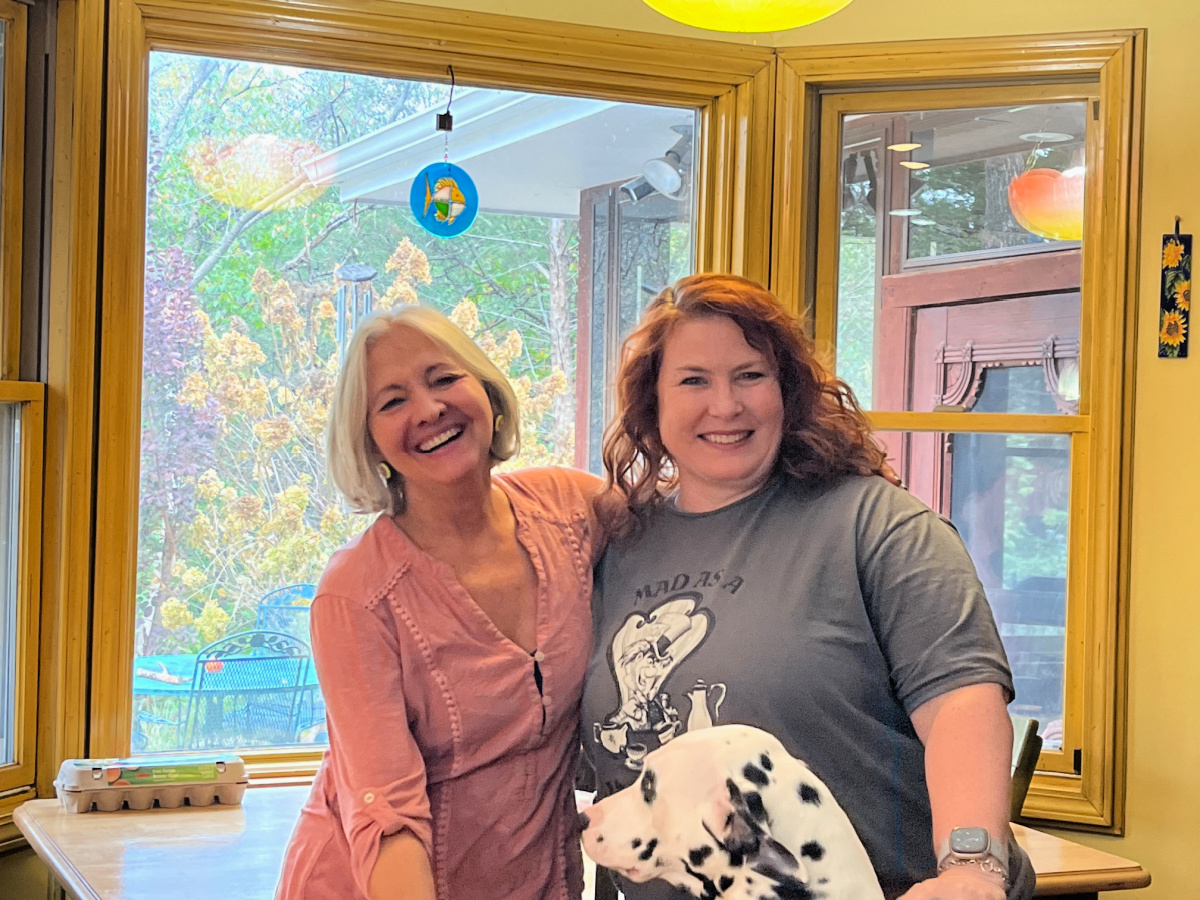
Time flies. No other expression is more accurate. More than four long years passed since I met the contestants of the Great American Baking Show, Season 5, in the lobby of a hotel in London, not too far from Heathrow Airport. We were all exhausted, and not just for the long trip. For several weeks prior, we had been through the toughest baking marathon one could ever imagine, and even though we were aware that a few other people in the US were going through that exact same ordeal, only then we got to meet in person. Most of our group has kept in touch virtually over these years. But only now Tanya and I got to meet again in person. We spent a weekend together, the four of us, bakers and respective husbands. We baked, we talked, we laughed, and we baked some more. I screwed up a sourdough bread that turned out as one of the worst loaves I’ve made in the past couple of years… But Tanya and I were both in a certain tent, so we know too well that things can go wrong when we really hope them not to… Today I share our best adventure of the weekend, the making of a fantastic dessert from Matt Adlard’s book Bake it Better. Chocolate Souffles… To die for!
When Tanya and Jamie came to visit us, she brought her copy of Bake it Better, as I own the Kindle version and it is easier to use in the kitchen a real book, especially if you are cooking with friends. We had settled on the soufflés for our dessert after a meal of grilled salmon, quick tahdig rice and asparagus. The recipe is actually available online, and you can find it here. It makes a little more than 4 individual portions, I would say 6 or 7 using the ramekins he calls for.
We had no issues with the recipe, worked great, gave the exact lift that we expected and that Matt showed in his beautiful pictures in the book, which, by the way I highly recommend you get. Click here for the amazon link.
Main conclusion from the weekend?
BAKING IS BETTER WITH A FRIEND!
And the excitement was definitely shared by the pups, here is their recollection of the weekend….
We had THE BEST WEEKEND EVER! Imagine this, our Kingdom received the visit of two brand new Peasants, and we had a total blast teaching them how to properly play, and how to share their food and shoes. We were certain Zenless (aka our Mom) and The Dad would be proud of our way to make them feel welcome, but then here we are, getting our ears full. Apparently, Star did a big no-no by French kissing the man – repeatedly – and the fact that I got all excited and decided to hump her while she was all affectionate with our guest, only made matters worse. We were told we generated chaos and embarrassment. Squeaking the toy loudly at 5:50am on a Sunday was also a big no-no, and invading the privacy of the bathroom when the nice lady was trying to be there in peace goes into the list of capital doggie sins. Life can be very tricky at times. Can you put a good word for us and tell the New Peasants to come back? We miss them!
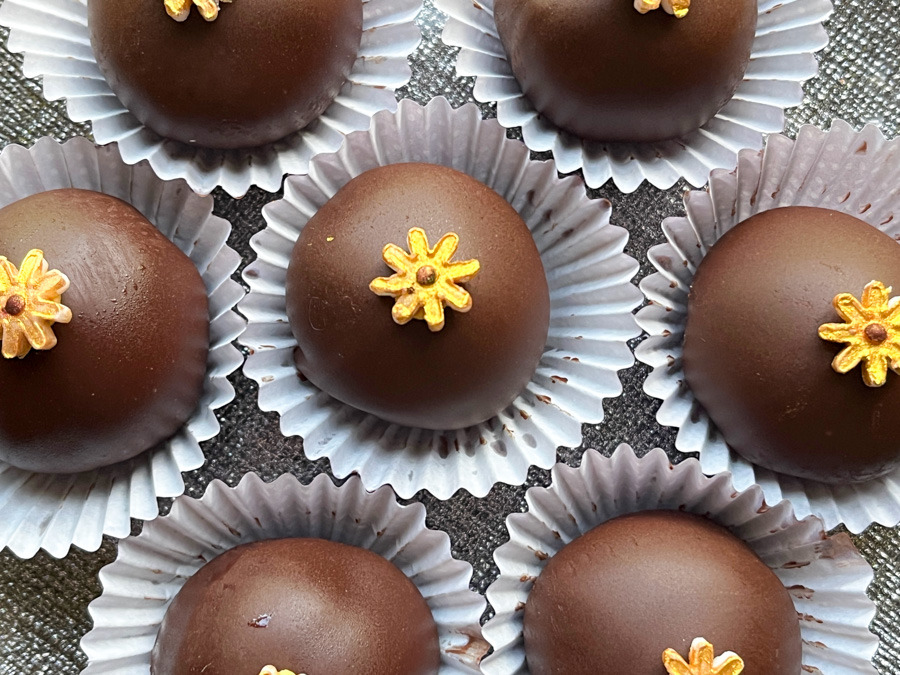
For those who are not into complicated baking recipes but want to impress friends, here is a great idea: Oreo balls. All you need is a food processor, Oreo cookies and cream cheese. The real step that takes them to a higher level is covering them with chocolate, and yes you can use compound chocolate without feeling guilty and inadequate. Nothing wrong with making life a little easier. Decorating them with a fondant bit is optional, you can add sprinkles, or paint with a brush of gold luster mixed with vodka. Or leave them plain. Keep them in the fridge and enjoy them either still pretty cold or after allowing to sit at room temperature for 10 minutes or so.
OREO BALLS (from The Bewitching Kitchen)
24 Oreo cookies, any flavor 90g cream cheese, at room temperature or slightly cold 200g compound chocolate or regular chocolate with 30g vegetable oil fondant to decorate (optional)
Coarsely chop the Oreos and place them in a food processor. Add the cream cheese and process it all until a kind of sticky dough forms. Make little balls, each with 20g of the mixture. It they got too warm in the food processor, place in the fridge for a few minutes before forming the balls. Transfer the balls to the freezer for a full hour, that will make the coating set faster.
Melt the compound chocolate and dip each ball using a stick to help it get fully coated. Stick on a base of styrofoam until full set. Make fondant decorations if so desired, paint with gold and stick to the top once the chocolate is set. Keep in the fridge, they stay good for a week or so.
Comments: You need some type of a stick to help coat the balls with melted chocolate and to stand them up to set. I used a little styrofoam board to keep them upright. You can of course re-use the sticks, just clean them up after removing from the little balls.
To glue the fondant I used some royal icing I had hanging around, but you can also use melted chocolate. Consider using white chocolate plain or dyed with different colors, and different kinds of Oreo cookies to make the balls. Really a super fun project that you can definitely do with kids.