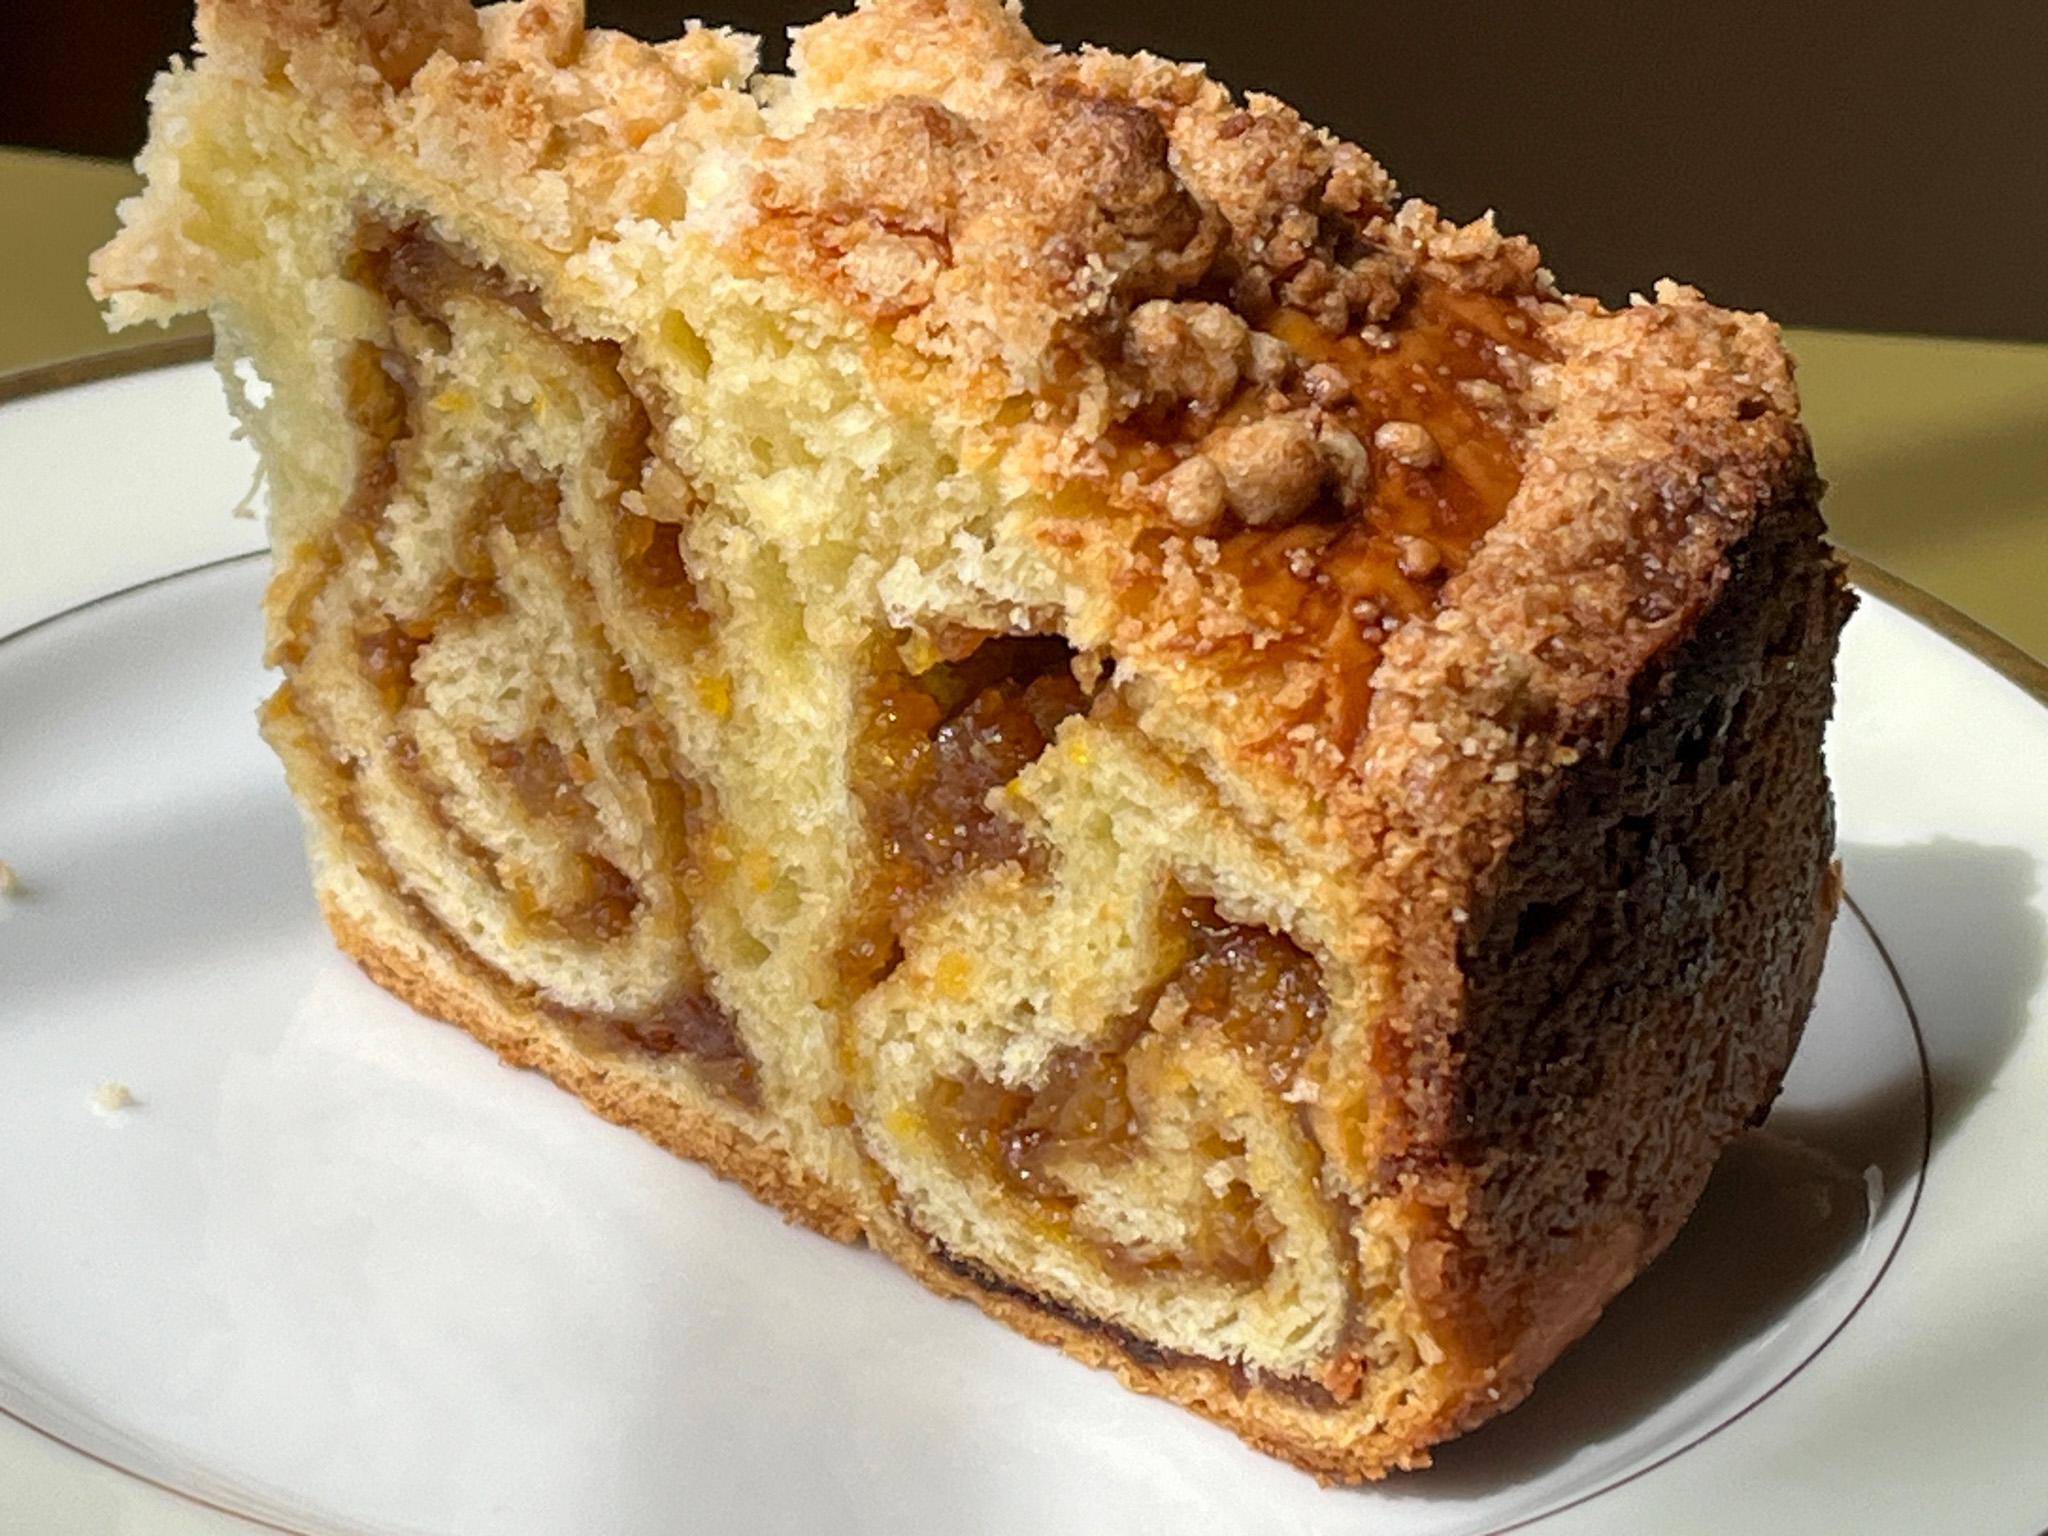
Is it a cake? Is it a sweet bread? Is it heaven on a plate? Yes to all! Another amazing recipe from Helen Fletcher, this is a bit involved but absolutely worth it… Slicing through it to reveal the coiled pattern inside is just too cool!

APRICOT CRUMBLE COFFEE CAKE
(from Helen Fletcher’s Pastries Like a Pro)
¾ cup unsalted butter (170 grams)
1 teaspoon active dry yeast
3 tablespoons warm water
Pinch granulated sugar
2 ¼ cup bread flour (315 grams)
1 ½ tablespoons granulated sugar
½ teaspoon salt
3 large eggs, room temperature
¼ cup half and half (or heavy cream)
Filling
¾ pound dried apricots
1 cup water
5 tablespoons butter (75 grams)
½ cup powdered sugar (65 grams)
1 ½ teapoons vanilla
2 teaspoons cocoa
Almond Paste Crumb Topping
1 cup cake flour (125 grams)
½ cup almond paste (125 grams)
⅔ cup granulated sugar (130 grams)
½ cup unsalted butter (114 grams)
Assembly
1 large egg, well beaten
Make the brioche dough: Cut the butter into small pieces by cutting the stick in half lengthwise, the cutting it into half inch pieces. Place it back in the refrigerator to keep cold. Make a sponge by dissolving the yeast and pinch of granulated sugar in the 3 tablespoons warm water. Add 3 tablespoons flour from the measured amount of 2 ¼ cups flour. Stir together to completely mix the ingredients. Cover with film and set aside to double or more while preparing the rest of the ingredients.
In the processor bowl fitted with the steel blade, place the remaining flour, salt and sugar. Process 5 seconds to mix. Place the cold butter in a circle over the flour. Process the butter until it is indistinguishable, about 20 seconds. Scrape down and process about 5 seconds more.
Place the eggs in a circle over the dry ingredients, pour the half and half or cream over the eggs, and add the sponge, also in a circle. Process approximately 20 to 25 seconds until the ball which initially forms breaks down into a creamy, evenly dispersed batter in the processor bowl. Do not stop processing until the batter is formed, as the motor may stall when you try to restart it. If the ball doesn’t break down, that’s fine as long as everything is mixed well.
Remove from the processor bowl and place in an ungreased bowl. Cover securely with plastic wrap and allow to rise until double in bulk about 2 to 2 ½ hours. Stir down and refrigerate overnight. Punch down and use as directed. It can stay in the refrigerator for up to 3 days before using.
for the filling:
Place the apricots and water in a small saucepan and bring to a boil. Reduce to a simmer and, stir frequently until most of the water is gone. Place the apricots and remaining ingredients, except the cocoa, in a processor bowl and process until smooth. Set aside to cool. Stir the cocoa in. This may be made a week ahead and stored in the refrigerator. Remove to room temperature before using.
for the crumb topping:
Place the flour and almond paste (either home made or bought) in the bowl of a processor. Process until the almond paste is indistinguishable. Add the sugar and butter and process until it begins to form crumbs. Switch to pulses and pulse only until large crumbs form. Remove them to a bowl and refrigerate until needed.
To assemble the coffee cake:
Spray a 9×3″ cheesecake or springform pan with a non-stick baking spray. Set aside.
Remove the brioche from the refrigerator, punch down, pat into a rectangle on a lightly floured surface and roll into a 20×11 inch rectangle so the long horizontally in front of you to make rolling up easier.
Spread the filling evenly over the brioche within ½” of the edges. Roll up tightly from the 20″side and pinch the seam securely together. Roll and gently stretch it until it is 30″ long. If it is very soft at this time, coil it up on a parchment line baking sheet and chill to firm up. Do not let it freeze.
Starting in the middle of the pan, coil the roll around towards the outer edge of the pan. Press it down to flatten and fill the pan. Cover with a towel and let rise until doubled in bulk. Because everything is cold, this could take 4 to 4 ½ hours to rise.
Heat the oven to 375F. When the coffee cake is full risen, brush it with the beaten egg and distribute the almond paste crumbs evenly over the brioche. Bake for 45 to 55 minutes until the top is browned. A tester is difficult here because the filling stays moist and clings to the tester. If the top begins to brown too quickly, tent it with foil. Cool until barely warm and release the cake. Dust with powdered sugar to serve.
ENJOY!
to print the recipe, click here
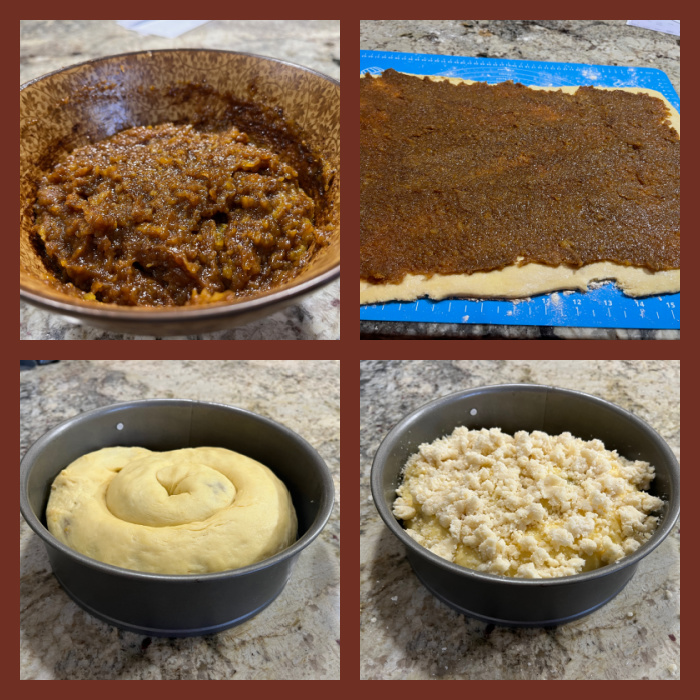
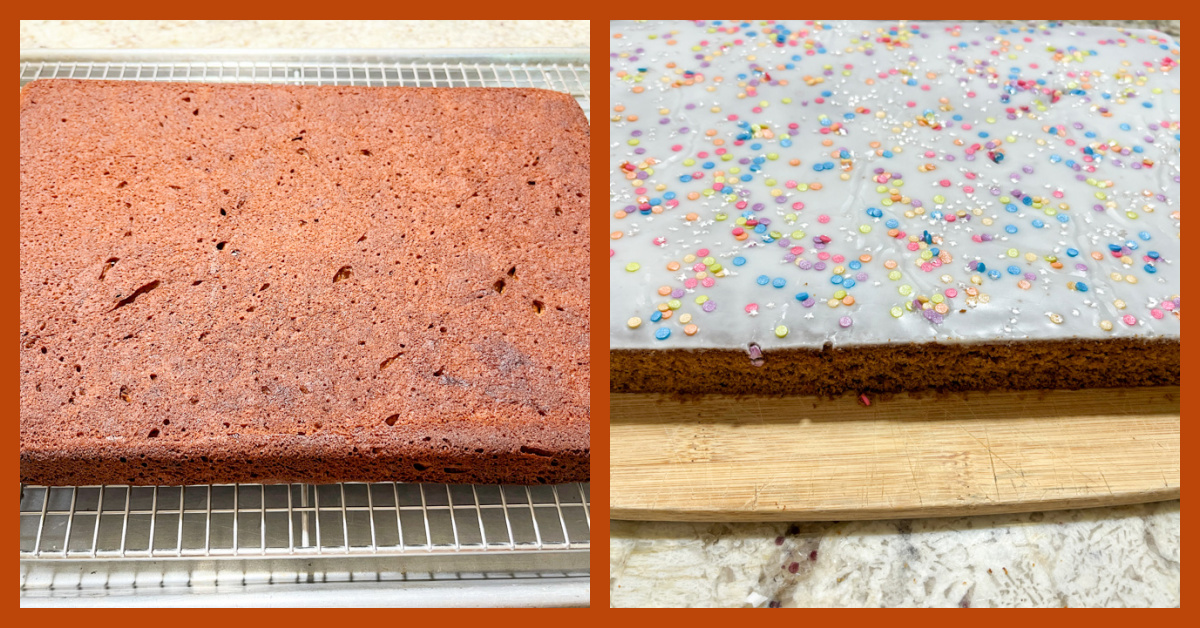
Comments: Helen’s method to make a brioche in the food processor is something I’ve been meaning to try for the longest time, and it works so well, I will keep it as my method of choice from now on. It considerably speeds up the preparation of the dough, and you cannot beat the texture. A pleasure to work with. I could have done a better job keeping the coil leveled on all sides of the pan, if you look at the bottom left photo of the composite above, you’ll see that my coil got a bit lopsided. Other than that, no issues. I highly recommend you visit Helen’s site (click here) because she goes over every little step with pictures and you get a better idea of what to expect as you make this recipe.

The crumb topping is irresistible, so I advise you to stop nibbling on it and use it exclusively to top the cake. I made my own almond paste, following Helen’s detailed recipe, and it turned out perfect! I used her simple syrup method. You can read her post about it clicking here. My little concoction looked exactly like hers – or the ones you can buy at the store – but my picture was badly out of focus, so you will have to take my word for it. I loved making this crumb cake, now I dream of variations, maybe some black sesame paste in the filling could be fantastic also!
ONE YEAR AGO: Hawaij, Three Ways
TWO YEARS AGO: A Most Painful Goodbye
THREE YEARS AGO: Masala Clay Pot Chicken Thighs
FOUR YEARS AGO: Happy Swirls Tonka Macarons
FIVE YEARS AGO: Chocolate Tartlets with Honey-Caramel Filling
SIX YEAR AGO: Zucchini Soup with Tahini
SEVEN YEARS AGO: Black Sesame Macarons
EIGHT YEARS AGO: Fine Tuning Thomas Keller
NINE YEARS AGO: Cauliflower Tortillas
TEN YEARS AGO: Majestic Sedona, Take Two
ELEVEN YEARS AGO: Secret Ingredient Turkey Meatballs
TWELVE YEARS AGO: Swedish Meatballs and Egg Noodles
THIRTEEN YEARS AGO: Italian Easter Pie
FOURTEEN YEARS AGO: Black Olive Bialy