BRAZILIAN CANDY: SURPRESA DE UVA

Surpresa de uva means “Grape Surprise”. It is essentially the most traditional of all Brazilian sweets – the brigadeiro – hiding a full grape inside. Everybody back home loves it, but I must admit this was my first time trying one. It was not “a thing” when I was growing up a few years ago (cough, cough). We loved it so much that the husband requested me to work on a “blueberry surprise.” I am on it!

SURPRESA DE UVA
(from the Bewitching Kitchen)

1 can condensed milk
1 tablespoon butter
2 tablespoons heavy cream
1/3 cup white chocolate, cut in small pieces
pinch of salt
16 to 20 small seedless green grapes
sanding sugar to coat
sprinkles to decorate (optional)

Add the condensed milk, butter, heavy cream, chocolate and salt to a heavy non-stick pan and cook, stirring constantly over medium to low heat, until bubbly and the mixture starts to release from the sides of the pan. Once that happens, lower the heat as low as it will go, and keep stirring for another couple of minutes.

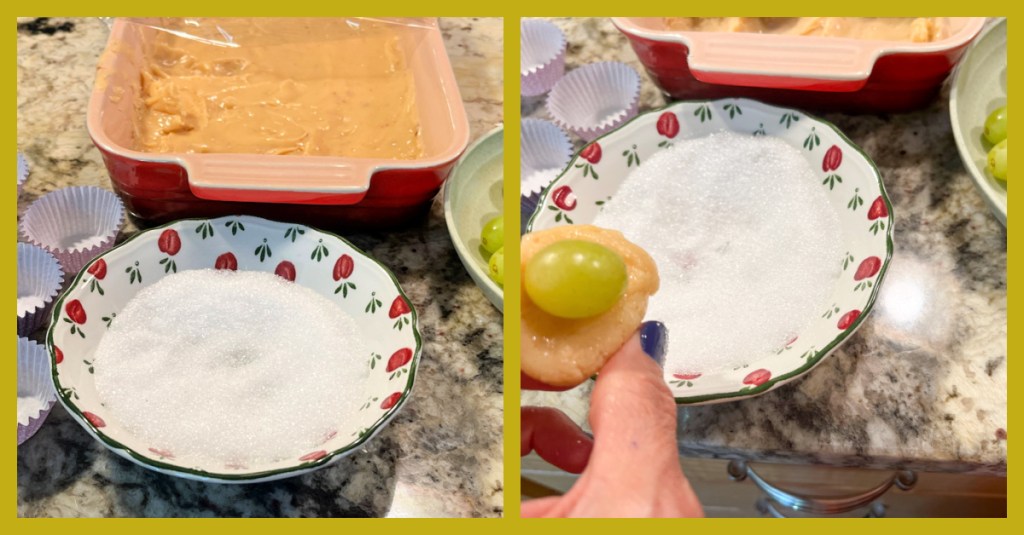
Remove from heat, transfer to a small baking dish to cool faster. Place in the fridge if you like to speed up the cooling process. Once at room temperature, grab small amounts with a spoon, spread on the palm of your hand and place a grape in the center. Carefully roll the mixture around (wet hands help), enclosing the grape. Roll on sanding sugar. Decorate with a sprinkle, if so desired.

They will keep at room temperature for a day or two, many days in the fridge, and even longer frozen.

ENJOY!

to print the recipe, click here

Comments: These are sooooo delicious! Brigadeiro is sweet, very sweet. The inclusion of the grape is brilliant, it cuts the sweetness with just the right amount of fresh. I envision a blueberry version in the future, trying to imagine the right flavor of brigadeiro to enclose it with. Stay tuned!

ONE YEAR AGO: Red Quinoa “Tabbouleh”

TWO YEARS AGO: Cucumber Salad with Yogurt-Harissa Dressing

THREE YEARS AGO: Sundried Tomato and Feta Cheese Torte 

FOUR YEARS AGO: Hickory-Smoked Beef Tenderloin

FIVE YEAR AGO: Spaghetti Squash, Revisited

SIX YEARS AGO: Stir-fried Chicken and Cabbage in Spicy Almond Sauce

SEVEN YEARS AGO: Fifteen Years!

EIGHT YEARS AGO: Light Brioche Burger Buns

NINE YEARS AGO: Sourdough Blues

TEN  YEARS AGO: Headed to Hawaii

ELEVEN YEARS AGO: A yummy Brazilian cake: Bolo de Fuba’

TWELVE YEARS AGO:  Hidden Treasure

THIRTEEN YEARS AGO: Avocado Three Ways

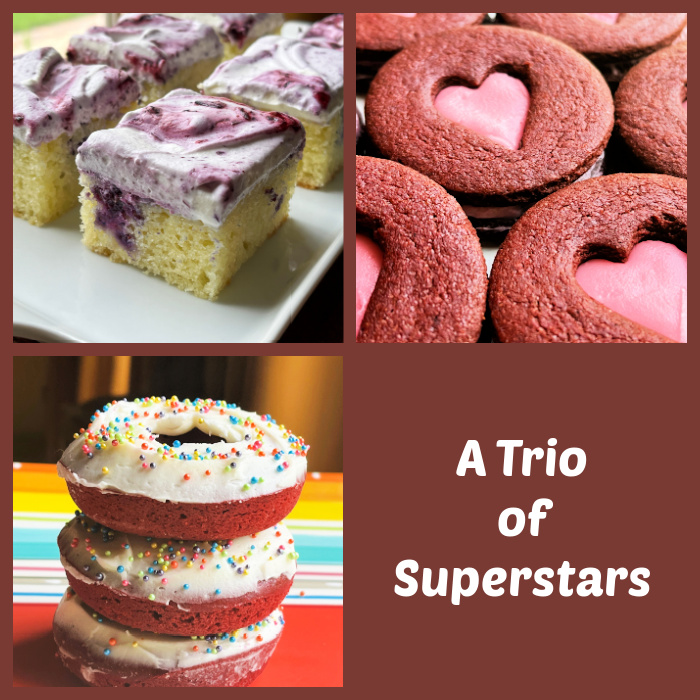
A TRIO OF SUPERSTARS

Today my blog pays homage to three amazing bakers who put great effort into each post they compose. Their blog articles end up as detailed tutorials that allow even a beginner baker to tackle what might seem very intimidating at first. I share three recipes, in the chronological order I baked them in the past couple of months.

SUPERSTAR BAKER #1
HELEN FLETCHER

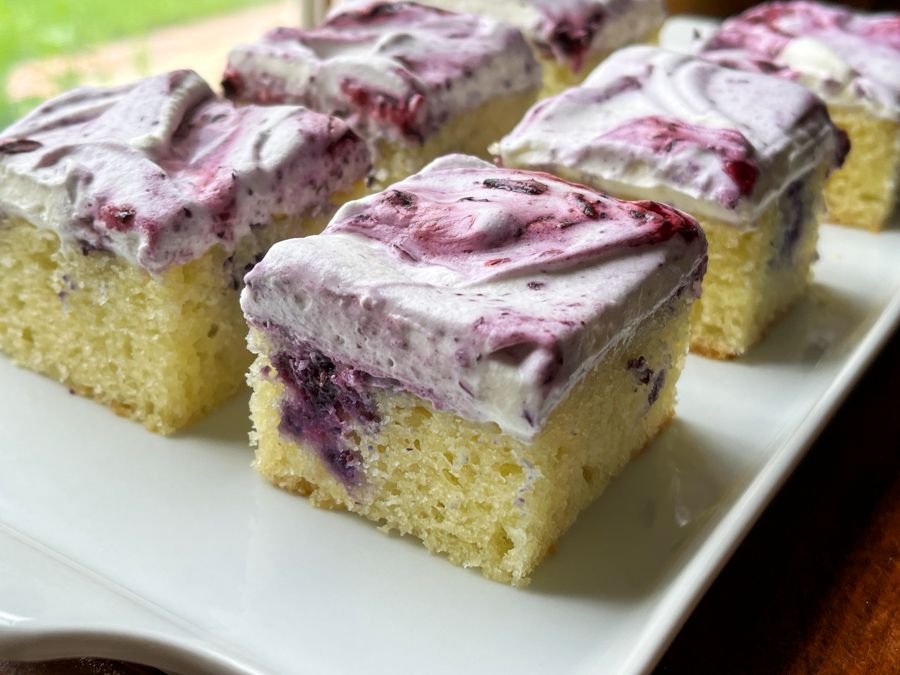
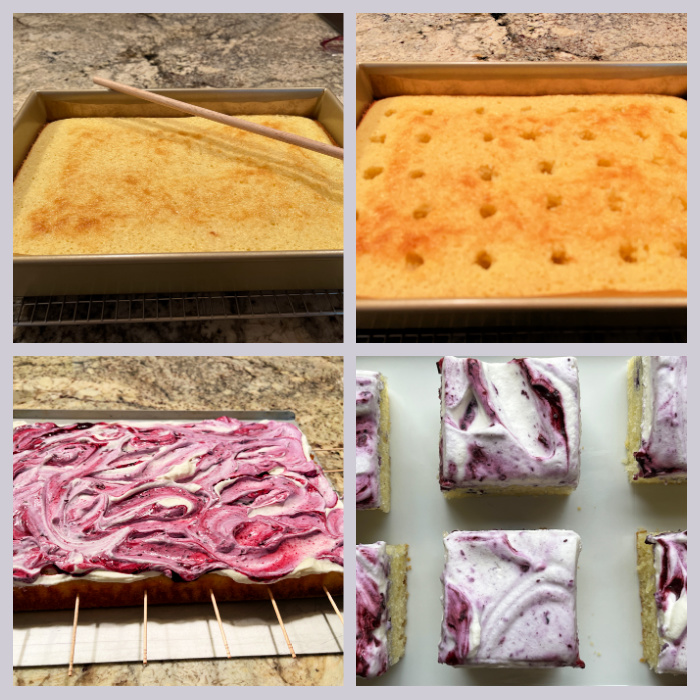
BLUEBERRY LEMON POKE CAKE

BLUEBERRY LEMON POKE CAKE

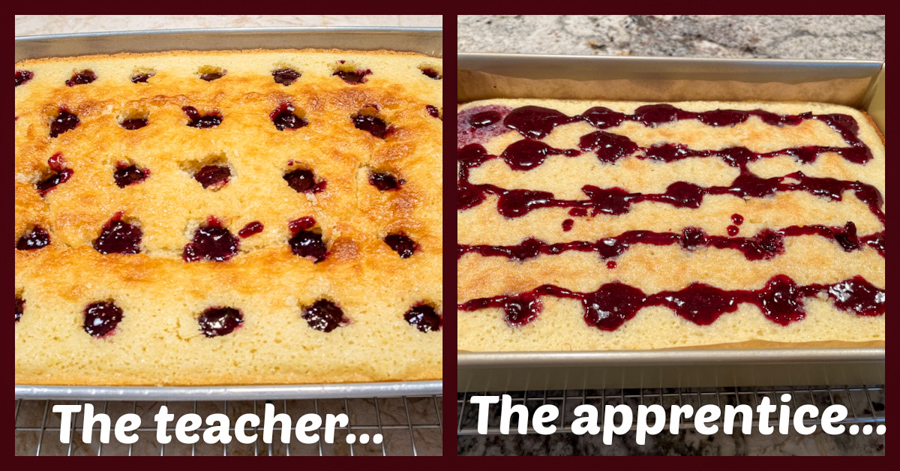
One of the tastiest cakes baked in our kitchen, and I am not exaggerating. Moist. Sweet to the perfect level. Luscious. Everything works in this cake. For the recipe and very detailed tutorial, visit Helen’s blog with a click here. You will make a blueberry jam to fill the cake, and I advise you to give enough time to allow it to set a bit, just to make it easier to work with…. Below, a little comparison between Helen’s neat work and yours truly… my jam was still bit too loose. No major harm done, though, I just thought it was funny to share.

Helen’s site and her cookbooks are a constant source of inspiration for me. Plus, she is tremendously helpful and whenever I get into trouble I drop her an email. She has rescued me more than once. A lot more than once (wink, wink).


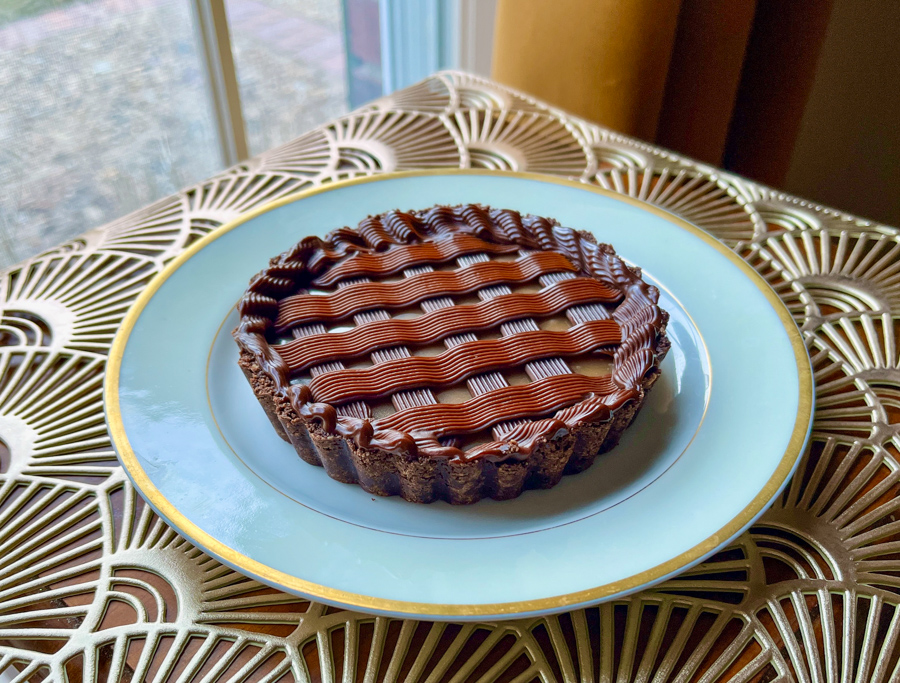
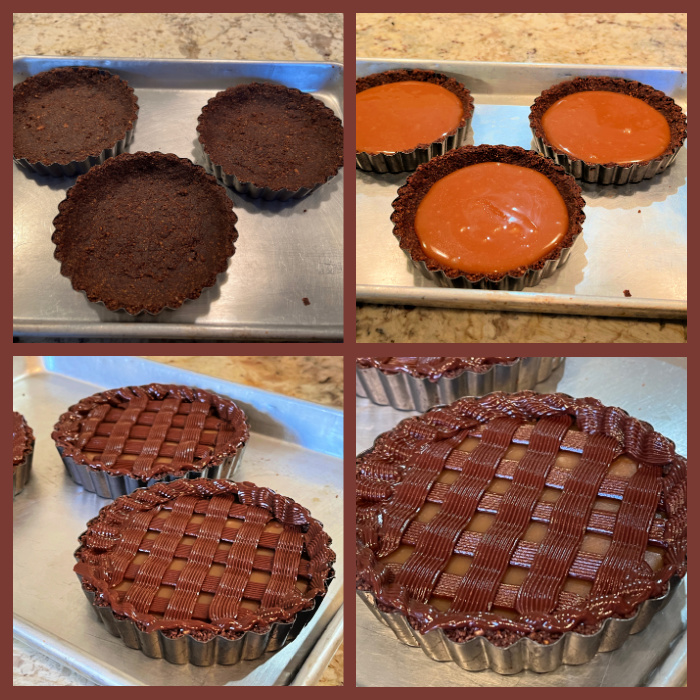
Every once in a while, Helen offers online classes, and I’ve taken a couple of them. One of my favorites was last year, in which she taught how to make Chocolate Tartlets with a caramel filling. A thing of pure beauty and absolutely decadent! Make sure to subscribe to her blog, so you get notification of upcoming classes.

SUPERSTAR BAKER #2
CAROLINE
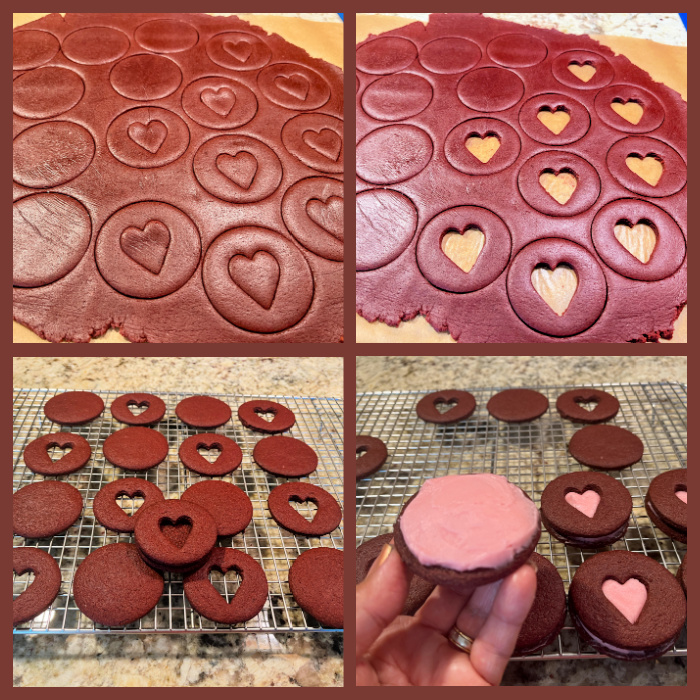
RED VELVET OREO STYLE SANDWICH COOKIES

RED VELVET OREO STYLE SANDWICH COOKIES

Absolutely delicious, you can make them without the cutouts if you’d like to simplify your life, but of course turning them into Linzer territory is not a bad move at all! For the full recipe click here. I made a very slightly modification adding strawberry extract to the filling and a touch of pink gel color. Other than that, I followed her recipe to a T.

You can modify the filling, use jam, or Nutella, the cookies are very flavorful and will be perfect no matter your choice of filling. Caro has countless baking lessons in her site, I highly recommend you pay her a visit and subscribe to be notified of new posts. Caroline is one of the moderators of a Facebook group with almost 18 thousand members, for lovers The Great British Bake Off, and that’s how I got to know her. I don’t know how she manages to do all she does…

SUPERSTAR BAKER #3
TANYA OTT
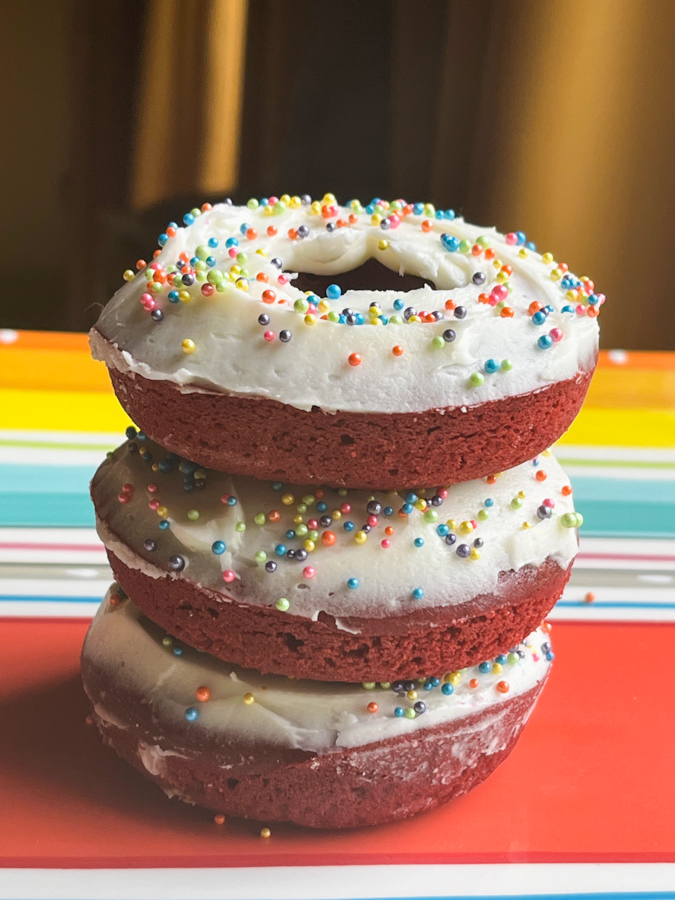
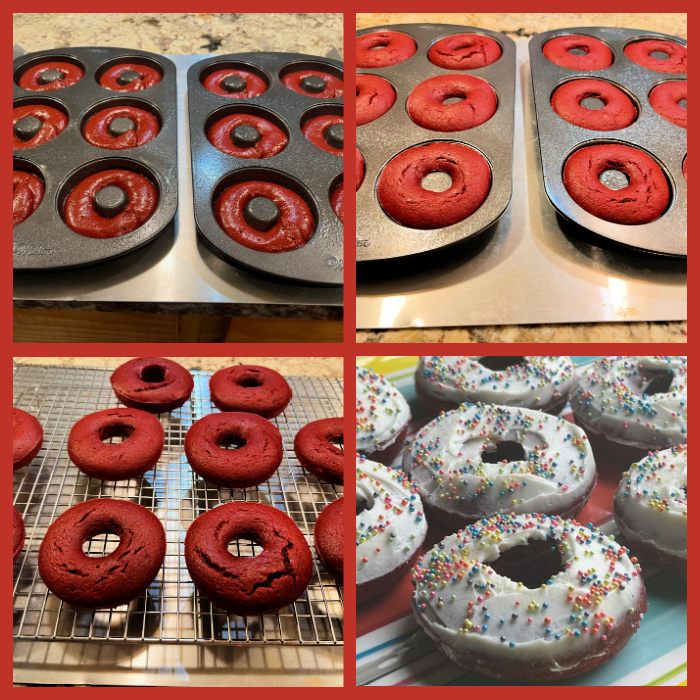
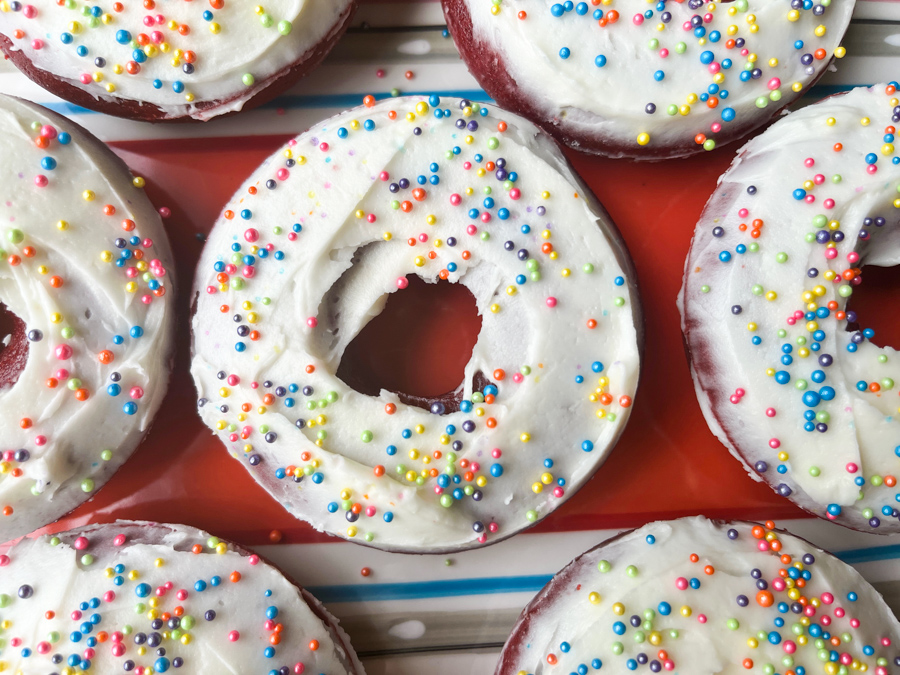
RED VELVET CAKE DONUTS

As you can see, I’ve been on a red velvet kick lately. These are spectacular and simple to make, especially if you follow the detailed instructions and the very helpful video available in Tanya’s blog. Essentially two bowls, no need for an electric mixer until you get into frosting territory.

Another example of a great baking instructor, Tanya’s articles are always carefully composed, and I am in awe of the amount of work she puts into the making of each of the videos often included in her posts. In case you don’t know, Tanya was one of the contestants in season 5 of The Great American Baking Show, and I shared the tent with her a few times. She even got a handshake from a certain guy with penetrating blue eyes…

That’s all for now, folks! I hope you visit my friends’ sites, and get as inspired
by their baking as I do…

ONE YEAR AGO: Turkey Meatloaf

TWO YEARS AGO: Prue Leith’s Smoked Salmon and Beetroot Blinis

THREE YEARS AGO: Mandioca Frita 101

FOUR YEARS AGO: White Chocolate Raspberry Dome Cake

FIVE YEARS AGO: Blueberry Crumble Coffee Cake

SIX YEARS AGO: Pickled Red Onions

SEVEN YEARS AGO: Strawberry Chocolate Chip Cake

EIGHT YEARS AGO: Mini-Chocolate Cheesecake Bites

NINE YEARS AGO: Whole-Wheat Spaghetti with Grated Tomato Sauce

TEN YEARS AGO: A Taste of Yellow to Honor Barbara

ELEVEN YEARS AGO: Gratin of Beefsteak Tomatoes

TWELVE YEARS AGO: Tour de France Final Stage: PARIS

THIRTEEN YEARS AGO: Snickerdoodles with a Twist

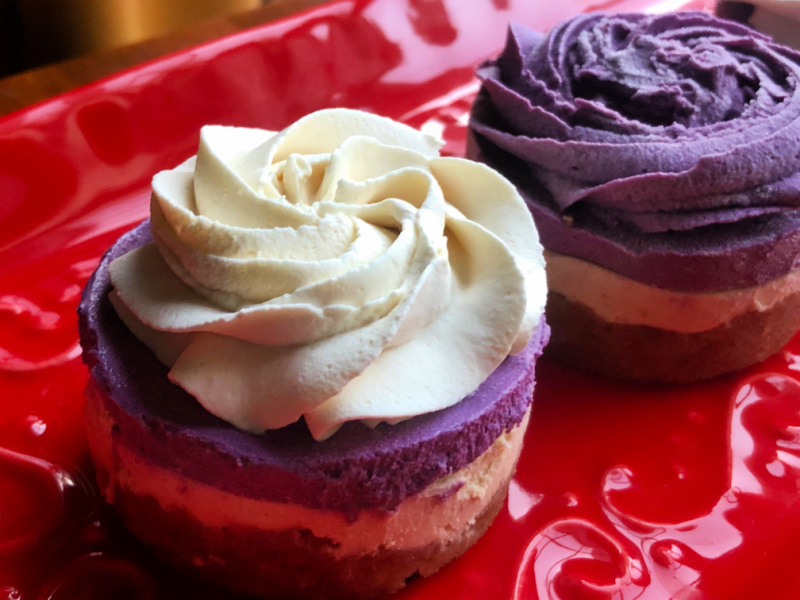
VEGAN BLUEBERRY-LEMON CHEESECAKE

This post makes me thrilled and sad at the same time. Thrilled because I cannot believe that a vegan dessert could taste so good… and sad because I won’t be able to share the full recipe. I did my best to try and get permission from the author, but no luck. If you are truly interested in making this cute dessert your best option is buying her book: Incredible Plant Desserts, by Anthea Cheng. I modified the whipped topping, and will share that component of my version with you.

VEGAN WHIPPED CREAM
(from Berrybaker.com)

375g unsweetened soy milk
50g granulated sugar
1/4 tsp vanilla extract or paste
110g cacao butter, finely chopped
76g coconut oil
1/8 tsp xanthan gum, optional but recommended

Simmer 250g (or 1 cup) of soy milk, and sugar until almost boiling. Place the coconut oil and cocoa butter in a Vitamix type blender, add the vanilla, and the hot soy milk over it. Let it all sit together for a minute, then run the blender at high speed for 2 minutes.

Add the rest of the soy milk and blend until incorporated. Refrigerate for 6 hours to be firm enough to whip. When ready to use, sprinkle the xanthan gum on the surface, and then whip with a handheld mixer. It will be ready to pipe or spoon on any dessert you like.

ENJOY!

to print the recipe, click here

In the recipe devised by Anthea, the topping is the exact same component as the top layer, but whipped into piping consistency. I decided to change it by using a vegan whipped “cream” alternative, and the recipe I found with a quick internet search was a complete winner. Excellent texture, and a taste that mimics real whipped cream surprisingly well. I highly recommend you give it a try. I like the way the topping has a contrasting color with the layer of blueberry mousse below. Everything worked very well together.

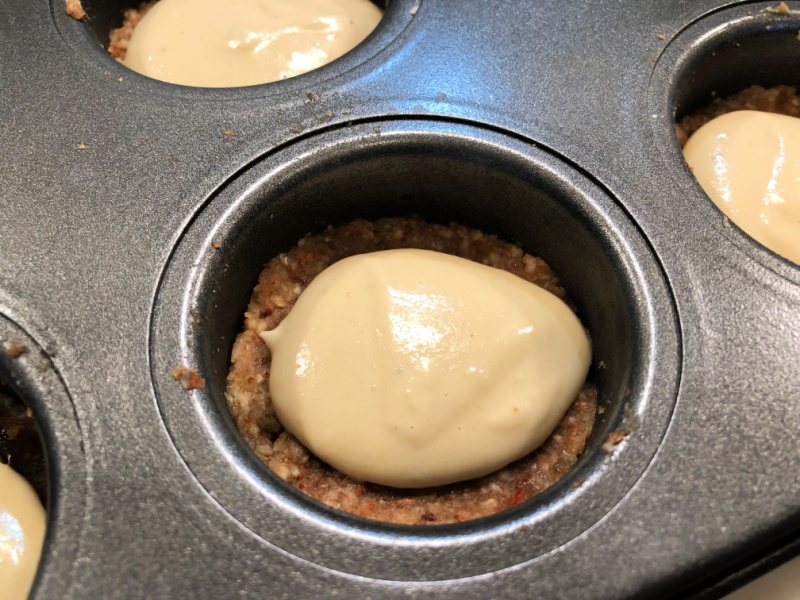
This cheesecake is not baked, the bottom layer is made of almonds and dates. Both the lemon and the blueberry mousse are based on cashew cream, coconut oil and cocoa butter. With a bit of maple syrup to sweeten it all up. Truly delicious! Anthea has a very enticing Instagram page, which you can follow with a click here.

ONE YEAR AGO: Green Tea Rice with Edamame and Butternut Squash

TWO YEARS AGO: Santa Hat Mini-Mousse Cakes

THREE YEARS AGO: Fun with Sourdough

FOUR YEARS AGO: Pasteis de Nata

FIVE YEARS AGO: New Mexico Pork Chile, Crockpot Version

SIX YEARS AGO: Chocolate on Chocolate

SEVEN YEARS AGO: Double Chocolate and Mint Cookies

EIGHT YEARS AGO: The Story of my first Creme Brulle’

NINE YEARS AGO: Sourdough Mini-rolls

TEN YEARS AGO: Focaccia with Sun-dried Tomatoes and Gorgonzola

ELEVEN YEARS AGO: Mediterranean Skewers

TWELVE YEARS AGO Fettuccine with Shrimp, Swiss Chard, and Tomatoes


ONE GIFT, ONE DOUGH, TWO RECIPES

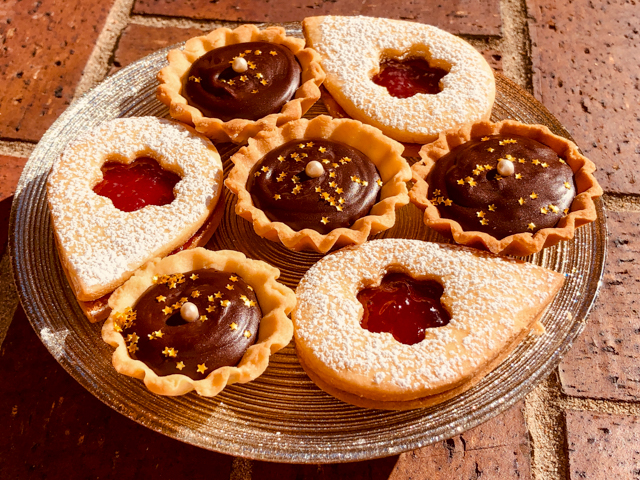
Last month my dear friend Louise sent me a wonderful gift: a box with many (and by many I mean more than 50!) little tartlet tins in several different shapes and sizes. I was speechless, and so touched by her generosity! It is now time to share my first adventure with this special gift. A single dual-purpose dough was used to make little tarts and a modernized version of Linzer cookies. The recipe for the dough comes from Haniela’s blog. She is one of the cookie artists I follow and try to learn from. I suspect it will become my default dough for sweet tarts. The texture is perfect, and I loved the way it is intensely flavored with vanilla.

CHOCOLATE GANACHE MINI-TARTLETS
(dough recipe from Haniela’s)

for the dough:
430g all-purpose-flour
1/8 tsp salt
160g powdered sugar
3 egg yolks
2 tsp vanilla bean paste or vanilla extract
226 g unsalted butter, at room temperature

for the filling:
6oz dark chocolate, cut in small pieces
1/2 cup heavy cream
1/8 tsp orange oil
sprinkles to decorate (optional)

Sift flour and salt. Set aside. In a mixer fitted with a paddle beater, mix butter and powdered sugar until smooth. In a small dish whisk together egg yolks and vanilla. Gradually beat egg yolk mixture into the creamed butter. Scrape the bowl a few times as needed.

On low-speed, gradually add flour mixture to butter mixture. Mix until it starts to come together. If the dough is too crumbly, add 1tsp milk. Do not overwork the dough. Invert the dough onto a clean work surface or into a large bowl and gather dough together with your hands into a ball. Then form the dough into a disk, wrap it in the foil and chill for 1 to 2 hours.

Heat oven to 350F. Place mini tart shell molds onto a baking sheet. Spray with a non-stick spray, set aside. Take out the chilled dough, cut it in half. Let if soften for 5 minutes. Roll it to 1/8 inch rolling. Cut out as many rounds as you can. Gather scraps and re-roll. Shape the tarts and use a fork to prick the bottom of the shells. Bake at 350F for 12-14 minutes until golden around the edges.

Let cool for 10-15 minutes before removing tarts from the molds. Turn the mold upside down and tap it firmly onto your work surface to release the shell. Let the tarts cool before adding a filling.

Make the filling: place the chocolate in a bowl, heat the heavy cream to almost boiling, and pour over the chocolate. Wait a few minutes, add the orange oil, and gently stir until fully smooth. Let the ganache cool for about 5 minutes, then place in a piping bag and fill the tartlets, smoothing the top. Decorate with sprinkles, if desired. Place in the fridge to set the ganache for about 30 minutes. Serve at room temperature.

ENJOY!

to print the recipe, click here

Comments: Check Hani’s site for detailed step-by-step instructions. As she shows, the best way to shape the dough is using an empty tin of the same format to press it in, with a Saran wrap type plastic over the dough to protect it. Works like a charm (check top right picture in composite above). You can make many tartlets and store them in the freezer for a mini-tartlet emergency…

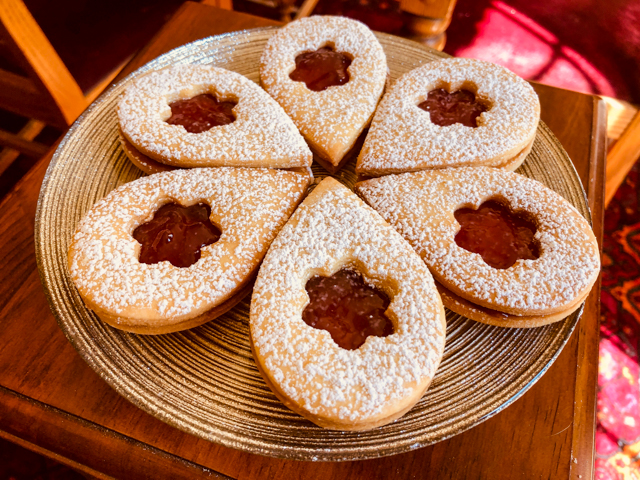
The same exact dough can be rolled and cut into any shape you like to make a Linzer version. I went with a teardrop and cut-out small flower shapes for the top layer.

Simply bake the cookies, let them cool, and spread a thin layer of the jam of your choice. I used seedless raspberry jam for this batch.

A little shower with powdered sugar is optional, but in my opinion, a nice finishing touch.

The dough is wonderful to work with, and as a cutout cookie, it held the shape well. The tartlets puffed up a bit, but midway through baking I pressed them down gently. Perfect texture.

A big thank you to Louise and Haniela!

ONE YEAR AGO: Rocking the Zucchini Boat

TWO YEARS AGO: Polenta Bites with Spicy Tomato Sauce

THREE YEAR AGO: Vague Mousse Cake

FOUR YEARS AGO: Cottage Loaf, my very own technical challenge

FIVE YEARS AGO: Pork Ribs: Sticky, Spicy and Awesome

SIX YEARS AGO: Sobering Peach Sorbet

SEVEN YEARS AGO: Buttermilk-Blueberry Breakfast Cake

EIGHT YEARS AGO: Silky Cauliflower Puree with Almond Milk

NINE YEARS AGO: Beef and Broccoli Stir-fr

TEN YEARS AGO:Wheat Germ and Sage Sourdough Bread

ELEVEN YEARS AGO:Popeye-Pleasing Salad

TWELVE YEARS AGO:Summer’s Finale

OMG PEANUT BUTTER BARS

I cannot stand the texture of peanut butter and its ability to glue to gums and teeth. The idea of grabbing a spoon of peanut butter and licking it leaves me paralyzed with terror. These peanut bars? Seriously addictive. In her original post, Lauren called them “World’s Best Peanut Butter Bars.” I have not tried that many – full disclosure, this is my second – so I share the recipe with you, and if you are a peanut butter bar connoisseur, let me know what you think.

PEANUT BUTTER BARS
(from Tastes Better from Scratch)

for the bars:
3/4 cup butter
1/2 cup granulated sugar
1 cup light brown sugar
2 large eggs
1/2 teaspoon vanilla extract
1/2 cup creamy peanut butter (plus more for spreading over baked bars)
2 + 1/2 teaspoons baking soda
1/2 teaspoon salt
1 + 1/2 cups all-purpose flour
2 cups old-fashioned rolled oats

for the chocolate frosting:
1/4 cup butter
1 Tablespoon unsweetened cocoa powder
1 + 1/2 Tablespoons milk
1 + 1/4 cups powdered sugar
1 teaspoon vanilla extract

Heat the oven to 350 degrees F. In a large mixing bowl, cream together the butter with both types of sugar. Add the eggs, vanilla, and peanut butter and mix well.

In a separate bowl mix together the dry ingredients. Add dry ingredients to creamy mixture.

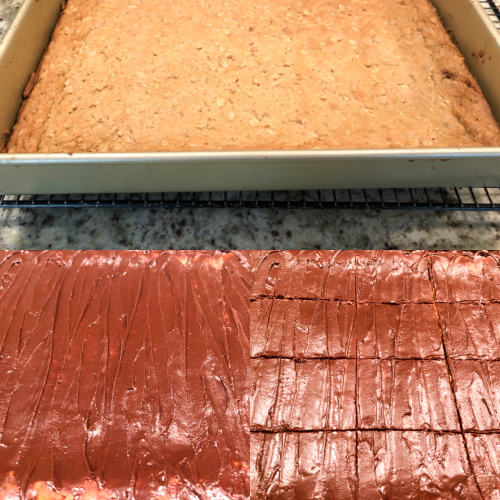
Press firmly into a greased 9×13” pan. Bake at 350 degrees for 17-20 minutes. It will look just barely set in the center, and will harden as it cools. Allow to cool completely, then spread a thin layer of peanut butter over the bars.

To make the chocolate frosting: Add butter to a small skillet over medium heat. Once melted, stir in cocoa. Remove from heat and add milk, powdered sugar and vanilla. Whisk until smooth, using electric beaters to get out any lumps, if needed. .

Spread chocolate frosting over the top of the bars. Cut into squares once the topping is fully set. Using a knife moistened with very hot water from the faucet helps to get neat slices.

ENJOY!

to print the recipe, click here

Comments: These bars were donated, but I “sampled” a little of the trimmings. It’s a good thing I had planned to donate them, because just like a certain cauliflower of my recent past, portion control with this baby would require Herculean efforts. If you make it, consider cutting in even smaller squares if you can, because they are rich. Decadent. I love the inclusion of oats in the base. I am thinking of incorporating oats in sugar cookies in the near future.

ONE YEAR AGO: Kansas Sunflower Seed and Black Walnut Macarons

TWO YEARS AGO: Curry Turmeric Sourdough

THREE YEARS AGO: Black Olive Tapenade and Deviled Eggs

FOUR YEARS AGO: Blueberry Crumble Coffee Cake

FIVE YEARS AGO: Fresh Strawberry Yogurt Bundt Cake

SIX YEAR AGO: Quinoa Salad with Red Grapes and Avocado

SEVEN YEARS AGO: Strawberry Coffee Cake

EIGHT YEARS AGO: Lemon-Poppy Seed Muffins

NINE YEARS AGO: Mascarpone Brownies

TEN YEARS AGO: Salmon Tacos

ELEVEN YEARS AGOCinnamon Turban Bread

TWELVE YEARS AGO: Summertime Gratin