GLUTEN-FREE RED LENTIL BAGELS

And now for something completely different… Do I need to avoid gluten? No. Do I like experimenting with recipes that cater to that need? Big yes. Haniela is my guru cookie decorator, as you might know if you follow my baby blog (can you call a blog a baby when it is 4 years old?). But she is also a fantastic cook and her blog covers a whole range of recipes, from cakes to breads and savory stuff. Check it out by clicking here. She bakes these bagels often, and I had them on my list of things to try for quite some time. Here I am to share her recipe and urge you to make them. Simple and very delicious! They freeze well too…

GLUTEN-FREE RED LENTIL BAGELS
(from Haniela’s blog)

2/3 cup dry red lentils (150 grams)
1 ¼ cup boiling water to soak lentils (300 ml)
1 tbsp lemon juice
scant ¼ cup psyllium husk (20 grams)
2 tbsp olive oil (20 grams)
1 tbsp lemon juice (15 ml)
¼ cup almond meal (30 grams)
1/3 to 1/2 cup water for the dough (120mL)
¼ tsp baking soda
1 tsp baking powder
½ cup mixed seeds ( pumpkin, sunflower, sesame)


Pour 1¼ cup( 300 ml) boiling water over red lentils, add 1 tablespoon lemon juice, stir it and soak for 12 hours. Rinse soaked red lentils well under running water.

Into the food processor add rinsed, soaked red lentils, about 1/3 cup of water for the dough (reserve the rest of the water in case the dough is too stiff). Blend for about a minute or two, until lentils are broken up into a somewhat runny paste.

Into the blended red lentils add psyllium husk, almond flour, lemon juice, 2 tablespoons (20 grams) olive oil and 1 teaspoon table salt. Blend until well combined and thick, somewhat sticky dough forms.
If the dough is too dry add a little more water. Lastly add 1 teaspoon baking powder and 1/4 teaspoon baking soda, give it about 5-10 pulses.

Invert the slightly sticky dough onto the work on a plate. Lightly wet your hands and shape the dough into a ball, flatten it slightly. Cut it into 4 equal parts. Shape each piece into a ball, flatten slightly, dip both sides into the seeds and place buns onto a baking sheet lined with parchment. Repeat for other balls of dough. Make a hole in the middle of each bun. Use a back of a wooden spoon. Make the hole bigger than you think it should be, dough will spread a little in the oven. Bake red lentil bagels at 375F for 30 minutes or until golden brown. Allow to cool before serving.

ENJOY!

to print the recipe, click here

Comments: The only thing to remember is to soak the lentils the day before you want to make the bagels, other than that it is a very fast and straightforward recipe. They are hearty without being overly heavy, and perfect with toppings such as smoked turkey, or ham and a little mustard. Smoked salmon with cream cheese would be great too, or a simple spread of avocado, drizzle of olive oil and lemon juice. Salt. Definitely salt.

The recipe makes only four, but it can be doubled, so keep that in mind.
Check Hani’s blog for variations, I will try them soon.

ONE YEAR AGO: Sourdough Bubble Bread

TWO YEARS AGO: Watermelon Salad

THREE YEARS AGO: Kashmiri Chicken Thighs

FOUR YEARS AGO:  A Vegan Trilogy

FIVE YEARS AGO: The Mystifying Hurricane Roll

SIX YEARS AGO: Pop-Tarts with Strawberry Balsamic Jam

SEVEN YEARS AGO: Ptichye Moloko, a Russian Dessert

EIGHT YEARS AGO: Cheesy Low-Carb Zucchini Tarts

NINE YEARS AGO: Blogging Hiatus

TEN YEARS AGO: Apricots, Three Ways

ELEVEN YEARS AGO: Up Close and Personal with Kale

TWELVE YEARS AGOBlack Berry Cherry Sorbet

THIRTEEN YEARS AGO: Asparagus Pesto

FOURTEEN YEARS AGO: Chocolate and Chestnut Terrine

FIFTEEN YEARS AGO: Under the spell of lemongrass

SIXTEEN YEARS AGO: Greens + Grapefruit + Shrimp = Great Salad!
ZUCCHINI FRITTATA

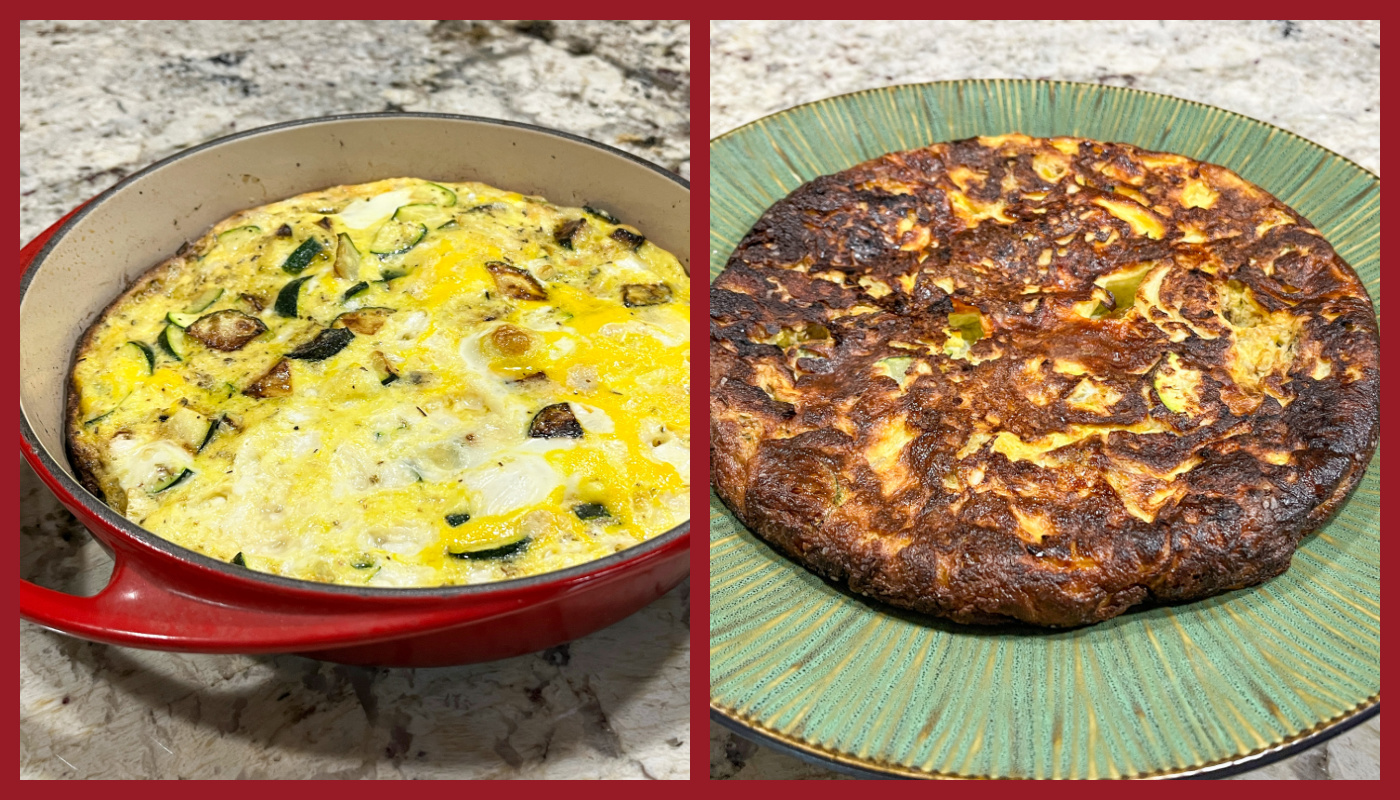
I might be on a roll concerning special gadgets. Case in point, I have a pan that is designed to make Tarte Tatin (!!!), but today I am incredibly proud to show you how to use it to make a nice frittata. Do you need that pan? No. But are you going to be the coolest cook in town if you use it? YES, YOU ARE.

ZUCCHINI FRITTATA
(from The Bewitching Kitchen)

2 Tbsp. olive oil or unsalted butter
2 shallots, minced
2 medium zucchini, sliced and each slice quartered
4 large eggs
1/4 cup whole milk
4-6 pieces of fresh mozzarella
1/2 tsp salt
1/2 tsp Herbes de Provence
¼ tsp. freshly ground black pepper

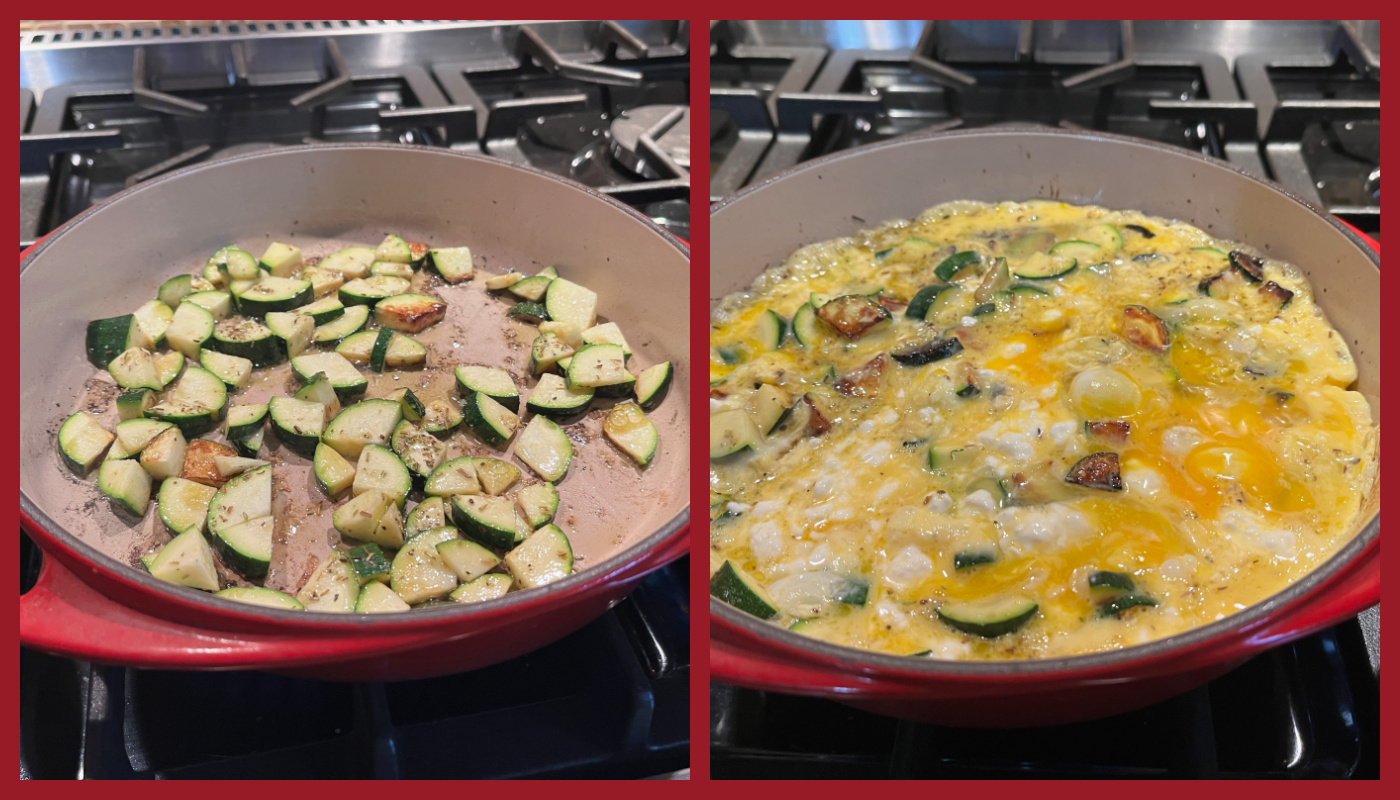
Place rack in middle of oven; heat oven to 350°. Heat 2 Tbsp. olive oil or unsalted butter in an oven-proof skillet. Add the shallots and zucchini, sauté, stirring occasionally, until softened, about 5 minutes. Meanwhile, whisk the large eggs in a medium bowl with the milk, salt, pepper and spices mix.

Pour egg mixture into the skillet. Add the pieces of mozzarella. Cook, stirring occasionally, just until edges pull away from sides of pan, about 5 minutes. Transfer skillet to oven and bake until set, 10–15 minutes. Serve immediately or at room temperature within an hour or so.

ENJOY!

to print the recipe, click here

Comments: You can flip the frittata off the pan and serve it with the brown side up, or cut it straight in the pan, anything works. It turned out creamy, light and fluffy. The pan makes it a breeze to invert and flip the frittata onto a serving plate. We will be enjoying this type of meal in many variations on a regular basis… Mushrooms, red bell peppers, maybe even some smoked salmon in the mix.

ONE YEAR AGO: Chocolate-Covered Oreos Strike Again

TWO YEARS AGO: Sesame-Miso Yakitori

THREE YEARS AGO: Marinated Chickpeas with Slow-Roasted Red Peppers

FOUR YEARS AGO: Mini-Pullman Sourdough Bread

FIVE YEARS AGO: Gibassier

SIX YEARS AGO: Sundried Tomato Twist Bread

SEVEN YEAR AGO: And now for something completely different….

EIGHT YEARS AGO: Parsnip, Coconut, and Lemongrass Soup

NINE YEARS AGO: In My Kitchen, October 2016

TEN YEARS AGO: Paleo Moussaka

ELEVEN YEARS AGO: In My Kitchen, October 2014

TWELVE YEARS AGO: In My Kitchen, October 2013

THIRTEEN YEARS AGO: Crimson and Cream Turkey Chili

FOURTEEN YEARS AGO: Taking a break from the nano-kitchen

FIFTEEN YEARS AGO: Chocolate Chip Cookies

PEANUT BUTTER ENERGY BARS

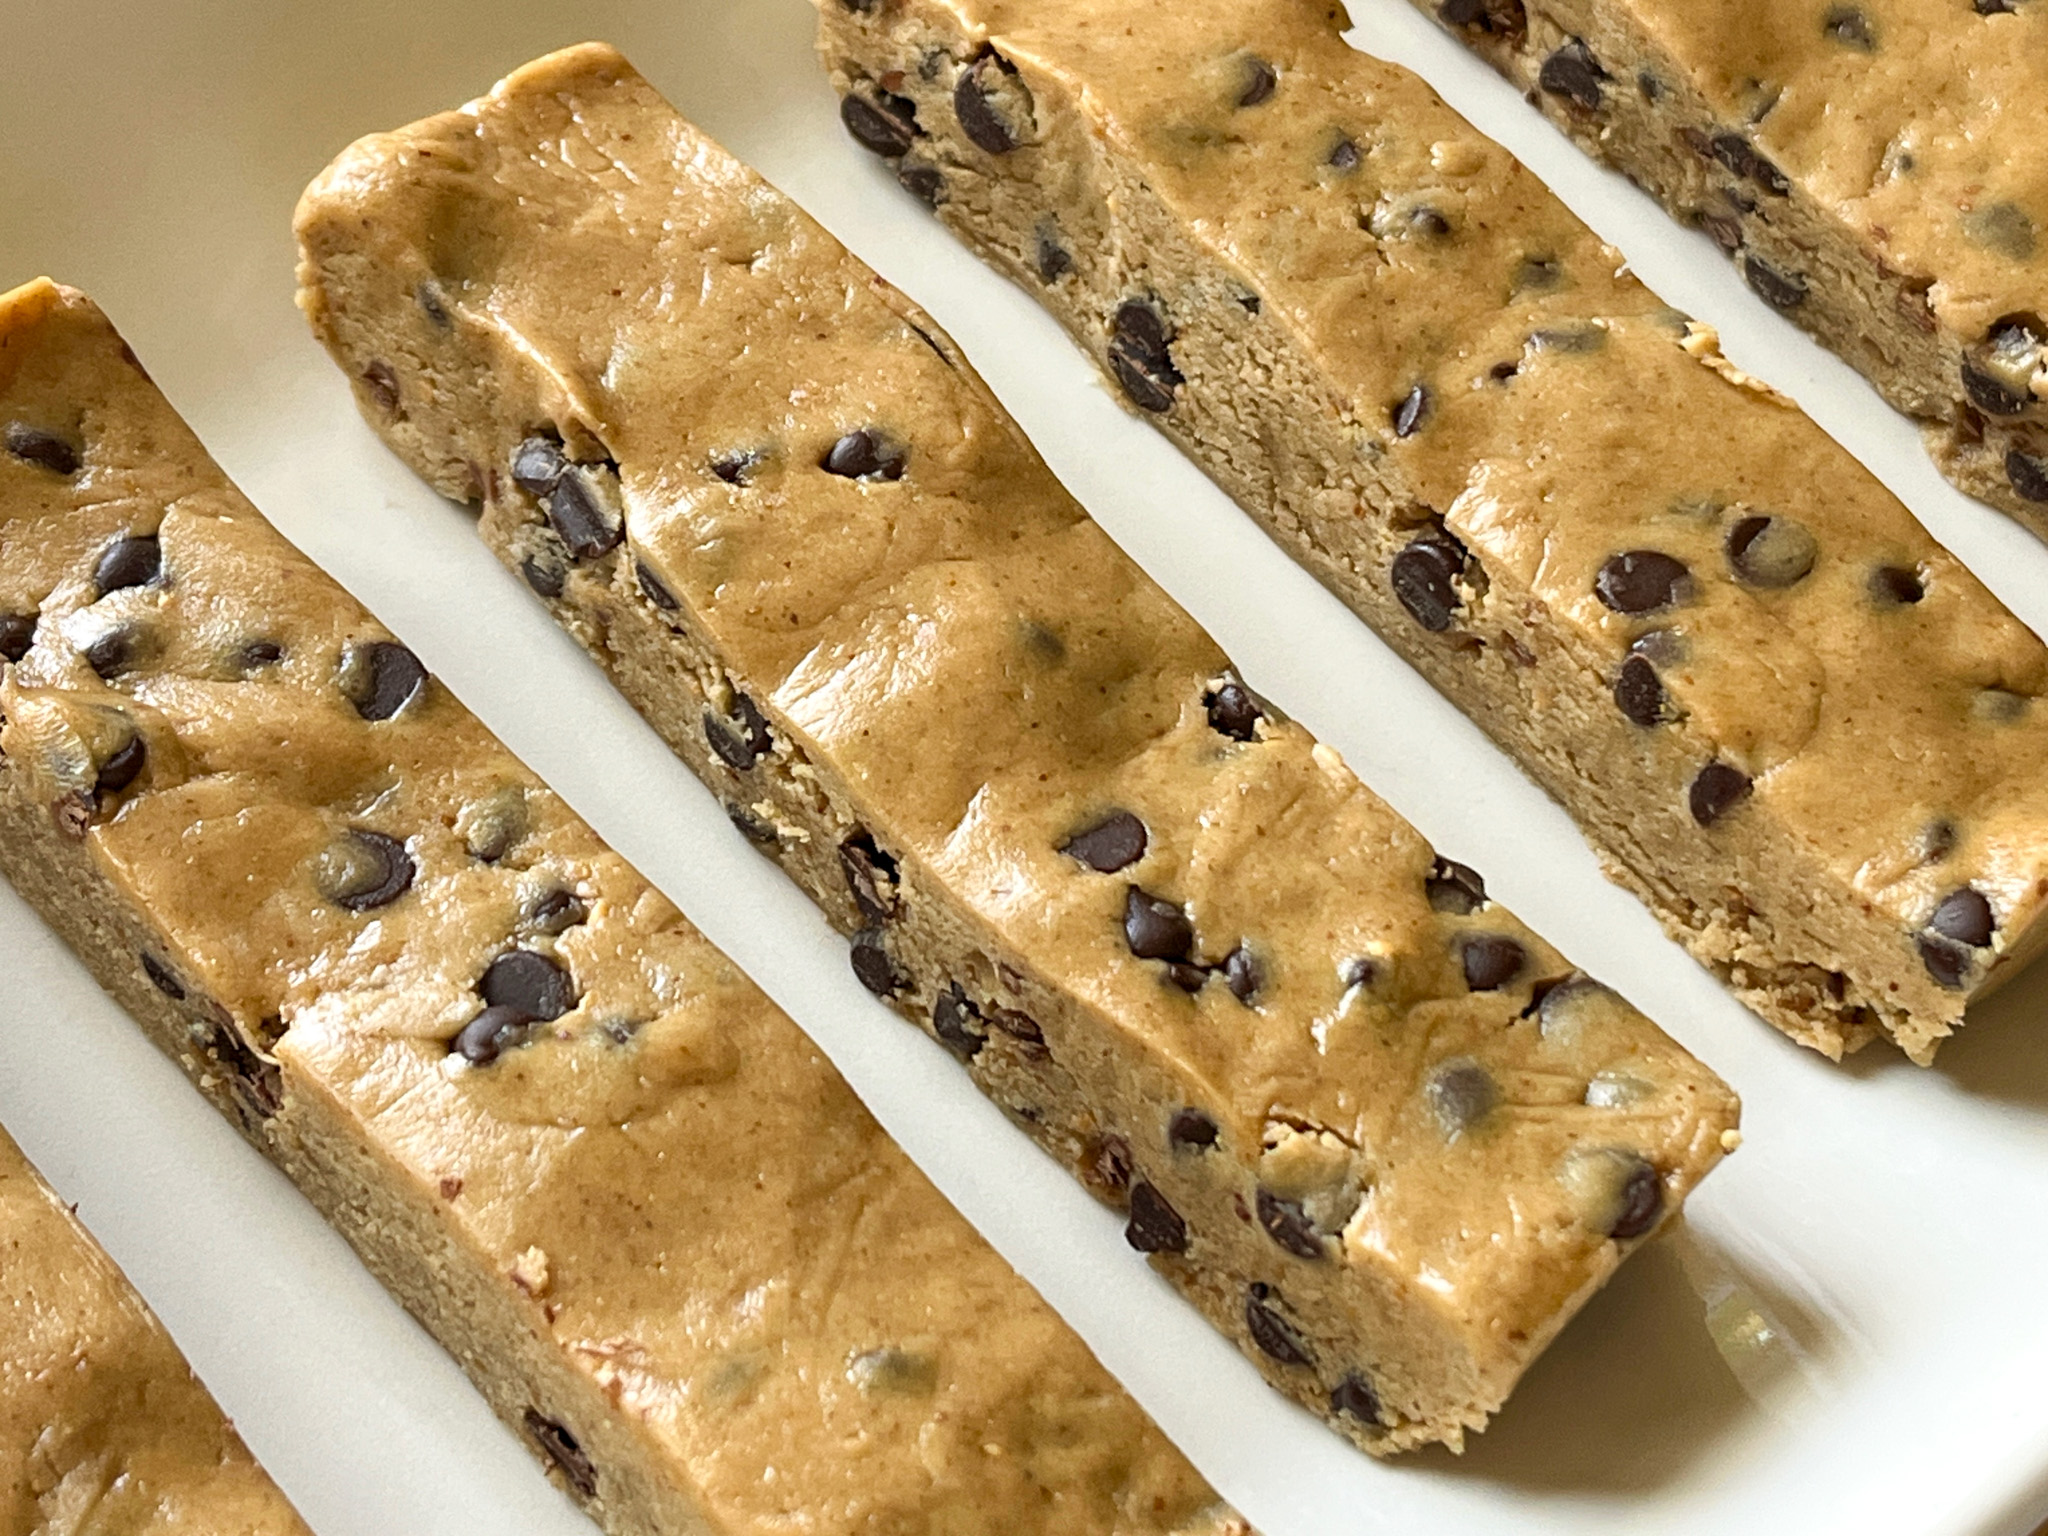
And now for something completely different! I don’t normally make this type of stuff, but my dear stepdaughter-in-law urged me to give them a try. First, no oven is needed, they require no baking. Second, you can customize them in many different ways. She adds dried fruits, uses maple syrup instead of honey, they always work. I made the recipe exactly as published in my first time but the husband already requested that I add seeds and nuts to future batches. I don’t eat energy bars but must say that after trying a bite of these, I was hooked. Sweet, but not too sweet. Delicious! And a little bit goes a long way indeed, as energy bars are supposed to do.

PEANUT BUTTER ENERGY BARS
(from Erin Lives Whole)

1 1/4 cup oat flour (store bought is best for ultra fine texture)
1/4 cup vanilla protein powder
1/4 tsp salt
1/2 cup natural peanut butter
1/3 cup honey
1 tsp vanilla extract
1– 2 tbsp melted coconut oil
3/4 cup mini chocolate chips

In a large bowl, mix together oat flour, protein powder, and salt.

Add in peanut butter, honey, vanilla extract, and 1 tbsp coconut oil. Mix. It will be very thick, I suggest using your hands to really mix well. It should eventually come together like playdough, but if it’s still too dry add more coconut oil. You want them to be FIRM not soft and too much coconut oil will make them soft. Mix in chocolate chips.

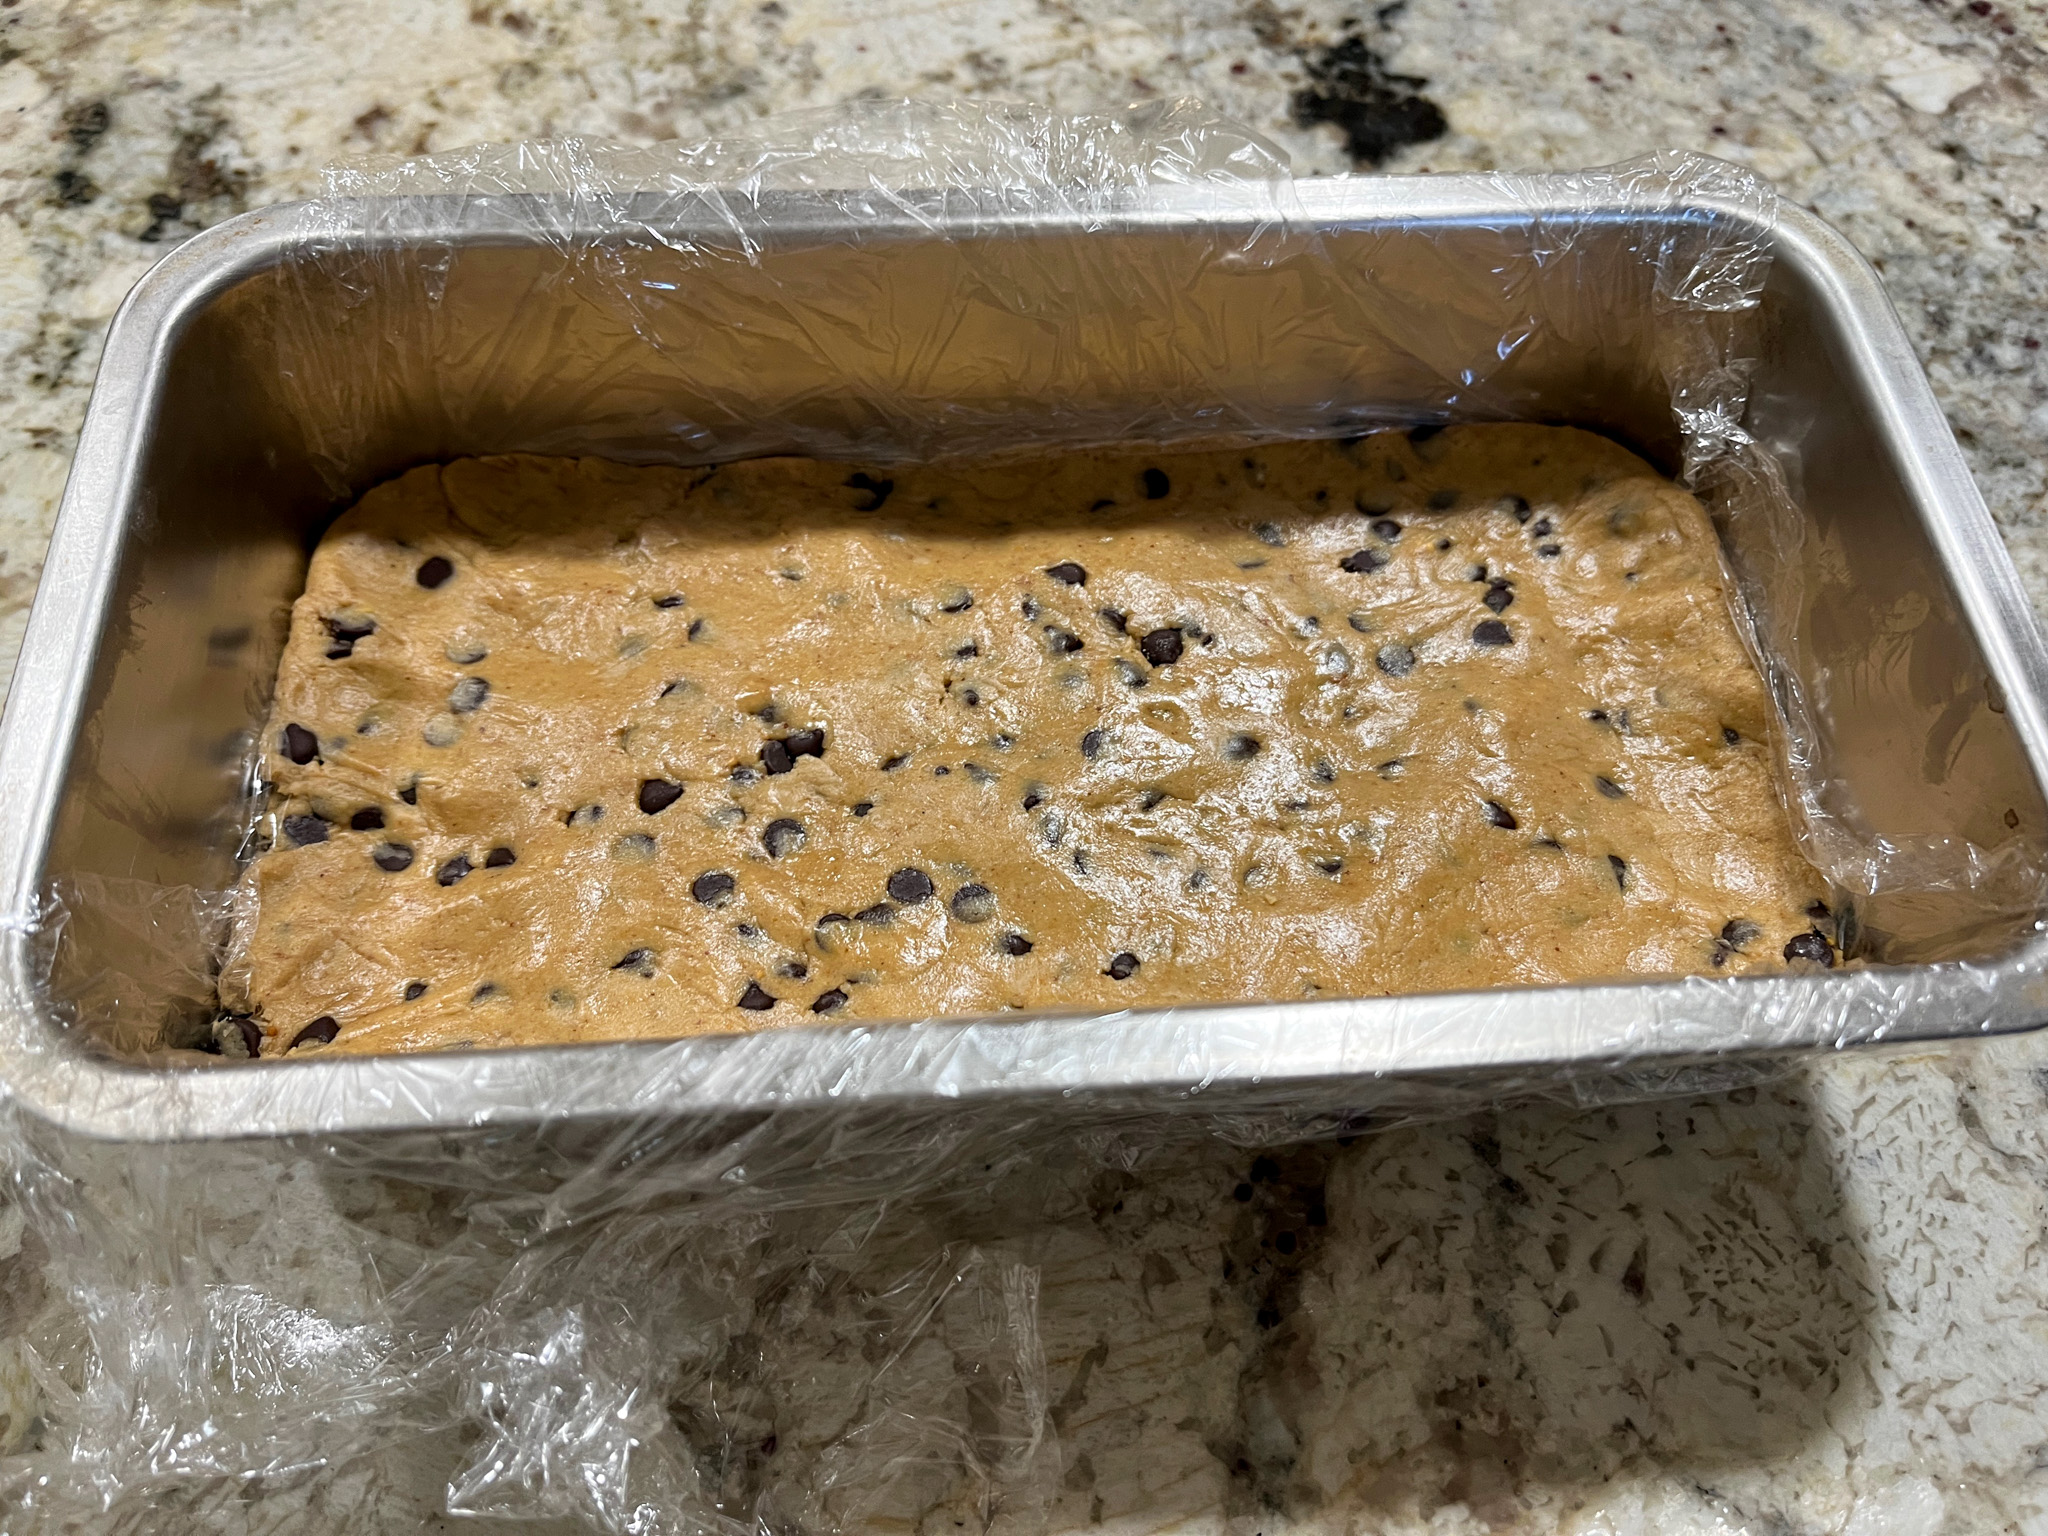
Press into a bread pan (~8×4) and add more chocolate chips on top if desired. Press them into the top.

Let sit in fridge for at least 1 hour before cutting into. Store in fridge.

ENJOY!

to print the recipe, click here

Comments: Check the original post to see all the variations Erin has tried. Apparently these are copycat versions of a popular brand called Perfect Bars. I had never heard of them, but as I mentioned, it’s not something I consume. The husband is more into cereal bars and things of that sort. I will be making them again for sure, they lasted a little less than a week for us, and stayed unchanged in flavor and texture sitting in the fridge. Courtnie, my daughter-in-law says they also freeze well. She likes them with maple syrup instead of honey and with tiny bits of dried blueberries…

.

ONE YEAR AGO: Cocoa-Lattice Sourdough

TWO YEARS AGO: Pistachio Sugar Cookies, the Uzbek Way

THREE YEARS AGO: Carrots and Zucchini Stir-Fry with Peanut Sauce

FOUR YEARS AGO: Cookie Therapy, Anyone?

FIVE YEARS AGO: The Quasi-Vegan Quiche

SIX YEARS AGO: Not Quite Moqueca

SEVEN YEARS AGO: Roasted Butternut Squash with Cashew Nuts

EIGHT YEARS AGO: Mississippi Roast and the Open Mind

NINE YEARS AGO: Walnut-Raisin Bran Muffins

TEN YEARS AGO: A Star is Born!

ELEVEN YEARS AGO: Chestnut Flour Sourdough Bread

TWELVE YEARS AGO: Kinpira Gobo and Japanese Home Cooking

THIRTEEN YEARS AGO: Walnut Sourdough

FOURTEEN YEARS AGO: Thai Chicken Curry

FIFTEEN YEARS AGO: Zen and the art of risotto

INCREDIBLY SIMPLE PROSCIUTTO BAKED EGGS

This recipe was inspired by a version from Mark Bittman published back in 2022. I really like the modifications I included, and hope you will also. In typical Sally’s fashion, I got so hooked on it that it was my lunch several days in a row. Yeah, that’s the way I roll. Sometimes.

BAKED EGGS WITH PROSCIUTTO AND TOMATO
(inspired by Mark Bittman)

serves two

2 low-carb tortillas (or any other flour tortilla you like)
olive oil spray
2 slices beefsteak tomato
2 slices of prosciutto di Parma
2 eggs
Parmigiano-Reggiano cheese
drizzle of heavy cream (optional)
salt (very little)

Heat oven to 375F.

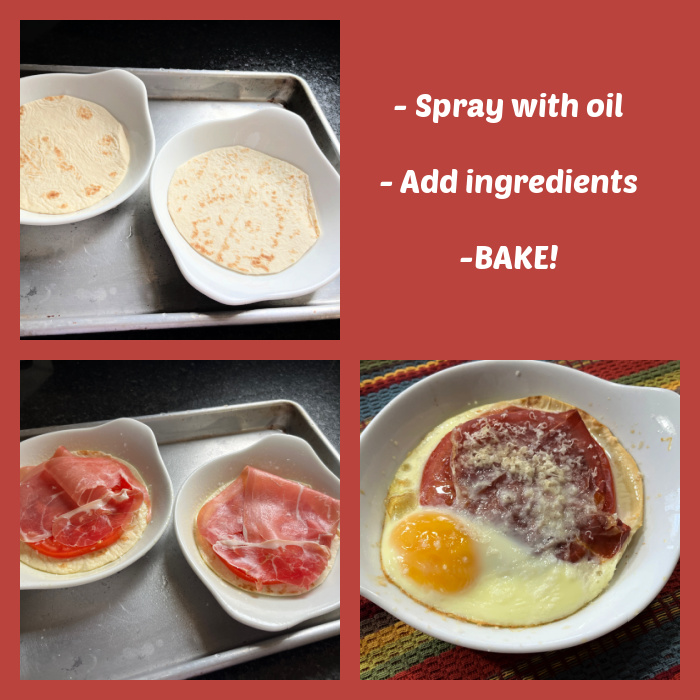
Cut the tortilla to fit snuggly and the bottom of your dish. Spray the dish with olive oil, add the tortilla, spray the top lightly with oil.

Place a slice of tomato on top, a slice of prosciutto, break the egg over it. Add cheese, and if you want, a little drizzle of cream. Salt lightly, the prosciutto will be very salty.

Bake for 15 minutes, or until egg yolk cooked to your liking. If egg white is not fully cooked, run under the broiler. You can also start the baking covering the dish with aluminum foil to help steam the egg white and cook it properly.

ENJOY!

to print the recipe, click here

Comments: To me, this is almost a perfect lunch. You can kick it up a notch using a slice of sourdough bread instead of tortilla, but I like to keep it light. Beefsteak tomato is underrated, in my opinion. I love it and in this preparation it is really the best kind to use. It stands to baking and contributes moisture and flavor. You can use ham instead of prosciutto, although I rather stick with the latter. The only tricky part is baking long enough to cook the egg white without overcooking the yolk, but play with it and you’ll find what works best in your oven.

ONE YEAR AGO: Bicolor Ravioli

TWO YEARS AGO:  Crispy Asparagus Salad with Toasted Bread Crumbs

THREE YEARS AGO: Low-Carb Super Fast Chicken Parmigiana

FOUR YEARS AGO: Sundried Tomato Spelt Sourdough

FIVE YEARS AGO: A Duet of Chocolate Bonbons

SIX YEARS AGO: Chocolate Tartlets with Honey-Caramel Filling

SEVEN YEAR AGO: Zucchini Soup with Tahini

EIGHT YEARS AGO: Black Sesame Macarons

NINE YEARS AGO: Fine Tuning Thomas Keller

TEN YEARS AGO: Cauliflower Tortillas

ELEVEN YEARS AGO: Majestic Sedona, Take Two

TWELVE YEARS AGO: Secret Ingredient Turkey Meatballs

THIRTEEN YEARS AGO: Swedish Meatballs and Egg Noodles

FOURTEEN YEARS AGO: Italian Easter Pie

FIFTEEN YEARS AGO: Black Olive Bialy

BARBARI BREAD AND HUMMUS

A match made in heaven!

Barbari Bread originates in Iran, formerly known as Persia, a name that evokes beautiful things in my mind. Barbari is a flatbread with ridges and a dark golden color provided by a glaze that often contains baking soda. I share a recipe that makes one small flatbread, fitting in a quarter sheet pan.

BARBARI BREAD
(adapted from cookingorgeous)

160 ml water (lukewarm)
250 g all-purpose flour
4 g instant yeast
5 g salt
3 g sugar
10 ml olive oil


For the Topping (you won’t need the full amount)
1 teaspoon olive oil
1 tablespoon all-purpose flour
½ cup water
½ teaspoon baking soda
2 tablespoon Sesame seeds


In the bowl of a KitchenAid type mixer combine the flour, salt, sugar, olive oil, and yeast. Add warm water gradually, stirring to form a sticky dough. Knead at low-speed for about 5 minutes. Place the dough in a lightly greased bowl, cover it with a damp cloth, and let it rise in a warm spot for 2 hours.

Make the glaze: in a small saucepan, combine flour, water, olive oil, and baking soda.
Cook over low heat, stirring continuously until it thickens into a smooth paste. Set aside to cool.

Shape the Dough: Flatten the dough into an oval or rectangular shape on a parchment-lined baking sheet. If the dough resists too much, form into a ball and allow it to rest for 15 minutes. The dough should end as 12 inches long and 5 inches wide. Using your fingers, gently press lines into the dough from top to bottom to create the signature ridges of Barbari bread. Brush the glaze mixture over the surface, covering the dough evenly. This will help to keep the bread moist and create that golden crust during baking. Sprinkle on sesame seeds.

Second Rise and Baking the Bread: Cover the shaped and topped dough with a damp cloth and allow it to rise for one hour.

Heat the oven to 390F. Bake the bread for about 20 minutes or until it turns golden brown with a crisp crust.

ENJOY!

to print the recipe, click here

For the hummus, I used a fantastic recipe from Milk Street, which is available online (click here). I advise you to halve the recipe because it would feed an army. I am not too fond of freezing hummus, so half the recipe was perfect for us. Can you tell how luscious and creamy it is?


Comments: Barbari bread is definitely one to consider adding to your rotation, because it is super easy to make and absolutely delicious. As to the hummus, Milk Street recipe is pretty involved, but worth it. Thick, intensely flavored, a real hit of sesame with each bite.


I hope you try both this recipes, they were perfect together. Hummus is often a breakfast item in Israel, consumed warm with Kawarma (spiced ground meat) spooned all over it. We took the less authentic route by enjoying it as a dip. If you have The Milk Street Cookbook that goes along with the TV show, both recipes are there.

ONE YEAR AGO: Baking Through the Blogosphere

TWO YEARS AGO: Crispy Air-Fried Zucchini

THREE YEARS AGO: Pasta with Cremini Mushroom Ragu

FOUR YEARS AGO: A Magical Marinade

FIVE YEARS AGO: Roast Veggies with Black Barley

SIX YEARS AGO: Pumpkin Sourdough

SEVEN YEARS AGO: First Monday Favorite

EIGHT YEARS AGO: Secret Recipe Club: Paalak Paneer, a Farewell Post

NINE YEARS AGO: In My Kitchen, November 2015

TEN YEARS AGO: Helen Fletcher’s Oatmeal Cookies

ELEVEN YEARS AGO: Thai-Style Pesto with Brown Rice Pasta

TWELVE YEARS AGO: Shrimp with Spicy Orange Sauce

THIRTEEN YEARS AGO:  A Simple Appetizer (Baked Ricotta)

FOURTEEN YEARS AGO: Sour Cream Sandwich Bread

FIFTEEN YEARS AGO: Pasta with Zucchini Strands and Shrimp