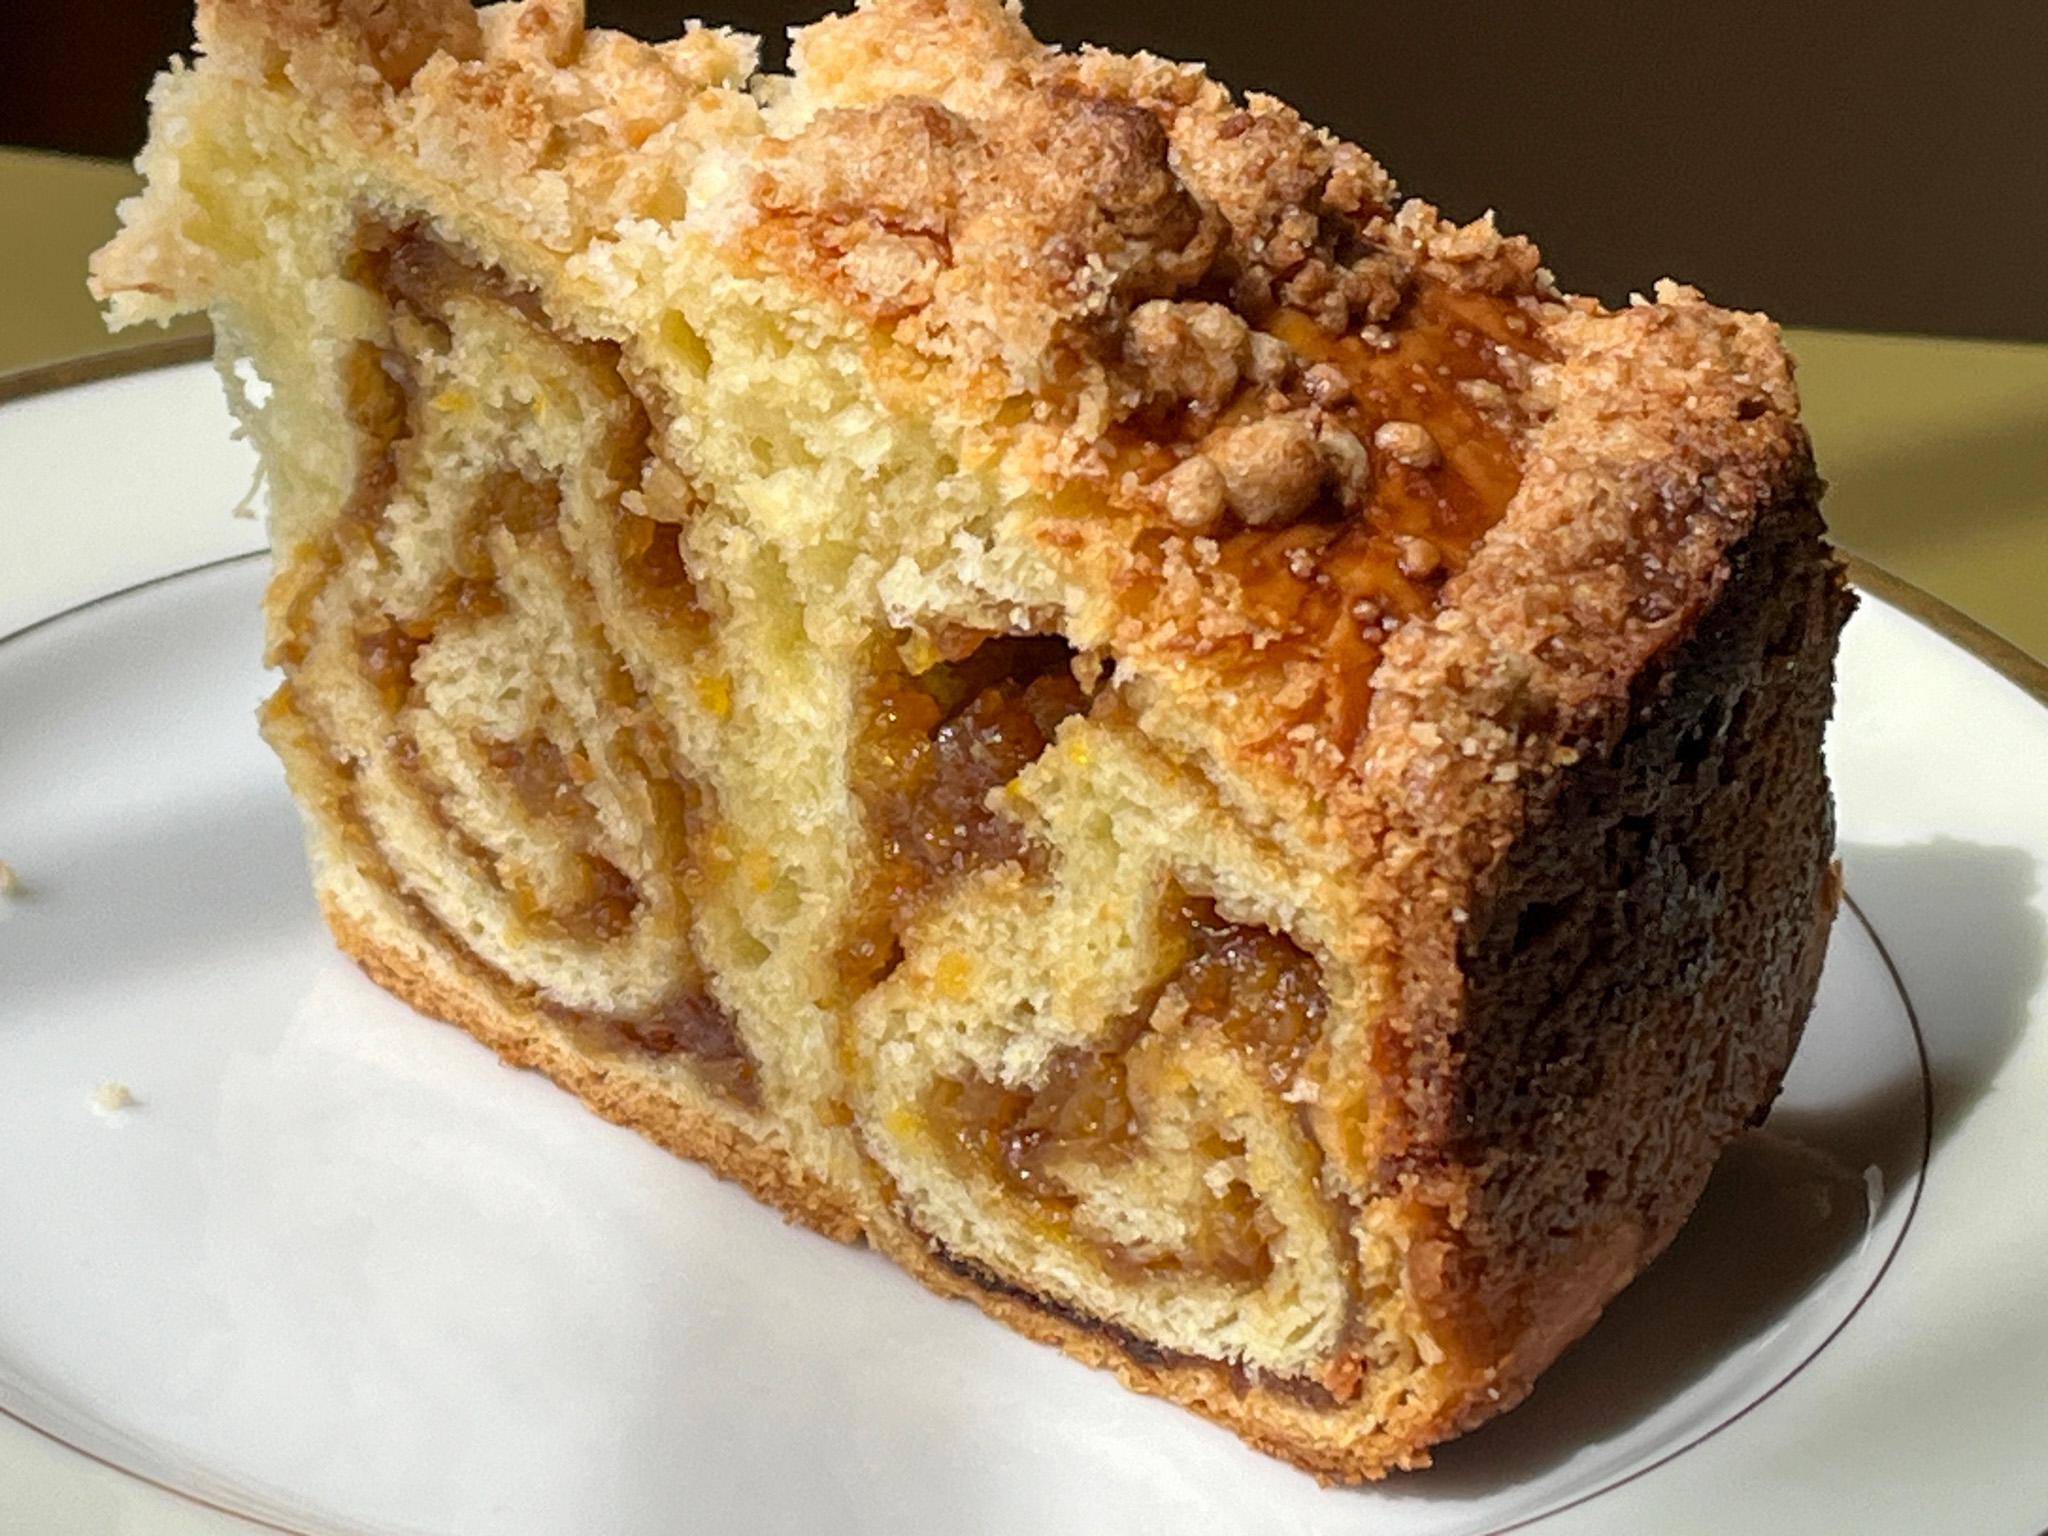
MJUKKAKA, A SWEDISH SOFT FLATBREAD

Totally in love, I must admit… Huge thank you to Mimi, a food blogger and friend I’ve been following and learning from for so many years! Check her detailed post about it clicking here. If you want to make the real authentic version, a special rolling pin is a must, but you can probably get by with a dough rolling docking gadget of even the tines of a fork. I have a tough time resisting gadgets, as you may have noticed, so I got one (amazon is your friend, I suppose).

MJUKKAKA
(from Chef Mimi’s blog)

2 cups bread flour plus an extra tablespoon or two if necessary and more for rolling the dough
3/4 cup barley flour
1 1/2 teaspoons instant yeast
1 teaspoon fine sea salt
1 teaspoon granulated sugar
1 cup water room temperature
1/4 cup plain whole-milk Greek yogurt
1 tablespoon canola oil plus more for oiling the bowl and cooking the flatbreads
2 tablespoons unsalted butter, melted
Flaky sea salt for sprinkling

Whisk bread flour, barley flour, yeast, salt and sugar together by hand in the bowl of a stand mixer. Add water, yogurt and 1 tablespoon oil to the dry ingredients.

Fit a stand mixer with the dough hook and begin mixing at medium-low speed until dough just comes together. Increase mixer speed to medium and knead dough for three minutes. If dough is sticking to the sides or the bottom after the first 3 minutes of kneading, add an additional tablespoon of bread flour before continuing the kneading process. Continue kneading at medium speed until the dough is tacky but not sticky and clears the bottom and sides of the bowl, approximately 2-3 more minutes. Add an additional tablespoon or two of bread flour if dough continues to stick to the sides or bottom of the bowl during the kneading process.

Transfer the dough to an oiled bowl. Cover and let rise for an hour at room temperature or until doubled in size. Transfer dough to a clean countertop and divide into 8 equal pieces, about 80 g each. Roll each piece into a rough ball. Cover with plastic wrap.

Working with one piece of dough at a time, use a rolling pin to create a thin circular flatbread (like a thin tortilla). If the dough sticks to the rolling pin, sprinkle a little flour on top. It’s okay if the dough is sticking to the work surface. Finish by rolling the flatbread a couple of times with a deep notched rolling pin. Brush off any excess flour from the top of the dough.


Using a dough scraper and your fingers, gently release the flatbread from the countertop. Add to a skillet with a little oil heated over medium heat. Cook the first side for 1 to 2 minutes, flip and cook the second side. Remove the flatbread from the skillet and transfer to a plate. Brush lightly with melted butter and sprinkle with coarse salt, if so desired (I omitted the butter).

Repeat the process with the remaining portions of dough. Eat immediately or wrap tightly and freeze once the flatbreads have cooled to room temperature

ENJOY!

to print the recipe, click here

Comments: I love the pattern that the rolling pin makes on the dough, and also how it prevents the bread from puffing too much during cooking. I used a dosa flat pan to cook it over the stove, but you can use cast iron and probably a griddle might work too. As to oiling the pan, what worked better for me was brushing oil right on the bread after rolling and brushing the excess flour off. I used a silicone brush and added a very light coating. I did not add more oil to the other side before flipping the bread, it was not necessary.
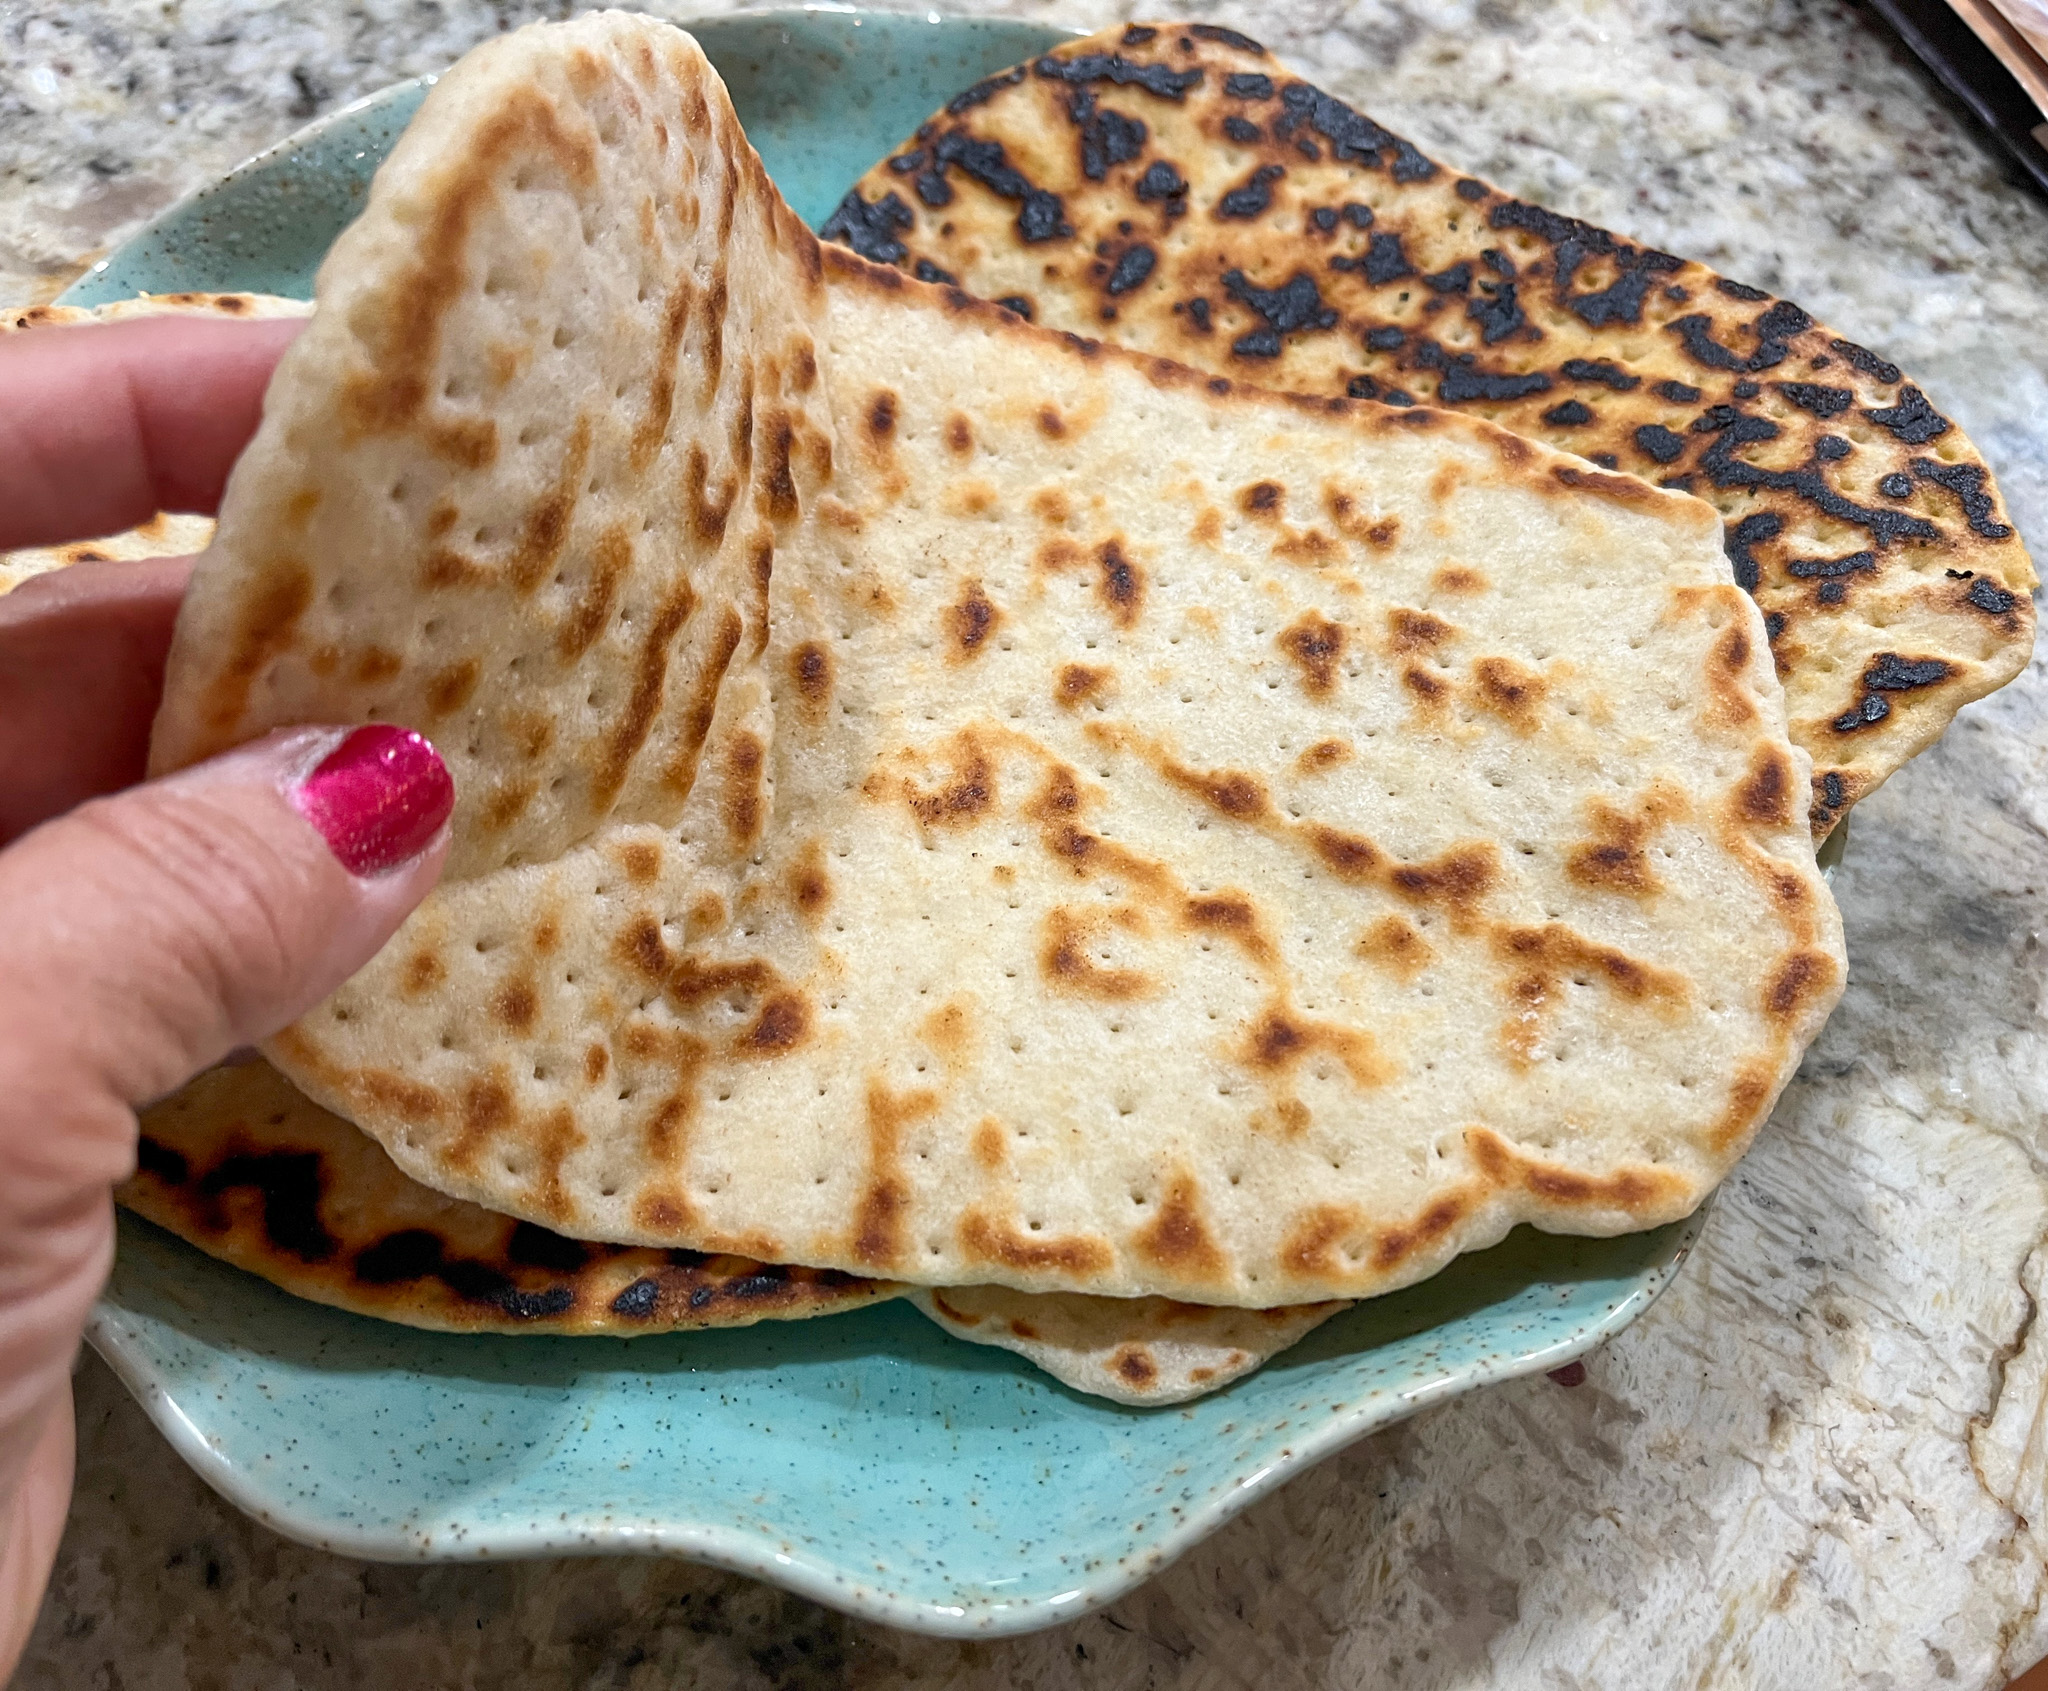
We had it for a weeknight dinner with several different goodies: smoked salmon with yogurt dill dipping sauce, ham, prosciutto, mortadella, mustard, hummus… It was simple and fun at the same time. I placed all flatbreads wrapped in foil in a very low oven (used our Breville small oven for that), and the bread stayed soft and warm through the whole meal. We did not bother slathering the bread with butter, but feel free to do so.
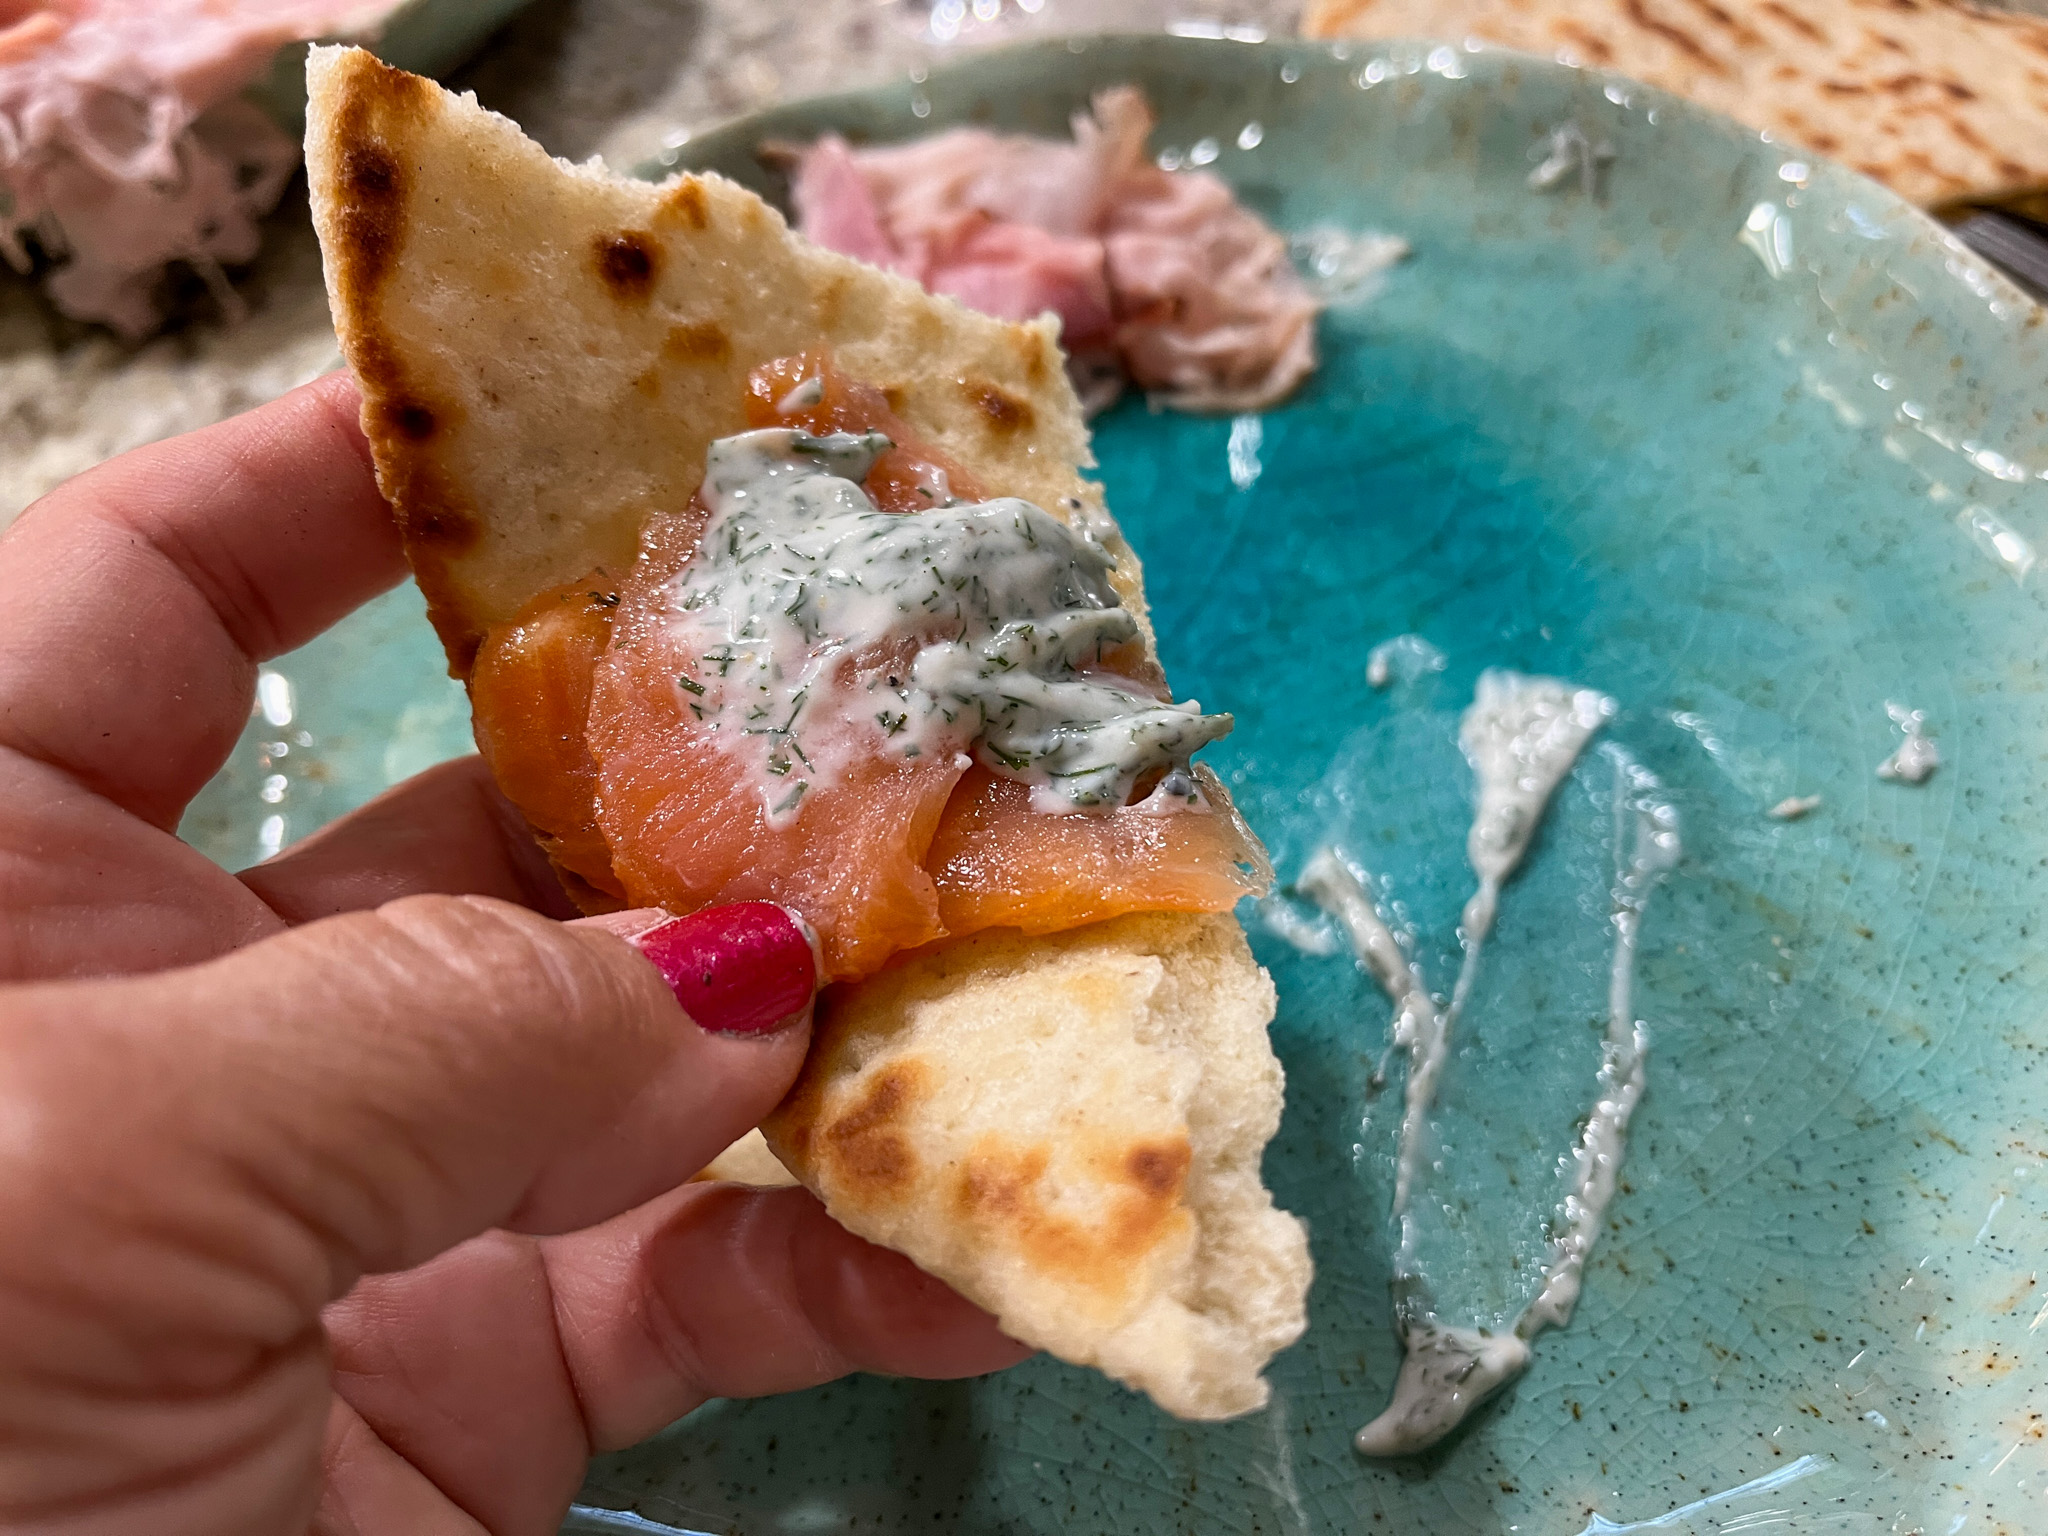
This one is definitely going into our rotation, and I hope you will give this recipe a try. Thank you so much, Mimi!

ONE YEAR AGO: Polka Dot Love Sourdough

TWO YEARS AGO: Plum Sorbet

THREE YEARS AGO: Grilled Chicken with Sesame Roasted Carrots

FOUR YEARS AGO: Let’s Get Spooky!

FIVE YEARS AGO: Miso and Sesame Roast Chicken with Revelation Quinoa

SIX YEARS AGO: Incredibly Simple Times Four

SEVEN YEARS AGO: Parsnip, Coconut and Lemongrass Soup

EIGHT YEARS AGO: In My Kitchen, October 2016

NINE YEARS AGO: Paleo Moussaka

TEN YEARS AGO: In My Kitchen, October 2014

ELEVEN YEARS AGO: In My Kitchen, October 2013

TWELVE YEARS AGO: Bourbon and Molasses Glazed Pork Tenderloin

THIRTEEN YEARS AGO: Crimson and Cream Turkey Chili

FOURTEEN YEARS AGO: Taking a break from the nano-kitchen

FIFTEEN YEARS AGO: Chocolate Chip Cookies

PUFF PASTRY TWISTS WITH CINNAMON AND CARDAMON

You can conceivably use store-bought puff pastry (try to find a brand that uses real butter, not shortening), but a lot of the fun is making your own. For this type of pastry, no need to do too many folds. Great project for a weekend, but avoid days of excessive heat.


PUFF PASTRY TWISTS WITH CINNAMON AND CARDAMON
(from The Bewitching Kitchen, adapted from several sources)

3 cups (390g) all-purpose flour
1½ tablespoons sugar
1½ teaspoons salt
2 teaspoons white vinegar
1 cup ice water (you may not need the full cup)
for butter square:
3 sticks unsalted butter, chilled

Process flour, sugar, and salt in food processor until combined. With processor running, add vinegar, followed by ¾ cup super cold water. Add remaining ¼ cup water as needed, a little at a time with the machine always running. Stop adding water when the dough comes together, and immediately remove from the processor, gathering the dough gently with your hands. Form into a square, wrap in plastic and refrigerate for 1 full hour.

Start working on the butter block: Lay the three butter sticks side by side over a sheet of parchment paper and cover with a plastic wrap. Gently pound butter with rolling pin until butter is softened, then roll out as an 8-inch square, trying to keep the thickness equal all over the extension of the butter. Wrap the square in plastic and refrigerate until chilled, about 1 hour.

Roll chilled dough into 14 inch square on lightly floured counter. Place chilled butter square diagonally in center of dough. Fold corners of dough up over butter square so that corners meet in middle and pinch dough seams to seal (see first photo of the composite below). Gently roll dough into 14-inch square, dusting with extra flour as needed to prevent sticking. Fold dough into thirds like a business letter, then fold rectangle in thirds to form a square, try to make it as neat as possible. Wrap dough in plastic, freeze for 30 minutes and remove to the refrigerator, keeping it there for 60 minutes more.

Repeat the folding and rolling twice, if you can do it fast no need to refrigerate, but if at any time you feel the butter warming, place it in the fridge for 45 minutes before the next rolling out. Once you complete the foldings, let the dough rest for 2 full hours before finally using it.

MAKING THE TWISTS
1/2 of the puff pastry made as above
½ cup sugar
3 tablespoon unsalted butter melted
pinch of salt
2 teaspoons ground cinnamon
¼ teaspoon ground cardamom

Mix sugar, salt and spices in a small bowl. Reserve. Heat the oven to 400F and line a baking sheet with parchment paper (it works better than silicone for this type of bake, disregard what you see in the composite picture below, I switch to parchment on the second batch).

Roll the puff pastry into a large square (about 12 x 12 in), the thinner the better without allowing it to crack. Brush melted butter all over the pastry, then sprinkle the sugar-spice mixture, pressing gently with the fingers. Fold the pastry sheet in half, enclosing the sugar mixture. Cut narrow strips with a pizza roller. Twist each piece and place on the parchment-lined sheet.

Bake for 14-15 minutes until golden brown.

ENJOY!

to print the recipe, click here

Comments: These turned out absolutely delicious, although they un-twisted quite a bit during baking. I should have pressed the ends harder on the parchment paper, but still it didn’t compromise the experience. I cut the long strips in half because I did not want to have very long twists, so do what you think is best for you.

Yes, making puff pastry from scratch takes a bit of work, but quite a bit of it is waiting for the dough to chill. I will make turnovers pretty soon, so stay tuned!

ONE YEAR AGO: Three Delicious Bakes

TWO YEARS AGO: Banana Bread from the Experts

THREE YEARS AGO: Shrimp Stir-Fry with Snow Peas and Cashews

FOUR YEARS AGO: Pickled-Roasted Chickpeas with Cashew Cream

FIVE YEARS AGO: Twice-Baked Goat Cheese Souffle

SIX YEARS AGO: A Star from England in the Bewitching Kitchen

SEVEN YEARS AGO: Hommage to the Sun

EIGHT YEARS AGO:The Fabulous Three
.
NINE YEARS AGO: Turkey-Chorizo Burger with Green Chile Dressing
.
TEN YEARS AGO:Taco Salad
.
ELEVEN YEARS AGO: Semolina Sourdough Boule
.
TWELVE YEARS AGO:Forgive me, for I have sinned
.

THIRTEEN YEARS AGOCracked Wheat Sandwich Bread
.
FOURTEEN YEARS AGO:  Au Revoir, my Bewitching Kitchen
.
FIFTEEN YEARS AGO:French Bread

BRIOCHE ROLLS WITH PISTACHIO FILLING

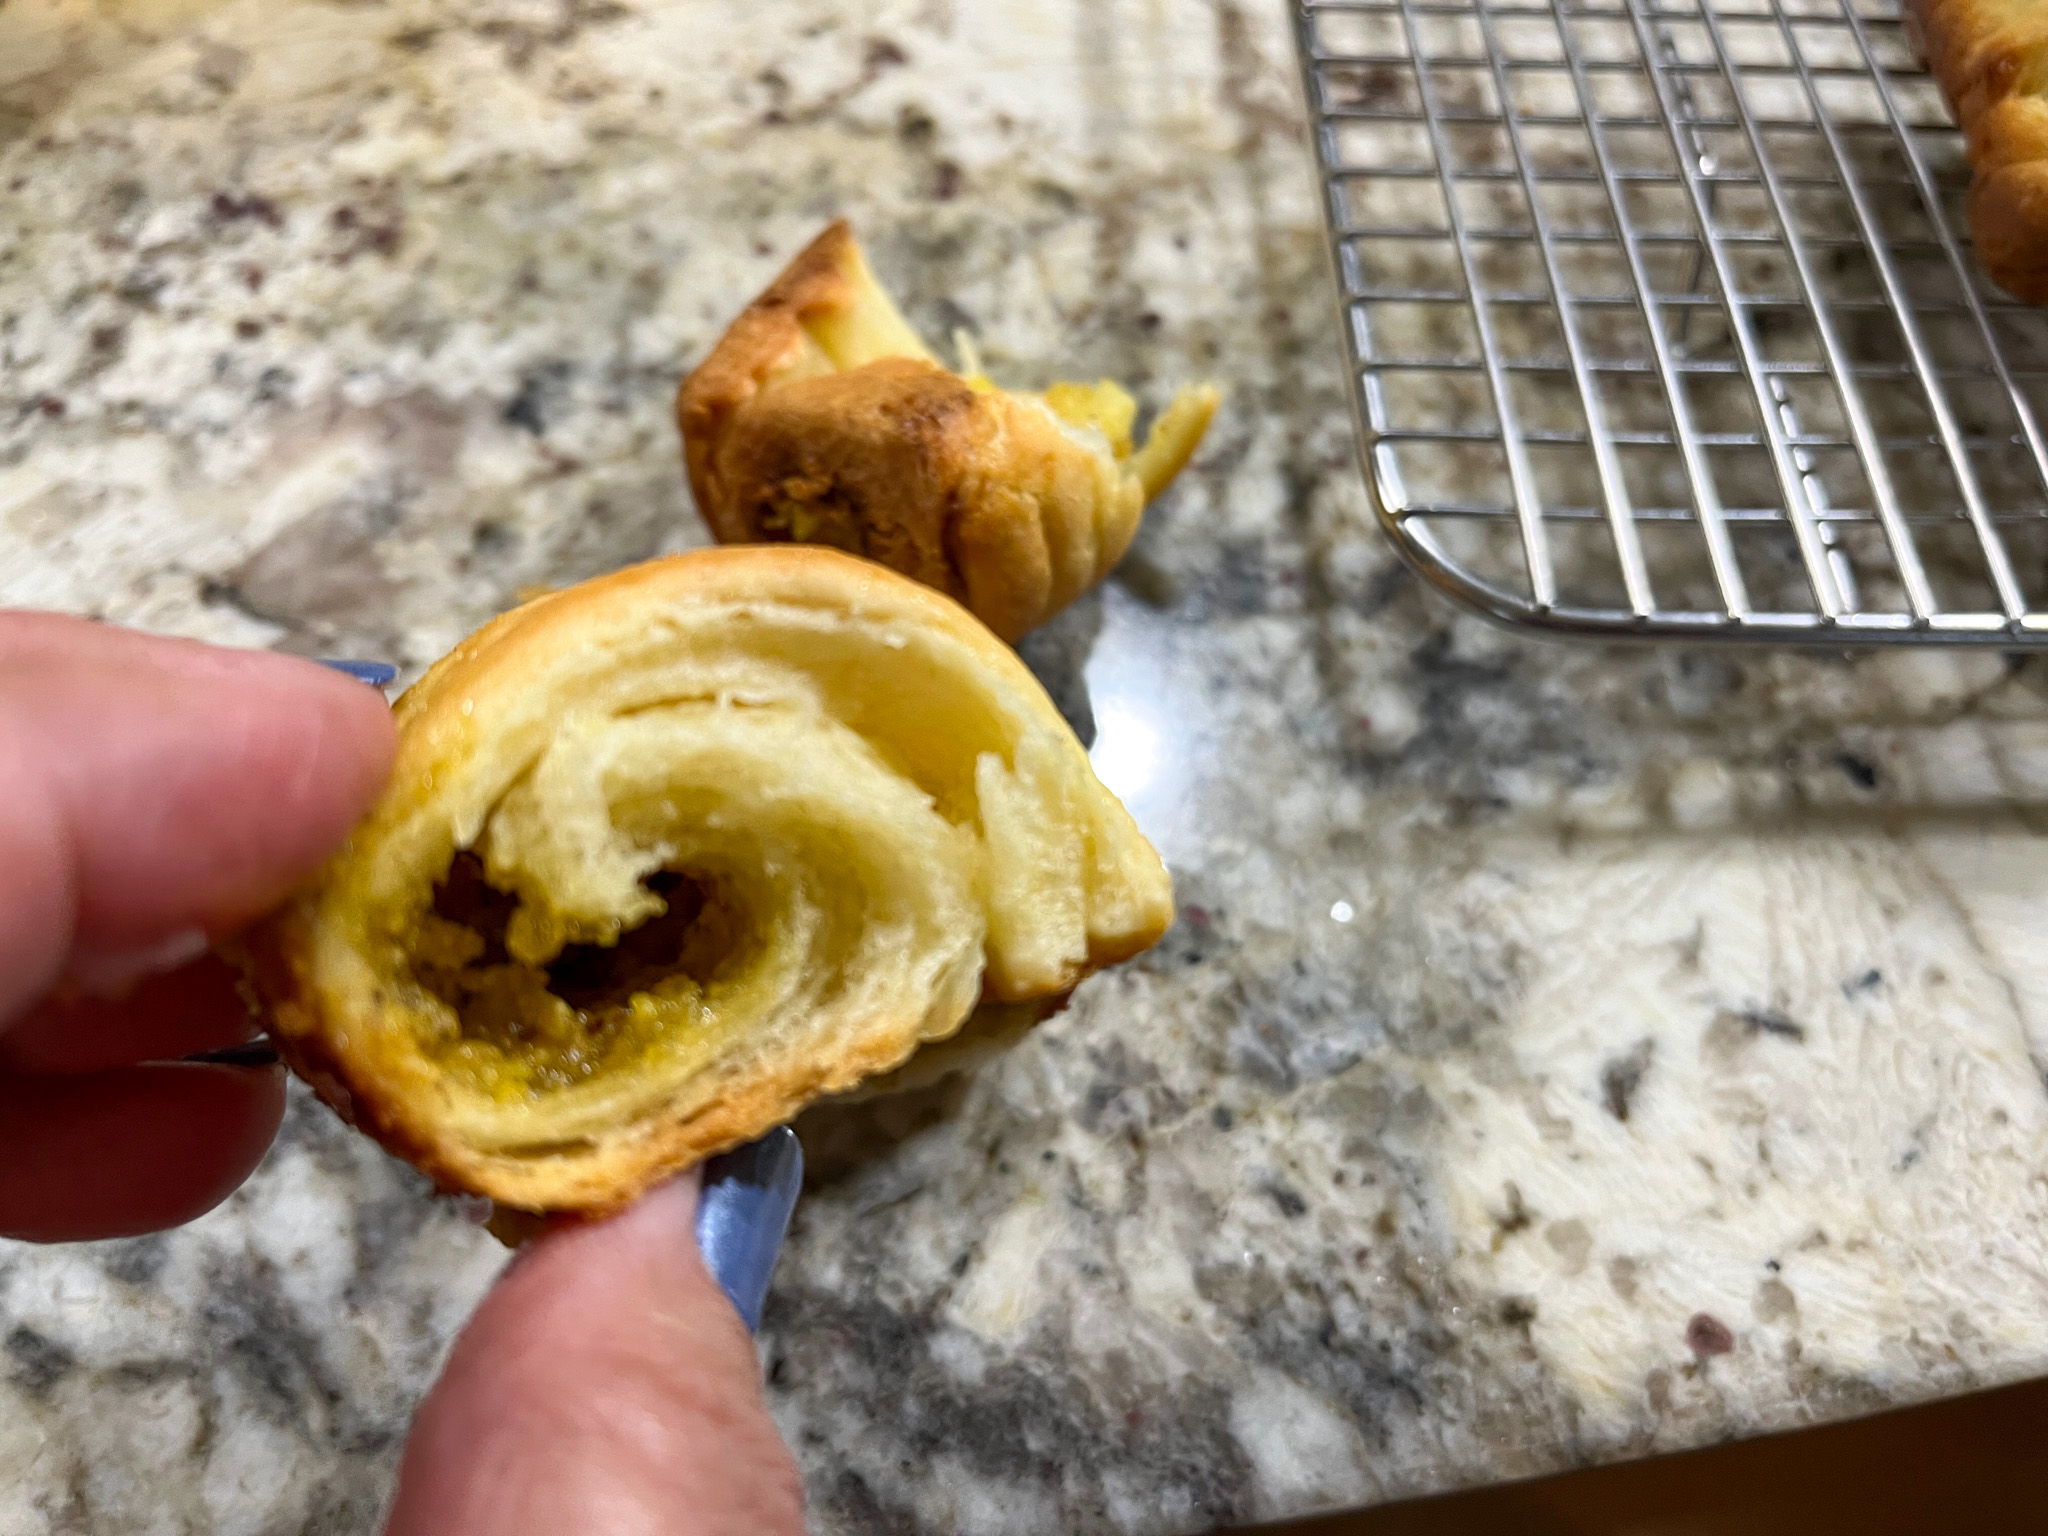
I went back to a favorite recipe to make brioche dough, found in Helen Fletcher’s blog Pastries Like a Pro (click here to retrieve it). After the overnight proofing in the fridge, I took 60g amounts and shaped as little rolls, enclosing a tasty pistachio filling.


BRIOCHE ROLLS WITH PISTACHIO FILLING
(from Helen Fletcher and The Bewitching Kitchen)

for the dough, click here

for the filling:
3/4 cup granulated sugar
1/4 cup unsalted butter, at room temperature
1/8 teaspoon salt
1 large egg white
1/4 teaspoon vanilla extract
1 + 1/4 cup pistachio flour

In a medium bowl, mix together the granulated sugar and butter with a wooden spoon or rubber spatula until combined. Mix in the salt and egg white (reserve the egg yolk for the egg wash), and then add the vanilla extract. Stir in the pistachio flour. Place in a large piping bag and reserve.

To shape the rolls: grab 60g portions of the dough, still cold from the fridge and roll as a rectangle so that the shorter dimension will fit in your baking pan of choice. Cut small strands on 3/4 of the length as shown in the pictures below. Add the filling to the top and roll it to close. Place in your baking pan and let it rise covered loosely for 1 hour to 90 minutes. Brush the surface with the egg yolk reserved, and bake at 375F for 20 to 25 minutes, until golden brown.

ENJOY!

to print the recipe, click here

Comments: I saw this cool shaping technique over at Instagram in the page of Chef Antonis, from Greece (click here to visit his page. Worked like a charm with this brioche dough, I intend to try other shaping methods in the future.

The picture above is slightly out of focus, but when I noticed it was too late and I did not want to cut another one, as they were to be donated later that day. The dough has the right amount of sweetness, and the pistachio cream complemented it well. I highly recommend you play with this recipe and come up with new combinations of flavors and shaping.

Once again, a huge thank you to Helen for her great method to make brioche dough!

ONE YEAR AGO: Shrimp with Pickled Jalapeños and Broccoli

TWO YEARS AGO: Sticky Spicy Pork Over Golden Rice

THREE YEARS AGO: Mini-Pullman Sourdough Bread

FOUR YEARS AGO: Gibassier

FIVE YEARS AGO: Sundried Tomato Twist Bread

SIX YEARS AGO: And now for something completely different….

SEVEN YEARS AGO: Parsnip, Coconut, and Lemongrass Soup

EIGHT YEARS AGO: In My Kitchen, October 2016

NINE YEARS AGO: Paleo Moussaka

TEN YEARS AGO: In My Kitchen, October 2014

ELEVEN YEARS AGO: In My Kitchen, October 2013

TWELVE YEARS AGO: Crimson and Cream Turkey Chili

THIRTEEN YEARS AGO: Taking a break from the nano-kitchen

FOURTEEN YEARS AGO: Chocolate Chip Cookies

SAVORY CREPES FOR A LIGHT DINNER

When I lived in Paris, I had crepes often. Once back in the US I made them at home every once in a while. However, I am the first to admit, not often enough. It is such a simple meal to put together, and yes, it can be light if you don’t go overboard on cream sauces and cheese. Our version is quite austere, so feel free to change it to your liking.

SAVORY CREPES
(from The Bewitching Kitchen)

1 cup milk
2 eggs
2 tablespoons olive oil
salt and pepper to taste
dash of nutmeg
1 cup all-purpose flour

fillings:
sauteed mushrooms
ham
cheese
tomatoes

To a blender, add all ingredients for the crepes except the flour. Blend for a couple of minutes, then add the flour and blend again until smooth. Place it in the fridge for 2 hours if you have the chance.

Pour 1/3 cup batter on a non-stick crepe pan (or small skillet), and cook on both sides. I like to brush a little oil before the first crepe, and work carefully with the flame to cook them to a light brown without browning too much. Place the crepes over a plate separated by parchment paper until time to assemble them. They can sit in the fridge for hours or even overnight.

Place a crepe on a surface, add your fillings to half the area, fold the other half over, then fold again to form a sort of triangle. Bake in a 350F oven for 10 minutes.

ENJOY!

to print the recipe, click here

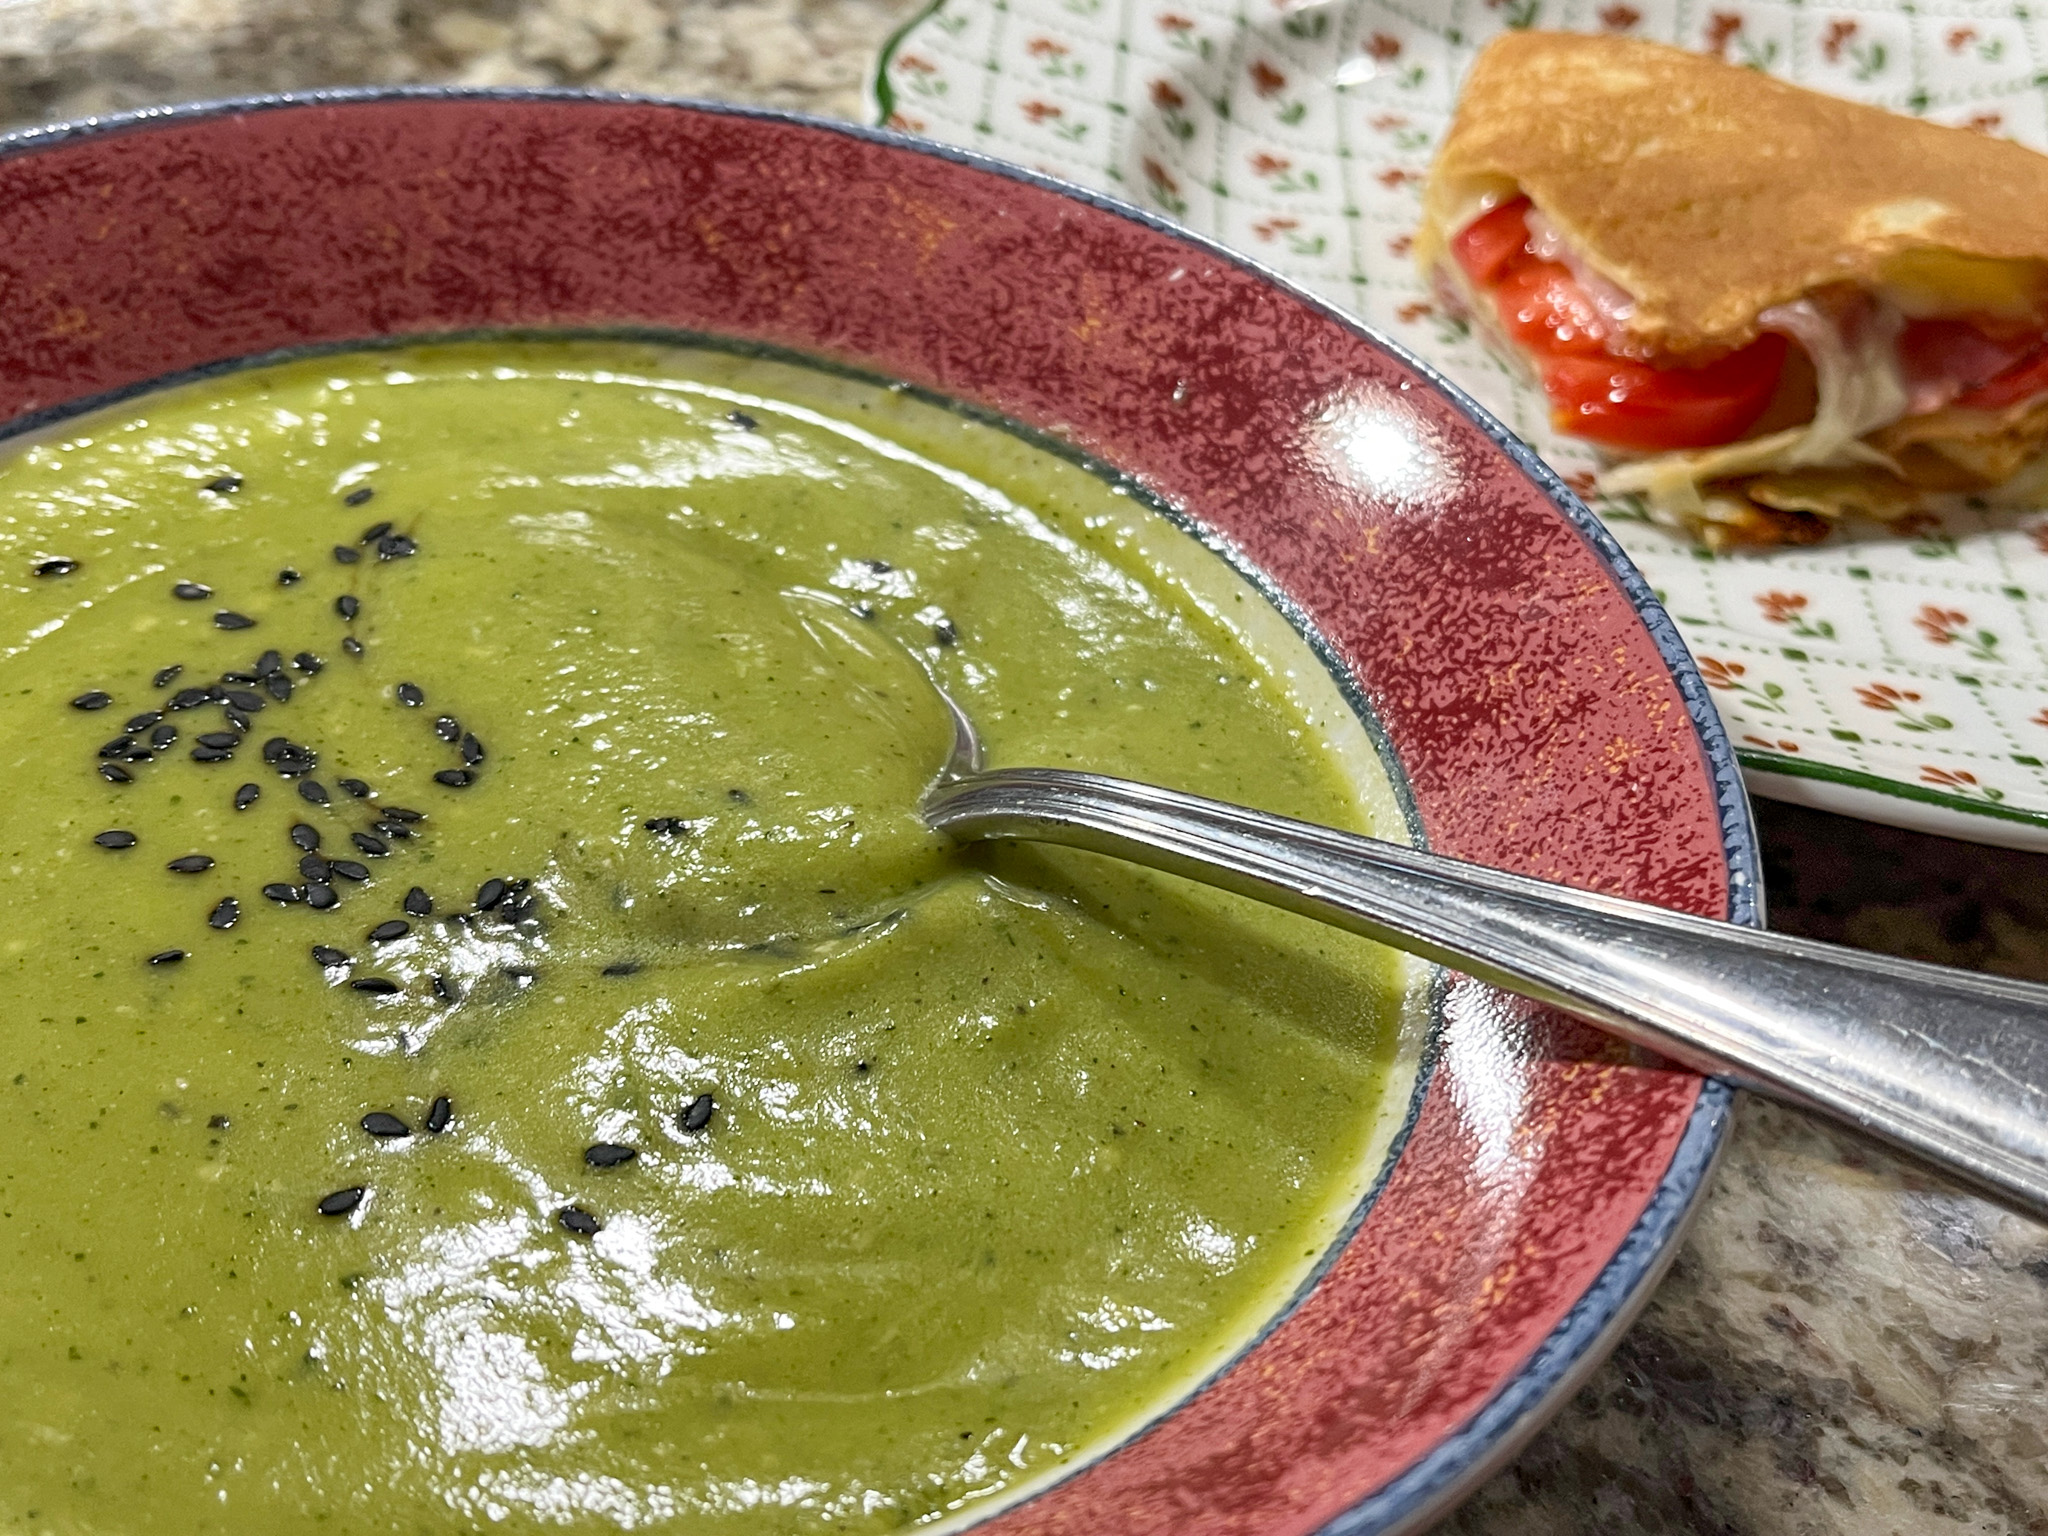
Comments: With this meal, we’ve decided that crepes will be part of our regular rotation. The batter can actually sit in the fridge for a day or so, making it even simpler to get them going. The possibilities for fillings are endless, as you can imagine. Salmon with cream cheese and dill, sautéed shrimp, chicken breast in a cream sauce. We will quite likely stick with our versions, and serve a little something on the side. Like this delicious zucchini-sesame soup

And of course, the icing on the cake…. my lunch next day!!!!

ONE YEAR AGO: My First Video Tutorials

TWO YEARS AGO: Citrus and Herbs Roasted Chicken Thighs

THREE YEARS AGO: Springtime Piped Flower Macarons

FOUR YEARS AGO: Charcoal Sourdough

FIVE YEAR AGO: Smokin’ Hot Meatloaf and Homemade Ketchup

SIX YEARS AGO: Ispahan Macarons

SEVEN YEARS AGO: Banana Bread with Espresso Glaze

EIGHT YEARS AGO: Slow-Cooker Carnitas & Paleo Planet Cookbook Review

NINE YEARS AGO: The Making of a Nobel Reception

TEN YEARS AGO: Fennel Soup with Almonds and Mint 

ELEVEN YEARS AGO: Green Curry Pork Tenderloin

TWELVE YEARS AGO: Farfalle with Zucchini and Ricotta

THIRTEEN YEARS AGO: Slow-baked Salmon with Lemon and Thyme

FOURTEEN YEARS AGO: Hoisin Explosion Chicken

APRICOT CRUMB COFFEE CAKE

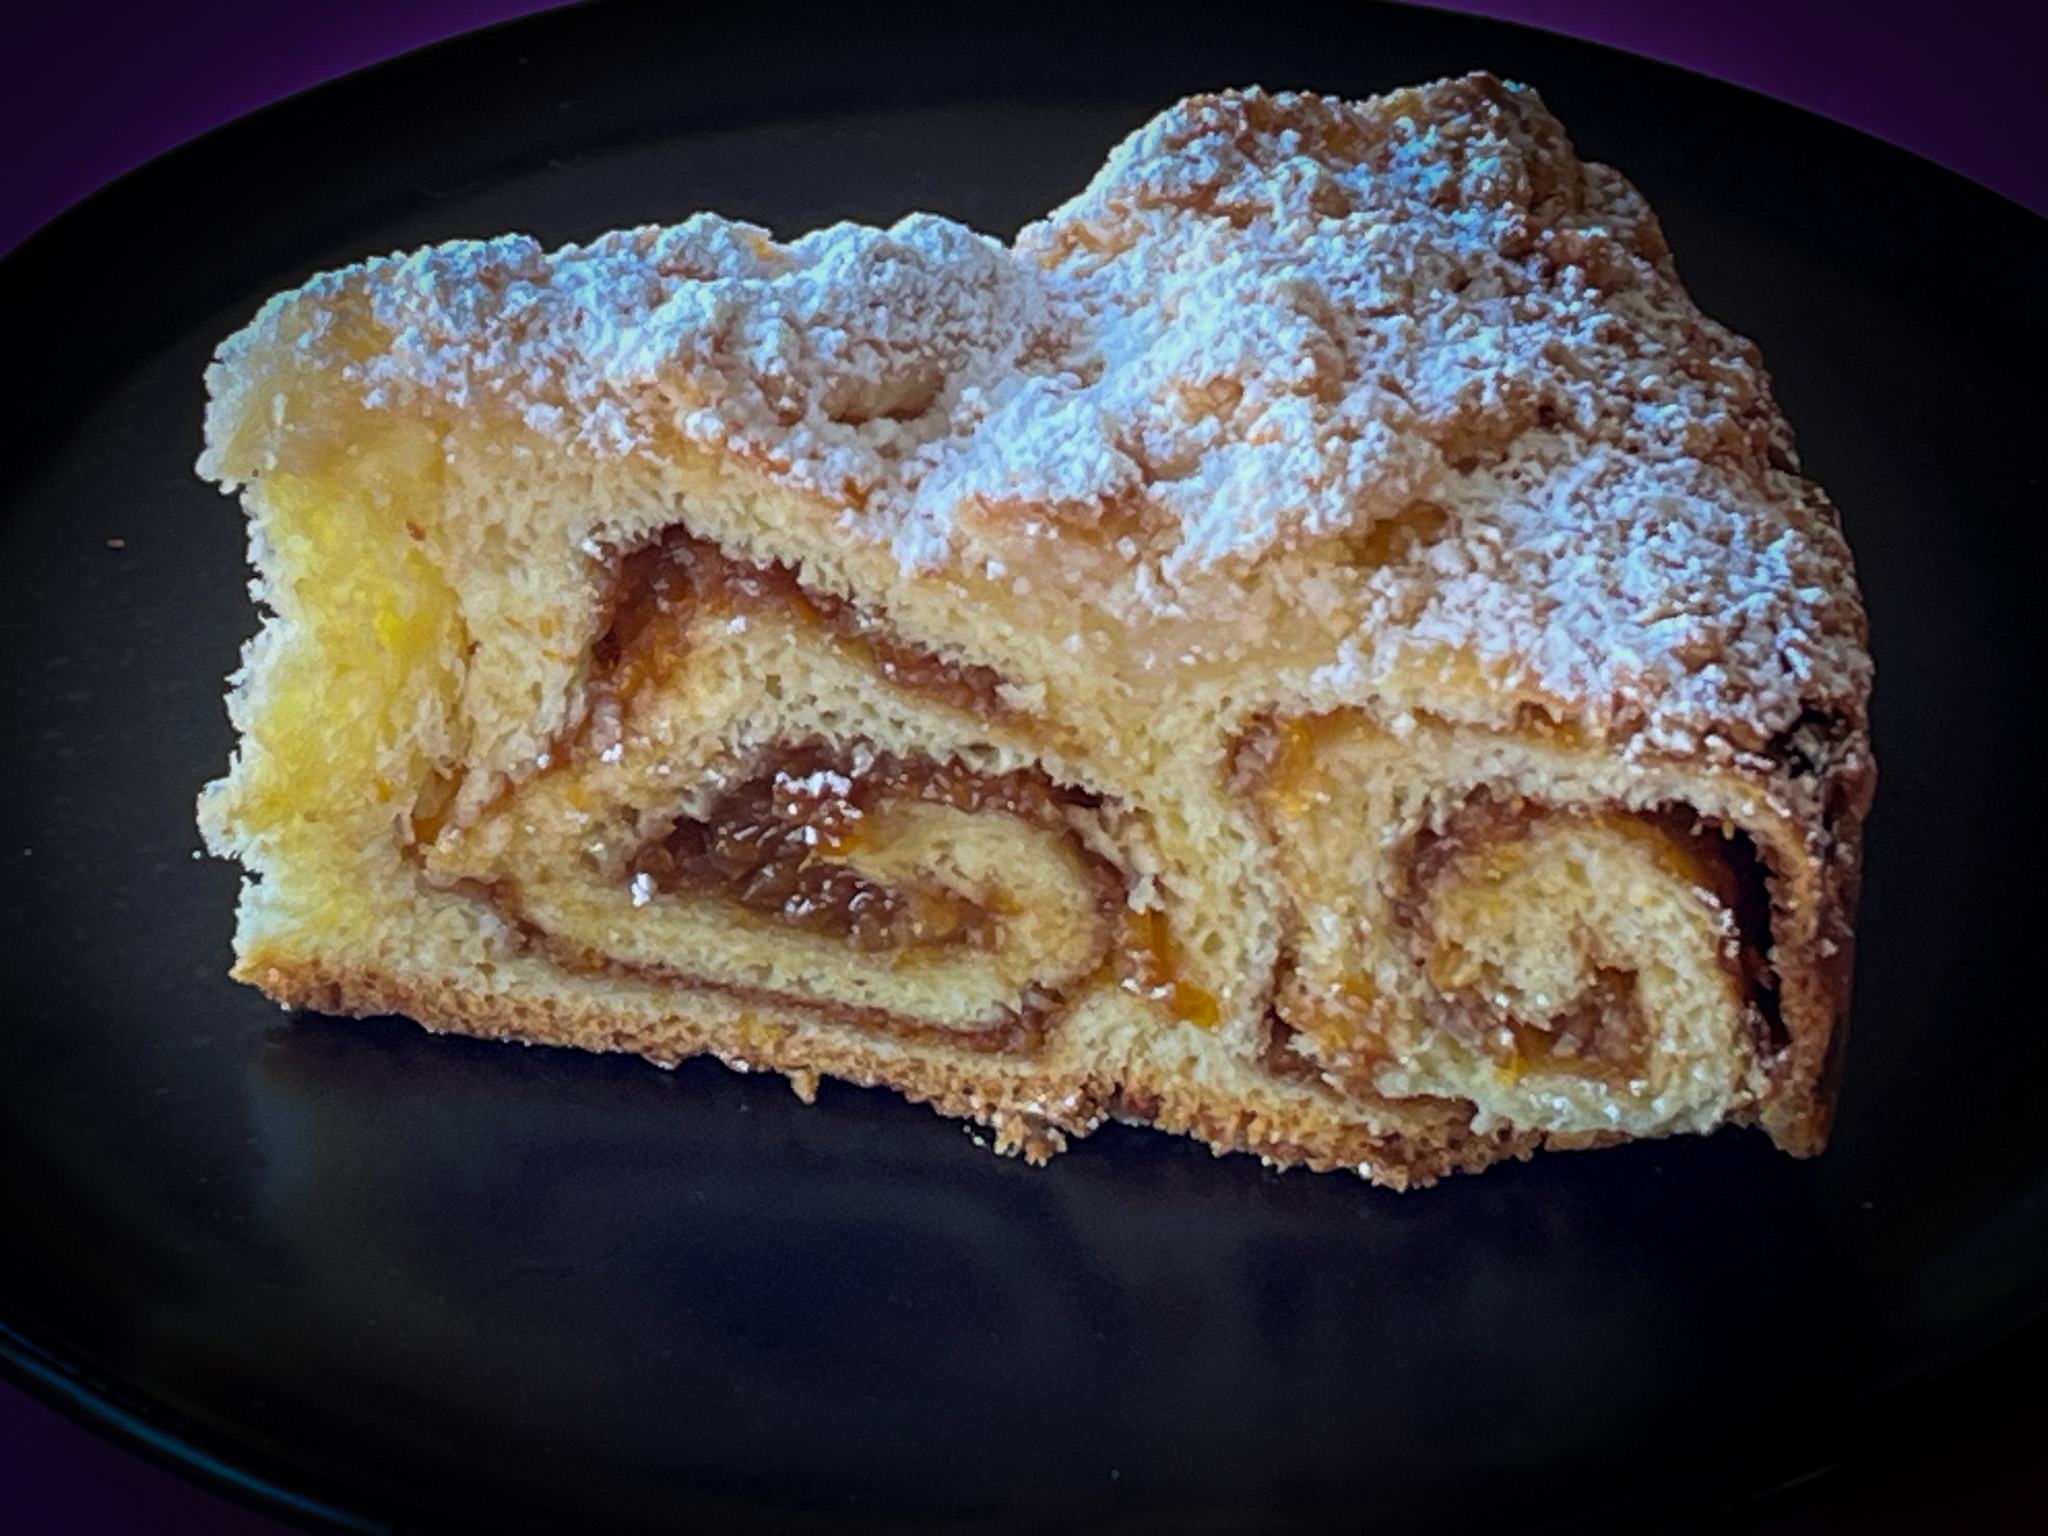
Is it a cake? Is it a sweet bread? Is it heaven on a plate? Yes to all! Another amazing recipe from Helen Fletcher, this is a bit involved but absolutely worth it… Slicing through it to reveal the coiled pattern inside is just too cool!

APRICOT CRUMBLE COFFEE CAKE
(from Helen Fletcher’s Pastries Like a Pro)

¾ cup unsalted butter (170 grams)
1 teaspoon active dry yeast
3 tablespoons warm water
Pinch granulated sugar
2 ¼ cup bread flour (315 grams)
1 ½ tablespoons granulated sugar
½ teaspoon salt
3 large eggs, room temperature
¼ cup half and half (or heavy cream)

Filling
¾ pound dried apricots
1 cup water
5 tablespoons butter (75 grams)
½ cup powdered sugar (65 grams)
1 ½ teapoons vanilla
2 teaspoons cocoa

Almond Paste Crumb Topping
1 cup cake flour (125 grams)
½ cup almond paste (125 grams)
⅔ cup granulated sugar (130 grams)
½ cup unsalted butter (114 grams)

Assembly
1 large egg, well beaten

Make the brioche dough: Cut the butter into small pieces by cutting the stick in half lengthwise, the cutting it into half inch pieces. Place it back in the refrigerator to keep cold. Make a sponge by dissolving the yeast and pinch of granulated sugar in the 3 tablespoons warm water. Add 3 tablespoons flour from the measured amount of 2 ¼ cups flour. Stir together to completely mix the ingredients. Cover with film and set aside to double or more while preparing the rest of the ingredients.

In the processor bowl fitted with the steel blade, place the remaining flour, salt and sugar. Process 5 seconds to mix. Place the cold butter in a circle over the flour. Process the butter until it is indistinguishable, about 20 seconds. Scrape down and process about 5 seconds more.
Place the eggs in a circle over the dry ingredients, pour the half and half or cream over the eggs, and add the sponge, also in a circle. Process approximately 20 to 25 seconds until the ball which initially forms breaks down into a creamy, evenly dispersed batter in the processor bowl. Do not stop processing until the batter is formed, as the motor may stall when you try to restart it. If the ball doesn’t break down, that’s fine as long as everything is mixed well.

Remove from the processor bowl and place in an ungreased bowl. Cover securely with plastic wrap and allow to rise until double in bulk about 2 to 2 ½ hours. Stir down and refrigerate overnight. Punch down and use as directed. It can stay in the refrigerator for up to 3 days before using.

for the filling:
Place the apricots and water in a small saucepan and bring to a boil. Reduce to a simmer and, stir frequently until most of the water is gone. Place the apricots and remaining ingredients, except the cocoa, in a processor bowl and process until smooth. Set aside to cool. Stir the cocoa in. This may be made a week ahead and stored in the refrigerator. Remove to room temperature before using.

for the crumb topping:
Place the flour and almond paste (either home made or bought) in the bowl of a processor. Process until the almond paste is indistinguishable. Add the sugar and butter and process until it begins to form crumbs. Switch to pulses and pulse only until large crumbs form. Remove them to a bowl and refrigerate until needed.

To assemble the coffee cake:
Spray a 9×3″ cheesecake or springform pan with a non-stick baking spray. Set aside.
Remove the brioche from the refrigerator, punch down, pat into a rectangle on a lightly floured surface and roll into a 20×11 inch rectangle so the long horizontally in front of you to make rolling up easier.
Spread the filling evenly over the brioche within ½” of the edges. Roll up tightly from the 20″side and pinch the seam securely together. Roll and gently stretch it until it is 30″ long. If it is very soft at this time, coil it up on a parchment line baking sheet and chill to firm up. Do not let it freeze.

Starting in the middle of the pan, coil the roll around towards the outer edge of the pan. Press it down to flatten and fill the pan. Cover with a towel and let rise until doubled in bulk. Because everything is cold, this could take 4 to 4 ½ hours to rise.

Heat the oven to 375F. When the coffee cake is full risen, brush it with the beaten egg and distribute the almond paste crumbs evenly over the brioche. Bake for 45 to 55 minutes until the top is browned. A tester is difficult here because the filling stays moist and clings to the tester. If the top begins to brown too quickly, tent it with foil. Cool until barely warm and release the cake. Dust with powdered sugar to serve.

ENJOY!

to print the recipe, click here

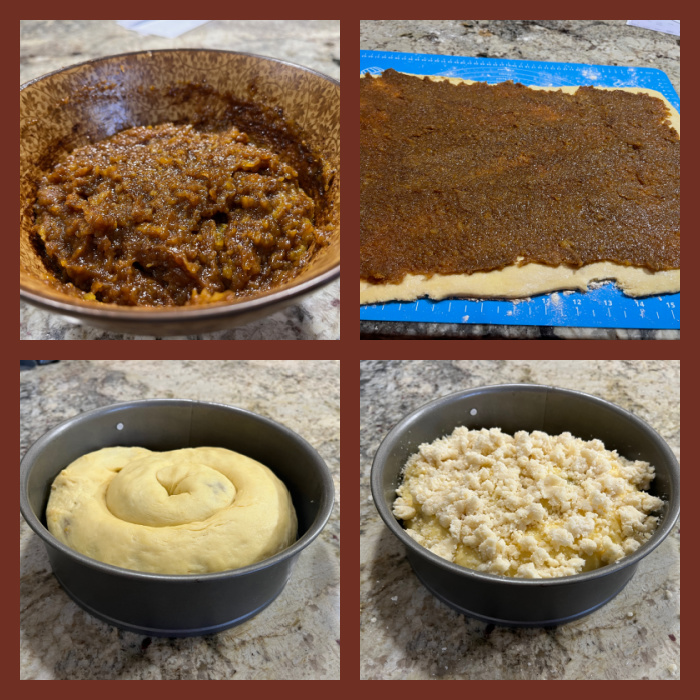
Comments: Helen’s method to make a brioche in the food processor is something I’ve been meaning to try for the longest time, and it works so well, I will keep it as my method of choice from now on. It considerably speeds up the preparation of the dough, and you cannot beat the texture. A pleasure to work with. I could have done a better job keeping the coil leveled on all sides of the pan, if you look at the bottom left photo of the composite above, you’ll see that my coil got a bit lopsided. Other than that, no issues. I highly recommend you visit Helen’s site (click here) because she goes over every little step with pictures and you get a better idea of what to expect as you make this recipe.

The crumb topping is irresistible, so I advise you to stop nibbling on it and use it exclusively to top the cake. I made my own almond paste, following Helen’s detailed recipe, and it turned out perfect! I used her simple syrup method. You can read her post about it clicking here. My little concoction looked exactly like hers – or the ones you can buy at the store – but my picture was badly out of focus, so you will have to take my word for it. I loved making this crumb cake, now I dream of variations, maybe some black sesame paste in the filling could be fantastic also!

ONE YEAR AGO: Hawaij, Three Ways

TWO YEARS AGO: A Most Painful Goodbye

THREE YEARS AGO: Masala Clay Pot Chicken Thighs

FOUR YEARS AGO: Happy Swirls Tonka Macarons

FIVE YEARS AGO: Chocolate Tartlets with Honey-Caramel Filling

SIX YEAR AGO: Zucchini Soup with Tahini

SEVEN YEARS AGO: Black Sesame Macarons

EIGHT YEARS AGO: Fine Tuning Thomas Keller

NINE YEARS AGO: Cauliflower Tortillas

TEN YEARS AGO: Majestic Sedona, Take Two

ELEVEN YEARS AGO: Secret Ingredient Turkey Meatballs

TWELVE YEARS AGO: Swedish Meatballs and Egg Noodles

THIRTEEN YEARS AGO: Italian Easter Pie

FOURTEEN YEARS AGO: Black Olive Bialy