BLACK SESAME JAPANESE MILK BREAD

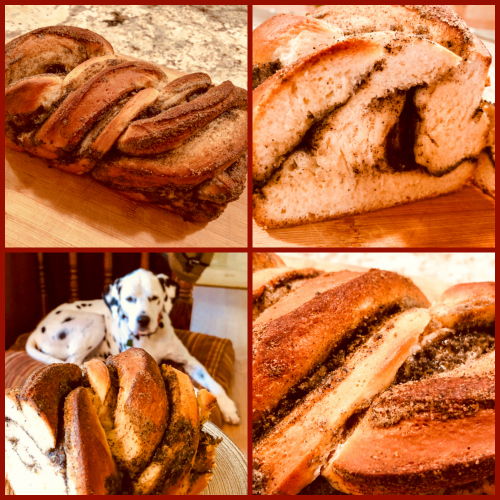
Have you heard of the tangzhong method to make bread? It is a Japanese technique that cooks part of the flour before incorporating it into the dough, causing the starch to suffer a change in structure that retains water more efficiently, so the bread will be very soft and have a longer shelf life. This recipe was on my friend’s Dana blog and I jumped on it almost immediately because the way she spoke about the black sesame paste made me realize I needed that in my life. Badly. The bread ends up with airs of a showstopper creature, but it’s really not complicated to make. And the flavor? My gosh. You need that black sesame paste in your life also.

BLACK SESAME JAPANESE MILK BREAD
(slightly modified from Wakeandbakemama)

for the black sesame paste (can be made the day before):
½ cup toasted black sesame seeds, finely ground
½ cup granulated sugar
½ cup unsalted butter, softened

for the tangzhong:
6 tablespoons
water
2 tablespoons bread flour

for the dough:
1/4 cup whole milk
1 + 1/2 teaspoons active dry yeast
320 grams bread flour, plus up to 30 grams more
1 teaspoon salt
1/4 cup sugar
1/4 cup heavy whipping cream
1 tablespoon powdered milk (optional)
2 eggs, 1 for the dough and 1 for the egg wash
2 tablespoons butter, softened
splash of milk or water, for the egg wash

Make the sesame paste.Finely grind the black sesame seeds in a spice grinder. Add the sugar and softened butter. Pulse to make a paste. Transfer to a small bowl, cover, and set aside. You can refrigerate this in advance. Before using, bring to room temperature to ensure it has a spreadable consistency.

Make the tangzhong. In a small saucepan, whisk together 6 tablespoons of water and 2 tablespoons of bread flour until no lumps remain. Heat the mixture over medium-low heat, whisking constantly. It should thicken to a gel-like consistency after just a few minutes. As soon as lines appear in the mixture when stirred, remove it from the heat and transfer it to a small, clean bowl. Let cool to room temperature.

Make the dough. Heat the milk briefly to just above room temperature, about 110° F or lukewarm to the touch. Sprinkle the yeast over the milk and set it aside for 5 minutes for the yeast to activate.

In the meantime, whisk together 2 1/2 cups of the bread flour, salt, and sugar in a large bowl. In a smaller bowl or a measuring cup, whisk together the tangzhong, cream, milk powder (is using), and one egg.

Add the yeast mixture to the wet ingredients, and whisk gently, just to incorporate. Make a well in the dry ingredients and pour in all of the wet ingredients. Stir with a wooden spoon until the mixture forms a loose, shaggy dough, then switch to using your hands. Knead for 4 to 5 minutes, or until the dough forms a semi-smooth ball. The dough will be quite sticky — sprinkle the extra 1/4 cup flour, a tablespoon or so at a time, over the dough and your hands as you knead to keep it from sticking too much. I usually use at least 2 tablespoons and often up to the full amount, but you may not need it all.

Add the butter to the dough, one tablespoon at a time, kneading after each addition. Add the second tablespoon of butter only after the first has been evenly incorporated. The dough will be slippery and messy at this point, but just keep kneading and it should eventually form a soft and pliable dough that’s easy to work with. Knead for an additional 4 to 5 minutes, or until the dough becomes smooth and elastic. Place the dough in a large bowl and cover the bowl with plastic wrap or a damp towel. Let rise for 1 to 2 hours, or until doubled.

Once the dough is doubled gently deflate the dough and roll it out as a large rectangle. Spread the black sesame paste all over it, leaving a small border free of paste. Roll the dough from the long side, forming a cylinder, with the seam down. Using a sharp knife, slice the dough almost all the way through, and open the halves, exposing the center.  Twist the two strands around, making sure the inner layers are facing up.  Carefully drop it inside a loaf pan (9 x 5 in works fine), and allow it to rise covered for another hour, hour and a half.  Meanwhile, heat the oven to 350F.

Whisk your second egg with a splash of milk or water, and brush the egg wash over the dough. Bake for about 30 minutes, or until golden-brown on top. Internal temp should be 200 degrees F. Let it cool completely before slicing.

ENJOY!

SOURDOUGH FOUR-PLAY

October 16th is World Bread Day!

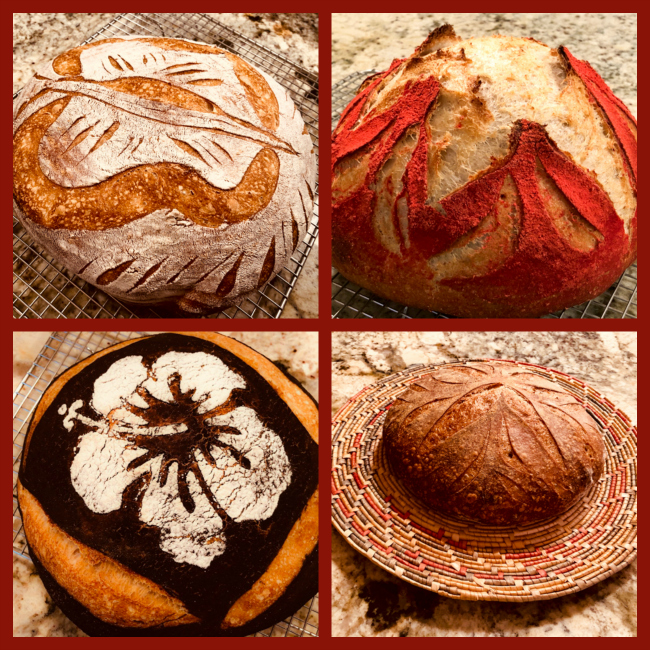
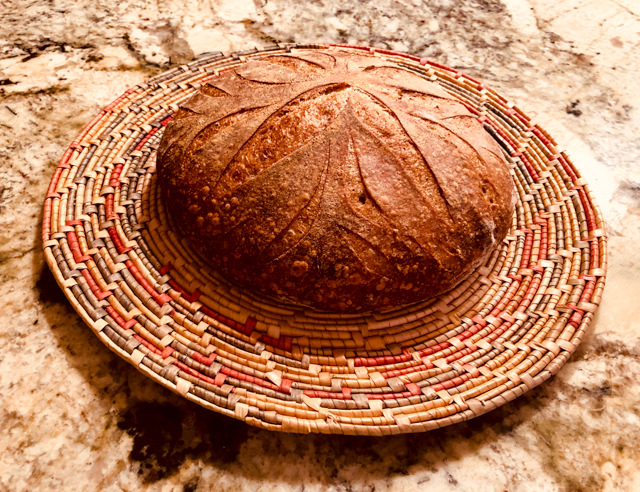
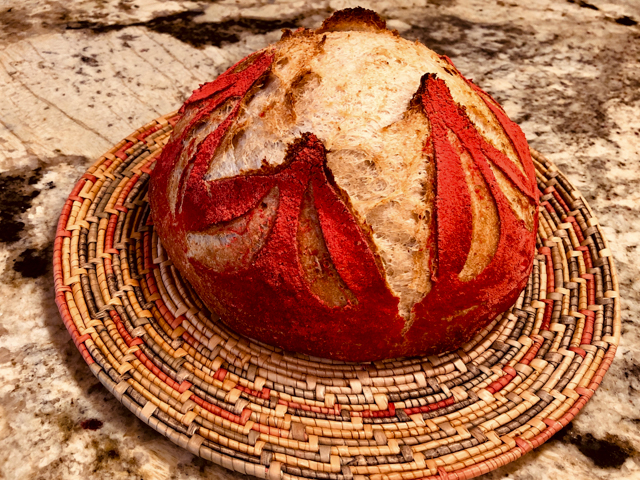
Sourdough four-play… I should stop giggling now.  A sombrero, a butterfly, a flower and a flaming red loaf were recent playful adventures in our kitchen. The butterfly is still a work in progress, haven’t managed to do it like I imagined, but I have fun trying and a few less than ideal bakes here and there won’t stop me.  All breads were made with the same general technique, but slightly different flour composition.

BASIC SOURDOUGH LOAF METHOD
(from the Bewitching Kitchen)

Dissolve the starter in the water in a large bowl, mixing well until it is well-dispersed. Add the flours and salt, mix with your hands or with a wooden spoon until it forms a shaggy mass.

After 20 minutes, do a minimal kneading, about 10 times or so until the dough becomes smooth. You will now allow the dough to ferment for 3.5 to 4 hours at room temperature, folding the dough every 40 minutes or so. Ideally try to have 4 cycles of folding, if the dough seems a bit too “weak”, incorporate one more cycle of folding.

Let the dough relax for about 30 minutes, and proceed to shaping as a round loaf.

Place inside a banetton well dusted with flour and keep it in the fridge overnight, from 8 to 12 hours.

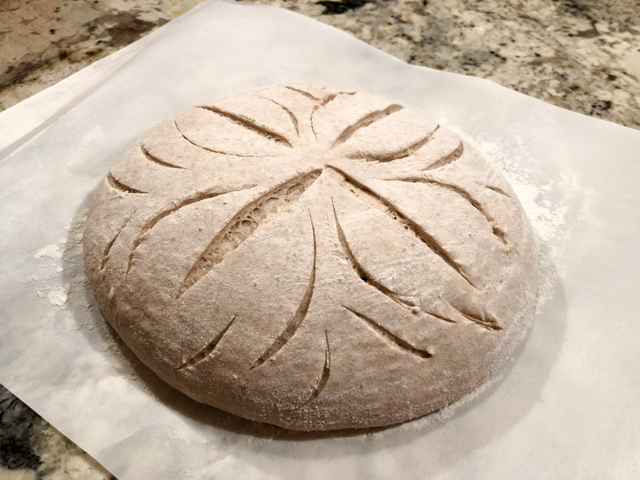
Next morning, heat the oven to 450F.  Invert the dough on a piece of parchment paper and slash it or use a stencil.

Bake at 450F for 45 minutes, preferably covered for the first 30 minutes to retain steam.  Cool completely over a rack before slicing.

Below I give you the composition of each of the loaves.

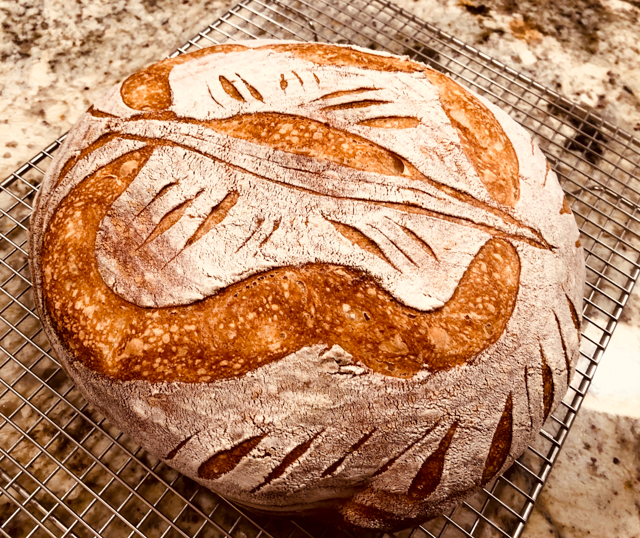
SOMBRERO BREAD

This is a loaf that goes in the direction of a hearty Poilane type bread, but considerably simplified.

100 g active sourdough starter at 100% hydration
390g water
250g whole-wheat flour
200g bread flour
50g rye flour
10g salt

After overnight in the fridge, the dough was slashed in a simple pattern.


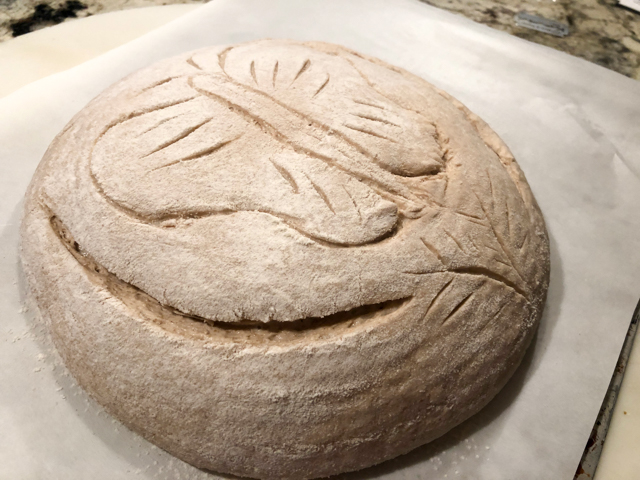
BUTTERFLY BREAD


100 g active sourdough starter at 100% hydration
390g water
250g whole-wheat flour
250g bread flour
10g salt

After overnight in the fridge, dough was slashed to form a butterfly design. Apologies to all beautiful Lepidoptera.


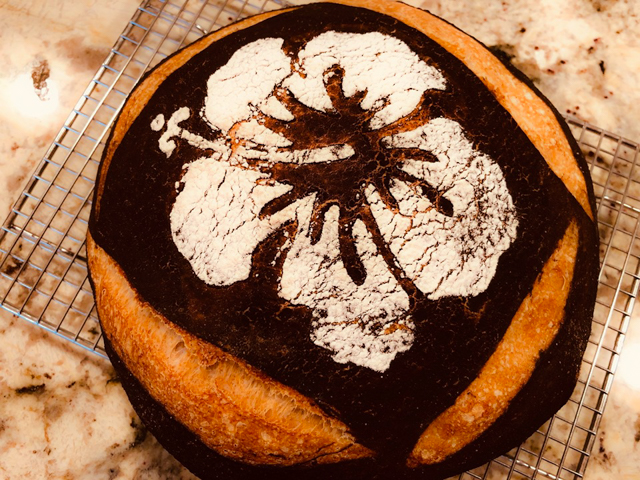
HIBISCUS FLOWER BREAD

150 g active sourdough starter at 100% hydration
585g water
675g bread flour
75g spelt flour
15g salt
cocoa powder and water to form a paste

After overnight in the fridge, loaf was brushed with cocoa paste, then a flower stencil placed on top, and a light dusting of white flour made the design.

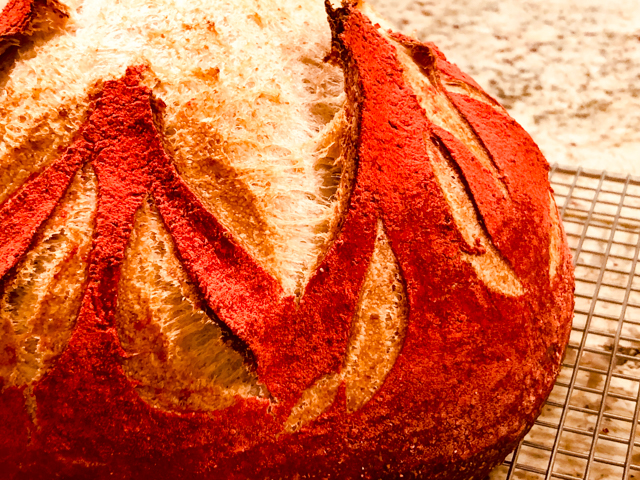
FLAMING RED SOURDOUGH

150 g active sourdough starter at 100% hydration
390g water
475 g bread flour
25g rye flour
10g salt
powder red food dye + all-purpose flour

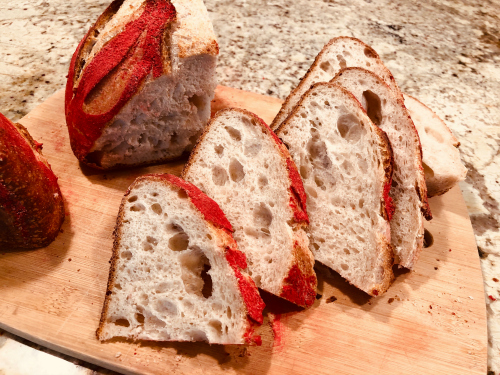
After overnight in the fridge, the top of the loaf was dusted with a mixture of flour and red food dye.  A simple scoring (similar to sombrero bread) was applied before baking.  The dough had a very impressive oven spring, probably because I fed the starter with rye flour a couple of times and also increased the amount of starter in the dough.

I loved all these loaves, but I guess my favorite is the Flaming Red Sourdough because it looked so impressive as the bread exploded through the scoring. The small amount of rye gave the bread enough complexity without making it heavy. The only issue is the food dye rubbing off in the fingers a bit.  I might consider other ways to dye the surface, but it’s hard to beat the intense red tone given by the powder.

This method of preparing the dough the day before is hard to beat. If you are spending your Saturday afternoon at home, it’s really no big deal to make it. No need to be precise with the timing for folding the dough, just make sure you give it a minimum of 3 and a half hours of bulk fermentation. Next morning, turn the oven on, plan your design, and don’t forget, no need to heat the pan you’ll use to bake the bread in.  Free yourself from those nasty oven burns… Into a cold pot the dough goes, and I promise you it will all be fine!

ONE YEAR AGO: World Bread Day 2018

TWO YEARS AGO: Slow-Roasted Tomatoes

THREE YEARS AGO: Spicy Cotija and Black Olive Sourdough

FOUR YEARS AGO: Apple Cinnamon Oatmeal Cake

FIVE YEARS AGO: Sourdough Rye Bread with Flaxseeds and Oats

SIX YEARS AGO: PCR and a Dance in the Mind Field

SEVEN YEARS AGO: October 16: World Bread Day

EIGHT YEARS AGO: The US Listeria Outbreak 2011

NINE YEARS AGO: 36 Hour Sourdough Baguettes

TEN YEARS AGO: October 16 is World Bread Day


BRITISH BAPS, A TECHNICAL CHALLENGE

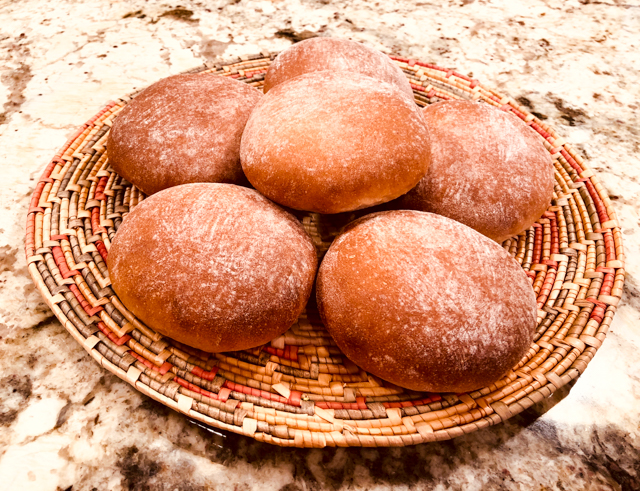
Baps. Very popular in the UK, these are what on this side of the pond we know as rolls or buns. When I was in London, I realized that breakfast baps are all the rage, you slice one of these babies, and add the usual suspects: bacon & eggs, sausage, ham & cheese, or whatever you crave early in the morning. I don’t eat breakfast, but had to try one of these classics at lunch during my visit. Soft, delicate, quite delicious. And as you can see from this post, pretty simple to make.  I modified a bit a recipe from Paul Hollywood to add a touch of whole wheat. Just because. These were the technical challenge last week in the Great British Bake Off. Some of the contestants committed the shameful sins of underbaking or underproofing, but most did pretty good. They also had to make a veggie burger pattie to go with the buns, so the challenge also involved sizing baps and filling appropriately. That is not as easy as one might think, as the patties had to be made while the dough was proofing. Great fun was had by all. Or almost all…

BRITISH BAPS
(adapted from Easy Online Baking Lessons)

350 g bread flour
25 g whole-wheat flour
7 g salt
7 g fast-acting yeast
30 g sugar
30 g butter
250 mL water (I used a little less)

Add all ingredients (but hold back a bit of the water, maybe 25 mL or so) to the bowl of a Kitchen Aid type mixer and knead on low-speed for about 8 minutes. If needed, add the rest of the water.

Place in a large oiled bowl and ferment at room temperature for about 90 minutes.

Punch the dough down (delicately) and divide it in 8 equal portions (about 85 g each). Roll each as a tight little bun. Place each roll on a mat lightly coated with flour and flatten it in one direction with a rolling pin, making it into an oval shape. Turn it 90 degrees and do the same. You will end up with a round, more flat type of roll.  Do the same for all other buns, then place at room temperature covered with a cloth for 30 to 45 minutes, while you heat the oven to 425 F.

Coat the buns lightly with flour, bake for 12 to 15 minutes. Remove to a rack to cool completely.

ENJOY!

to print the recipe, click here

Comments: Even if you are not comfortable baking bread, I think this would be a very nice recipe to try. Yes, it was a technical in the GBBO, but a lot of the complexity in the show has to do with timing (pretty tight) and the preparation of the veggie burger component plus toppings as the dough rises. If you just tackle the bread and don’ worry about a timed deadline, it’s quite doable.

The bread has a tight but moist crumb, if made with white flour only will be even softer, but I like the more assertive taste that the whole-wheat offers. They freeze well, and defrost quickly, so it’s the perfect type of bread to have around.

ONE YEAR AGO: Japanese-Style Cupcakes with Cherry Blossom Icing

TWO YEARS AGO: Quick Weeknight Soups

THREE YEARS AGO: Sourdough Loaf with Cranberries and Walnuts

FOUR YEARS AGO: Sichuan Pork Stir-Fry in Garlic Sauce

FIVE YEARS AGO: Our Green Trip to Colorado

SIX YEARS AGO: Ditalini Pasta Salad

SEVEN YEARS AGO: Celebrate Wednesday with a Thai Seafood Curry

EIGHT YEARS AGO:  Post-workout Breakfast

NINE YEARS AGO: Semolina Barbecue Buns

TEN YEARS AGO: Lavash Crackers


FIVE STRANDED BRAIDED BREAD & A COOKBOOK REVIEW

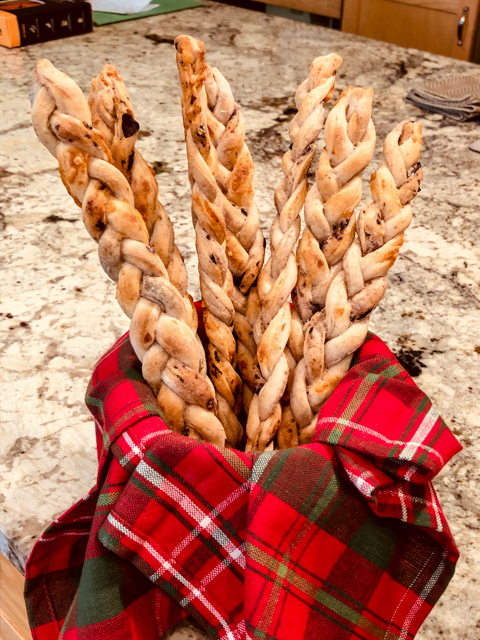
Braids, twists and elaborate knots fascinate me. I suppose it’s the repetitive pattern leading to elegance and serenity. Tying things together in harmony. When it comes to bread, going past the three-strand braid can be intimidating, but trust me, once you get the pattern going it is quite simple. A few months ago I was searching for videos on youtube to help me understand the process and found a gem of a cookbook: The Art of Braiding Bread, by Roberto von Krammer. His instructions are crystal clear and easy to follow.  I share with you my first attempt at a five-stranded braided bread.

FIVE-STRANDE BRAIDED BREAD
(adapted from The Art of Braiding Bread)

345 g bread flour
30 g sugar
26 g egg yolks
48 g whole eggs
26 g mild vegetable oil
110 g water
7 g salt
10 g instant yeast

Place all the ingredients in a Kitchen Aid type  bowl. Knead on first speed for 3 minutes until all the ingredients are thoroughly incorporated, then on second for approximately 5 minutes.

Ferment for 2 hours. The dough can also ferment overnight in the fridge. If you prefer to do that, allow it to sit at room temperature for one hour, then degas it gently by pressing it down, and place in the fridge. Press it down gently again two more times over a period of two hours.  A colder dough temperature makes it easier to form strands. The dough can be divided and shaped straight from refrigeration.

Pre-shape 5 round of dough and rest on an unfloured work surface, covered with plastic. When relaxed enough to be elongated without tearing, usually 10 to 15 minutes, roll out the strands and form the braids (process in the comments). Once braided, proof the loaves covered with baker’s linen and a sheet of plastic to prevent the formation of a skin.

Final fermentation after braiding: ½ to 2 hours at about 25 C.

Heat oven to 375 F. Before baking, thoroughly egg wash the surface of the loaves. If desired, sprinkle poppy or sesame seeds on top. Bake until golden brown and internal temperature is about 200 F, about 30 minutes.

ENJOY!

to print the recipe, click here

Comments:  With Mr. Krammer’s permission, here is the process to form a 5-stranded beta braid. First thing is to number the strands from left to right, then keep in mind that as the strand moves around, then new formation also gets numbered the same way, first strand to the left will be number 1, last one to the right will be number 5. If strand #5 jumps in between strand #1 and #2, it will become strand #2 in the new formation.

 Place #5 between #1 and #2

Move #1 between #3 and #4

Place #2 over #3 and #3 under #2 (twist)

End of cycle, repeat all over again until you reach the end of the bread.

By going through the process, you’ll end up with a beautiful 5-strand braid, that is then allowed to ferment until almost doubled in size.

I also made a Four-Braided Alpha loaf, and you can see that it generates a totally different look.

Now for the book. I could not believe how many different styles of braiding bread exist. From the number of strands used to the actual braiding, it is mind-blowing! You can use the basic dough for all of them, dividing the dough in the appropriate number of strands, and then deciding which method to follow. For each one Roberto provides pictures of EACH movement of the strand, plus the numeric pattern that you can memorize and repeat as you become more comfortable and experienced.

You will find several methods of braiding for 3, 4, 5, and 6 stranded loaves that go way beyond what you might imagine. Some braiding methods are challenging, but his instructions are so clear and the pictures of each step make it all doable.  I will definitely be challenging myself to the more complex styles, including braided round loaves, and breads that stack braids together.

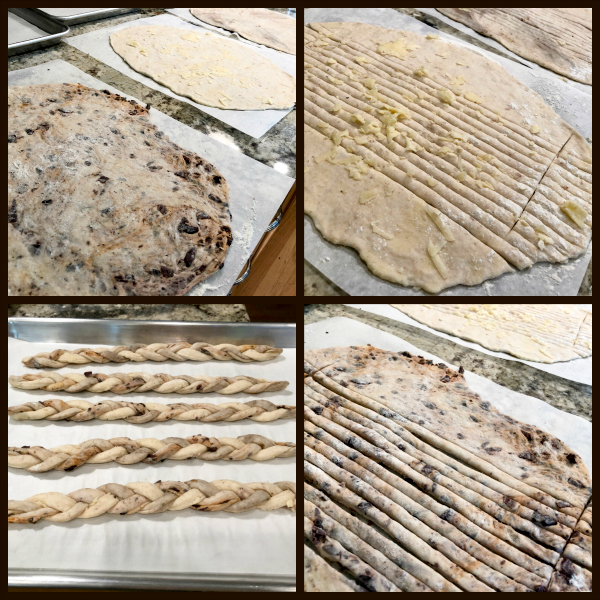
This composite photo shows a few examples of the many found in his book, which I highly recommend! Click on his name below the recipe title for buying info.

A braided bread never fails to impress because it is so festive, and of course you can use other types of dough, with chocolate, or even going into a savory territory. Don’t be intimidated, and have fun with it!

ONE YEAR AGO: Green Olive Salad

TWO YEARS AGO: Coffee Macarons Dressed up to Party

THREE YEARS AGO: Blogging Hiatus

FOUR YEARS AGO: Tomato Tatin

FIVE YEARS AGO: Headed to Colorado!   

SIX YEARS AGO: Farofa Brasileira

SEVEN  YEARS AGO: Thai-Inspired Pork Tenderloin

EIGHT YEARS AGO: A yummy Brazilian cake: Bolo de Fuba’

NINE YEARS AGO:  Summer’s Tomatoes

TEN YEARS AGO: Leaving on a jet plane… 

CURRY TURMERIC SOURDOUGH

A beautiful, golden loaf, with great flavor!

sallybr's avatarBewitching Kitchen

Bewitching Kitchen is a food blog and I like to keep it focused on the subject with only small detours into two passions of mine: science and fitness. I must say, though that a couple of recent posts by bloggers I follow echoed deeply inside me, so I share them with you. First, I invite you to read A Texan New Yorker’s take on chili. I must make that recipe in honor of a family I admire and already miss immensely. Then, please stop by Cecilia’s site, who just published a post called “I am an immigrant.”  While you are reading it, keep in mind that I am one, one who got her green card and naturalization through long, complex processes several years ago. Her article is a very well-written piece describing the pleasure and pain associated with leaving your home country and starting all over somewhere else. I firmly believe that we are stronger…

View original post 721 more words