THE SECRET RECIPE CLUB: CASHEW CHICKEN LETTUCE WRAPS

Drum roll please…..     This is my first anniversary as a member of The Secret Recipe Club!   One year!  Obviously, I was counting the days for this Reveal Day, and jumped on my assigned blog the very minute I got the email notification.  This month I am cooking from Loving Life, a fun blog hosted by Kirstin, the super busy Mom of two teenage daughters, who also home schools them.  I get tired just thinking about it.  The mystery is how does she find the time to cook and blog?   Superpowers?  Probably. I chose a recipe from her blog quite quickly, because it is one of the favorite dishes we used to order at a place called BJ’s in Oklahoma.  Light, refreshing, flavorful,  Phil and I would share that as an appetizer almost every single time, but I had never made it at home.  Great opportunity, which I grabbed right away!  😉

CASHEW CHICKEN LETTUCE WRAPS
(adapted from Loving Life)

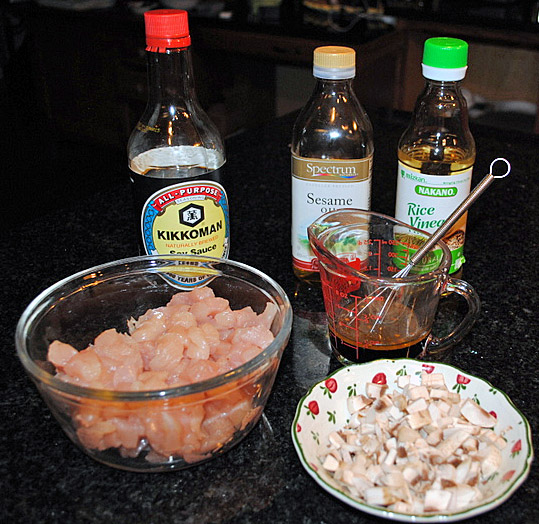
for teriyaki sauce:
2 Tbs. soy sauce
1 Tbs. rice vinegar
1 Tbs. brown sugar
1 tsp fresh grated ginger
1/8 tsp. cayenne pepper
1 tsp. Sesame oil

for chicken:
3/4 lb. chicken breast or tenders, diced in small pieces
6 green onions, finely chopped
1/2 cup diced baby-bella mushrooms
3/4 cup chopped cashews
1 tsp. soy sauce
canola oil
6-8 butter lettuce leaves

for topping:
2 carrots, peeled & julienned
1/2 Tbs. Sesame Seeds

Mix all sauce ingredients, making sure the brown sugar dissolves.

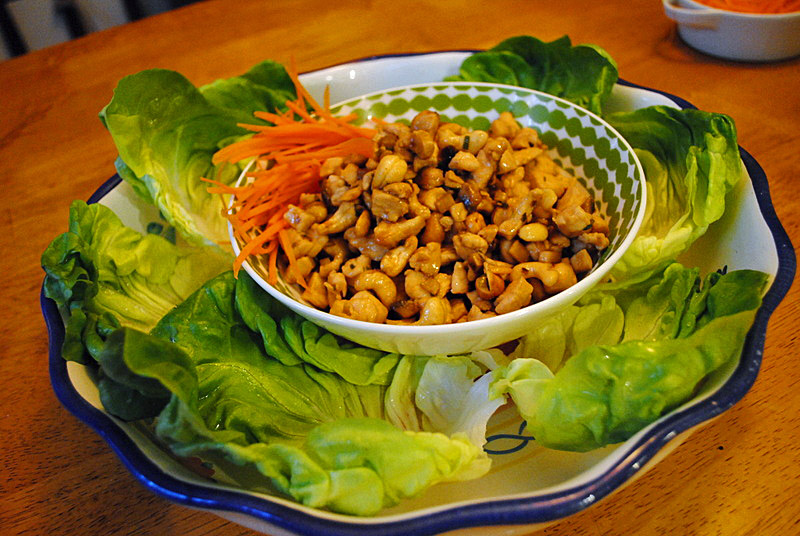
Place some canola oil in a non-stick pan and cook chicken till cooked through and lightly browned. Add green onions, mushrooms, cashews and 1 tsp. soy sauce. Cook until mushrooms soften. Add teriyaki sauce. Cook stirring often on medim-high heat until sauce began to caramelize a bit on the chicken. Lower heat to “low” and continue to cook a bit longer or until your desired consistency is reached.
.
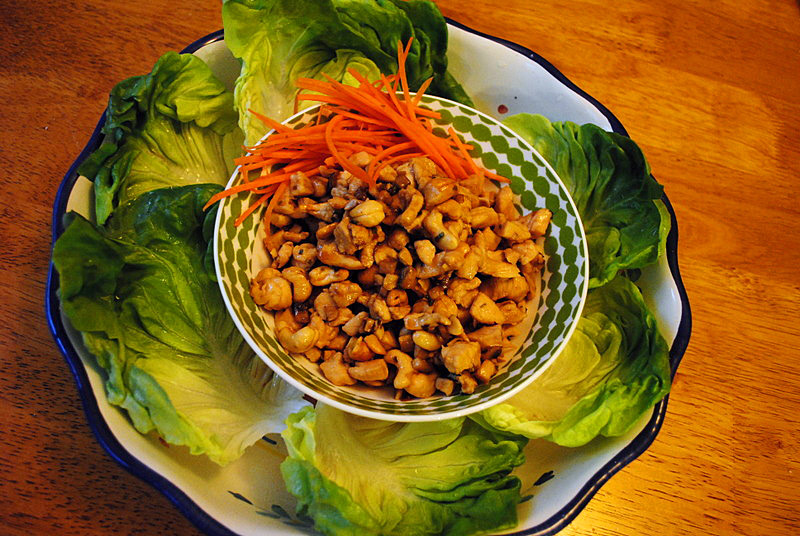
Serve on lettuce cups, adding julienned carrots and sesame seeds on top.
.
ENJOY!

to print the recipe, click here
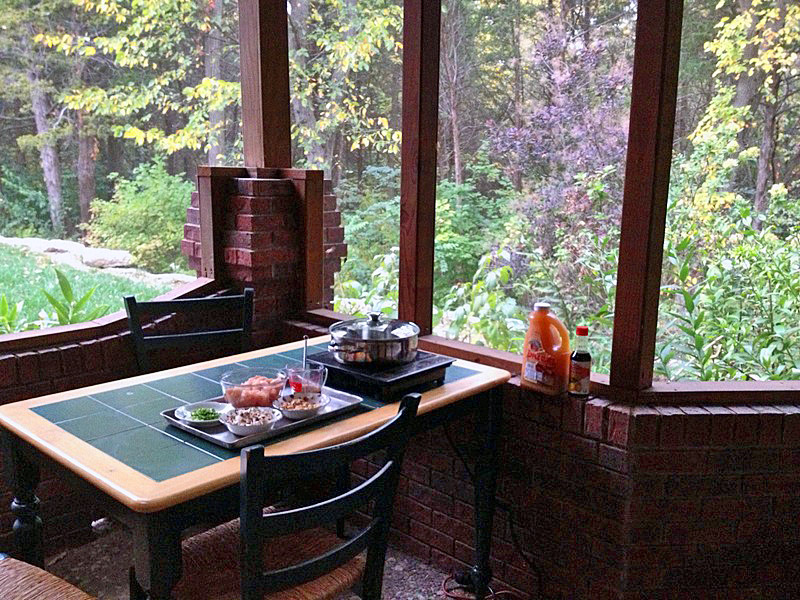
We absolutely loved this recipe!  Next time I might just up the amount of sauce a little bit, but other than that, no changes…    This post gives me the opportunity to share with you a very special gift we received from our friend Cindy.  She probably got tired of me complaining about the electric stove in our new home, and one day I got this box delivered with an induction-type single burner cooktop!  Not only it works great, but it is a life-saver for me, due to another small problem in our kitchen: no ventilation. I had pretty much given up on frying or sauteing fish or meat.   With this cooktop, I was able to install a cooking area on our patio, and voila’: no more offensive odors!  Plus, it’s is such a nice setting, don’t you agree?
Cindy, thanks so much for such a thoughtful gift!

For the full round-up on the Secret Recipe Club, click on the cute blue frog. To see which recipe was chosen from my blog this month click here to visit Lindsay’s blog…

Kirstin, nice to “meet” your blog!  Have fun with today’s reveal day!
ONE YEAR AGO: Clay-pot Pork Roast

TWO YEARS AGO: Panmarino

THREE YEARS AGO: A Classic Roast Chicken



INSPIRED BY MARCELA

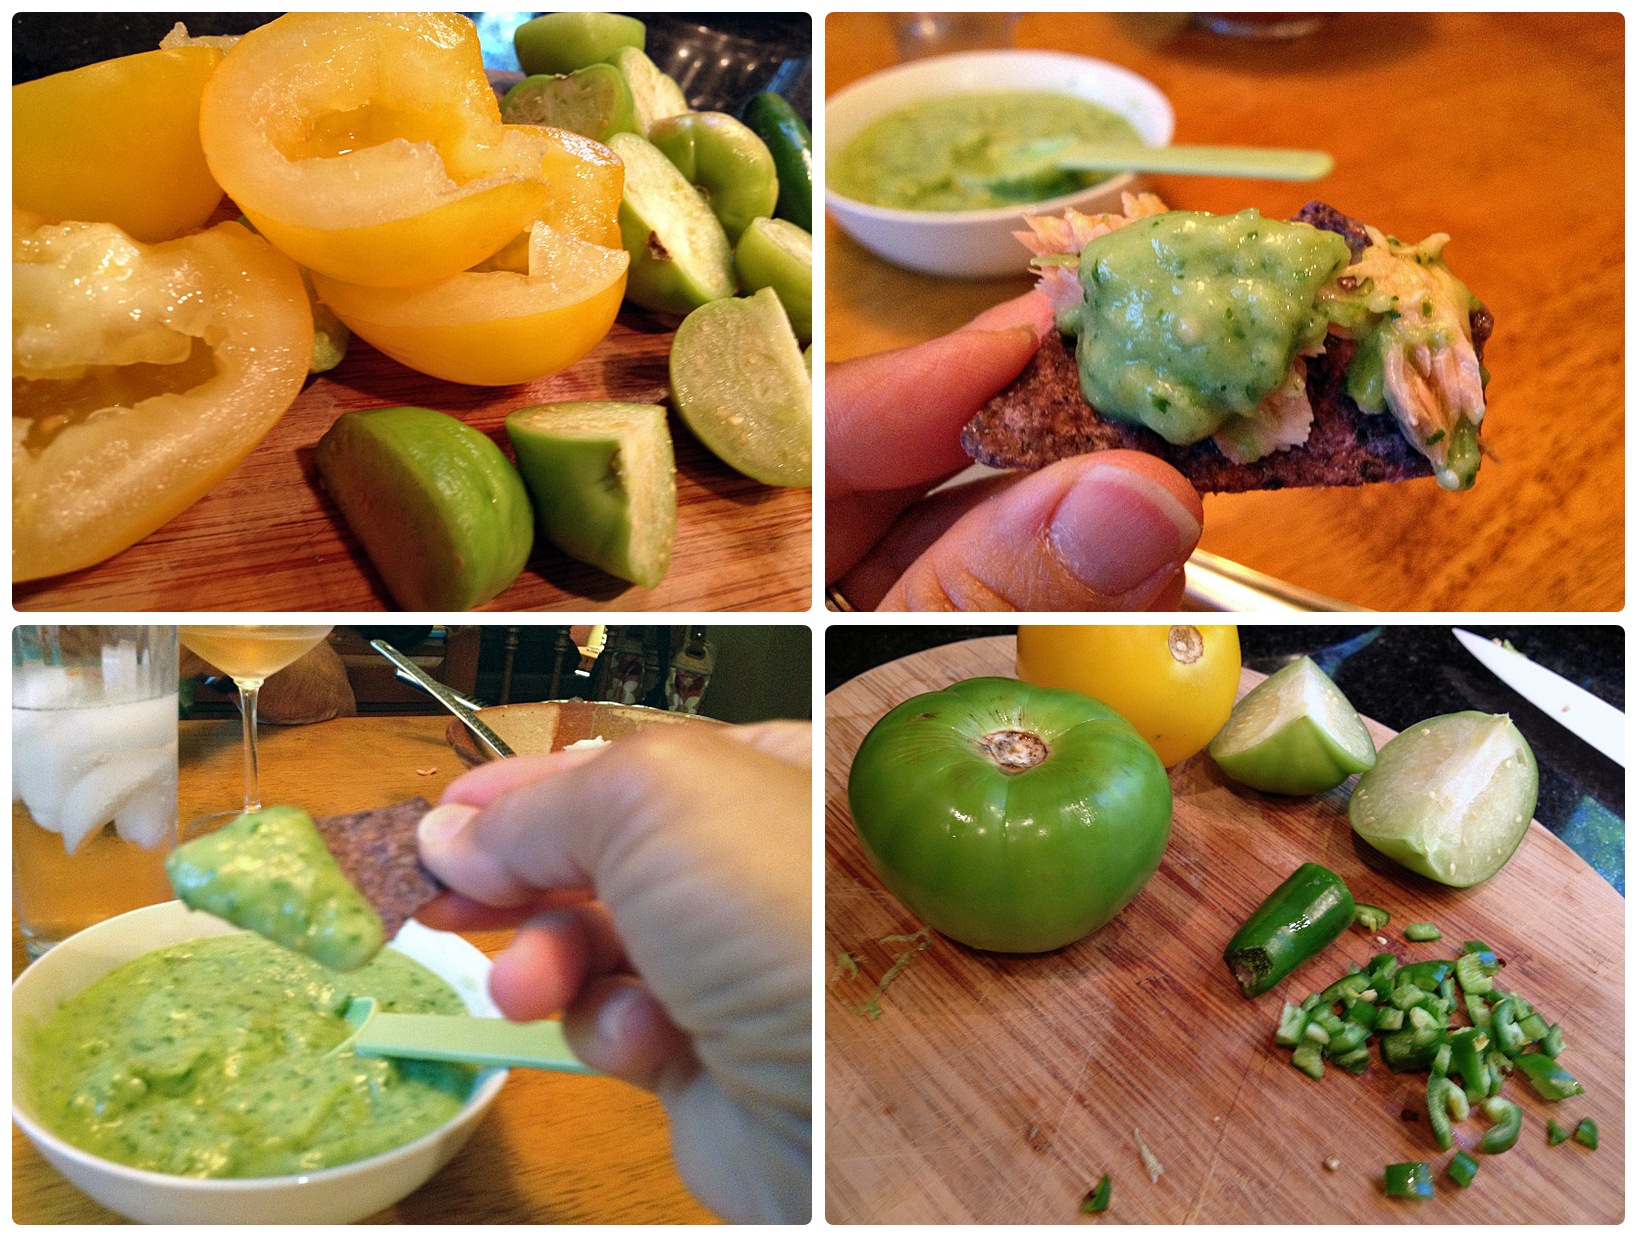
The FoodTV Network: Like a broken record, I might normally go on and on complaining about how great it was but no longer is…  I must say, though, that the more I watch “Mexican Made Easy”, the more I enjoy the show. Marcela Valladolid is knowledgeable, cooks great food, and is fun to watch.  Plus, she’s fit, which is not an easy task when you’re cooking and working with food 24 hours/day. Or close to that.  😉  Apparently she owes her great shape to yoga. On one segment about healthy Mexican recipes, they showed her serene composure during a tough variation of Warrior III, and in an advanced Twisted Pigeon pose.   Impressive, to say the least. ANYWAY,  back to cooking.  In another recent episode she shared a tempting recipe for Chicken Tostadas.  I didn’t make it yet, but I prepared one of its components, the tomatillo-avocado salsa.  It couldn’t be easier, and it couldn’t be tastier.   You absolutely HAVE to make and serve this alongside anything!  Ok, maybe not with that slice of chocolate cake… 😉

FRESH TOMATILLO-AVOCADO SALSA
(adapted from Marcela Villadolin)

6 ounces tomatillos, husked, rinsed and coarsely chopped
2 large yellow tomatoes, cored and seeded, coarsely chopped
1 avocado, halved, pitted and peeled
1/2 cup packed fresh cilantro leaves
1/2 Serrano chile, seeded, minced
1 tablespoon fresh lemon juice
salt and  black pepper

Combine the tomatillos, yellow tomatoes, avocado, cilantro, chile, and lemon juice in a blender and puree until smooth. Season the salsa with salt and pepper, to taste. Transfer to a serving bowl, cover and refrigerate for up to 2 hours or until ready to use.

ENJOY!

to print the recipe, click here

I intend to make her chicken tostadas soon, my problem is the tostada part, as we still don’t have a gas cooktop. But I might improvise and come up with an alternative.  Tomatillos are usually cooked before incorporation into salsas and sauces, but in this fresh preparation  the  trick is to mellow their sharpness down by adding the avocado and using lemon juice instead of lime juice, as most salsas would call for.  Simple. Brilliant.

My adaptation was adding some yellow tomatoes because they were looking at me and begging to be consumed. So I did.  Next time I might either process a little less, or save a few pieces of diced yellow tomatoes to add at the end and make it a bit more chunky.  We served it with grilled steel head trout and steamed rice.  Phil thought that a great idea for an appetizer would be a small piece of grilled salmon or trout over a blue tortilla chip, and a dab of tomatillo salsa on top.  No doubt in my mind I married a guy with great taste.  😉

On a slight tangent: as I was preparing this post, I got the feed notification of a new article by Kelly, over at Inspired Edibles.  She wrote a nice tribute to her yoga instructor, and I invite you to jump over there and read it, very inspring! As a bonus, you’ll also get a recipe for homemade energy bars…
I am all for energy bars these days! 😉

ONE YEAR AGO: Chocolate Intensity

TWO YEARS AGO: Shrimp in Moroccan-Style Tomato Sauce 

THREE YEARS AGO: Golden Zucchini: A Taste of Yellow

INTO THE LIGHT AGAIN

In our department at KSU one of the secretaries organizes a lunch potluck to celebrate the birthdays of the month.  The email to announce the monthly event ends with “Remember, simpler is better”, but you may find a spread containing spaghetti with homemade meatballs,  very elaborate curries, and fantastic snickerdoodles made from scratch (that was the case last week, and I was unashamed of sitting by that platter and turning them into 80% of my meal).

For last week’s potluck, I made a slightly different version of  the Mediterranean Skewers  posted last year.  They are light, refreshing, fun to eat and won’t weigh you down before a substantial meal. Or a tantalizing spread of 10 different dishes offered at your next departmental party!  😉

MEDITERRANEAN SKEWERS WITH BALSAMIC DRESSING
(from the Bewitching Kitchen)

30 skewers
mozzarella mini-balls (like these)
sharp Cheddar cheese, cut in cubes
pitted black kalamata olives
pitted large green olives
15 red grape tomatoes, halved
15 yellow grape tomatoes, halved

for the dressing:
2 Tbs olive oil
2 tsp lemon juice
1/4 tsp ground fennel
2 tsp balsamic vinegar (white, if available for you)
salt and pepper to taste

Line your ingredients, and have some fun:  form the skewers starting and ending with a cut tomato, with the cut side facing towards the center of the skewer. Alternate the cheeses types and olives, so that you end up with many variations in composition and colors.    Arrange the skewers on a serving platter.

Make the dressing by whisking all the ingredients in a small bowl, drizzle over the skewers half an hour before serving. White balsamic has a nicer color for this type of dish, but if you don’t mind the brownish hint given by the regular balsamic, you can definitely use it.

ENJOY!

to print the recipe, click here

The possibilities for this type of appetizer are pretty much endless… Mozzarella and tomatoes with a pesto drizzle on top would make a nice “Caprese on a Stick”,  a small bunch of Romaine lettuce squeezed between pieces of  sharp cheese and grilled chicken, and voila’:  Chicken Caesar on a Stick!    Just make sure they are user-friendly, because if the skewers are too big, they can be awkward to eat. These ones I made were right at the limit.  😉

ONE YEAR AGO: Five Grain Sourdough Bread

TWO YEARS AGO: The Nano-Kitchen

THREE YEARS AGO: Kaiser Rolls

A SMIDGEN OF A TART

One of my favorite food blogs is “Just a Smidgen”, from the lovely Barbara, a poet, mother, cellist, great cook, and superb photographer.  Each of her posts is a work of art, with carefully chosen words, and photos that will make you dream.  And, to top it all, everything she cooks makes my mouth water…   Last month she had this tomato tart featured on her blog, and since heirloom tomatoes insist on jumping in my grocery cart,  I immediately added it to my Pinterest cooking board for future reference.   Contrary to what usually happens, I made it right away, it was simply irresistible!

ROASTED HEIRLOOM TOMATO TART
(adapted from Just a Smidgen)

1 package puff pastry, defrosted (use one half for the tart)
5 to 6 heirloom tomatoes
olive oil
salt and cracked black pepper to taste
1 container of bocconcini mozzarella, drained (200g / 7 to 8 ounces)
1/4 cup tomato sauce
1/8 cup Parmigiano-Reggiano cheese, grated
2 tsp Herbes de Provence
1 egg

Heat oven to 400° F.

Roll out one sheet of puff pastry directly on a piece of parchment paper until it is about an 11” x 14” rectangle. Take a fork and poke holes all over the pastry, leaving a one-inch border all around. Using the palm of your hands, gently roll up to form a border of dough.

Within that border, spread the tomato sauce evenly then add the mozarella pearls over the top.

If your tomatoes are too juicy, slice them and place over paper towels to drain the excess moisture. Place them over the tart, overlapping slightly. Use different colors and sizes, it is supposed to be a rustic-looking tart.

Sprinkle with the herbes the Provence. Finish by sprinkling the grated Parmigiano over the surface of the tart.

In a small bowl, whisk the egg with a drizzle of water to make a wash. Brush this egg mixture on the border of the pastry.

Bake for about 30 minutes or until the puff pastry has risen and lightly browned, but start checking the bottom of the tart after 20 minutes, as depending on the moisture of your tomatoes, it could be ready earlier.

Cool slightly and serve warm or at room temperature, cut in squares.

ENJOY!

printable version available soon

Make sure to stop by Smidge’s blog to look at her gorgeous photos of the making of this tart.  The use of bocconcini mozzarella pearls was a nice touch. Although they may seem a bit bulky to lay on the tart,  they’ll melt into a thing of pure beauty and enticing creaminess, in a perfect marriage with the heirloom tomatoes.  Let me remind you once more:  if using overly juicy tomatoes, drain  the slices and pat them dry.  They will release more liquid during baking, so there will be no risk of ending with a dried up topping.

I hope there is no penalty for a blog with too many heirloom tomato recipes.  If there is, I’m in trouble, because there will be more, I’m afraid…  😉

Barbara, thanks for a great recipe!

ONE YEAR AGO:  A Tropical Street Market

TWO YEARS AGO: Groceries

THREE YEARS AGO:  A Souffle to Remember Julia Child

EDAMAME HUMMUS IN CUCUMBER BITES

If you’d like to especially please guests  who are low-carbing, or simply want to serve something very flavorful but kind to everyone’s waistline, this is a perfect option.   I’ve got a recipe for edamame dip already published, but this one knocked my socks off.  Another fascinating English expression that made me smile the first time I heard it.  No similar phrase exists in Portuguese, I must add, and as far as I searched, its origin is uncertain. Feel free to enlighten me with an explanation in the comments…  😉

The recipe comes from a great blog called “Tess’s  Japanese Kitchen”.  Tess became a real expert on the subject by working her way through the 250 recipes from this book by  Hiroko Shimbo. Pretty amazing!   If you are into authentic Japanese cooking, bookmark her blog and get ready to learn a lot from it. And, while you are at it, reserve a bookmark for Ms. Shimbo’s site, Hiroko’s Kitchen.

BRIGHT GREEN EDAMAME DIP IN CUCUMBER BITES 
(slightly modified from Tess’s Japanese Kitchen)

for the cucumber “cups’
3 cucumbers

for the dip
1 cup shelled edamame (frozen is fine)
2 ounces feta cheese
3 Tablespoons olive oil
3 Tablespoons non-fat yogurt (low or full fat is ok)
1  teaspoons salt
juice of half a lemon
a sprinkle of paprika for color contrast

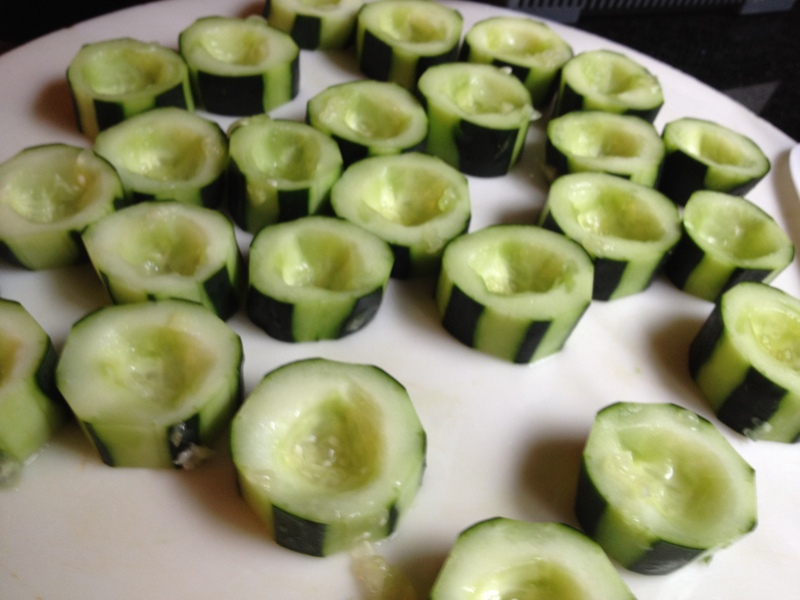
Make the cucumber “cups” by peeling the cucumbers leaving streaks of unpeeled portions.  Cut in 3/4 inch slices, and carefully hollow each slice to form a small cup.  Discard the pulp. Reserve the cucumber slices, if they seem too wet place them over paper towels to catch excess liquid.

In a large pot of salted boiling water, cook the edamame until they are tender, 5 to 6 minutes. Drain them in a colander and rinse briefly with cold water to stop the cooking.  Let it cool slightly, then add to the bowl of a food processor.

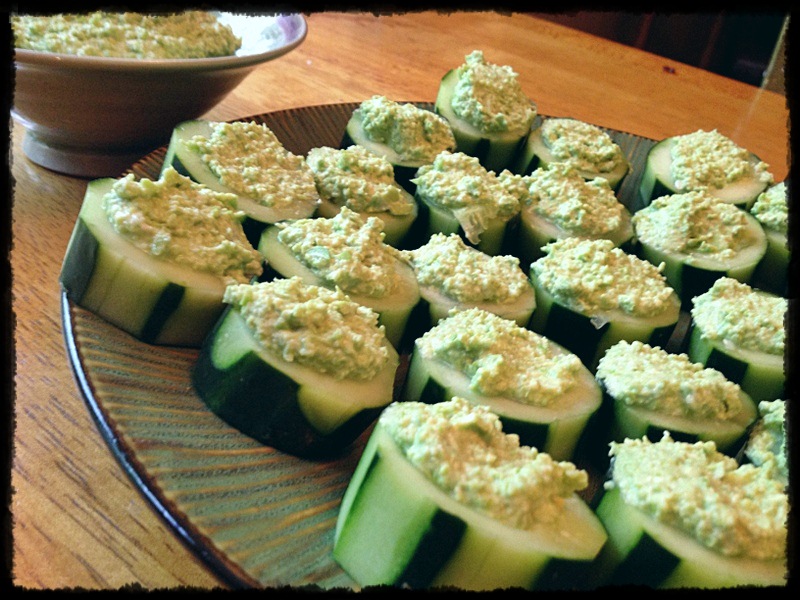
Add all other ingredients, except the paprika.  Process to make a smooth paste, scraping the sides of the bowl midway through processing.  Taste, adjust seasoning, and spoon small portions of the dip inside the hollowed cucumber slices.  Serve any additional dip with crackers or crudites.

ENJOY!

to print the recipe, click here

If you want to go real fancy, take a Zen breath and try your hands at this beautiful preparation of cucumber cups, yet another courtesy of Tess. I imagine the dip would look pretty awesome in the center of those little flowers…

When I brought this platter to  a departmental get-together, most people were puzzled, trying to figure out where the green color was coming from.

“Avocado? could it be avocado?”

“No, I don’t think so…. I taste some cheese, but no avocado”…

“What is in it?”

Mysterious or not, everyone loved it! The feta contributes a nice salty bite, the yogurt mellows it down, and the edamame closes the deal with its umami aura, very special. My slight modification was to reduce the amount of olive oil (the original had 6 tablespoons instead of 3), use non-fat yogurt instead or regular, and add lemon juice because I am a lemon freak. Sounds a bit wicked, but… such is life.  😉

ONE YEAR AGO:  Headed to Brazil!

TWO YEARS AGO: Twice-Baked Goat Cheese Souffle

THREE YEARS AGO: Golly Moses: She’s  a Muffin!