HOMEMADE CORN TORTILLAS

And the food snob strikes again!  😉

What can I say?  Once we tasted the tortillas made in the coziness of our (former) own home, we were shocked by how much better than the store-bought version they are!   Get yourself a good quality tortilla press, one that feels heavy and powerful like this one I found for a bargain at ebay.
All you’ll need is a bowl, the masa harina, some water and a little salt.  No need to knead, no need to wait. Amazing tortillas will be yours in less than 10 minutes!
HOMEMADE CORN TORTILLAS
(from the back of Masa Harina’s bag)

2 cups masa harina
1/2 tsp salt
1 to  1 + 1/4 cups hot water

Mix together the masa harina, salt, and water in a bowl.  Add the smaller amount of water, form a dough. If too rough, add the rest of the water, a little at a time.  The dough must stick together, but it should not be too wet, so that when you roll a portion on your hand it will turn out smooth.

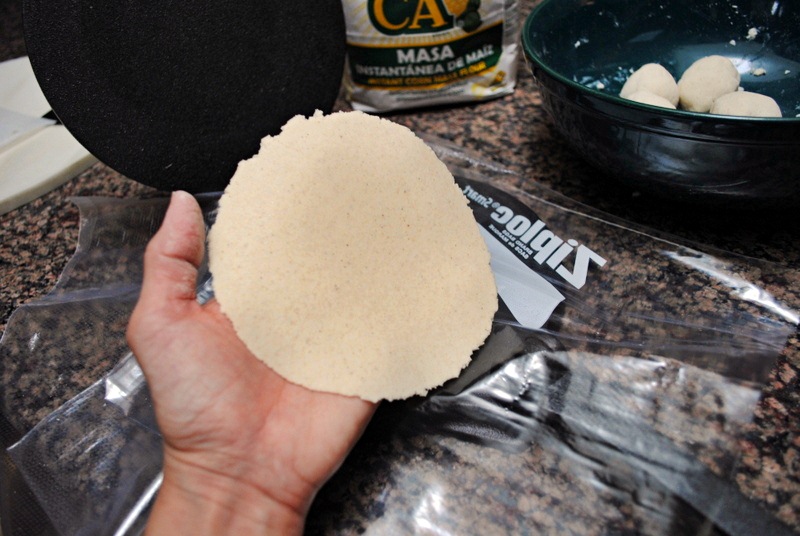
Form golf ball-sized chunk of dough and  place into a tortilla press protected on both sides by plastic wrap (I cut open a large ziplock type bag).  Press, open, peel the tortilla off the plastic, reserve. When all tortillas are made, cook them for 45 seconds to 1 minute per side on a hot skillet, preferably cast iron. Set the cooked tortillas over a inside a folded towel to keep them warm and moist.

For added flavor, right before serving, set each over an open flame until you get small brown blisters on the surface, flip and do the same on the other side.

ENJOY!

to print the recipe, click here
Now, for the sad news…  I was holding this post for publication at a later time, when I could include a special recipe made with the tortillas.  But, the stove in our new home is electric and I’m having a bit of a hard time adjusting to it.  The lack of a flame prevents me from finishing the tortillas the way I like, so I am not sure when I’ll be able to make tortillas at home again.  It might take a while.. 😦

  To compensate, I share a link to the type of recipe I’d like to make using homemade corn tortillas.  It comes from a great blog I visit often, called Taste Food.  Ready?  Click here, and ENJOY!  

ONE YEAR AGO: Whole-Wheat Spaghetti with Vegetables and Peanut Sauce

TWO YEARS AGO: Brigadeiros: A Brazilian Party!

THREE YEARS AGO: Lemony Asparagus
EDAMAME DIP

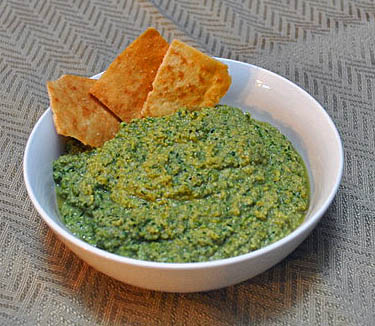
T’is the season to splurge, indulge, and be jolly!  But, even in time of non-stop celebrations,  it’s good to have a few options of lighter food that won’t make you feel sluggish and heavy.  I’ve had this recipe for edamame dip in my files for a long time, finally gave it a try the week before Christmas. Originally from Alton Brown, this adaptation was published in the  blog Closet Cooking.  Kevin substantially reduced the fat content in the dip by using part of the cooking liquid from the edamame to adjust the texture, instead of olive oil.

EDAMAME DIP
(adapted from Closet Cooking)

1 cup edamame beans (I used frozen)
1/4 cup shallots, diced
1/2 cup cilantro
1 clove garlic
juice of 1 lime
1 tablespoon yellow miso
1 teaspoon soy sauce
1 teaspoon chili sauce (I used Sriracha)
salt, if needed

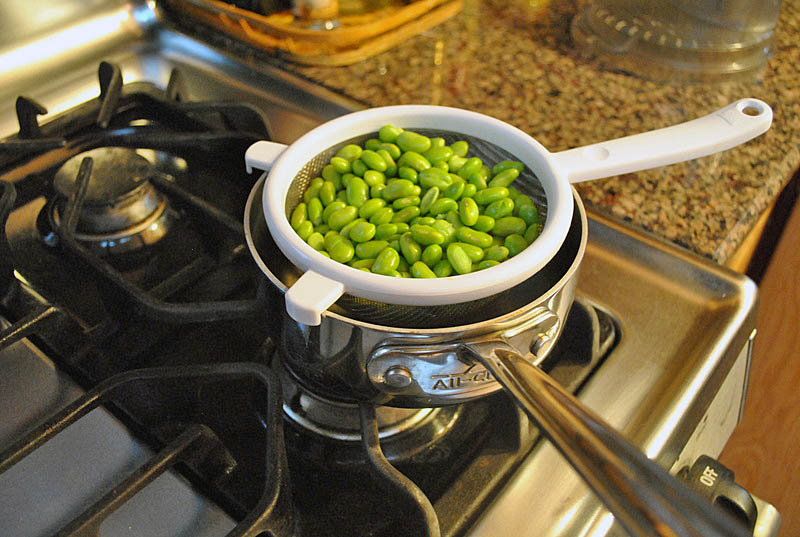
Place the edamame in a small saucepan, cover with water and boil for 5 minutes.  Drain, reserving the cooking liquid.

Add the cooked edamame into the bowl of a food processor, together with all other ingredients.  Process until it forms a paste, and adjust the consistency with some of the cooking water reserved.

Taste, adjust seasoning with salt (you may not need it, both miso and soy sauce are salty), and serve cold, with crackers or carrot and celery sticks.

ENJOY!

to print the recipe, click here

This is a very nice option of appetizer for a dinner party in which the main dish might be on the heavy side.  Your guests will appreciate the bright flavor, unless they are cilantro haters.   Those people are out there, believe me! 😉 One of my best friends in Brazil  (hello, Fabio!) hates cilantro so much that while traveling through  China a few years ago, he carried a sign in Mandarin with the words: “Please, no cilantro in my food”.   The herb flavor is very pronounced in this dip, so make sure and warn your guests, just in case…

ONE YEAR AGO: Gougeres

TWO YEARS AGO: Beef Wellington on a Special Night

A SIMPLE APPETIZER

When entertaining,  I pay equal attention to the appetizers and the main course because appetizers are the first  “welcome” to the guests. That first impression that leaves its mark.  It’s nice to have a few options that are simple to prepare, and this one fits the bill quite well.  Ever since I saw Celia’s post about it, I wanted to try it.  Baked ricotta!  You can adapt it to your own taste, adding different herbs and spices.  The most important step is draining the ricotta before baking, so that it doesn’t go all watery in the oven.

BAKED RICOTTA
(from Fig Jam and Lime Cordial)

1 container of full-fat ricotta cheese (8 – 10 oz)
salt and pepper
1/4 cup olive oil
zest of 1 lemon
dried herbs of  your choice

Drain the ricotta for a few hours in the fridge in a colander lined with  cheesecloth. Meanwhile, infuse the olive oil with lemon zest, by heating it gently in a small pan over very low heat. When the oil starts to form small bubbles on the edges, turn the heat off and close the pan.  After 30 minutes pass the oil through a sieve to remove the zest.

Transfer the drained ricotta to a small bowl, season it lightly with salt and pepper.  Spread it on an oven-proof dish, drizzle a little of the infused oil on top (you won’t need the full amount!), sprinkle with dried herbs and bake in a 350 F for 30 minutes, until set. Serve warm or cold with your favorite cracker or toast.

ENJOY!

to print the recipe, click here

If I had to pick one item that we always serve when entertaining it would be hummus.  We love it and never get tired of it.  I suspect that baked ricotta will be present next to it from now on.  A very nice combination, they look good together and their flavors don’t clash, quite the contrary.

Celia, thanks for constantly inspiring me!

ONE YEAR AGO: Sour Cream Sandwich Bread

TWO YEARS AGO: Pasta with Zucchini Strands and Shrimp

Add to FacebookAdd to DiggAdd to Del.icio.usAdd to StumbleuponAdd to RedditAdd to BlinklistAdd to TwitterAdd to TechnoratiAdd to Yahoo BuzzAdd to Newsvine

ITALIAN EASTER PIE

Each year I spot recipes for Easter Pie in websites and magazines, and I tell myself that I’ve got to see what it’s all about, but for one reason or another I never get around to making it.  Still, the chances that this was the year to end my Easter Pie virginity were slim, because the thought of rolling dough in our nano-kitchen was downright scary.  Yet, strange things happened. I read this post, and couldn’t stop thinking about it.  Then, having the house to myself for several hours on Sunday (my husband the golfer!) was the final push to jump in with both feet: when I’m facing a challenging project, solitude is my best friend.  😉

ITALIAN EASTER PIE
(adapted from King Arthur website)

for the crust:
2 + 1/2 cups all purpose flour
1 tsp salt
1 tsp instant yeast
1 Tbs sugar
1/8 cup olive oil
1/2 cup + 1 Tbs room temperature water

for the filling:
6 large eggs (3 of them hard boiled, and diced)
1/2 pound diced ham
1 cup ricotta cheese
1/2 cup grated parmiggiano-reggiano cheese
minced parsley to taste
salt and pepper to taste

for the glaze:
1 egg, beaten
1 Tbs sugar

Make the crust dough by adding all the ingredients in the bowl of a food processor and pmixing until a ball forms.  Adjust with more water if necessary.  When the dough forms a ball, process it for about 20 seconds. Remove it from the machine and knead gently by hand for a minute or so. Place in a lightly oiled bowl, and let it rise for 1 to 2 hours in a warm spot of your kitchen.  The dough should about double in size, and feel bubbly.

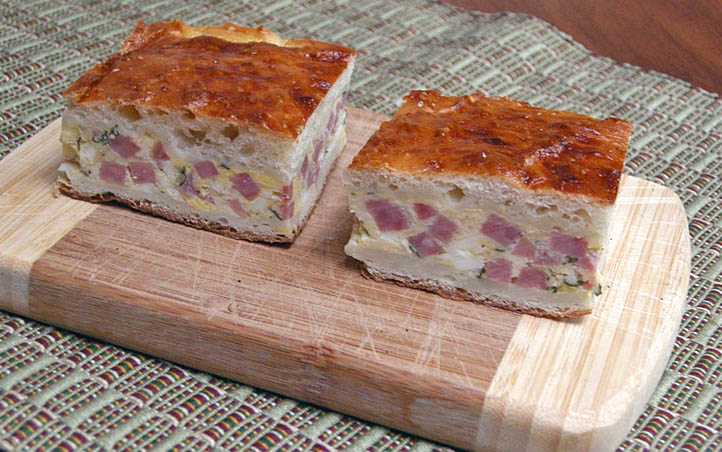
Meanwhile, prepare the filling by mixing the diced ham, boiled eggs, ricotta and Parmigiano cheese with the three raw eggs.  Add salt, pepper, and parsley.

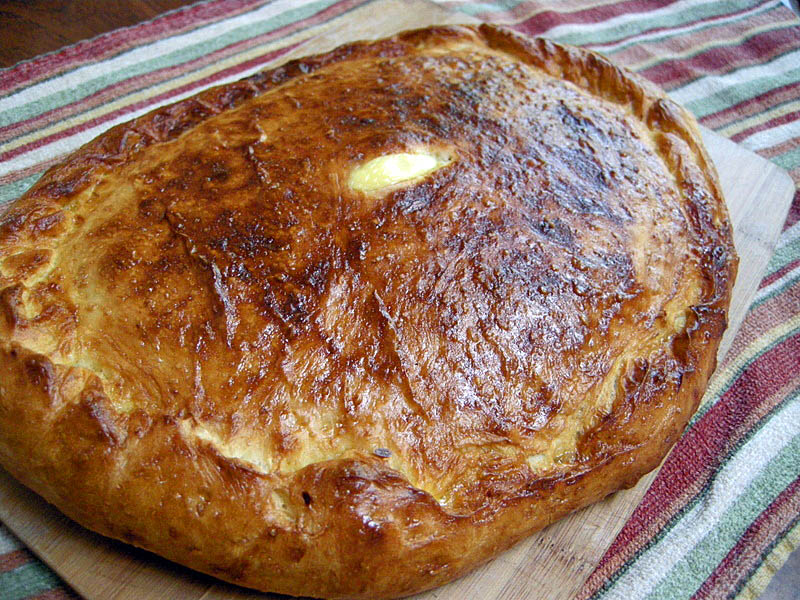
When the dough has doubled in size, divide it into two equal portions and roll them into oval shapes, about 10”x 14”.  Place the filling over one of the dough disks, leaving a clean, 1/2 inch border.  Carefully lift the second disk of dough and layer on top of the filling, enclosing it by pressing the borders together.  Cut a slit on top of the pie with a knife or razor blade, and brush the surface with a glaze made from mixing the egg and sugar.

Bake it in a 350 F oven for 25 minutes or until the top is golden brown.  Remove to a rack and allow it to cool.

ENJOY!

to print the recipe, click here

Comments:  Things were going so smoothly during the preparations of dough and filling that I found myself multitasking:  a little vacuum-cleaning here, a little exercising there, and even a break to walk the dogs.  But, naturally, the dark clouds were gathering and the lightning struck big time when I went to roll out the dough, and found…… no rolling pin in the house!  Without naming names, someone dispatched my improvised rolling pin (an empty wine bottle without its labels) to the recyclable waste.  In desperation I tried a bottle of wine (with labels on!),  but it didn’t work.   Flour was flying and the dough was beyond its rise.  So, I took matters (literally) into my own hands, and  “rolled” it with the palm of my hand on parchment paper.  It’s not a relaxed activity for a Sunday morning; I don’t recommend it. Actually, it wouldn’t be too bad for a single crust concoction, like galette or another other rustic pie.   But, for this pie you’ll need two disks of dough with similar dimensions.  Perhaps Easter Pie was what prompted the invention of the rolling pin!  😉

All problems aside, this pie was wonderful!  As  Ms. Hamel mentioned in her post,  each Italian family has their own “authentic” version.  Some are loaded with meats, while some – like Pastiera Napoletana – have a sweet, cheesecake-like filling.  This version is lighter than most,  but still substantial.  If you celebrate Easter, then I suggest that you make it this weekend. If you don’t celebrate, it’s a delicious dish for a dinner party.  I’ve been enjoying it for lunch at work with a juicy tomato alongside.  Heaven!

ONE YEAR AGO: Black Olive Bialy

Add to FacebookAdd to DiggAdd to Del.icio.usAdd to StumbleuponAdd to RedditAdd to BlinklistAdd to TwitterAdd to TechnoratiAdd to Yahoo BuzzAdd to Newsvine

SaveSave

DOUBLE ASPARAGUS DELIGHT

Here’s a clever approach that Michel Richard published in his cookbook “Happy in the Kitchen” :  asparagus spears paired with an asparagus “vinaigrette.”   If you love green vegetables, as I do, you will delight in this recipe.  It’s a model of simplicity because it involves so few ingredients, but you must pay attention to the details, and above all, avoid overcooking the spears.  I can’t imagine a better way to welcome Spring!

ASPARAGUS ON ASPARAGUS
(from Happy in the Kitchen)

24 large asparagus
2 Tbs extra virgin olive oil
1 tsp Dijon mustard
1 Tbs fresh lemon juice (I used Meyer lemons)
pinch of  sugar
pinch of salt

Set aside 4 whole spears for the dressing. Cut off the tough bottom ends of all asparagus spears and set those aside for the as well. With a vegetable peeler, peel the remaining asparagus starting about one inch below the tip.

Have a bowl with ice cold water ready.  Steam the asparagus spears for 5 to 6 minutes only, until they are just tender when gently pierced with the tip of a knife.  knife. When the asparagus is cooked, lift the spears with a pair of tongs and plunge them in the ice bath to cool, then remove and dry on kitchen paper or a towel.

Make the asparagus sauce: cut the 4 reserved spears into 1-inch pieces. Place them in a small saucepan with the trimmed asparagus bottoms and add ¼ cup water and the olive oil. Bring it to a simmer, cover, and gently cook for 8 to 10 minutes, or until the asparagus is completely softened. The water should have evaporated, leaving the asparagus  stewing in only the oil.

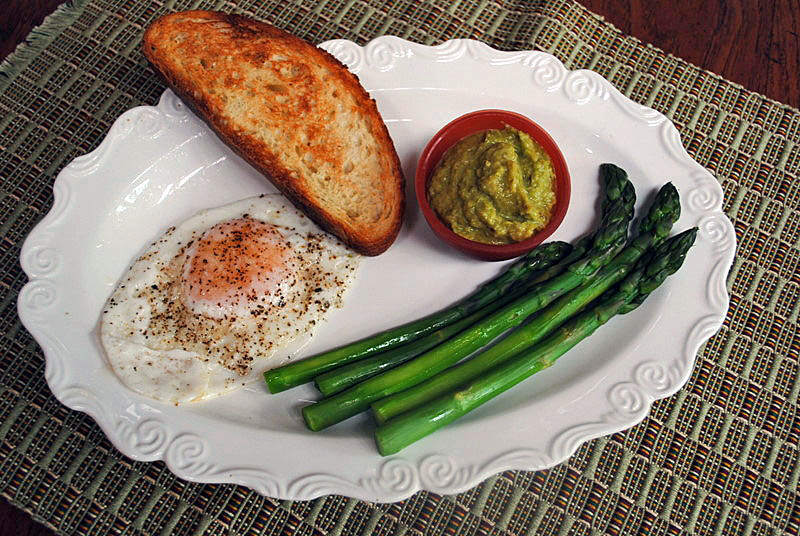
Transfer the asparagus to a blender or food processor and puree it until completely smooth. Transfer the puree to a small bowl and whisk in the mustard, lemon juice, salt, and pepper. Serve the asparagus on a platter, with the vinaigrette in a small dish or ramekin on the side for dipping or dousing the spears.

ENJOY!

to print the recipe, click here

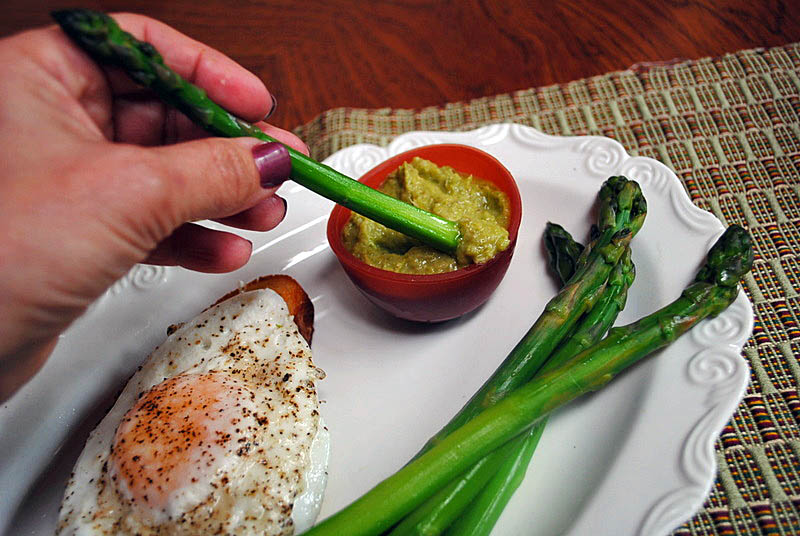
Comments:  Peeling the asparagus may seem like work, but don’t skip it.   Use large asparagus for this dish, and the peeling will ensure a wonderful texture and even cooking.  I enjoyed them as a light lunch with homemade bread and a sunny-side egg, but the dish is also a perfect option as an appetizer at a dinner party.  The asparagus lovers among your guests will never forget it!

The sauce or dressing is an excellent adaptation for the tough ends of the spears, so consider making some whenever you cook asparagus.  I imagine that it will also complement other dishes, like grilled salmon, with a sprinkle of fresh dill on top.  Must try that soon.

The beginning of asparagus season always makes us happy!

ONE YEAR AGOSundried Tomato and Feta Cheese Torte

Add to FacebookAdd to DiggAdd to Del.icio.usAdd to StumbleuponAdd to RedditAdd to BlinklistAdd to TwitterAdd to TechnoratiAdd to Yahoo BuzzAdd to Newsvine