COOKING PROJECTS 2012

This is not part of New Year Resolutions, this list is not intended to put pressure on me, it’s simply a summary of  projects  I’d  like to tackle this year, but if I don’t get to some of them, 2013 will still be there, with open arms!

BEET PASTA
As you can see from the photo, this is something I’ve made in the past, but after cooking, the color completely faded away!   I intend to try that pasta again, adding a higher proportion of pureed beets to the dough.  Should be a fun project!

CROISSANTS.
I’ve made croissants in the past, and even blogged about them, but my attempts have been a disaster. I would like to get better and make a batch that would come a little closer to the great croissants we enjoyed in Paris.   My hope is to follow the footsteps of the  amazing TxFarmer, a regular contributor at The Fresh Loaf Forum.  Check out her write up on croissants by clicking here.

BAGUETTES
I feel pretty comfortable making sourdough boules, but shaping a baguette is a skill that requires a lot of practice and patience, that virtue I lack.  This year I would like to master the baguette, following the authentic shaping instead of the improvised methods I’ve used in the past.    I have my favorite recipe to practice with, and will use this nice video to get the shaping right.

CODRUTA’S CHEESY FLATBREAD
About a year ago, I got to know a food blogger through a comment she left on the Bewitching. Even though she blogs in Romanian, I haven’t missed a single of her new posts ever since (thank you, Google translate!).  She is an outstanding  baker and a while ago posted a recipe for a flatbread full of childhood memories. Imagine a bread re-created after 30 years of first tasting it!  I simply must make it!   Check out her article about it here (she has the translator tool right on the site, so pick your language and enjoy it).

FISH WRAPPED IN POTATO SLICES
I’ve seen them in cooking shows, I’ve had them in restaurants a couple of times.  Never attempted to make them at home, but always wanted to.  Of course, I’ll need to find the best possible quality fish, and a tried-and-true recipe.  Anne Burrell comes to mind…

CANDIED ORANGE PEEL
I never thought much about them, until a dear friend served us a chocolate mousse decorated with her homemade candied orange peel.  I loved them so much, she brought me a small jar with the leftovers from the dessert, and I had to use all my self-control not to wolf down the whole thing.   I must make them soon, very soon…

ALFAJORES
When I was in graduate school in Brazil, Silvia, a student from Argentina worked in the same lab.  Once a year she would travel to Buenos Aires, and it never failed: when she arrived back, she would bring a couple of boxes of alfajores to the lab.  We would go absolutely crazy for them!  I’ve seen recipes in the net, and always wanted to make them.   Maybe this will be My Year of the Alfajor!

And, the “best” for last:

GENOISE CAKE
There. I said the dreadful words. Many years ago I suffered a public humiliation serving a strawberry genoise cake at a party. I never ever attempted to make it again.  You may wonder what made me change my mind.  Believe it or not, it was Tony Horton, the fitness guru, developer of the P90X.   I recently started his new P90X2 program, and the first routine has an exercise that Tony struggles with.  He is obviously a strong, ultra-fit guy, but his balance is not the greatest.  This particular exercise requires considerable balance and strength in legs and core.   Before demonstrating it, he literally screams:  “MY NEMESIS!  I WILL CONQUER THEE!” And, he goes for  it, hopping around, struggling, but following his own motto of “do your best”.

So, I will follow his example and “CONQUER THEE!”  Not sure who will be my genoise teacher, maybe  Tish Boyle?  She better be ready for this herculean task… 😉

So, these are some of the cooking projects I have in mind for the near, and not so near future.  What about you?  Any fun cooking plans for 2012?

ONE YEAR AGO: No-Fuss Coffee Cake

TWO YEARS AGO: Swedish Limpa

Add to FacebookAdd to DiggAdd to Del.icio.usAdd to StumbleuponAdd to RedditAdd to BlinklistAdd to TwitterAdd to TechnoratiAdd to Yahoo BuzzAdd to Newsvine

EVERYDAY FOOD TO THE RESCUE

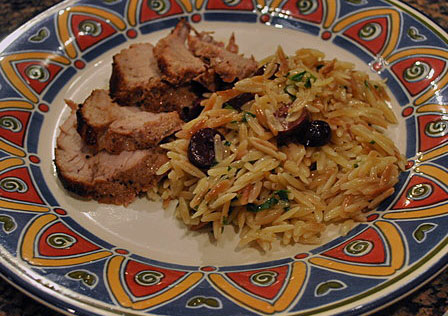
Last week, on a very busy day in which I had zero inspiration for cooking dinner, the daily email from Martha Stweart’s Everyday Food was a life saver.  It arrived mid-morning as usual,  and featured a grilled pork tenderloin with a simple soy-citrus marinade.  I had a tenderloin in the fridge, and all ingredients needed for the marinade.   Side dish?   Orzo sounded great, so I searched for recipes on the same website, and one of the top choices was “Toasted Orzo with Olives and Lemon”.   The clouds left the horizon,  blue skies announced that my dinner blues were gone.  And you’ll get both recipes in a single post!  😉


PORK TENDERLOIN WITH SOY, GINGER, AND LIME
(adapted from Everyday Food)

1/4 cup soy sauce
1/4 cup rice vinegar
1 tablespoon lime juice
1 tablespoon vegetable oil (I used grapeseed)
2 teaspoons grated fresh ginger
1 pork tenderloin (about 1 pound), trimmed of excess fat and silver skin

In a medium bowl, combine soy sauce, vinegar, lime juice, oil, and ginger. Add pork to the marinade, turning to coat well on all sides. Marinate in the fridge for several hours to overnight.

Remove meat from marinade, and pat it dry.  Season it very lightly with salt, and grill for 7 minutes on a hot grill.  Turn the meat to grill the opposite side, and grill for 6 minutes more.  Without opening the grill, turn the heat off and let the meat stay inside for 5 minutes.   Remove the meat from the grill, tent it with foil, and let it rest for 5 minutes before slicing.

to print the recipe, click here


TOASTED ORZO WITH OLIVES AND LEMON
(adapted from Everyday Food)

1 to 2 tablespoons olive oil
1/2 pound orzo (1 + 1/4 cup)
1 teaspoon grated lemon zest
Salt and ground pepper
1/4  cup slivered black olives
1/4 cup chopped fresh parsley
2 tablespoons fresh lemon juice

Heat 1 tablespoon of olive oil in a medium pan over medium-high heat. Add the orzo and cook for 5 minutes, stirring often.  Add 2 cups of water and lemon zest, season with salt and pepper, and bring to a boil. Reduce heat to medium; cover, and simmer until orzo is al dente and liquid is absorbed, 10 to 15 minutes.

Remove from heat. Stir in olives, parsley, lemon juice, and remaining tablespoons of olive oil, if desired (I omitted this step).

ENJOY!

to print the recipe, click here

Comments:  What a great dinner this was! Ready in less than 30 minutes, all I had to do was make the marinade at lunch time (but you can do it in the morning, if you don’t go home for lunch), and by the time we came home from work, dinner was a cinch to make.

I used the 7-6-5 grilling method for the pork tenderloin, because it works well with pretty much any type of marinade or dry rub.  It is easy to take care of the rest of the meal when all you have to do is set a timer and move the meat around when it goes off.

Toasting the orzo is what makes this side dish so special.  I’ve used a similar method before in one of the simplest and greatest recipes I’ve made last year, the “Carrot Nib Orzo”.  If until now you’ve only treated orzo as a normal pasta, boiling in salted water, please try either of these recipes, you will be more than pleasantly surprised by the improvement in taste and texture.

ONE YEAR AGO: Weekend Pita Project

TWO YEARS AGO:  Mandioca Frita 101 – Fried Yucca Root (Brazilian Food at its best!)

Add to FacebookAdd to DiggAdd to Del.icio.usAdd to StumbleuponAdd to RedditAdd to BlinklistAdd to TwitterAdd to TechnoratiAdd to Yahoo BuzzAdd to Newsvine

THE GREEN CHIP ALTERNATIVE

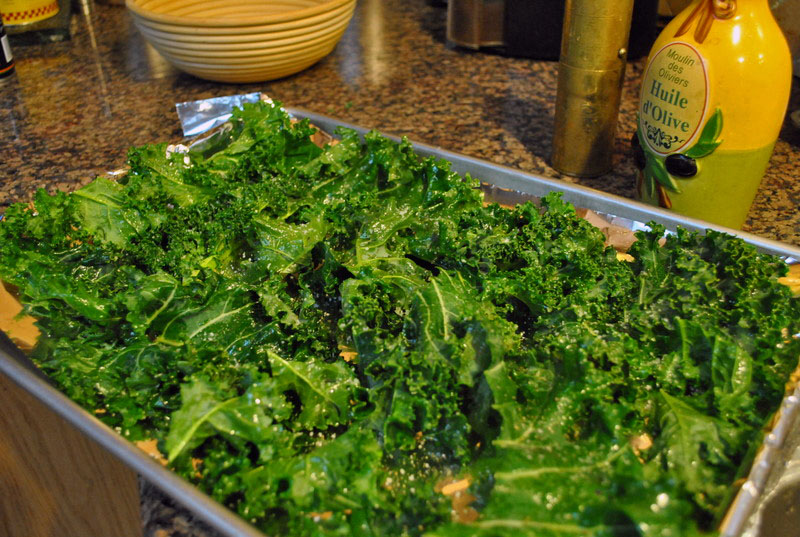
Anne Burrell has a way to get me into the kitchen and make her recipes shortly after watching her show.  Last week she made kale chips, and I was mesmerized. They were very simple to prepare and she munched on them with so much gusto, I could not wait to try some.  Serendipity happened: I arrived at the grocery store for my weekly shopping, and found bunches of organic kale that looked absolutely perfect.   I left the store with a huge smile on my face, hoping that Phil would get as excited about kale as I was (yeah, right ;-)).

KALE CHIPS
(from Anne Burrell)

1 bunch of kale leaves
olive oil
salt and pepper

Wash the kale leaves, dry them well, cut them in half lengthwise, removing the central, thick stem.

Place them in a single layer over a rimmed baking dish, spray olive oil lightly over the leaves, season with salt and pepper.  Repeat the misting with olive oil on the other side of the leaves.  Gently toss them around, trying to distribute the oil throughout the leaves.

Place them back on the baking dish in a single layer, trying not to overlap them too much.  Bake on a 250 F oven for  30 to 35 minutes.   Keep an eye on them, remove leaves that start to crisp up too much.

ENJOY!

to print the recipe, click here

Before….

and after….

These chips are addictive! I hope you’ll give them a try, even if kale is not your favorite veggie. I kept the small amount that was left inside a bowl covered with plastic wrap, and two days later enjoyed the last pieces, still crispy and delicious.   Add less salt than you think they need (sorry, Anne Burrell): the leaves shrink a lot during baking, and the salt tends to get concentrated on spots.

Husband’s verdict:  Two thumbs up! 

ONE YEAR AGO: Weekend Pita Project

TWO YEARS AGO: Tried and Tasted Roundup

Add to FacebookAdd to DiggAdd to Del.icio.usAdd to StumbleuponAdd to RedditAdd to BlinklistAdd to TwitterAdd to TechnoratiAdd to Yahoo BuzzAdd to Newsvine

HALFTONE CALENDAR & FITNESS

As I told you before,  I  keep my annual records of exercise, with the goal of each month exercising more than 50% of the days.   Until now, my records had a boring look…

But, 2012 arrived with new ideas! My stepson Casey developed a cool halftone calendar that comes with empty circles, and each day you fill a circle with a black pen (a Sharpie marker works fine).  On his site he offers quite a few options of images, for instance this Mona Lisa version, shown in the photo of his partner, actress extraordinaire Carly.

It took me only a few seconds to choose my image: Audrey Hepburn, with her unique aura of charm and beauty.  You can see all available images for a calendar or poster here.   Audrey’s image is in the bottom row, “Icons”.

Casey also made it possible to design your own calendar, from a photo stored on your computer. Just follow the instructions on his site, and you can get a unique product for you or a special friend.

So, where does the fitness fit in?

I will use my halftone calendar marking the days I exercise with a dark black dot, and leaving the other days blank.   At the end of the year, I’ll take a photo of it. Hopefully I’ll have exercised often enough to see a distinct image.   But, one could use it for all sorts of activities:  do you want to skip drinking a few nights of the week?  Mark the alcohol-free evenings!  Study that foreign language you love so much?   Meditate?  Or, forget about keeping score, just pick an image you love, and have fun watching it form, one day, one dot at a time!

ONE YEAR AGO: A soup for what ails you

TWO YEARS AGO: Let it snow, let it snow, eggs in snow (a favorite dessert of ours!)

Add to FacebookAdd to DiggAdd to Del.icio.usAdd to StumbleuponAdd to RedditAdd to BlinklistAdd to TwitterAdd to TechnoratiAdd to Yahoo BuzzAdd to Newsvine

GOLDEN AGE GRANOLA

It’s been a while, but it’s my pleasure to re-introduce my favorite guest blogger, who made a few past appearances in the Bewitching (remember guacamole?).  My beloved husband, who at age 21 was almost as handsome as he is today, shares with you his recipe for the best granola ever!   It pains me to admit it comes from a former girlfriend, but chances are I bake a better bread, and play a much meaner  round of golf. So, there!  😉
.


We spent part of our winter holiday in Sedona, AZ, where we enjoyed one of the local stores, the New Frontiers Natural Marketplace.  Still, I nearly choked on the price of some of their whole grain cereals: $13 or more for a pound of granola. It convinced me to get off my ass and make my own granola, so here’s my recipe from the golden age of peace and love: 1973.

We lived in a big Green House on Capitol Avenue in Lansing, MI, and this recipe became a staple of our diet.  It’s where me and Dave (together in the picture), Jimmy, Al and Joey spent a few years, chasing girls, cooking for each other, and listening to great music on Dave’s JBL speakers. I was 21 and dating Susie, who made the best granola anywhere, from Ann Arbor to Bloomington to Madison.

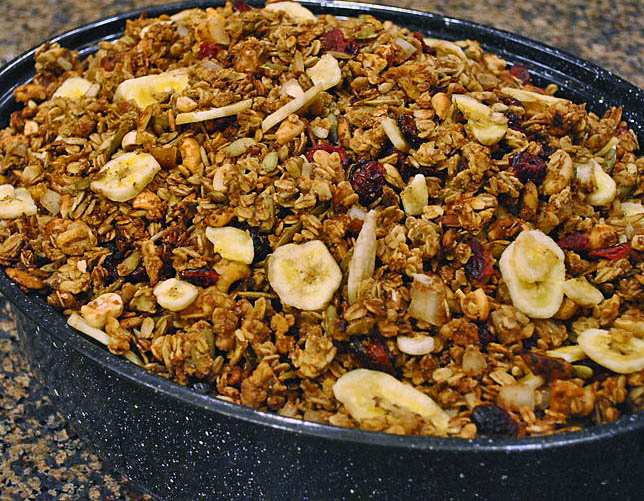
For us it was a golden age, of optimism, exploration, righteousness, liberation and natural foods.  When  you put together the ingredients for this recipe you’ll understand (and embrace) the meaning of  “grain brain.” Nothing’s better than this kind of natural food.   Once you make it and have a morning bowlful, you may never return to the preposterous prices of commercial granola.  The cost of this recipe has at least tripled in the nearly 4 decades I’ve made it, from about $10-12 to near $40 per batch, but it makes about 15 pounds, bringing the cost to a more realistic $2.50 per pound.   Cost aside, the granola’s flavor is unforgettably nutty and hearty, and the beauty of the recipe is its flexibility: you can change it in whatever way you want to customize the cereal.  Want a gluten-free version?  Then skip the wheat germ and use oat bran instead.  Don’t care for walnuts?  Use pecans instead.  Allergic to peanuts?  Substitute sunflower oil for the peanut oil.  I usually add raisins and chopped dates, which are excellent, to the baked granola, but in this batch I added dried cranberries and banana chips for a change of pace. Or leave out the banana chips and eat a bowl with fresh banana slices.  Mmmmm, that’s good!

Now, this is not a low-fat granola.  It’s a natural, whole-grain mix that gives you a mouthful of rich flavors in every bite.  To control the calories, just eat less (which you may find difficult!).

GOLDEN AGE GRANOLA
(from PEK)

Ingredients

1.  Mix the dry ingredients in a large (huge) pan or bowl:
3 pounds rolled oats
1 pound raw wheat germ
1 pound chopped walnuts
1 pound other chopped nuts (hazelnuts, pecans, cashews, almonds or a mixture)
1 raw, chopped coconut (water drained and reserved)
1 pound sunflower seeds
1 pound pepitas
1 pound brown sugar

2.  Mix the wet ingredients in a large (½ gallon) container:

water from the coconut
2 cups hot water
1 cup peanut oil
1 cup sesame oil
1/3 cup honey
1/3 cup agave nectar
1/3 cup molasses
1/3 cup maple syrup (or, use whichever of these sugars you prefer in the proportion you desire)
2 T vanilla

Heat the oven to 325 F.  Mix the dry ingredients very well in a large roasting pan or a huge bowl.  Whip the wet ingredients with a whisk or fork and pour half of it over the dry ingredients.  Mix well and then pour the remainder of the wet ingredients over the batch.  Mix very well with a large spoon, making certain that all the materials become uniformly moistened.  Spread the cereal on cookie sheets, about 3/4 in thick, and bake for 45 – 60 min, turning with a spatula every 15 min.  Let the granola cool, combine the baked batches and add some dried fruits: raisins, dates, apricots, cranberries, blueberries or banana chips … your choice, about 1.5 pounds.  Store the cereal in a large, airtight tin or vac-pack it in 1-2# pound portions.

ENJOY!

to print the recipe, click here

Some photos of the process (click on the pictures to enlarge)…

The ingredients…

Mixing the dry ingredients…

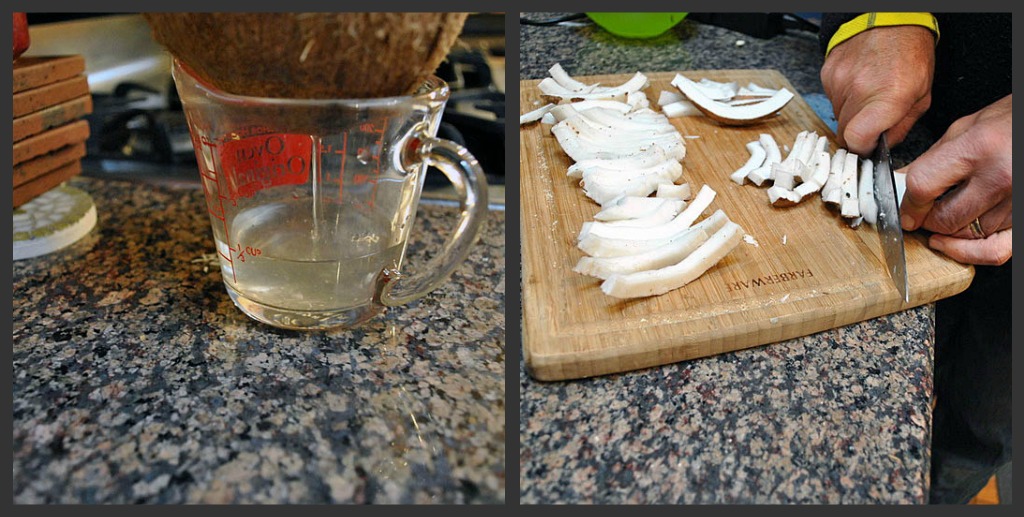
Draining and chopping the coconut…

Chopping the nuts…

Mixing dry and wet ingredients…

Baking, turning, and cooling…  the final stretch!

ONE YEAR AGO: Mushroom Souffle for Two

TWO YEARS AGO: Stollen

Add to FacebookAdd to DiggAdd to Del.icio.usAdd to StumbleuponAdd to RedditAdd to BlinklistAdd to TwitterAdd to TechnoratiAdd to Yahoo BuzzAdd to Newsvine