KEN FORKISH’S WARM SPOT SOURDOUGH

First bread post of 2015!  Not the first bake of the year, because this was made for Phil’s birthday on the last week of December. He chose the whole menu, which consisted of oysters on the half-shell as a first course, and clam chowder as the main dish. Also according to his request, no dessert to keep things moderate.  Perfect for me.  The bread was all that bowl of chowdah needed to shine in its creamy glory!

Warm Spot Sourdough1

WARM SPOT SOURDOUGH

I am not going to share the full recipe (from Ken Forkish’s book Flour Water Salt Yeast), but you can find it online with a visit to Karen’s site. And don’t just limit yourself to that recipe,  look around and be amazed by her talent. Just a recent example: she tackled Pretzel Rolls, the traditional Laugenbrötchen. That is on my mile-long list of things to try this year. Now, back to my sourdough…

A little walk through the method… The bread takes three days to prepare, but don’t let that intimidate you. It is worth your time. The interesting twist in the recipe is keeping your sourdough starter at a higher temperature of fermentation, around 85 F. During the winter that can be a challenge, but I am the lucky owner of a bread proofing box. Problem solved. Because the starter ferments at a higher temperature you will need to refresh it more often than usual, but as I mentioned in my previous sourdough post, Ken is particularly helpful in laying out a nice schedule for each of his recipes.

After the bulk fermentation, in which I gave four folding cycles to the dough, the bread is shaped, and retarded in the fridge overnight. From the fridge it goes straight into the hot oven, no need to bring it to room temperature.

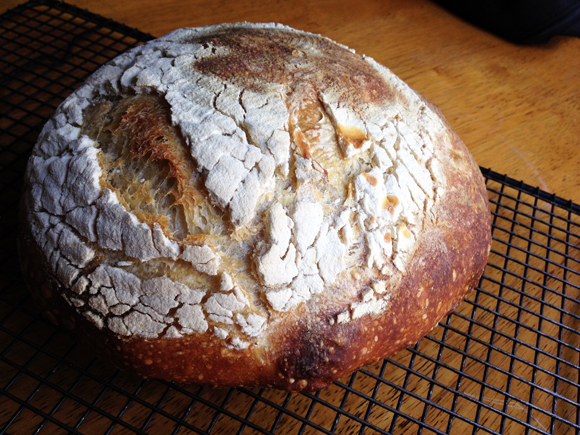
One of the things I did differently in this bake was to flour my banetton, cover it with plastic wrap (Saran Wrap type), flour the plastic and place the shaped dough for its final proof, seam side UP (going against Ken’s usual method).  Next morning, I inverted the bread on parchment paper, slashed the surface and baked it with my normal method of steam (Dutch oven covered with a wet lid).  Ken likes to allow his breads to open naturally, so he proofs the shaped loaf with the seam side down, then simply inverts it on the baking sheet without slashing. I did this on my first time making this recipe a couple of months ago, and even though the bread tasted as good as this one, it failed to open in a more dramatic way.  Take a look:
FirstLoaf

Maybe it is just a matter of personal preference, but I rather help the bread open in a more defined way.  One more remark before I go: I liked the use of the plastic wrap because it gave me extra confidence removing the bread from the banetton. I’ve had too many situations of dough sticking and compromising the shape of the loaf in the end.  I suspect my skills to shape the loaf and generate enough surface tension need improvement. Until then, I will be using this trick, and if you had problems with dough sticking give it a try…

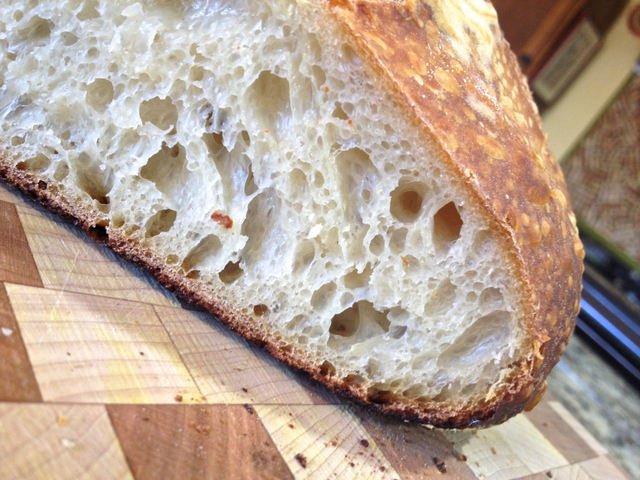
The bread had good oven spring, the crust was just the way we love it!
CrumbCRUMB SHOT

So there we have it, another birthday celebration, with good music, juicy oysters, delicious bread, and a warming bowl of soup, all in the comfort of our home!  Life is good…

I am submitting this post to Susan’s Yeastspotting event…

ONE YEAR AGO: Bran Muffins, Rainbows, and a wonderful surprise!

TWO YEARS AGO: Cider-Marinated Pork Kebabs

THREE YEARS AGO: Golden Age Granola

FOUR  YEARS AGO: Mushroom Souffle for Two

FIVE YEARS AGO: Stollen

CREMINI MUSHROOM MEATLOAF

As Anne Burrell often puts it: brown food tastes good. I fully agree, but it is a nightmare for food bloggers. Why? Taking a good picture is quite tricky. Granted, photography is not one of my fortes, but I am aware that even those who know their way around a camera need to work a little harder when faced with beef stews, chocolate brownies, and – case in point – meatloaf.  This one maybe even trickier as the beef is mixed with cremini mushrooms. Double decker brown for you!  Still, no matter the quality of the photos, I had to share this recipe because it is totally worth it. The mushrooms not only provide extra moisture to the meat loaf, but they add that enticing umami-ness.  The recipe comes from Cooking Light magazine which is one of my favorite sources for weeknight recipes. Never too rich, always packing great flavor.

Cremini Meat Loaf

CREMINI MUSHROOM MEAT LOAF
(adapted from Cooking Light)

1 pound cremini mushrooms
1 tablespoon canola oil
1 shallot, minced
1 garlic clove, minced
2 tablespoons dry sherry
2 teaspoons chopped fresh thyme
1/4 cup almond flour
3/4 teaspoon kosher salt
1/2 teaspoon ground black pepper
8 ounces ground sirloin
1 large egg, lightly beaten
Cooking spray
1/4 cup ketchup, divided
.
Heat oven to 375°.
.
Place the mushrooms in a food processor; process until minced. Do it in two batches if necessary.
.
Heat a large skillet over medium-high heat. Add oil to pan; swirl to coat. Add minced shallot; sauté 3 minutes. Add garlic; sauté 1 minute. Add mushrooms; cook 7 minutes or until liquid evaporates and mushrooms begin to brown. Add sherry; cook 1 minute, stirring frequently. Remove from heat; stir in thyme. Cool slightly.
.
Combine mushroom mixture, almond flour, and next 4 ingredients (through egg), mixing until well combined. Shape mixture into a free-form loaf on a foil-lined baking sheet coated with cooking spray. Bake at 375° for 20 minutes. Remove from oven; brush with half of ketchup. Bake an additional 10 to 15 minutes or until a thermometer registers 160°. Remove from oven; brush with remaining ketchup, if desired. Cut into 8 slices.
.
ENJOY!

to print the recipe, click here

served

One of the changes I made in the recipe from Cooking Light was using almond flour instead of Panko. If you prefer a more traditional take, go for breadcrumbs, same amount.  I served the meatloaf with mashed cauliflower and spinach, a recipe that I blogged about not too long ago. This was a simple, but delicious meal. You can prepare the mushroom mixture in advance, even a couple of days earlier to speed up dinner preparation. One of the best things of this meal: leftovers. My lunch next day was a couple of slices of meat loaf with a hard-boiled egg, and an avocado. The type of lunch that doesn’t make me sluggish during the afternoon. Love it!

ONE YEAR AGO: Roast Chicken with Clementines

TWO YEARS AGO: Eight-Ball Zucchini: The Missing Files

THREE YEARS AGO: Grilling Ribbons

FOUR YEARS AGO: Peppery Cashew Crunch

FIVE YEARS AGO: Ossobuco Milanese: an Italian Classic

CREAMY BROCCOLI SOUP WITH TOASTED ALMONDS

This soup was quite a revelation for me, because it tasted amazing even though it called for very few, humble ingredients. No need to search for black truffles in a jar to make it, although I must say the flavor was so complex that I wondered if truffles had been hanging out around that broccoli at harvest time. Nah…. Just my overly vivid imagination.  The inspiration came once more from Mike, the man behind The Iron You. I’ve been a reader of his blog for only a few months, but that is long enough to realize his taste in food matches ours quite well. On a side note, for those into special nutrition, this concoction is paleo-friendly and low-carb.

unnamed-3

CREAMY BROCCOLI SOUP WITH TOASTED ALMONDS
(modified from The Iron You)

1 ½ lbs broccoli cut into florets
2 tablespoons coconut oil (or olive oil)
1 leek stalk, thinly sliced
3 small celery ribs, thinly sliced
1 garlic clove, minced (optional)
2 ½ cups vegetable broth
1 teaspoon fine grain salt
Freshly ground pepper to taste
1 (13.5 oz) can full fat coconut milk
dash of ground nutmeg
slivered almonds slightly browned in olive oil
.
Heat the coconut oil in a large saucepan over medium-high heat. Add leeks, celery, garlic, a little salt and pepper, and cook, stirring every now and then, until softened, about 7 minutes.

Add broccoli florets, broth, and bring to a boil. Reduce to a simmer and cook until the broccoli florets are tender, about 15 minutes. Add coconut milk, give a good stir and cook for further 5 minutes. Add the nutmeg and mix well.
.
Transfer the soup to a blender and puree in batches, or use an immersion blender if you prefer. Adjust seasoning with salt and pepper, maybe a little more nutmeg. If the soup is too thick add a bit of water; if instead it’s too thin cook until it reaches the desired consistency.
.
Serve warm with sautéed almonds on top.

ENJOY!

to print the recipe, click here

Comments: For some reason I don’t make soups that often, but whenever I do, I feel quite virtuous…  I prepared this particular recipe early in the morning and had it for lunch after running. It was a bright sunny day, but quite cold, maybe 40 F with a little wind.  The soup was like a warm hug, soothing and energizing at the same time. I highly recommend it after a workout. There’s something about the creaminess offered by the coconut milk that will make you feel on top of the world.  Vivid imagination, you say? 😉

Mike, thanks for the constant culinary inspiration!

ONE YEAR AGO: Cheddar and Fennel Seed Crackers 

TWO YEARS AGO: A Festive Pomegranate Dessert

THREE YEARS AGO: My First Award!

FOUR YEARS AGO: A Message from WordPress

FIVE YEARS AGO: Turkish Chicken Kebabs


AND ANOTHER YEAR STARTS…

To begin, begin…
(William Wordsworth)

Many food bloggers will list their most popular posts for the year that just ended. Many will talk about resolutions for the New Year that starts, or blog about healthy recipes. Nothing wrong with that. I actually look forward to reading these types of posts, even if I don’t always follow the trend.

So, what’s my take on a new year that starts?  I am not too big on resolutions or setting a particular starting point to change behaviors and attitudes,  but it is almost impossible not to get into a self-analyzing mode when a new year is about to say hello. I think if I had to offer a motto to go by, it would be: strive to become the best person you can be, in all aspects of your life. Leave a space in better shape than it was when  you arrived. Maybe all it takes is a smile, a compliment to someone, or doing some extra task you are not required to do. Pursue a personal goal you’ve been neglecting for too long. Volunteer for a cause you believe to be important, such as gun control. There will be a ton of stuff to be sad, upset, frustrated about, and you won’t be able to do anything about 90% of it.

Truth is, we are all impotent to deal with the horrors, the incredible level of cruelty that human beings can do to each other in the name of things often defined as sacred. We also feel helpless to deal with tragedy or serious illnesses hitting people we care deeply about. Obviously as we get older, we witness more and more of it. A feeling of impotence and despair can hit pretty hard sometimes. But that little space surrounding your body and your mind, you can have an impact on. Make it a positive one.

Anyway, another year starts. Quoting Tony Horton:

“Do your best, and forget the rest.”

and of course, no more cookbooks for me in 2015!

HAPPY NEW YEAR!

future(image from Wikimedia Commons)

(comments are shutdown for this post)


MACARONS: MUCH BETTER WITH A FRIEND!

Making macarons has been on my list of culinary projects for a very long time! They are quite intimidating, because small details in the preparation can ruin them. Even experienced bakers often share stories involving feet-less macarons  (can you imagine the horror?), cracked macarons, and many other types of monstrosities. Even though I did not list cooking projects for 2014, I was set on not letting another year pass by without attempting them.  Then, the perfect opportunity shaped up: our friend Cindy came up for a visit with her husband, and we decided to tackle this challenge together.  We had so much fun, I highly recommend that you consider inviting a friend over and doing the same. I’d been collecting recipes, tips, advice, and after consulting with my expert patissier friend Gary, we focused our efforts in two sites: Gwen’s Kitchen Creations and Joanne’s Eats Well With Others. They both definitely know their ways around the tricky Parisian macarons.

FrenchMacarons

SNICKERDOODLE MACARONS
(adapted from Gwen & Joanne)

for the shells:
3 large egg whites, (95-100g), aged overnight
1/4 tsp cream of tartar
1/4 cup sugar (50g)
pinch of salt
2 cups powdered sugar (200g)
1 cup almond flour  (120g)
.
for the filling:

(makes a lot, you can reduce the amount, if you prefer)
1 cup unsalted butter, room temperature
4 cups confectioner’s sugar
¼ cup heavy cream
2 tsp vanilla extract
salt, to taste
1 tbsp cinnamon, plus more for dusting

 .
 Sift the salt, powdered sugar, and almond flour into a large container. Discard any clumps in the sieve. Using a whisk attachment, beat egg whites with cream of tartar until foamy. Add sugar in 3 batches. Continue beating until stiff peaks form. Add gel food coloring, if desired, whisk again.
.
Add 1/3 of the almond mixture into the egg whites. Fold until incorporated – about 15-20 turns. Then add another 1/3. Fold again. Repeat one last time. It will take about 65 folds for the right consistency.
.
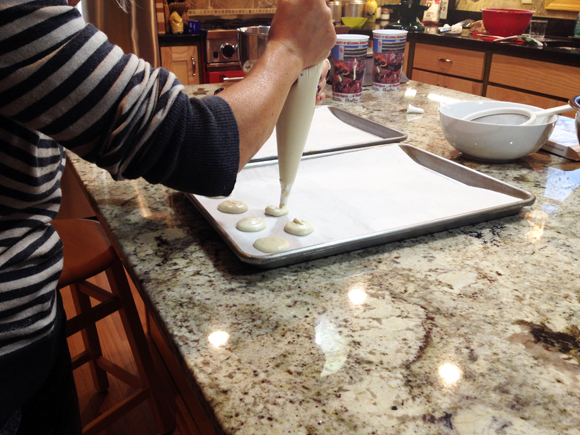
Draw circles with a pencil on a sheet of parchment paper, then place the sheet with the drawing side down on a baking sheet, so that you can see the lines through. Pipe small circles using a pastry bag, making sure your hand is vertical, at 90 degrees over the center of the circle.
.
Let rest until a skin forms. It should no longer be sticky. 30-60 minutes.
.
Bake at 275F for 17 minutes. Let the shells cool completely before attempting to peel them off.

Make the filling: in the bowl of a stand mixer fitted with the paddle attachment, combine the butter and powdered sugar, mixing on medium-high speed until light and fluffy. Add in the cream and vanilla and beat on medium-high for 3 minutes. Mix in the cinnamon until completely combined, as well as salt to taste.

Pipe the buttercream onto the flat side of half of the macarons and then top them with a second, similarly sized macaron. Refrigerate in an airtight container overnight. Dust with cinnamon before serving.

ENJOY!

to print the recipe, click here

piping

Comments: Very few culinary projects will confuse you as much as macarons. If you read cookbooks or advice online, you will find conflicting info almost for every step. Do not over-beat the egg whites… It’s impossible to over-beat the egg whites, beat a couple of minutes longer after you think they are done… don’t over-dry the shells…. it’s impossible to over-dry the shells….  sift the flour at room temperature…. roast the flour to dry it completely…  don’t even think of making macarons with regular meringue…  Mind blowing, my friends, mind-blowing.  At some point you will have to settle on a recipe for your first time, take a deep breath, and see how it goes. I think for a first time we did pretty good, actually.  Aren’t they cute?

closeup
From what I gathered around the many sources, it is VERY important to age the egg whites, so make sure to do that. Crack the eggs the day before, separating the whites and let them sit over the countertop overnight.

Since this was such an involved process, I’d like to share a few photos of our adventure…

Sifting… it was by far the most painful and boring step of the whole recipe. We took turns, but sifting the almond flour took a loooong time. Cindy did a much better job than me, she is patient and thorough. Moi? Not so much… (sigh)
sifting

We made a nice template for the shells, using the top of shot glasses….
template

Egg whites were beaten until shiny, smooth-looking peaks formed…
eggwghites

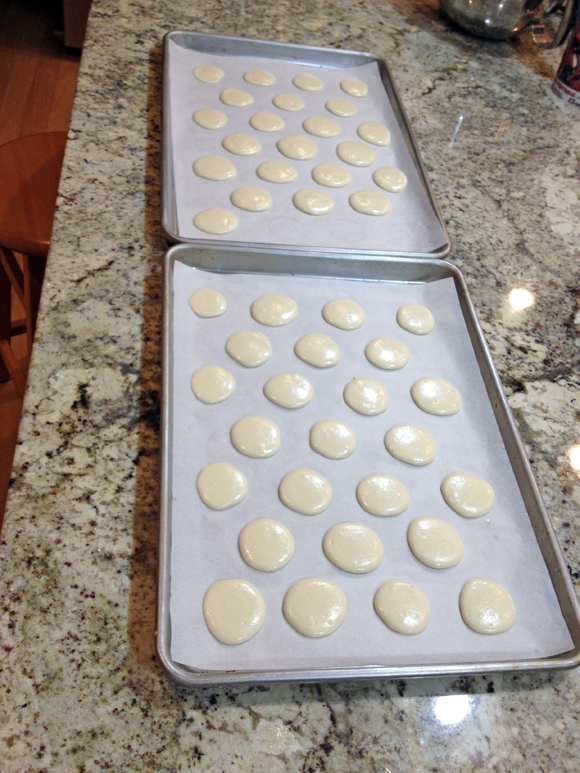
Here are the results of our labor of love, shells piped and drying….
drying

Here are our baby-shells after baking, most with nice little feet…..
baked

All in all, we had a great time, and learned a lot that day… We assembled the best looking ones, and some of the ugly ducklings were consumed right away by our partners in the name of aesthetics.
ready

The advice to wait to savor them next day is also spot-on: there is a definite improvement in texture, so these are perfect to make in advance and show-off your baking abilities at a get together.

Next time I will try Dorie Greenspan’s recipe, that uses an Italian-type meringue, in which the sugar-egg white mixture is stabilized by heat. I thought it was too involved for our first time, but from what I’ve been reading, it might be a better approach.

Cindy, thanks for joining me in this challenge,
I definitely could not have done it without you!

ONE YEAR AGO: Our Mexican Holiday Dinner 

TWO YEARS AGO: The Ultimate Cranberry Sauce

THREE YEARS AGO: Edamame Dip

FOUR YEARS AGO: Gougeres

FIVE YEARS AGO: Beef Wellington on a Special Night