Am I breaking my own rule of never ever stating that a recipe is the best ever? Apologies for the convoluted phrase. But to answer my own question, no I am not. Because I was NOT the one who chose the name. It was published as such in Saveur magazine. You can read the interesting article clicking here. My beloved husband found it, showed it to me and said “we should probably give it a try.” Even though we alternate cooking dinner – one day he cooks, next day I do – he thinks I should be the one venturing in new territories. Which is totally fine with me. The problem with this recipe is that it will have you fry countless slices of breaded eggplant. It seemed like an ordeal and with a high chance of disappointment in the end: a heavy portion of greasy eggplant loaded with cheese. But after reading the article, I decided to humor the husband and give it a go. I tell you one thing: I was wrong. This was one OUTSTANDING eggplant parmigiana, and worth all the work.

SAVEUR EGGPLAN PARMIGIANA
(from Saveur magazine)
For the sauce:
2 (28-oz.) cans plum tomatoes with their juices
3 Tbsp. extra-virgin olive oil
6 large garlic cloves, peeled (I used finely minced celery in its place)
Kosher salt
Freshly ground black pepper
For the eggplant:
3 large eggs
Kosher salt
1¼ cups dried plain fine bread crumbs
1 Tbsp. dried Italian seasoning, or equal parts dried basil, dried rosemary, and dried oregano
3 medium eggplants (about 3 lb. total), mostly peeled except for a few strips of skin, sliced into thin rounds slightly thinner than ¼ in.
About 1 cup extra-virgin olive oil
1½ cups (about 10½ oz.) shredded mozzarella cheese (not fresh)
3 Tbsp. finely grated Pecorino Romano
Make the sauce: In a blender, pulse the tomatoes and their juices until just slightly chunky. In a pot over medium-low heat, add the oil and garlic (or celery), and cook, stirring occasionally, for a couple of minutes. Pour in the puréed tomato mixture and season with a generous pinch each of salt and pepper. Bring to a gentle simmer and cook, stirring frequently, until thickened slightly, at least 1 to 1½ hours. The sauce can be cooled and refrigerated for up to 2 days.
Bread the eggplant: In a wide shallow bowl, beat the eggs with 1 tablespoon water. Season with a generous pinch of salt. In a second baking dish or bowl, stir together the bread crumbs, Italian seasoning, and 1⁄2 teaspoon salt. Working with one or two at a time, dredge the eggplant slices in the egg wash and let the excess drip back into the bowl. Transfer to the bread crumbs and coat very lightly on each side. Line a large baking sheet with a few layers of paper towels and set by the stove. In a large high-sided skillet over medium-high heat, heat ½ cup oil until shimmering. Turn the heat down to medium and add some eggplant slices in a single layer until the skillet is full. Cook, turning once, until well browned on each side, about 6 minutes total. Transfer to the prepared baking sheet. Repeat with the remaining eggplant, working in batches as needed and adding a little more oil every other batch, or as needed.
Heat the oven to 400F.
In a 9-by-13-inch baking dish, ladle ½ cup plus 2 tablespoons sauce into the bottom. Cover the sauce with a single layer of eggplant (start with the thickest ones on the bottom and save the prettiest slices for the top). Ladle another ½ cup sauce on top, spreading it evenly. Sprinkle with about 1⁄3 cup plus 2 tablespoons mozzarella and 1 tablespoon Pecorino. Add another layer of eggplant and repeat this process until you’ve reached the final layer of eggplant. Top this layer only with ½ cup sauce, a final thin layer of mozzarella, and some Pecorino. (Reserve any remaining sauce for another use.) At this point, the eggplant parmigiana can be refrigerated, covered, for up to 1 day.
Bake, uncovered, until the cheese is melted and bronzed in places and the sauce is bubbling around the edges, about 20 minutes (add about 10 minutes if your dish was previously assembled and chilled). Remove and let cool slightly. Slice into squares and serve warm.
ENJOY!
to print the recipe, click here
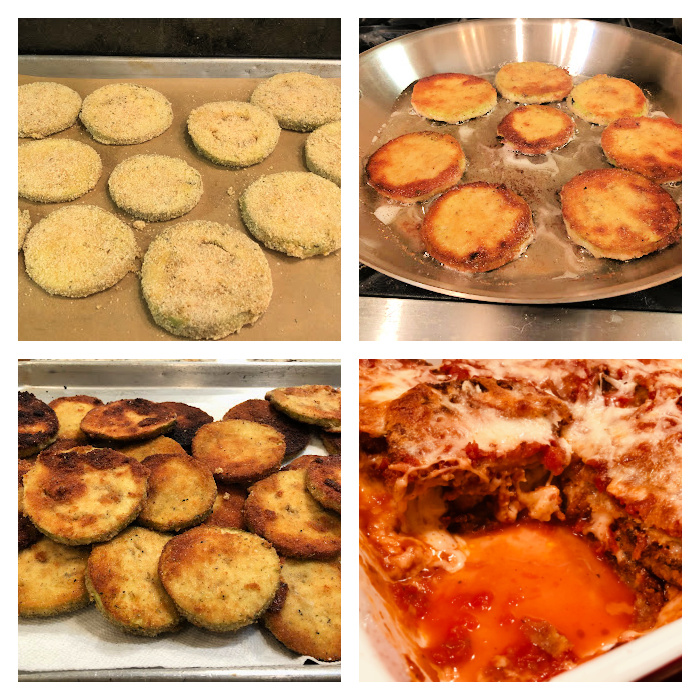
Comments: I am normally a lot more lax when I follow a recipe, and don’t worry about careful measurements (unless it is baking). But in this particular case I decided to follow it to a T and measured every component. Once the baking dish was fully assembled with the eggplant, sauce and cheese, I was quite skeptical about the outcome, because it did not look luscious enough. But I have to agree, when you follow the recommended amounts of sauce and cheese, and deal with the eggplant slices exactly as advised, the final dish is pretty amazing. The taste of the eggplant comes through without being “suffocated” by sauce and cheese. It is satisfying but not heavy. We are still talking about how good it was. Added bonus: leftovers kept frozen for a week tasted almost better with a slow defrost in the fridge and a brief warming in a low oven…

If you have a vegetarian friend to entertain, look no further. The main dish of your menu is decided!
ONE YEAR AGO: Roasted Butternut Squash and Grapes with Maple Pomegranate Glaze
TWO YEARS AGO: A Really Big Announcement
THREE YEARS AGO: Stir-Fried Chicken in Sesame-Orange Sauce
FOUR YEARS AGO: Monday Blues
FIVE YEARS AGO: A New Way to Roast Veggies
SIX YEARS AGO: Two Takes on Raspberries
SEVEN YEARS AGO: Spice Cake with Blackberry Puree
EIGHT YEARS AGO: Own Your Kitchen with Cappuccino Panna Cotta
NINE YEARS AGO: Chicken Parmigiana, the Thriller
TEN YEARS AGO: Wild Mushroom Risotto
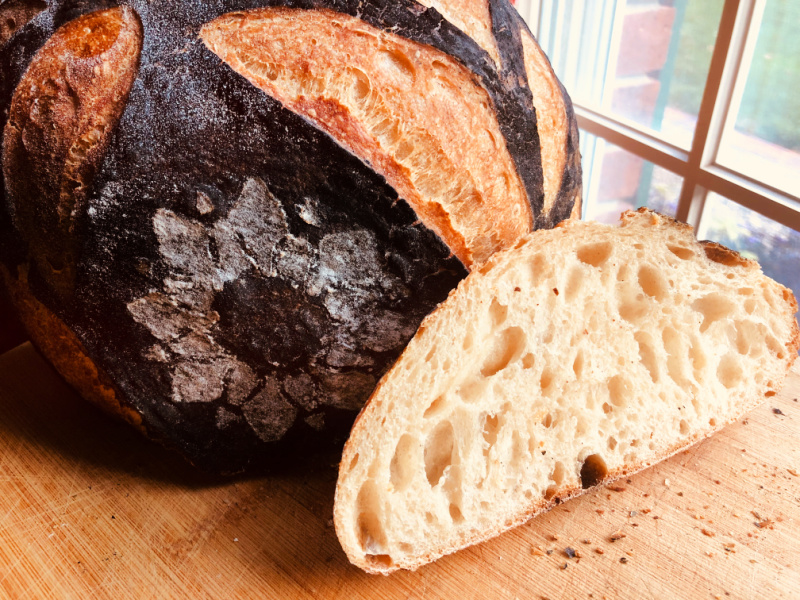
ELEVEN YEARS AGO: Tartine Bread: Basic Country Loaf
TWELVE YEARS AGO: Pugliese Bread