March 11th, 2020
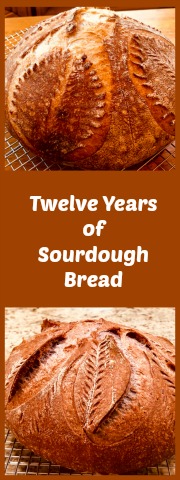
Twelve years of sourdough and 60 years alive and kicking!
The other day I found a little notebook with handwritten notes about the very beginning of my sourdough days, when I did not have a blog yet. No photos, just remarks about what to avoid, what to improve, the favorite recipes. The notebook is 12 years old, the age of my oldest starter, Dan. I wish I knew how many loaves I’ve baked over these years. What I realize is that I streamlined the process quite a bit, and now settled on a timeframe that works perfectly for me. Mix the dough around 4pm, shape and refrigerate around 9pm and bake next morning, straight from the fridge, into a cold Dutch oven type container, sitting on parchment paper. No more arm burns trying to deal with a screaming hot pan. Sometimes I throw a bit of water or an ice cube inside the pan, sometimes I forget and the fact that the pan is covered tightly with a lid seems to generate enough moisture for a nice crust. In this post, I share two loaves in which I played with color, razors and scissors. I also modified slightly how I mix the dough, and must say that I love the effect it has on the overall “strength” of the crumb. Purists, prepare to be disappointed.

SALLY’S SCISSORHANDS SOURDOUGH
(from the Bewitching Kitchen)
110g sourdough starter at 100% hydration
380g water
50g whole-wheat flour
450g bread flour
10g salt
Make the levain mixture about 6 hours before you plan to mix the dough. It should be very bubbly and active.
When you are ready to make the final dough, place the water in the bowl of a KitchenAid type mixer and dissolve the sourdough in it, mixing with a spatula briefly, then add all flours and salt. Turn the mixer on with the hook attachment and knead the dough for 4 minutes at low-speed all the time. You will notice the dough will gain quite a bit of structure even with just 4 minutes in the mixer. Remove from the machine, and transfer to a container lightly coated with oil, cover lightly with plastic wrap and allow it to ferment for 4 hours, folding every 45 minutes or so. Because the dough is already a bit developed from the initial time in the mixer, you should get very good structure after 3 and a half hours, or even sooner than that.
After four hours bulk fermentation, shape the dough as a ball, and place, seam side up, in a lightly floured banetton. Place in the fridge overnight, from 8 to 12 hours.
Next morning, heat the oven to 450F.
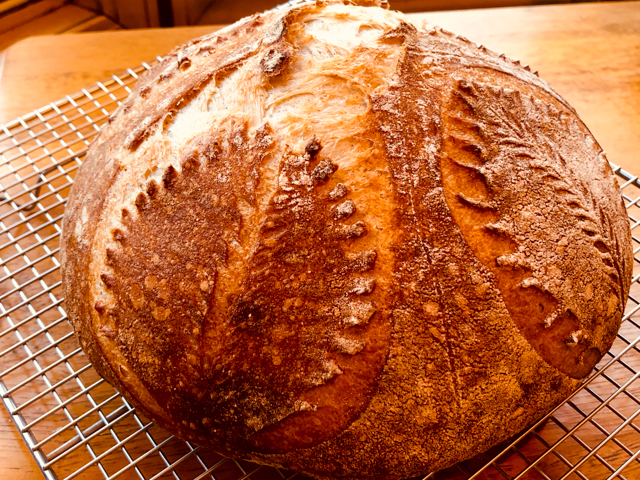
Invert the dough on a piece of parchment paper and lightly, very lightly coat it with flour, then rub all over the surface with the palm of your hand. Use a string to make four lines to mark regions of the bread to facilitate drawing the patters. Use a new razor blade to slash the dough in a leaf pattern, one leaf per quadrant. Then, with very small scissors, clip the outside lines of the leaves. Decorate the inside region with more razor blade slashes.
Bake at 450F for 45 minutes, preferably covered for the first 30 minutes to retain steam. You can generate additional steam by spraying the inside of the lid with water before closing the pan. Cool completely over a rack before slicing.
ENJOY!
to print the recipe, click here

Loved scoring the bread with scissors! I cannot take credit for it, just noticed a few breads like that in instagram feeds and pinterest, and decided to give the technique a try. I think I could have been a bit more assertive, but to tell you the truth, after I butchered Paul Hollywood’s Cob Loaf in front of the cameras because of excessive enthusiasm, I became slashing-shy. I need some more time to recover and find my mojo.
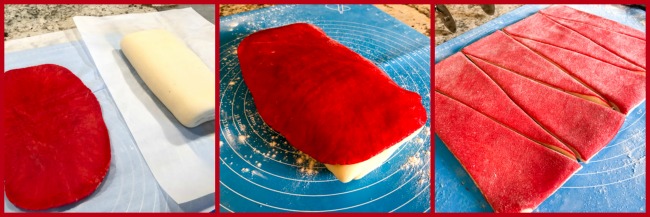
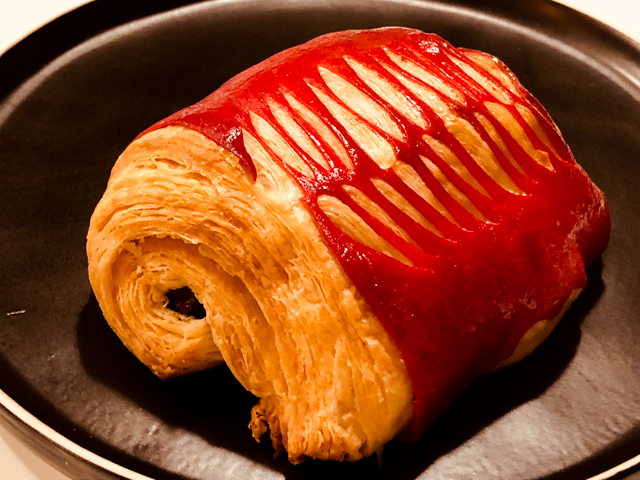
Moving on… A similar sourdough loaf with two additions: peanut butter and butterfly pea flower powder. I was so thrilled by the taste and looks of this bread, I cannot wait to bake another loaf.

NUTTY BUTTERFLY PEA FLOWER SOURDOUGH
(from the Bewitching Kitchen)
110g sourdough starter at 100% hydration
380g water
50g whole-wheat flour
450g bread flour
1 Tablespoon butterfly pea flower powder
1/8 cup peanut butter (crunchy or smooth)
10g salt
Make the levain mixture about 6 hours before you plan to mix the dough. It should be very bubbly and active.
When you are ready to make the final dough, place the water in the bowl of a KitchenAid type mixer and dissolve the starter and the peanut butter in it, mixing with a spatula briefly, then add the flours, and salt. Turn the mixer on with the hook attachment and knead the dough for 4 minutes at low-speed all the time. You will notice the dough will gain quite a bit of structure even with just 4 minutes in the mixer. Remove from the machine, and transfer to a container lightly coated with oil, cover lightly with plastic wrap and allow it to ferment for 4 hours, folding every 45 minutes or so. Because the dough is already a bit developed from the initial time in the mixer, you should get very good structure after 3 and a half hours.
After four hours bulk fermentation, shape the dough as a ball, and place, seam side up, in a lightly floured banetton. Place in the fridge overnight, from 8 to 12 hours.
Next morning, heat the oven to 450F.
Invert the dough on a piece of parchment paper and lightly, very lightly coat it with flour, then rub all over the surface with the palm of your hand. Use a new razor blade to slash the dough in a decorative pattern.
Bake at 450F for 45 minutes, preferably covered for the first 30 minutes to retain steam. You can generate additional steam by spraying the inside of the lid with water before closing the pan. Cool completely over a rack before slicing.
ENJOY!
to print the recipe, click here

Comments: I was a bit worried when the dough showed such intense blue color, but it gets quite a bit mellowed down during baking. The other thing that amazed me about the bread was the peanut smell during baking, very noticeable and pleasant. The idea of using a nut butter came from my friend, Bread Baker Queen, Elaine. She’s been doing it quite often with great results (check her post here) and I finally had a chance to do it myself. The additional fat in the peanut butter changes the texture of the crumb quite a bit. Try it, you might fall in love with it too.

Someone was very intrigued by the color of the loaf. Keep in mind that the blue color is lost on the crust as it gets dark in the oven, so don’t panic thinking that the blue was somehow ruined. Once you slice it, you’ll have a big smile in your face.
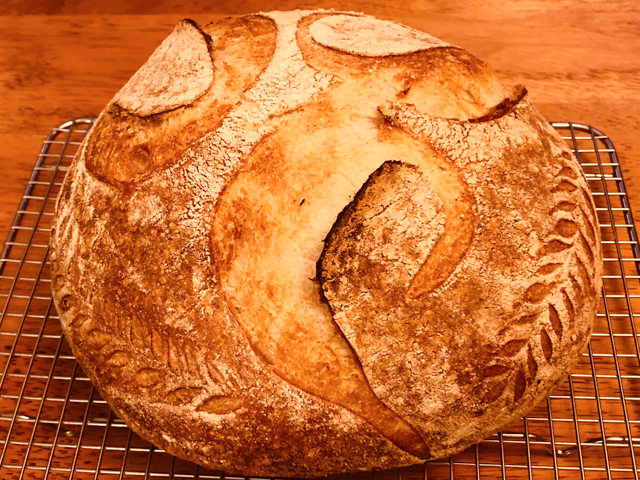
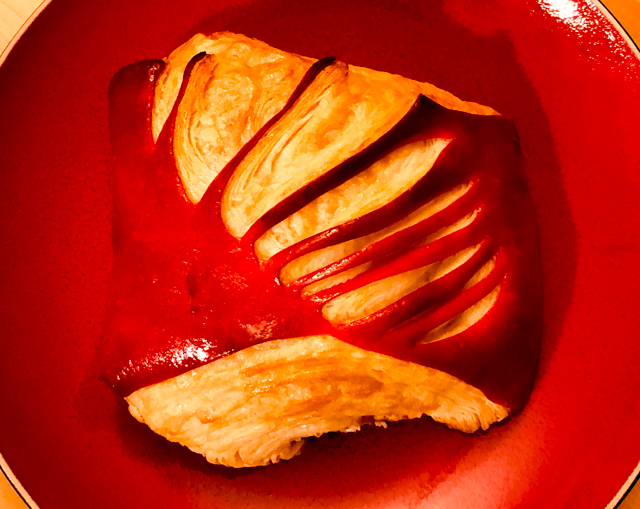
Did I say I was going to share two breads today? Well, here’s one more, same recipe as the first, but no scissors. Just some swirls.


I find sourdough baking one of the most flexible and forgiving methods to make bread. When you use commercial yeast, things happen so fast, you need to be around and on top of it from beginning to end. Once you get a system in place for the slow approach of wild yeast, you will never look back.

As this post is published, we will be in Oahu, enjoying a double celebration trip, 20 years of our wedding anniversary and my Birthday. I feel lucky and grateful for so much. Having the blog to share recipes and thoughts, and friends that make it so special, is the icing on my Birthday cake. THANK YOU!
ONE YEAR AGO: Rainbow Carrots with Rose Harissa
TWO YEARS AGO: Deviled Eggs go Green
THREE YEARS AGO: Tiramisu
FOUR YEARS AGO: Pulled Pork, Slow-Cooker version
FIVE YEARS AGO: The Pie of the Century
SIX YEARS AGO: Bon Bon Chicken
SEVEN YEARS AGO: Leaving on a Jet Plane
EIGHT YEARS AGO: A Pearfect Drink
NINE YEARS AGO: Ming Tsai Under Pressure
TEN YEARS AGO: Paris, je t’aime!