New Year, New Life, New Secret Recipe Group!
Those who follow my blog might be used to my Secret Recipe Club participation on the fourth Monday of each month. However, I’ve been a member for so long that it seemed like a good idea to move to a new group in the club. So, I switched to Group A, and my SRC posts will fall instead on the first Monday of each month. Of course it is a bit sad to leave the comfort of my old group, where so many ties were made, but I know they won’t be broken. Actually, if I may share something special, take a look at this post written by our wonderful moderator, Sarah Ellis. What a nice surprise it was! She does that type of Gold Member post on a regular basis, but it was my first time in her spotlight… Felt great!
Obviously, I was anxious to get my first assignment of the year, and was overjoyed when I got the email. Why? Because I was assigned to Sid’s site, a blog I’ve been following for a long time, so it felt like the warmest possible welcome for me… Sid has been blogging since June 2011 (see her first post here), although in fact she used to have another blog earlier, dedicated to pictures and crafts. Then she decided to start Sid Sea’s Palm Cooking to concentrate on food blogging. Well, I am thrilled she did it! One of the things I love the most about her site is her energy, upbeat mood, and wit. Every post gives me a big smile. Plus, she cooks amazing stuff all the time. Two features are quite interesting in her site, the “Tapas” and “Boat Club” posts, organized together in a page you can access here. Those are monthly events she participates (in real life), and then shares with her readers. If you need inspiration for a tapas or cocktail type party, look no further! I had quite a few recipes selected as possibilities for this assignment like her Yorkshire puddings, her Sweet Potato Samosas, her Sweet and Sour Chicken Meatballs, her elegant Leek Pancakes, but ended up settling for the Sunday Gravy with Braciole because it seemed perfect for the weather: luscious, filling, very complex flavors. Of course, brown food is not very camera-friendly, but it is fantastic for the taste buds. So there!
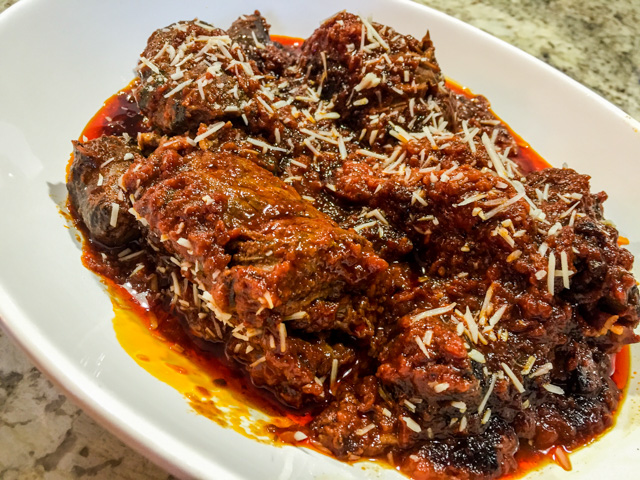
SUNDAY GRAVY WITH BRACIOLE
(slightly modified from Sid’s Sea Palm Cooking)
1/4 cup olive oil
6 mild Italian Sausages, cut in thirds
1/2 large onion, finely chopped
2 cloves garlic, minced
1 (5 oz) can of tomato paste
1/2 cup dry red wine
3 (28 oz.) cans Italian Plum Tomatoes (San Marzano if possible)
2-3 Tbsp. of equal parts of dried basil, thyme, sage and oregano
1/4 cup rye whiskey (optional, I used regular whiskey)
4 slices of bacon
2 tbsp chopped parsley
salt and pepper to taste.
olive oil for browning
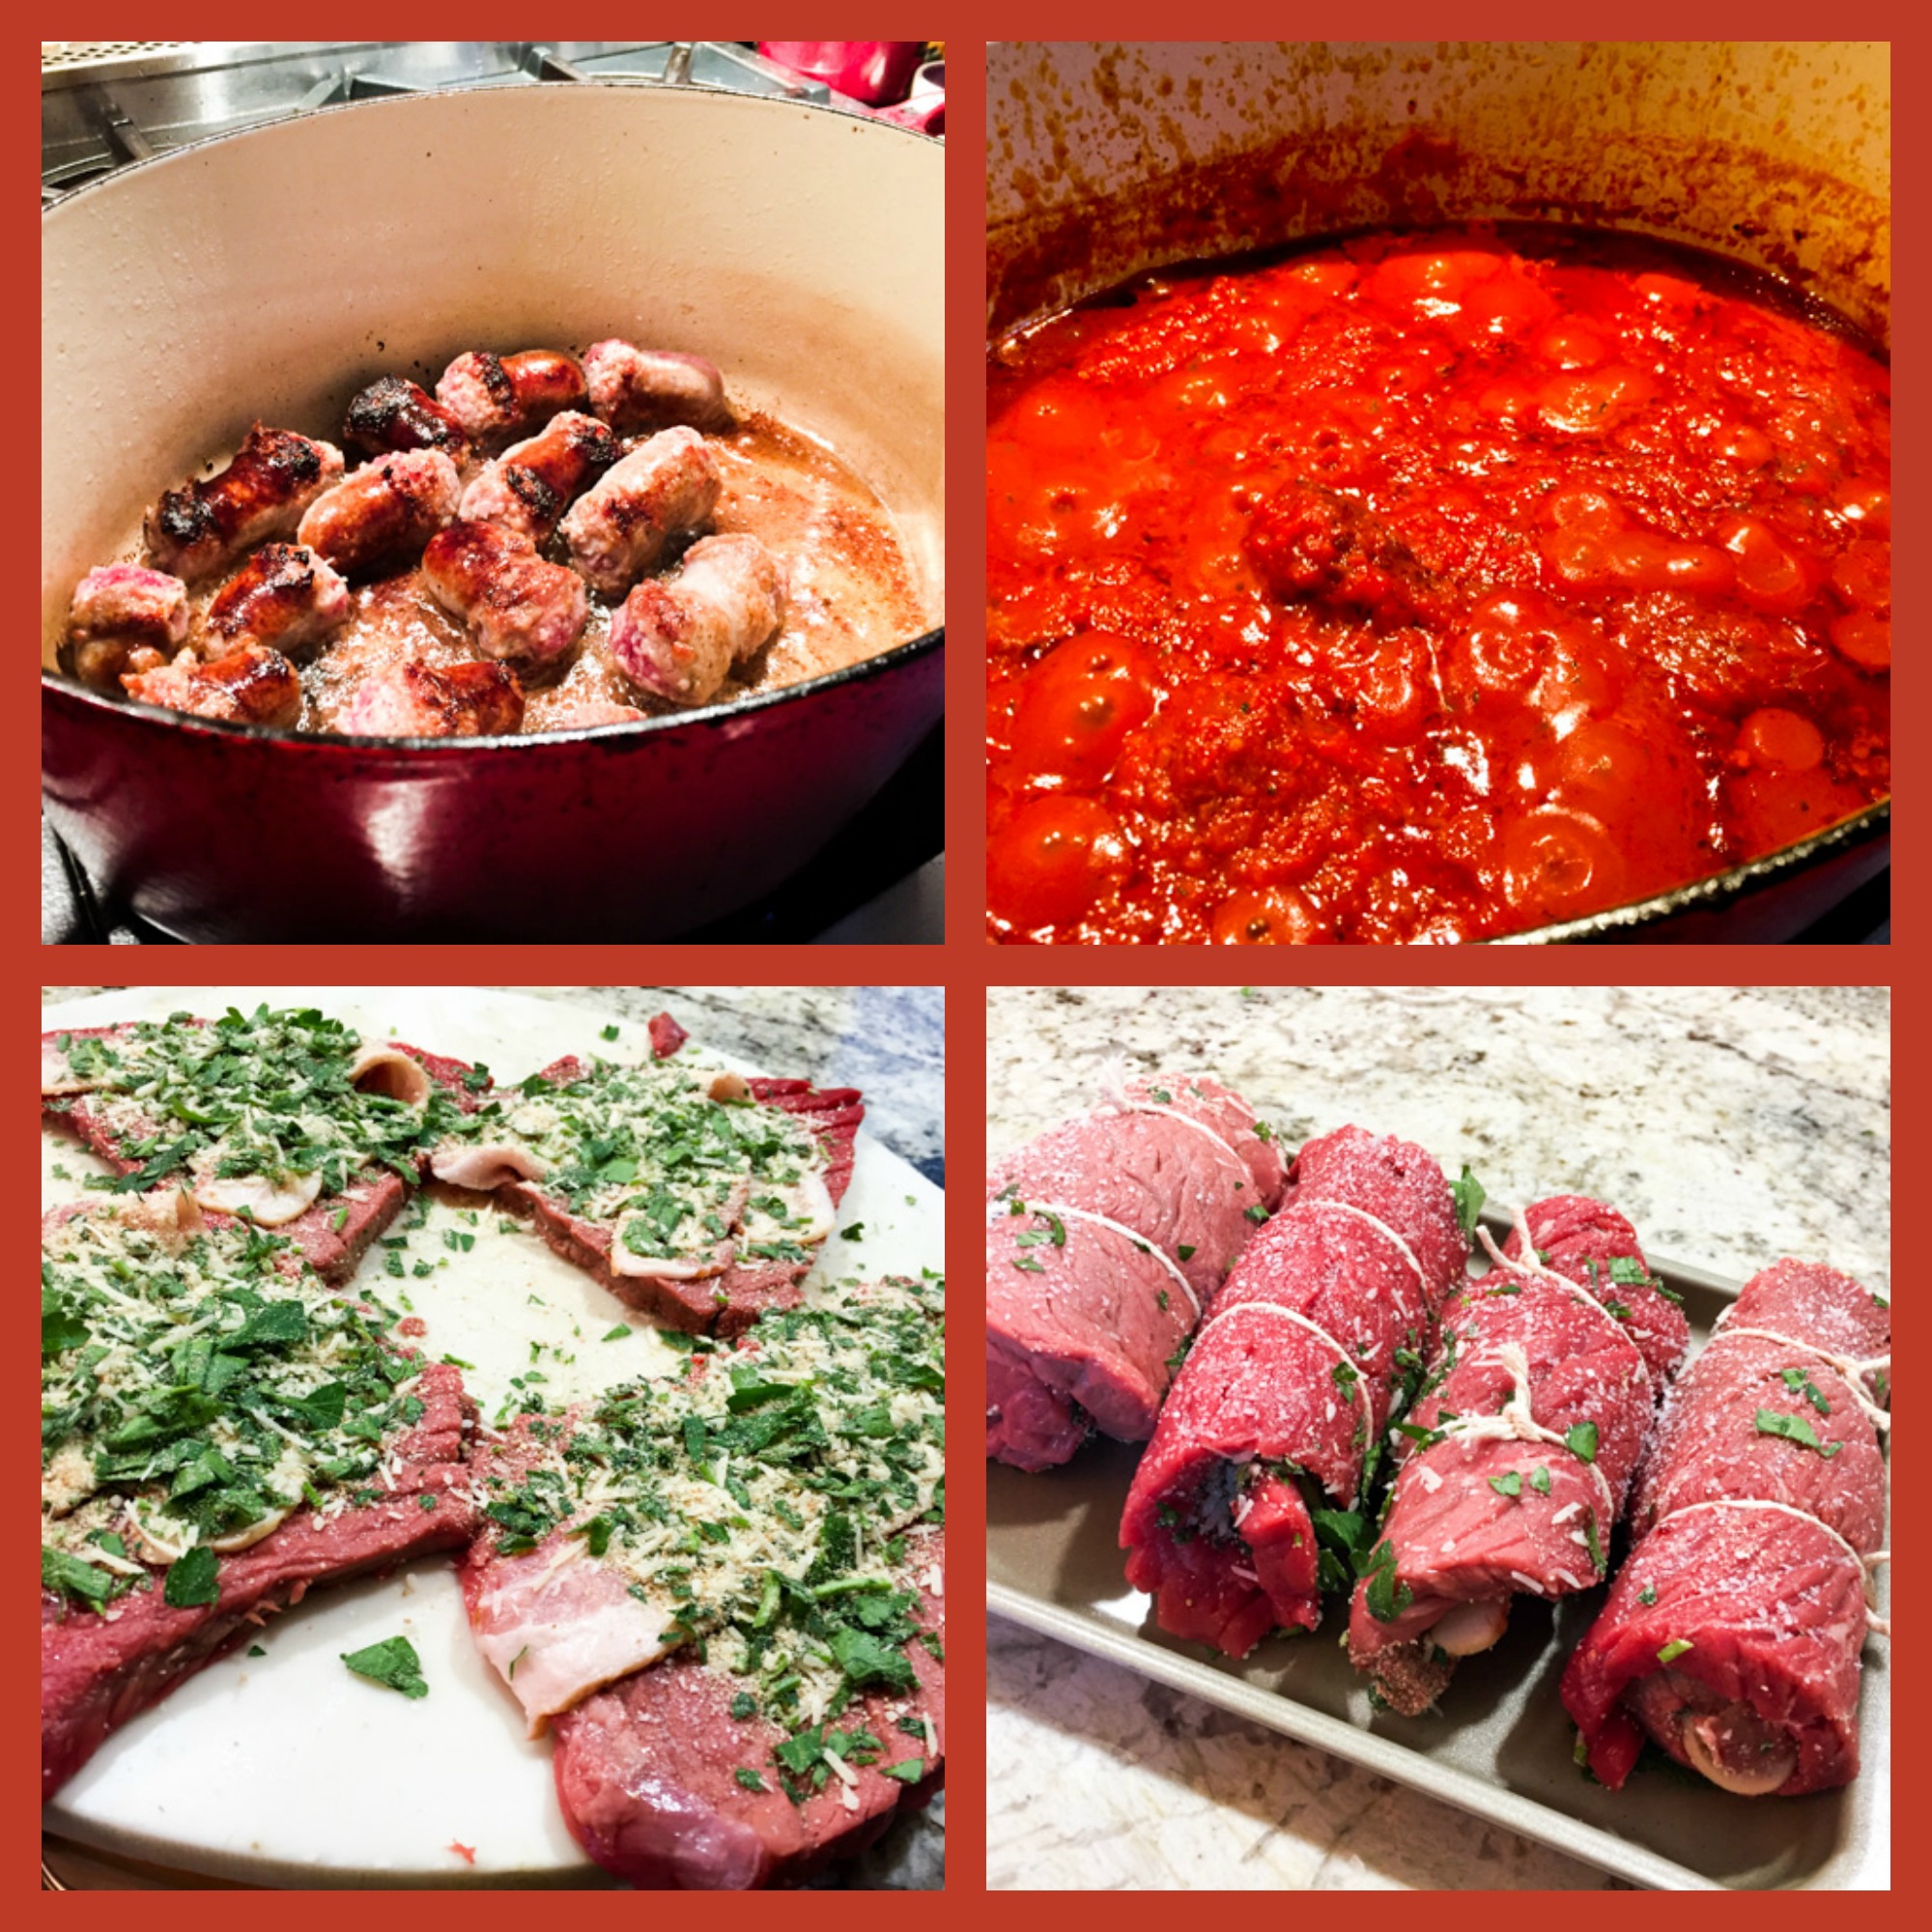
Make the gravy: Heat olive oil in a heavy-bottomed 6 quart pot, preferably non-stick, brown sausages on all sides. Add onion and garlic and saute until just soft. Don’t burn the garlic. Stir in tomato paste and cook gently 15 minutes being careful not to burn or have mixture stick to pot. Deglaze pot with the red wine and reduce out alcohol.Process in blender the tomatoes with their liquid until slightly chunky and puree like. Add tomatoes to the pot and bring to a simmer. Stir in seasonings and herbs. Adjust to taste, especially the salt. Add whiskey if using. This will cut acidity and make a slightly sweeter sauce. Simmer partially covered for about 3 hours, stirring occasionally. Sauce can be made in advance.
.
Make the braciole: Mix the parsley, bread crumbs, cheese, garlic, salt and pepper in a small bowl. Lay 1 strip bacon on each braciole, sprinkle cheese mixture evenly over braciole, roll up and tie securely with string. Heat oil in skillet and brown meat evenly on all sides. Transfer to the simmering ‘gravy’ and cook at least 2 hours.
.
Comments: I’ve always wanted to make Sunday Gravy. The name promises something delicious, don’t you think? Something that cooks slowly for hours… But, I confess I messed it up really bad. Sorry, Sid, I did. I made it on a Saturday. I know, I know, what was I thinking?
Apart from that, I followed the recipe to a T, and loved the outcome! The change in the sauce as it simmered down for 3 hours was a pleasure to witness. I made the gravy on Saturday, saved it in the fridge, removed the congealed fat from the surface on Sunday, and made the braciole that afternoon. Most important step? Browning them well before simmering with the sauce. A process that should not be rushed, allow the browning to take place and it will reward you with amazing flavor later. I promise.
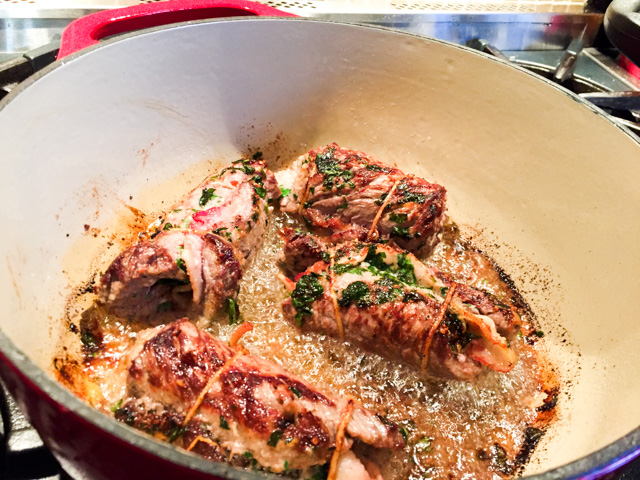
Another small change I made was to cook the braciole in the pressure cooker. I had the gravy ready, so after browning the little rolls of meat I transferred them to the pressure cooker, added the sauce and cooked under pressure for 35 minutes. After cooking I tasted the sauce and adjusted seasoning just lightly with a bit of salt and pepper.
There you have it, a fantastic meal, meat falling apart tender, a sauce that tastes almost sweet from the long simmering. Comfort food, all the way…

I enjoyed it with some spaghetti squash, but of course you can go the more authentic route of polenta, mashed potatoes, pasta, risotto… I prefer to balance a heavy dish with a lighter side. Do what feels right for you.
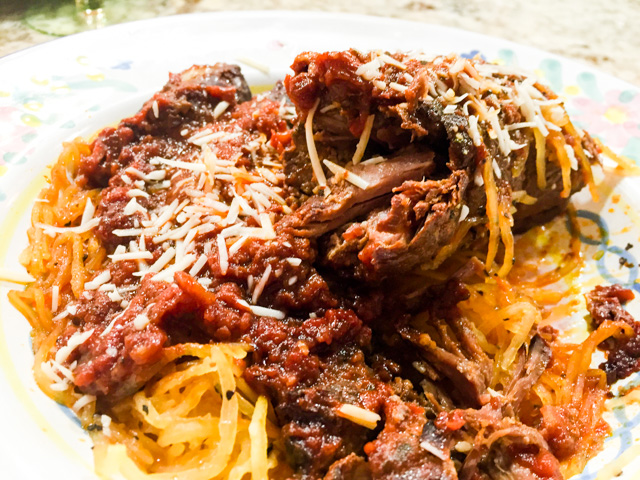
Dinner is served! You won’t even need a knife….
Sid, I had a great time stalking your site, it was a thrill to get your blog as my first assignment with the new group… I hope you had as much fun as I did this month!
To see what my new friends cooked up this month, click on the blue frog at the end of this post.
ONE YEAR AGO: In My Kitchen, February 2015
TWO YEARS AGO: Avocado and Orange Salad with Charred Jalapeno Dressing
THREE YEARS AGO: Green Olive, Walnuts and Pomegranate Salad
FOUR YEARS AGO: Romanian Flatbreads
FIVE YEARS AGO: Ziti with Artichokes and Meyer Lemon Sauce
SIX YEARS AGO: Blasted Broccoli, Stove-top version