SHRIMP TACOS WITH JICAMA-MANGO SALSA

We’ve had quite a few days with warm temperatures and that undeniable vibe of spring. This is a perfect light meal for the upcoming season. Simple, refreshing, full of flavors and textures. Make the salsa a few hours ahead if you have a chance.

SHRIMP TACOS WITH JICAMA-MANGO SALSA
(from the Bewitching Kitchen)

for the salsa:
1 mango, peeled and cut into cubes
half a jicama, peeled and cut into small dice
2 Roma tomatoes, diced
1 large jalapeños, seeded, deveined and finely minced
juice of half a lime
drizzle of olive oil
salt and pepper to taste

for the shrimp:
1 pound large shrimp, peeled and deveined
1 quart water
1/4 cup salt
1/4 cup sugar
juice of half a lime
1 tablespoon grape seed oil
2 teaspoons chipotle chili powder
1 teaspoon oregano
1/4 teaspoon ground cumin
salt and pepper to taste (go easy on salt, as the shrimp will be brined)

to serve:
tortillas, taco shells, guacamole, Cotija cheese

For mango salsa, combine mango, jicama, tomatoes, and jalapeño in a bowl. Add the lime juice, olive oil, and season to taste with salt and pepper. Refrigerate for a couple of yours if you have the time.

Prepare a mild brining solution mixing 1 quart water with 1/4 cup kosher salt and 1/4 cup sugar, plus the juice of half a lemon. Submerge the shrimp in the solution for about 20 minutes. Remove shrimp from brine, rinse briefly and dry on paper towels.

In a small bowl, mix together chipotle, oregano, cumin, salt and pepper until evenly mixed. Sprinkle over shrimp, rubbing on both sides. Heat the oil on a large nonstick skillet, when really hot add the seasoned shrimp in a single layer. Cook until shrimp are opaque and sides are browned. Cut the cooked shrimp into pieces for serving, if you like, or leave them whole.

Arrange the shrimp inside tacos or over tortillas, spoon the salsa, and if desired, add guacamole and Cotija cheese.

ENJOY!

to print the recipe, click here

Comments: This salsa is a winner. Make it, serve it with any kind of protein you like. I admit that prepping jicama is not my favorite pass time, but it was worth it. As always, most important thing is to not overcook the shrimp, but the brining step helps with the texture, and will allow a little more room for error in that step. I can hardly wait to bring this back to our table!

ONE YEAR AGO: Mini-Egg Brownies

TWO YEARS AGO: The Luck of the Irish

THREE YEARS AGO: When life gives you Eye-of-the-Round

FOUR YEARS AGO: Carrot Cake Macarons

FIVE YEARS AGO: Soup Saturday: Say Goodbye to Winter

SIX YEARS AGO: Manchego and Poblano Soup

SEVEN YEARS AGO: A Smashing Pair

EIGHT YEARS AGO: Spinach and Mushroom Stuffed Pork Tenderloin

NINE YEARS AGO: Crispy Chickpea and Caper Spaghetti

TEN YEARS AGO: Spring has Sprung!

ELEVEN YEARS AGO: Chickpea and Fire Roasted Tomato Soup

TWELVE YEARS AGO: Double Asparagus Delight

THIRTEEN YEARS AGO:  Sun-dried Tomato and Feta Cheese Torte

CAULIFLOWER TACOS WITH CHIPOTLE ROMESCO SAUCE

I debated whether to insert the “V” word into the title, but yes, this is vegan. And delicious with a big “D.” The sauce packs a huge hit of flavor. I used the smallest recommended amount of chipotle pepper in Adobo sauce, if you are a braver soul, go for the kill and add more. Obviously, you can use meat instead of cauliflower and please all the omnivores at your table. But whatever your gastronomic inclination, MAKE THE SAUCE.


VEGAN CAULIFLOWER TACOS WITH CHIPOTLE ROMESCO SAUCE
(adapted from Minimalist Baker)

for the cauliflower:
1 large cauliflower head, cut in small pieces
2 Tbsp canola oil
1 tsp ground cumin
1 tsp chili powder
1 tsp smoked paprika
1 tsp salt

for the sauce:
1/4 cup raw almonds
1 15-ounce can fire-roasted tomatoes (drained)
2 Tbsp olive oil
1 medium lime, juiced
1/4 tsp smoked paprika
1/2 tsp cumin
1/4 tsp sea salt (plus more to taste)
1 Tbsp maple syrup (plus more to taste)
1-2 whole chipotle peppers in adobo sauce (more for spicier sauce)

for serving:
corn tortillas
Lime juice / wedges
Fresh cilantro (optional)
shredded cheese (vegan, if you prefer)

Coat the cauliflower pieces with the oil and the spices. Either roast it in a 400F oven, or air-fry it for 15 minutes. Reserve.

Toast the almonds in a dry non-stick skillet until they start to get fragrant and get a bit of color, but do not move away from the stove and move them constantly to prevent them from burning. Add them to a blender (Vitamix works best) together with all other ingredients for the sauce. Blend until very smooth. Taste and adjust seasoning with salt, or maple syrup, depending on your preference.

To serve, warm up tortillas, add the sauce and the warm cauliflower on top, then more sauce, and any toppings you like.

ENJOY!

to print the recipe, click here

Comments: This sauce will definitely show up in our kitchen regularly because it is so easy to make, and absolutely perfect for our taste. When I first made it I thought it was too spicy, but it is not, it mellows down as you add it to the other components, and matches all sorts of protein or veggies. I enjoyed it next day with some leftover grilled chicken breasts.


ONE YEAR AGO: One gift, one dough, two recipes

TWO YEARS AGO: Rocking the Zucchini Boat

THREE YEARS AGO: Polenta Bites with Spicy Tomato Sauce

FOUR YEARS AGO: Vague Mousse Cake

FIVE YEARS AGO: Cottage Loaf, my very own technical challenge

SIX YEARS AGO: Pork Ribs: Sticky, Spicy and Awesome

SEVEN YEARS AGO: Sobering Peach Sorbet

EIGHT YEARS AGO: Buttermilk-Blueberry Breakfast Cake

NINE YEARS AGO: Silky Cauliflower Puree with Almond Milk

TEN YEARS AGO: Beef and Broccoli Stir-fr

ELEVEN YEARS AGO:Wheat Germ and Sage Sourdough Bread

TWELVE YEARS AGO:Popeye-Pleasing Salad

THIRTEEN YEARS AGO:Summer’s Finale

BRISKET TACOS: ANOTHER ONE FOR THE OMG FILES

Apologies to my vegetarian friends, this one is all about the meat. Brisket, in a very simple preparation, cooked in the crock pot for hours, until the connective tissue surrenders in all its glory. Chipotle peppers in adobo sauce. A small can holding a simple ingredient that imparts so much flavor and just the right amount of background heat. Love it. I found this recipe online and did a quick cut and paste of the ingredients, promptly forgetting to write down the link. Proper credit is not possible at the present time, if I ever find it again I’ll edit the post to include it. However, I modified the recipe a bit, so here’s to hoping that my crime is not worthy of too heavy a punishment. The recipe makes a ton of meat, which for us means leftovers galore. You can always have a taco party and invite ten of your best friends over…They can bring their pets too.  It will be a huge batch of taco-happiness!

SLOW-COOKER BRISKET TACOS
(from the Bewitching Kitchen)

4 bacon slices, cut in pieces
2 shallots, chopped
2 teaspoons salt
1 teaspoon freshly ground black pepper
1 beef brisket, trimmed, about 4 pounds
1 cup chicken broth
2 canned chipotle peppers
2 tablespoons adobo sauce (from the can)
1 tsp ground cumin
1 tablespoon Worcestershire sauce
1 tablespoon honey
2 tablespoons apple cider vinegar
Place bacon and chopped shallots in a 6- to 8-qt. slow cooker. Stir together salt and pepper; sprinkle over all sides of brisket. Place brisket over the bacon/shallot mixture.

Process broth and all ingredients except apple cider vinegar in a blender  until smooth; pour mixture over brisket. Cover and cook on low for  7 hours or until brisket is fork-tender. Transfer brisket to a 9- x 13-inch baking dish; cover with aluminum foil to keep warm.

Pour sauce through a fine wire-mesh strainer into a medium saucepan, and cook over medium-high heat, stirring occasionally, reducing it for about 10 minutes. Stir the apple cider vinegar. Coarsely shred the brisket, add the sauce and mix. Serve over tortillas, or white rice, with your favorite toppings.  I served with avocado slices and crumbled Cotija cheese. 

ENJOY!

to print the recipe, click here

Didn’t I tell you it made a H.U.G.E. batch?  I tell you another thing, it was better a couple of days later. The interesting thing is that the heat of the chipotle peppers seemed to dissipate a little instead of getting stronger. Maybe it just permeated the dish in a more uniform manner. That’s probably the case.

You can enjoy it over tortillas. Corn, please, the flour ones are so heavy you will have to lay down and spend a few hours thinking about the Big Bang, the Heinzenberg’s Uncertainty Principe, and how on Earth could you feel so stuffed…  You can serve them wrapped in a sturdy Romaine lettuce (messy but good), or over white rice. You can go for the kill and indulge on a nice helping over polenta. Just be ready for that Big Bang frame of mind. Yeah, brisket and polenta. It could conceivably kill me…

Next on my list? Short-rib Tacos. Go visit Karen’s site, and be ready to swoon!

ONE YEAR AGO: Aloha!

TWO YEARS AGO: Baby Back Ribs with Tomatillo Glaze

THREE YEARS AGO: Ten Years Ago

FOUR YEARS AGO: Someone Got a Summer Shave

FIVE YEARS AGO: Border Grill Margaritas

SIX YEARS AGO:  Goodbye L.A.

SEVEN YEARS AGO:  Vermont Sourdough


SaveSave

SaveSave

SaveSave

SaveSave

SaveSave

SaveSave

PULLING UNDER PRESSURE

Are you afraid of the pressure cooker? Are you so terrified that you don’t even own one and the thought of that thing in your kitchen gives you nightmares? I am here to help you out. As 99.99% of Brazilians, I grew up used to its noise a couple of times per week, making sure we never ran out of black beans, a staple in any Brazilian kitchen. Looking back, I am forced to admit that my Mom’s pressure cooker was scary. That thing had zero safety features and relied on the experience (and perhaps a little luck) of the user not to blow up. A wimpy-looking closing mechanism, a gasket that would definitely be worn out in a few months, and a tiny valve that danced the dance of the steam on top, but seemed ready to fly off any second. Basically, Mom’s pressure cooker was like a bomb in waiting. But, apart from one incident in which black beans tainted the kitchen’s ceiling, nothing serious ever happened.  Having said all that, today’s pressure cookers have absolutely nothing to do with the ones from my past. They have safety mechanisms in place that prevent building excessive pressure, and the lid simply will not open unless the pressure in versus out is equalized.  I don’t even hesitate to grab mine whenever I want to make black beans, but truth is, they are incredibly useful to cook many types of food, from soups to sauces, from meat to grains, veggies, and even desserts! But, let’s start with a favorite recipe of mine, Pulled Pork. An American classic made in a classic Brazilian cooking vessel, the one and only pressure cooker!

Pressure Cooker Pulled Pork22

PRESSURE COOKER PULLED PORK
(from The Bewitching Kitchen)

5 pounds boneless pork shoulder cut into large chunks
water
2 bay leaves
2 teaspoons ground cumin
1 tablespoon dried Mexican oregano
1/2 teaspoon Aleppo pepper flakes
1 tablespoon salt
1/4 cup apple cider

Place the chunks of meat in the pressure cooker, add water to just barely cover them, then add the bay leaves, and all other ingredients. Mix gently to dissolve the salt and incorporate the apple cider.

Close the pressure cooker and turn the heat on high until it builds pressure, then lower the heat and cook it for 45 minutes.  When the time is up, turn the heat off and allow the pressure cooker to come down naturally, it should take about 15 minutes, maybe a little less.

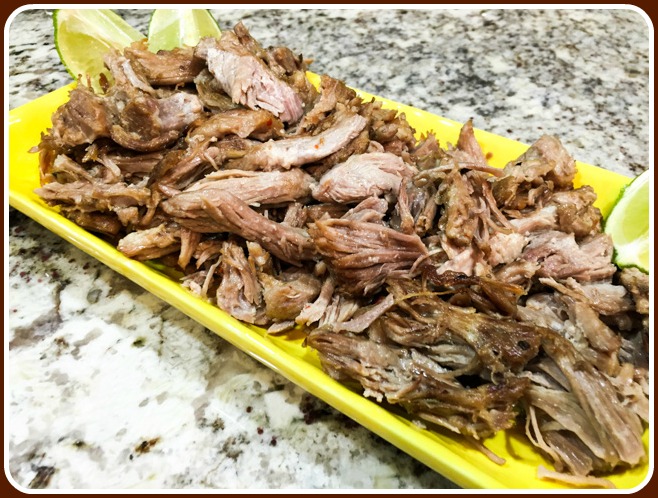
Open the pan once the pressure is equalized, and transfer the meat carefully to a baking dish. It will be very tender. You can save the cooking liquid, put it in the fridge to make it easier to remove the layer of fat that will form, using it as a base for sauce.

Shred the meat with two forks, discarding any fatty pieces or gristle. You can use the meat right away or save it for several days in the fridge.  When ready to use, you can saute it in olive or coconut oil to crisp up the edges, or warm it up gently in a pan and then spread the pulled meat on a layer and run it under the broiler (my favorite method).   Serve with tortillas, or over steamed rice and black beans, incorporate in sauces, improvise a Tex-Mex lasagna with it…  and…

ENJOY!

to print the recipe, click here

compositepulled

A word about pressure levels:  these days you can find regular pressure cookers and also electric ones. Many models will have two levels of pressure, the lowest around 6 psi (pounds per square inch), the highest from 13 to 15 psi. My pressure cooker delivers a single, powerful level of pressure of 15 psi. If yours doesn’t reach this level simply cook the meat 5 minutes longer. I have no experience with electric pressure cookers, but from what I see around they require longer times in general, perhaps 30% or even longer cooking times.  Use the specifications provided in the instruction booklet you have somewhere, or let google do the research for you…

Pulled pork is definitely one of our favorite meals, I’ve made it many, many times, as Phil’s kids also used to love it. My default recipe is in the blog and it is fantastic. However, I must say this one pleased me even more!  Something about the moisture retained by the meat cooked under pressure, and the way the seasoning is more uniformly present instead of concentrated on the charred surface made this dish a complete winner in my book…  The meat won’t look gorgeous as it comes out of the pressure cooker, so don’t be discouraged when you open the pan. Trust me on this. Get the meat out very gently, pull it and try a little piece… even without browning on a pan or under a broiler you will be amazed by how wonderful it is.

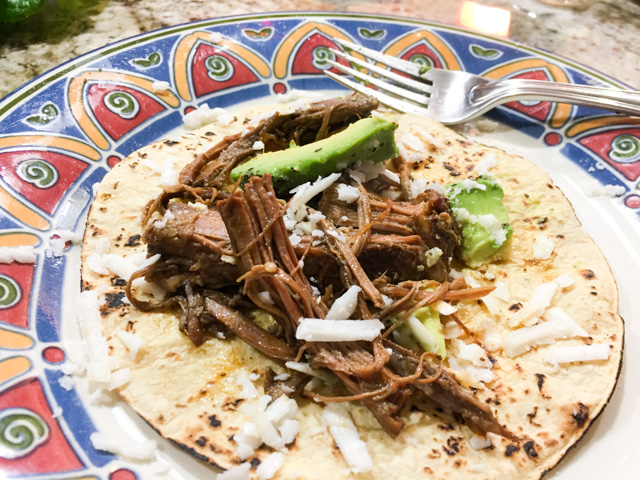
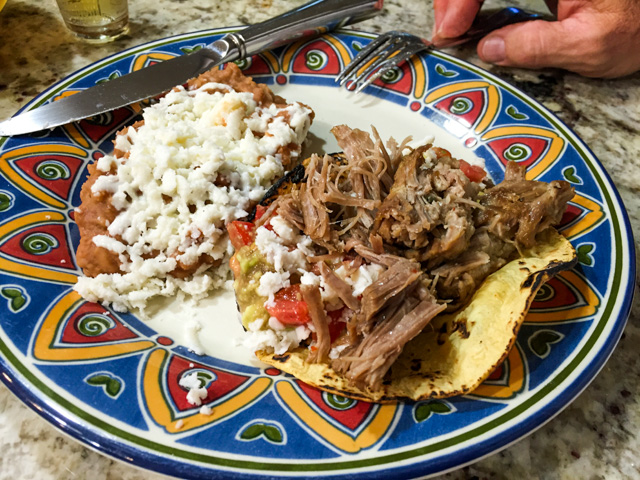
I like to serve mine over Romaine lettuce leaves, a bit of guacamole, shredded Queso fresco…

servedSally


But, of course, you can opt for a more authentic presentation that will include corn tortillas, and a serving of refried beans on the side…  It’s all good!

servedPEK


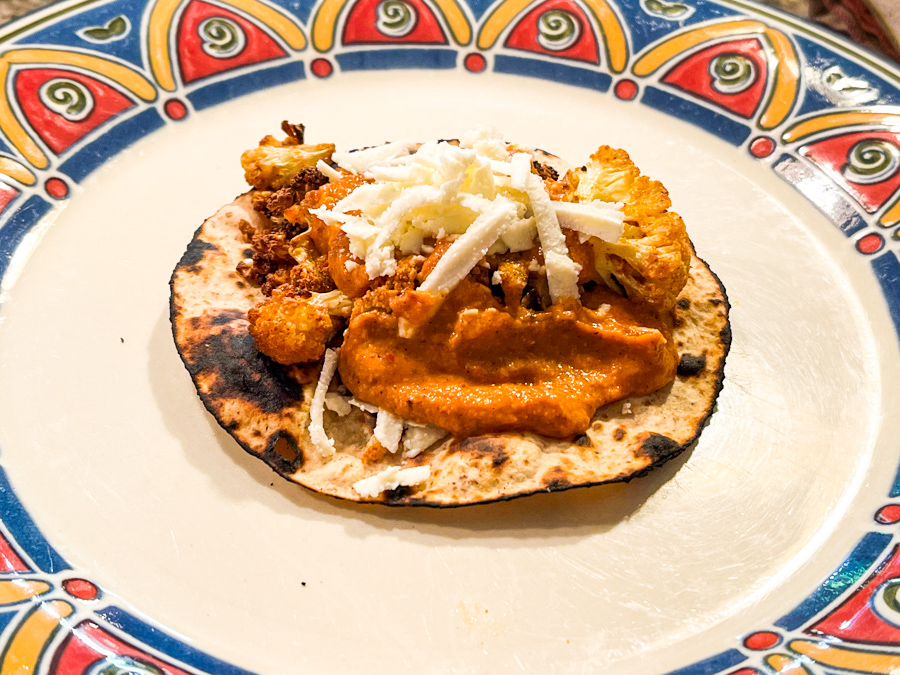
And you know what I love the most? Leftovers for lunch, so easy to put together… a quick saute of the meat, some tomatillo salsa, half an avocado, Queso fresco for good measure, and a nice sprinkle of the world’s best hot sauce, Sriracha!  Tell me, isn’t this a great lunch?

leftovers

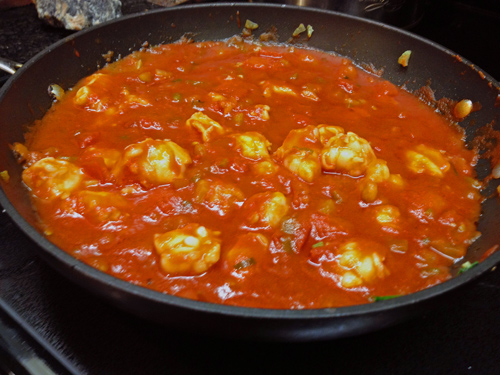
I hope I convinced you to lose your fear of pressure cooking.  Pork shoulder is very forgiving and probably one of the best types of meat to inaugurate your pressure cooking adventures.  Second best type? My vote goes for chicken thighs.  Stay tuned, I’ve got a nice curry coming up sometime soon. Well, you know… soon enough.

😉

before I leave you, a little picture of me and Mom, who doesn’t cook anymore, but I am sure remembers fondly the days in which she prepared the best black beans in the known universe for her family! As this post is published, I’ll be almost leaving Brazil to fly back home…

IMG_1537

ONE YEAR AGO: Cooking Sous-vide: Two takes on Chicken Thighs

TWO YEARS AGO: Miso Soup: A Japanese Classic

THREE YEARS AGO: On my desk

FOUR YEARS AGO: A must-make veggie puree

FIVE YEARS AGO: Vegetarian Lasagna

SIX YEARS AGO:  Brazilian Pão de Queijo

CLASSIC SHRIMP GOBERNADOR TACOS

Another great recipe coming straight from the adorable  Marcela Valladolid, these tacos can be prepared very quickly. Plus, if you make the shrimp filling the day before, the meal will be ready in less than 15 minutes. I tried hard to find the specific origin for Gobernador Tacos, no luck. Then, a dear friend sent me a link with the whole story behind it. (Thank you, Dr. G!). These tacos are very popular in Baja California.  I can guarantee they will be equally popular in your home!  😉

closeup111
CLASSIC SHRIMP GOBERNADOR TACOS
(adapted from Marcela Valladolid)

1 tablespoon olive oil
1 small shallot, minced
2 tomatoes, seeded. chopped
1 red bell pepper, stemmed, seeded, and diced
1 pound shrimp, peeled and deveined, chopped
1 cup canned tomato puree
1 teaspoon Mexican oregano
1 bay leaf
1/2 teaspoon smoked paprika
Salt and freshly ground black pepper
8 corn tortillas
1/2 cup shredded Oaxaca or mozzarella cheese
Lime wedges and hot sauce for serving
.
In a large heavy saucepan, heat the olive oil over medium-high heat. Add the minced shallot and cook until translucent, about 3 minutes. Add the tomatoes and bell pepper and cook for 3 minutes. Add the shrimp and cook for a couple of minutes.  Stir in the tomato puree, oregano, bay leaf, and smoked paprika. Cook for another couple of minutes, remove the pan from the heat and reserve.  Adjust seasoning with salt and pepper. Remove and discard the bay leaf.
.
Heat a large heavy skillet over medium-high heat. Lay 2 tortillas, flat on the bottom of the pan, side by side. Put a small mound of cheese on 1 side of each tortilla. Wait until the cheese melts slightly,  and then add about 2 tablespoons of the shrimp mixture to each tortilla. Fold the tortillas over into half-moon shapes and cook to melt the cheese completely, another 1 to 2 minutes. Transfer to a platter and keep warm.Repeat with the remaining tortillas, cheese, and shrimp mixture. Arrange the tacos on a serving platter and serve with lime wedges and hot sauce on the side.
.
ENJOY!
to print the recipe, click here
.

sauce
The shrimp sauce, so tasty as the taco filling, is equally wonderful as a main dish.  Just add a little white rice and some guacamole to complete the meal…

served

Deliciously messy to eat, this is a great recipe for a warm summer night!  One extra tip: do not cut the shrimp too small, keep the pieces in large chunks. If you want to splurge, chunks of  lobster tails in these tacos will be absolutely awesome!  Expensive, yes, but awesome!  😉

If you like Mexican food, tune into Mexican Made Easy, it’s always fun to watch Marcela preparing classic dishes,  often with a healthier approach.  Not much else appeals to me in the FoodTV these days, and that’s a little sad.

ONE YEAR AGO: A Walk Towards the Sunset

TWO YEARS AGO: In My Kitchen

THREE YEARS AGO:  Heavenly Home-made Fromage Blanc

FOUR YEARS AGO:  A Perfect Sunday Dinner