DUTCH MACARONS, AND WILLIAM CURLEY’S NOSTALGIC DELIGHTS

If you are a follower of my blog, you know I suffer from a macaron condition. Cannot stop baking them, and when I go into daydreaming mode, macarons flavors and colors are often part of it. One day, I was relaxing in my favorite armchair with a beautiful cookbook (Nostalgic Delights), when all of a sudden a recipe popped up… Dutch Macarons. Cute beyond description. They look like a macaron gone a bit wild, feet not as well-defined, instead their shells open on the top, revealing a similar inner structure. I could not wait to bake a batch. If you are afraid of baking macarons, these are in many ways easier. No macaronage stage to worry about, you mix the batter, pipe, and then exercise patience. They must dry for 12 hours before baking, which is a major difference. The outer skin has to be really dry, so that it can be cut with a sharp knife (I used a brand new razor blade) right before they go into the oven. That gives them the characteristic opening. I share this unusual recipe after getting permission from Chef William Curley. He is not only a fantastic patissier, but a very sweet person who patiently answered some annoying pressing baking questions I had for him. He owns a shop in Soho, so if you are in London, pay him a visit. I am kicking myself for not doing that last year when I was busy upsetting Paul Hollywood. Bottomline is: I must go back. I meant to Soho, not the tent.
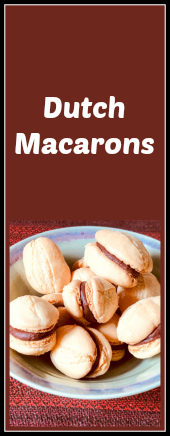
DUTCH MACARONS
(printed with permission from William Curley)

for the shells:
175g powdered sugar, sifted, and divided (125g + 50g)
125g ground almonds, sifted
75g egg whites
50g superfine granulated sugar
20mL water

for praline paste:
100g hazelnuts
100g almonds
200g sugar
1 tsp hazelnut oil (I used grape seed)

for the praline ganache:
150g heavy cream
125g bittersweet chocolate (I used Lindt 70%), chopped in small pieces
12g butter, softened
40g almond praline paste

Ideally the day before, make the praline paste (you will make more than you need, but it keeps well). Heat the oven to 400F. Spread the nuts on a baking sheet lined with a silicone mat. Roast for 8 to 10 minutes, then transfer to a heavy-bottom saucepan.

Cook over medium heat while gradually adding the sugar and stirring non-stop. Cook until the sugar turns into a caramel, it will take from 15 to 18 minutes. Pour the mixture over a baking sheet and allow it to cool. When the nuts are cold, place in a food processor or Vitamix and blend until it forms a paste, adding the teaspoon of oil to help emulsify.

Prepare the ganache: put the cream in a saucepan and bring to a boil. Put the chocolate in a mixing bowl and add the hot cream over it. Mix until emulsified, add the softened butter and the praline paste. Leave to set at room temperature for 2 hours, when it will reach a nice piping consistency.

Make the shells: Place 125g of the powdered sugar, the ground almonds and the egg whites in the bowl of a Kitchen Aid type mixer, and whisk for a minute or so, as  you start preparing the syrup.

Make a syrup with the granulated sugar and water, cooking it to 240F (116C), then pour the syrup over the mixture in the KitchenAid bowl while it is whisking at medium speed.  Beat for 5 minutes, then add the remaining 50g or powdered sugar.

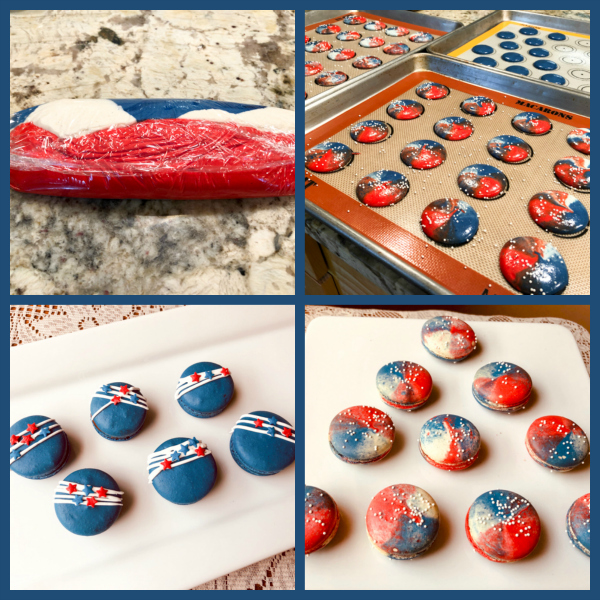
Spoon the mixture into a piping bag fitted with a 10mm round piping tip, and pie ovals of 3/4 inch x 1+1/4 inch.  I made a little template to help me with consistency. Leave in a cool, dry area for about 12 hours to fully dry the macarons.

Heat the oven to 350F. Using a sharp knife, cut a slit in the center of each macaron, then bake for 15 to 18 minutes, until they have puffed up and turned golden. Allow them to get fully cool.

Spread ganache on one shell, top with another of similar size (hopefully they will all be very similar in dimension), leave to set for 30 minutes so that the ganache sets.

ENJOY!

to print the recipe, click here


Comments: This was a super fun and exciting bake for me, because the recipe was familiar and unusual at the same time.  I was in mild hyperventilation mode up to the moment I opened the oven and marveled at those cute babies all plump and ready for the filling. Speaking of the filling, it is pretty spectacular:  almond/hazelnut praline with chocolate. Need I say more? Addictive, truly.

As to the taste, they are indeed very similar to macarons, but with more substance, let’s say that in a regular macaron the filling definitely speaks louder than the shells. In the Dutch version, they share center stage as equal partners. I loved the texture.  They reminded me of a sweet I used to enjoy as a child in Brazil called “AMANDITAS.” Interestingly enough, you can still buy those  which proves I am not that old. HA! The filling in amanditas is harder, but there is a resemblance there for sure.  I can tell you I’ll be making Dutch Macarons on a regular basis from now on.

TEASER RECIPE

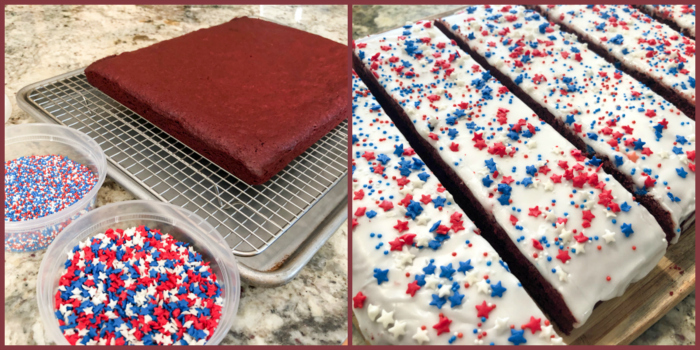
Before I take you for a virtual tour of Chef Curley’s book, let me show you another recipe I made from it. These are called Rout Biscuits (I laugh inside imagining how badly I butcher its pronunciation). Just like Dutch Macarons, it is a recipe from a couple of centuries ago, and rarely seen these days. William Curley brings it back to life adding quite a few touches of elegance. A delicate hazelnut-almond biscuit base holds a hazelnut cream piped in a circle, and after baking, a dollop of jam is added to the center. I loved it so much that I made it twice in the same weekend.  The second time around I used a bit of orange-chocolate ganache in the center instead of jam.

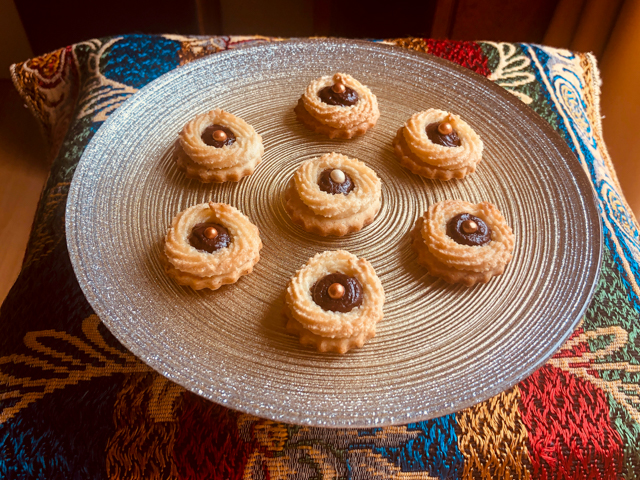
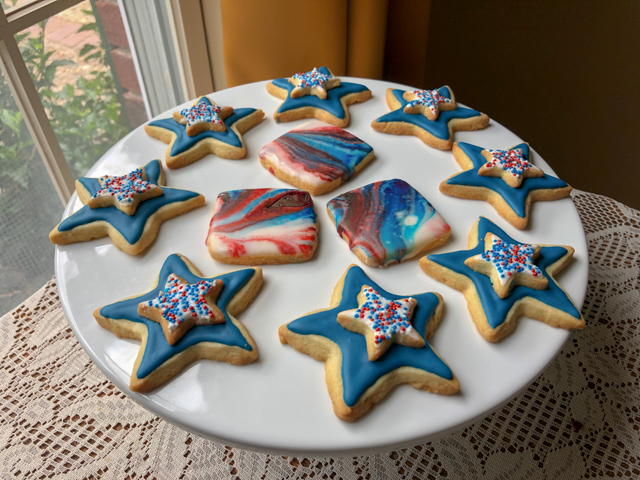
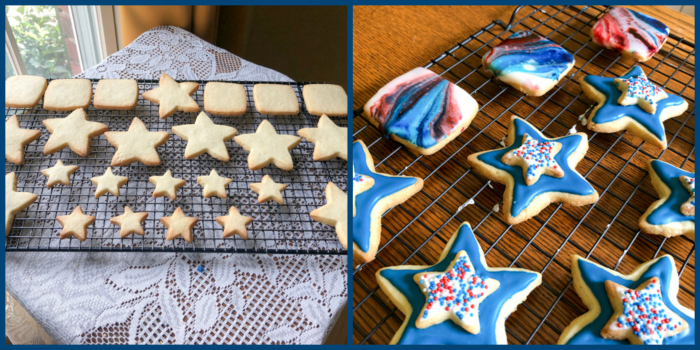
I took both batches to our department for my “Mondays with Sweetness”, and people were raving about them. Delicate, delicious, beautiful, just the right size… were some of the comments I got back. The biscuit base is wonderful on its own. I will share soon some cookies I made with that dough.

And now, time to review Nostalgic Delights….


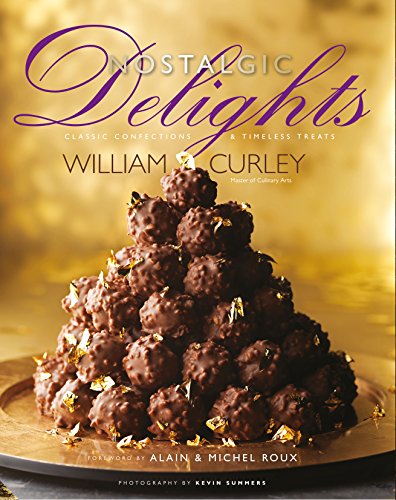
First of all, I adore the name… Nostalgic Delights gives me a nice warm feeling inside, anticipating beautiful bakes of the past. And here’s what William himself has to say about it:

“The definition of nostalgia is – a sentimental longing or wistful affection for a period in the past”.  Every individual has their own interpretation of nostalgia, and of course their own fond memories of food. I hope that within the recipes I have created for this book there is going to be a little something enabling every reader to capture their own bit of nostalgia” 

Isn’t that beautiful? The book is just a complete delight (pun intended), and it was written with passion not only for the art of baking but for teaching it even to those of us without professional training.

The book is divided in 7 chapters, as follows…

Chocolate Confectionery… Being an award-winning chocolatier, you can expect that his recipes in this chapter will take your breath away. It starts with a nice explanation on tempering, casting in moulds and dipping, which you will need to be comfortable with. The chapter opens with his Hazelnut Rochers, the recipe at the very cover of the book. His mother used to serve those at Christmas. Talk about nostalgia! He shared step by step photos of the process of making this beauty, which one day I shall take a deep breath and tackle myself.  I have to say that every single recipe in this chapter had me dreaming. He starts from simple recipes (like Australian Cartwheels, popular in the 1940’s) and turns them into morsels of chocolate-coated art. His Matcha and Yuzu Teacakes are definitely something I will bake in the near future. But truly everything is just amazing and every recipe has detailed photos of the whole process so that even common mortals can attempt them. He closes this chapter with the really fun Curley Wurly, a 1970 classic made in a Bournville factory in an attempt to use leftover toffee. It is basically a braided toffee coated in tempered chocolate, and I tell you, the day I get rid of my braces I will celebrate indulging in a full batch. Mine, all mine.

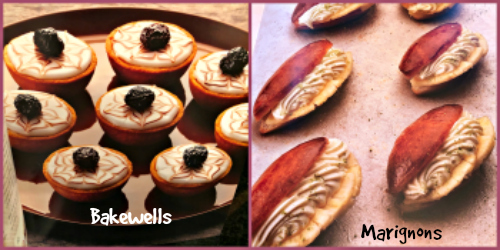
Bakery Favorites… The chapter starts with tips for lining tins with pastry, blind baking, working with yeast, and rough puff pastry. Then he shares bakes in which these techniques are employed.  His Chocolate Cherry Bakewells are just gorgeous, but you don’t have to take my word for it, here is a shot of that page. I am also quite smitten by the Marignons, because the basic component is a savarin, which intrigues me. I need to try and make it.

In this chapter, the classic Jam Tarts, Custard Tarts which most people are familiar with, but also some interesting bakes like one called Black Bun, a Scottish concoction to be enjoyed on the Twelfth Night of Christmas, much like Galette de Rois in France. Have you heard of Bee Sting? It is a German dessert with a ton of history behind it, and William shares his version, based on a recipe from the 15th century!  I cannot tell you how much I love this type of stuff….

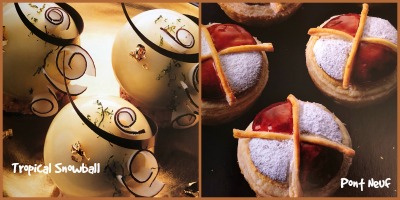
Patisserie Modern Classics… The introduction covers mousses, and I go immediately weak in the knees. This might very well be my favorite chapter.  It starts with my most beloved type of dessert, a mini entremet type cake, this one called Tropical Snowball. If that does not have my name all over it, I don’t know what does. Mango, Passion Fruit and Coconut with a snowy white mirror glaze.  In this chapter he does exactly what you expect, bakes the classics but all with a modernized twist. Black Forest Gateau, Charlotte Russe, Charlotte Royale, a Blackcurrant Cheesecake that is beyond showstopper lavel, a Chestnut Roll equally stunning, the most elegant presentation you can dream for Strawberry Shortcakes… Jaffa Cake Tarts, and a dessert I’ve been meaning to bake for a while now, Pont Neuf, designed in 1860’s to celebrate my favorite bridge in Paris (I am hopelessly romantic).

Ice Cream and Gateau…As William put it, desserts involving frozen components are always decadent, and associated with banquets and real fancy occasions, but they have gone out of fashion. In part because they do demand a lot of skill and attention to detail. Come to think of it, some of the most epic disasters in the Great British Bake Off involved frozen desserts. The initial tutorial in the chapter brings Ice Cream Anglaise and fruit sorbet. He starts with a bang, of course… Baked Alaska, in a Neapolitan fashion. Then Viennetta, his version is yet another masterpiece. Many wonderful things to try, but I would probably settle for his Prune and Armagnac Ice Cream. Prune and Armagnac was one of my favorite little desserts to order when we lived in Paris. So simple, and so delicious.

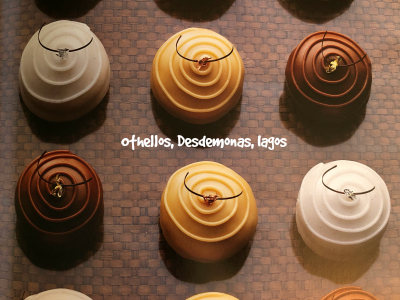
Afternoon Treats… The inspiration for this chapter was his Grandma, who taught him to bake and was the reason why he became a chef. In his words: “Even with all the decadence and luxury within my industry, you can’t beat a freshly baked homemade cake for a tasty afternoon treat”. I would gladly bake every single item of this chapter. I am totally fascinated by a trio of cakes called “Othellos, Desdemonas & Iagos”.  They are a combination of sponge cake, custard, and fondant, what changes is the main flavor, Othellos are chocolate, Desdemonas are vanilla, and Iagos are coffee. I will take one of each, please and thank you. Rout Biscuits are in this chapter, Empire Biscuits (OMG they are adorable!), and the Dutch Macarons I shared the recipe with you.

Frivolities… These are those little petit-fours that fancy restaurants might bring you at the end of a meal. One adorable bake after another, I am definitely going to make his Allumettes a concoction made in Brittany in the last century. Allumettes mean matchsticks and his version joins almond praline and chocolate. Rocher Noix de Coco, Turkish Delight, Nougat and Marshmallow are all in this chapter, as well as something new to me, a concoction called Mou, a soft caramel that can be flavored in many different ways. Another delicious treat that was designed in Brittany. Those people know a thing or two about sweets, right?

Basics… The final chapter. It is pretty much a big lesson on patisserie, covering all the basic recipes you might need, from pate sablee to filo pastry, the three types of meringue, creme patissiere and its derivatives, frangipane, curds, glazes, icings, and even how to make chocolate decorations.

That’s it, my friends! I cannot praise the book highly enough. The amount of work that went into making Nostalgic Delights is hard to imagine. Many of the recipes have step by step photos, in addition to the finished product. Chef Curley truly wants you to succeed and bake at home the wonderful things that bring him joy. The book gives me peace, I think it does transports me to past times, in which life was far less complicated and stressful than it seems to be today.

Mr. Curley, thank you so much for allowing me to share the recipe for Dutch Macarons with my readers, and for your patience helping me figure out a few issues here and there in my Bewitching Kitchen.

To order the book, click here (I make no profit from your purchase)

ONE YEAR AGO: Yogurt Tart

TWO YEAR AGO: Grilled Lamb-Stuffed Pita Bread

THREE YEARS AGO: Elderflower Macarons

FOUR YEARS AGO: A Duet of Sorbets

FIVE YEARS AGO: Sobering Peach Sorbet

SIX YEARS AGO: Spiralizer Fun

SEVEN YEARS AGO: Beer-Marinated Grilled Skirt Steak

EIGHT YEARS AGO:  Secret Recipe Club: Corn Chowda

NINE YEARS AGO: Page-A-Day Calendar (Pits and Chief 5 minutes of fame…)

TEN YEARS AGO: Home Sweet Home (our beloved Pits in one of his last photos)

ELEVEN YEARS AGO: Marbled Rye

CHAI-BUTTERFLY

(for a video tutorial on my default recipe for macarons, click here)

At the risk of inflicting misery on some of my readers, I confess that my current ear worm is “Fly, Robin Fly“, but with the lyrics “Chai Butterfly” instead. I apologize in advance for the inconvenience. Ear worms aside, these were fun to make, but it took me two attempts to get them right. The problem with my first batch (as you can see in the picture below) is that they turned out too big, each macaron could feed a family of four. You don’t want that. They need to mimic the delicate nature of the Monarch butterfly.  Imagine the size of a regular macaron and when you pipe the four circles that will be the final cookie, they must fit that dimension, or be just slightly bigger.

CHAI-BUTTERFLY MACARONS
(from the Bewitching Kitchen)

For the shells:
200g  Icing/powdered sugar
115 g Ground Almonds/Almond Meal
1 bag of Double Spice Chai Tea (Stash)
115 g egg whites at room temperature (approx. 4 eggs)
1/8 tsp of cream of tartar
100 g granulated sugar
¼ tsp vanilla paste or extract
orange, yellow and red food dye (adjusted to get the color of your favorite butterfly)

for the lemon buttercream:
40g unsalted butter, softened
130g powdered sugar
2 teaspoons heavy cream
1 tablespoon lemon juice
zest of 1/2 lemon
pinch of salt

For antennas (optional):
melted Candy melts
black food dye

Make the shells:
Line 3 heavy baking sheets with parchment/baking paper or Silpat mats. Layer the powdered sugar, almond flour and contents of the chai tea bag in a food processor. Pulse until the mixture looks like fine meal, about 12 pulses. Pass through a sieve and transfer to a small bowl or to a sheet of parchment/baking paper. Set aside.

Place the egg whites and cream of tartar in the bowl of a stand mixer fitted with the whisk attachment. Make sure that the bowl and the whisk are impeccably clean. Starting on medium speed, whip the whites with the cream of tartar until they look like light foam. The whites should not appear liquid. The foam will be light and should not have any structure.

Slowly rain in the granulated sugar in five additions, trying to aim the stream between the whisk and the side of the bowl. Turn the speed up to high. Continue to whip the meringue until it is soft and shiny. It should look like marshmallow creme (marshmallow fluff). Add the vanilla and food gel dye. Whip the egg whites until the mixture begins to dull and the lines of the whisk are visible on the surface of the meringue. Check the peak. It should be firm. Transfer the whites to a medium bowl.

Fold in the almond mixture in two increments. Paint the mixture halfway up the side of the bowl, using the flat side of a spatula. Scrape the mixture down to the center of the bowl. Repeat two or three times, then check to see if the mixture slides slowly down the side of the bowl.   Put the mixture in a piping bag fitted with your choice of piping tip.  Pipe shells, making two large circles touching side by side, and two smaller right below them.  Use a needle or a toothpick to smooth the surface and join the circles, to get the right shape.

Slam each sheet hard four to six times on the counter/worktop. Let the unbaked macarons dry until they look dull but not overly dry. Drying time depends on humidity. In a dry climate, the macarons can dry in 15 to 20 minutes; in a humid climate, it can take 35 to 40 minutes.

While the macarons are drying, heat the oven to 300 F. Bake one sheet at a time on the middle rack. Check in 11 minutes. If the tops slide or move (independently of the ‘feet’ when you gently twist the top), then bake for 2 to 3 more minutes. Check one or two. If they move when gently touched, put them back in the oven for 1 to 2 more minutes until they don’t move when touched.   Let the macaroons cool for 10 minutes before removing from the pan.  The macarons should release without sticking.

When they are cold, match the shells and decorate one of them using a black food pen.

For the lemon buttercream filling:
In a mixing bowl with whisk attachment, beat the butter until fluffy. Add powdered sugar, heavy cream, lemon juice, lemon zest and salt and beat until well combined. Transfer the buttercream into a pastry bag and fill the macarons.

If you want to make antennas, use Candy Melts dyed black, place in a small piping bag, no need to use a piping tip, just cut a small hole. Pipe antennas (make more than you need, because they break easily). Let them set. Stick them on the head of the butterfly, in between the two shells.

Store the macs in the fridge for 24 hours for perfect texture.

ENJOY!

to print the recipe, click here

Comments: There are two ways to pipe a butterfly-shaped shell. You can draw a butterfly shape and work with a small piping tip to fill it, or go the much easier route, piping two larger circles next to each other on top, and two smaller ones at the bottom. Smooth the joints using a toothpick or a cookie needle. On my first attempt I used two colors of batter and made a central line for the body in black. I did not like the effect, it was too thick. I think drawing the whole body details with a food-pen (Chefmaster has a soft point, perfect for it) is a much better option.

For the antennas, I used Candy Melts dyed black, and piped on parchment. When dry, I stuck into the filling. They are very fragile, and on my second batch I made mutant butterflies. Antenna-less. They are easier to wrap, which is a must for the treats I share at the Common Table.

For the macaron addicts out there, lately I’ve been incorporating one additional step to my recipe: I dry the almond flour the day before in a low oven (200F) for about 20 minutes. I find that the feet are bigger when I do so, and  I like the overall texture of the shell better. The chai flavor is subtle but definitely there.  One bag of the double chai tea is perfect for this amount of batter. I like the contrast of the spice in the shell with the brightness of the lemon buttercream in the filling.

ONE YEAR AGO: Roasted Cauliflower Salad over Hummus

TWO YEARS AGO: Sous-vide Egg Bites

THREE YEARS AGO: Paul Hollywood, The Weekend Baker

FOUR YEARS AGO: Texas Sheet Cake

FIVE YEARS AGO: In My Kitchen, September 2015

SIX YEARS AGO: Sour Cherry Sorbet: A Labor of Love

SEVEN YEARS AGO: In My Kitchen – September 2013

EIGHT YEARS AGO: Raspberry Sorbet at Summer’s End

NINE YEARS AGO: When three is better than two  (four years with Buck!)

TEN YEARS AGO: Grating Tomatoes (and loving it!)

ELEVEN YEARS AGO: A Peachy Salad for a Sunny Day

LADY BUG MACARONS

The other day I was minding my own business when a friend tagged me on Facebook. Quite nonchalantly – Caroline, I am looking at you! – she shared a video… “Sally, your next addiction, I mean… project?  ;-)”   The video was all about meringues and macarons, with amazing piping techniques made by a professional baker from Los Angeles. Truth is, this was not the first time a “friend” suggested baking projects for me. Usually they involve either macarons or mirror glazes, all with levels of complexity that make me tempted to ask “do you hate me that much?” or “what have I done to you?”  But, pandemic times do strange things to humans. Somehow, I decided to tackle one of the simpler projects from the video, macarons shaped as Lady Bugs. Having recently enraged Cheetahs, I figured I would be safer upsetting a small insect. I had a total blast with this adventure, and find them adorable… I hope you do too…

LADY BUG MACARONS WITH CHOCOLATE BUTTERCREAM FILLING
(from the Bewitching Kitchen)

For the shells:
200g Icing/powdered sugar
115 g almond flour
115 g egg whites at room temperature (approx. 4 eggs)
1/8 tsp of cream of tartar
100 g granulated sugar
1/4 tsp vanilla paste or extract
red and black food color

for the filling:
Chocolate Russian Buttercream Recipe
113g unsalted butter, room temperature  (1 stick)
1/2 tsp vanilla paste
1/8 tsp of salt
50g  unsweetened cocoa powder (1/2 cup)
200 g condensed milk (about 1/2 can)

to decorate:
Royal Icing (black) or Candy melts (black)
Black sanding sugar
food pen (black)

Make the shells:
Line 3 heavy baking sheets with parchment/baking paper or Silpat mats. Layer the powdered sugar, and ground almonds in a food processor. Pulse until the mixture looks like fine meal, about 12 pulses. Pass through a sieve and transfer to a small bowl or to a sheet of parchment/baking paper. Set aside.

Place the egg whites and cream of tartar in the bowl of a stand mixer fitted with the whisk attachment. Make sure that the bowl and the whisk are impeccably clean. Starting on medium speed, whip the whites with the cream of tartar until they look like light foam. The whites should not appear liquid. The foam will be light and should not have any structure.

Slowly rain in the granulated sugar in five additions, trying to aim the stream between the whisk and the side of the bowl. Turn the speed up to high. Continue to whip the meringue until it is soft and shiny. It should look like marshmallow creme (marshmallow fluff). Add the vanilla and the food color. Whip the egg whites until the mixture begins to dull and the lines of the whisk are visible on the surface of the meringue. Check the peak. It should be firm. Transfer the whites to a medium bowl.

Fold in the ground almond/almond meal mixture in two increments. When the mixture is starting to get homogeneous, remove a small amount and dye black. Remove a small amount and leave it white. Dye the rest red.  Continue with the three portions of batter until you get proper mixing (macaronage).  Put the mixtures in a piping bag fitted with your choice of piping tip (large, 8mm for red, 4mm for black, white can be left without a piping tip, just make a cut in the bag with scissors. To make the lady bugs, pipe a regular round red shell, then a small black round where the head will be. To make the flowers, use the white batter right after piping the red shell, and do the decorations you want, as if working with Royal Icing, “wet on wet” technique.

Slam each sheet  four times on the counter/worktop. Let the unbaked macarons dry until they look dull but not overly dry. Drying time depends on humidity. In a dry climate, the macarons can dry in 15 to 20 minutes; in a humid climate, it can take 35 to 40 minutes.

While the macarons are drying, heat the oven to 300 F. Bake one sheet at a time on the middle rack. Check in 11 minutes. If the tops slide or move (independently of the ‘feet’ when you gently twist the top), then bake for 2 to 3 more minutes. Check one or two. If they move when gently touched, put them back in the oven for 1 to 2 more minutes until they don’t move when touched. Let the macaroons cool for 10 minutes before removing from the pan. The macarons should release without sticking. When the shells are cold, made the black decorations with a food pen, for the lady bug’s body and the outline of the flowers and hearts. If desired, paint the lady bug’s head  with Royal Icing or Candy melts dyed black. Before it sets, sprinkle black sanding sugar.

Make the Russian buttercream. Whip the room temperature unsalted butter on a medium-high speed with a whisk attachment for 5 minutes. The butter should lighten in color as you incorporate air into it. Add in the vanilla extract, salt, and sifted cocoa powder mix on the lowest speed until incorporated.  Pour very slowly the sweetened condensed milk as you whisk at medium-speed. Scrape the  bowl to make sure it is all very well incorporated. Refrigerate until needed to fill the shells.

Assemble the macarons: match two shells similar in size and add buttercream to the bottom of one of them. Place another shell on top and gently squeeze to take the filling all the way to the edge. Store in the fridge overnight before consuming.

ENJOY!

to print the recipe, click here

Comments: In the video, the decorations for the lady bugs were made with piped Royal Icing, but I decided that a food pen was simpler. Also, you can make antennas with candy melts piping them on parchment or acetate, allowing them to fully set, and then stick them in between the two shells, held by the filling. Some bakers use licorice strands cut in small pieces. Since my macs are donated and each must be wrapped individually, I skipped the antennas. My Lady Bugs are mutants, and I hope they don’t hate me for that.

The filling… My first time using Russian buttercream. I decided to try it because many people claim it to be less sweet than American and very easy to prepare. I will say that the texture is really nice, but it is still quite sweet. Of course, it is made with condensed milk, so what was I expecting?  I had a few problems with the texture too, I believe you need to get the butter temperature just right, not too cold, not too warm. My buttercream ended up a tad too soft. When opting for a chocolate filling for macs, I think I’ll stick with a ganache-base.

For the flowers and hearts decorations, the secret is to work fast. Pipe two or three red shells and immediately start to work on the details, because you want to make sure the design will set and dry homogeneously with the background.  It is exactly the same technique I used before, except that I used the food pen to outline the drawings. It does not have to be perfect, in fact I think that being a bit more lax with the outline makes them more interesting. That’s my story…  😉

I hope you enjoyed my little Lady Bug Macarons. Just want to make something abundantly clear: Unicorns are simply never ever happening.  There. I feel better.

ONE YEAR AGO: Five-Stranded Braided Bread

TWO YEARS AGO: Green Olive Salad

THREE YEARS AGO: Coffee Macarons Dressed up to Party

FOUR YEARS AGO: Blogging Hiatus

FIVE YEARS AGO: Tomato Tatin

SIX YEARS AGO: Headed to Colorado!   

SEVEN YEARS AGO: Farofa Brasileira

EIGHT  YEARS AGO: Thai-Inspired Pork Tenderloin

NINE YEARS AGO: A yummy Brazilian cake: Bolo de Fuba’

TEN YEARS AGO:  Summer’s Tomatoes

ELEVEN YEARS AGO: Leaving on a jet plane… 

4TH OF JULY INSPIRED BAKING

HAPPY 4th OF JULY!

Just a couple of days ago I celebrated 11 years of my naturalization! It always gives me a smile the fact that it fell so close to such an important holiday. Today I share four bakes that celebrate the occasion: macarons, sugar cookies, red velvet brownies, and baked donuts. The common denominator? Sprinkles. I bet you are not surprised.

4th OF JULY MACARONS WITH CHOCOLATE COCONUT FILLING
(from the Bewitching Kitchen)

For the shells:
200g  powdered sugar
115 g almond flour
115 g egg whites at room temperature (approx. 4 eggs)
1/8 tsp of cream of tartar
100 g granulated sugar
¼ tsp vanilla paste or extract
red, blue, purple and black food gel dye

for the chocolate-coconut ganache:  
180g cream of coconut
1/8 tsp salt
200g chocolate, cut in small pieces (II used 70% Lindt)

to decorate:
white non-pareils

Make the shells:
Line 3 heavy baking sheets with parchment/baking paper or Silpat mats. Layer the powdered sugar, and ground almonds in a food processor. Pulse until the mixture looks like fine meal, about 12 pulses. Pass through a sieve and transfer to a small bowl or to a sheet of parchment/baking paper. Set aside.

Place the egg whites and cream of tartar in the bowl of a stand mixer fitted with the whisk attachment. Make sure that the bowl and the whisk are impeccably clean. Starting on medium speed, whip the whites with the cream of tartar until they look like light foam. The whites should not appear liquid. The foam will be light and should not have any structure.

Slowly rain in the granulated sugar in five additions, trying to aim the stream between the whisk and the side of the bowl. Turn the speed up to high. Continue to whip the meringue until it is soft and shiny. It should look like marshmallow creme (marshmallow fluff). Add the vanilla. Whip the egg whites until the mixture begins to dull and the lines of the whisk are visible on the surface of the meringue. Check the peak. It should be firm. Transfer the whites to a medium bowl.

Fold in the ground almond/almond meal mixture in two increments. Paint the mixture halfway up the side of the bowl, using the flat side of a spatula. Scrape the mixture down to the center of the bowl. Repeat two or three times, then check to see if the mixture slides slowly down the side of the bowl.   Divide the batter in three parts, dye 1/3 red, dye 1/3 blue (using a mixture of blue, purple and black to get the tone of blue you like). Leave the final third white. Pour the three batters side by side over plastic wrap, enclose them wrapping the plastic around like a sausage. Drop the bag with the three colors inside a piping bag fitted with a round piping tip.  If you want to make a set of solid color, divide the batter to get a bigger amount of that color and place some of it in a separate piping bag.

Pipe rounds over Silpat or parchment paper in a half-sheet pan and then slam each sheet hard four to six times on the counter. Add sprinkles, if like.  Let the unbaked macarons dry until they look dull but not overly dry. Drying time depends on humidity. In a dry climate, the macarons can dry in 15 to 20 minutes; in a humid climate, it can take 35 to 40 minutes.

While the macarons are drying, heat the oven to 300 F (150 C/130C Fan oven/Gas Mark 2). Bake one sheet at a time on the middle rack. Check in 11 minutes. If the tops slide or move (independently of the ‘feet’ when you gently twist the top), then bake for 2 to 3 more minutes. Check one or two. If they move when gently touched, put them back in the oven for 1 to 2 more minutes until they don’t move when touched.   Let the macaroons cool for 10 minutes before removing from the pan.  The macarons should release without sticking.

Make the ganache. Bring the coconut puree and salt to the boil in a small pan. Remove from the heat and pour over the chocolate in a bowl. Stir well with a whisk until combined. Cover the ganache with plastic wrap touching the surface and leave at room temperature for at least 1 hour. Do not place in the fridge. Whip with a handheld blender for a minute or so to get a slightly thicker consistency for piping.

Match shells and add the filling (I used a piping bag cut open, no piping tip). Decorations for the small macarons were made with Candy Melts (white) and star-shaped sprinkles. Place the macarons in the fridge overnight to mature before enjoying or freezing them for later.

ENJOY!

to print the recipe, click here

Comments: For the tie-dye color effect, add the three batters to the same bag. The easiest way to do that is to open a large piece of plastic film on your countertop, lay the different colors in three large stripes, side by side. Roll the plastic wrap as a sausage and drop it inside a piping bag fitted with your favorite tip. That will make sure the colors get a random mixing as you pipe the shells. I reserved some blue batter to make smaller macarons, all blue. If you want the colors to be more separated, with clear margins (also a very cool effect), simply place them in three separate piping bags and drop them inside a larger one, after cutting their tips (easy to forget, don’t ask me how I know).

4th OF JULY CARDAMON-ORANGE COOKIES
(from the Bewitching Kitchen)

360 g all-purpose flour
2 teaspoons baking powder
215 g sugar
¼ tsp salt
227 g cup butter, cold and cut in pieces
1 egg
3/4 tsp Fiori di Sicilia extract
zest of 1 large orange
1/2 tsp cardamom

for the Royal Icing:
80 g egg whites
420 g powdered sugar
blue gel food dye

MAKE THE COOKIE DOUGH. Heat oven to 350 F. Combine the flour, baking powder and salt, set aside. Add the orange zest to the sugar and rub it all with your hands to release the fragrant oils. Cream the sugar and butter. Add the egg, Fiori di Sicilia and cardamom, mix well. Scrape the sides of the bowl. Add the flour mixture and beat just until combined.

Dough can be rolled right away in between sheets of parchment paper. Roll to about 1/4″ thick, and cut into shapes. I used large stars, small stars, and rectangles. Place on parchment-lined baking sheets, freeze for 5 to 10 minutes. Bake for about 12 minutes. Transfer to cooling rack and cool to room temperature before icing.

MAKE THE ROYAL ICING: whisk the egg whites and powdered sugar using a KitchenAid type mixer until fully smooth. Adjust if needed with sugar or a little milk. Color half of it blue, keep the other half white. Make the small stars first, flooding them with white icing. Add the sprinkles before the icing sets. As they sit on a rack, flood the large stars with blue icing. Keep the very center empty, all you need is a little icing to glue the small star on top. Since it is going to be a bit heavy, if you flood the whole extension of the cookie, it will risk pressing is too much and running down the edges. Place the small star on top and allow them to dry overnight.

For the painted cookie effect, see this post.

ENJOY!

to print the recipe, click here

Comments: This basic recipe for sugar cookies is the one I had planned to use in the Great American Baking Show. I’ve made it so many times now, that I don’t even need to look at the recipe anymore. It always works. My only advice for you is to use regular American butter, like the simple, humble Land-O-Lakes. That butter seems to be the best in terms of less spreading and less fat leaking during baking. And the cookies taste as good as those made with higher fancier brands. Come to think of it, if I had made it in the tent, who knows how they would turn out? I shiver to think.  😉

RED VELVET BROWNIE CAKE
(slightly modified from Mary Berry’s Fast Cakes)

300g semi-sweet chocolate, broken into pieces
200g  butter
200g sugar
4 large eggs
1 tsp vanilla paste
150g all-purpose flour
1 + 1/2  tsp baking powder
pinch of salt
8 g red gel color (I used Americolor Super Red)

for icing:
300g powdered sugar
3 tbsp very hot water
squeeze of lemon juice
sprinkles

Heat the oven to 325 F.  Grease a  12 x 9 in pan tin and line with parchment paper. Sift the flour with the baking powder and the salt. Reserve. Gently melt the chocolate and the butter together.  Let it cool slightly and add the sugar, eggs, vanilla and red gel dye. Mix well until smooth and shiny.  Add the flour mixture, stir until no dry bits remain.

Pour the mixture into the pan and level the top. Bake for 35–40 minutes, or until risen and a crust has formed on the surface. The middle should feel just firm when pressed with your fingertips. Leave to cool in the pan, then remove it.

Make the icing: Mix the powdered sugar, water and lemon juice together in a bowl to make a smooth paste, adjust consistency as needed. Spread over the cold cake and top with sprinkles. Cut in pieces to serve.

ENJOY!

to print the recipe, click here

Comments: Pretty much everything I bake these days go for Common Table meals, and they need to be wrapped individually. I am always tweaking the recipes so that they bake as flat and uniformly as possible, and if they have some type of icing, it is not too soft. Crusting buttercream and powdered sugar-based icings are the best.  I tend to use less baking powder than the recipes call for, so feel free to up a little the amount (up to 2 + 1/2 tsp)  if you don’t mind a certain dome effect in the center of your cake. For this recipe a 13 x 9 will give a cake a bit too thin, if that’s the only size you have, perhaps a 10 inch square pan will work better.

4th OF JULY BAKED ORANGE DONUTS
(from the Bewitching Kitchen)

100g granulated sugar
Zest of 1 large orange
160 g cake flour, sifted
1 + ¼ tsp baking powder
1/4 tsp salt
½ cup buttermilk
1 egg
1 tbsp butter, melted
½ teaspoon vanilla paste

Spray your donut pans with a very light coating of baking spray. I used one mini donut pan and one regular size.  Heat oven to 400 F.

In a small bowl combine sugar and orange zest until the sugar is moistened and fragrant. In a large mixing bowl, sift together cake flour, baking powder, and salt. Stir in sugar mixture.

Add buttermilk, egg, butter, and vanilla and stir until just combined. Add batter to a piping bag and fill each donut cup approximately one-half full.

Bake for about 10 minutes or until the top of the donuts spring back when touched.
Let cool in pan for 4–5 minutes before removing. Finish the donuts with melted Candy Melts and add sprinkles before it sets.

ENJOY!

to print the recipe, click here


Comments: I’ve made these donuts about a month ago using orange blossom water instead of vanilla paste, and to me they tasted a bit artificial. So this time I kept the orange theme exclusively in the zest. Maybe it depends on the brand of orange water you have. At any rate, they are very simple to prepare and have a nice texture. Fiori di Sicilia would probably be quite nice also, but I did not want to have two exact same flavors in the weekly bake. All these goodies were included in the same Common Table meal of July 3rd.

I hope you enjoyed this small collection of 4th of July bakes, and that you are having a nice weekend. Please stay vigilant, observe social distance, and wear a mask when outside. It is not a political issue, it is a matter of your health and that of those around you.

A mask is a sign that you care.

For a recent review on staying safe during this pandemic, visit this post.

ONE YEAR AGO: In My Kitchen, July 2019

TWO YEARS AGO: Brigadeiros for the 4th of July

THREE YEARS AGO: Kaleidoscopic Macarons

FOUR YEARS AGO: Zucchini Noodles with Sun-dried Tomato Pesto

FIVE YEARS AGO: In My Kitchen, July 2015

SIX YEARS AGO: Sous-vide Pork Chops with Roasted Poblano Butter

SEVEN YEARS AGO: Roasted Strawberry-Buttermilk Sherbet

EIGHT YEARS AGO: Amazing Ribs for the 4th of July!

NINE YEARS AGO: Baby Back Ribs on the 4th of July

TEN YEARS AGO: Blueberry Muffins

ELEVEN YEARS AGO: A Pie for your 4th of July


ONE TWO THREE MACARONS

One color, two colors, three colors, that is…  

Starting from the simplest, the idea is to try to match the shell with the sprinkle, and then choose a contrasting tone for the drizzle. Easy-peasy. What I loved the most about these macarons? The filling. Black Sesame Ganache. It cuts the excessive sweetness of the white chocolate, and echoes the nut component of the shell. I will be making that again for sure. For all macarons, use the basic recipe below.

ONE COLOR

BLACK SESAME MACARONS
(from The Bewitching Kitchen)

For the shells:
200g  Icing/powdered sugar
115 g Ground Almonds/Almond Meal
115 g egg whites at room temperature (approx. 4 eggs)
1/8 tsp of cream of tartar
100 g granulated sugar
¼ tsp vanilla paste or extract

for the black sesame ganache:  
300 g white chocolate, cut in small pieces
100 g heavy cream
1 tablespoon black sesame powder
1 tsp black sesame seeds

 to decorate:
Candy melts + food gel dye + sprinkles

Make the shells:
Line 3 heavy baking sheets with parchment/baking paper or Silpat mats. Layer the powdered sugar, and ground almonds in a food processor. Pulse until the mixture looks like fine meal, about 12 pulses. Pass through a sieve and transfer to a small bowl or to a sheet of parchment/baking paper. Set aside.

Place the egg whites and cream of tartar in the bowl of a stand mixer fitted with the whisk attachment. Make sure that the bowl and the whisk are impeccably clean. Starting on medium speed, whip the whites with the cream of tartar until they look like light foam. The whites should not appear liquid. The foam will be light and should not have any structure.

Slowly rain in the granulated sugar in five additions, trying to aim the stream between the whisk and the side of the bowl. Turn the speed up to high. Continue to whip the meringue until it is soft and shiny. It should look like marshmallow creme (marshmallow fluff). Add the vanilla. Whip the egg whites until the mixture begins to dull and the lines of the whisk are visible on the surface of the meringue. Check the peak. It should be firm. Transfer the whites to a medium bowl.

Fold in the ground almond/almond meal mixture in two increments. Paint the mixture halfway up the side of the bowl, using the flat side of a spatula. Scrape the mixture down to the center of the bowl. Repeat two or three times, then check to see if the mixture slides slowly down the side of the bowl.   Put the mixture in a piping bag fitted with your choice of piping tip (for rosette macarons, use a Wilton 1M type).  If you don’t have a macaron mat, draw circles on baking/parchment paper about 2inches/5cm in diameter & turn the paper over before placing on the baking sheets.  Pipe shells, I like to count numbers in my head and use the same count for each shell so they end up similar in size.

I pipe inside the circles to about 1 ¾ inches/4.5cm but you can go to 1 ½ inches (3.8cm) & the macarons will spread & fill the circle while drying.

Slam each sheet hard four to six times on the counter/worktop. Do not slam the sheets if you are making rosette macarons, just let them dry. Let the unbaked macarons dry until they look dull but not overly dry. Drying time depends on humidity. In a dry climate, the macarons can dry in 15 to 20 minutes; in a humid climate, it can take 35 to 40 minutes. Rosette macarons benefit from longer drying time.

While the macarons are drying, heat the oven to 300 F (150 C/130C Fan oven/Gas Mark 2). Bake one sheet at a time on the middle rack. Check in 11 minutes. If the tops slide or move (independently of the ‘feet’ when you gently twist the top), then bake for 2 to 3 more minutes. Check one or two. If they move when gently touched, put them back in the oven for 1 to 2 more minutes until they don’t move when touched.   Let the macaroons cool for 10 minutes before removing from the pan.  The macarons should release without sticking.

For the black sesame ganache: 
Place the heavy cream in a small saucepan, add the black sesame powder (you can grind enough sesame seeds in a spice grinder until you get the right amount, or use store-bought powder).  Bring to a gentle boil, shut down the heat, cover the pan and allow it to sit for 20 minutes. Bring it gently back to a simmer again, drizzle on top of the chocolate. After a couple of minutes, gently mix with a spatula until the chocolate melts. Add the sesame seeds. Bring to room temperature or place in the fridge for a couple of hours. Use a handheld mixer to whip the ganache lightly before using to fill the shells.

Assemble the macarons: match two shells similar in size and add ganache to the bottom of one of them. Place another shell on top and gently squeeze to take the filling all the way to the edge.

To decorate the macarons,  melt Candy Melts in the microwave, add black food dye and use to drizzle the top. Add sprinkles before the candy melt hardens.

Store the macs in the fridge for 24 hours for perfect texture.

ENJOY!

to print the recipe, click here

Comments: The ganache made a little more than I needed for all the shells, I used it later to make some shortbread sandwich cookies, and it worked quite well also. The only thing to be concerned about when you do a white chocolate ganache is to make sure to increase the proportion of chocolate, or you will end up with a filling that is too soft, even if you whip it.  I hope you try this filling.

TWO COLORS

CHERRY BLOSSOM MACARONS
(from The Bewitching Kitchen)

basic macaron recipe above
Divide the batter in two portions, keep one white
Add a drop of pink food gel to the second portion

Place small amounts of batter in alternating colors over a layer of plastic wrap. Enclose the batter by wrapping the plastic around it, then place it inside a piping bag fitted with your choice of piping tip (see composite picture below).

Add sprinkles right after piping, before a skin forms.

for the filling:
8 ounces white chocolate
1/2 cup black cherry jam
3 tablespoons heavy cream
1/2 tsp Sakura essence

Place chocolate in a heatproof bowl and set over a pot of simmering water on low heat. Stir chocolate until melted. Remove from heat, and whisk in jam, heavy cream and Sakura essence. Cover and chill 2 hours, or until cold. Whip it with a hand-held electric mixer until it reaches a good consistency for piping. Transfer ganache to a piping bag and use to fill shells.

to print the recipe, click here

Comments: The way you place the different colors inside the piping bag will affect the final look of the shells. In this case, adding them in a random pattern, you’ll get quite unique swirls as you pipe along, it’s really a lot of fun. Yes, I know, I am too easily amused.  You could omit the sprinkles and go just for the swirl look, but I liked the added layer of decoration they provided. Plus, I need to justify my compulsion to buy sprinkles so if there is ANY chance of incorporating them into a cookie… there they shall be.

THREE COLORS

PISTACHIO MACARONS
(from the Bewitching Kitchen)

same basic recipe as above

Divide the batter in 3 portions. 3/4 will be dyed very light green (I used Sugar Art Master Elite Kiwi); the remaining will be divided in two small portions, and dyed darker green (I used Artisan Accents Forest Green), and coral (I used Sugar Art Master Elite Flame). Place the light green batter in a regular piping bag fitted with your favorite tip. Place the other colors in small piping bags, no tips needed. Cut a small opening right before using.

Pipe a slightly smaller shell than you need using the light green batter. Make about 6 shells and stop. Immediately use the other two colors to make your chosen designs.  Continue piping until you use all the batter. If you have leftovers of any color, just pipe small macs or donut macs to use them up. Bang the tray very gently to release bubbles and bake.

for the pistachio ganache:
150 g white chocolate, cut in small pieces
40 g heavy cream
2 tablespoons pistachio paste
tiny amount of green food color (optional)

Bring the heavy cream to a gentle boil in a saucepan. Add to the chocolate together with the pistachio paste, and whisk until melted. You might need to use the microwave very briefly. Add green food dye if you like. Leave it at room temperature or in the fridge for a couple of hours, then whip lightly with a handheld mixer.  Use to fill the shells.

to print the recipe, click here

Comments: These are SO MUCH FUN!  A little departure on my first attempt at a similar decoration technique. Ok, I admit that if you are a beginner at macaron adventures, it might be better to practice a bit with a regular macaron, then move to the two-color version before attempting these. The only problem is that you need to work fast. But the possibilities for designs are endless, really.  I also think that for this particular type, you are better off with the French meringue method. It is a bit too convoluted to do the Italian meringue and divide it in three portions, considering you have to divide the egg whites and the colors in meringue and  almond-sugar portions, so the whole thing  becomes a bit too complex for my taste. Two-colors would be doable, but three or more? I prefer to stick with the French meringue. But if you find a way to do it and the Italian meringue is your favorite method, let me know your secrets…

My first post in the 12th year of blogging had to be my favorite thing to bake. No matter how many mirror glazes, mousse cakes, sourdough breads, or cookies I make, macarons will always have a special place in my heart.

ONE YEAR AGO: Marshmallow Macarons

TWO YEAR AGO: Fujisan Bread

THREE YEARS AGO: Air-Fried Tomatoes with Hazelnut Pesto & Halloumi Cheese

FOUR YEARS AGO: Red Velvet Layered Cake

FIVE YEARS AGO: Lemon-Lavender Bars

SIX YEARS AGO: Quinoa Fried Rice

SEVEN YEARS AGO: Carrot Flan with Greens and Lemon Vinaigrette

EIGHT YEARS AGO: The Secret Recipe Club: Granola Bars

NINE YEARS AGO:  Awesome Broccolini

TEN YEARS AGO:  A Twist on Pesto

ELEVEN YEARS AGO: Ciabatta: Judging a bread by its holes