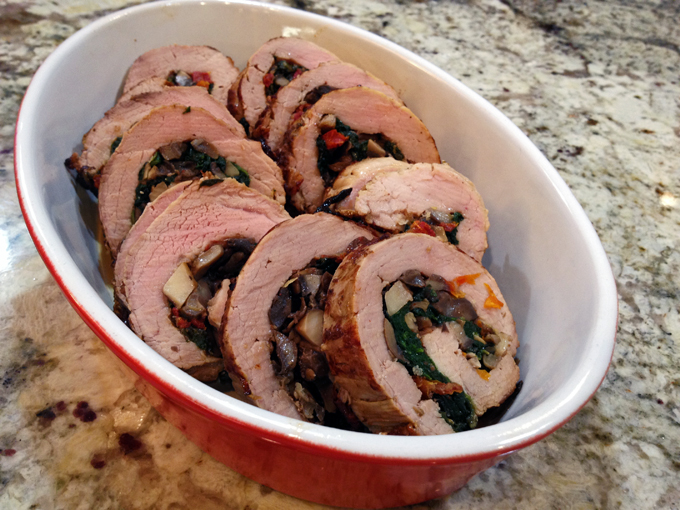
FAKEBBOULEH

Meet the lighter sibling of tabbouleh. Made with riced cauliflower instead of cracked wheat, it is every bit as delicious, but won’t make  you feel stuffed after going back for seconds. I don’t know about you, but I can never stop at one serving of tabbouleh. I always go back for another helping, or when dining at home just the two of us, I keep visiting the serving bowl with my own fork: a little mindless bit here, another there as we talk about life, the mysterious process of bacterial iron uptake, or which brand of shoes could prevent my ankle from saying nasty things to me during a longer run. You know, real important stuff.
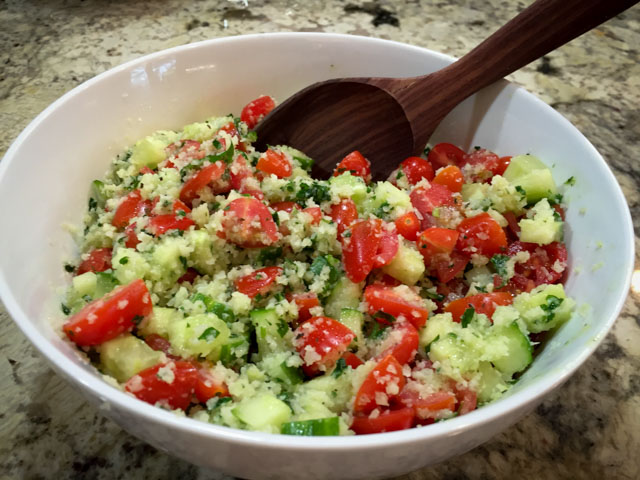
fakebouleh

CAULIFLOWER A LA TABBOULEH
(from the Bewitching Kitchen)

1 head of cauliflower
1 tablespoon coconut oil (or olive oil)
salt and pepper
2 cucumbers, seeded, diced
2 large tomatoes, diced
2 tablespoons fresh mint leaves, minced (or 1/2 teaspoon dried mint)
1/3 cup parsley leaves, minced (or amount to taste)
2 tablespoons olive oil
zest and juice 1/2 lemon

Rice the cauliflower florets in a food processor, blender, or grating box. Heat the coconut oil (or other fat of your choice) on a large skillet, preferably non-stick.  When the oil is hot, add the riced cauliflower, season lightly with salt and pepper, and move it around for a few minutes. Immediately remove from the heat and transfer to a dish to cool. I like to use a baking dish to get the cauli-rice well spread.

Add the cucumber, tomatoes and parsley to a bowl. Don’t be skimpy on the amount of parsley, and mince it very well. If using fresh mint, add it to the bowl too.

Make a quick and simple dressing with the olive oil, lemon juice and zest, add salt and pepper, dried mint if using it.

Add the cooled cauliflower rice to the veggies, pour the dressing on top and mix gently.  It gets better with a little time in the fridge.  Serve at room temperature.

ENJOY!

to print the recipe, click here

dinner

Comments: There are several ways to cook riced cauliflower, each with a slightly different outcome. When I enjoy it as I would real rice, I prefer to bake it. For this type of recipe, I’ve tried three ways: baked, microwaved, and sautéed in oil. I favored the third option because the texture was perfect to mimic cracked wheat.  Baked would be my second choice, the problem is that the grains of cauliflower shrink a lot more in the oven. You can of course use any method you like, just make sure it is all at room temperature when you mix the fakebbouleh. As to the parsley,  next time I will add more to my version. I love it and like my tabbouleh – fake or authentic – to be pretty “herbal.”

Next day leftovers were all I had for lunch. I did squirt a little more lemon juice on top because I believe there is never too much lemon on this type of preparation. It freshens up everything. One last thought before I leave you… I usually add a lot less dressing to salads than most recipes call for, so if you try this recipe, keep that in mind and consider doubling the amount. A touch of Maldon salt flakes right before indulging is not mandatory, but quite pleasant for the taste buds.
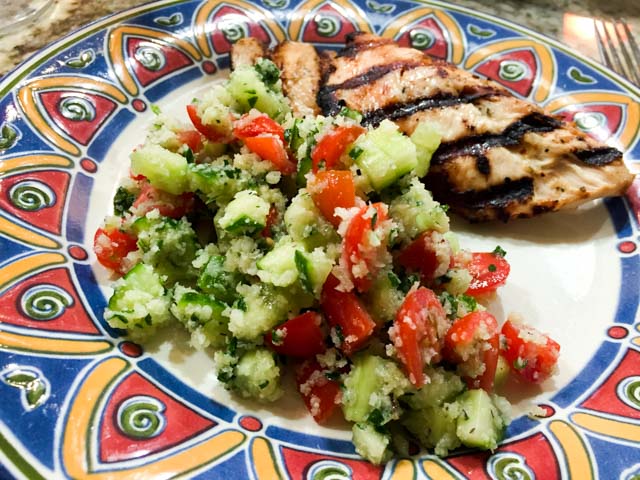
dinner-2

Dinner is served!  Grilled chicken breasts were perfect with my fakebbouleh…

ONE YEAR AGO: Yellow Squash Soup

TWO YEARS AGO: Grilled Chicken with Tamarind and Coconut Glaze

THREE YEARS AGO: Chicken-Apricot Skewers

FOUR YEARS AGO:  Asparagus Quiche

FIVE YEARS AGO: Two-stage Pea and Prosciutto Risotto

SIX YEARS AGO: Mellow Bakers: Corn Bread


CREAMY BROCCOLI AND MUSHROOM CASSEROLE

One more time I am sharing a recipe from the super athlete Mike, who runs the blog The Iron You. For those who like to experiment with a lower carb or Paleo nutrition, eggs are a fundamental ingredient. Great source of protein and fat, they are so versatile: you can make a nice omelette, frittatas, egg muffins, egg bakes, adding all sorts of ingredients from meats to veggies. I eat a lot of eggs each week for lunch, usually sunny side up or scrambled, sometimes hard-boiled, but at dinner time I opt for more elaborate uses, souffle’ being a favorite when I don’t mind splurging a little.  This casserole is quite low in carbs, but feels like splurging. Satisfying without making you feel uncomfortably stuffed. Perfect side dish, if you ask me…

Broccoli Casserole1

CREAMY BROCCOLI AND MUSHROOM CASSEROLE
(slightly modified from The Iron You)

1 ½ pounds broccoli florets
2 tablespoons coconut oil
1 medium shallot, thinly sliced
1 celery stalk, finely diced
1 pound white button mushrooms, sliced
1 teaspoon dried thyme
1 teaspoon fine grain salt
½ teaspoon sweet paprika
¼ teaspoon ground black pepper
⅛ teaspoon red pepper flakes
4 eggs, at room temperature
1 cup full fat coconut milk

Heat oven to 350°F  and place a rack in the middle. Grease a 9×13 baking dish with olive oil.
Place an inch of water in a saucepan with a steamer and bring to a boil. Steam the broccoli for 5 minutes, until tender but still firm. Remove from the heat and let cool.

While the broccoli cools, melt coconut oil in a large skillet over medium-high heat, add the shallot and celery and sauté until translucent and fragrant, about 5 minutes.   Add mushrooms, thyme, salt, paprika, black pepper, and red pepper flakes. Sauté until mushrooms have browned a bit, about 8 minutes.

When broccoli florets have cooled down a little bit, chop the larger ones into bite-sized pieces. Add broccoli to the skillet and gently stir until combined. Pour the broccoli-mushroom mixture into the prepared baking dish. In a bowl whisk eggs with coconut milk and pour over broccoli mixture. Bake for 45 to 50 minutes until golden-brown.

ENJOY!

to print the recipe, click here

Comments: If you google recipes for low-carb egg bakes or egg muffins, you’ll end up with thousands of hits to choose from. For the most part, they can be divided in two categories: those that use just eggs to bind the ingredients, and those that rely on dairy (quite often heavy cream).  I am not too fond of recipes that use only eggs because they end up with a rubbery texture I don’t care for. As to the ones loaded with heavy cream, they feel overly rich for my taste. This recipe solves both problems, the texture is perfect, and it has just the right amount of naughty…   We enjoyed it back in December, actually.  Obviously, it’s taking me a while to share,  but the weather is still appropriate for casseroles. Make it and you will fall in love with it too. You can add different veggies, in fact soon I intend to try a version using carrots and zucchini. I might even get my spiralizer out just for fun, and a bit of added naughty.

Mike, thanks for all the great dishes you blog about, two thumbs up for this one!

ONE YEAR AGO: Maple Walnut Biscotti

TWO YEARS AGO: Barley Risotto with Peas

THREE YEARS AGO: Oatmeal Fudge Bars

FOUR YEARS AGO: Cauliflower Steaks

FIVE YEARS AGO: Soft Spot for Chevre

SIX YEARS AGO: Quick sun-dried Tomato Crostini

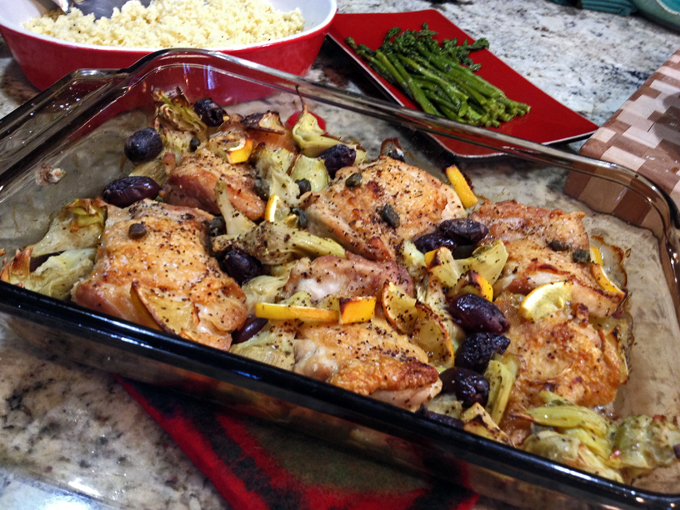
CHICKEN THIGHS WITH ARTICHOKES AND CAPERS

If you are into Paleo recipes, make this dish!  If you are not into Paleo recipes, make this dish!  Yes, I am a bit bossy today, as a husband and a few graduate students might have noticed. But it’s all with good intentions, as I know what is good for them, for you, and maybe even for myself.  The inspiration for this recipe was found in one of my Kindle cookbooks, Make it Paleo II, by Hayley Mason and Bill Staley. They also have a food blog, Primal Palate, with great recipes and youtube videos. I always read the good and the bad reviews of a cookbook before buying it, and one of the reviewers at amazon.com said that this recipe alone was worth getting the book. I made it twice, once exactly as written, but in this post I am sharing my take on it, modified not only in flavor but also in the method itself. In their version, it is all made in a single skillet, but I did not want to turn on the big oven, so after browning the meat I transferred the pieces to a baking dish that fits in our Breville.

SkilletChickenThighs

CHICKEN THIGHS WITH ARTICHOKES AND CAPERS
(adapted from Make it Paleo II)

6 skin-on chicken thighs, boneless
Sea salt to taste
1 tsp dried oregano
1/2 tsp za’tar
1/2 tsp freshly ground black pepper
1 (6-oz) jar artichoke hearts, drained and sliced
1/2 cup Kalamata olives, pitted and drained
2 Tbsp capers
1 lemon, sliced into rounds and quartered

Heat the oven to 425°F. Heat a skillet or cast iron pan over medium heat. Pat the chicken thighs dry with a paper towel, removing as much moisture as possible. Season the skin with salt and place them skin side down in the hot skillet. Flip the thighs once they develop a nice brown sear on the skin, which should naturally make them easily release from the pan. Cook the chicken skin side up for 1 minute, then transfer to a baking dish, skin side up.  Season evenly with the oregano, za’tar, and  more black pepper to taste. Add the artichoke hearts, olives, capers, and lemon slices to the skillet. Place the skillet in the oven and roast for 30 to 35 minutes, until the chicken is fully cooked.

ENJOY!

to print the recipe, click here

Comments:  If you never de-boned a chicken thigh yourself, take a deep breath and try it, because it’s a nice skill to acquire in the kitchen. I don’t know what type of chicken meat your grocery store carries, but where we live I can find bone-in, skin-on chicken thighs, and boneless, skinless.  The former I use for roasting all the time, but the skinless I reserve for either braises, stir-fries, or grilling (usually after a nice marinade with yogurt or some citric concoction).  You absolutely need boneless pieces with the skin on for this recipe, so if you cannot find it, roll your sleeves up and get working.  It was a bit of a struggle, but I got better and better as I did it.  I watched some videos on youtube to help me with the technique, but most videos available show professional chefs who handle the knife as if they were born with one in their hands.  Amazing to watch, but when trying to mimic them, my shortcomings became quite evident. I say take your time, put some soothing music on, and practice. By the way, if you don’t have za’tar, don’t worry. But get some, will you?  I must say it’s one of my favorite spice mixtures at the moment. Love it.

Phil is so addicted to my default recipe for chicken thighs, that at first he was disappointed by the different preparation. But, it took him only one bite to say that I should revisit this recipe whenever I feel like it. Two thumbs up!  So there you have it, make this dish because I said so, and Sally knows what’s best for everyone. HA!

😉

ONE YEAR AGO: Pea Pancakes with Herbed Yogurt

TWO YEARS AGO: Mushroom Stroganoff

THREE YEARS AGO: Tomato Sourdough

FOUR YEARS AGO: Gamberetti con rucola e pomodori

FIVE YEARS AGO: Flirting with Orzo

ARE YOU AFRAID OF CELERY ROOT?

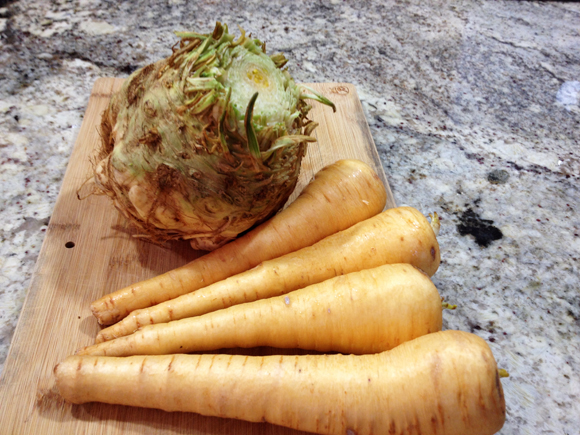
If I had to choose a word to define my childhood and even teenage years, fear would be it. To name a few of my fears: darkness, sleeping alone, mirrors, clowns, dolls, sleepovers,  odd numbers (don’t ask), heights, cockroaches. There were many more, but let’s keep it simple, shall we? Glad to report that just as my pickiness to eat, those fears are a thing of the past. Except heights and cockroaches. The former I still try to work on, cockroaches are out of question. I am talking about the tropical kind, with their scary dimensions and uncanny ability to fly across a room. I shiver just to think about them. Growing up, I don’t remember ever seeing  celery root in our home, but being the easily scared self I was,  I bet I would be afraid of it too. It does look like a large potato under the spell of black magic. Something that belongs in the setting of Hansel and Gretel’s tale (which as a matter of fact gave me nightmares for months after reading it as a child).

ingredients
But, don’t let celery root (aka celeriac) looks prevent you from enjoying it. Under that harsh appearance, lies a beautiful white entity, with a flavor vaguely reminiscent of celery, but much more complex.  Yes, it is a bit hard to peel, and if you are not careful a finger or two could be hurt in the process, but keep calm, peel on, and make soup before the weather gets too hot.  Too hot. What a silly statement. Sorry, sometimes I make no sense.

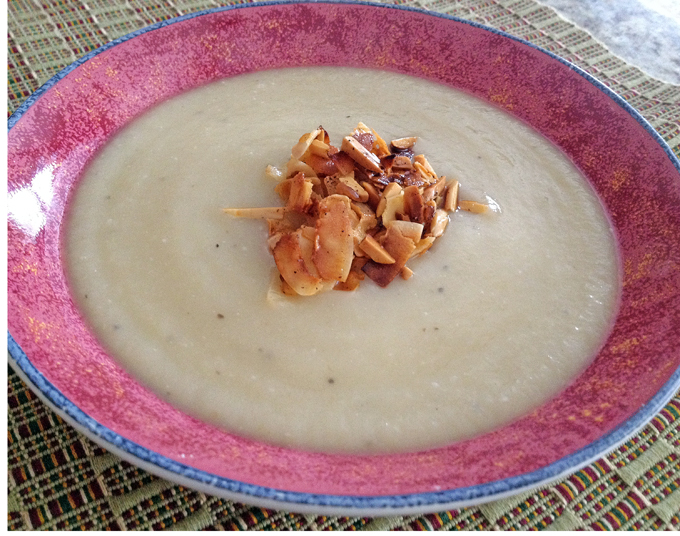
Parsnip&CeleriacSoupCELERIAC AND PARSNIP SOUP WITH TOASTED COCONUT
(from the Bewitching Kitchen)

1 tablespoon olive oil
1 medium celery rib, diced
1 shallot, minced
1 large celeriac, peeled and cut in chunks
3 to 4 medium-sized parsnips, peeled and cut in chunks
salt and black pepper
dash of nutmeg
4 cups water
lemon juice to taste

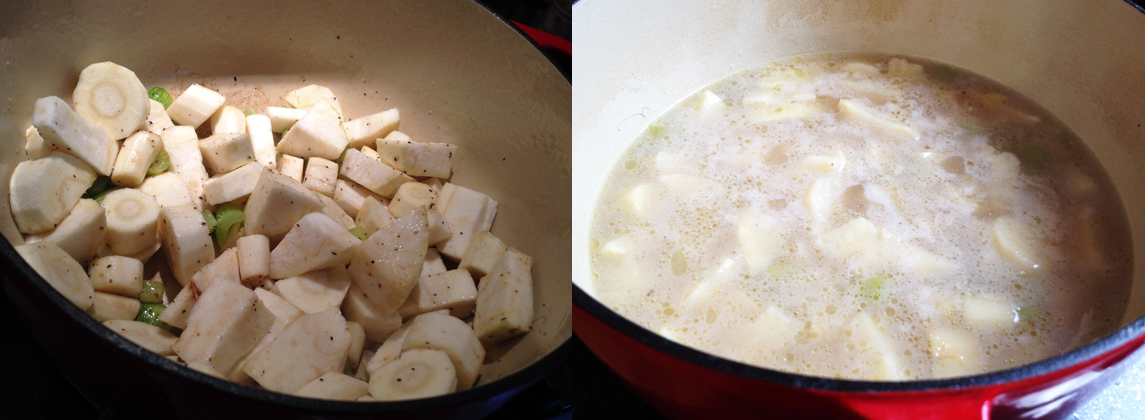
Heat the olive oil in a pan large enough to accommodate all ingredients. Sautee the shallot with the celery until fragrant and shallots become translucent. Season lightly with salt and pepper.  Add the pieces of parsnips and celeriac, saute for a few minutes, moving them around.

Add water, making sure it cover the veggies. Bring to a boil, cook until parsnips and celeriac pieces are tender, 20 to 30 minutes. Transfer the veggies with some of the water to a blender or food processor, blend until smooth. You might need to do it in two batches, being careful while processing hot liquids (using a blender keep the lid open and cover the top with a kitchen cloth).  Use only enough water to get the consistency you like.

Return the processed soup to the pan on low heat, adjust consistency with the reserved water if needed. Season with nutmeg, add a squeeze of lemon juice, taste and adjust seasoning.

Serve with coconut flakes (unsweetened) sautéed in olive oil or butter, lightly seasoned with salt, or with any other topping you like.

ENJOY!

to print the recipe, click here

composite
This was a delicious soup, the lemon juice at the end does that citric magic I am very fond of. If I had a dollar bill for every time I use lemon juice in my cooking, I’d be rich. You can make this soup a bit more luscious adding a touch of cream if you want, or using chicken stock instead of water, but I often like to keep things simple and let the flavor of the veggies take the spotlight.  I am not quite sure about the nutmeg. I love nutmeg with cauliflower and in bechamel sauce, but I might omit it in this soup next time. Maybe I used too heavy a hand, I thought the flavor was a bit too strong. Anyway, if you make it, go easy with it and taste it.

Before I say goodbye, here is a small collection of recipes to help you lose any residual fear of celery root… just in case you need it  😉

SWEET AND SOUR CELERIAC SEPHARDIC STYLE, from Tasty Eats

CELERY ROOT, APPLE AND WALNUT SALAD from Cooking and Traveling in Italy and Beyond

CELERY ROOT LETTUCE WRAPS from The Wimpy Vegetarian

CELERY ROOT REMOULADE, from Kitchen Riffs

FRENCH LENTILS WITH CARAMELIZED CELERY ROOT, from Martha Stewart

POACHED EGGS OVER CELERY ROOT LATKES, from Fresh Start

POTATO AND CELERY ROOT ROSTI, from Martha Stewart

I hope you enjoyed this small tour on celeriac possibilities, and if you are a celeriac virgin, you will give it a try in the near future. Nothing to fear, I promise!

**********************************************************************************

ONE YEAR AGO: Prime Rib Roast, Mexican Style

TWO YEARS AGO: Sourdough Bread with Walnuts and Dates

THREE YEARS AGO: Braised Brisket with Bourbon-Apricot Glaze

FOUR YEARS AGO: The Real Vodka Sauce

FIVE YEARS AGO: Pork Tenderloin and Blue Cheese


SPINACH AND MUSHROOM STUFFED PORK TENDERLOIN

The pi day last week made me realize that for a blog that is almost 6 years old, I have very few pies to share. Not the type of stuff we make that often, and of course, it reflects on their limited presence in the site. On the opposite side of the spectrum we have pork tenderloin, by far one of the types of meat I make the most. This version is a little more dressed-up than usual, and perfect for a weekend dinner. The recipe comes from Fine Cooking magazine, and for those who care to know nutritional details, it is Paleo-friendly (if you omit the cream sauce) and low-carb. It is also elegant, and flavorful, which is what really matters 😉

StuffedPorkTenderloinSPINACH AND MUSHROOM STUFFED PORK TENDERLOIN
(slightly modified from Fine Cooking)

5 Tbs. extra-virgin olive oil
3-1/2 oz. cremini mushrooms, thinly sliced (1-1/2 cups)
1/2 cup sun-dried tomatoes, packed in oil, drained and diced
salt and freshly ground black pepper
6 oz. baby spinach (5 lightly packed cups)
1 large pork tenderloin (about 1-1/4 lb.)
zest of one large lemon
2 tsp of lemon juice
1 large shallot, finely diced
3/4 cup low-salt canned chicken broth
2-1/2 Tbs. sherry vinegar
2 Tbs. heavy cream

Set a rack in the center of the oven and heat the oven to 450°F. Heat 2 Tbs. of the oil in a heavy, ovenproof 12-inch skillet over medium-high heat until shimmering hot. Add the mushrooms, sprinkle with 1/2 tsp. each of salt and pepper, and cook, stirring, until browned and tender, about 3 minutes. Stir in the spinach and sun-dried tomatoes, sprinkle with salt, and cook, tossing well with tongs, until the spinach is wilted, about 2 minutes. Transfer the mixture to a colander and set the skillet aside.

Butterfly the tenderloin by making a horizontal slice lengthwise through the meat almost all the way to the other side. Open the meat flat, like a book. Cover with plastic wrap, and using a meat mallet, a small, heavy skillet, or the heel of your hand, lightly pound the pork so that it’s 1/4 inch thick. Rub the pork all over with 1 Tbs. of the oil, the lemon juice, and sprinkle all over the zest of the lemon and about 1/2 tsp. each of salt and pepper.

Squeeze any excess liquid from the spinach and mushrooms. Spread over the pork, leaving bare a 2-inch border along one long edge. Starting with the long side that’s covered with filling, roll the stuffed tenderloin toward the bare-border side so that it forms a cylinder, and tie it with kitchen twine.

Wipe the skillet clean if necessary. Heat the remaining 2 Tbs. oil in the skillet over medium-high heat until shimmering hot. Sear the pork on all three non-seam sides until well browned, about 6 minutes total. Flip onto the seam side, then transfer the skillet to the oven. Cook until an instant-read thermometer inserted into the thickest part of the roast registers 140ºF, 15 to 20 minutes.

Transfer the meat to a clean cutting board, tent with aluminum foil, and let rest for 10 minutes. Meanwhile, return the skillet to the stove over medium-high heat (be careful; the skillet’s handle will be hot). Add the shallots, season with 1/4 teaspoon salt, and cook, stirring, until the shallots soften and brown, about 2 minutes. Add the chicken broth, sherry vinegar, and simmer briskly until the mixture reduces by a bit more than half, about 4 minutes. Stir in the cream and season with salt and pepper to taste.

Slice the pork into 1/2-inch-thick slices and serve with the sauce.

ENJOY!

to print the recipe, click here

composite1
Comments: The only problem when cooking pork tenderloin is the delicate nature of this meat, and its tendency to dry during roasting because it has such low-fat content. By filling it with the sautéed mixture of veggies, you won’t run such risk.  I prepared the filling, rolled the meat, wrapped it in plastic and left it in the fridge for several hours, then finished it all up for our dinner on a Saturday evening, back in January.

You can serve it with any type of starchy side you’d like, pasta, rice, mashed root veggies, but in this particular dinner I went with a much lighter option, and enjoyed it with a side of grated carrots lightly seasoned with lemon juice & olive oil.  I like to keep it in the fridge for an hour or so, then add salt and pepper right before serving. It is amazing what a touch of lemon juice can do to grated carrots.  I first read about it on Leite’s Culinaria, after a tip from our friend Cindy. Try it sometime, nothing could be simpler, but you’ll find yourself making it again and again.

served11


ONE YEAR AGO: Crispy Chickpea and Caper Spaghetti

TWO YEARS AGO: Spring has Sprung!

THREE YEARS AGO: Chickpea and Fire Roasted Tomato Soup

FOUR YEARS AGO: Double Asparagus Delight

FIVE YEARS AGO:  Sun-dried Tomato and Feta Cheese Torte