PORK TENDERLOIN, BRACIOLE STYLE

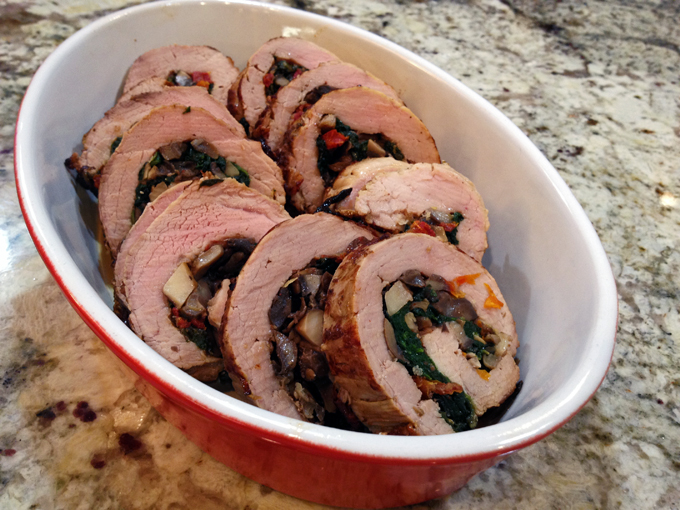
There I go taking liberties with food once again. Braciole is a very traditional Italian recipe made with beef. Flank steak, butterflied and pounded thin is the meat of choice for it. I used pork tenderloin. And I made it sous-vide. Reckless. Times two.

PORK TENDERLOIN, BRACIOLE STYLE
(from the Bewitching Kitchen, inspired by Jeff Mauro)

1 pork tenderloin, butterflied, pounded thin
salt and pepper
smoked mozzarella, sliced thin
8 asparagus stalks, blanched and cooled
1/2 cup Panko bread crumbs
1/4 cup sun-dried cherry tomatoes packed in oil, coarsely chopped
3 tablespoons walnuts, toasted and diced
3 tablespoons raisins
1 to 2 tablespoons olive oil
for searing:
a little olive oil
a little lemon juice
a touch of maple syrup

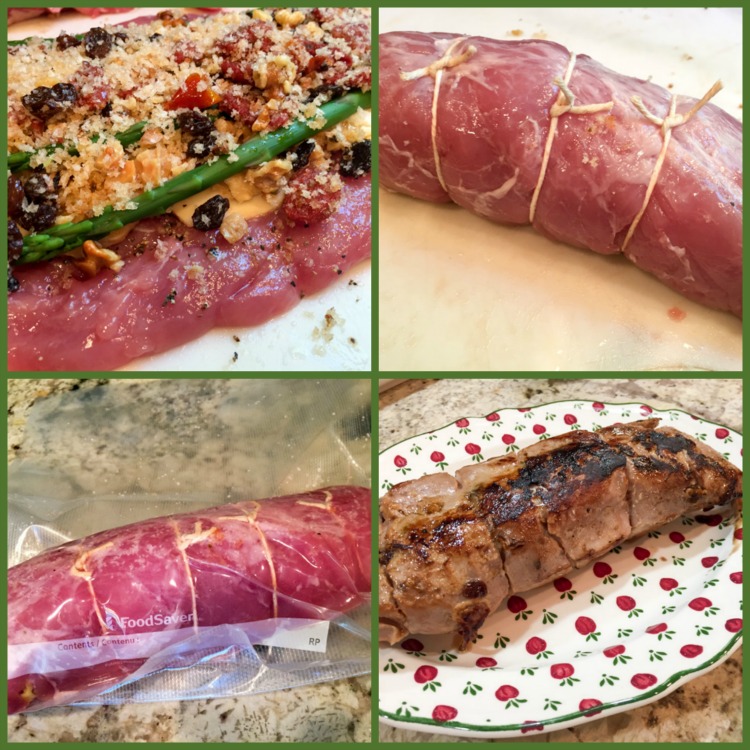
Make the filling by mixing Panko bread crumbs, tomatoes, walnuts, raisins and olive oil in a small bowl. Season lightly with salt and pepper.

Place the butterflied pork tenderloin on a flat surface, season with salt and pepper. Lay slices of smoked mozzarella over the surface, leaving a little border without cheese all around. Place the stalks of asparagus over the cheese, add the filling on top.  Roll the meat as tightly as  you can make it, tie with kitchen twine at 2 inch intervals. Season the surface lightly with salt and pepper. If using sous-vide, seal the meat and place in a water-bath set to 140F. Cook for 2 to 6 hours.

Make the brushing sauce by mixing  olive oil, lemon juice, and maple syrup in a small bowl. Remove the meat from the bag,  brush the surface with the olive oil mixture, and sear on a hot grill or non-stick pan. Cut in slices and serve.

If cooking on a regular oven, sear the surface of the meat over high heat after brushing with the olive oil mixture. Place in a 375 F oven until done to your liking.

ENJOY!

to print the recipe, click here

Comments: You can definitely make this exact recipe without a sous-vide gadget. The  big advantage of sous-vide is keeping the rolled meat nicely tight. No filling spills out, it is all contained by the vacuum packing. And, of course, the flexibility with timing is a nice touch too. Anywhere from 2 to 6 hours will work perfectly well, all you have to do after is sear the outside for cosmetic reasons. For our taste the pork cooked at 140F was too rare. I was kicking myself for choosing that temperature, knowing that we do not like the taste of the meat when it’s still a bit pink. So, full disclosure: I seared the cut slices briefly on a skillet before we enjoyed them. Next time I’ll go for 150F.

The smoked  mozzarella does a magical job in the filling. It packs so much flavor, and it pairs well with the sweetness of the raisins and the sun-dried tomatoes. A very nice main dish well suited for company. You can serve it with many sides: mashed cauliflower, mashed potatoes, a little pasta, or a lemony risotto. If you prefer a more austere route, just a salad with a bright vinaigrette will do.

Soon I’ll make the traditional version with flank steak, since we enjoyed this one so much.  Flank steak will be easier to roll in layers, the pork tenderloin ends up more like a single layer of meat enclosing the filling.  I imagine that I could have pounded it a bit thinner, but I was afraid to compromise the texture of the meat.  At any rate, this one is a keeper, and I hope that – sous-vide or not – you’ll give it a try.

Make me happy… grab a pin!

Add to FacebookAdd to DiggAdd to Del.icio.usAdd to StumbleuponAdd to RedditAdd to BlinklistAdd to TwitterAdd to TechnoratiAdd to Yahoo BuzzAdd to Newsvine

ONE YEAR AGO: Raspberry Buckle

TWO YEARS AGO: Seafood Gratin for a Special Dinner

THREE YEARS AGO: Cooking Sous-Vide: Sweet and Spicy Asian Pork Loin

FOUR YEARS AGO:  Farewell to a Bewitching Kitchen

FIVE YEARS AGO: In My Kitchen. June 2012

SIX YEARS AGO: Goodbye L.A.

SEVEN YEARS AGO: 7-6-5 Pork Tenderloin

SaveSave

SaveSave

SaveSave

SaveSave

SaveSave

SaveSave

SaveSave

SaveSave

SaveSave

SaveSave

SaveSave

SPINACH AND MUSHROOM STUFFED PORK TENDERLOIN

The pi day last week made me realize that for a blog that is almost 6 years old, I have very few pies to share. Not the type of stuff we make that often, and of course, it reflects on their limited presence in the site. On the opposite side of the spectrum we have pork tenderloin, by far one of the types of meat I make the most. This version is a little more dressed-up than usual, and perfect for a weekend dinner. The recipe comes from Fine Cooking magazine, and for those who care to know nutritional details, it is Paleo-friendly (if you omit the cream sauce) and low-carb. It is also elegant, and flavorful, which is what really matters 😉

StuffedPorkTenderloinSPINACH AND MUSHROOM STUFFED PORK TENDERLOIN
(slightly modified from Fine Cooking)

5 Tbs. extra-virgin olive oil
3-1/2 oz. cremini mushrooms, thinly sliced (1-1/2 cups)
1/2 cup sun-dried tomatoes, packed in oil, drained and diced
salt and freshly ground black pepper
6 oz. baby spinach (5 lightly packed cups)
1 large pork tenderloin (about 1-1/4 lb.)
zest of one large lemon
2 tsp of lemon juice
1 large shallot, finely diced
3/4 cup low-salt canned chicken broth
2-1/2 Tbs. sherry vinegar
2 Tbs. heavy cream

Set a rack in the center of the oven and heat the oven to 450°F. Heat 2 Tbs. of the oil in a heavy, ovenproof 12-inch skillet over medium-high heat until shimmering hot. Add the mushrooms, sprinkle with 1/2 tsp. each of salt and pepper, and cook, stirring, until browned and tender, about 3 minutes. Stir in the spinach and sun-dried tomatoes, sprinkle with salt, and cook, tossing well with tongs, until the spinach is wilted, about 2 minutes. Transfer the mixture to a colander and set the skillet aside.

Butterfly the tenderloin by making a horizontal slice lengthwise through the meat almost all the way to the other side. Open the meat flat, like a book. Cover with plastic wrap, and using a meat mallet, a small, heavy skillet, or the heel of your hand, lightly pound the pork so that it’s 1/4 inch thick. Rub the pork all over with 1 Tbs. of the oil, the lemon juice, and sprinkle all over the zest of the lemon and about 1/2 tsp. each of salt and pepper.

Squeeze any excess liquid from the spinach and mushrooms. Spread over the pork, leaving bare a 2-inch border along one long edge. Starting with the long side that’s covered with filling, roll the stuffed tenderloin toward the bare-border side so that it forms a cylinder, and tie it with kitchen twine.

Wipe the skillet clean if necessary. Heat the remaining 2 Tbs. oil in the skillet over medium-high heat until shimmering hot. Sear the pork on all three non-seam sides until well browned, about 6 minutes total. Flip onto the seam side, then transfer the skillet to the oven. Cook until an instant-read thermometer inserted into the thickest part of the roast registers 140ºF, 15 to 20 minutes.

Transfer the meat to a clean cutting board, tent with aluminum foil, and let rest for 10 minutes. Meanwhile, return the skillet to the stove over medium-high heat (be careful; the skillet’s handle will be hot). Add the shallots, season with 1/4 teaspoon salt, and cook, stirring, until the shallots soften and brown, about 2 minutes. Add the chicken broth, sherry vinegar, and simmer briskly until the mixture reduces by a bit more than half, about 4 minutes. Stir in the cream and season with salt and pepper to taste.

Slice the pork into 1/2-inch-thick slices and serve with the sauce.

ENJOY!

to print the recipe, click here

composite1
Comments: The only problem when cooking pork tenderloin is the delicate nature of this meat, and its tendency to dry during roasting because it has such low-fat content. By filling it with the sautéed mixture of veggies, you won’t run such risk.  I prepared the filling, rolled the meat, wrapped it in plastic and left it in the fridge for several hours, then finished it all up for our dinner on a Saturday evening, back in January.

You can serve it with any type of starchy side you’d like, pasta, rice, mashed root veggies, but in this particular dinner I went with a much lighter option, and enjoyed it with a side of grated carrots lightly seasoned with lemon juice & olive oil.  I like to keep it in the fridge for an hour or so, then add salt and pepper right before serving. It is amazing what a touch of lemon juice can do to grated carrots.  I first read about it on Leite’s Culinaria, after a tip from our friend Cindy. Try it sometime, nothing could be simpler, but you’ll find yourself making it again and again.

served11


ONE YEAR AGO: Crispy Chickpea and Caper Spaghetti

TWO YEARS AGO: Spring has Sprung!

THREE YEARS AGO: Chickpea and Fire Roasted Tomato Soup

FOUR YEARS AGO: Double Asparagus Delight

FIVE YEARS AGO:  Sun-dried Tomato and Feta Cheese Torte