BANANA CUPCAKES WITH HONEY BUTTERCREAM FROSTING

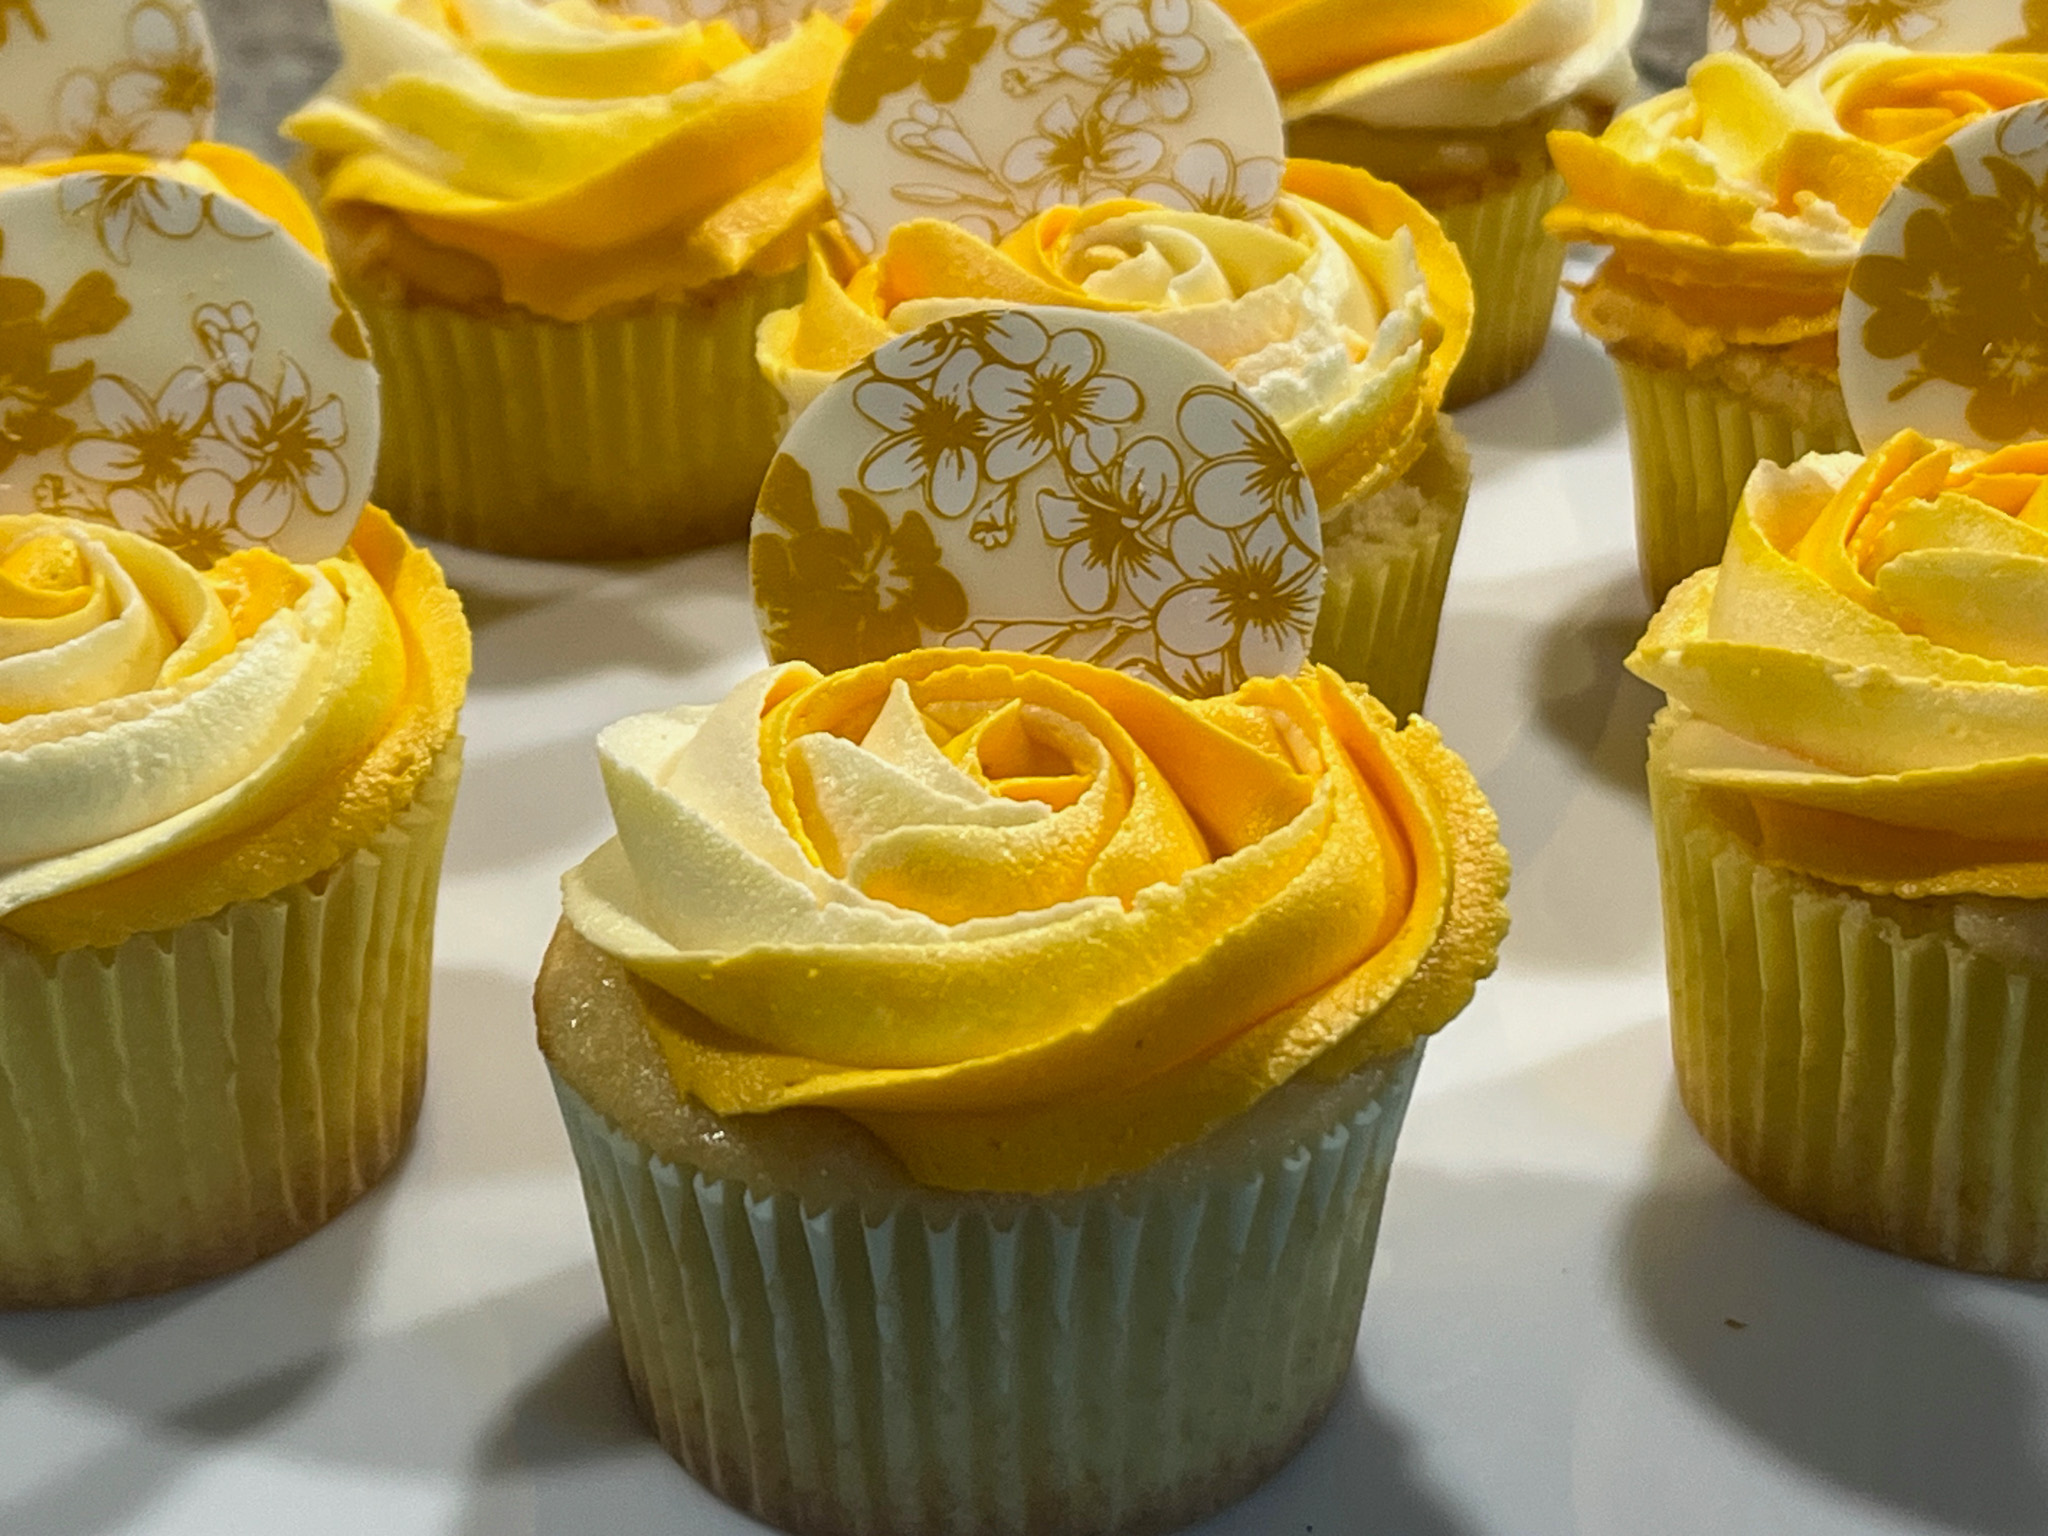
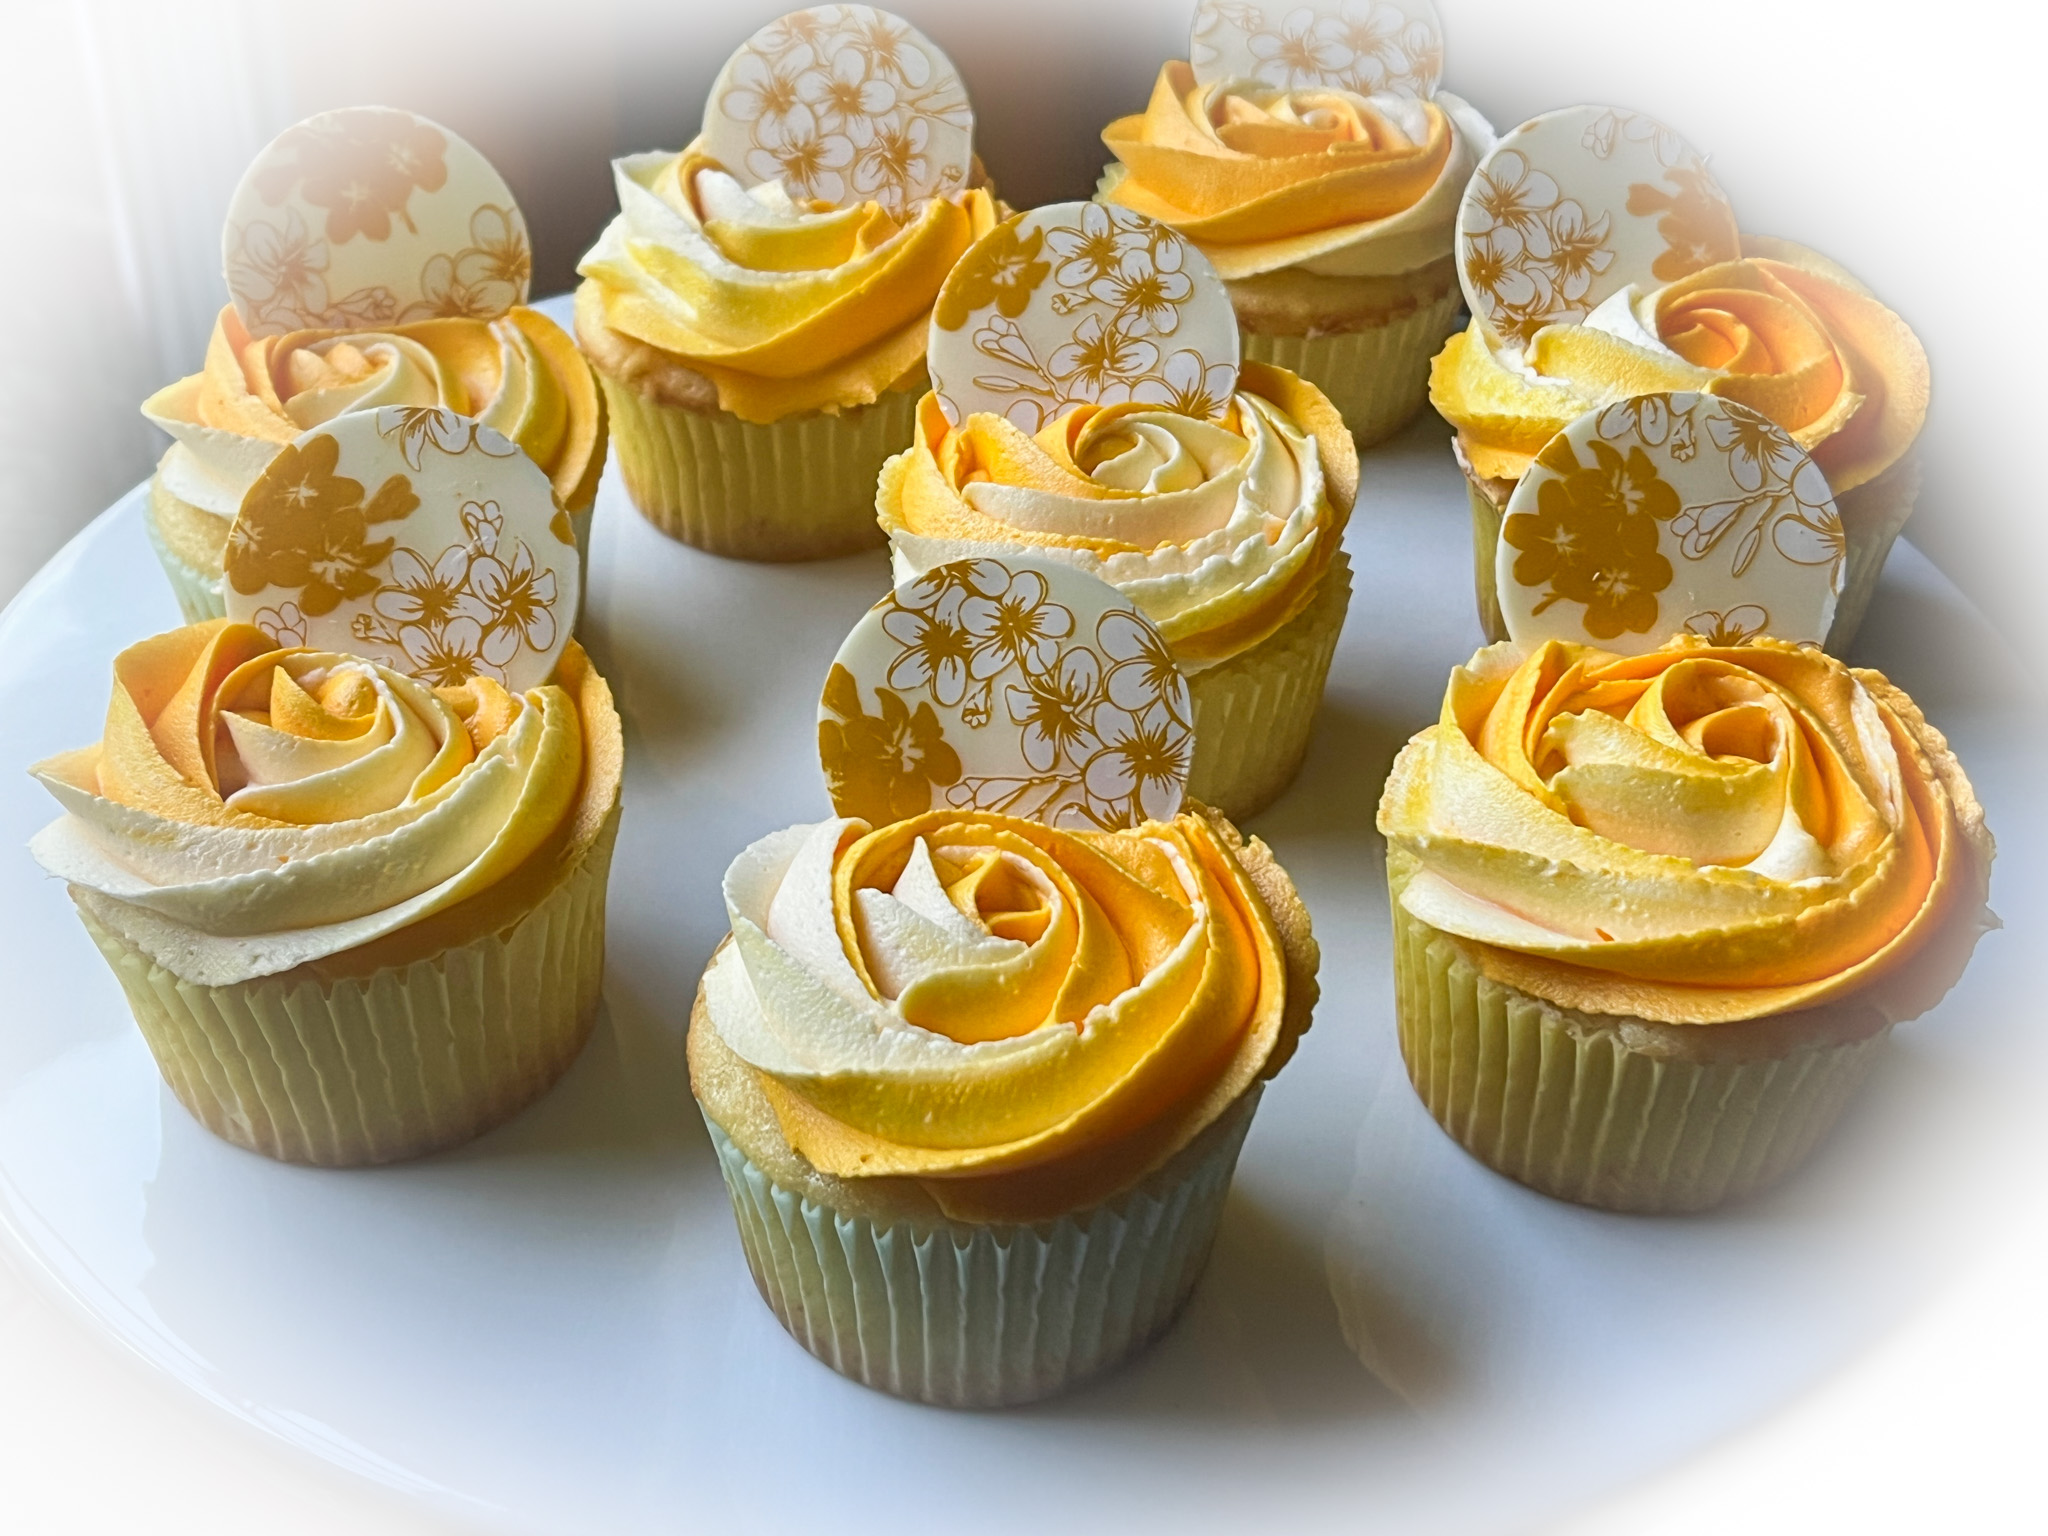
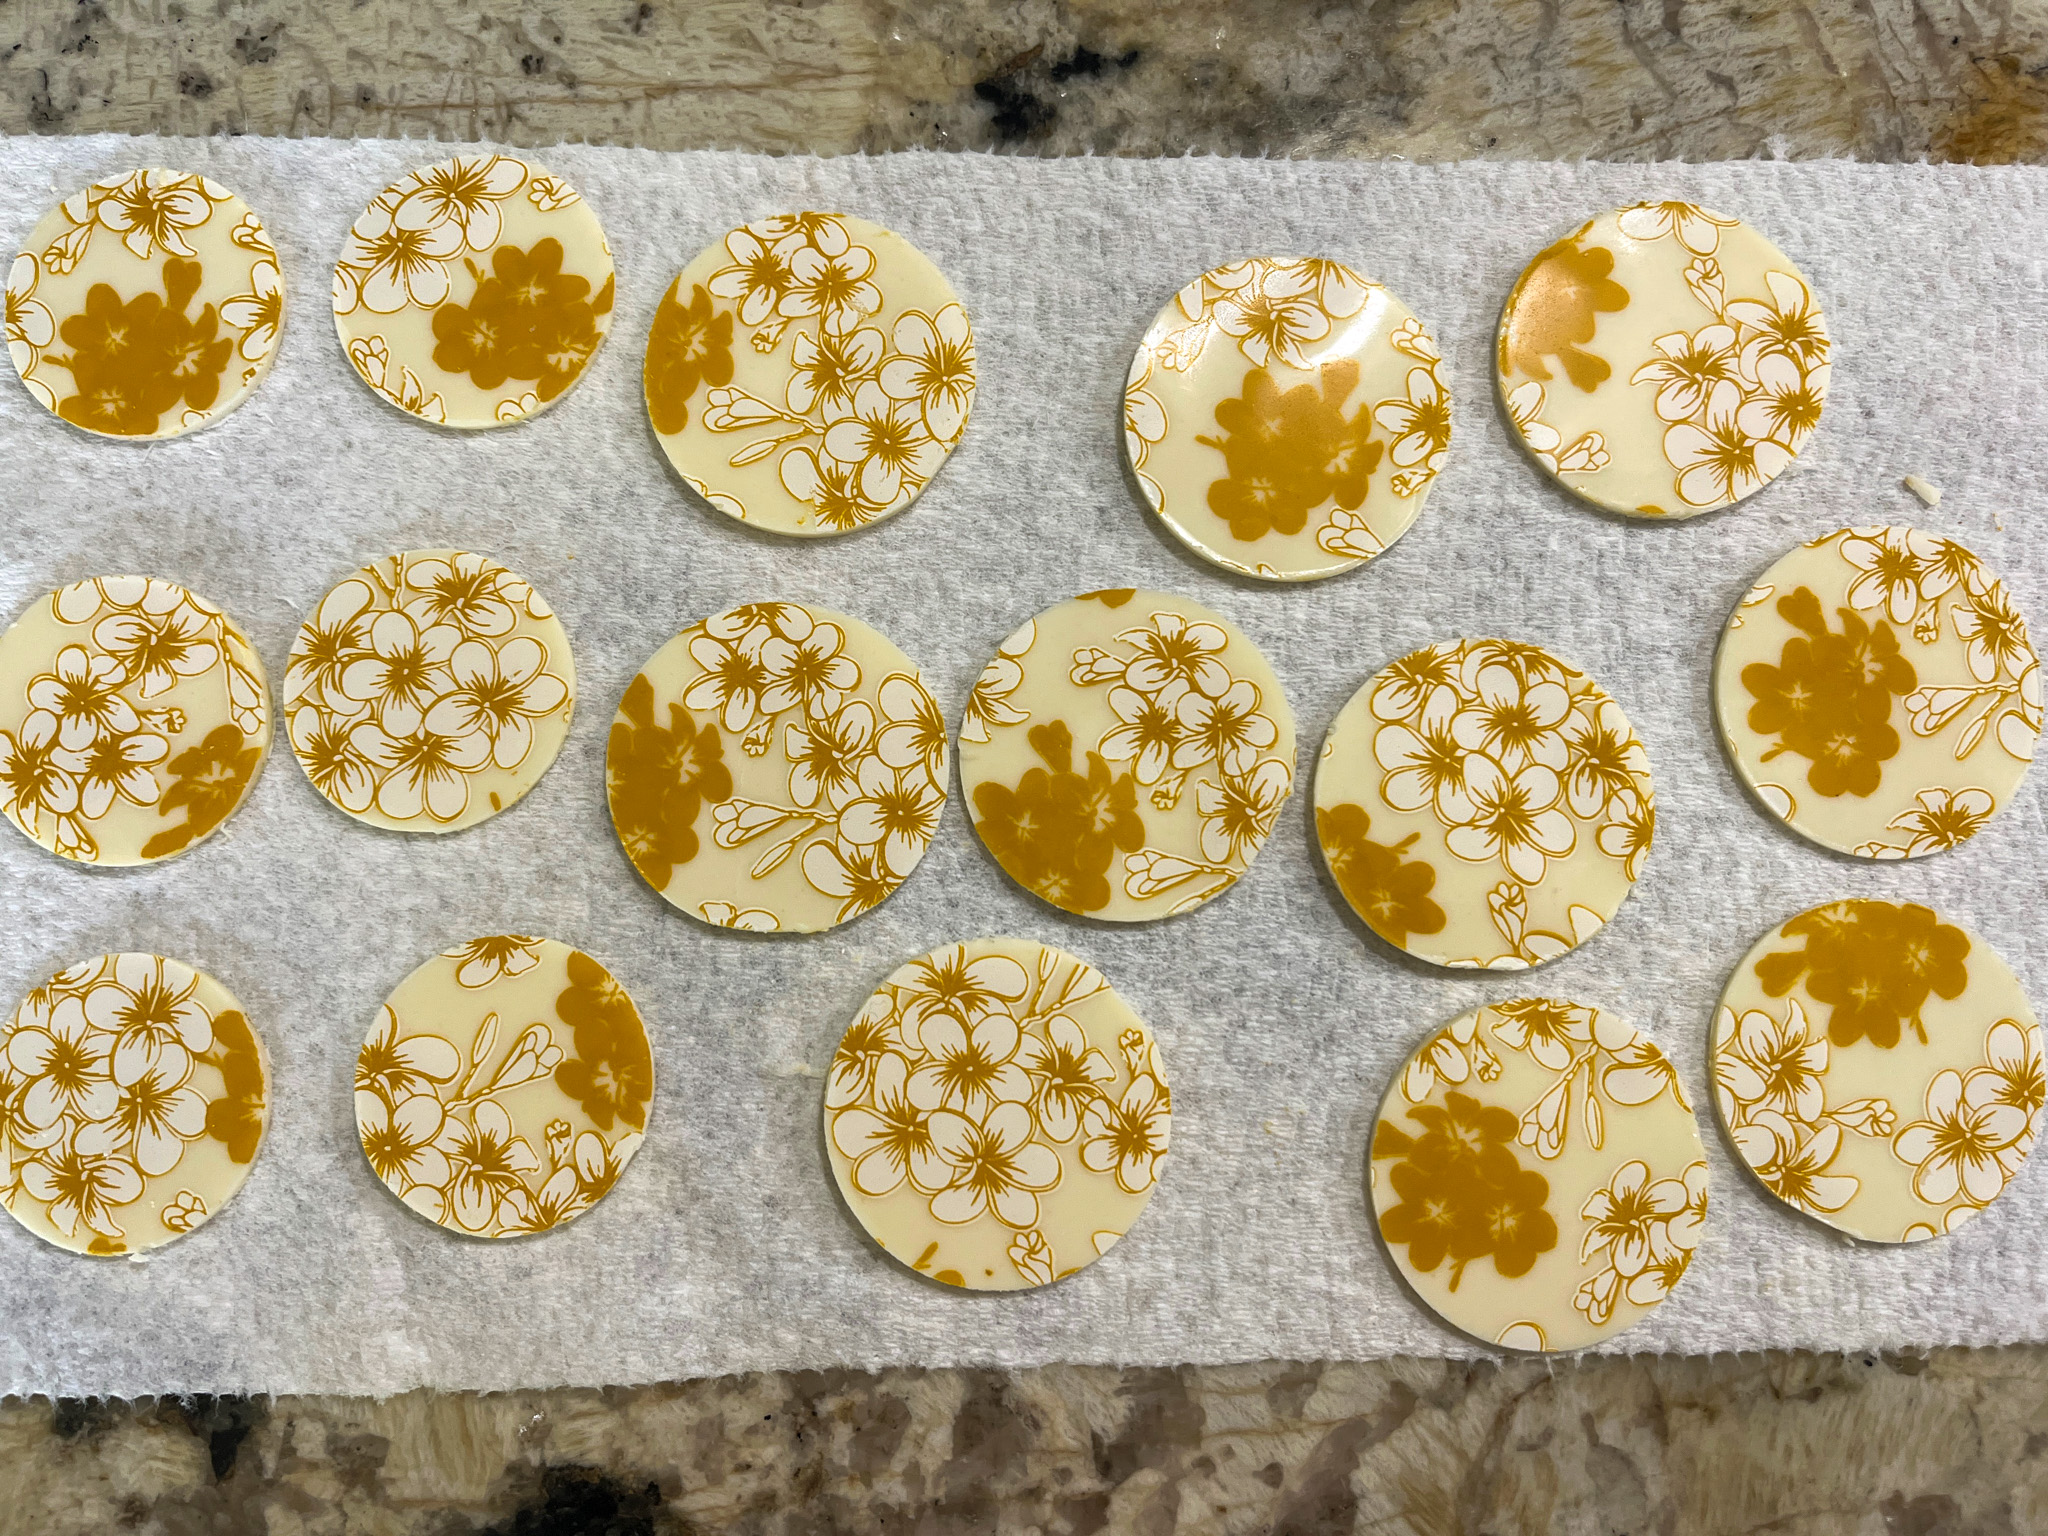
These cupcakes are like little bursts of sunshine on a plate… apart from a marbled buttercream, I added compound chocolate discs made by spreading the melted product over transfer sheets (click here for my favorite source), allowing to set and cutting small circles with a cookie cutter.


BANANA CUPCAKES WITH HONEY BUTTERCREAM FROSTING
(adapted from several sources)

makes 16 cupcakes

2 cups ( 260g) all-purpose flour
1 teaspoon baking soda
1 teaspoon ground cinnamon
3/4 teaspoon salt
1 and 1/2 cups (350g) mashed bananas
1/2 cup (113g) unsalted butter, softened to room temperature
1/2 cup (100g) packed dark brown sugar
1/2 cup ( 100g) granulated sugar
2 large eggs, at room temperature
1/4 cup ( 60g) sour cream at room temperature
2 teaspoons pure vanilla extract
1/2 cup (120ml) buttermilk, at room temperature

Heat the oven to 350°F. Line muffin pans with cupcake liners.

Whisk the flour, baking soda, cinnamon, and salt together. Set aside. Cream the butter and both sugars together on high speed until smooth and creamy, about 2 minutes. Add the eggs, sour cream, and vanilla, then beat on medium-high speed until combined. Beat in the mashed banana. With the mixer on low speed, add the dry ingredients until just incorporated. With the mixer still running on low, slowly pour in the buttermilk until combined.

Spoon the batter into the liners to no more than 2/3 full. Bake for 18-20 minutes, or until a toothpick inserted in the center comes out clean. Allow the cupcakes to cool completely before frosting.


HONEY BUTTERCREAM FROSTING

2 + ½ cups (300g) confectioners’ sugar
1 cup (2 sticks) unsalted butter, room temperature
2 tablespoons honey
¼ teaspoon ground cinnamon

With an electric mixer on medium speed, beat all ingredients until smooth.Divide in two portions, leave one white, and yellow food coloring to the other half. Add both batters side by side into a piping bag fitted with a tip 1M to add a swirl to the top of each cupcake. Stick a little decoration if so desired.

ENJOY!

to print the recipe, click here

Comments: I have not tried the cupcakes but got very nice reviews once I donated them. The chocolate decor is a nice touch, but of course, can be omitted to make life easier. I usually make the discs every time I use chocolate transfer sheets to make chocolate-covered Oreos, so I simply save them in a little plastic container at room temperature.

ONE YEAR AGO: Air-Fryer Chicken Skewers

TWO YEARS AGO: Almond-Cranberry Sandwich Cookies

THREE YEARS AGO: Brazilian Candy, Surpresa de Uva

FOUR YEARS AGO: Red Quinoa “Tabbouleh”

FIVE YEARS AGO: Cucumber Salad with Yogurt-Harissa Dressing

SIX YEARS AGO: Sundried Tomato and Feta Cheese Torte 

SEVEN YEARS AGO: Hickory-Smoked Beef Tenderloin

EIGHT YEAR AGO: Spaghetti Squash, Revisited

NINE YEARS AGO: Stir-fried Chicken and Cabbage in Spicy Almond Sauce

TEN YEARS AGO: Fifteen Years!

ELEVEN YEARS AGO: Light Brioche Burger Buns

TWELVE YEARS AGO: Sourdough Blues

THIRTEEN  YEARS AGO: Headed to Hawaii

FOURTEEN YEARS AGO: A yummy Brazilian cake: Bolo de Fuba’

FIFTEEN YEARS AGO:  Hidden Treasure

SIXTEEN YEARS AGO: Avocado Three Ways

CHOCOLATE CUPCAKES WITH PEANUT BUTTER FROSTING

Such a classic bake, and so simple!

CHOCOLATE CUPCAKES WITH PEANUT BUTTER FROSTING
(from The Bewitching Kitchen)

120 grams (1 cup) all-purpose flour
50 grams (1/2 cup + 2 Tablespoons) natural cocoa powder
225 grams (1 + 1/8 cups) granulated sugar
1 teaspoons baking powder
1/2 teaspoon baking soda
1/2 tsp Kosher salt
85 grams (about 1/2 cup) grapeseed oil
2 large eggs, room temperature
2 teaspoons vanilla extract
75 grams (1/3 cup) milk, room temperature
170 grams (3/4 cup) very hot water

Makes 12 cupcakes. Use paper liners in your pan.

Heat oven to 350F.

In a large mixing bowl, add the flour, cocoa powder, granulated sugar, baking powder, baking soda and salt. Whisk very well to fully combine the dry ingredients.

Add the oil into the mixing bowl and mix on medium speed with a hand mixer until well combined. Add the eggs and vanilla extract to the bowl and continue mixing until smooth.

With the mixer still running, slowly pour in the milk and then the hot water. Continue mixing until everything is evenly incorporated, the batter will be super thin, do not worry about it. Place the batter in cupcake pan and bake until toothpick inserted in the center comes clean. This will take 20 to 25 minutes, but check a couple of minutes earlier. Cool completely before frosting.

PEANUT BUTTER FROSTING

113 grams (1/2 cup) unsalted butter, room temperature
175 grams (1/2 cup) smooth peanut butter (Jiffy works great)
210 grams (1 + 3/4 cup) powdered sugar
1 teaspoons vanilla extract
1/4 teaspoon kosher salt
2 to 3 tablespoons of milk to adjust consistency

In the bowl of a stand mixer fitted with a paddle attachment, beat the butter and peanut butter on medium speed for about a few minutes, until fluffy. Scrape down the sides and bottom of the bowl.

Add the powdered sugar and salt into the mixing bowl and start mixing on low until the sugar starts to combine with the butter. Turn the mixing speed up to medium-high and beat for about 3 minutes until the mixture is light and fluffy. Mix in the vanilla extract. Add milk to adjust the consistency. If not using immediately you can refrigerate for several days. Bring back to room temperature and whip again before using to frost the cakes.

Use a piping tip like Wilton 1M if you like to make a rose pattern on top. Spraying gold is optional but nice…

ENJOY!

to print the recipe, click here


Comments: I love this cake recipe so much because it is simple, straightforward and always works. You can use hot coffee instead of hot water, but I tend to simplify it and just grab water from the tap, as hot as I can get it. I know many people prefer Swiss buttercream frosting but I donate the cupcakes and not knowing how long they will sit waiting, I rather use a sturdier buttercream, which is also much simpler to prepare. If you are a peanut butter/chocolate lover, this cupcake is for you!

ONE YEAR AGO: Incredibly Simple, Times Four

TWO YEARS AGO: Zucchini-Prosciuto Parcels

THREE YEARS AGO: Double Peanut Sourdough Loaf

FOUR YEARS AGO: Fennel-Rubbed Shrimp in Light Coconut Sauce

FIVE YEARS AGO: Puff Bread Balls, Two Salads and a Cookbook Review

SIX YEARS AGO: Pistachio-Caramel and Apple Mousse Cakes

SEVEN YEARS AGO: La Couronne Bordelaise

EIGHT YEARS AGO: A Special Birthday Dinner

NINE YEARS AGO: Duck Confit for a Special Occasion

TEN YEARS AGO: Tuscan Grilled Chicken and Sausage Skewers

ELEVEN YEARS AGO: Celebrate Wednesday with Pork Tenderloin & Apples

TWELVE YEARS AGO: Salmon Wellington

THIRTEEN YEARS AGO: The Green Chip Alternative

FOURTEEN YEARS AGO: Weekend Pita Project

FIFTEEN YEARS AGO: Let it snow, let it snow, eggs in snow

RED VELVET LAYERED CAKE FOR SEVEN YEARS OF BLOGGING!

closeup
Better late than never, I can finally share a little cake to celebrate my 7th year of  food blogging. I knew I wanted to make a layered cake this time and also knew it had to be from a new cookbook I fell in “love at first page.”  Granted, I have quite a few books dedicated to cake baking, but Layered might be my favorite now. Not only Tessa Huff’s explanations are detailed enough to give confidence to a cake-challenged person, but  many of her cakes have enticing, unexpected flavors. Sure, you will find a chocolate cake, a shortbread strawberry, a Boston cream pie, but she will also awe you with combinations that bring together Raspberry and Stout.Lavender and Olive Oil... Butterscotch and Bourbon...   Pink Peppercorn and Cherry… Those are included in a wonderful chapter called “Adventurous Cakes.”  I have The Cake Bible from Rose Beranbaum and love it too, but I’d say that about 1/4 of the recipes of that book appeal to me, whereas I would gladly try more than 80% of the recipes from Layered.  Funny thing is that I almost did not buy it because I’m not too fond of naked layered cakes, and that’s what I saw on the cover of the book. Clearly I am part of a minority, as they are very popular these days.  But reading the many great comments on amazon made me change my mind.  So, it’s now officially confirmed the wisdom of:  “Don’t judge a book by its cover.”  HA!

Red Velvet Cake

RECIPE OVERVIEW

Red Velvet Cake with Heritage Frosting, from Layered: Baking, Building and Styling Spectacular Cakes.

Originally this cake is supposed to have 6 layers, so you’ll make 3 red velvet cakes and slice each one crosswise in half. I baked three cakes, but as I started the assembly next day, I thought it was tall enough using only two of them. Plus, probably due to my inexperience and very limited skills, the amount of frosting I ended up with would not be enough to fill and cover a higher cake. Gravity plays tricks on me on a regular basis, perhaps it’s due to my last name. But, independent of the amount of available frosting, I liked the way it turned out as a 4-layer production, easier to slice and serve.

The cake component…  The cake batter uses grapeseed oil and sugar beaten together. To that, some eggs and red food coloring (preferably gel) are added and incorporated. Then, flour, cocoa powder, baking powder, a touch of salt are sifted and added to the oil mixture in batches, together with buttermilk. Once the batter is smooth, a bit of baking soda dissolved in vinegar gets into the mixer.  The batter is divided equally into three 6-inch cake pans, and baked until a toothpick comes out clean.

compositecake

The frosting… contrary to most Red Velvet Cakes, this frosting is not based on cream cheese. It is an old-fashioned recipe called “Heritage Frosting” that starts with a thick cooked paste made with milk and flour. That gets incorporated into butter and sugar creamed together with a touch of vanilla. Very unusual, I had never heard of this type of frosting but it was reasonably easy to work with.

compositefrosting
Normally, Buck would be right by my foot and ready to take care of any potential messes. However, having learned painful lessons in the past, I decided that red food coloring and a Jack Russell could be too fiery a match.  Both him and Oscar stayed outside for the duration of my baking adventure. However, they both developed a fascination with my sandal even long after I washed it. Scent of a Frosting. It has movie potential…

Well, for once I will say this cake baking experience was “almost painless.”  At least the cake itself. No problems. A little hyperventilation here, another there, but overall fine. The frosting is another story. Every time I try to frost a cake, I feel this intense respect for those who do it for a living.  I opted for a rustic look, because hell would have to freeze over twice before I could apply a smooth layer of frosting to the top of a cake, let alone its sides…   But even if there is room for improvement in my technique, I think this was one tasty cake!

sliced

Here’s what Phil had to say about it:

Quite often the frosting overpowers the taste of a cake, but this was not the case. The cake is flavorful, it has a very nice texture.  It’s substantial without being too heavy. Slices very well with a sharp knife without crumbling all over the place. The frosting is very creamy but stands well on the cake. It is much less sweet than buttercream or double-boiled white icing.  Enthusiastically approved!

Well, after getting enthusiastic approval from the resident cake critic, I enthusiastically invite you  to join me on my 8th year in the blogosphere… 

ONE YEAR AGO: Lemon-Lavender Bars

TWO YEARS AGO: Quinoa Fried Rice

THREE YEARS AGO: Carrot Flan with Greens and Lemon Vinaigrette

FOUR YEARS AGO: The Secret Recipe Club: Granola Bars

FIVE YEARS AGO:  Awesome Broccolini

SIX YEARS AGO:  A Twist on Pesto

SEVEN YEARS AGO: Ciabatta: Judging a bread by its holes