SPRINGTIME MACARONS BAKE-ALONG


If ten years ago someone would tell me I would be hosting a video tutorial on how to make French macarons, I would roll on the floor laughing. Literally. Somehow, that is actually happening. Mind-blown. Here’s the full story behind it. Back in June last year I joined a Facebook group called Great British Bake Off Fans“, hosted by Christine and Caroline. The group currently has about 20 thousand members, and every once in a while opens to accept new participants, by invitation only. They often host “bake-alongs.”  One baker posts a detailed video of a recipe, and members can bake from Friday through Sunday, posting their results and asking questions if they run into trouble.  Much to my surprise (and with the obvious hyperventilation starting right after I said yes), they asked me to host a macaron-baking video. The big party will take place this Friday. My video (which includes unfortunate footage of yours truly with meringue glued to her chin), is available right now on youtube, thanks to the hard work of Caroline, who edited my 10 short videos, added text, music, and a few well-deserved jokes here and there.

Some steps are omitted from the video, for instance the time the shells rest after piping. I cannot imagine me trying to entertain you with short stories for 30 minutes. And for that I am sure you are grateful. I should warn you that the sound could have been a bit louder. It was my first time doing it, and I now believe a microphone of some kind would be appropriate. I had to place the cell phone a bit far away to get good coverage of a larger area and that compromised the sound a bit. But thanks to Caroline adding text to the video, I think you can get by. Just set your volume to the highest and I hope it will work for you.
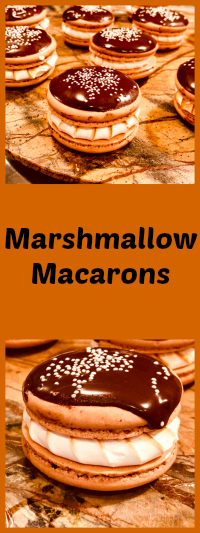
SPRINGTIME MACARONS
(adapted from Colette Christian’s recipe)

For the shells:
200g  Icing/powdered sugar (1 ⅔ cups)
115 g Ground Almonds/Almond Meal (1 + scant ¼ cup)
115 g egg whites at room temperature (approx. 4 eggs)
1/8 tsp of cream of tartar (optional)
100 g granulated sugar (½ cup)
¼ tsp vanilla paste or extract
drops of gel food color of your choice (optional)

Line 3 heavy baking sheets with parchment/baking paper or Silpat mats. Layer the powdered/icing sugar and ground almonds/almond meal  in a food processor. Pulse until the mixture looks like fine meal, about 12 pulses. Pass through a sieve and transfer to a small bowl or to a sheet of parchment/baking paper. Set aside.

Place the egg whites and cream of tartar in the bowl of a stand mixer fitted with the whisk attachment. Make sure that the bowl and the whisk are impeccably clean. Starting on medium speed, whip the whites with the cream of tartar until they look like light foam. The whites should not appear liquid. The foam will be light and should not have any structure.

Slowly rain in the granulated sugar in five additions, trying to aim the stream between the whisk and the side of the bowl. Turn the speed up to high. Continue to whip the meringue until it is soft and shiny. It should look like marshmallow creme (marshmallow fluff). Add the vanilla. Whip the egg whites until the mixture begins to dull and the lines of the whisk are visible on the surface of the meringue. Check the peak. It should be firm. Transfer the whites to a medium bowl.

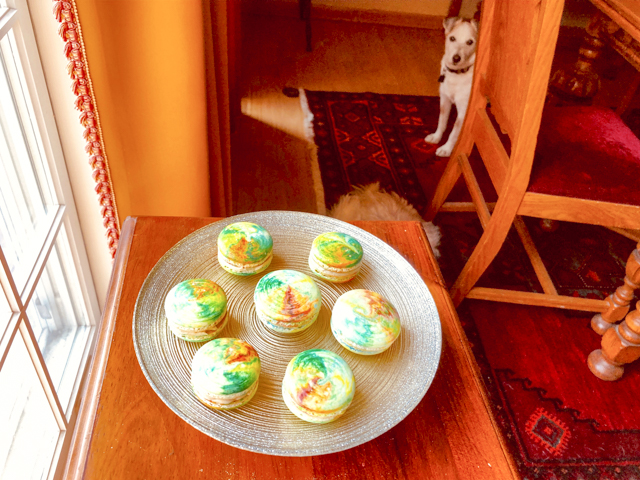
Fold in the ground almond/almond meal mixture in two increments. Paint the mixture halfway up the side of the bowl, using the flat side of a spatula. Scrape the mixture down to the center of the bowl. Repeat two or three times, then check to see if the mixture slides slowly down the side of the bowl. Add drops of gel color and mix them briefly with a toothpick. Put the mixture in a piping bag fitted with your choice of piping tip (round, ¼ or ½ inch in diameter or 6 – 12 mm).   If you don’t have a macaron mat, draw circles on baking/parchment paper about 2inches/5cm in diameter & turn the paper over before placing on the baking sheets.  Pipe shells, I like to count numbers in my head and use the same count for each shell so they end up similar in size.

I pipe inside the circles to about 1 ¾ inches/4.5cm but you can go to 1 ½ inches (3.8cm) & the macarons will spread & fill the circle while drying.

Slam each sheet hard four to six times on the counter/worktop. Let the unbaked macarons dry until they look dull but not overly dry. Drying time depends on humidity. In a dry climate, the macarons can dry in 15 to 20 minutes; in a humid climate, it can take 35 to 40 minutes.

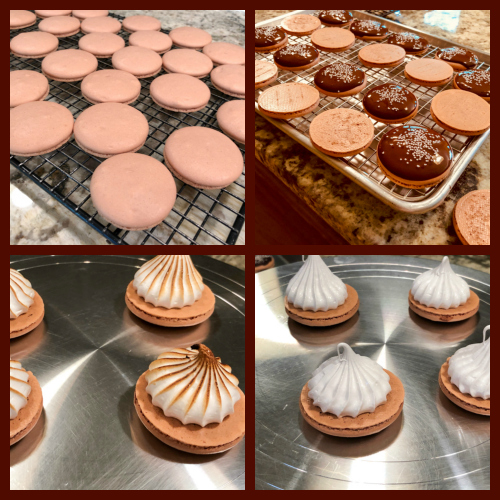
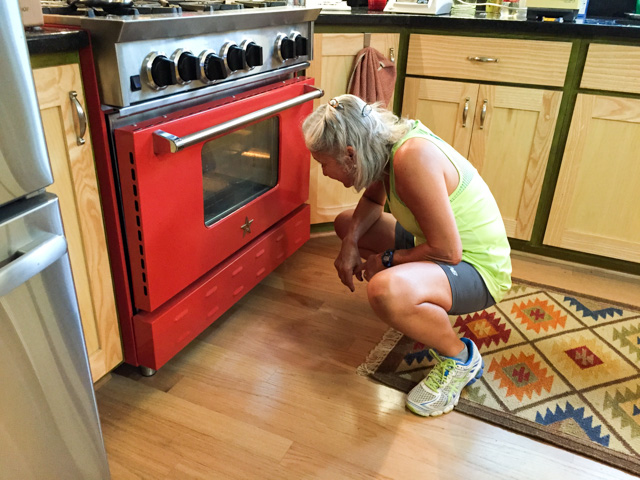
While the macarons are drying, heat the oven to 300 F (150 C/130C Fan oven/Gas Mark 2). Bake one sheet at a time on the middle rack. Check in 11 minutes. If the tops slide or move (independently of the ‘feet’ when you gently twist the top), then bake for 2 to 3 more minutes. Check one or two. If they move when gently touched, put them back in the oven for 1 to 2 more minutes until they don’t move when touched.   Let the macaroons cool for 10 minutes before removing from the pan.  The macarons should release without sticking.

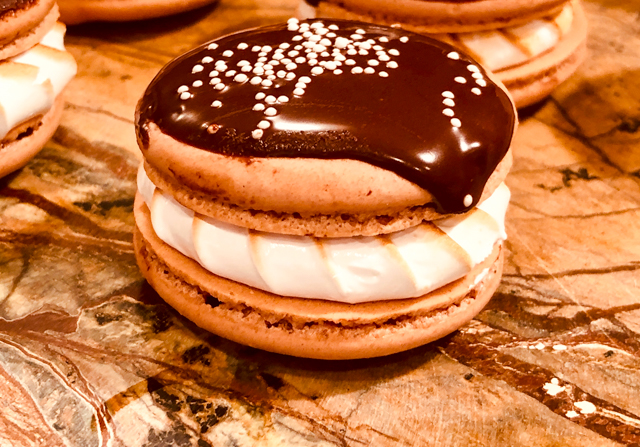
Assemble the macarons: find two macarons similar in size and add a good amount of filling to the bottom of one of them. Place the other on top and squeeze gently to take the filling all the way to the edge.  Store in the fridge for 24 hours for perfect texture.

ENJOY!

to print the recipe, click here

A FEW IMPORTANT NOTES BEFORE YOU START

  1. If you want to add solid color instead of the swirls, add GEL FOOD DYE about 1 minute after you finished incorporating all the granulated sugar in the meringue, at the same time that you add the vanilla extract (or other flavoring of your choice). Stop the machine, lift the whisk and add the color right at the bottom of the whisk, this way it goes smoothly into the batter and will not get splashed everywhere.
  2. If you have almond flour that has been laying around for a while, it is a good idea to dry it in a very low oven before using. You can do that the day before. Just add the flour to a baking sheet (over parchment paper) and place in a 250F oven for 20 to 30 minutes. Let it cool completely and use. Humidity is a big enemy of macarons, so if my almond flour has been open for more than a month, I do that just as added precaution.
  3. Hollows. DO NOT worry about them. For the most part they will “fill” once you add the filling and place in the fridge. Particularly in your first batches, don’t worry about perfection. They happen, and they almost always go away through maturation.
  4. Every oven is different. It took me many batches of macarons to figure out the best placement of the rack and the temperature of the oven. Once you are comfortable making the batter, you can play with all the conditions and figure out the perfect environment to bake yours. In my case it is 300F with the rack slightly under the center of the oven. One tray at a time. No convection. Your oven might behave in a different way. You can make several small trays and tweak the baking as you go, writing down your results. Just like in a lab!
  5. Contrary to many other baking goodies, macarons will not be hurt if you open the oven to check on them. In fact, Pierre Hermé, the Macaron King, recommends opening the door of the oven to allow some steam (therefore moisture) to be released. I sometimes open the oven at around 6 minutes to look at the little feet forming. And then again at the 11 or so minute mark to check for doneness.
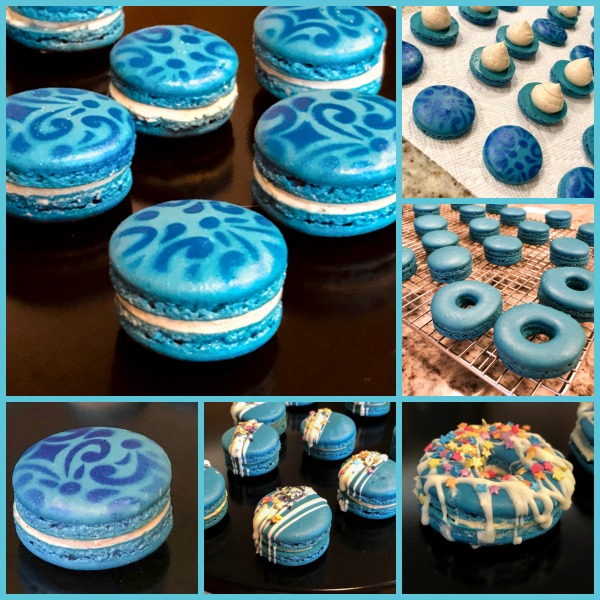
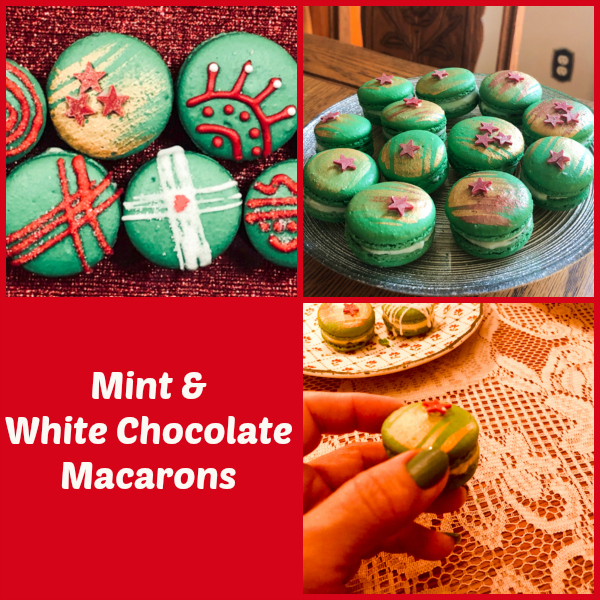
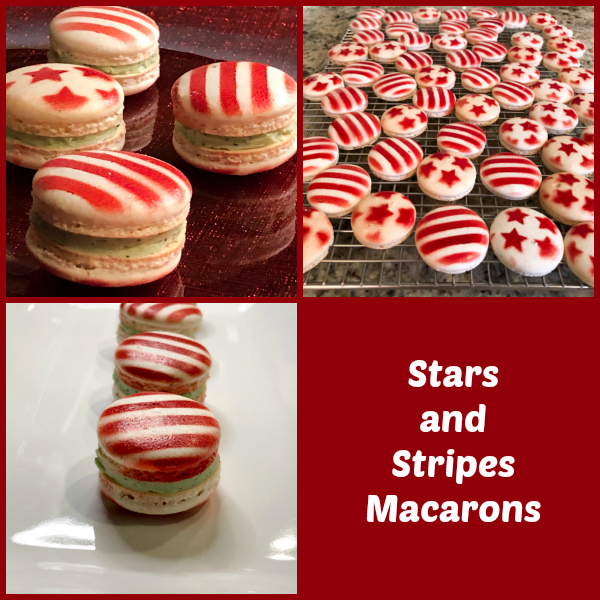
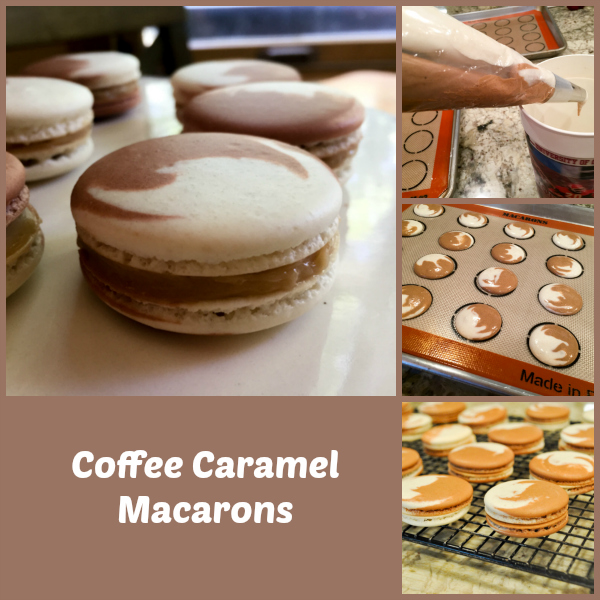
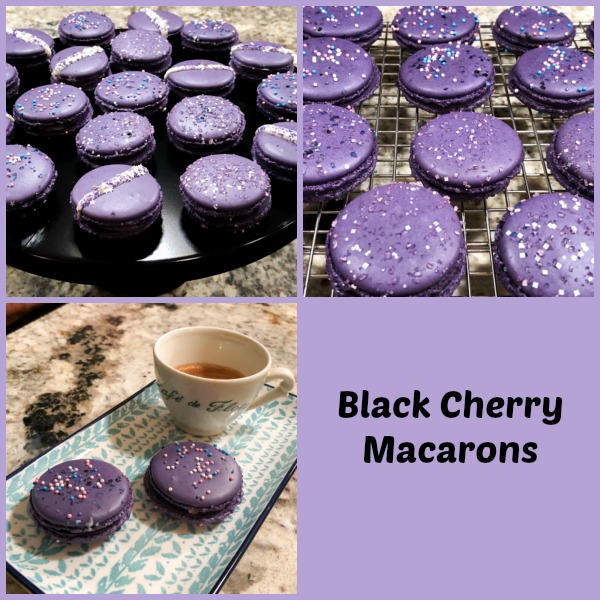
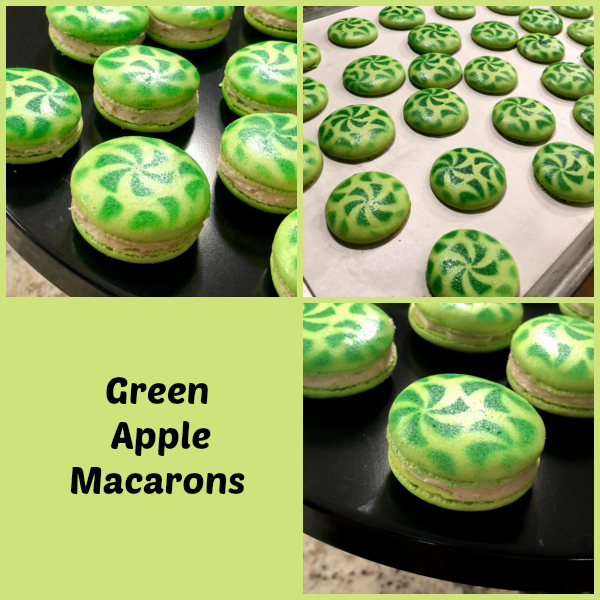
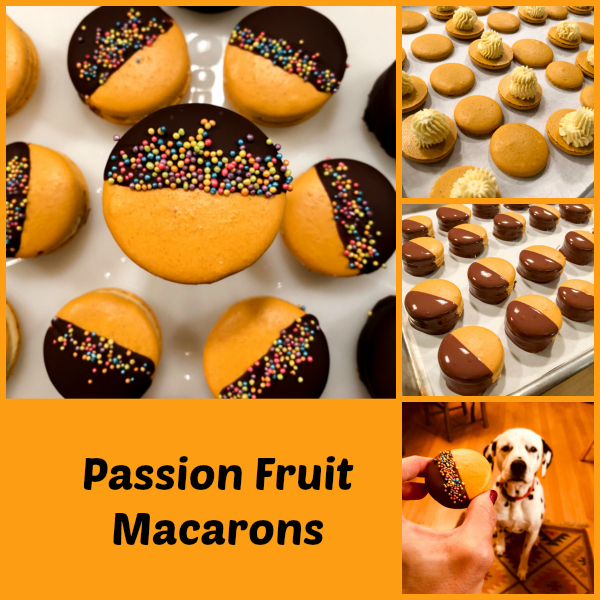
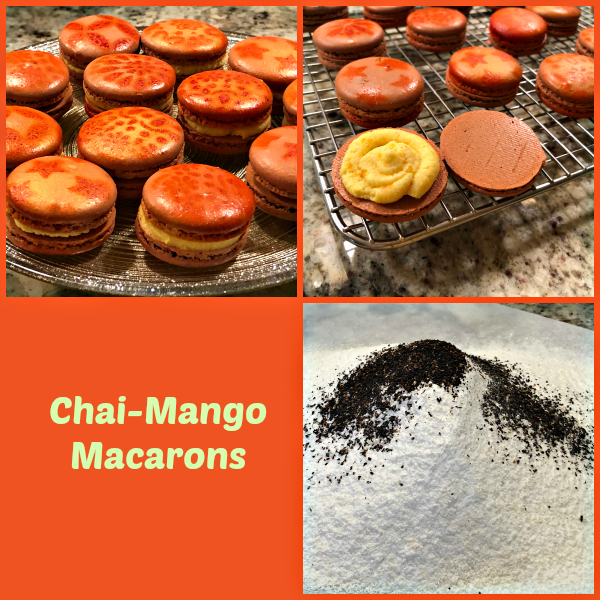
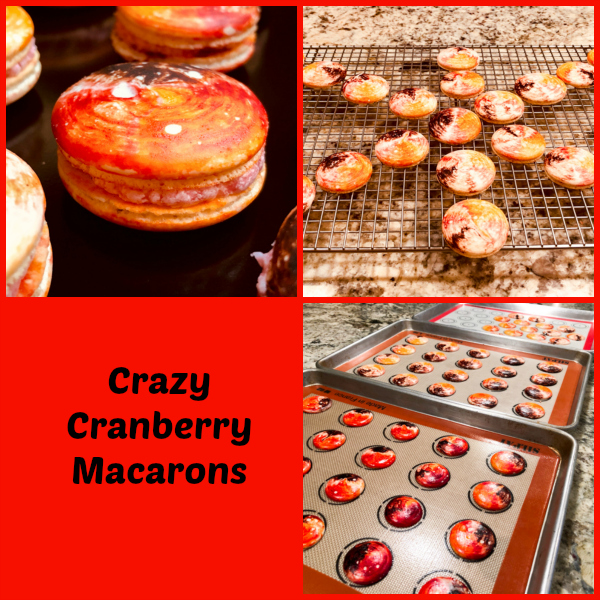
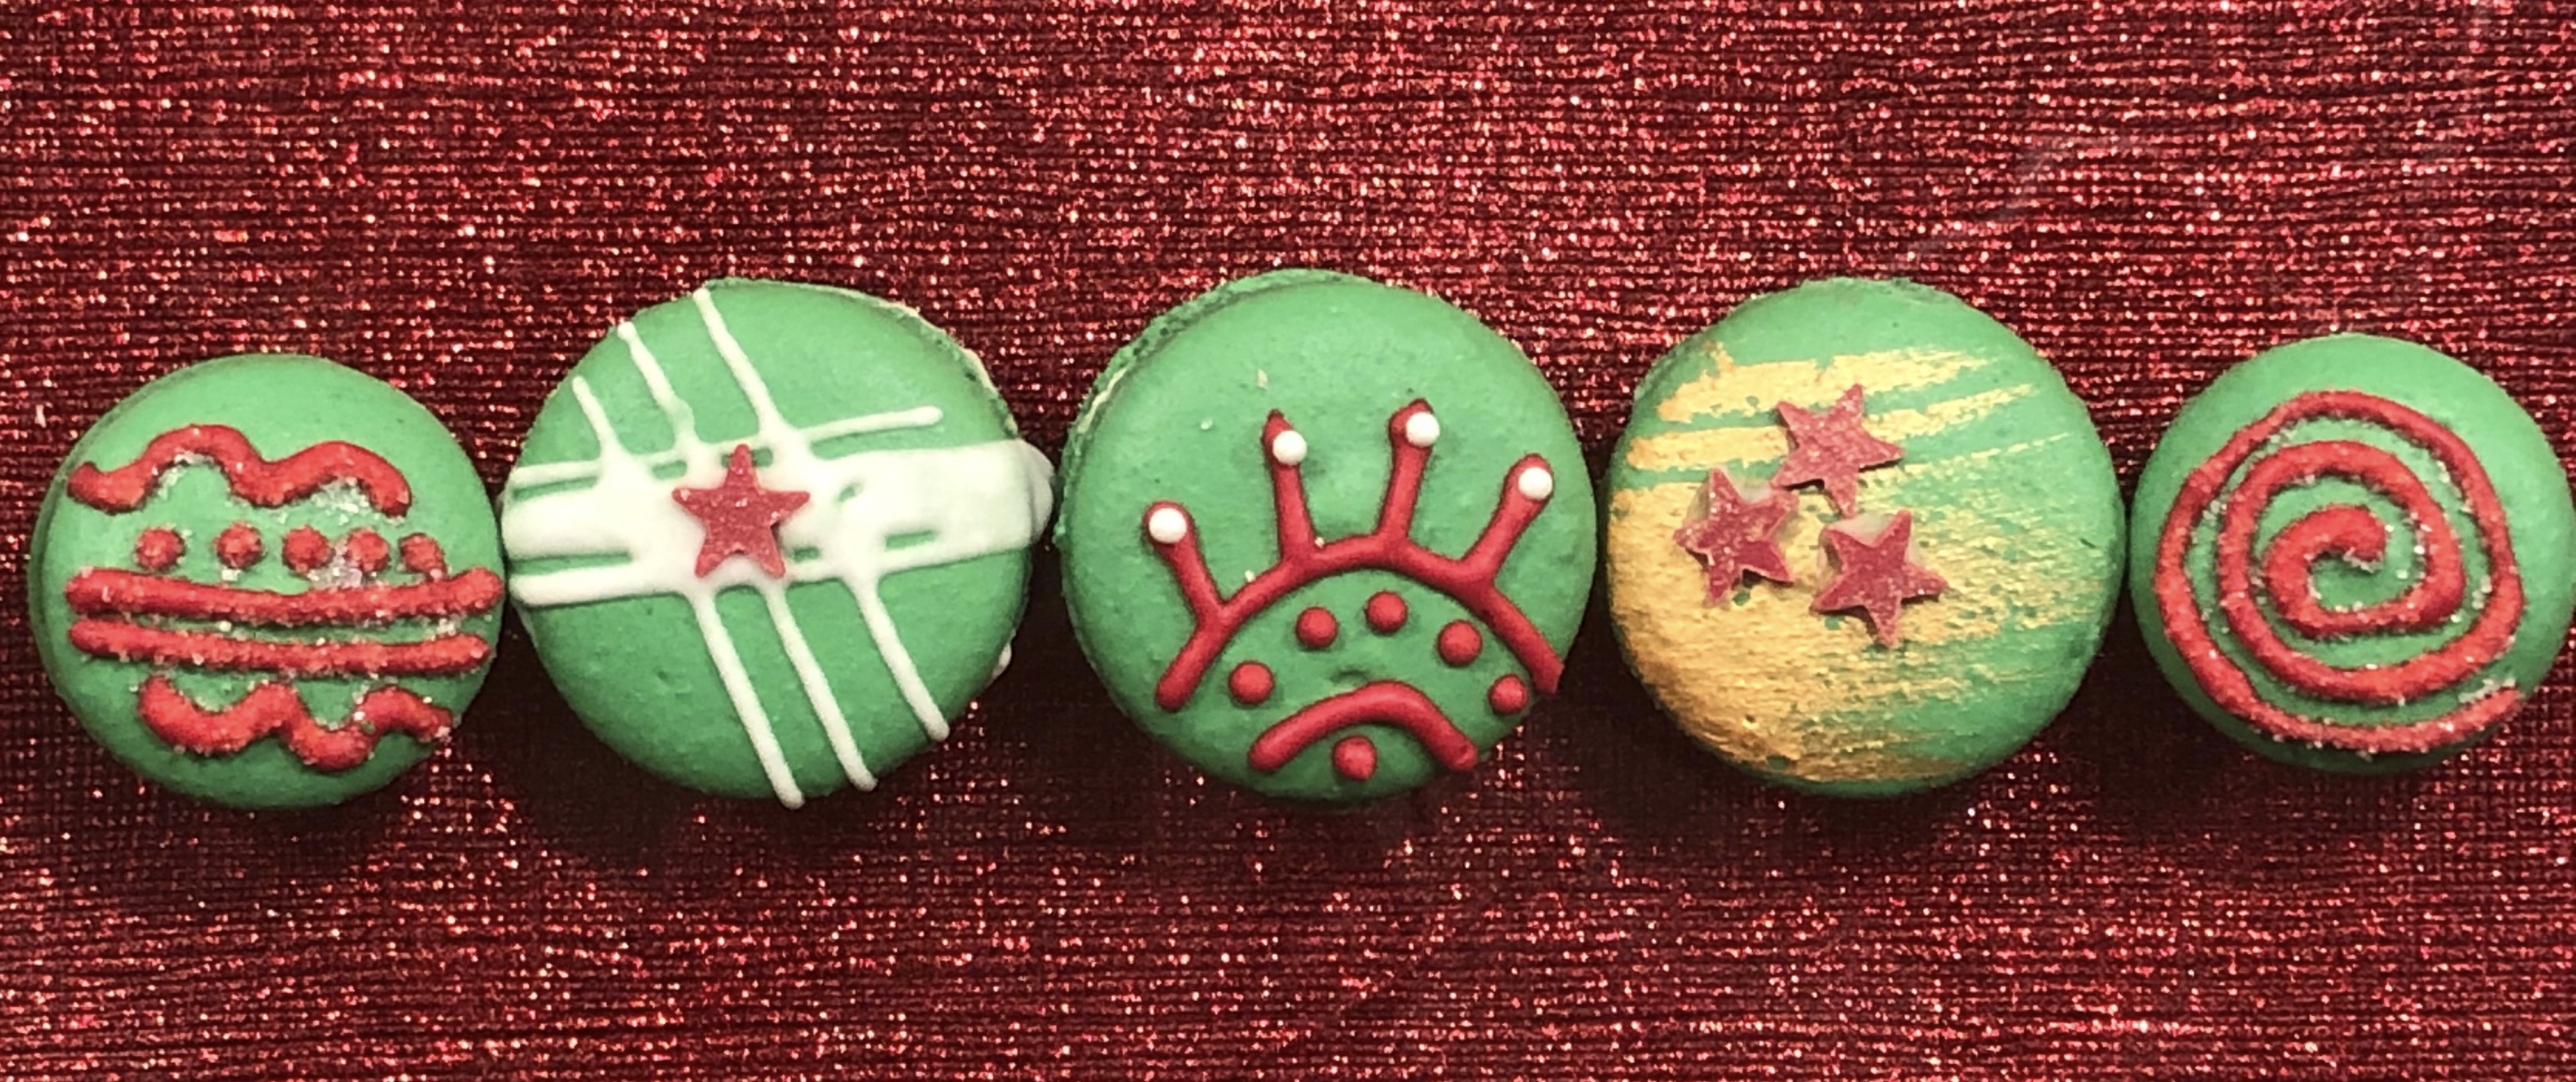
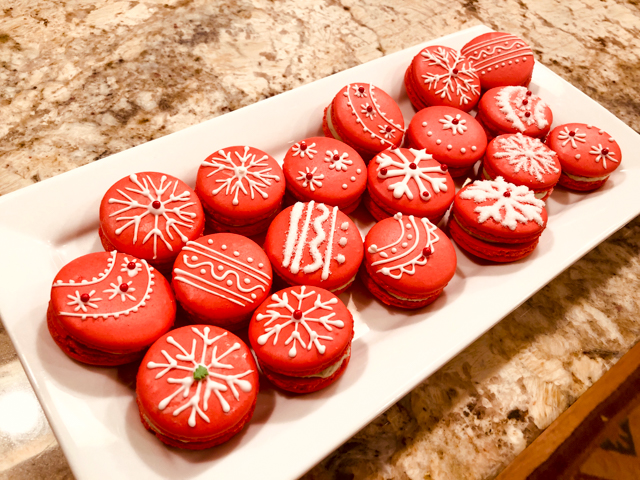
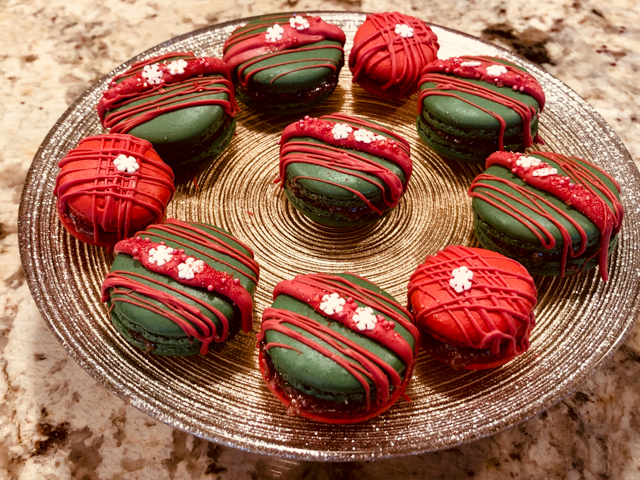
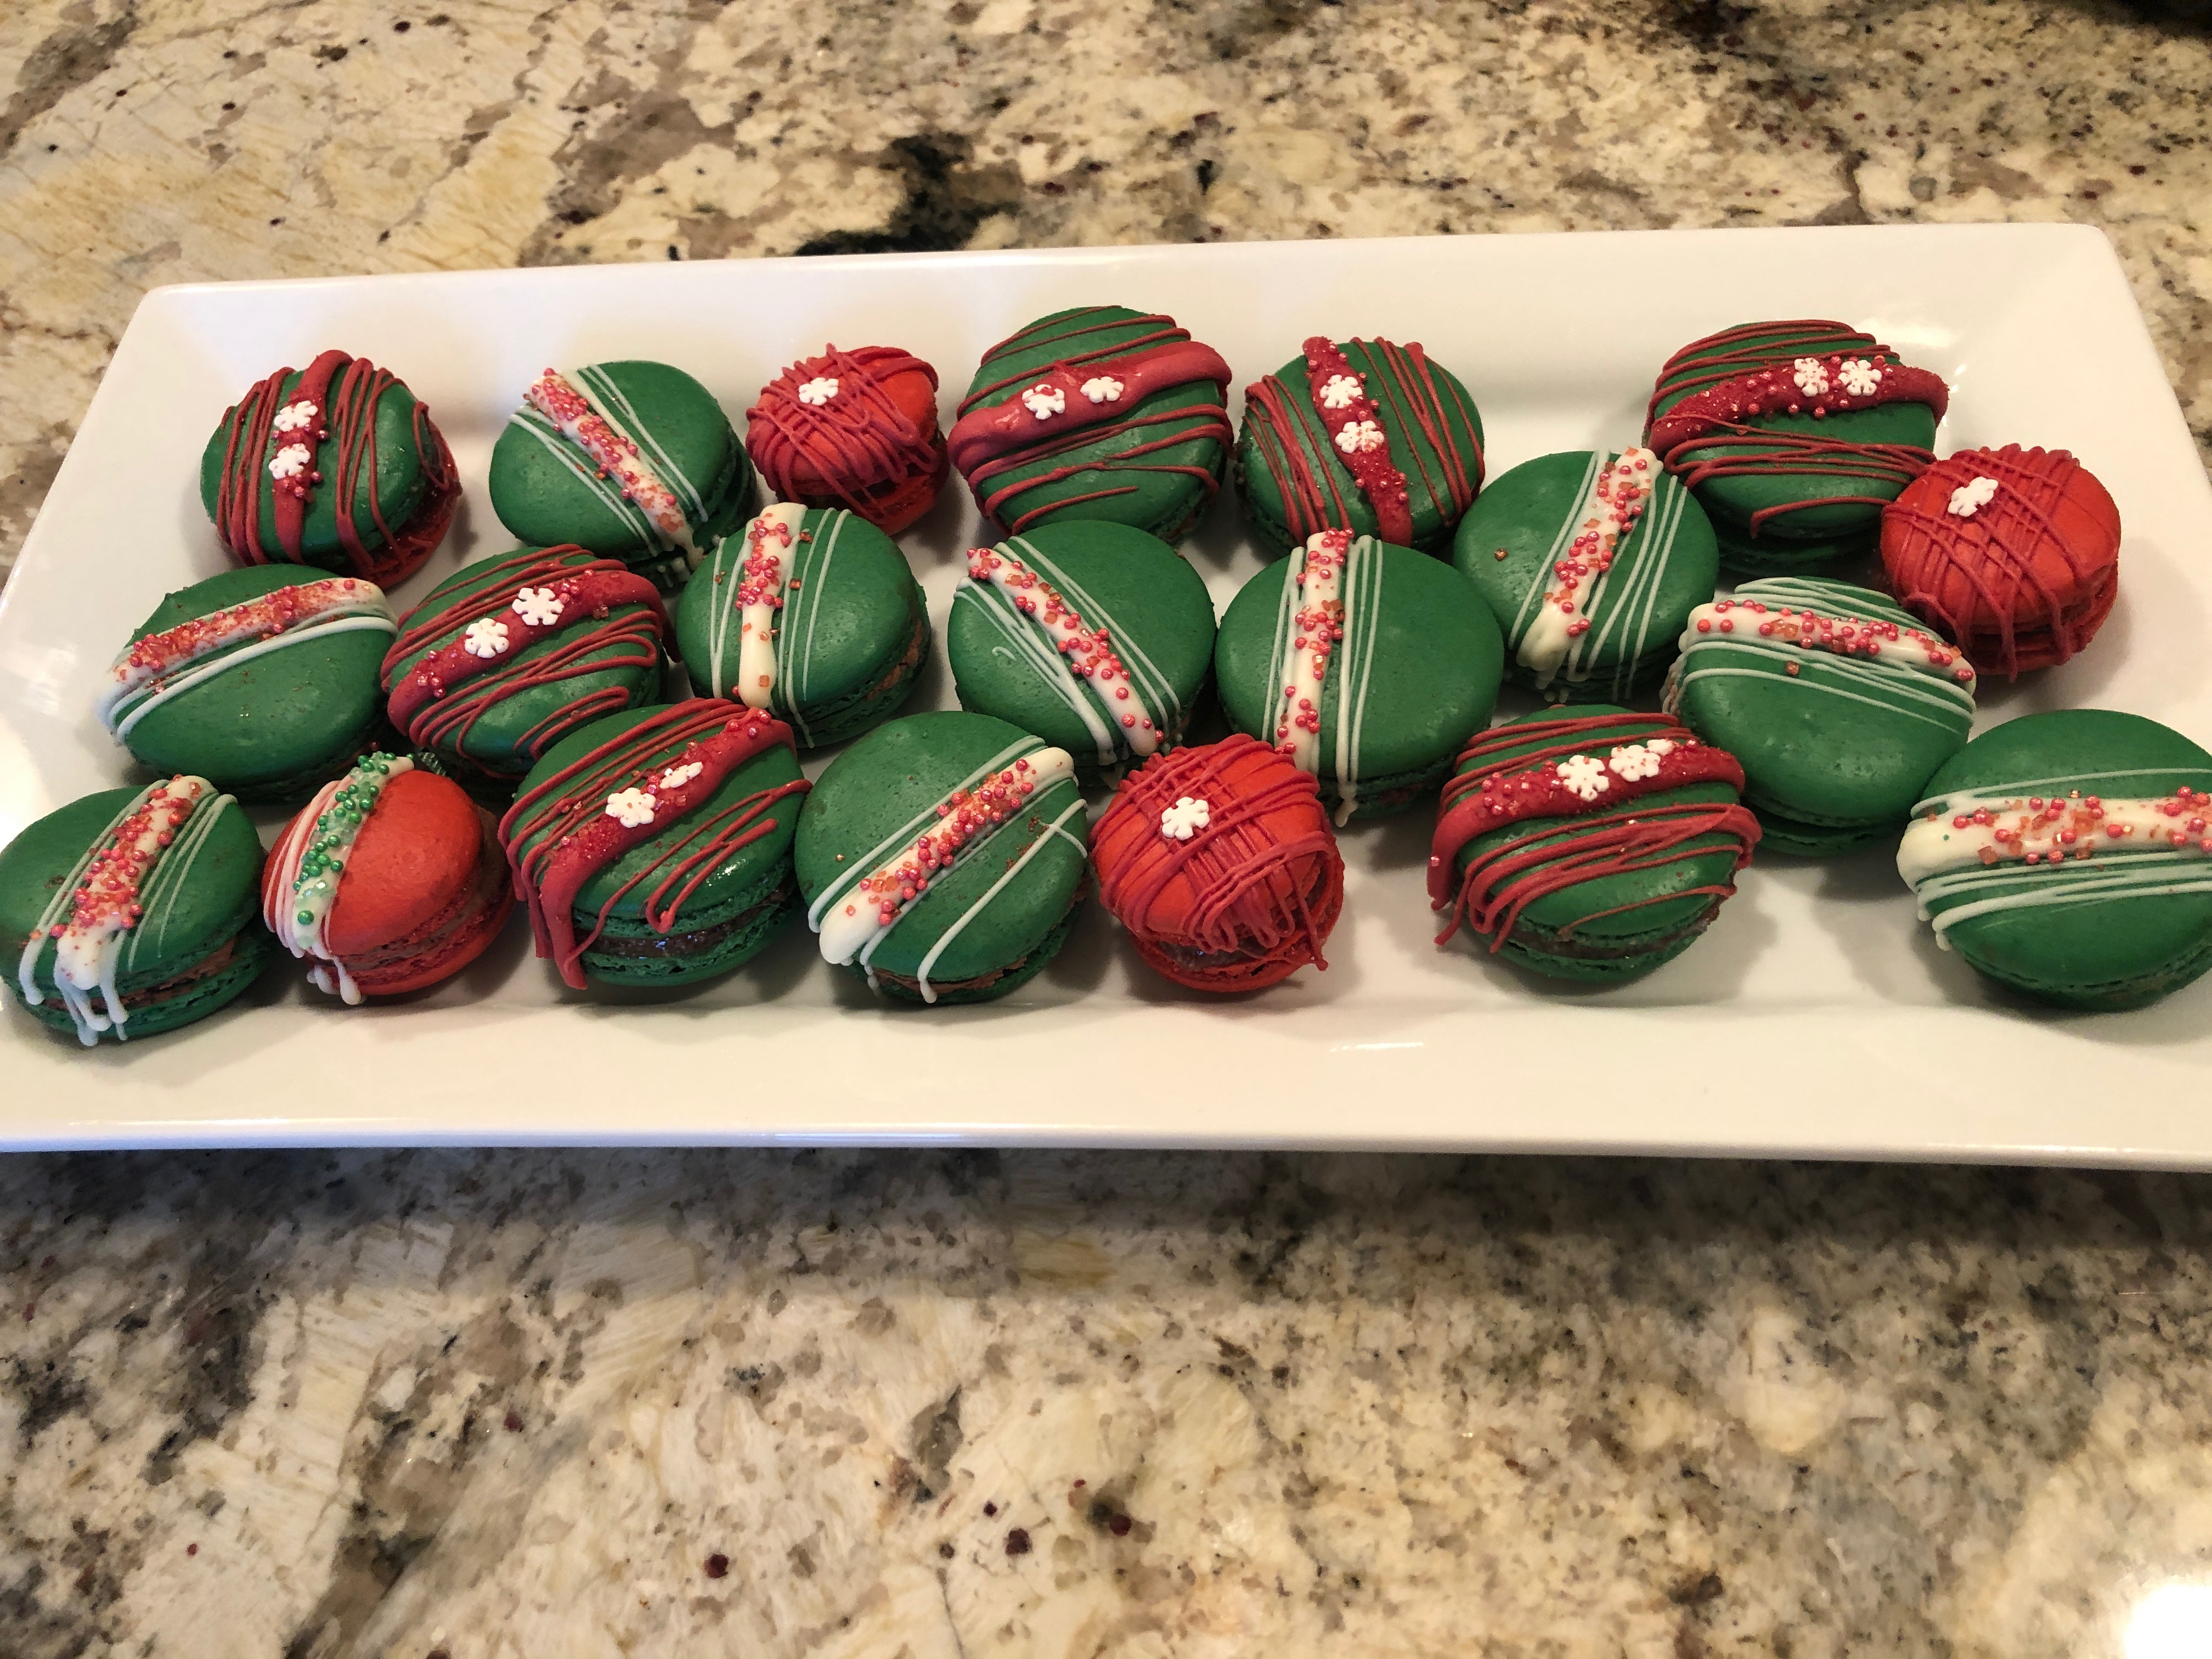
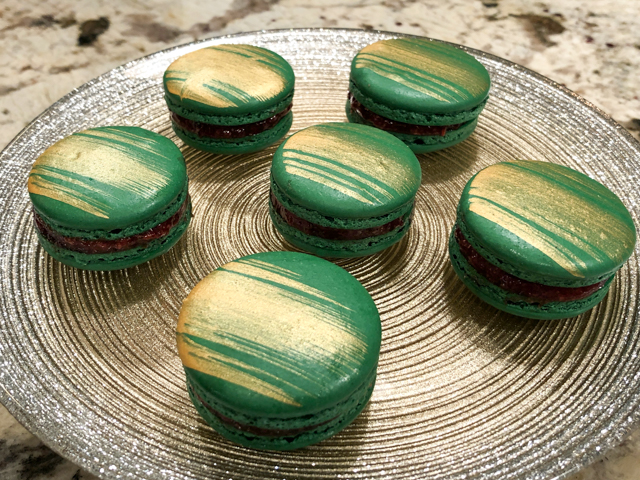
  6. For different ideas to decorate the macs, I invite you look at a few of my posts. I love doing drizzles with candy melts and adding sprinkles (see this post). If you have an air-brush system and stencils, you can have a ton of fun with it (see this post). You can keep it simple and just add sprinkles to the shells right after piping (see this post). You can dye different colors of batter to the piping bag for a nice effect, although I would do that only after you are more comfortable with making them (see Coffee Caramel macarons in this post). You can cut shapes using candy melts and glue to the shells (see this post).  For a very elegant and incredibly simple effect, use a fan brush and pearl dust with vodka or lemon extract (see this post)
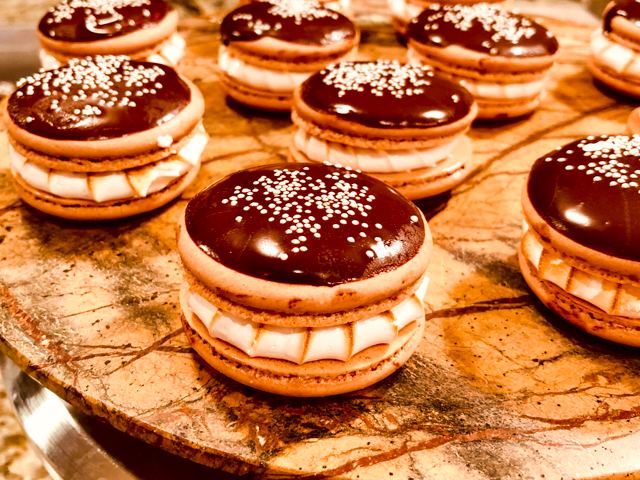
  7. Fillings. Over the years I’ve published many posts on macarons using all kinds of fillings. I suggest you go to my  INDEX PAGE  and look at the Macaron category for ideas. If you want to keep it super simple for your first time, open a jar of your favorite store-bought jam and use it. Absolutely nothing wrong with it.

I will be ready to answer your questions during the bake-along, and I hope you will have fun in your kitchen!  See you then….

Caroline, thank you so so much for all the work you put into editing the video, and Christine, you know how much I love the site that you created and turned into a cozy, friendly, wonderful spot in the blogosphere.

ONE YEAR AGO: Macarons for a Little Princess

TWO YEARS AGO: Gilding the Sourdough Loaf

THREE YEARS AGO: Lolita Joins the Bewitching Kitchen

FOUR YEARS AGO: Cashew Cream Sauce

FIVE YEARS AGO: Blood Orange Margaritas

SIX YEARS AGO: Smoked Salmon Appetizer

SEVEN YEARS AGO: Clementine Cake

EIGHT YEARS AGO: Springtime Spinach Risotto

NINE YEARS AGO: The end of green bean cruelty

TEN YEARS AGO: Torta di Limone e Mandorle


MACARONS FOR ALL SEASONS AND REASONS

Staying safe in Corona virus time: read the guest blog post by Phillip Klebba here

Crazy times ahead for all of us. I find it difficult to go on blogging as if life is normal, but on the other hand, this site is one of my ways to feel connected, and blogging keeps me sane. Or so I hope. Instead of sharing a recipe, I will talk briefly about a series of macarons that happened in our kitchen over the past few months, since last December to be more precise. When we had no idea of all that was probably already brewing in our beautiful planet. Macarons always make me smile, the idea is to bring a smile to you too…

All recipes in this collection used the same basic method that you can find here.

I start with perhaps my favorite…

These were decorated with air-brush and stencil. Some were piped as donuts and topped with drizzles of Candy melts and sprinkles. The filling was a simple almond buttercream (butter, powdered sugar and smooth almond butter).


These were made around the holiday season, using a white chocolate ganache with mint, and decorated in two different ways. Some were painted with golden pearl dust and topped with little stars (for detailed technique, look here). Others were decorated with Royal icing, as at the time we were busy making sugar cookies and had a lot of icing laying around.


Very similar filling, except that I used mini-mint chocolate chips to make the ganache. Shells were left plain and decorated with air-brush and stencils.  Come to think of it, a blueberry filling would turn these perfect for the 4th of July!


For these shells, I divided the batter in two portions, before proceeding with the macaronage step (when things are still pretty roughly mixed). One portion stayed clear, the other was dyed with gel food color (Chesnut by Progel). Each was placed in a small piping bag, and both were slipped inside a larger bag with a round piping tip (see top right photo in the above picture). The filling, a coffee ganache, was from this post.


Galaxy Macarons were all the rage a few years ago. I made them three times, but to be honest, I have not reached my desired goal yet. The batter is divided in four portions, dyed black, dark blue, light blue and pink.  My main mistake is using too much of the darker colors, so they  become too dominant. But this batch was my best, and I decided to share. Stay tuned for future adventures in this theme. Filling was a blueberry ganache made along the lines of this recipe.


Very simple batch, dyed Purple using Artisan Accents gel color. As soon as the batter is piped, sprinkles are added on top. Some shells were left naked and decorated later with Candy melts. The filling was another variation of the Galaxy macs, this time using Black Cherry Jam.

Very simple design using once again the air-brush and a stencil. Shells were dyed with a mixture of green and yellow gel dye from Artisan Accents. The filling was American type buttercream (butter and icing sugar) with the addition of Tart Apple flavoring from Amoretti.


Loved these! Shells were dyed orange (Artisan Accents gel color), and the filling was a white chocolate ganache with Passion Fruit flavoring once again from Amoretti. After filling, macarons were dipped in a mixture of “magic shell” (like this version). Before the coating set, Sprinkle Party!


Thrilled about this and urge you to consider flavoring the shells this way. Simply open a bag of Double Chai tea (I used Stash) and add to the dry almond-powdered sugar mixture. Follow your recipe as you normally would. Shells were decorated with air-brush and several different stencils. The filling was a modification of that from my recent batch. I made a white chocolate ganache and added to it the leftover mango-jellie that I had in the fridge.  The chai flavor is amazing on the shells, and I can tell you I’ll be playing with all sorts of teas in the future.


This batch follows along the lines of mixing several colors (in this case purple, red and orange), but instead of separating the batter, you simply paint the inside of the empty bag with a stripe of undiluted food dye.  Fill with the full amount of batter to be piped, and as it moves along it will drag the colors with it. The pattern will be random, the proportion of colors changing as you go. Two things I do not like about this method: you need to make sure the dye reaches way to the bottom of the bag, close to the opening, and as you add the second and third colors, there is a high chance you will mess up the stripes already there. Still, it is a very popular method to make colorful shells. The filling was a Cranberry Swiss Meringue Buttercream which in fact I had made to use in a cake the day before. Recipe should be on the blog soon.


Last but not least, a similar effect using a different technique which I read about it in a forum for Mac-addicts on Facebook. Instead of painting the bag, just add a few drops of gel dye on top of the batter once it is ready to go. Quickly move it around with a toothpick, fill the bag and start piping. The picture on the right top corner shows how I did it. You can use many more colors in this case, as you are not limited by the small area inside the piping bag. I loved it! Very easy to do, no mess, no fuss. Expect to see more of this technique in the future. These macs were filled with a White Chocolate Coconut Whipped Ganache. I made it using shredded coconut, simmering heavy cream with it, allowing to cool, straining, and proceeding with a regular ganache.


I hope you enjoyed this small collection of macarons, and that it made your social isolation a bit more colorful…


ONE YEAR AGO: Lentils and Radicchio? Yes, please!

TWO YEAR AGO: Tres Leches Cake

THREE YEARS AGO: The Joys of Grating Squash

FOUR YEARS AGO: Auberge-Pecan Walnut Bread

FIVE YEARS AGO: Gluten-free and Vegan Raspberry Bars

SIX YEARS AGO: Lasserre, a French Classic

SEVEN YEARS AGO: Sourdough Bread with Walnuts and Dates

EIGHT YEARS AGO: Braised Brisket with Bourbon-Apricot Glaze

NINE YEARS AGO: The Real Vodka Sauce

TEN YEARS AGO: Pork Tenderloin and Blue Cheese


MACARONS FOR THE HOLIDAY SEASON


One recipe, two colors, four different ways to decorate, from simple to a little more time-consuming. It is definitely the reason why I adore macarons. You can dress them up for party or keep them simple, and play with filling flavors that match any season. For these Christmas-inspired versions, I filled some with raspberry jam and others with white chocolate-mint ganache.

CHRISTMAS MACARONS
(from the Bewitching Kitchen, adapted from Colette Christian)

for the shells:
200 g powdered sugar
115 g almond meal
115 g egg whites at room temperature
a pinch of cream of tartar
100 g granulated sugar
Red or Green gel color from Artisan Accents
1/4 tsp vanilla paste

for the filling:
Raspberry jam
or
240g white chocolate, chopped
5 Tablespoons heavy cream
1/4 to 1/2 tsp peppermint extract
1/8 cup mini mint chocolate chips (optional)

to decorate:
white candy melts
red food color
gold dust dissolved in lemon extract or vodka
sprinkles of your choice
or
Royal Icing:
40 g egg whites
210 g powdered sugar
lemon juice

Line 2 or 3 heavy baking sheets with Silpat mats. Layer the powdered sugar and almond meal in a food processor. Pulse until the mixture looks like fine meal, about 15 seconds. Pass through a sieve and transfer to a small bowl. Set aside.

Place the egg whites and pinch of cream of tartar in the bowl of a stand mixer fitted with the whisk attachment. Make sure that the bowl and the whisk are impeccably clean. Starting on medium speed, whip the whites with the cream of tartar until they look like light foam. The whites should not appear liquid. The foam will be light and should not have any structure.

Slowly rain in the granulated sugar, trying to aim the stream between the whisk and the side of the bowl. Turn the speed up to medium-high. Continue to whip the meringue until it is soft and shiny. It should look like marshmallow creme. Add the gel color and the vanilla. Staying at medium-high speed, whip the egg whites until the mixture begins to dull and the lines of the whisk are visible on the surface of the meringue. Check the peak. It should be firm. Transfer the whites to a medium bowl.

Fold in the almond meal mixture in three increments. Paint the mixture halfway up the side of the bowl, using the flat side of a spatula. Scrape the mixture down to the center of the bowl. Repeat two or three times, then check to see if the mixture slides slowly down the side of the bowl. Put the mixture in a piping bag fitted with one of the tips listed above. Pipe on the prepared baking sheets.

Slam each sheet hard four to six times on the counter. Let the unbaked macarons dry until they look dull, 30 to 40 minutes.

While the macarons are drying, heat the oven to 300 F.  Bake one sheet at a time on the middle rack. Check in 11 minutes. If the tops slide, then bake for 2 to 3 more minutes. Let the macaroons cool for 10 minutes before removing from the pan.

Make the filling:  Melt the white chocolate with the mint chips (if using) in a double boiler or microwave, very gently. Add the heavy cream and stir until smooth. Add the peppermint extract. Allow it to cool to almost room temperature and whisk with a hand-held mixer to achieve piping consistency. Do not over-whip or the ganache will go grainy. Use to fill shells.

Decorate with melted Candy melts and sprinkles. For the brush effect, use a fan brush on a mixture of gold dust with lemon extract. To make the Royal Icing mix all ingredients in a Kitchen Aid type mixer for 5 minutes, adjust consistency with lemon juice or powdered sugar.

Store macarons in the fridge for 24 hours before serving.

ENJOY!

to print the recipe, click here


These shells were decorated with Royal Icing using either a very fine piping tip (Wilton number 1), or a slightly bigger tip (Wilton number 3). Sanding sugar was sprinkled on some macarons while still wet and allowed to dry.  They were filled with White Chocolate Ganache, and tasted amazing!


The filling for this batch was a simple, store-bought raspberry jam, decorated with white candy melts dyed red.

Raspberry Jam filling once again, with a drizzle of white candy melts and sprinkles…

They really make it for a nice, festive presentation that screams Christmas! I made them when I had a special interview at home for our evening news… If you’d like to see it, click here


But the simplest of all to decorate might be one of my favorites… I love the contrast of gold with green… Red and gold could be wonderful too, I might bake another batch before saying goodbye to 2019.

ONE YEAR AGO: Apple and Sobacha Caramel Dome Cake 

TWO YEARS AGO: White Chocolate Peppermint Macarons (serendipity?)

THREE YEARS AGO: Shrubs, a fun alternative to alcoholic drinks

FOUR YEARS AGO: Date Truffles 

FIVE YEARS AGO: Mascarpone Mousse from Baking Chez Moi

SIX YEARS AGO: Pumpkin Brigadeiros

SEVEN YEARS AGO: Pumpkin Espresso Loaf

EIGHT YEARS AGO: Caramelized Carrot Soup

NINE YEARS AGO: Miso-Grilled Shrimp

TEN YEARS AGO: A Special Holiday Fruitcake

MARSHMALLOW MACARONS

I wanted the first post in my second decade of blogging to be special. Macarons have a permanent spot in my heart. My fascination with these cookies made me persist after many failures, but what ultimately led me to conquer them was getting the perfect instructor to virtually hold my hand and show me the tricks to master these finicky creatures. Colette Christian is her name. Her class on Bluprint (former Craftsy) will turn ANY person into a confident macaron baker. If you’ve been following my blog for a while, you may notice that her recipe is my go-to. I sometimes venture into Italian and Swiss territory just for fun, but if I have a very important batch to make I don’t blink, Colette’s tried and true it is.  Her instructions are flawless, and if you have questions she always answers them. The inspiration for the flavor and looks of this batch came from Ettore Cioccia, an Italian patissier who works in Spain. I follow his beautiful productions closely online.

MARSHMALLOW MACARONS
(adapted from Colette Christian’s Craftsy version)

for the shells:
198 g powdered sugar
113 g almond meal
113 g egg whites at room temperature
a pinch of cream of tartar
100 g granulated sugar
caramel food gel from Chefmaster
1/8 tsp vanilla extract

for the filling:

90g egg whites  (from about 3 eggs)
130g sugar (superfine if available)
1/8 teaspoon kosher salt
1/8 teaspoon cream of tartar

to decorate:
4 ounces (113 g)  70% chocolate
1 + 1/2 tsp coconut oil
white non-pareils sprinkles

Line 2 or 3 heavy baking sheets with parchment paper or Silpat mats. Layer the powdered sugar and almond meal   in a food processor. Pulse until the mixture looks like fine meal, about 15 seconds. Pass through a sieve and transfer to a small bowl. Set aside.

Place the egg whites and pinch of cream of tartar in the bowl of a stand mixer fitted with the whisk attachment. Make sure that the bowl and the whisk are impeccably clean. Starting on medium speed, whip the whites with the cream of tartar until they look like light foam. The whites should not appear liquid. The foam will be light and should not have any structure.

Slowly rain in the granulated sugar, trying to aim the stream between the whisk and the side of the bowl. Turn the speed up to medium-high. Continue to whip the meringue until it is soft and shiny. It should look like marshmallow creme. Add the gel color and the vanilla. Staying at medium-high speed, whip the egg whites until the mixture begins to dull and the lines of the whisk are visible on the surface of the meringue. Check the peak. It should be firm.

Switch to paddle attachment. Add half the almond meal mixture, turn the mixer on low and mix for about 3 seconds. Stop and add the rest of the almond mixture, turn the mixer on low, and process for about 5 more seconds. It should still be reasonably thick, but the grains of almond should be more or less disappearing in the batter.  Remove the bowl from the mixer, and finish the macaronage by hand.  Put the mixture in a piping bag fitted with one of the tips listed above. Pipe on the prepared baking sheets.

Slam each sheet hard four to six times on the counter. Then fist bump each end of the sheet’s underside twice. Let the unbaked macarons dry until they look dull but not overly dry. Drying time depends on humidity. Ina dry climate, the macarons can dry in 15 to 20 minutes; in a humid climate, it can take 35 to 40 minutes.

While the macarons are drying, heat the oven to 300 F. Bake one sheet at a time on the middle rack. Check in 11 minutes. If the tops slide, then bake for 2 to 3 more minutes. The macarons should release without sticking. Check one or two. If they stick, put them back in the oven for 1 to 2 more minutes. Let the macaroons cool for 10 minutes before removing from the pan.

Decorate half the shells with chocolate. Place chocolate and coconut oil in a microwave-safe bowl. Melt gently, mixing well. Dip half of the shells into the chocolate, leave to almost set. Add the white sprinkles when the chocolate is still a bit sticky to the touch. Reserve.

Make the filling: Fill a wide pot with a couple of inches of water. Place over high heat until almost boiling, then adjust temperature to maintain a gentle simmer. Combine egg whites, sugar, salt, and cream of tartar in the bowl of a stand mixer. Set over steaming water, stirring and scraping constantly with a flexible spatula, until egg whites reach 175°F. It should take less than 10 minutes. Transfer to a stand mixer fitted with a whisk attachment and whip at high speed until meringue is glossy and beginning to ball up inside the whisk, about 5 minutes.  Place the mixture in a piping bag fitted with a closed start tip. Pipe on the shells that are not decorated with chocolate.  Burn the surface with a torch, and immediately close the macaron with a decorated shell.  Press gently so that the burned design shows through the edge.

 Store in the fridge for 24 hours for perfect texture.

ENJOY!

to print the recipe, click here

Comments: These macs were a ton of fun to make…  I wasn’t sure how the Swiss  meringue would behave as I torched it, but the whole thing worked flawlessly. Remember that I cooked the egg whites to a slightly higher temperature than most recipes call for, resulting in a more stable meringue. I piped and torched four at a time.  More than that could be a bit tricky. The chocolate shell was still pretty nice after 2 days in the fridge.  You could use tempered chocolate or if you truly want to simplify, candy melts work too. However, real chocolate tastes a lot better and in this case there’s quite a bit of it on the shell. Just make sure to coat the shells carefully so that no chocolate drips to the side.

Although, I doubt anyone would mind a little chocolate insinuating its presence down the shell… Would you?


About Chef Colette Christian

Chef Christian not only teaches SIX classes at Bluprint (Macarons, Miniature French Desserts, Croissants, Pain au Chocolat, Danish and other goodies), she also published a macaron cookbook that goes way beyond the basics to show amazing decorating techniques and cool things to bake using macarons as the basic method. To order your copy click here.  To visit her blog click  here.


ONE YEAR AGO: Fujisan Bread

TWO YEARS AGO: Air-Fried Tomatoes with Hazelnut Pesto & Halloumi Cheese

THREE YEARS AGO: Red Velvet Layered Cake

FOUR YEARS AGO: Lemon-Lavender Bars

FIVE YEARS AGO: Quinoa Fried Rice

SIX YEARS AGO: Carrot Flan with Greens and Lemon Vinaigrette

SEVEN YEARS AGO: The Secret Recipe Club: Granola Bars

EIGHT YEARS AGO:  Awesome Broccolini

NINE YEARS AGO:  A Twist on Pesto

TEN YEARS AGO: Ciabatta: Judging a bread by its holes


PURPLE STAR MACARONS

When it comes to macarons, people are divided in two teams, those who think the color of the shells should match the type of filling, and those who could not care less. I can go either way, but with this bake I joined the rebels. Shells are purple, filling is strawberry-based. My goal was to make macarons with the colors of KSU (purple and silver), but I wanted to use my made-from-scratch jam as part of the filling. So there you go, purple macarons with a strawberry-balsamic-black pepper buttercream.

PURPLE STAR MACARONS
(adapted from Colette Christian’s Craftsy version)

for the shells:
198 g powdered sugar
113 g almond meal
113 g egg whites at room temperature
a pinch of cream of tartar
100 g granulated sugar
purple food gel from Chefmaster
1/8 tsp vanilla extract

for the filling:
3 tablespoons (40gr) unsalted butter, softened
3/4 cup (100gr) powdered sugar
2 teaspoons heavy cream
2 tablespoon strawberry jam (I used this recipe)
½ teaspoon pure vanilla extract
1/8 teaspoon salt

to decorate:
white candy melts dyed purple
silver pearl dust
vodka or lemon extract

Line 2 or 3 heavy baking sheets with parchment paper or Silpat mats. Layer the powdered sugar and almond meal   in a food processor. Pulse until the mixture looks like fine meal, about 15 seconds. Pass through a sieve and transfer to a small bowl. Set aside.

Place the egg whites and pinch of cream of tartar in the bowl of a stand mixer fitted with the whisk attachment. Make sure that the bowl and the whisk are impeccably clean. Starting on medium speed, whip the whites with the cream of tartar until they look like light foam. The whites should not appear liquid. The foam will be light and should not have any structure.

Slowly rain in the granulated sugar, trying to aim the stream between the whisk and the side of the bowl. Turn the speed up to medium-high. Continue to whip the meringue until it is soft and shiny. It should look like marshmallow creme. Add the gel color and the vanilla. Staying at medium-high speed, whip the egg whites until the mixture begins to dull and the lines of the whisk are visible on the surface of the meringue. Check the peak. It should be firm.

Switch to paddle attachment. Add half the almond meal mixture, turn the mixer on low and mix for about 3 seconds. Stop and add the rest of the almond mixture, turn the mixer on low, and process for about 5 more seconds. It should still be reasonably thick, but the grains of almond should be more or less disappearing in the batter.  Remove the bowl from the mixer, and finish the macaronage by hand.  Put the mixture in a piping bag fitted with one of the tips listed above. Pipe on the prepared baking sheets.

Slam each sheet hard four to six times on the counter. Then fist bump each end of the sheet’s underside twice. Let the unbaked macarons dry until they look dull but not overly dry. Drying time depends on humidity. Ina dry climate, the macarons can dry in 15 to 20 minutes; in a humid climate, it can take 35 to 40 minutes.

While the macarons are drying, heat the oven to 300 F. Bake one sheet at a time on the middle rack. Check in 11 minutes. If the tops slide, then bake for 2 to 3 more minutes. The macarons should release without sticking. Check one or two. If they stick, put them back in the oven for 1 to 2 more minutes. Let the macaroons cool for 10 minutes before removing from the pan.

Make the filling:  Whisk the butter with the powdered sugar until creamy, slowly add the heavy cream and continue whisking until fluffy and smooth. I used a hand held electric beater. Add the vanilla, salt, and finally the strawberry jam. Whisk to incorporate, keep in the fridge until needed.  Place it in a piping bag fitted with a star tip like Wilton 1M.

Paint each shell before assembling.  In a very small bowl, mix silver pearl dust with vodka or lemon extract until it has a nice consistency to brush on the shells. Use a fan brush to get a nice effect. Assemble the macarons: find two macarons similar in size and add a good amount of buttercream filling on top of one shell, close with the other, and squeeze gently.

To make the stars, dye a small amount of melted candy purple. Spread on a piece of parchment as a thin layer. Let it set at room temperature, cut star shapes.  Right before using, add a bit of silver pearl dust and shake them gently around to cover lightly. Glue one or more stars to the top of each assembled macaron using candy melts.

Store in the fridge for 24 hours for perfect texture.

ENJOY!

to print the recipe, click here

Comments: The stars can be a bit tricky to make because the points are very fragile and tend to break, so make more than you think you’ll need.  I coated them with a bit of silver pearl dust, the same one used to brush the shells, except that I added them dry to the candy melt stars.

The strawberry jam is absolutely delicious, and I’ve used it in two other desserts that should be featured in the near future. The recipe comes from the most trustworthy baking website in the known universe: Pastries Like a Pro, from Helen Fletcher. If you want to improve your baking skills, you must follow her. Making the jam was a lot less complicated than I expected, so I see other jam adventures in my horizon. I have plans for a mango version to materialize in the Bewitching Kitchen sometime soon.

ONE YEAR AGO: Smoked Salmon, Fait Maison

TWO YEARS AGO: Kouign-Amann, Fighting Fire with Fire

THREE YEARS AGO: In My Kitchen, Yin and Yang

FOUR YEARS AGO: Chocolate Toffee Banana Bread

FIVE YEARS AGO: In My Kitchen, June 2014

SIX YEARS AGO:  Strawberry Frozen Yogurt

SEVEN YEARS AGO: Baked Coconut and “The Brazilian Kitchen”

EIGHT YEARS AGO: Honey-Glazed Chicken Legs

NINE YEARS AGO: French-Style Rolls