
Three days, three posts! In my series of collaborative articles with Jamie, from Cooking in Red Socks, it is now time to share the dessert course of our romantic meal for two. But, before I do that, let me urge you to visit her site and check out her choice for the last course of her V-day extravaganza! She pulled all the stops and made some seriously gorgeous Strawberry Napoleons, heart shaped and all. I am in complete awe! Wish I was one of the guests in her party… 😉
Now, to the finale of my dinner for two. It was hard for me not to think about chocolate when choosing a dessert for Valentine’s Day. Having settled on that, I needed something red and sexy to pair it with. Red and sexy like raspberries. All lightly dusted with a very light sprinkle of powdered sugar. For good measure.
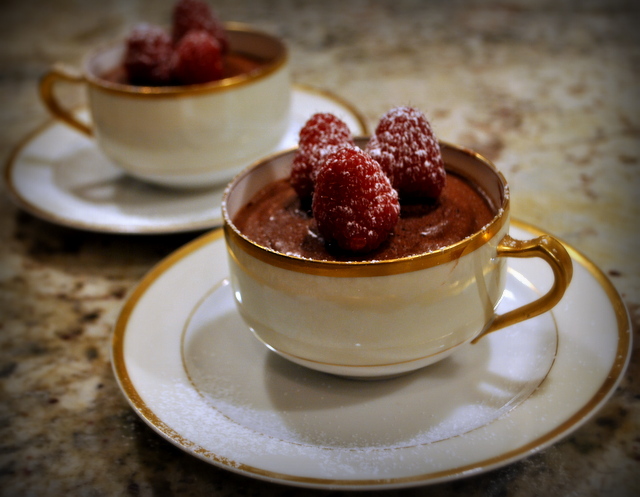
CHOCOLATE MOUSSE WITH RASPBERRIES
(from Good Food Magazine, May 2010)
85g dark chocolate, 70% (I used Trader Joe’s)
1 tbsp cocoa powder
½ tsp espresso powder (I used Spice House)
½ tsp vanilla extract
2 egg whites
boiling water (enough to use 2 tablespoons)
1 tbsp sugar
50g full-fat Greek yogurt
raspberries, to decorate
powdered sugar
Chop the chocolate very finely and put it into a large bowl that will fit over a pan of simmering water. Mix the cocoa, coffee and vanilla with 2 tbsp cold water, and pour over the chocolate. Place the bowl over simmering water, give it all a stir, then remove from the heat. Leave the bowl still over the hot water, stirring occasionally until fully melted. If necessary, place the water back on the stove for a minute or so.
Stir the melted chocolate, it will be quite thick. Stir in 2 tbsp boiling water and the chocolate will immediately thin down and become silky smooth. Leave to cool slightly.
Beat the egg whites to fairly soft peaks, then whisk in the sugar until thick and glossy. Beat the yogurt into the cooled chocolate. Fold about one-third of the egg whites into the chocolate mix using a large metal spoon, then very gently fold in the rest of the whites until they are evenly mixed in.
Spoon into 4 small cups or ramekins and chill for a couple of hours, or overnight. Top with a few raspberries, then dust with a little powdered sugar.
ENJOY!
to print the recipe, click here
♥♥♥♥♥♥♥♥♥
Comments: As far as chocolate mousse goes, this is one of the lightest options you will find. Because our cups were a bit large, the recipe made only two portions, each one perfect to be shared. As a result, we enjoyed this dessert two days in a row. Naughty naughty naughty…
The yogurt gives the mousse a little bit of a tang, cutting the richness of the chocolate. If you are fond of that super rich feeling of a regular mousse, this could be too light for you. But, if you rather play conservative with your sweets, this is a perfect way to end a romantic dinner.
Make sure to stop by Jamie’s site to see what she is sharing with her friends.
Jamie, it was great to collaborate with you on this joint virtual project!
Have a wonderful Valentine’s Day celebration!
ONE YEAR AGO: Almond Butter Chocolate Chip Cookies
TWO YEARS AGO: Dan Dan Noodles
THREE YEARS AGO: Sophie Grigson’s Parmesan Cake
FOUR YEARS AGO: Antibiotics and Food


