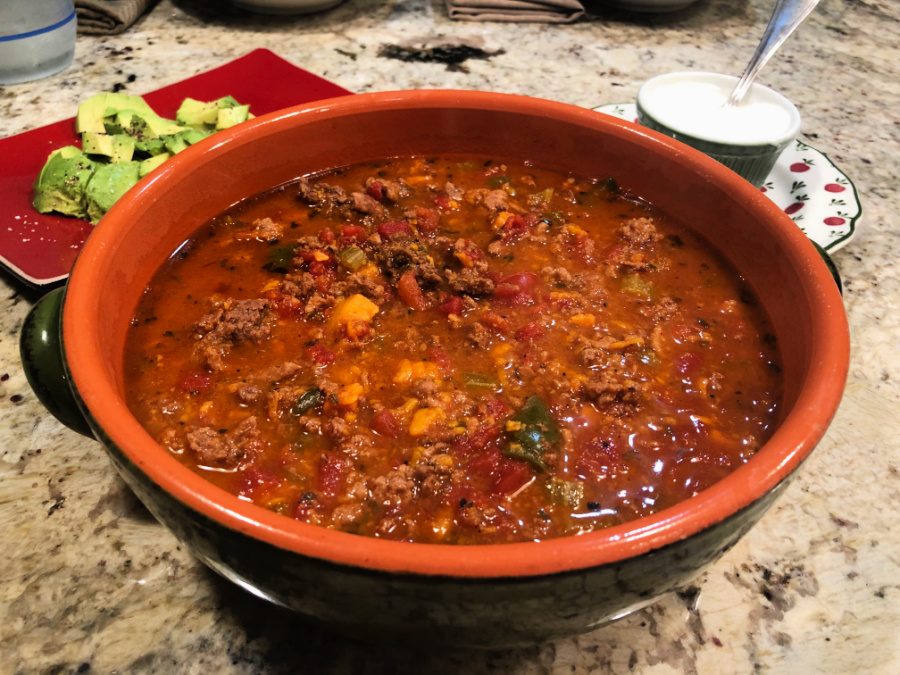
This was made in a pressure cooker, but if you don’t own one, no problem. Follow my modifications for a stove-top version. I often make chili exclusively with ground turkey but this version with 50% bison won our seal of approval. Not that much additional fat, but definitely a more complex flavor.
TURKEY-BISON JALAPENO CHILI (from The Bewitching Kitchen)
2 tablespoons olive oil 1 large shallot, diced 1 red bell pepper, diced 2 jalapeños, minced (remove seeds for less heat) 2 large sweet potatoes, diced 1 pound ground chicken 1 pound ground bison meat 2 teaspoons smoked paprika 2 teaspoons chili powder 2 teaspoons dried oregano 2 teaspoons kosher salt 1 teaspoon ground cumin ½ teaspoon Aleppo pepper (or other red pepper of your choice) 1 can (28 ounce) whole tomatoes garnishes of your choice
Heat the olive oil in the pressure cooker. Sautee the shallot, bell pepper and jalapeños with a little salt and pepper. When fragrant, add the two kinds of meat and saute for a few minutes. Add all other ingredients, close the pressure cooker and bring to full pressure.
Reduce heat, cook for 25 minutes. Release the pressure quickly according to the method recommended for your pan. Simmer the chili gently for a few more minutes and serve. Adjust consistency with water or by reducing it further. Serve with toppings of your choice. If making in a regular pan, simmer gently for 1 hour, adding more liquid if needed during cooking.
Comments: As you may know, we cook with leftovers in mind, and chili is one of the perfect recipes to enjoy in subsequent days, it gets better and better. Bison meat is widely available where we live, but any ground beef will work, although the fat amount will be higher with most other cuts. We love the mixture of the two types of meat. If you have pickled jalapeños hanging around, they are a nice topping idea also. We used guacamole and yogurt seasoned with salt and lime juice.
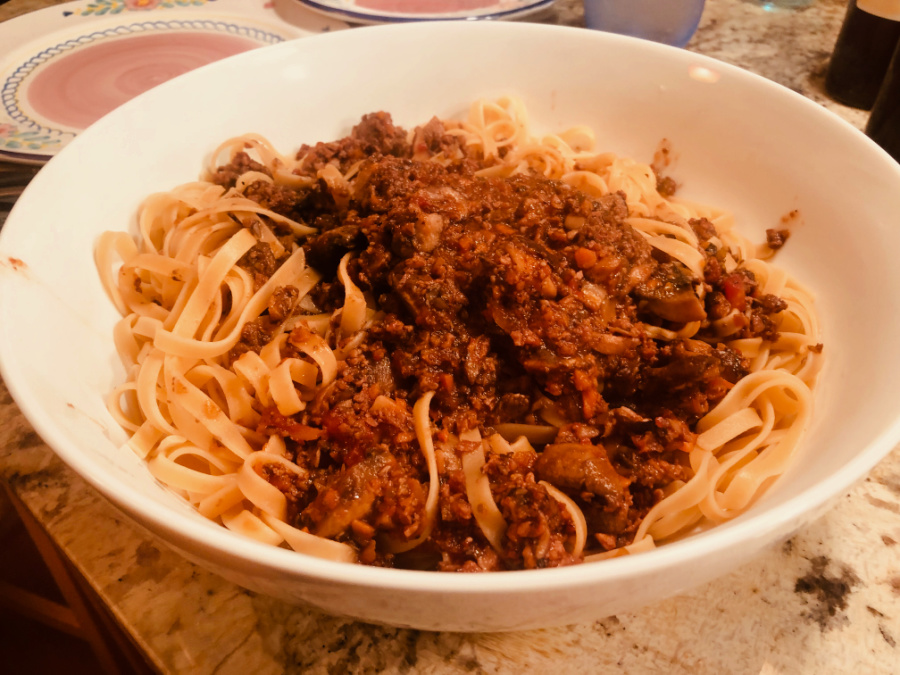
I could have added the denomination VEGAN to the title of this post, but was afraid to cause The Great Bewitching Exodus of 2021. So, yes, it is a vegan recipe but will please any omnivore around. Phil and I included. It is hearty, satisfying and with a depth of flavor that will surprise you. I started from a recipe published by America’s Test Kitchen, but I am a lot happier with my considerably modified version.
VEGAN MUSHROOM RAGU (from The Bewitching Kitchen)
2 pounds cremini mushrooms, trimmed and quartered 1/4 pound shiitake mushrooms 2 large carrots, peeled 2 large stalks celery 1 (28-ounce) can whole peeled tomatoes 3 tablespoons extra-virgin olive oil 2 tablespoons tomato paste 1 cup dry red wine 1/2 cup texturized soy protein (I used this one) 1/2 cup vegetable broth or water 1 tablespoon soy sauce salt and pepper to taste
Reserve about 1 cup of cremini mushrooms whole. Working in batches, pulse the remaining cremini and shiitake mushrooms in food processor until pieces are about 1/2 inch in size. Transfer to a bowl. Pulse the carrots and celery in the food processor, add them to the bowl with the mushrooms. Add the can of tomatoes with the juices to the processor and run it until smooth. Reserve.
Heat oil in Dutch oven over medium heat until shimmering. Add processed vegetables, season with salt and pepper. Mushrooms will release liquid, so keep cooking until it seems dry. Stir tomato paste, cook for a minute or so, stirring constantly. Add the wine and simmer gently for 5 minutes.
Add the tomatoes, texturized soy protein, vegetable broth, soy sauce, and more salt and pepper (about 1/2 tsp each). Simmer for 5 minutes, quarter the reserved cremini mushrooms and add to the sauce. Simmer everything together gently for about 10 minutes.
Adjust seasoning, and serve over cooked pasta of your choice.
Comments: You are probably not very thrilled about the texturized soy protein, as it is one exotic ingredient to buy, but I’ve made this recipe without it and the difference in texture is quite striking. I highly recommend you include it. If you want to omit it, add a little water to the sauce and simmer it longer. I also recommend that you get the brand I bought because it is apparently the best one out there.
It is tempting to compare it with Bolognese sauce, but I rather not go there. Let me just say you won’t be disappointed if you try this version, and it’s something that might come in handy if you want to entertain a person who is vegetarian or vegan. I’ve made it three times so far, and it will show up again at our table, maybe as a lasagna version.
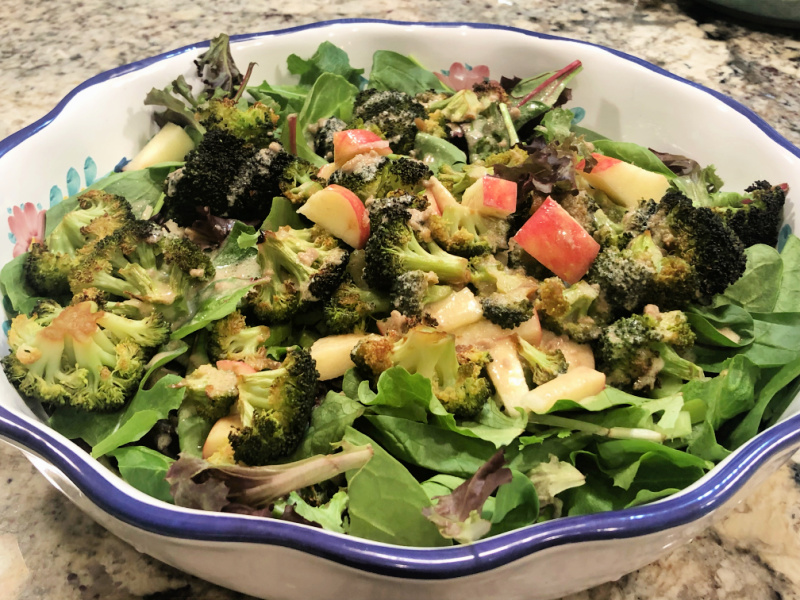
Easily makes it into the OMG FILES. Everything goes together in perfect harmony, so my advice is not to skip any of the ingredients. Broccoli has that funky nature that people love or hate, but even if you are in the latter group, the apples act as the perfect partner. Like couples that make each other shine a little brighter. I don’t really have a broccoli issue, but maybe some of my readers do, so don’t let that stop you from trying this recipe.
ROASTED BROCCOLI AND APPLE SALAD WITH TAHINI DRESSING (from the Bewitching Kitchen, adapted from several sources)
for the broccoli: Broccoli florets, enough to cover a quarter-sheet pan 2 tablespoons soy sauce 1 tablespoon maple syrup salt and pepper to taste
for the dressing: 1 tablespoon grapeseed oil 3 tablespoons lemon juice 1 to 2 tablespoons tahini 2 tablespoons apple cider vinegar 2 teaspoons maple syrup 1 teaspoons Dijon mustard
for the salad: greens of your choice (baby spinach, spring mix, baby arugula) apples, cored and diced (I used Honeycrisp)
Heat the oven to 420°F. Line a baking sheet with parchment paper or non-stick aluminum foil. Place the broccoli in a bowl, toss with the soy sauce and maple syrup, season with salt and pepper. Spread on the baking sheet and bake for about 25 minutes, moving them around half-way through roasting. Remove from the oven and let it cool still spread out, so they don’t steam and get mushy.
In a small bowl, whisk together the dressing ingredients. Set aside. Assemble the salad: add all the ingredients to a large bowl, drizzle the dressing and toss gently. Adjust seasoning with salt, if needed.
Comments: We had this salad twice already, the second time I’ve added roasted slivered almonds and dried cranberries, and it was even better, so I recommend you include them if you like. The inclusion of broccoli makes it more substantial and if you are vegetarian or vegan, a hearty piece of bread will be all you need to call it dinner. Sourdough dipped in balsamic vinegar plus olive oil would be a match made in Vegan Heaven.
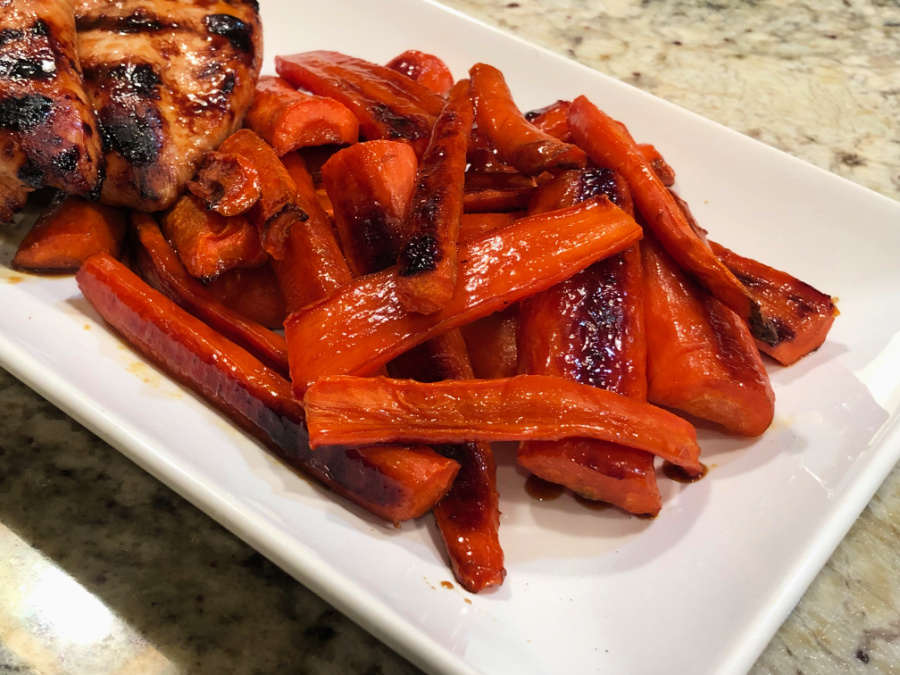
I kept waiting and waiting to get more recipes and make a more involved article in my “Incredibly Simple” category, but truth is I would MARRY these carrots if I was single and searching for a perfect match. It makes no sense to delay this post. You will not find a simpler recipe. And definitely not one that will surprise you as much for the outcome versus simplicity ratio. Do not be ashamed to buy this ingredient at the grocery store: Sweet Soy Sauce for Rice, by Kikkoman. It is all you need. Well, carrots would be nice to have also…
JAPANESE-STYLE ROASTED CARROTS (from the Bewitching Kitchen)
Carrots, cut in sticks, enough to cover a quarter baking sheet 1 to 2 tablespoons grape seed oil salt and pepper to taste 3 tablespoons sweet soy sauce for rice (Kikkoman) zest of 1/2 lemon + lemon juice to taste
Heat oven to 420F. Coat cut carrots with olive oil, season very lightly with salt and pepper.
Roast for about 25 minutes, until edges start to get golden brown. Remove from the oven, drizzle the soy sauce and lemon zest all over, and roast for 5 minutes more, or until the sauce starts to caramelize. Serve with a little drizzle of lemon juice.
Comments: I don’t know if I will ever bother making a different version of carrots, at least not until I get bored with this beauty. If you want to feel virtuous and work harder, make the sweet soy sauce yourself from scratch. There are many recipes around (like this one), but at least once go the easy route and try this version. We all need a simple side dish in the repertoire for those times in which life seems a tad overwhelming.
Today I share three recipes to put your sourdough starter to use. Opening with hamburger buns, moving on to a no-knead, no-fuss sandwich type bread (courtesy of Karen, from Karen’s Kitchen Stories), and wrapping the post with my favorite type, a rustic, spicy loaf.
SOURDOUGH HAMBURGER BUNS (from the Bewitching Kitchen)
80 grams bubbly, active sourdough starter at 100% hydration 240 grams whole milk, warm 1 egg 6g salt 20g sugar 430g all-purpose flour, divided 45g butter, softened egg wash (1 egg beaten with a little water) sesame seeds, black and white
In the bowl of an electric mixer with the paddle attachment, mix sourdough starter, milk, 1 egg, yeast, salt, sugar and 300 grams of flour on medium speed until a loose, shaggy dough is formed. Cover the dough with a damp cloth and let rest in the bowl for 30 minutes.
Change to the dough hook, knead the dough for 7-8 minutes, gradually adding an additional 130 grams flour and the butter in small amounts. The dough should be soft and slightly sticky, but pulling away from the edges of the bowl as it kneads. Transfer the dough to an oiled bowl and keep at room temperature for the bulk proof for 4 to 5 hours. It will not double in size, but it should expand and feel “lighter.
Divide the dough into six portions (about 120 g each). Form into tight little balls and allow to proof at room temperature for 2 to 3 hours. Heat the oven to 375F, brush the surface of the rolls with egg wash and sprinkle sesame seeds. Bake for about 20 minutes, until golden brown and internal temperature of 190F. Cool completely on a rack before slicing.
Comments: My only issue with the recipe is that the dough took a very long time to proof and did not seem to expand that much. The enrichment of the dough with added fat slowed things down a bit. However, they had excellent oven spring. I still want to do the tangzhong method with sourdough, so stay tuned for that. I see recipes that add a touch of instant yeast to speed things up, but I decided to go through a pure sourdough method this time.
Moving on, a recipe from my friend Karen, which I made right after she blogged about it, but as usual, it takes me a little time to make things show up in the blog. If you are in the initial steps of your sourdough journey, this is a very relaxing bake, I urge you to give it a try.
Sometimes it is nice to have a bread in the traditional loaf format, perfect for sandwiches and also to make croutons, if you so desire. I want to bake another loaf again very soon. Thank you, Karen!
Finally, a sourdough with a lot of flavor, thanks to Penzey’s, my favorite online source for all things spice…
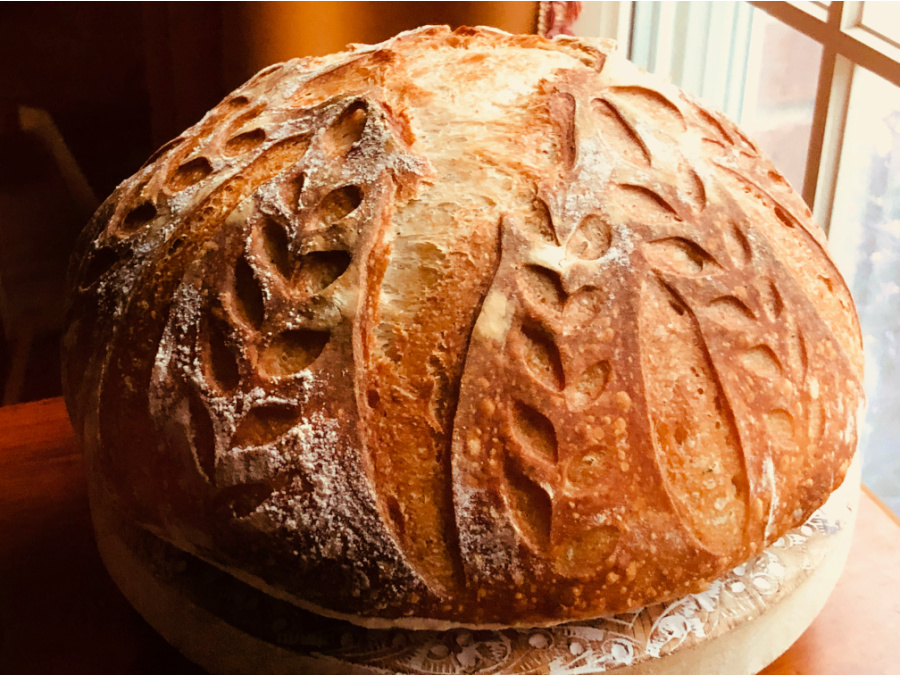
SOUTHWEST SPICE SOURDOUGH LOAF (from The Bewitching Kitchen
385g white bread flour 16g whole-wheat flour 1 + 1/2 to 2 tsp Southwest Seasoning Mix (Penzey’s) 8g salt 280g water 65g sourdough starter at 100% hydration
Make the levain mixture about 6 hours before you plan to mix the dough. It should be very bubbly and active.
When you are ready to make the final dough, place the water in the bowl of a KitchenAid type mixer and dissolve the starter in it, mixing with a spatula briefly, then add the two types of flour, the spice mix and the salt. Turn the mixer on with the hook attachment and knead the dough for 4 minutes at low-speed all the time. If the dough is too sticky, add 1/4 cup flour, you want the dough to start clearing the sides of the bowl, but still be sticky at the bottom.
Remove from the machine, and transfer to a container lightly coated with oil, cover lightly with plastic wrap and allow it to ferment for 4 hours, folding every 45 minutes or so. After four hours bulk fermentation, shape the dough as a ball, and place, seam side up, in a lightly floured banetton. Leave at room temperature one hour, and then place in the fridge overnight, from 8 to 12 hours.
Next morning, heat the oven to 450F. Invert the dough over parchment paper, rub gently white flour on the surface. Score with the pattern of your choice using a brand new razor blade.
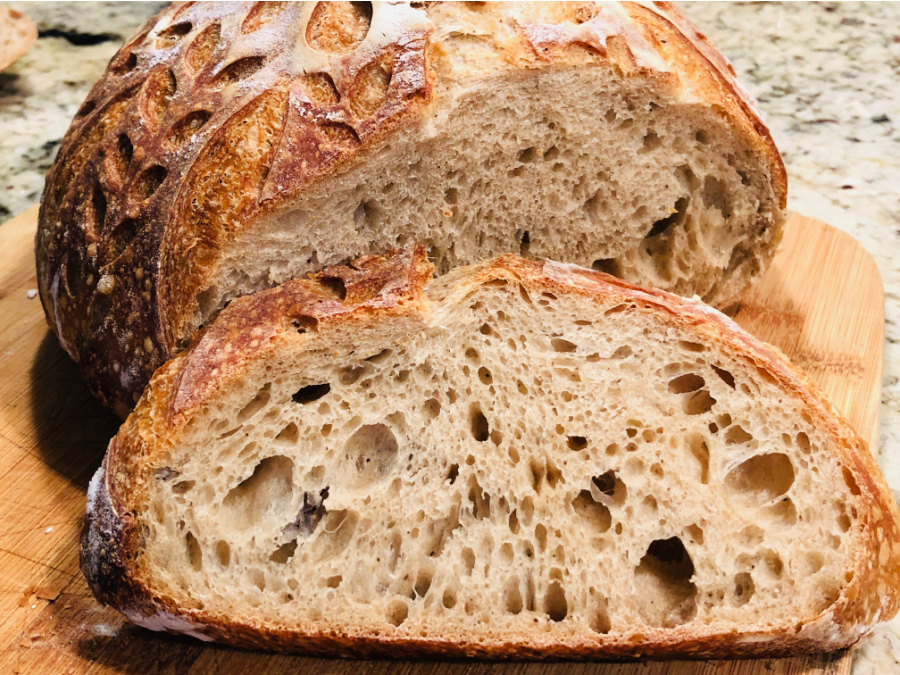
Bake at 450F for 45 minutes, preferably covered for the first 30 minutes to retain steam. Cool completely over a rack before slicing.
Comments: I often run into the “problem” of excessive oven spring ruining my scoring. But I admit, it is not a bad problem to deal with, it just means your starter is doing its job. This was such a great bread, you can use other mixes if you like, or make your own, paprika, cumin, oregano, garlic, onion, are some of the components of Penzey’s mix.
I hope you like this trio of sourdough options. Now that the weather is turning cooler, it’s definitely time to bring the starter to play more often.