This goes to the OMG FILES – if I had one, that is… Great recipe brought to my attention by my friend Eha. You can find the original jumping here. I modified it quite a bit, turning it from salad into warm side dish, as at the present time we endure temperatures that have the potential to make Brazilians weep.

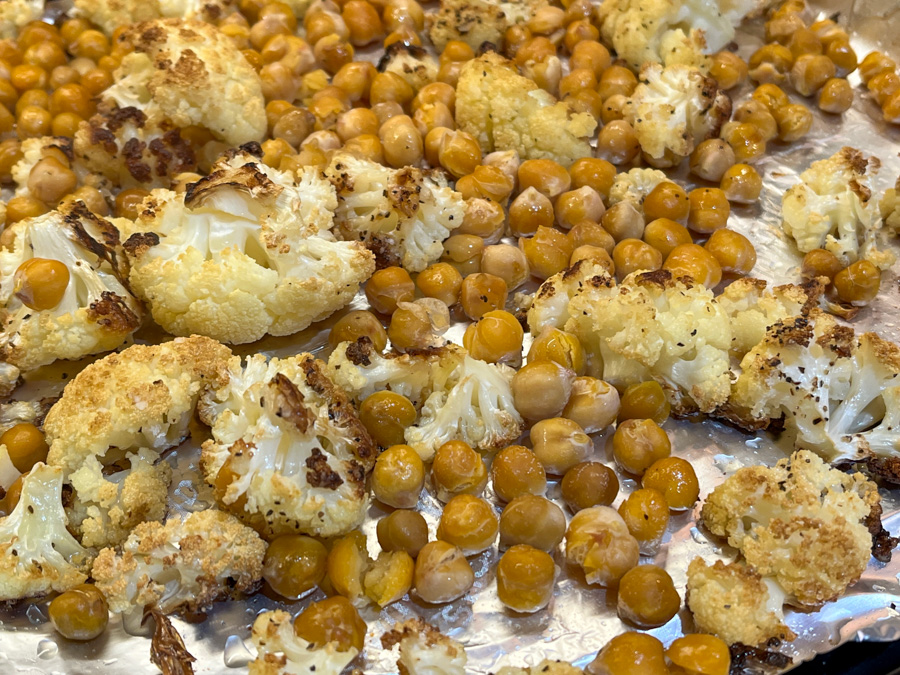
ROASTED CAULIFLOWER WITH CHICKPEAS AND QUINOA
(slightly modified from Cook Republic)
for the roasted component:
1 medium-sized head of cauliflower, cut in florets
1 tsp smoked paprika
1 tsp ground cumin
2 – 3 tbsps olive oil
½ tsp salt
black pepper, freshly ground
1 can of chickpeas, drained and well-rinsed
for the dressing:
2 tbsps balsamic vinegar
1 tbsp mustard
1 tsp lemon zest
1 tbsp lemon juice
2 tbsps olive oil
to assemble the dish:
1 cup cooked quinoa, still warm
handful of raisins
handful of sliced almonds
fresh parsley, chopped, amount to taste
Heat oven to 400F. . Line a large, rimmed baking tray with non-stick aluminum foil or parchment paper.
Mix cauliflower florets, smoked paprika, ground cumin, olive oil, salt and pepper in a medium bowl. Spread cauliflower on the prepared tray and roast in the preheated oven for approximately 20 minutes until golden and tender. Add the drained chickpeas, a little more olive oil and roast everything together for 5 to 10 additional minutes. Remove from the oven and set aside to cool slightly.
Prepare the dressing by mixing balsamic vinegar, grain mustard, lemon juice and zest and olive oil in a small bowl. Mix well.
To assemble the salad, add warm quinoa quinoa to a large bowl. Add spring onion, raisins, toasted almond flakes and roasted cauliflower. Top with parsley and salad dressing. Mix well to ensure the dressing coats everything evenly. Serve with your main dish of choice.
ENJOY!
to print the recipe, click here
Comments: Amazing combination of flavors and textures, I do think it is much better warm than it would be cold, but as I always say, your kitchen, your rules. Make it as a salad if you prefer, or if perhaps you are living the height of the summer right now. The balsamic vinegar is quite prominent so I advise you to choose a brand you love. The original recipe called for grainy mustard, which I did not have, so I went with regular, smooth mustard. Everything worked great, from the raisins to the almonds, and leftovers were delicious two days later. This one is a keeper all the way, and we will be enjoying it regularly. Thank you, Eha!
ONE YEAR AGO: A Savory Phyllo Pie
TWO YEARS AGO: Nut-Free Lady Grey Macarons
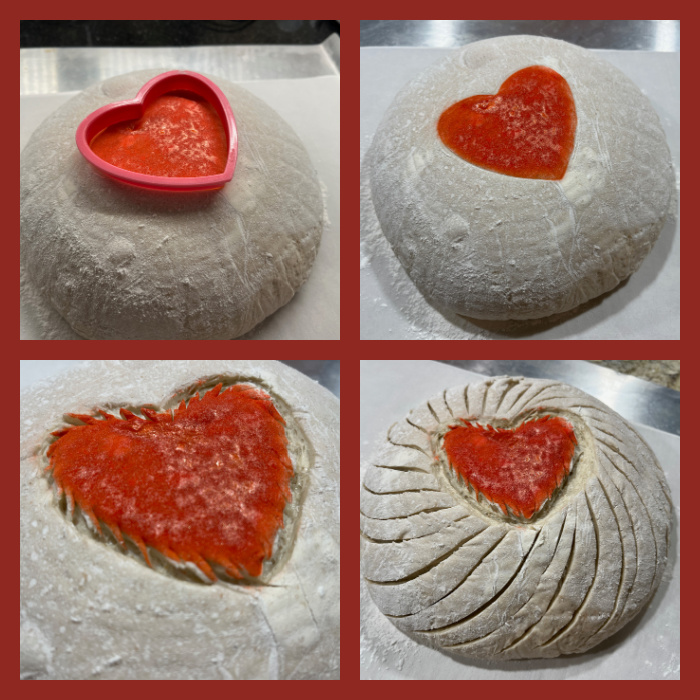
THREE YEARS AGO: Mini-Heart Cakes for your Valentine
FOUR YEARS AGO: Blue Moon Milk
FIVE YEARS AGO: Slow-Cooked Chicken Meatballs
SIX YEARS AGO: Zesty Flourless Chocolate Cake
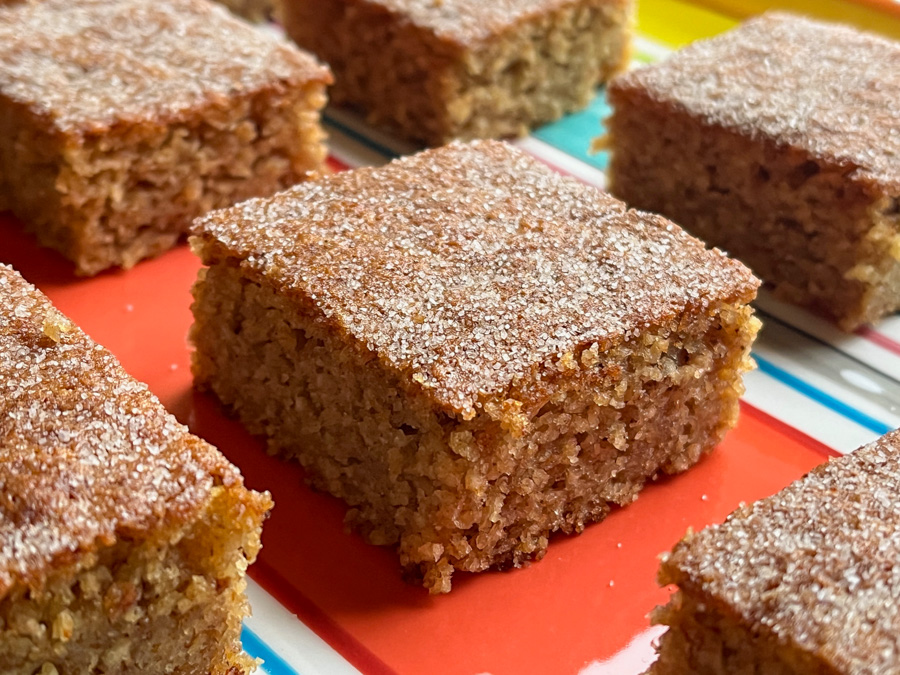
SEVEN YEARS AGO: Maple Pumpkin Pecan Snacking Cake
EIGHT YEARS AGO: Silky Gingered Zucchini Soup
NINE YEARS AGO: Sweet Fifteen!
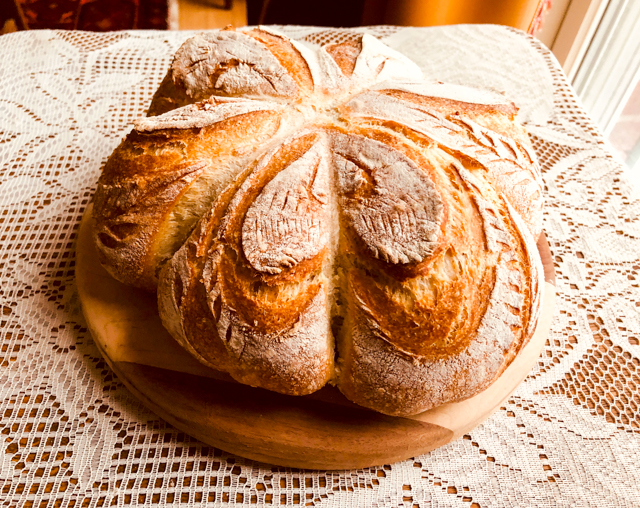
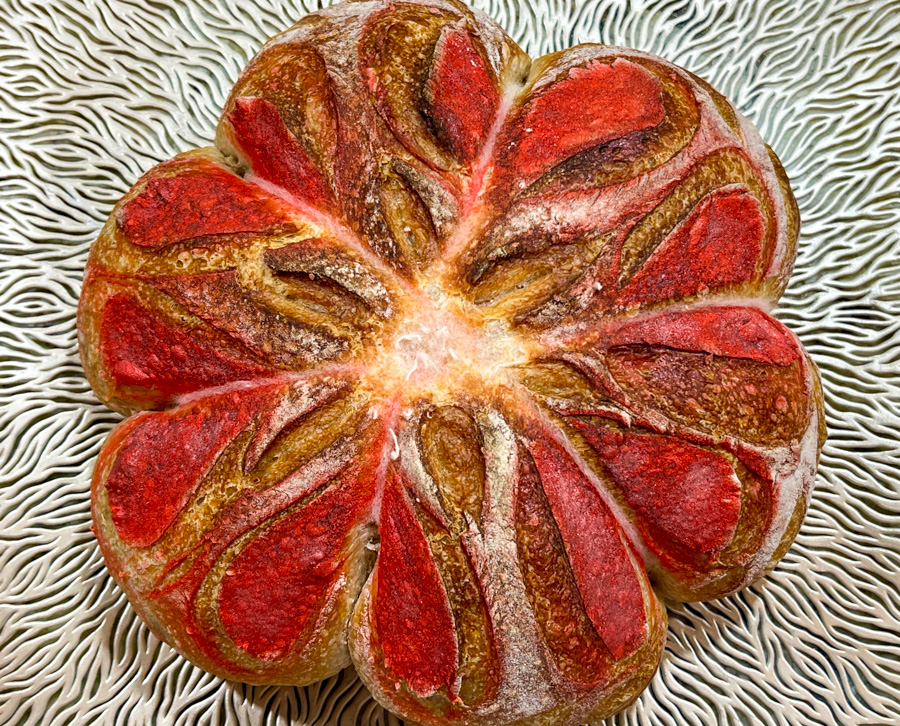
TEN YEARS AGO: Sesame and Flaxseed Sourdough
ELEVEN YEARS AGO: Green Beans with Miso and Almonds
TWELVE YEARS AGO: Saturday Morning Scones
THIRTEEN YEARS AGO: White Bread