POMEGRANATE WALNUT DELIGHT

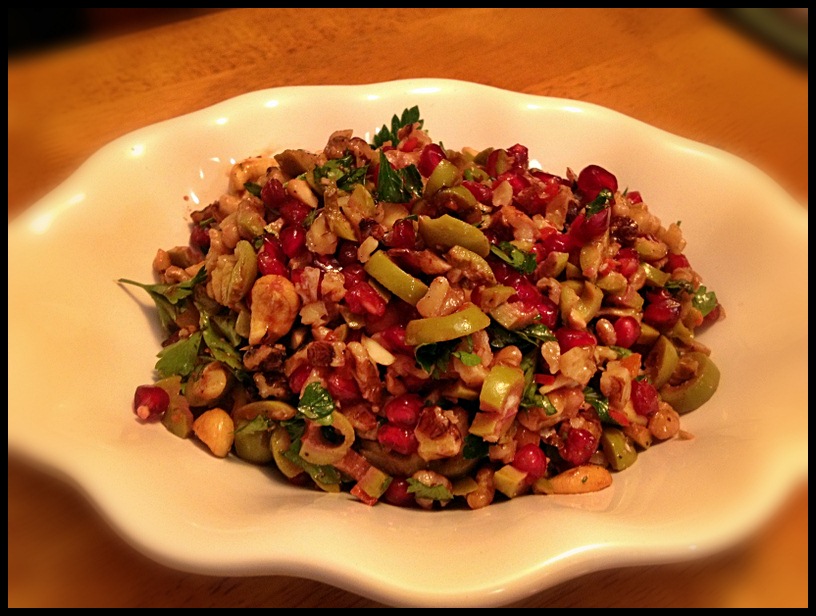
This unusual salad will take the center spot in any meal with its intense flavors and contrast of textures. I spotted the recipe around Thanksgiving last year, saved it to my Pinterest cooking board, and finally made it.  Please, don’t drag your feet like I did, make it sooner rather than later. Green olives, walnuts, pomegranate seeds… What a treat!
served111

GREEN OLIVE, WALNUTS & POMEGRANATE SALAD
(adapted from Alexandra’s Kitchen,  original recipe at Turquoise)   

3/4 cup shelled walnuts
1/2 cup pitted green olives, coarsely chopped
1/4 cup roasted cashews, coarsely chopped
3/4  cup pomegranate seeds
1 red Serrano chile, seeded and finely minced
shredded flat-leaf parsley to taste
1 tablespoon walnut oil
splash of pomegranate molasses
juice of ½ lemon
sea salt
freshly ground black pepper

Heat the oven to 350⁰F. Scatter the walnuts onto a jelly-roll pan and roast for 5-10 minutes, until deep golden brown.  Chop the walnuts coarsely and toss in a sieve to remove any remaining skin or dust.

Combine all the ingredients in a large bowl and toss gently. Leave to stand for 5 minutes or so before serving to allow flavors to meld. Taste and adjust seasoning. I ended up adding more lemon juice.

ENJOY!

to print the recipe, click here
closeup
Confession: I tend to be salad-lazy.  I don’t mind making a recipe that involves plenty of steps, be it reducing a sauce, braising for hours, or as you probably know, bake a loaf of bread that took 12 hours to proof.  But, ask me to make a multi-ingredient salad and I am invaded by a sense of pure exhaustion.  Washing the greens, cutting all ingredients, preparing the dressing…  However, this salad never left my mind from the day I saw it at Alexandra’s site, which, by the way, is a site worth subscribing to.  And, did you notice?  No greens to wash. Yeaaaaaah!   😉

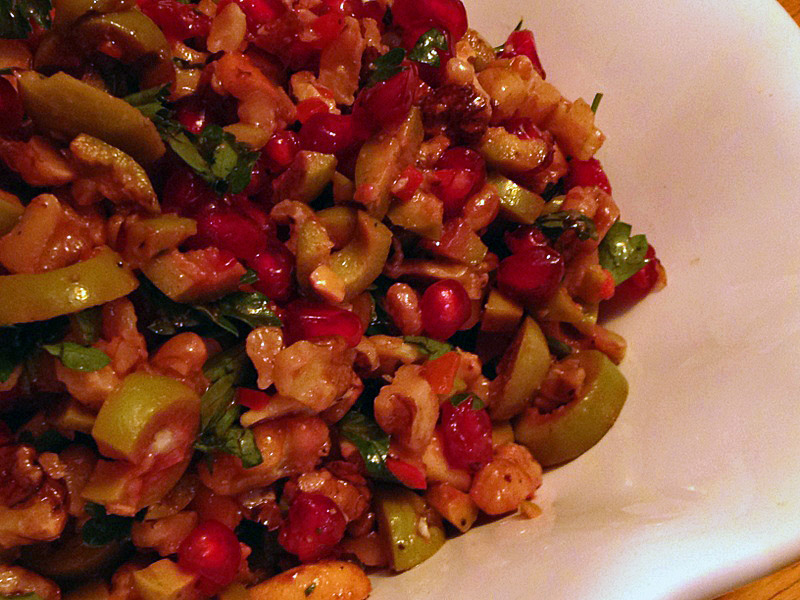
Everything works in this recipe. I am a lot more fond of black Kalamata type olives than green, but trust me, they taste unbelievably good here.  Together with the unique heat that only a Serrano pepper delivers, you’ll enjoy the sweet and sour taste of pomegranate molasses, the toasty walnuts, the herby parsley, the lemon, and last but not least the pomegranate seeds!  Like little pine nuts dressed for a gala party…
We love them!

Three words for you: Make this salad.

ONE YEAR AGO: Romanian Flatbreads

TWO YEARS AGO: Ziti with Artichokes and Meyer Lemon Sauce

THREE YEARS AGO: Blasted Broccoli, Stove-top version
BRAN MUFFINS, TAKE TWO

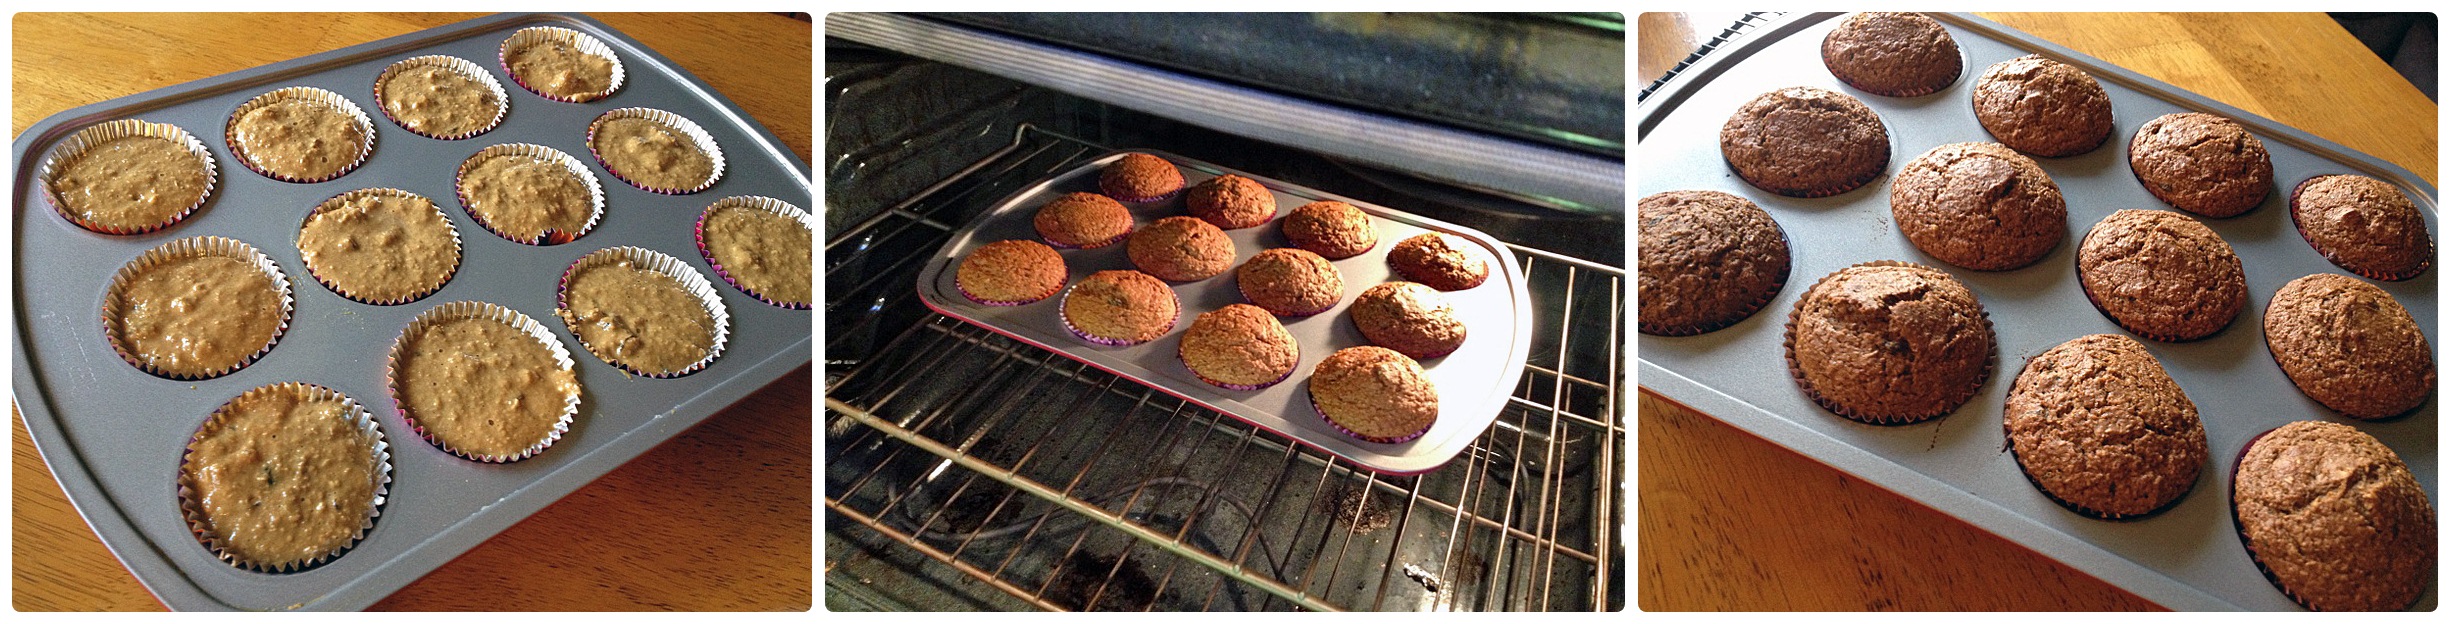
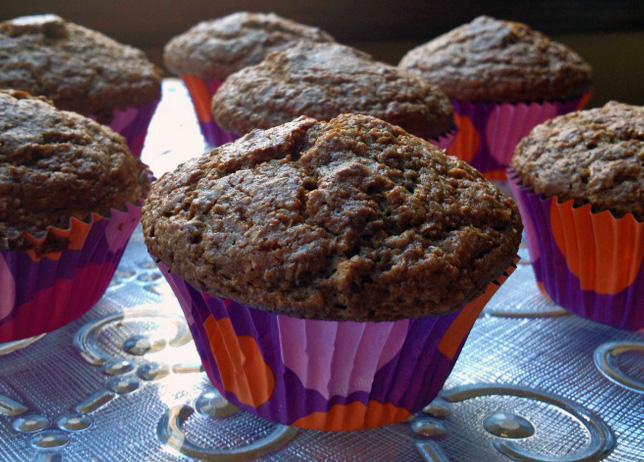
Bran muffins make Phil very very happy, so I tried a new recipe for his favorite morning treat.  On a whim, I went with the “back of the bag” recipe in the Bob’s Red Mill Wheat Bran product.  I reasoned that they probably tested and re-tested the recipe to make sure whoever baked a batch would love it and buy another bag. 😉  I also thought that using applesauce in the batter would make it moist and flavorful. I was right.
muffin2
MOLASSES BRAN MUFFINS
(from Bob’s Red Mill)

1 cup wheat bran
1 1/2 cups whole-wheat flour
1/2 cup raisins
1 tsp. baking powder
1 tsp. baking soda
1 cup milk
1/2 cup molasses (or honey)
3/4 cup applesauce
1/4 cup chopped walnuts (toasted is best)
2 Tbsp. oil
2 eggs, beaten

Heat the oven to 400°F. Combine wheat bran, flour, baking soda and baking powder. Stir in nuts and raisins. In a separate bowl, blend applesauce, milk, molasses, oil and egg. Add to dry ingredients and stir just until moistened. Spoon into a muffin pan lined with paper muffin cups) and bake for  20 minutes. Makes 12 regular-size muffins.

ENJOY!

to print the recipe, click here

composite

Comments:  Between these bran muffins and the first one I blogged about, I think I prefer this batch because of the prominent apple taste that mellows the “hippie factor” of the wheat bran.  Did I hit the jackpot with them?  And by jackpot I mean bran muffins that match the ones of Phil’s past. Not quite yet there.  However, after almost 13 years of marriage, I finally got a hint on one of the issues: size.  The muffins he loved so much were bigger.  Size does matter after all!  A shocking realization.   But, here is the tricky part, in those days they did not make them gigantic. They were just slightly bigger. So, now I am on a mission to find a pan that will make a muffin somewhere between “regular” and “jumbo”.   As to taste, I am on the right track.  Raisins and walnuts, yes.  But next time, less apple, and honey instead of molasses.

I do not go down without a fight, my friends! One day, I will bake the bran muffin of his dreams…

ONE  YEAR AGO: Brown Butter Chocolate Chip Cookies

TWO YEARS AGO: Breville Sourdough

THREE YEARS AGO: Vienna Bread

THE SECRET RECIPE CLUB: PUMPKIN BOLO DE FUBA’ CREMOSO

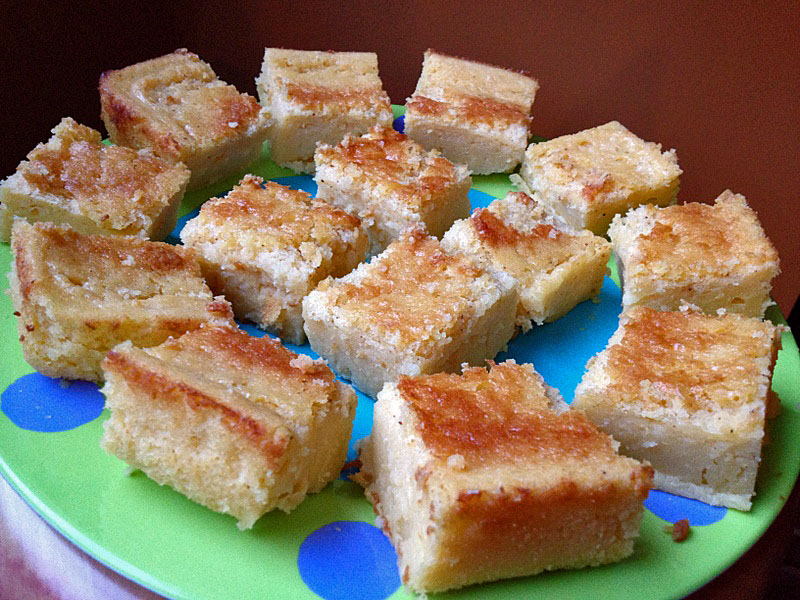
The Secret Recipe Club took a break in the month of December, but now we are back!  For those who don’t know, the SRC is a fun blogging event in which you are paired (in secret) with another blogger, and on reveal day post a recipe chosen from that blog.  Everyone in the same group posts at the exact same time, even if you are blogging from Japan.  😉  This month I was paired with Shirley, from the blog Enriching your Kid.  Shirley is a clinical psychologist who, after having kids, opted for working very hard at home taking care of them and paying particular attention to a healthy nutrition.   She cooks a lot of Indian food, so at first I had my mind set on one of her many paratha recipes, but then I spotted a very familiar Portuguese name – “bolo de fuba’ cremoso” – and that was it.  I knew it would be my choice for the first SRC post of 2013.   She added a nice twist to the classic, by incorporating pumpkin in the cake.  Check out her post about it here.

served
PUMPKIN BOLO DE FUBA’ CREMOSO
(adapted from Enriching your Kid)

1 cup masa harina (corn flour)
3/4 cup pumpkin puree’
1 cup sugar
2 tablespoons butter
2 cups milk
2 eggs
pinch of salt
1 cup grated cheese
1/2  tablespoon baking powder
1 tsp grated nutmeg
lemon zest

Pre-heat the oven to 350 degrees. Place all of the ingredients (up to the salt) in a blender or a food processor and mix for 4 minutes or until the mixture is smooth (it will be very liquid).  If your processor or blender is very large, you can add the rest of the ingredients. Otherwise, transfer the mixture to a bowl and add the cheese, baking powder, nutmeg and lemon zest, mixing well with a whisk.   Pour into a buttered and floured pan (8 x 8 inches).

Bake for 35-40 minutes or until the top of the cake is golden. Cool the cake before cutting it into slices.

ENJOY!

to print the recipe, click here

closeupbake

Comments: First, a little bit on language, as Shirley was puzzled about the gender issue in Portuguese.  All nouns have a gender, and for the most part words that end with “a” are feminine.  Words that end with “o” are masculine. However, there are exceptions.  Fuba’, for instance, the term that describes a particular type of corn flour, ends with “a“, but it is masculine.  Therefore, the adjective that goes along with it, “cremoso”  (creamy) must agree with the gender, and end with “o“.  Let’s suppose we were talking about a coconut concoction called “cocada“.  Cocada ends with an “a“, and it is indeed feminine.  In this case, creamy coconut would be described as “cocada cremosa“.  Clear as mud?  Well, mud is feminine: A lama.  Earth is feminine: A Terra. Love is masculine: O amor (gotcha there! Amor ends with “r”  to confuse non-native speakers ;-)).

Now, to the recipe:  I made a few small modifications, using cooked pumpkin instead of raw. I absolutely had to put my beloved pumpkin puree to use, and that was a perfect opportunity.  I also reduced the sugar slightly.  If you are Brazilian and grew up enjoying bolo de fuba’, this version seems like a different sweet, mainly because of the nutmeg. If you are not too fond of nutmeg, or if you want something closer to the Brazilian version, reduce the amount or omit it. Pumpkin was a great addition to bolo de fuba’, I  loved what its subtle taste brought to the cake.

Shirley, I will definitely be cooking other recipes from your blog,  as Indian cuisine is fascinating and I don’t have enough experience with it.  I hope you are having a great reveal day…  😉

For my readers: if you want to see what the crowd from SRC Group D came up with in this first posting of the year, click on the happy frog and a new page will open with plenty of great posts.

ONE YEAR AGO: Citrus-crusted Tilapia Filets

TWO YEARS AGO: Bran Muffins, not just for Hippies

THREE YEARS AGO: Flourless Chocolate Cake


BRINED-ROASTED PUMPKIN SEEDS, AND A BLOG AWARD!

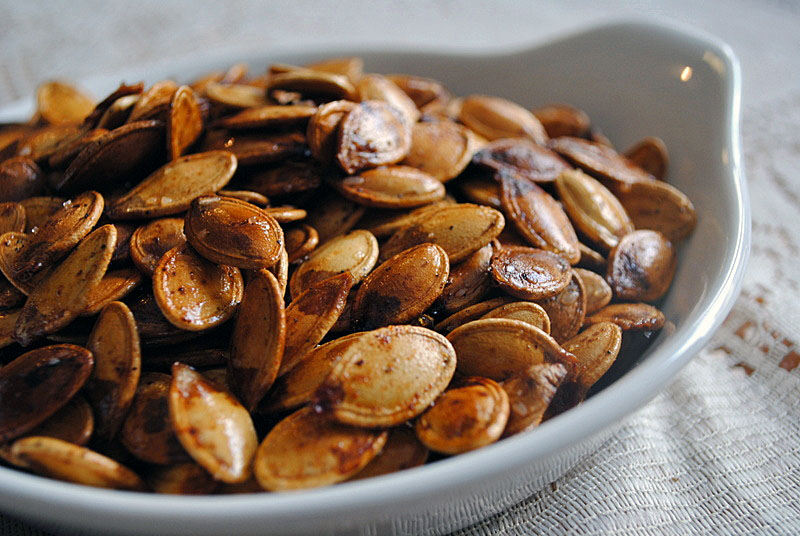
As I mentioned on my last post, we love to make our own pumpkin puree.  The pulp stores well in the freezer and we can use it for pies, soups, sauces or anything else that calls for the canned product.  Once that pumpkin is cut open, don’t even consider discarding the seeds.  Roasted pumpkin seeds, home-made, are a special delicacy.  Until now, we’ve followed traditional recipes that simply lay the seeds on a baking sheet, lightly coated with oil and a little seasoning.  This time, I took a slightly different route: I brined the seeds before roasting, and what a difference that made!  All credit goes to Sawsan, the wonderful blogger and ultra-talented photographer from Jordan.  Check her post about it here.

seedsserved
GINGER-PAPRIKA TOASTED PUMPKIN SEEDS
(from Chef in Disguise)

1/2 cup pumpkin seeds
2 cups water
1 tablespoon salt
about 1 tablespoon olive oil
powdered ginger to taste
paprika to taste
     

Scoop out the insides of your pumpkin. Separate the seeds from the stringy core and then rinse them.

In a small saucepan, add the water, seeds and 1 tablespoon of salt
Bring to a boil. Let simmer for 10 minutes. Remove from heat and drain.
Spread your seeds on a baking sheet and allow to dry completely.

Drizzle the seeds once they get dry with olive oil, sprinkle with the powdered ginger and paprika, or any seasonings you like, and mix to coat them as evenly as possible.  Spread the seeds out over the roasting pan, all in one layer.

Bake in a preheated oven at 390-400 F (200 Celsius) until they become golden brown or are roasted the way you like (10-20 minutes).  Allow to cool, and….

ENJOY!

to print the recipe, click here

composite22
Comments:
  Three great advantages in this brining approach: first, the salt gets into the seed instead of outside only, so you won’t get excess salt in one bite and not enough in another, which is quite common in the “old” method.  Second, the roasting time is reduced quite a bit, as the seeds will have a chance to start mellowing down in the brining step.  Third, a more pleasant texture in the final roasted seeds.  Try it with different seasonings, Southwest spices, chili, I bet even a little curry could be pretty interesting.

Sawsan, thanks for teaching me about brining seeds, loved it!

And now, time to show off the blog award I received…

sisterhood-of-the-world-bloggers-award

I was nominated by Alison, from Happy Domesticity, and of course, it made my day when I got her note about it!  The winner of such an award must answer 10 questions. Alison added one more. I don’t mind at all, as 11 is a prime number, therefore a lot cooler than 10.  Let’s get down to business:

  1. What is your favorite color? Maybe yellow, but I do love all colors.
  2. Your favorite animal? I am a dog person as far as pets go, but my favorite animal is the elephant.
  3. Your favorite non-alcoholic drinks? Home-made carbonated water (Penguin). Twist of lemon is optional.
  4. Facebook or Twitter? I use Facebook because my blog posts are publicized there and I get messages from readers.  I don’t like Twitter, and that is a good thing because I wouldn’t have time for it anyway.
  5. Your favourite pattern? I love horizontal stripes, just the other day I noticed that a lot of my clothes have stripes.
  6. Do you prefer getting or giving presents? Giving.
  7. Your favourite number?  4
  8. Your favorite day of the week? Friday.
  9. Your favorite flower? Christmas-cactus in full bloom.
  10. What is your passion? My work. But fitness comes a close second. Cookbooks get the bronze medal.
  11. Why did you start to write your blog? I love to write and I love to cook. Blogging seems like a good way to join both… 😉 

Alison, thank you once again for the award!
Makes blogging even more fun!

ONE YEAR AGO: A Sourdough Experiment

TWO YEARS AGO: Shrimp and Fennel Casserole

THREE YEARS AGO: Tuscan Bread

PUMPKIN UNCANNED

A little over 3 years ago, I shared with you our recipe for pumpkin pie that uses home-made pumpkin puree. Phil is absolutely adamant about it, having grown up watching his Grandma and his Mom make the puree from scratch and producing delicious pies with it. But, there’s more than pie to pumpkin, and by making the puree yourself, you can also enjoy your own roasted pumpkin seeds. Plus, one large pumpkin will give enough puree to last for a year!  Yes, you can do it with large pumpkins, even if they are a little more fibrous. And yes, it freezes quite well. Without further ado, here’s how we make it…

First, you need to cover a working surface with newspaper, and your body with a nice apron. Then cut open a lid on the top of your pumpkin, and scoop out all the seeds and the fibers that glue them together. Reserve them for later.
seeding

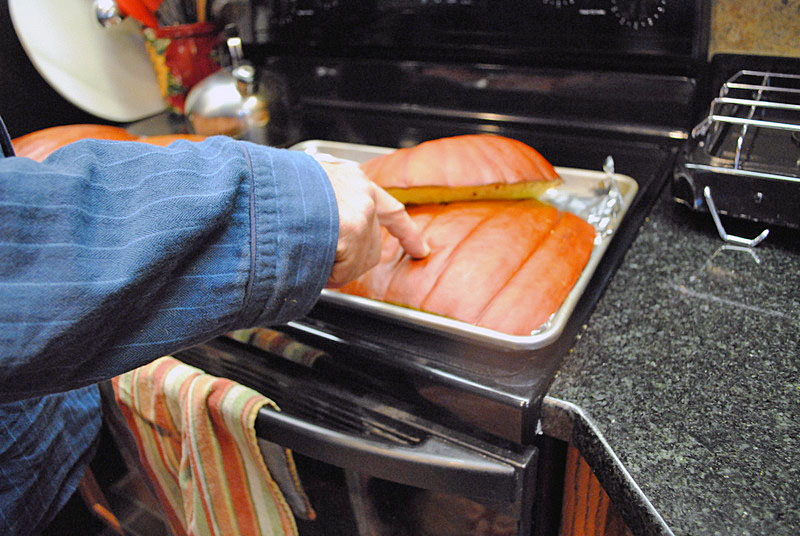
Next, cut large slices that will fit over baking sheets, and place them in a 350 F oven, with the cut side down. No need for salt, no need for oil. Easy as pie.
intotheoven
Bake the pumpkin for about 1 hour, or until soft. A good test is pushing your finger lightly on the skin, it should form an indentation.
bakingready

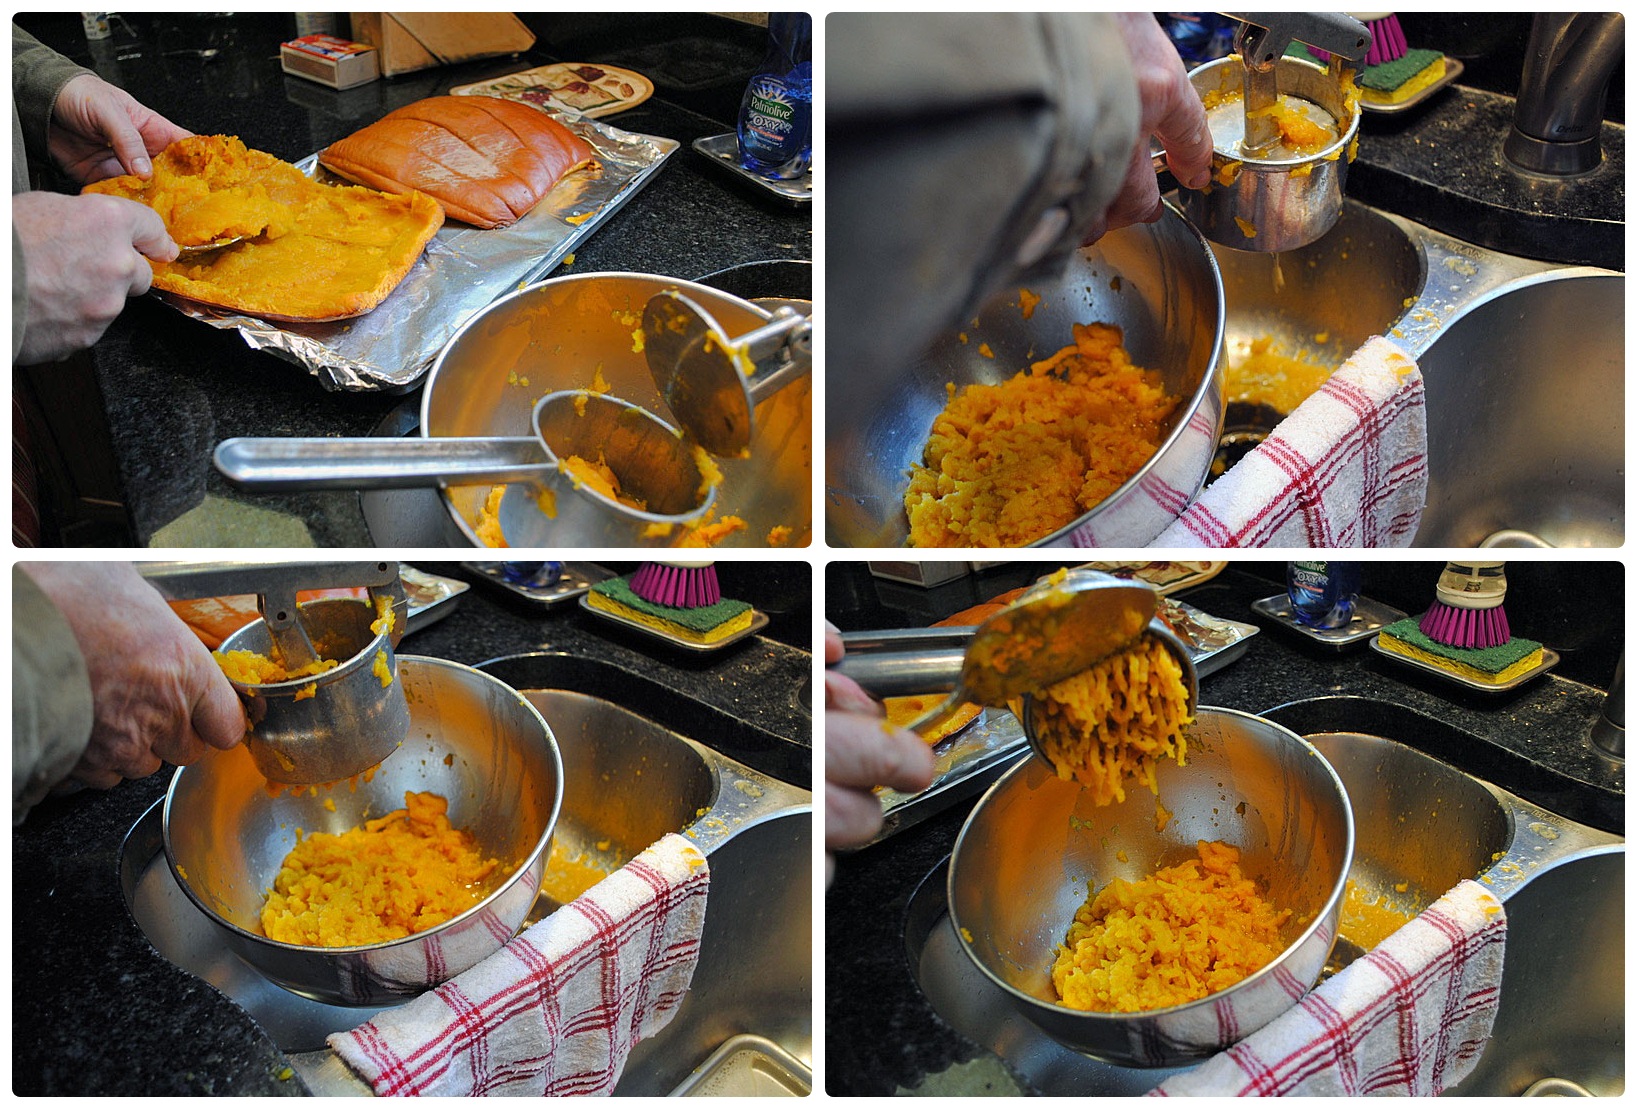
Now, let the fun begin!  Scrape the flesh into a bowl, and go to the sink, carrying the cooked pumpkin, an empty bowl, and a potato ricer.  Place some of the pulp in the masher, and squeeze out with a light pressure, just to release what is mostly water.  Let that go down the drain.  Once you feel most of the watery stuff is released, puree the pulp into the clean, empty bowl.  Do that in batches until all the pulp is passed through the holes of the ricer.
composite2

Now, marvel at the beauty of the mashed pumpkin you made yourself, or at least that you took pictures from while your husband worked hard at it… 😉
pureeready
You can use it to make a nice pumpkin pie like the one I blogged about…
sliced
And save the rest in the freezer. I normally make a few 1-cup and some larger portions. Make sure to label, because the freezer can quickly turn into a parallel universe, unknown and mysterious.
freezer
My next two posts will feature goodies I made with our uncanned pumpkin…  First, I will show you an interesting take on roasted pumpkin seeds, and next…  well, next I cannot tell you yet.  It’s a secret.  😉

ONE YEAR AGO: Pork Ragu

TWO YEARS AGO: Friendly Kuri Squash

THREE YEARS AGO: Celery and Apple Salad